WooCommerce Countdown Banner
Overview
The Countdown Banner embed is a bold, full-width banner countdown — a headline, a live timer, and an optional button or coupon over a designed background — placed automatically across products via the Embeds engine. It's the same feature as the Countdown Banner block, but targeted instead of hand-inserted.
Create a WooCommerce countdown banner with this countdown banner plugin when you need a WooCommerce sale banner, a full-width countdown timer, or a targeted product page sale banner for a campaign.
How it works
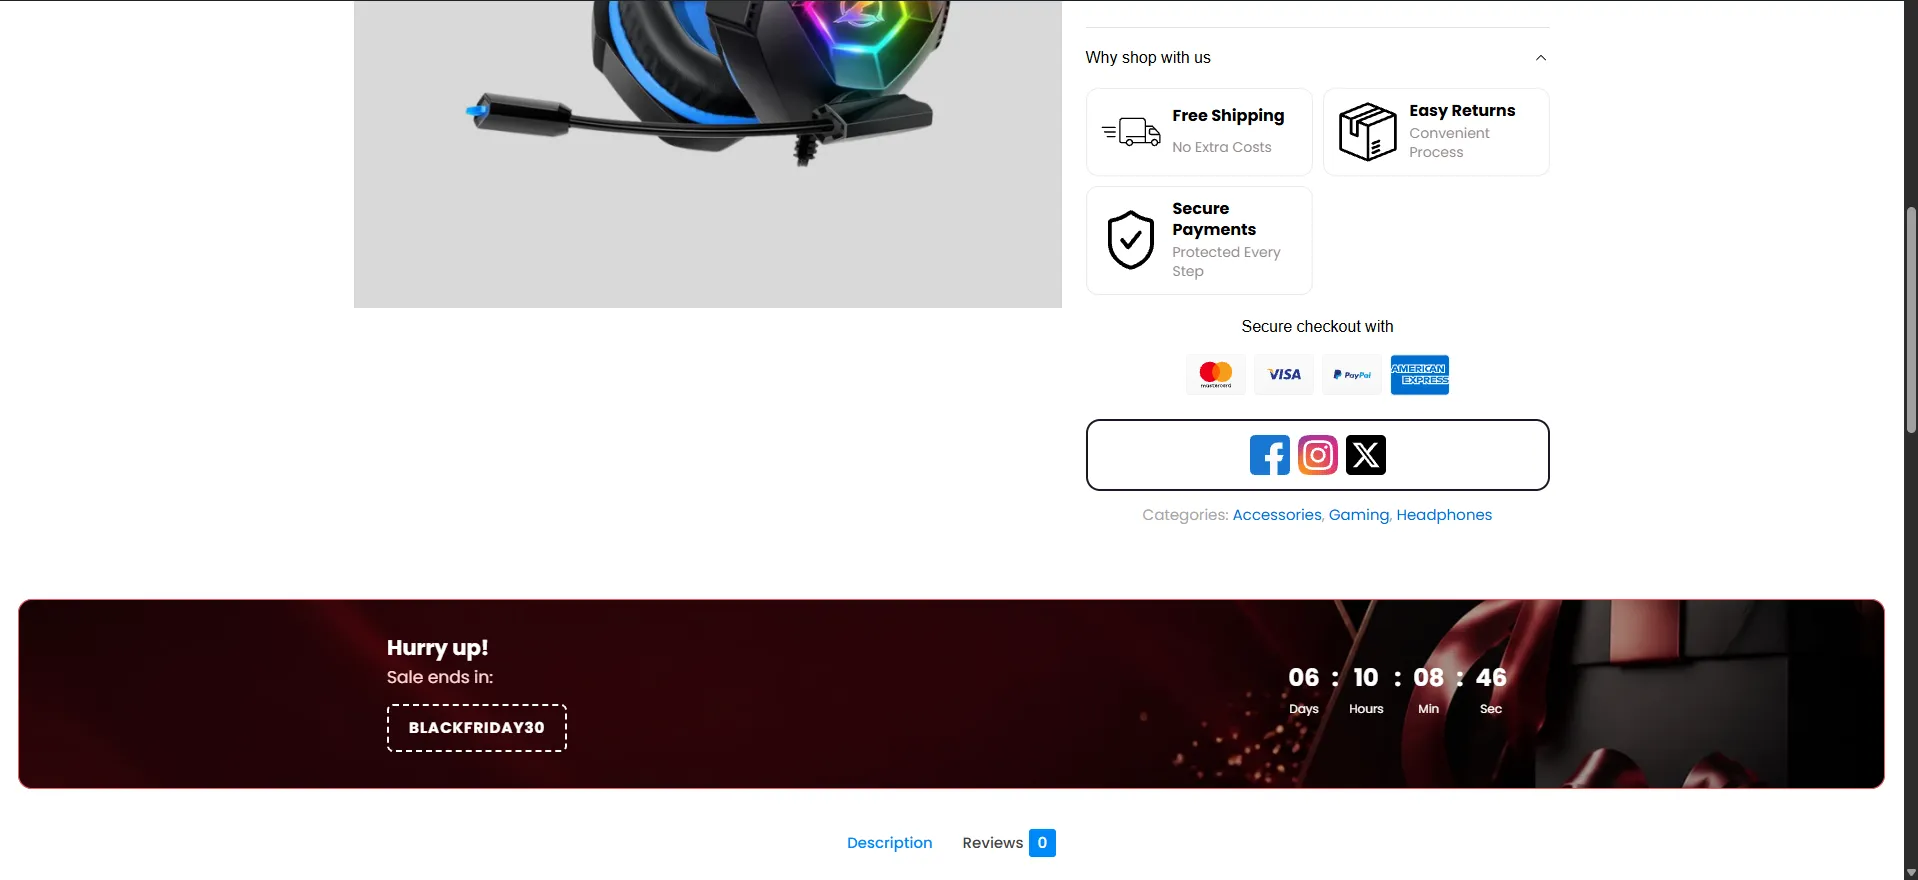
You're running a store-wide Black Friday sale. Instead of adding a banner to every page by hand, you create one Countdown Banner embed, pick a seasonal design, target it to on-sale products, and it appears — full width, with a live countdown — below every matching product.
Embeds are available in the Pro version.
Step-by-step setup
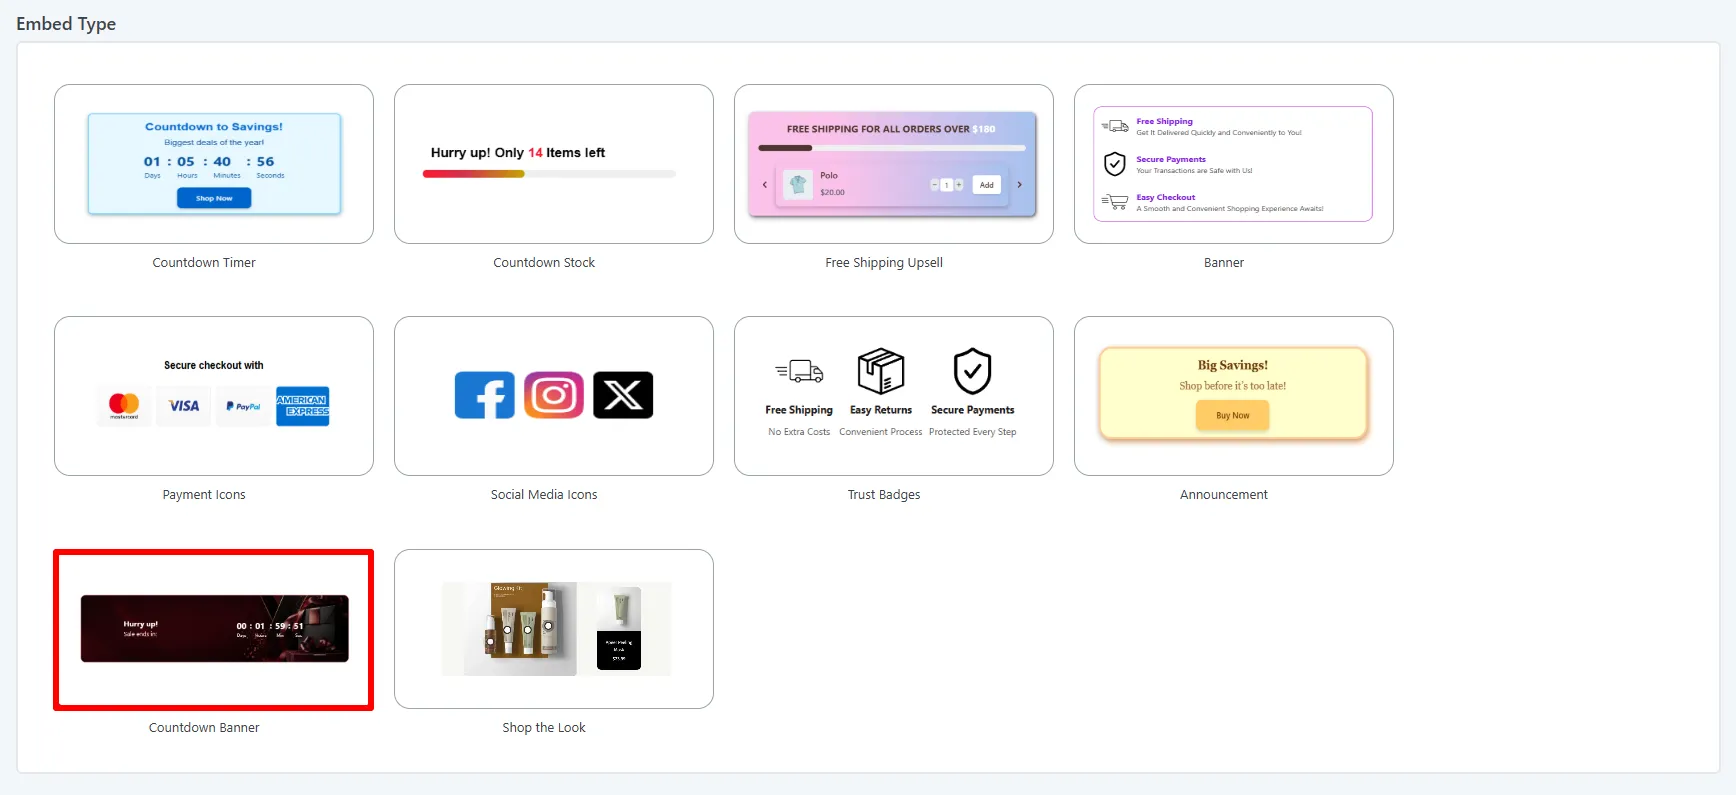
1. Pick the Countdown Banner type
Open Sale Badges → Embeds → Add New and, under Embed Type, choose Countdown Banner.
2. Write the message
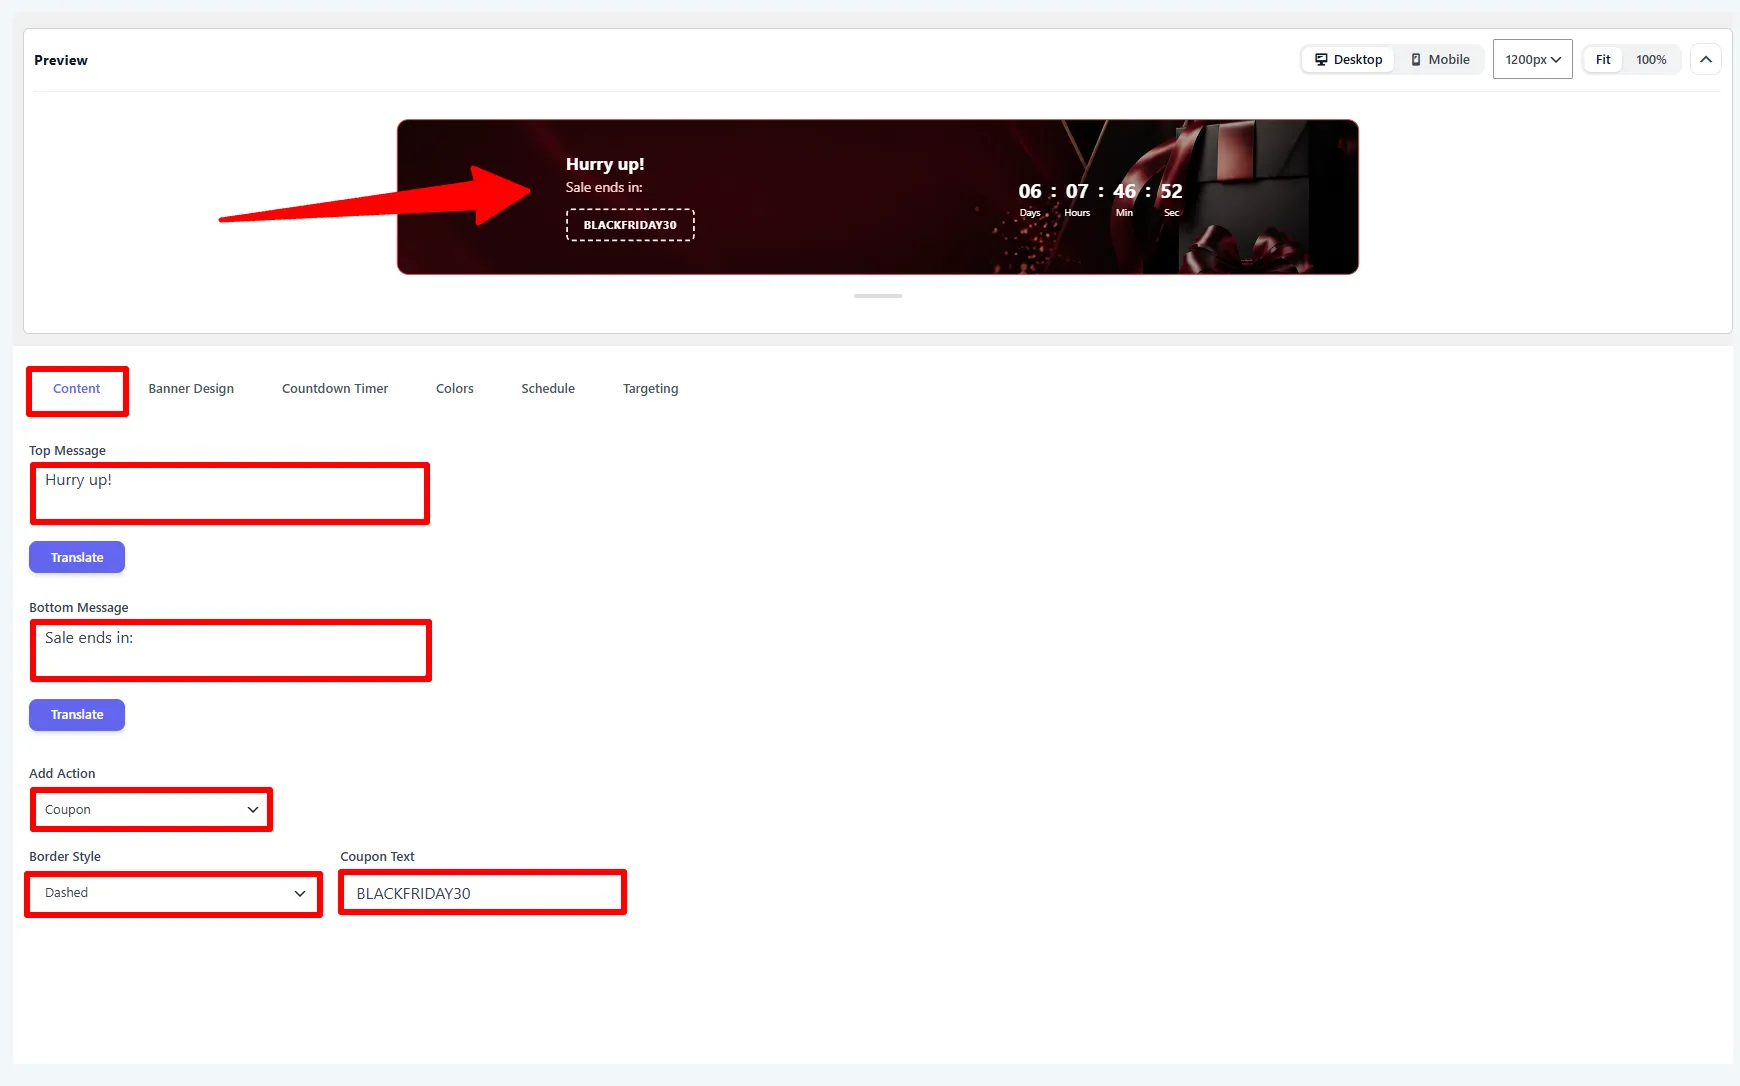
On the Content tab, set the Top Message (e.g. Hurry up!) and Bottom Message (e.g. Sale ends in:), then an Add Action — None, Button, or Coupon (Coupon Text + Border Style, e.g. BLACKFRIDAY30). The full-width live preview sits at the top, with Desktop / Mobile and zoom controls.
3. Set the timer
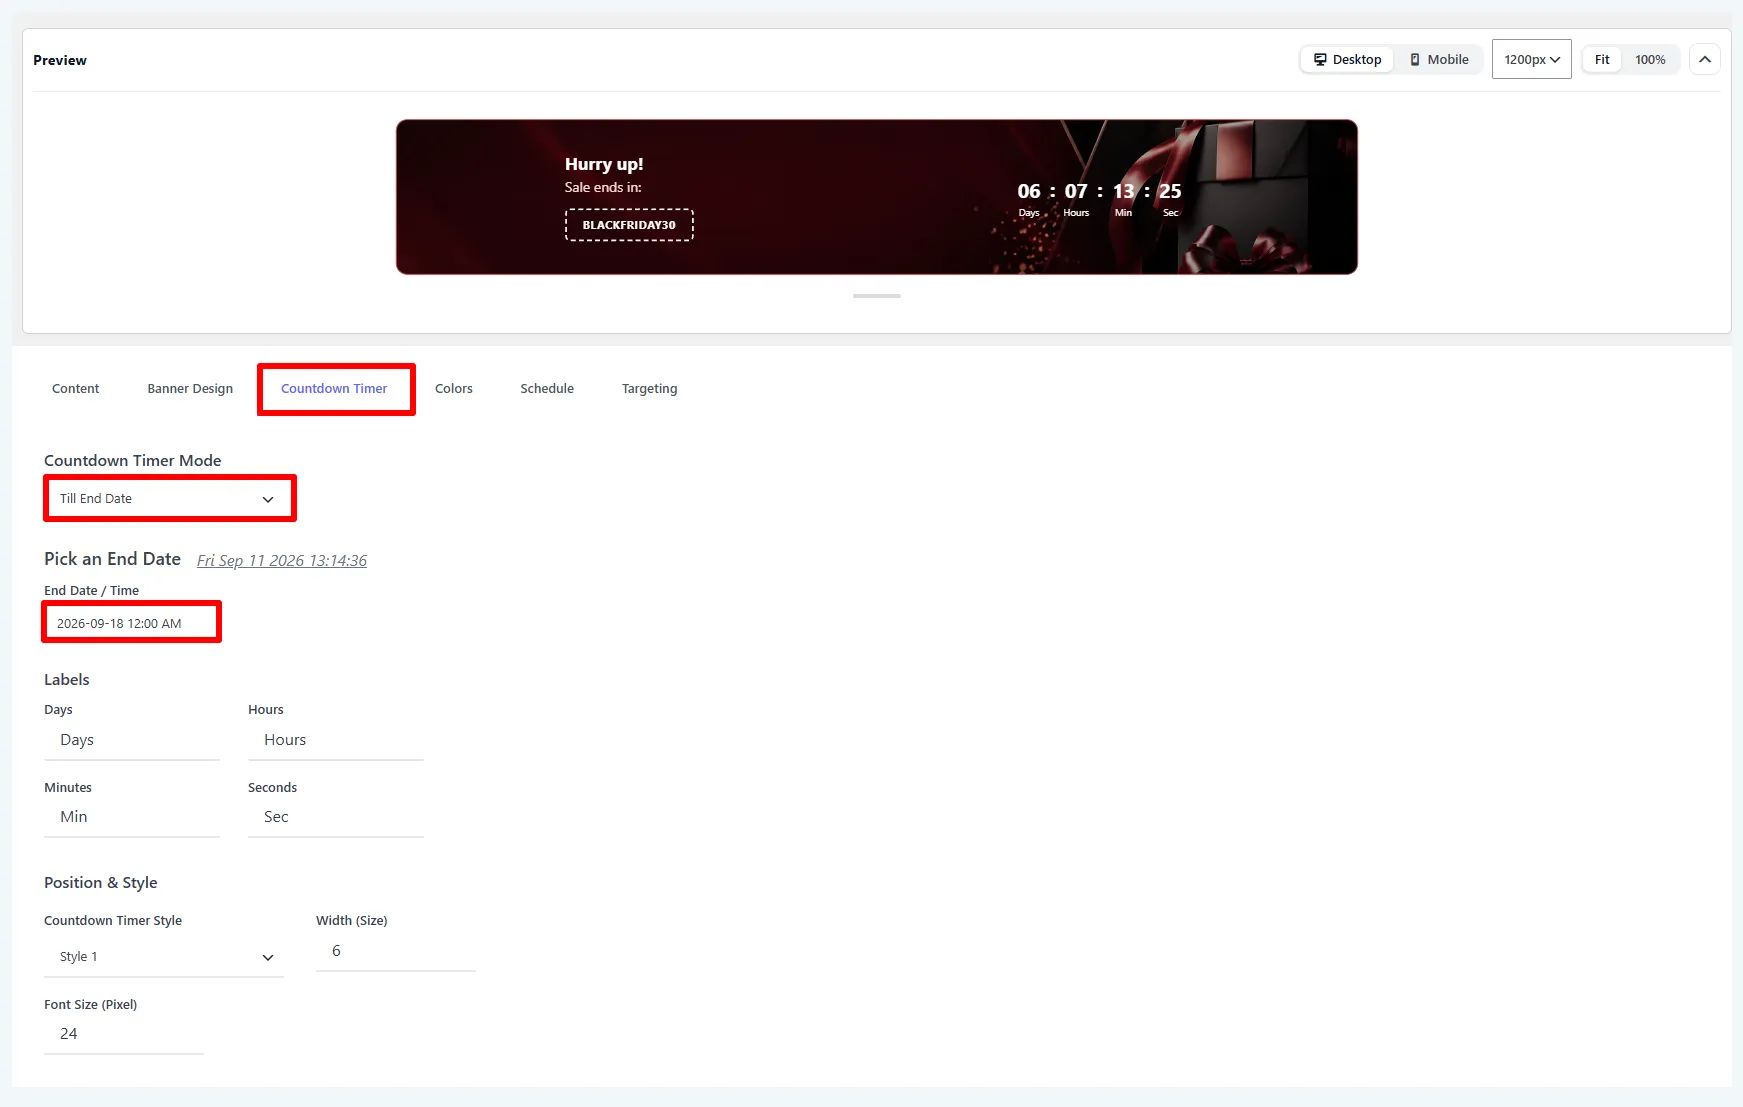
On the Countdown Timer tab, choose Till End Date (pick an End Date / Time) or Evergreen, rename the Labels, and set the Countdown Timer Style, width, and font size.
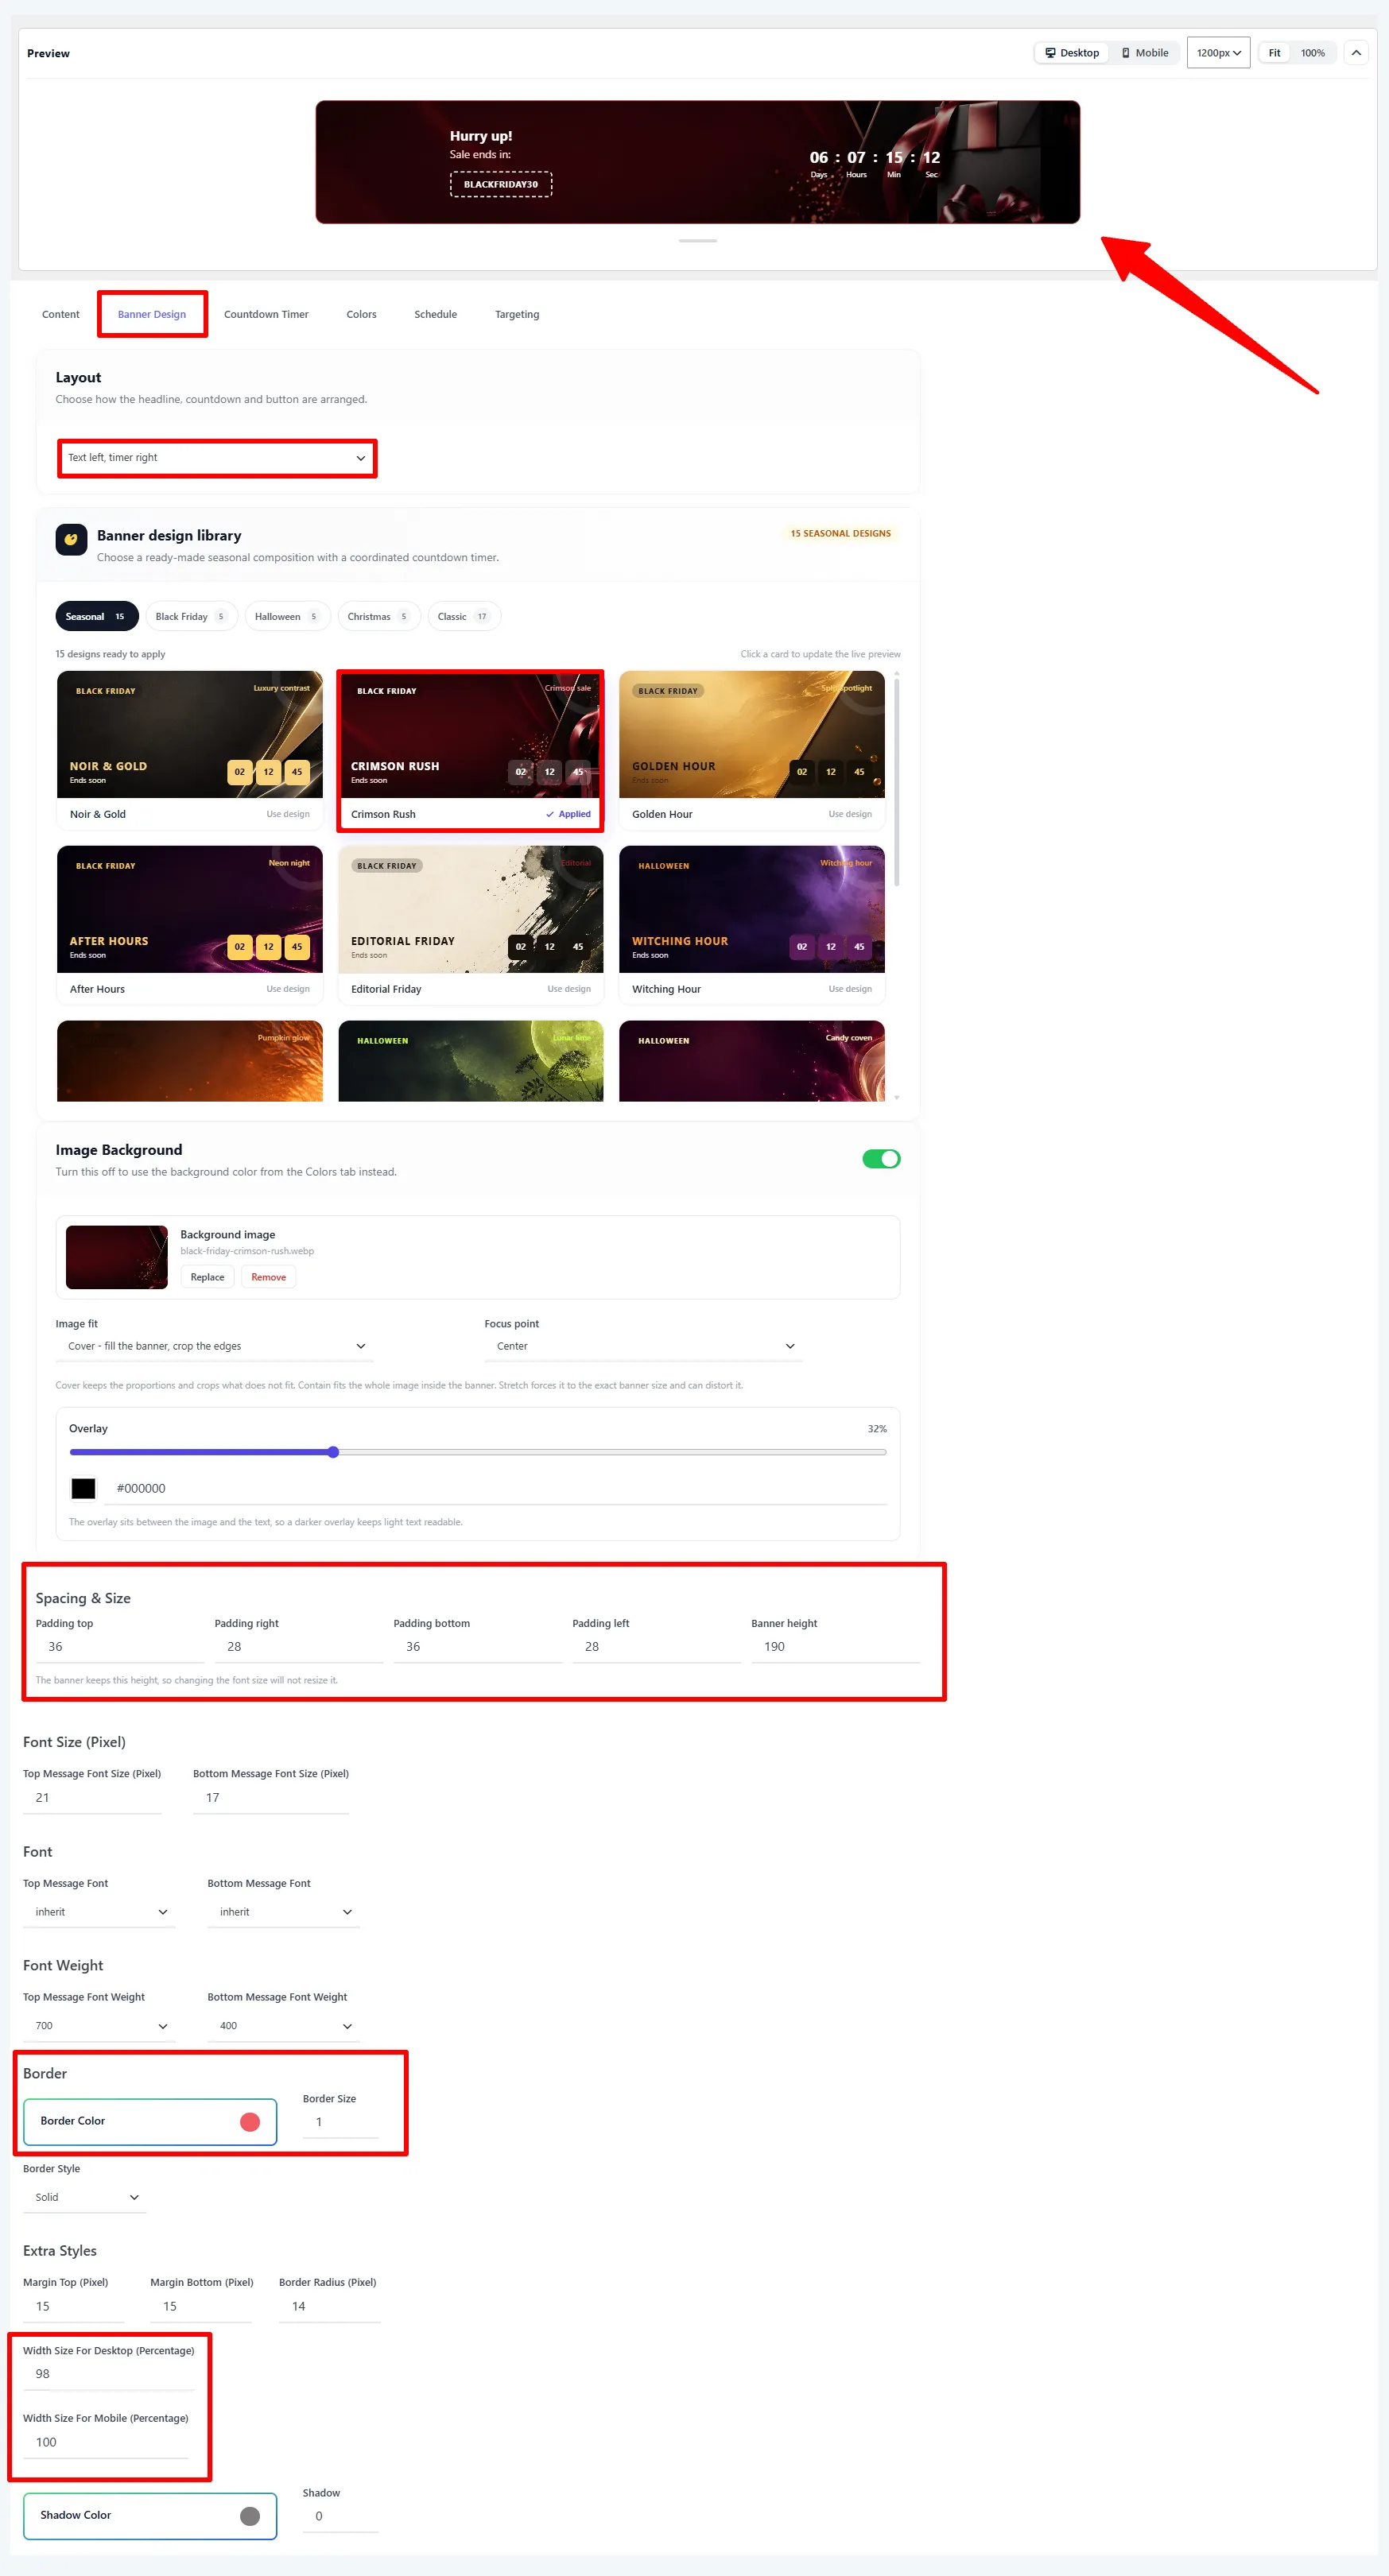
4. Design the banner
The Banner Design tab is unique to this type:
| Section | What it does |
|---|---|
| Layout | How the headline, countdown, and button are arranged (e.g. Text left, timer right). |
| Banner design library | 15+ ready-made compositions across Seasonal, Black Friday, Halloween, Christmas, and Classic — click a card (e.g. Crimson Rush) to apply it to the live preview. |
| Image Background | Toggle a background image (with Replace / Remove), Image fit (Cover / Contain / Stretch), Focus point, and an Overlay color + opacity so light text stays readable. Turn it off to use the Colors-tab background instead. |
| Spacing & Size | Padding (top/right/bottom/left) and a fixed Banner height — the banner keeps this height, so changing the font size won't resize it. |
| Font / Weight / Border / Width / Shadow | Message fonts, border, margins, radius, and desktop/mobile width. |
5. Place it and target
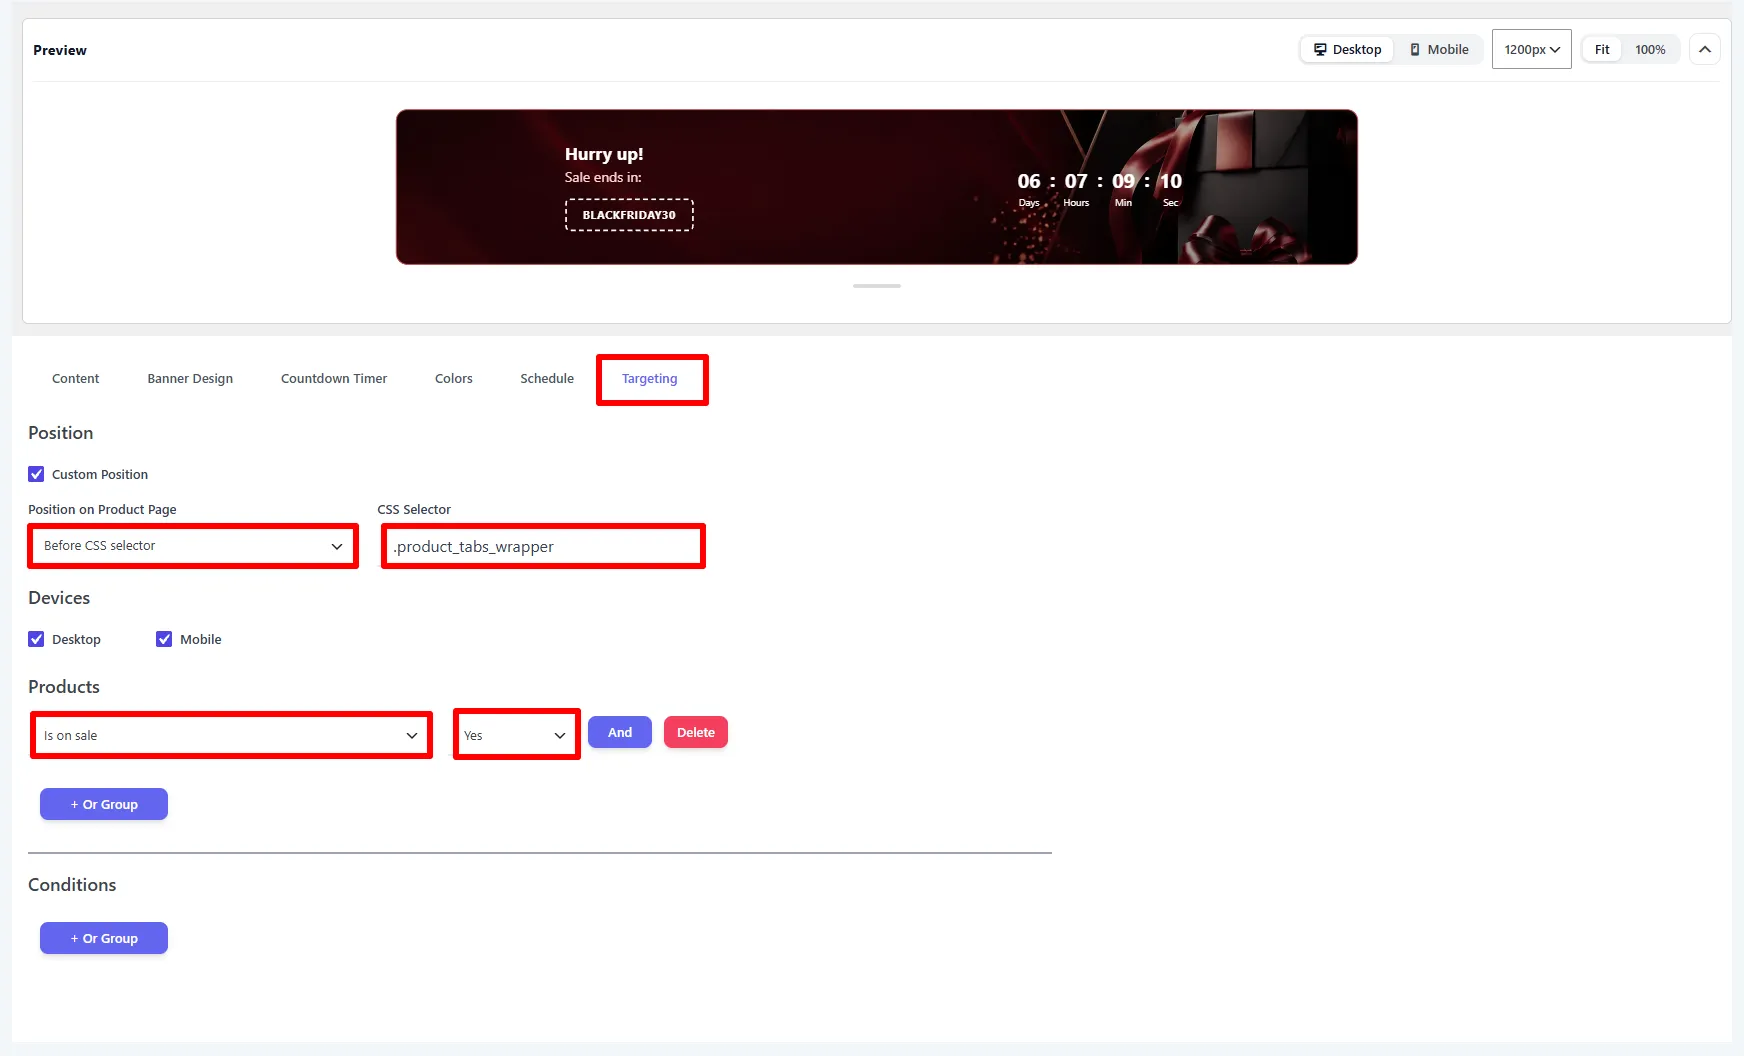
On the Targeting tab, tick Custom Position and pick where it appears — for a full-width banner below the summary, use Before CSS selector with a selector like .product_tabs_wrapper. Choose Devices, and add Products rules (e.g. Is on sale → Yes).
6. Name it and Save
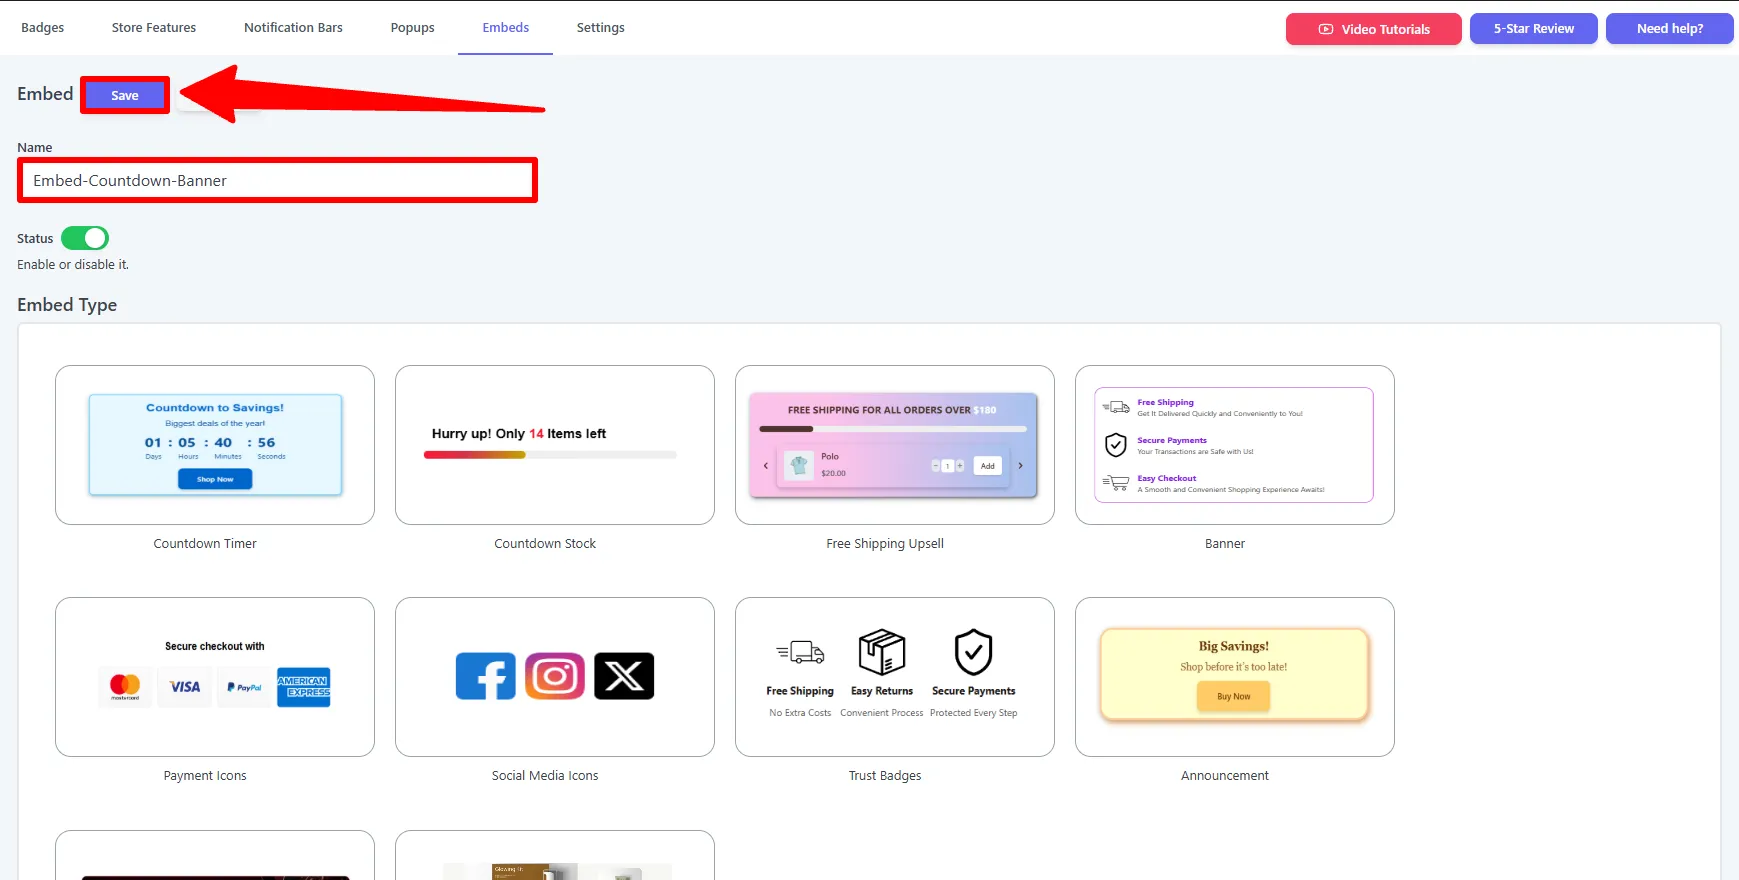
Give the embed a Name, confirm Status is on, and click Save.
Block or embed?
| Block | Embed | |
|---|---|---|
| Where it appears | Exactly where you insert it | Anchored to a hook/selector across products |
| Scope | One page or post | Every product matching your targeting |
| Targeting & schedule | Not available | Full targeting, conditions, and schedule |
| Set up in | The block editor | Sale Badges → Embeds |
The design controls are identical — see the Countdown Banner block guide for the full library and background options.
🧪 Example configuration
The banner shown in the screenshots:
| Setting | Value |
|---|---|
| Type | Countdown Banner |
| Top / Bottom Message | Hurry up! / Sale ends in: |
| Action | Coupon BLACKFRIDAY30 (Dashed) |
| Timer | Till End Date → 2026-09-18 12:00 AM |
| Design | Black Friday → Crimson Rush (image background, 32% overlay) |
| Layout / Height | Text left, timer right · 190 px |
| Placement | Before .product_tabs_wrapper |
| Targeting | Is on sale → Yes |
What customers see
A striking, full-width banner below the product — headline, coupon, and a live countdown over a seasonal background — impossible to miss as they scroll toward the details.
Next Steps
- Countdown Banner block — layouts & background options.
- Countdown Timer embed
- Embeds overview
Frequently Asked Questions
How do I add a countdown banner to WooCommerce?
Create an embed under Sale Badges → Embeds → Add New, choose Countdown Banner, configure the messages and timer, select a banner design, set targeting, and save.
Can a WooCommerce countdown banner use an end date and coupon?
Yes. Choose Till End Date, set the end date and time, then use Add Action → Coupon to display a campaign code alongside the live timer.
What is the difference between a countdown banner and a block?
A block is inserted manually into one page or post. A Countdown Banner embed uses placement, targeting, and scheduling rules to appear automatically across matching products.