WooCommerce Trust Badges for Product Pages
Overview
The Trust Badges embed is a reassurance row — items like Free Shipping, Easy Returns, and Secure Payments, each an icon + two lines of text. It's one of the three presets of the icon-row type (alongside Payment Icons and Social Media Icons) and belongs right under the Add to Cart button, where hesitation peaks.
Add WooCommerce trust badges and trust badges product page reassurance with WooCommerce secure payment badges, WooCommerce guarantee badges, and other product page trust signals placed near the purchase action.
How it works
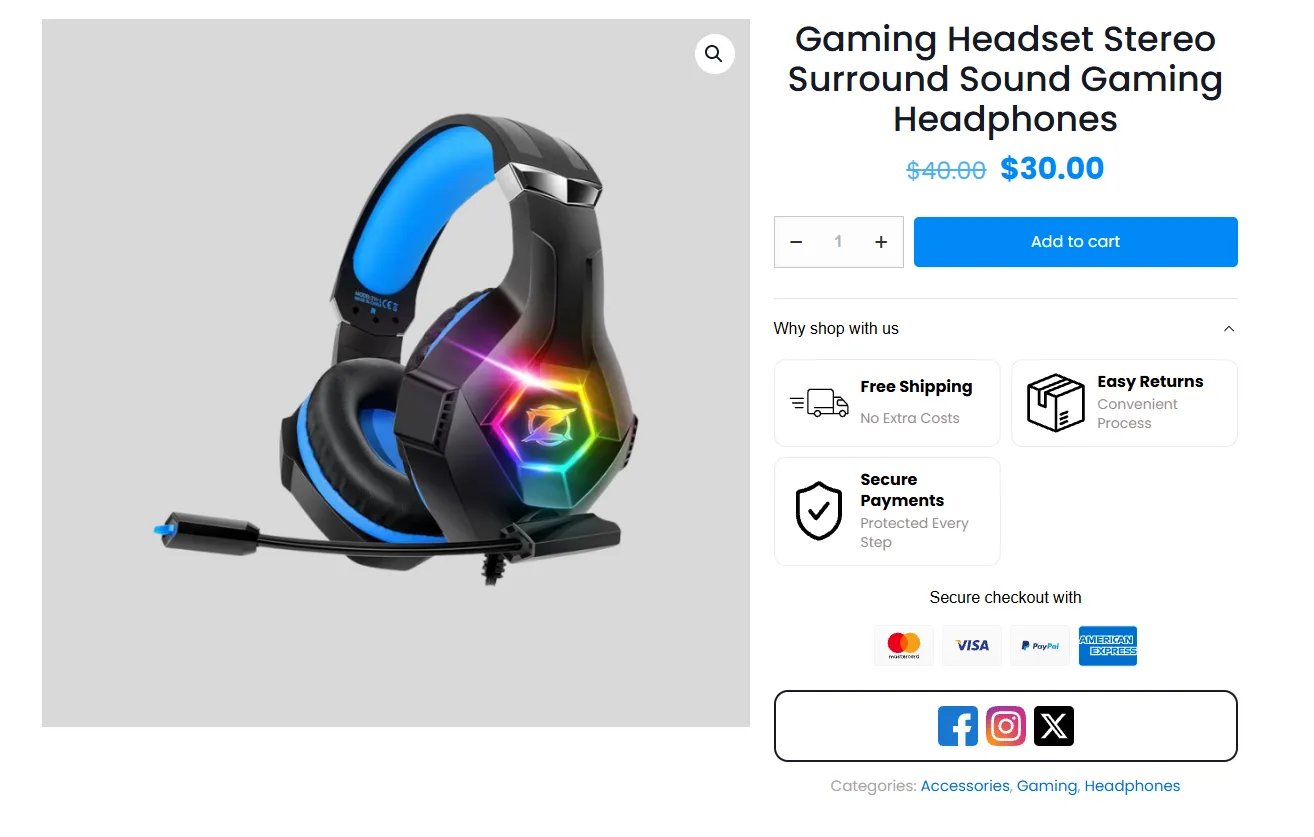
A shopper is deciding whether to buy. Just below Add to Cart you show a "Why shop with us" panel — Free Shipping · No Extra Costs, Easy Returns · Convenient Process, Secure Payments · Protected Every Step — and their doubts settle.
Embeds are available in the Pro version.
Step-by-step setup
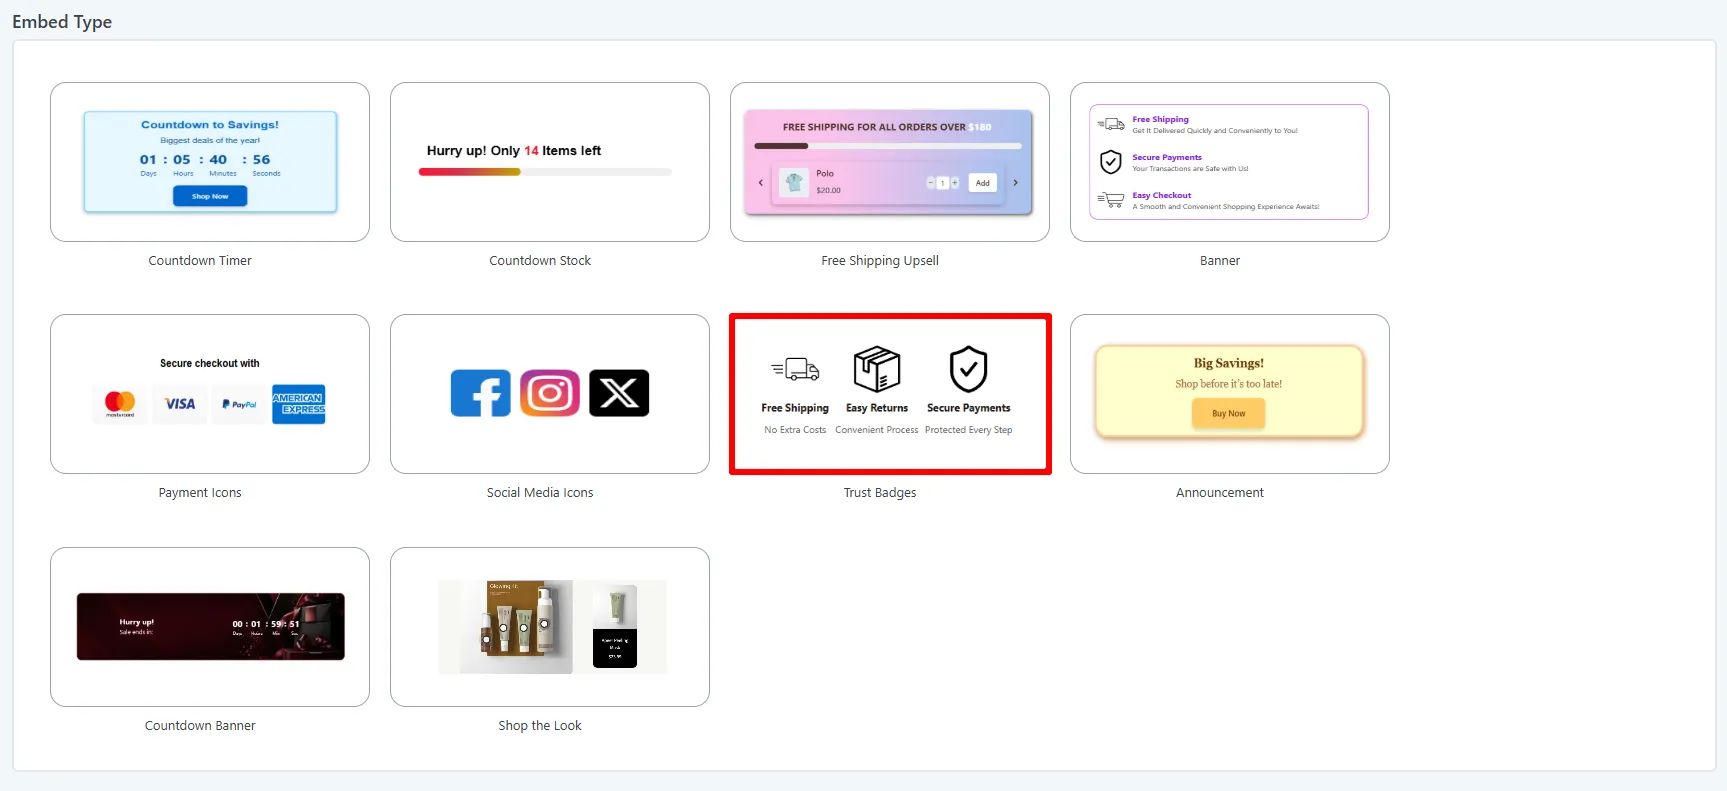
1. Pick the Trust Badges type
Open Sale Badges → Embeds → Add New, give the embed a Name, and turn Status on. Under Embed Type choose Trust Badges.
2. Set the badges
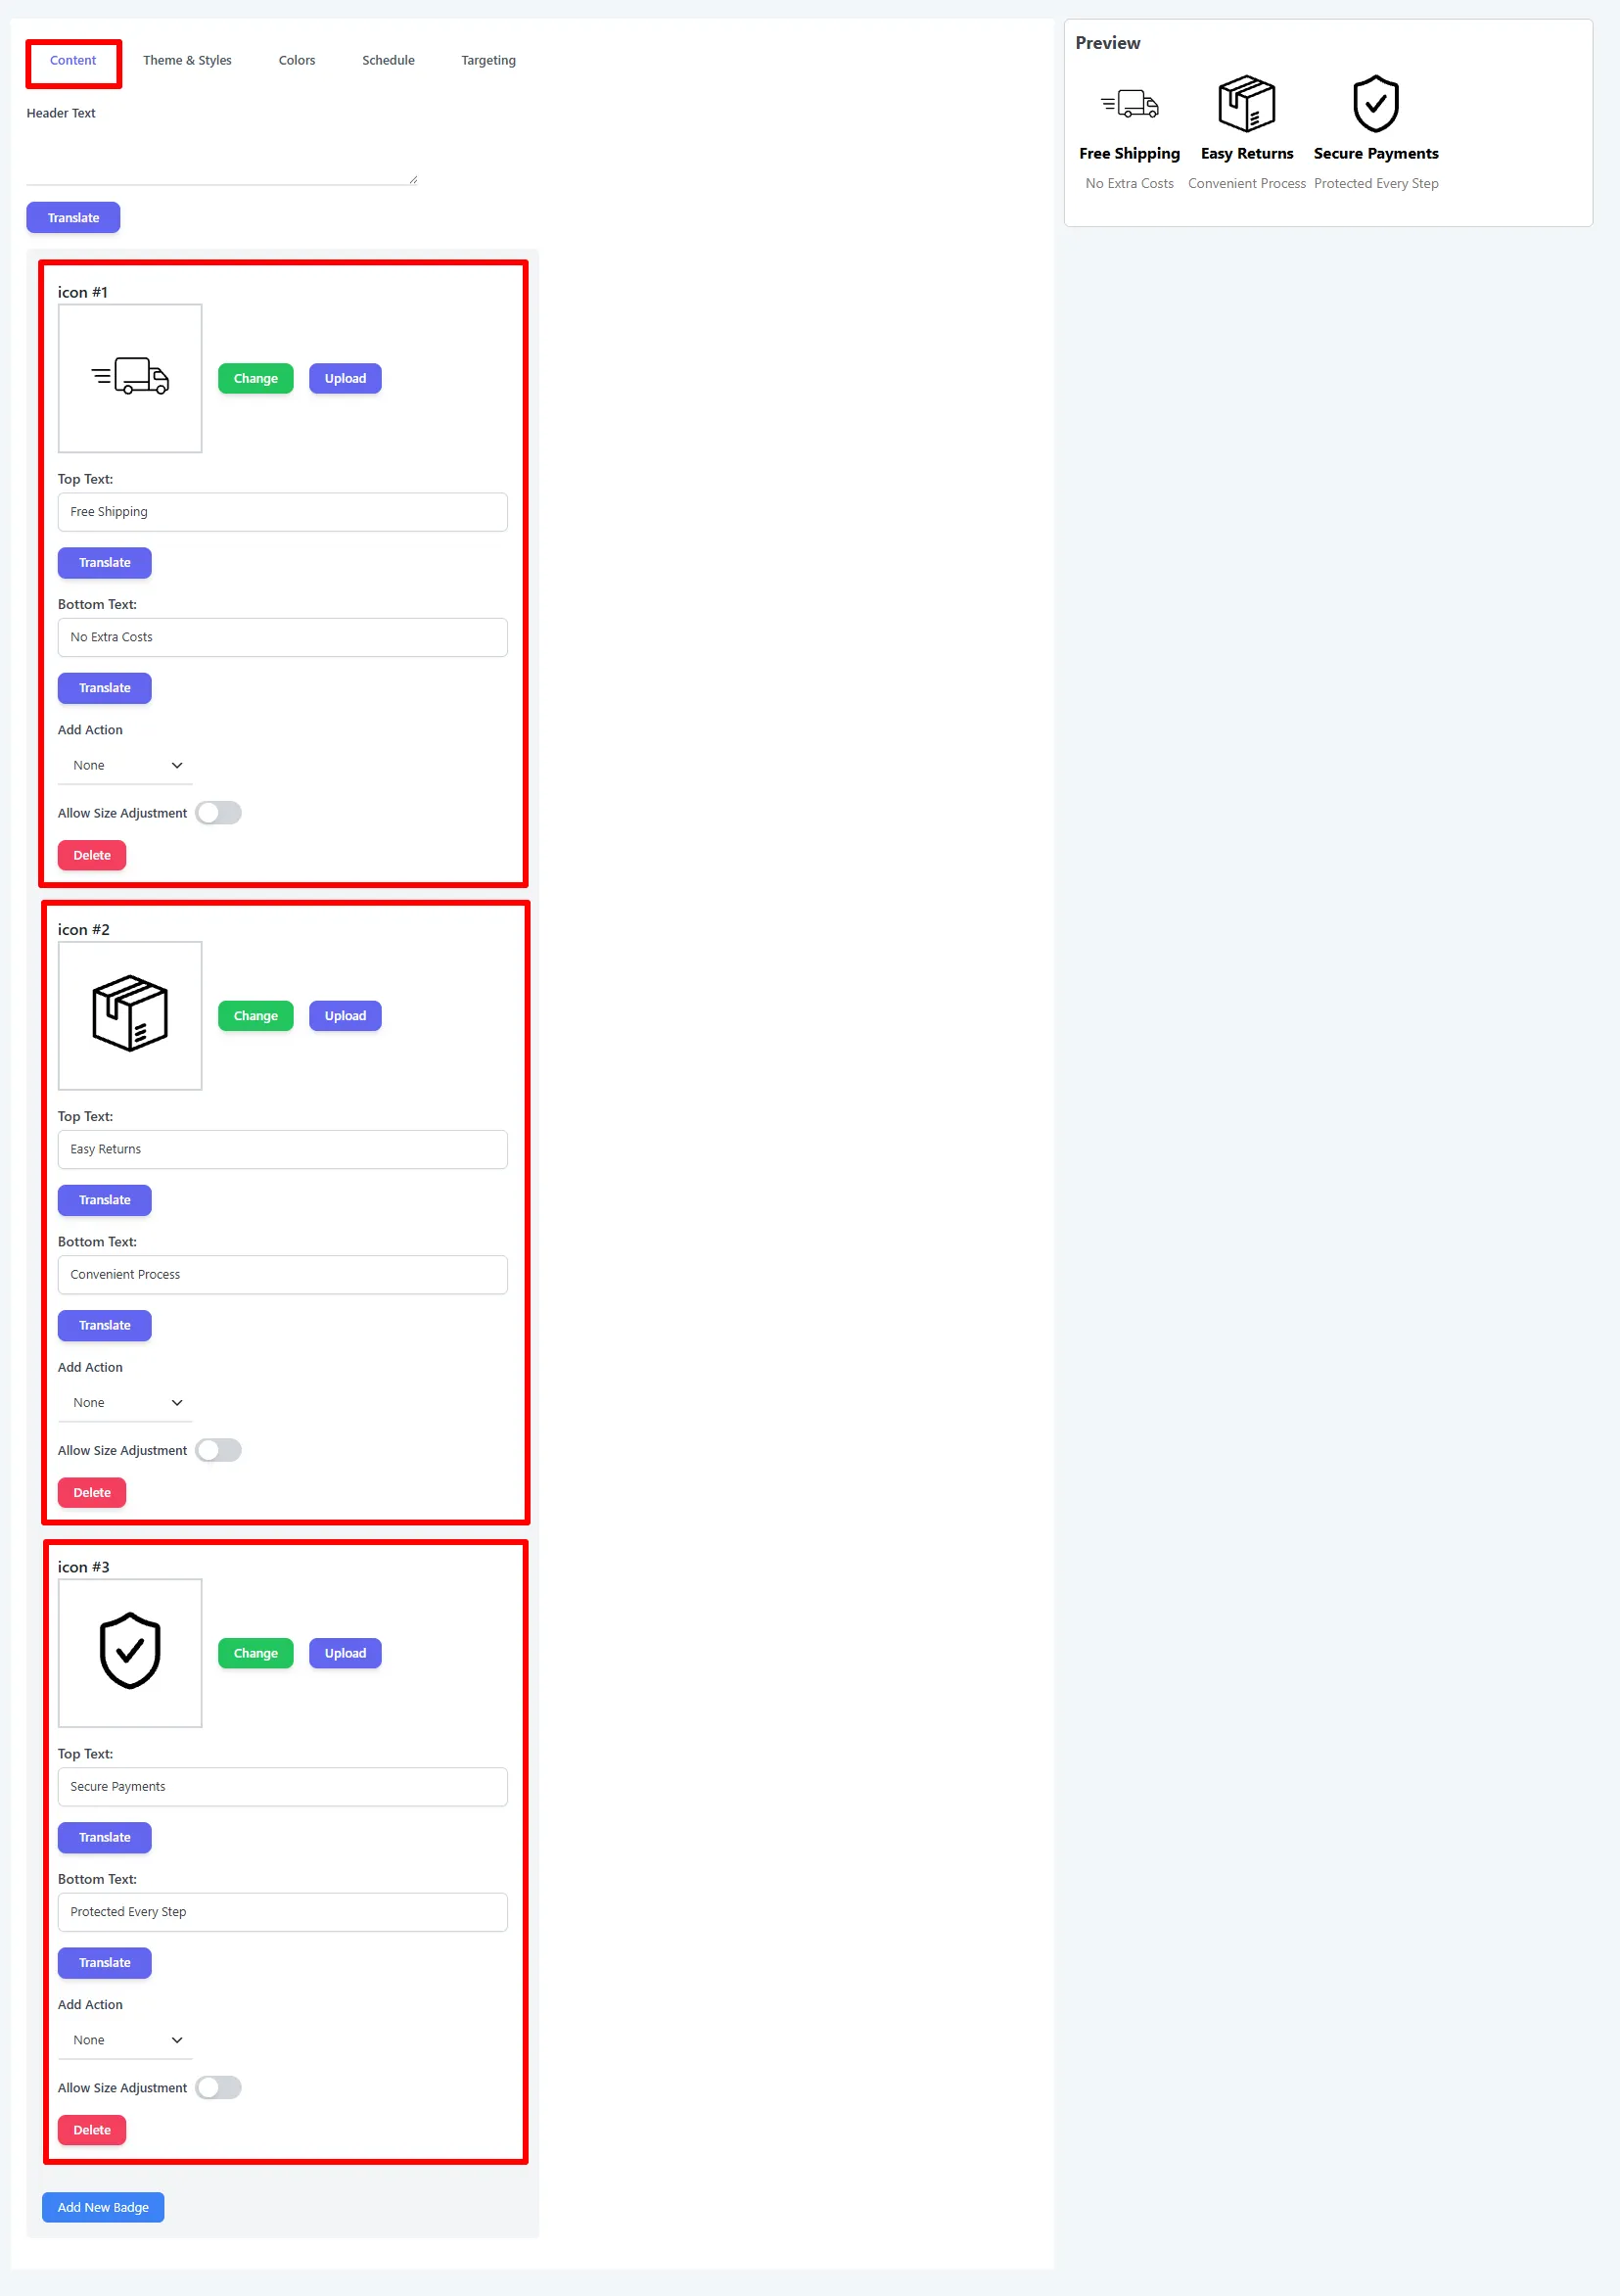
On the Content tab, add an optional Header Text and edit each badge:
- Icon — Change to a built-in icon or Upload your own.
- Top Text / Bottom Text — e.g.
Free Shipping/No Extra Costs. - Add Action — usually None for trust badges.
Use Add New Badge to add more and Delete to remove one. Every field has a Translate button.
3. Choose the layout & style
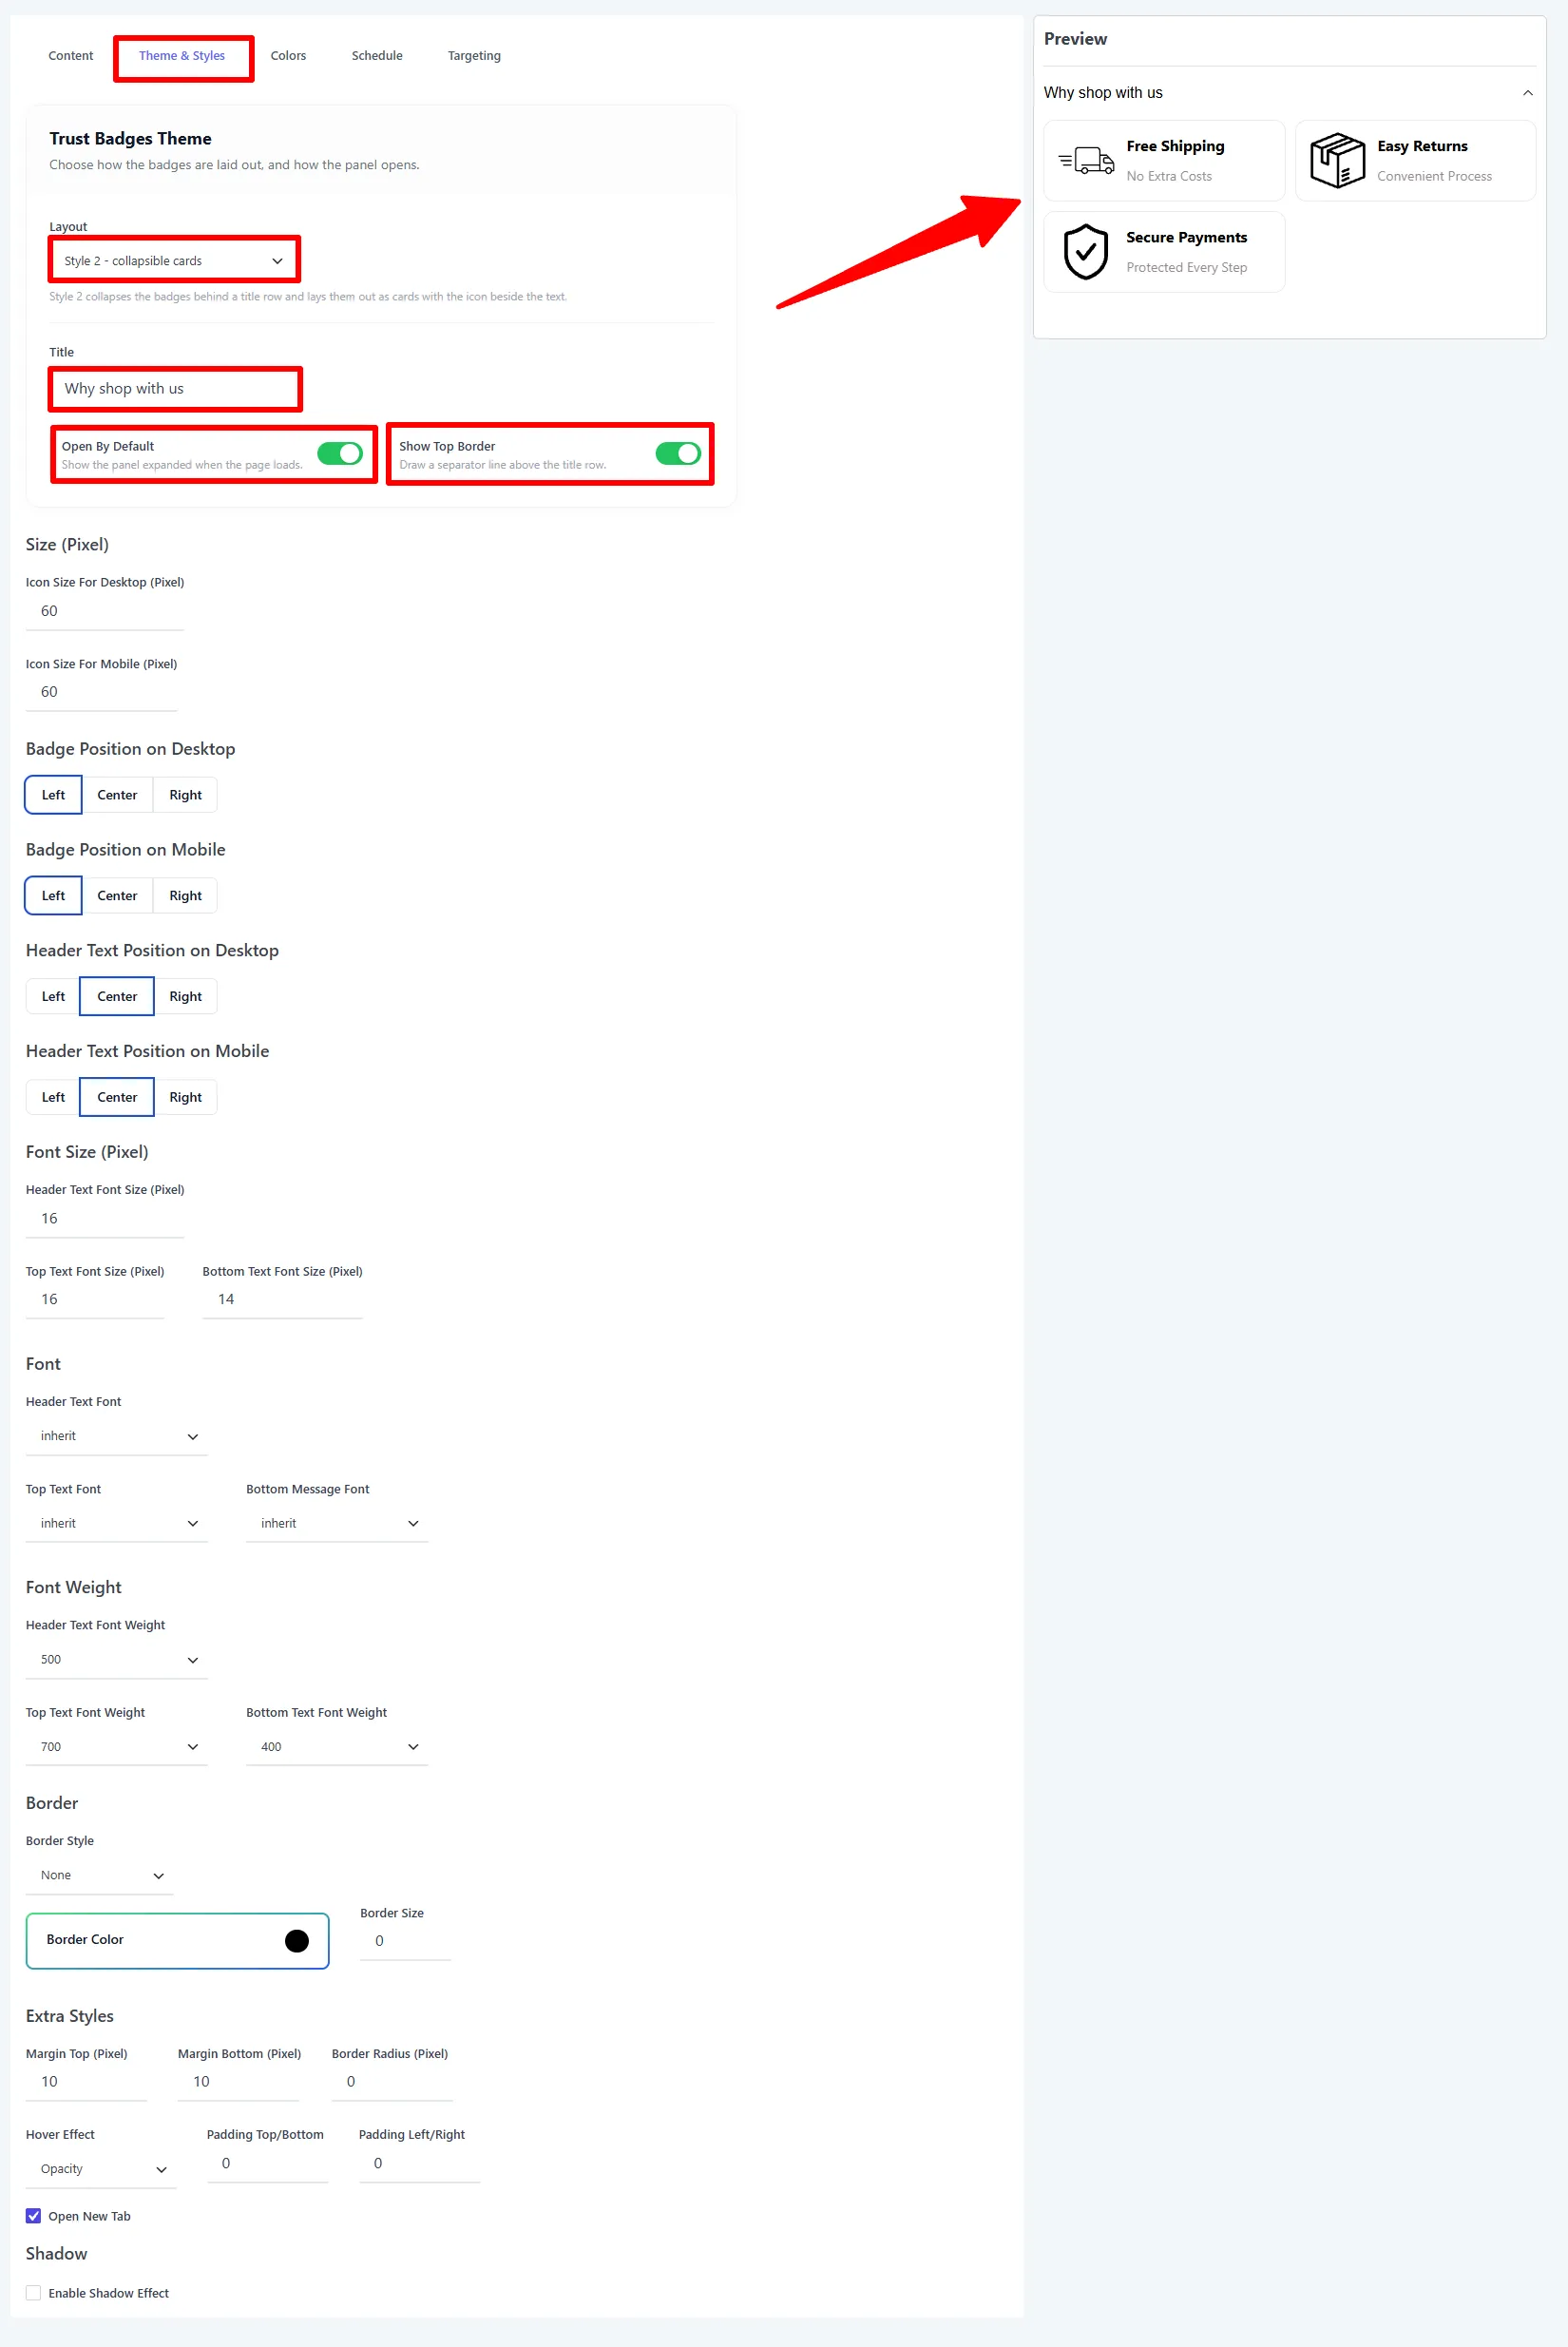
On the Theme & Styles tab, the Trust Badges Theme → Layout decides how the badges are laid out:
| Layout | Behavior |
|---|---|
| Style 1 — badges always visible | The classic row, all badges shown at once. |
| Style 2 — collapsible cards | Collapses the badges behind a title row and lays them out as cards with the icon beside the text. |
Style 2 adds a few extra options:
| Setting | What it does |
|---|---|
| Title | The heading on the title row (e.g. Why shop with us). |
| Open By Default | Show the panel expanded when the page loads. |
| Show Top Border | Draw a separator line above the title row. |
Then set Icon Size, Badge / Header Text Position (Left / Center / Right per device), fonts, border, margins, hover effect, and an optional shadow.
4. Place it, target, then Save
On the Targeting tab, tick Custom Position and set Position on Product Page (e.g. After CSS selector) with a CSS Selector (default form.cart — this places the panel just below the Add to Cart form). Pick the Devices, add Products rules (e.g. All Products), then click Save.
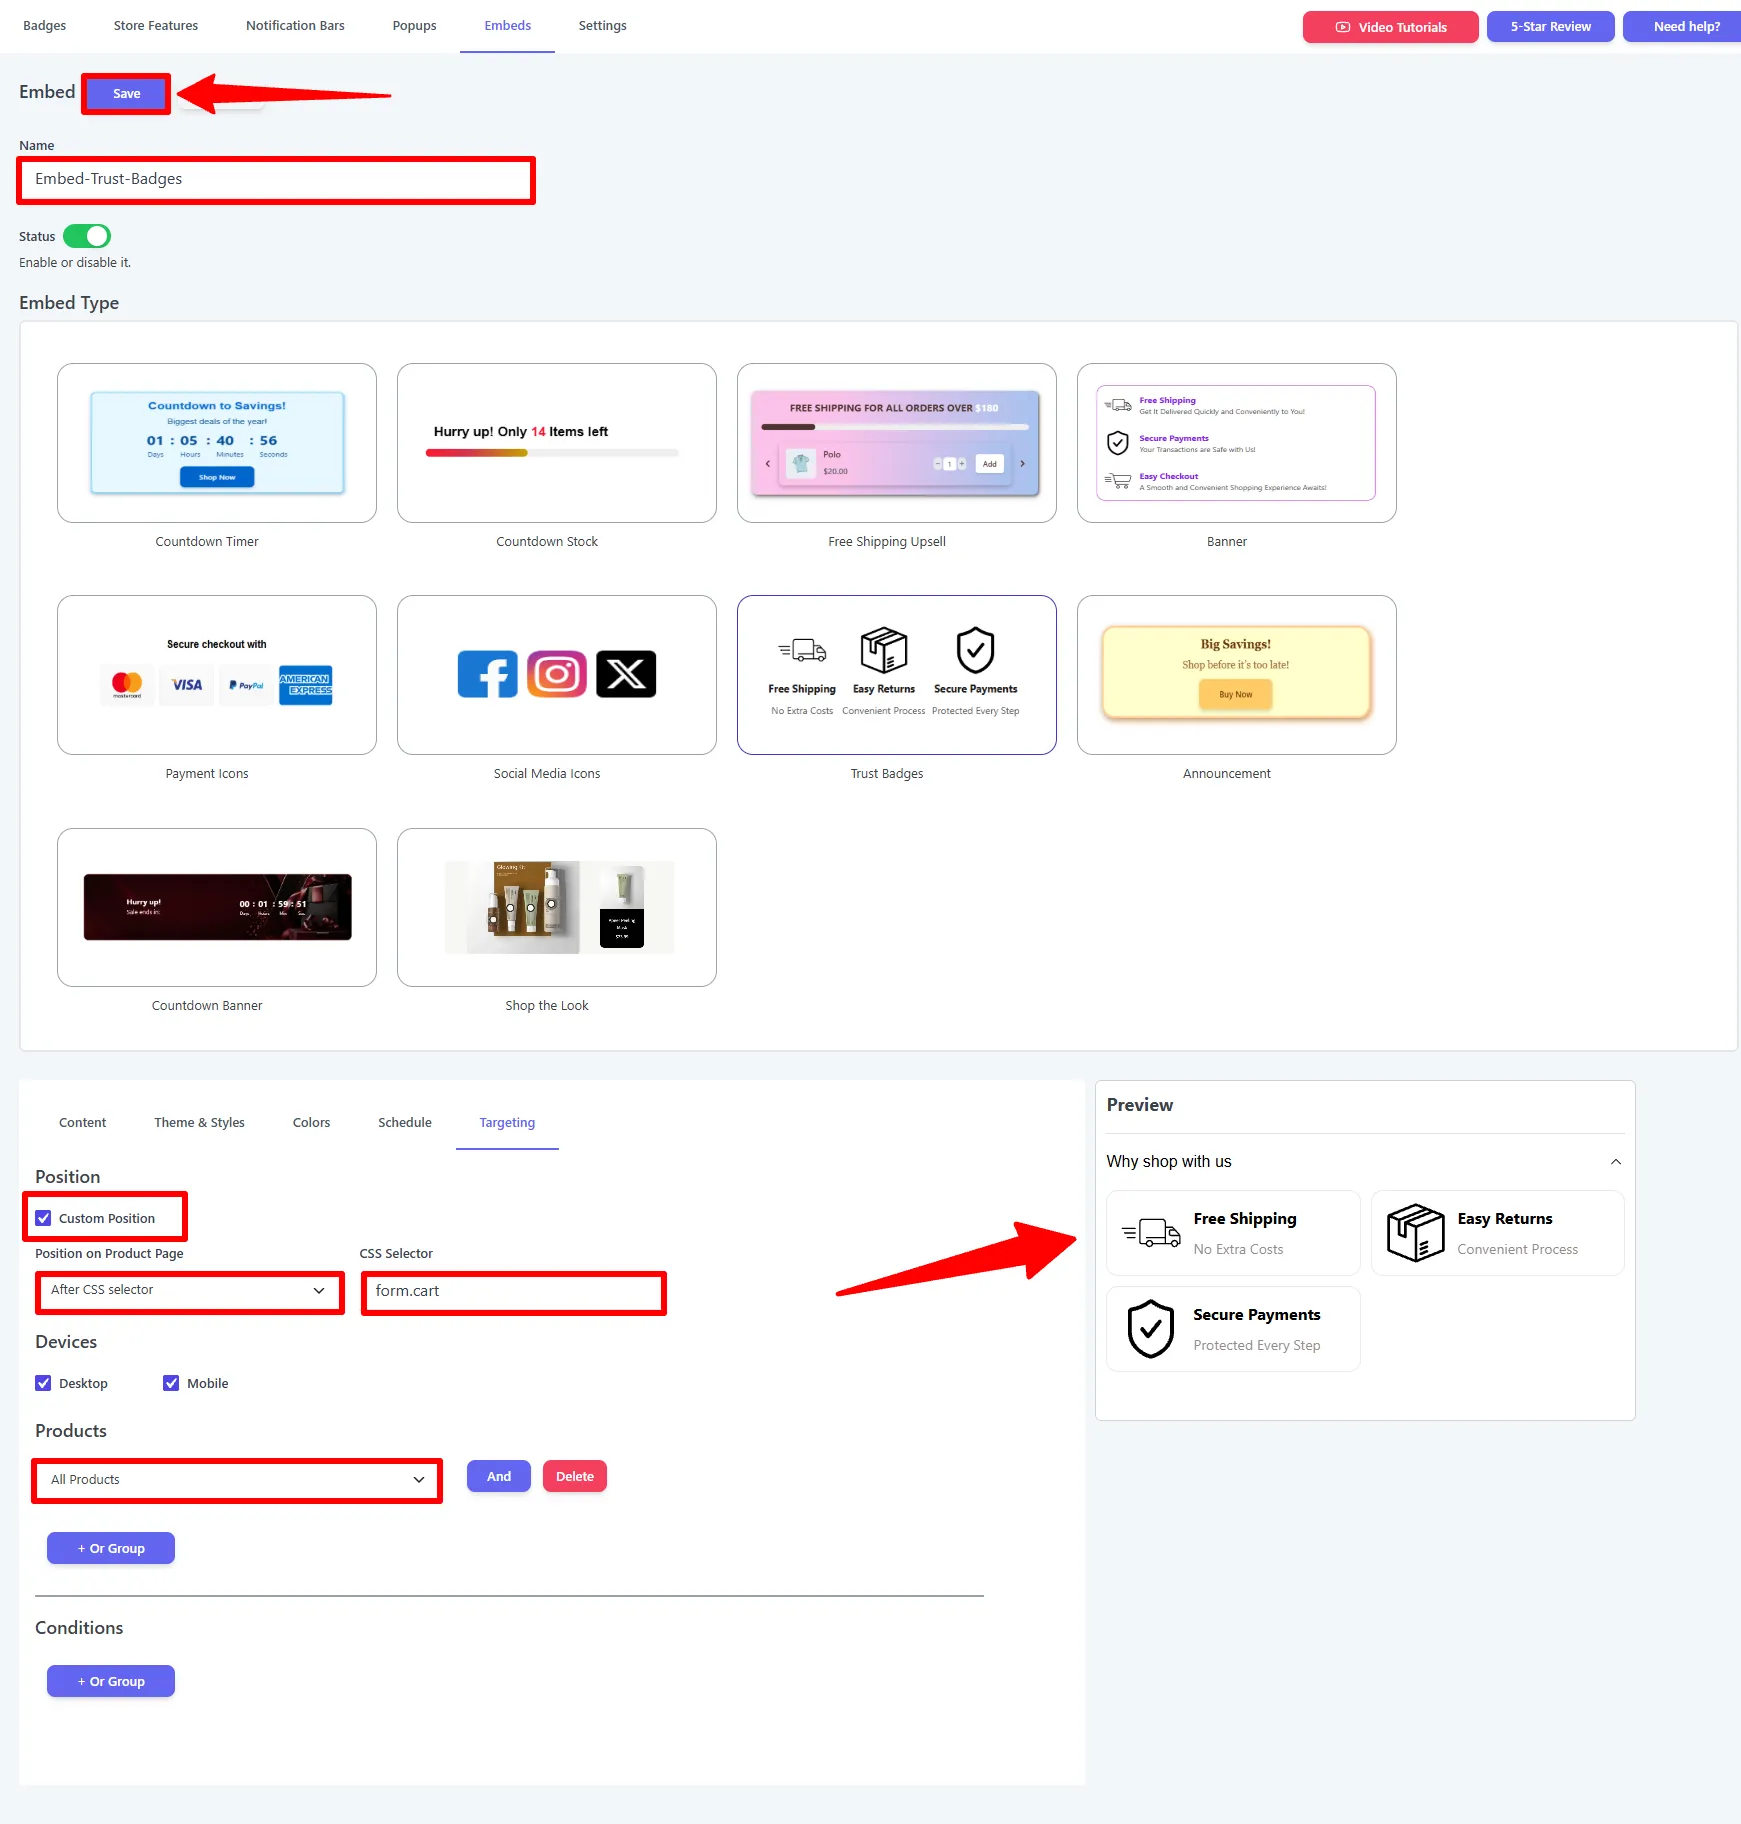
🧪 Example configuration
The panel shown in the screenshots:
| Setting | Value |
|---|---|
| Type | Trust Badges |
| Badge 1 | 🚚 Free Shipping / No Extra Costs |
| Badge 2 | 📦 Easy Returns / Convenient Process |
| Badge 3 | 🛡️ Secure Payments / Protected Every Step |
| Layout | Style 2 — collapsible cards |
| Title | Why shop with us (Open By Default, Show Top Border) |
| Placement | After form.cart |
| Targeting | All Products |
What customers see
Below the Add to Cart button, a "Why shop with us" panel opens into neat cards — each a benefit with an icon beside it — reassurance exactly where the decision happens.
Related
The same icon-row type also powers the Payment Icons and Social Media Icons presets.
Placement, targeting & schedule
For the full placement, product-rule, condition, and schedule reference, see the Embeds overview.
Next Steps
Frequently Asked Questions
What are WooCommerce trust badges?
WooCommerce trust badges are icons and short messages that communicate benefits such as free shipping, easy returns, secure payments, and guarantees near the Add to Cart area.
Where should trust badges appear on a product page?
Place them below or near Add to Cart, where shoppers evaluate the purchase. Use Position on Product Page, Custom Position, and device settings to fit the layout.
Can I customize the trust badge icons and text?
Yes. Choose built-in icons or upload your own, edit the top and bottom text, add or remove badges, select a layout, and customize colors, borders, spacing, and translations.