WooCommerce Product Feature Banner
Overview
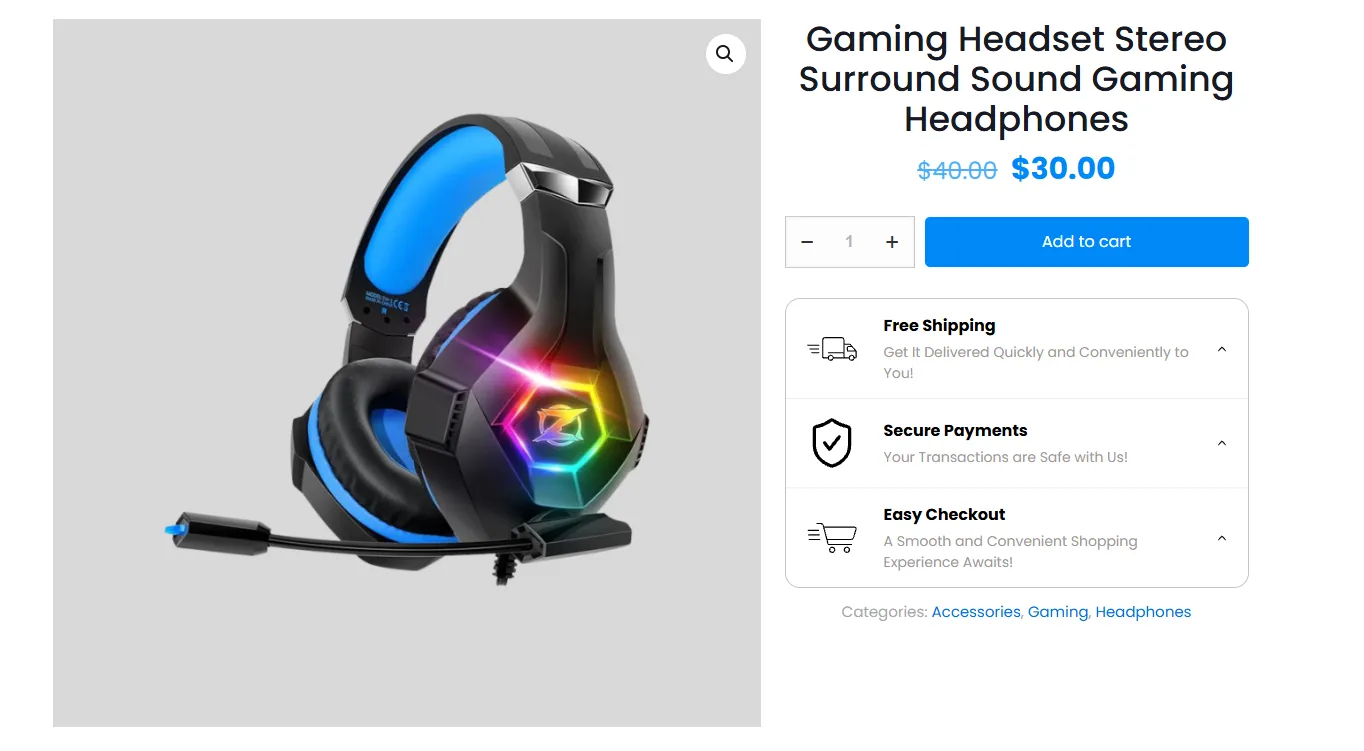
The Banner embed (Feature Banner) is a row of store-benefit highlights — each an icon + two lines of text, e.g. Free Shipping, Secure Payments, Easy Checkout — placed on the product page to reassure shoppers.
Use this WooCommerce feature banner to create a WooCommerce product feature banner with product benefit icons WooCommerce shoppers can scan quickly. It works as a compact WooCommerce icon banner for product page feature highlights such as shipping, payments, and checkout support.
How it works
You want every product page to reinforce why buying from you is safe and easy. You add a Feature Banner with three items — free shipping, secure payments, easy checkout — and it appears as a tidy card just below the Add to Cart button on every product.
Embeds are available in the Pro version.
Step-by-step setup
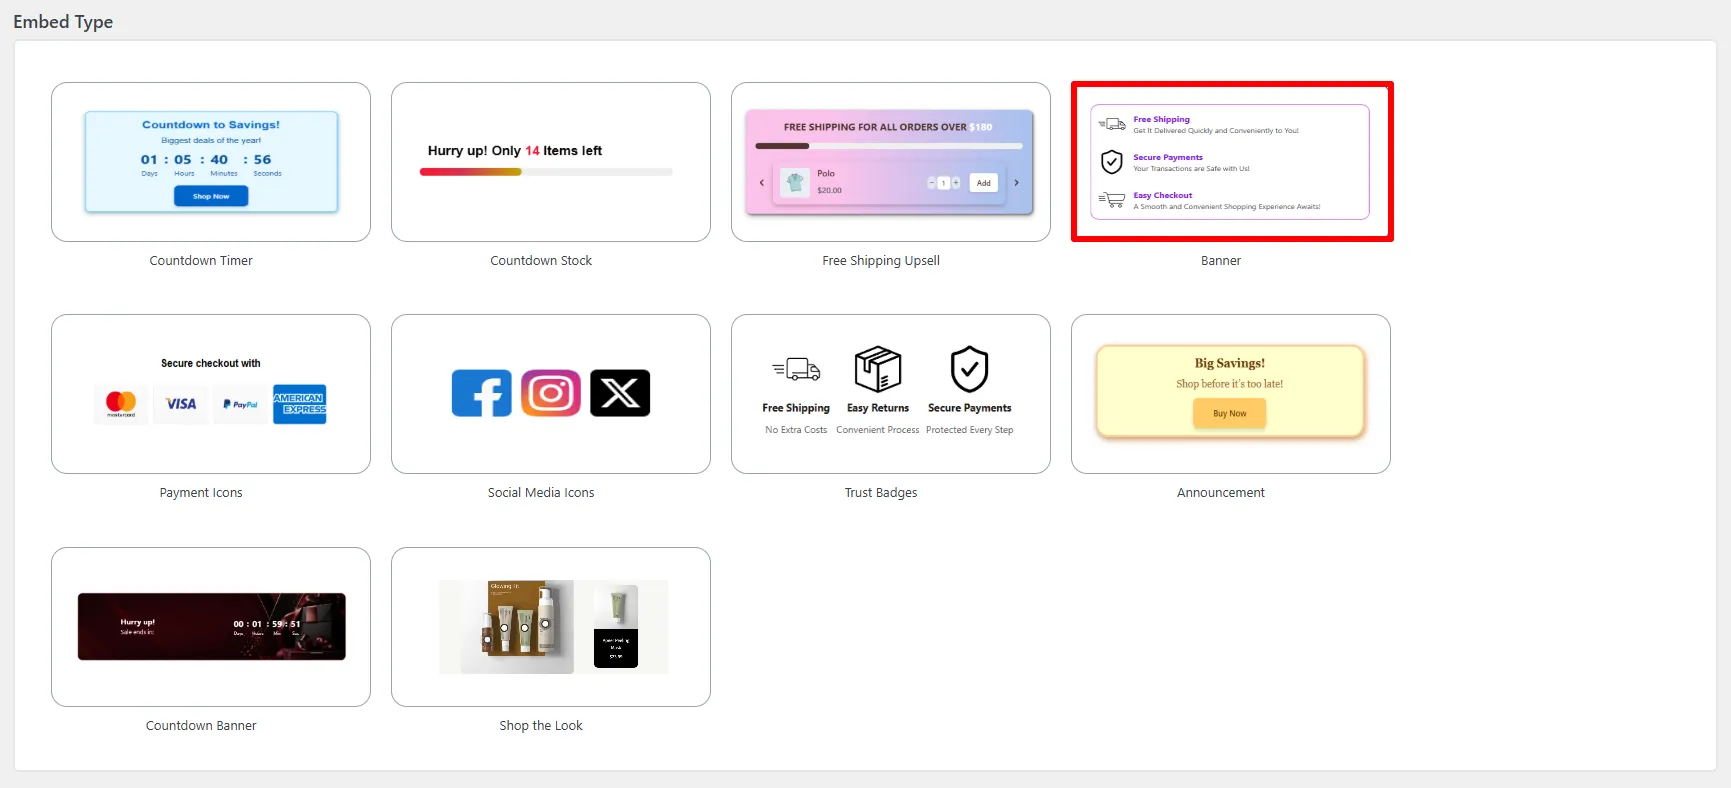
1. Pick the Banner type
Open Sale Badges → Embeds → Add New, give the embed a Name, and turn Status on. Under Embed Type choose Banner.
2. Add your feature rows
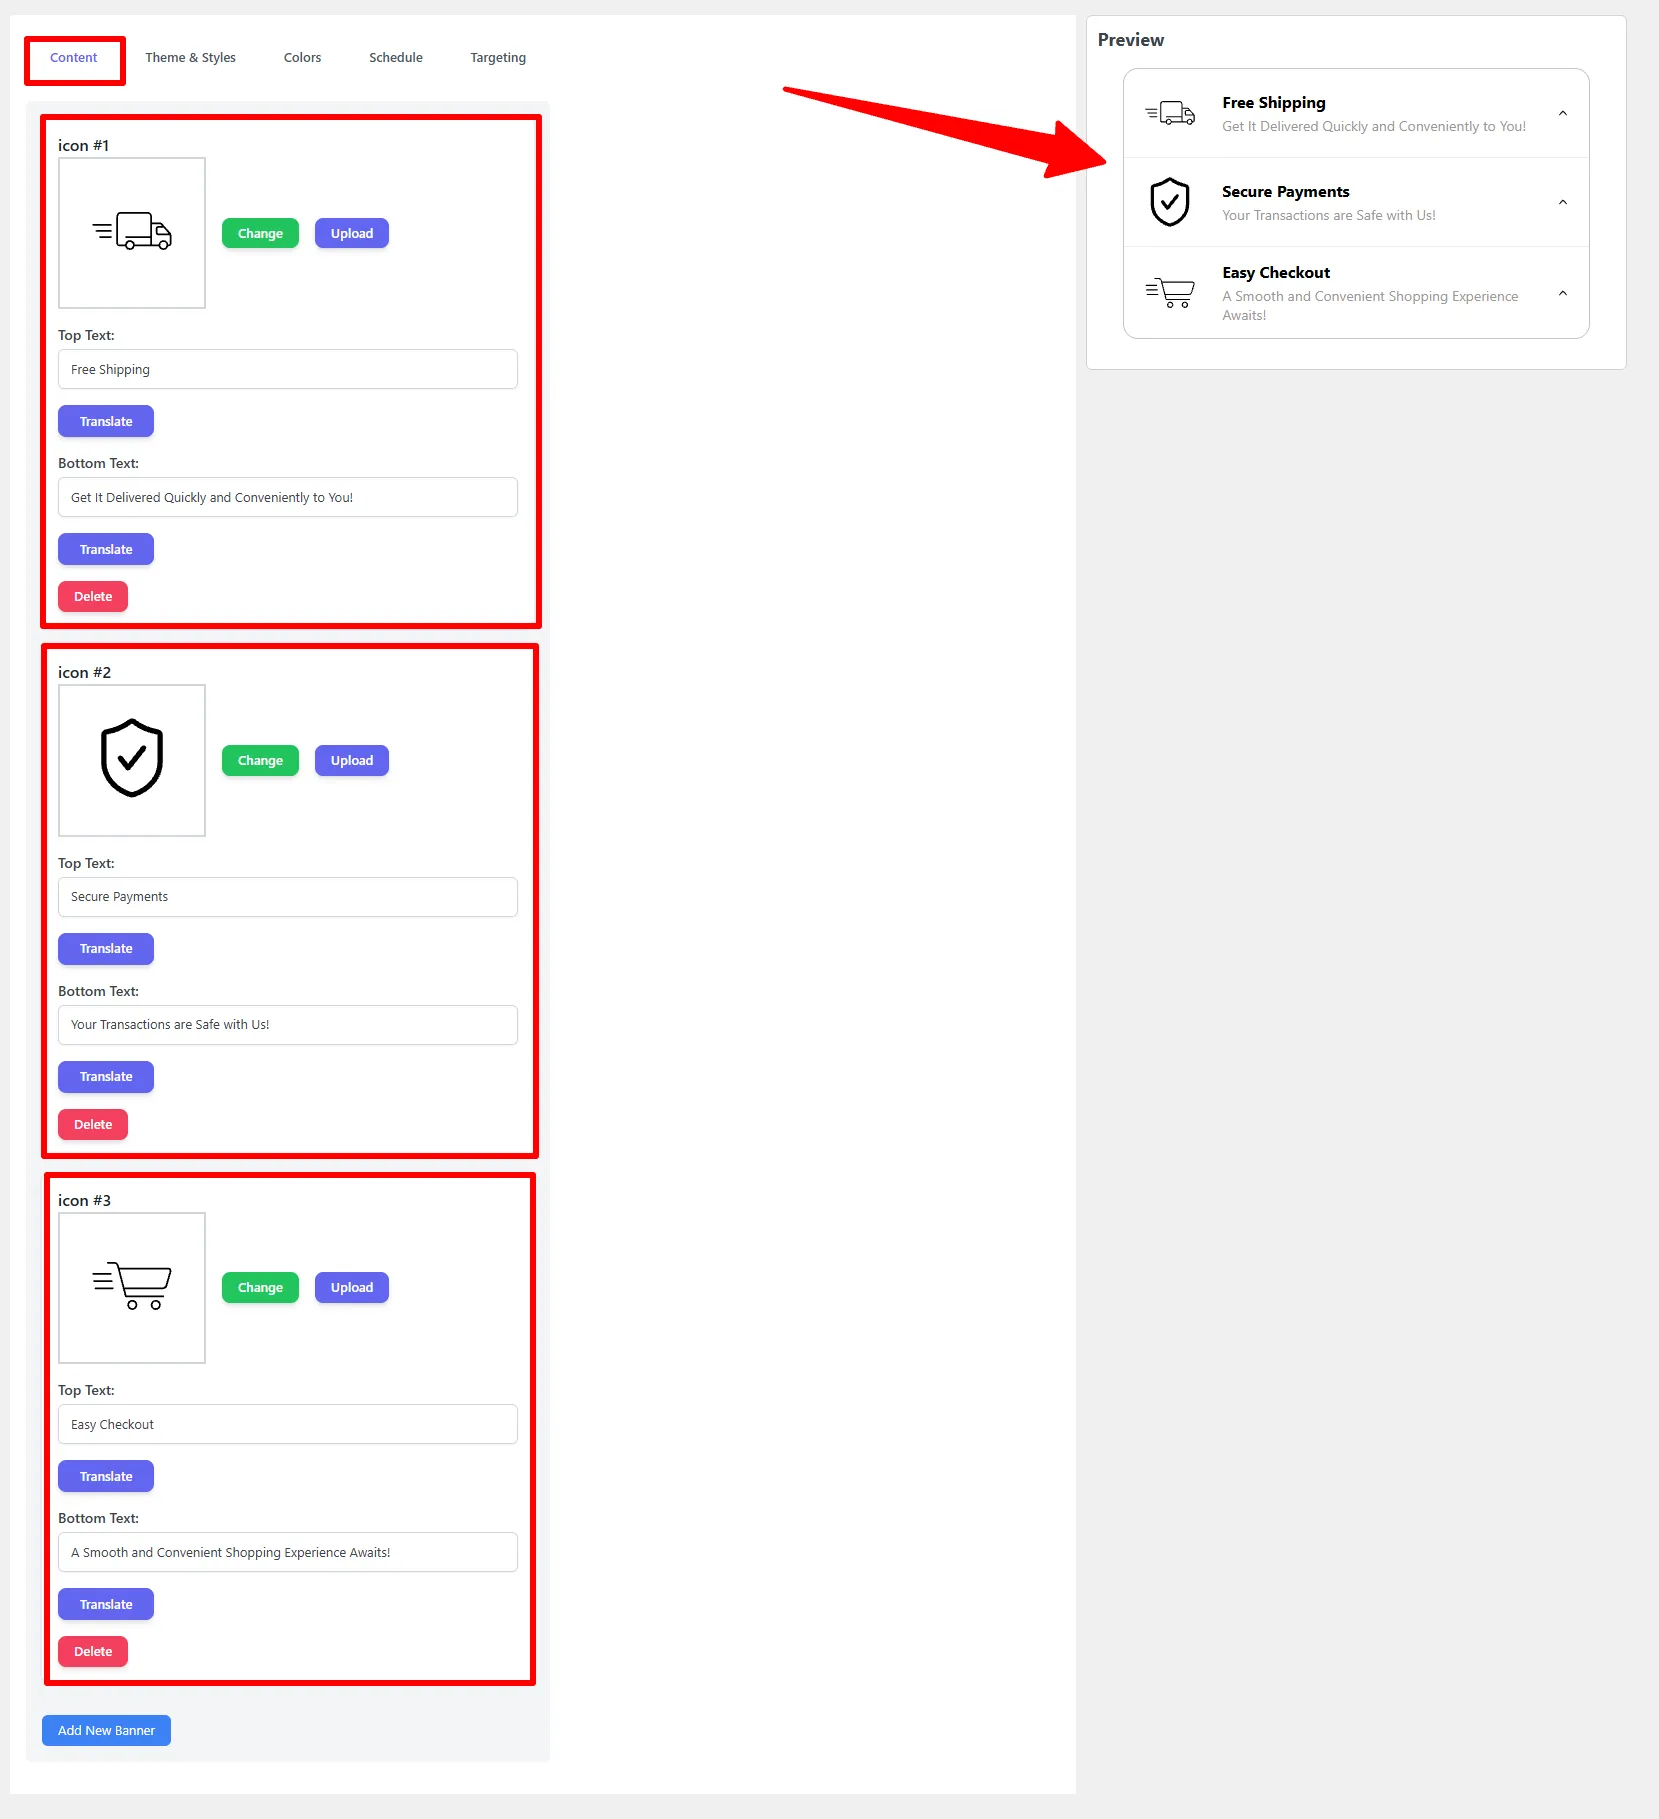
On the Content tab, each item is a row. For every one:
- Icon — Change to a built-in icon or Upload your own.
- Top Text — the bold headline (e.g.
Free Shipping). - Bottom Text — the supporting line (e.g.
Get It Delivered Quickly and Conveniently to You!).
Use Add New Banner to add more rows, Delete to remove one, and Translate for per-language text.
3. Choose the layout & style
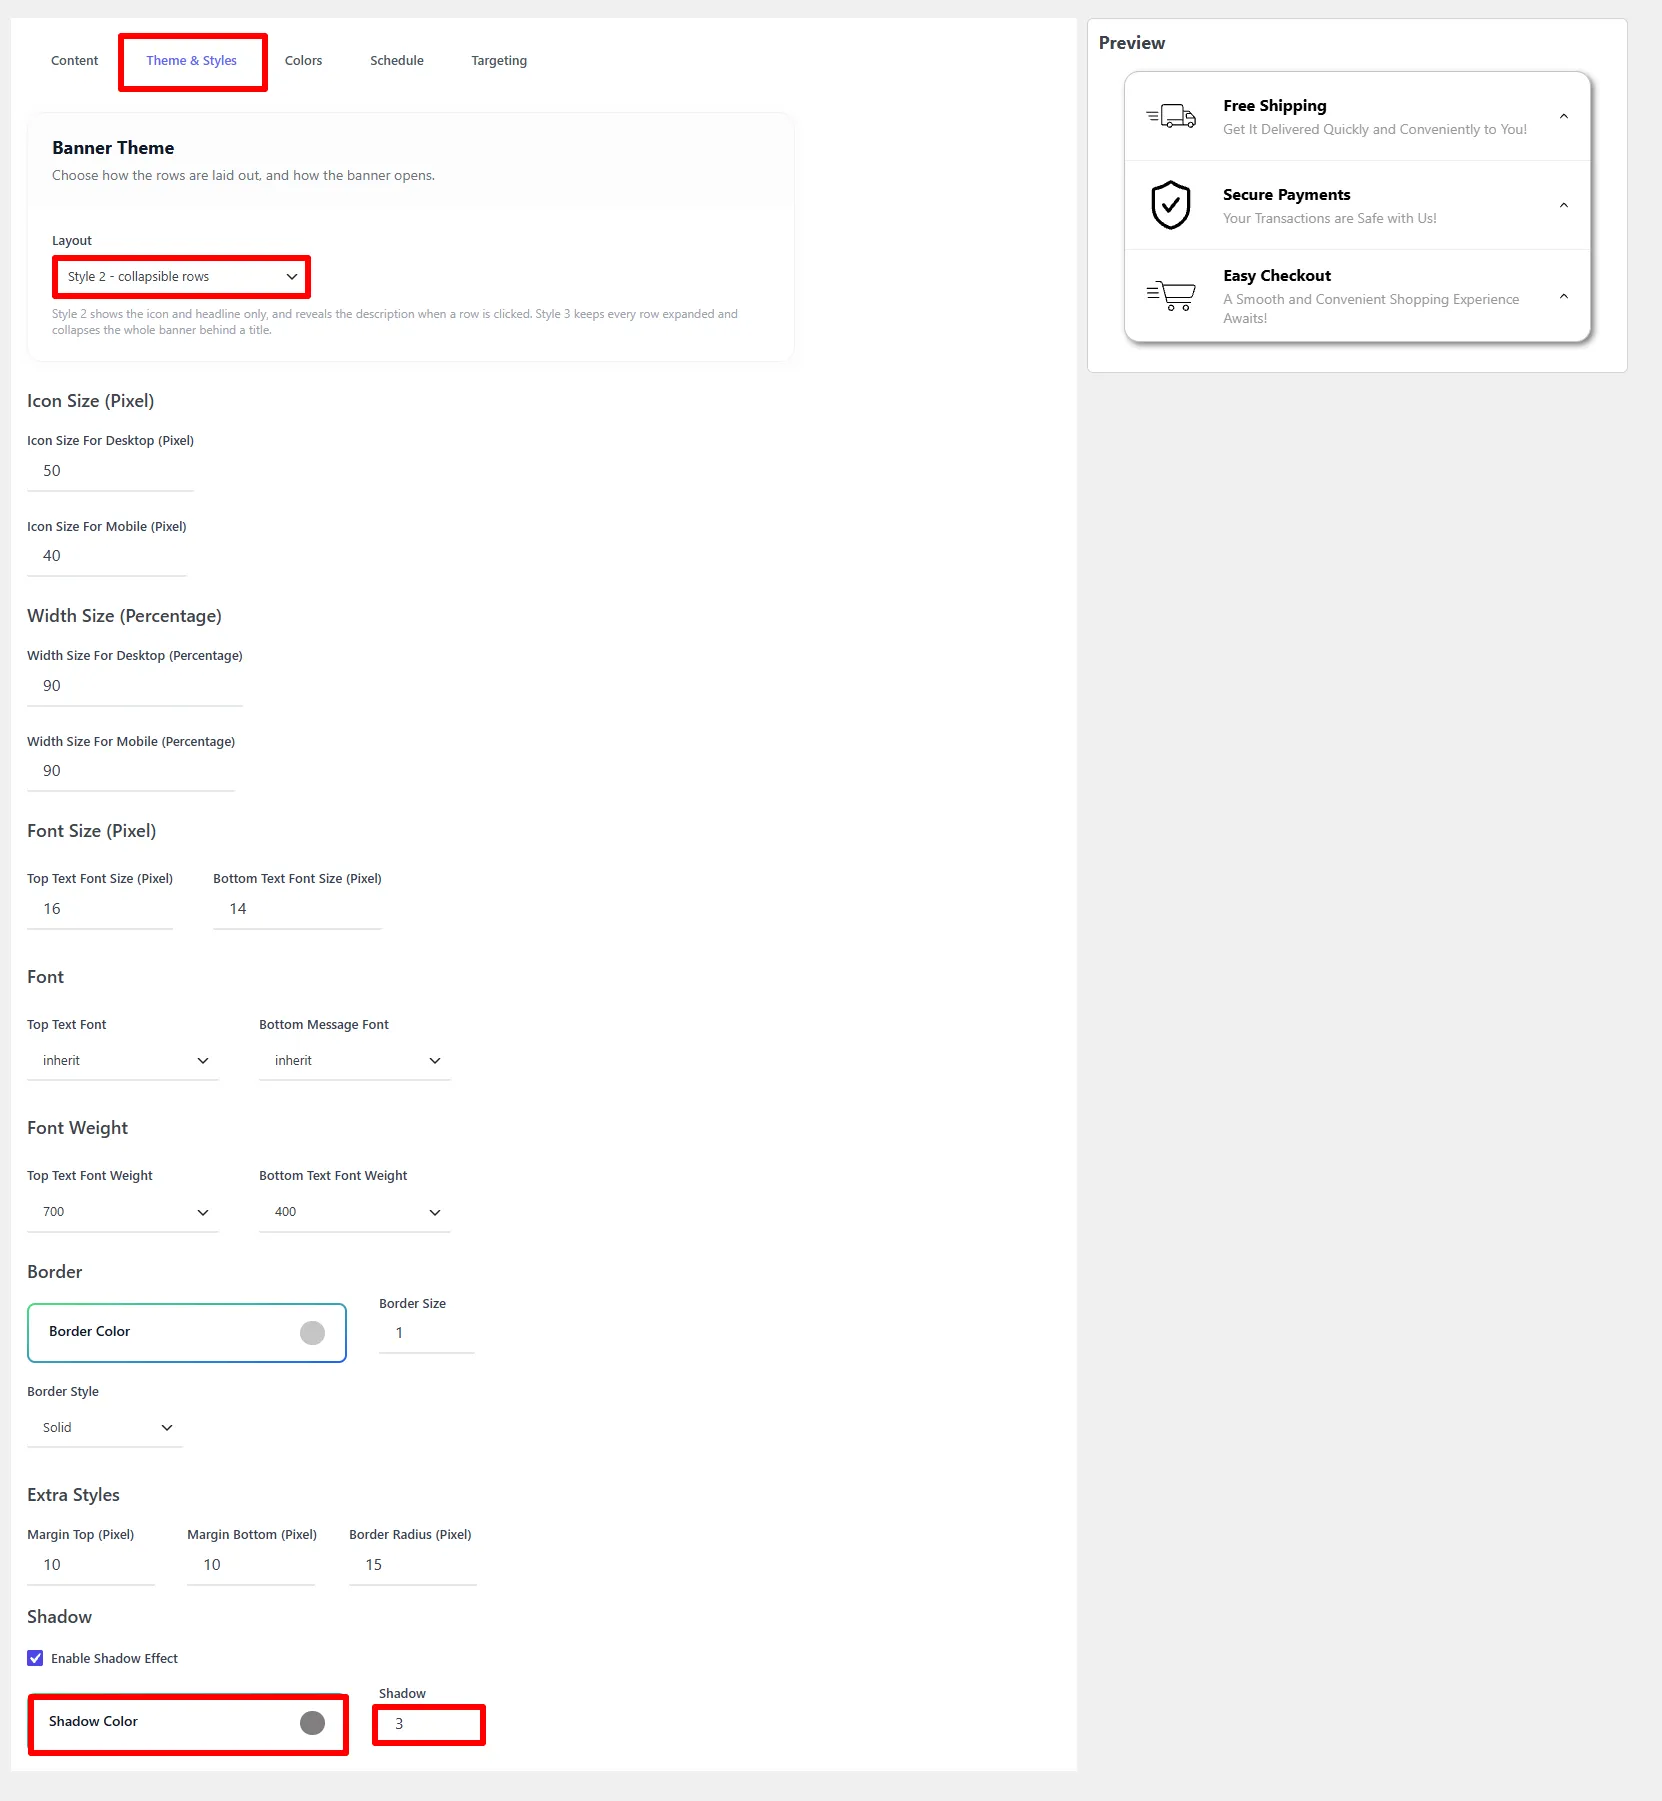
On the Theme & Styles tab, the Banner Theme → Layout controls how the rows behave:
| Layout | Behavior |
|---|---|
| Style 1 | Simple always-expanded rows. |
| Style 2 — collapsible rows | Shows the icon and headline only, and reveals the description when a row is clicked. |
| Style 3 | Keeps every row expanded and collapses the whole banner behind a title. |
Then set Icon Size (desktop/mobile), Width, Font Size / Font / Weight, Border, margins, Border Radius, and an optional Shadow.
4. Place it, target, then Save
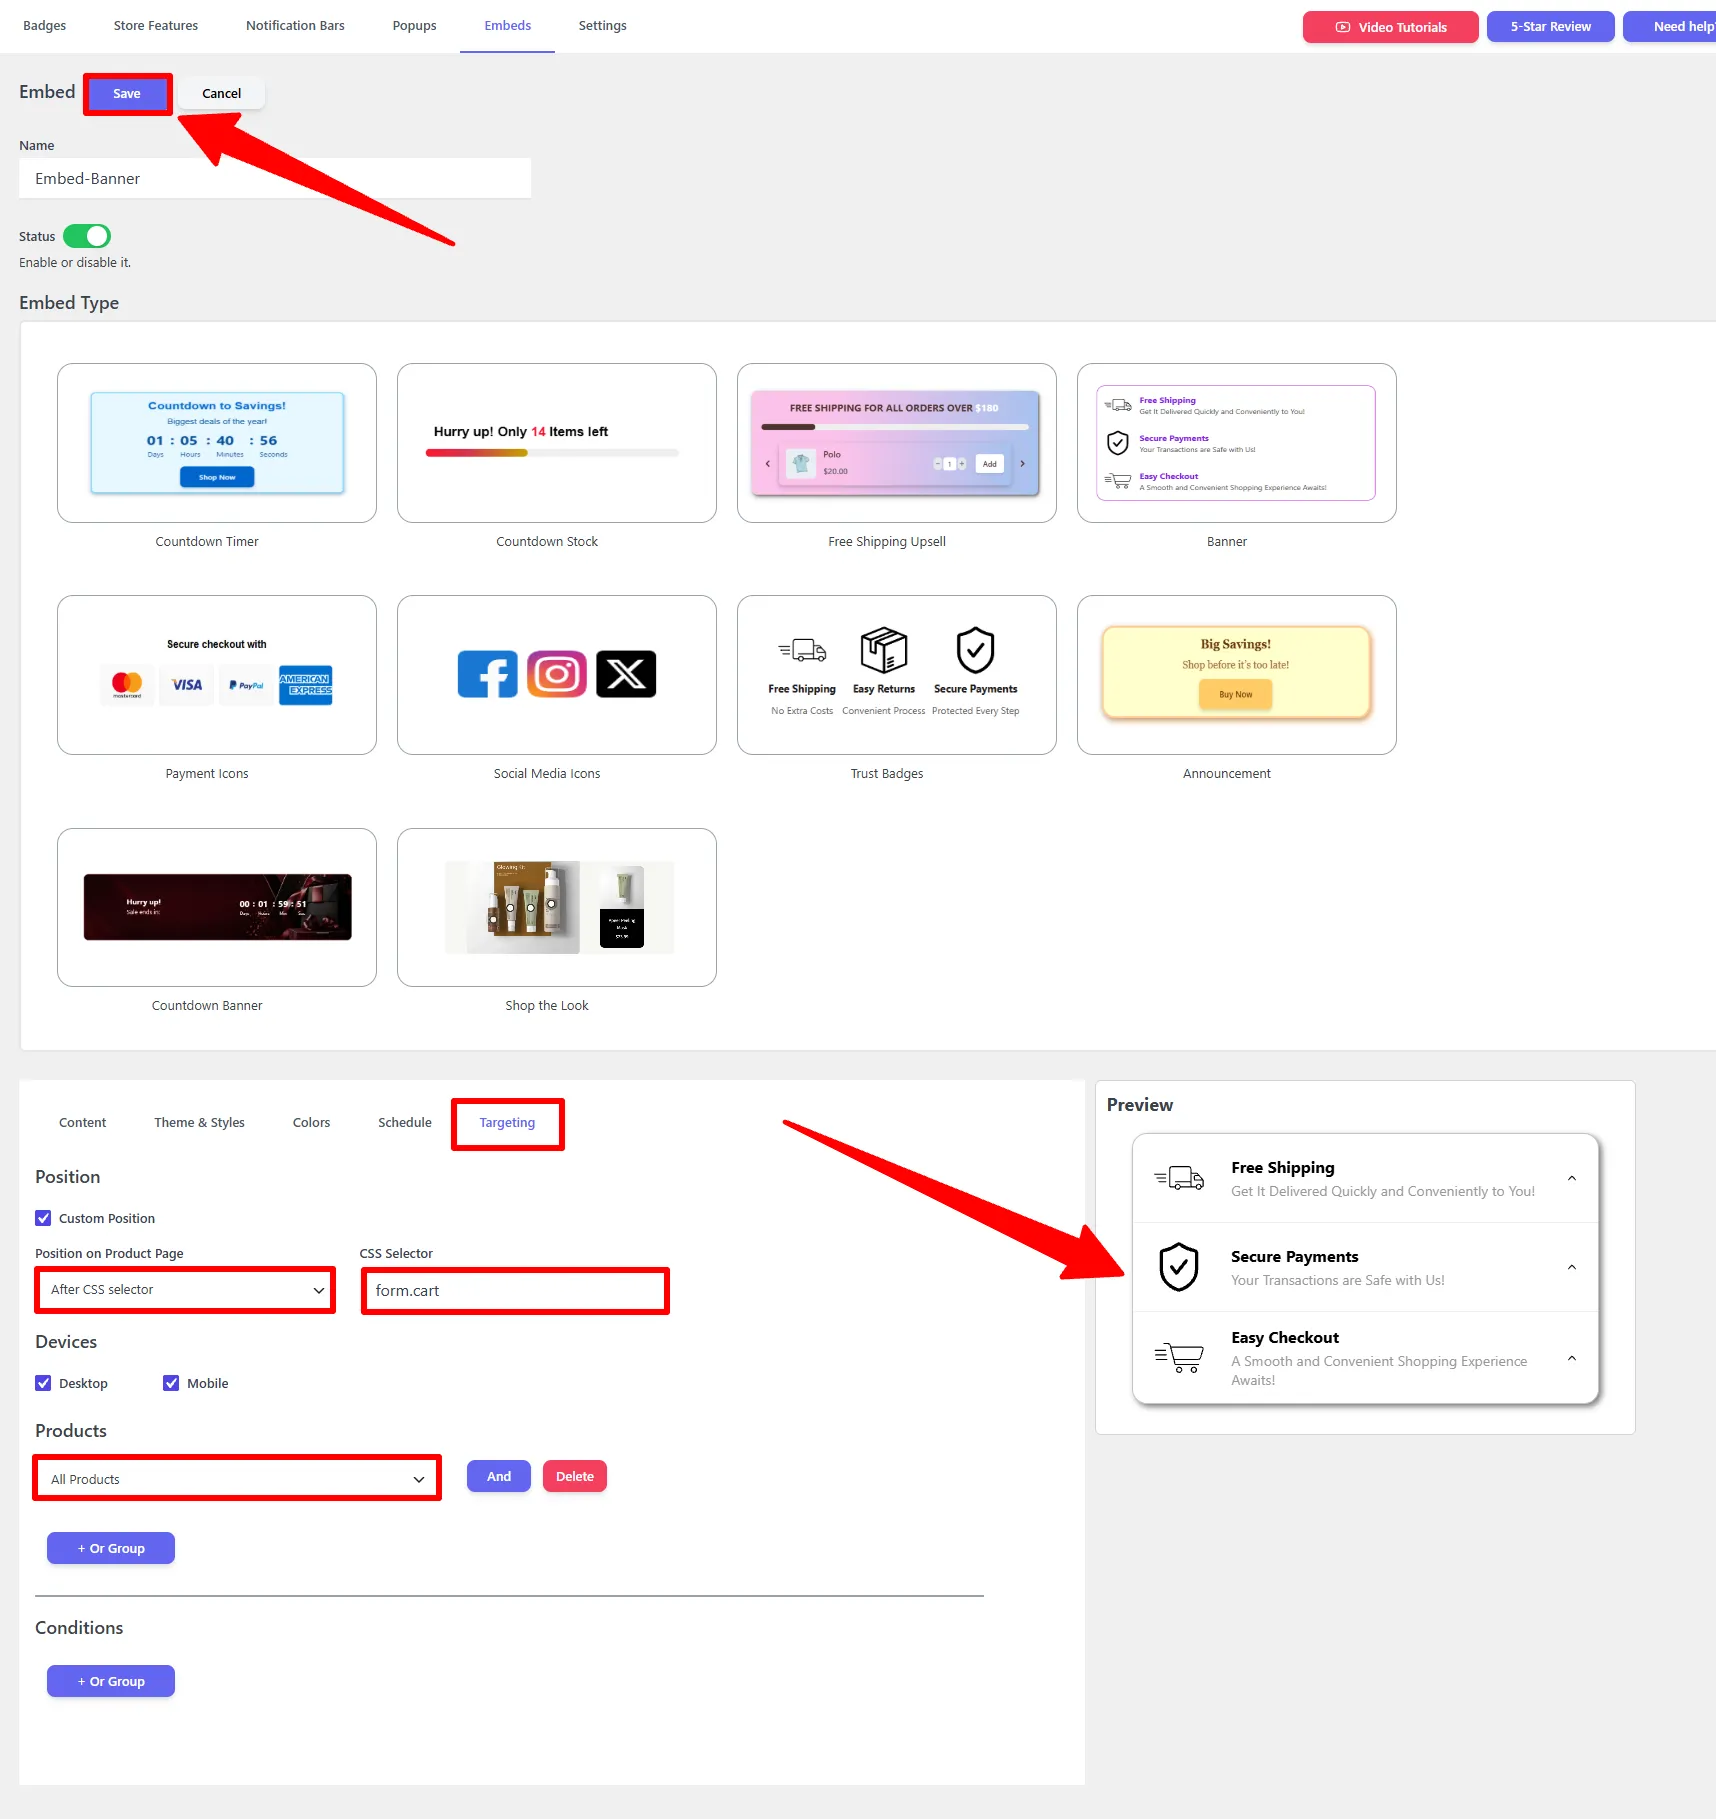
On the Targeting tab, tick Custom Position and set Position on Product Page (e.g. After CSS selector) with a CSS Selector (default form.cart — this places the banner just below the Add to Cart form). Pick the Devices, add Products rules (e.g. All Products), then click Save.
Options explained
Content
| Control | What it does |
|---|---|
| Icon | Change to a built-in icon or Upload your own. |
| Top Text / Bottom Text | The headline and supporting line. |
| Add New Banner / Delete | Add or remove rows. |
Theme & Styles
| Setting | What it does |
|---|---|
| Layout | Style 1 / Style 2 (collapsible rows) / Style 3. |
| Icon Size | Desktop & mobile icon size. |
| Width | Banner width for desktop & mobile. |
| Font size / Font / Weight | For the top and bottom text. |
| Border / Margins / Radius | Frame and spacing. |
| Shadow | Enable a shadow with color and size. |
🧪 Example configuration
The banner shown in the screenshots:
| Setting | Value |
|---|---|
| Type | Banner (Feature Banner) |
| Row 1 | 🚚 Free Shipping / Get It Delivered Quickly and Conveniently to You! |
| Row 2 | 🛡️ Secure Payments / Your Transactions are Safe with Us! |
| Row 3 | 🛒 Easy Checkout / A Smooth and Convenient Shopping Experience Awaits! |
| Layout | Style 2 — collapsible rows |
| Placement | After form.cart |
| Targeting | All Products |
What customers see
A neat card below the Add to Cart button listing your key benefits — reassurance exactly where the buying decision happens.
Placement, targeting & schedule
For the full placement, product-rule, condition, and schedule reference, see the Embeds overview.
Next Steps
Frequently Asked Questions
What is a WooCommerce product feature banner?
A product feature banner is an icon-led row that communicates store benefits such as free shipping, secure payments, and easy checkout below the product purchase area.
How many feature rows can I add?
Use the Content tab to add or remove banner rows. Each row can have an icon, top text, and bottom text, and each field can be translated.
Can I show the feature banner only on selected products?
Yes. Use the Targeting tab to set product rules, conditions, devices, a custom position, and an optional schedule.