Installation
Follow this guide to install the Product Badge, Label, Countdown Timer for WooCommerce (formerly Easy Sale Badges for WooCommerce) plugin on your WordPress site.
- WordPress 5.0 or higher
- WooCommerce installed and activated
- PHP 5.6 or higher
Free Version
Step 1: Go to the Product Badge, Label, Countdown Timer for WooCommerce page on WordPress.org and download the plugin.
Step 2: In your WordPress dashboard, open Plugins → Add Plugin. Make sure WooCommerce is installed and activated first.
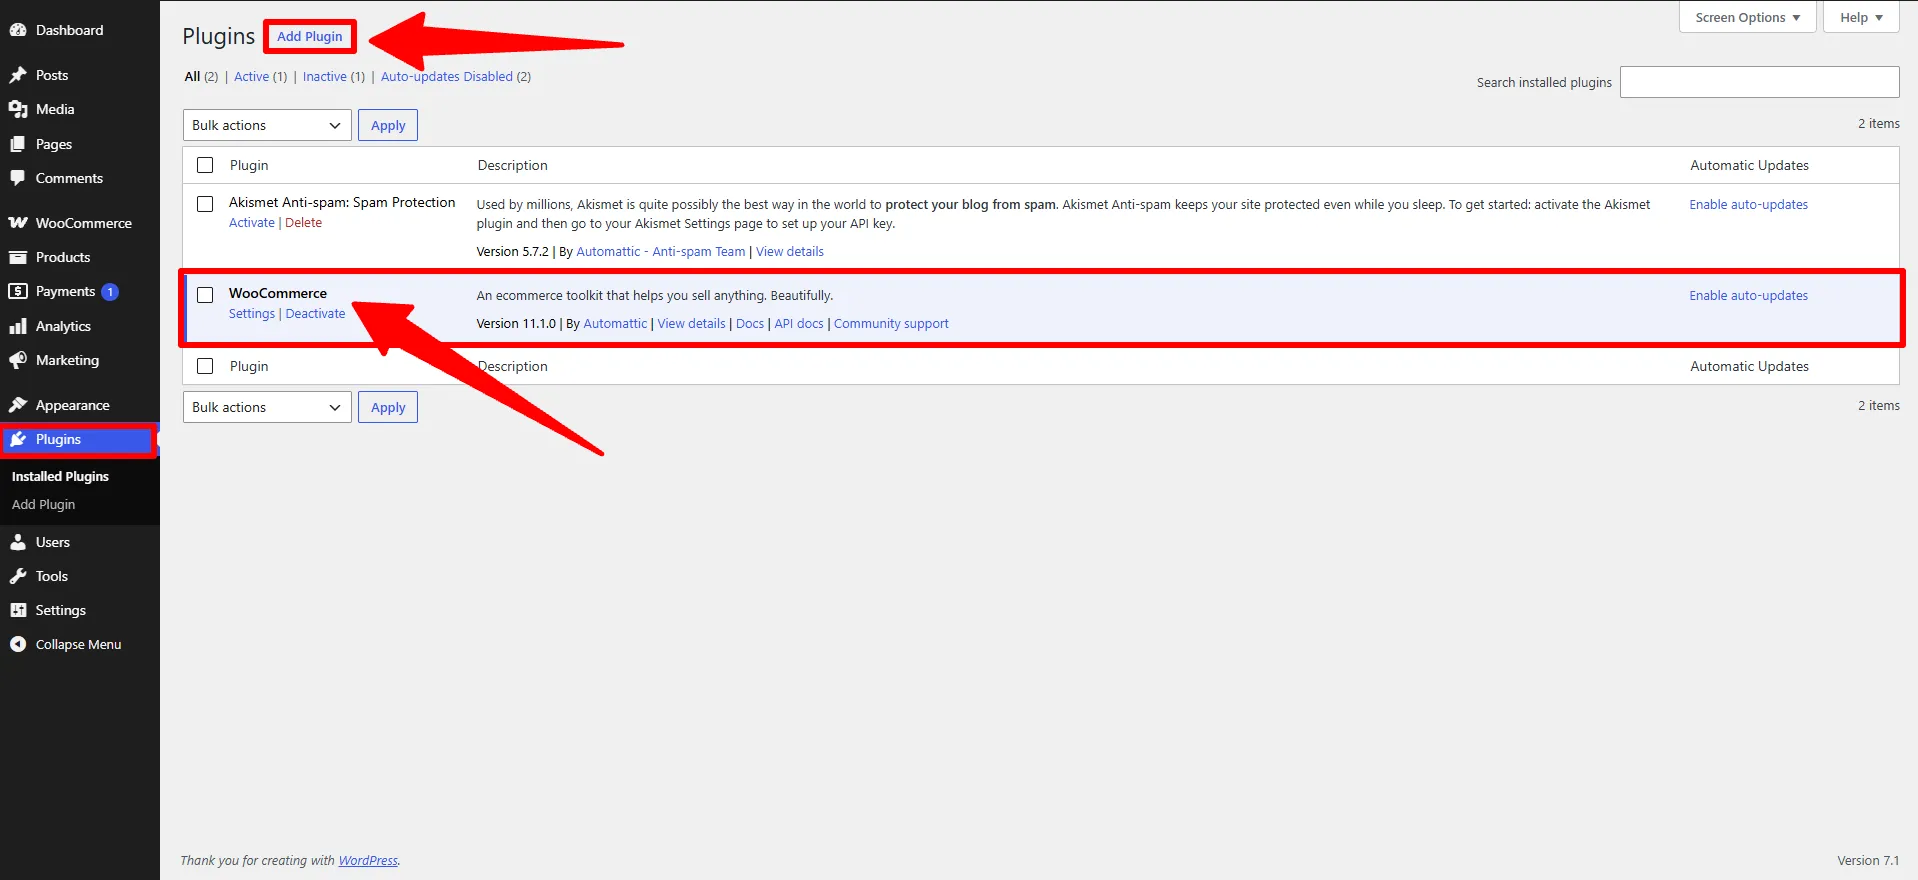
Step 3:
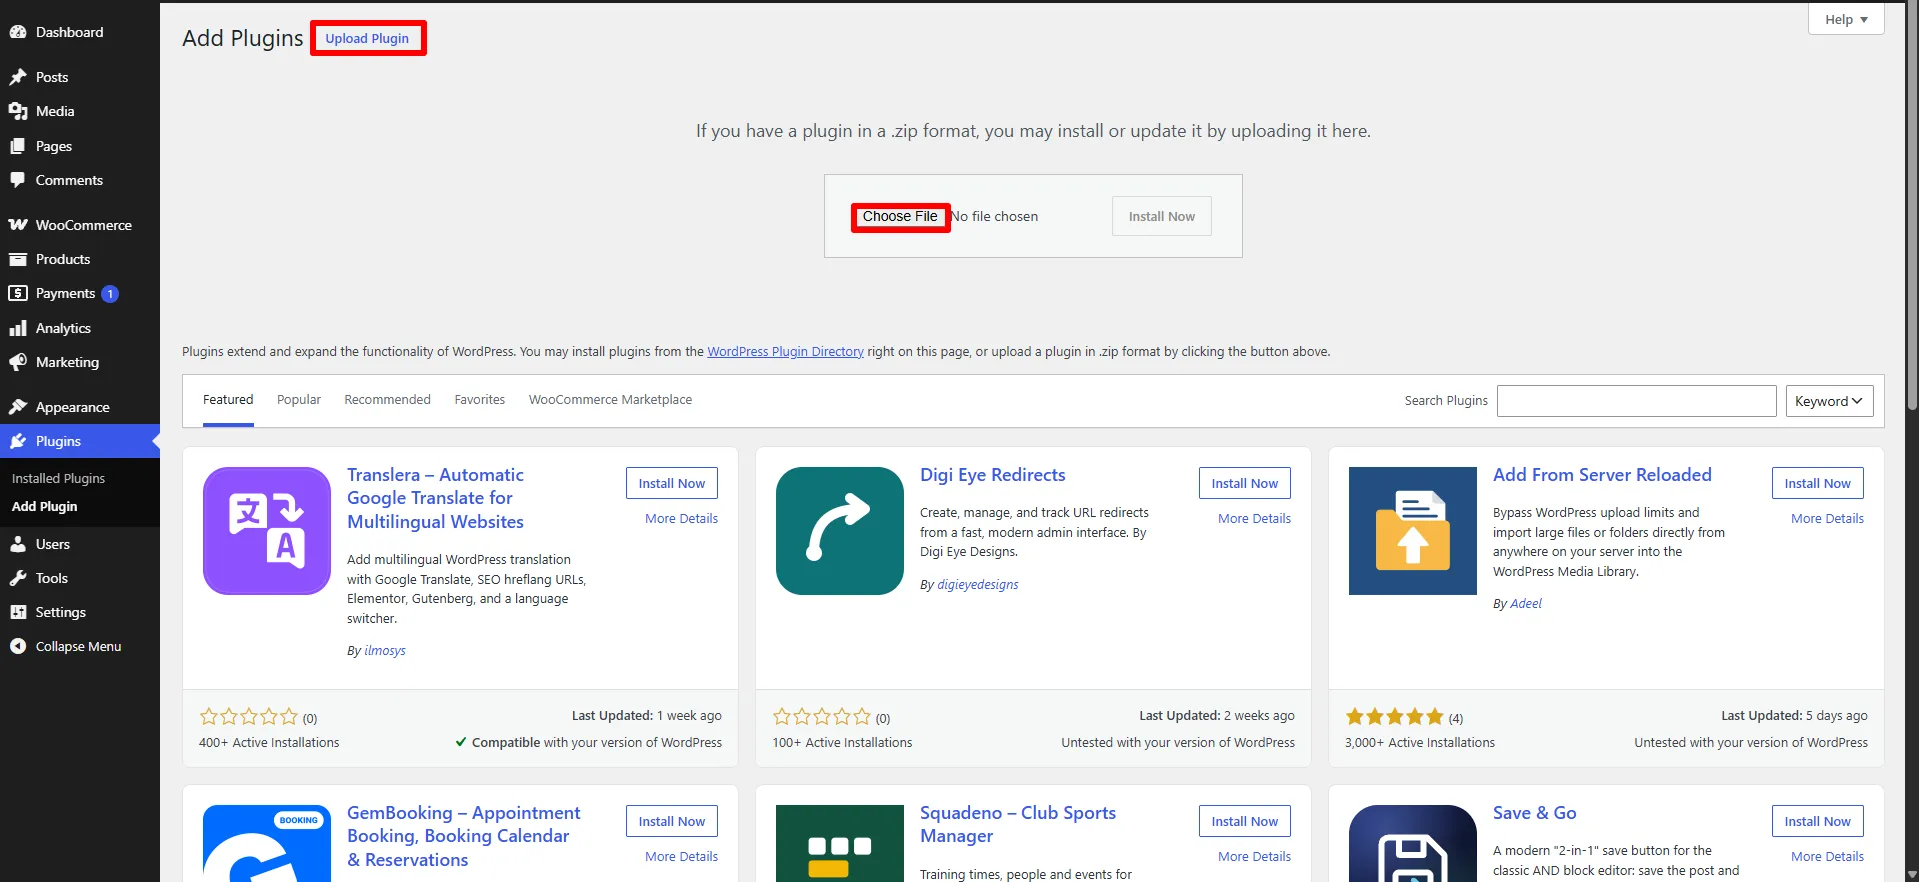
Click Upload Plugin, choose the easy-sale-badges-for-woocommerce.zip file, then click Install Now.
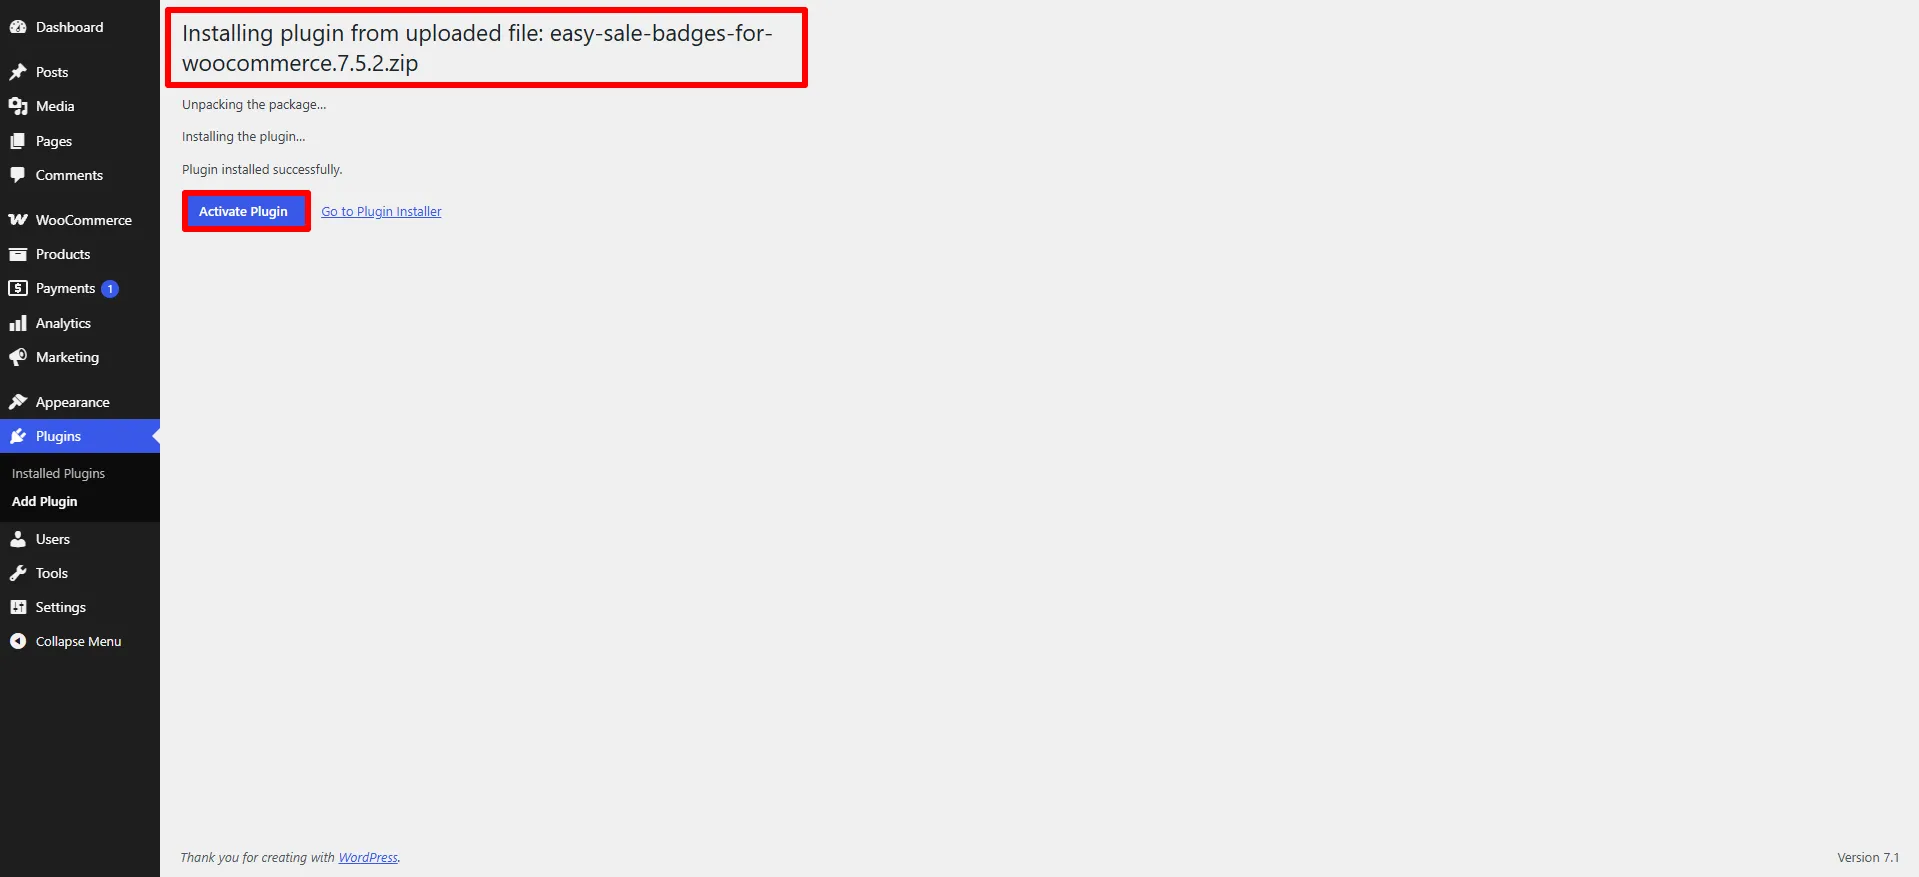
Step 4: When the plugin is installed, click Activate Plugin.
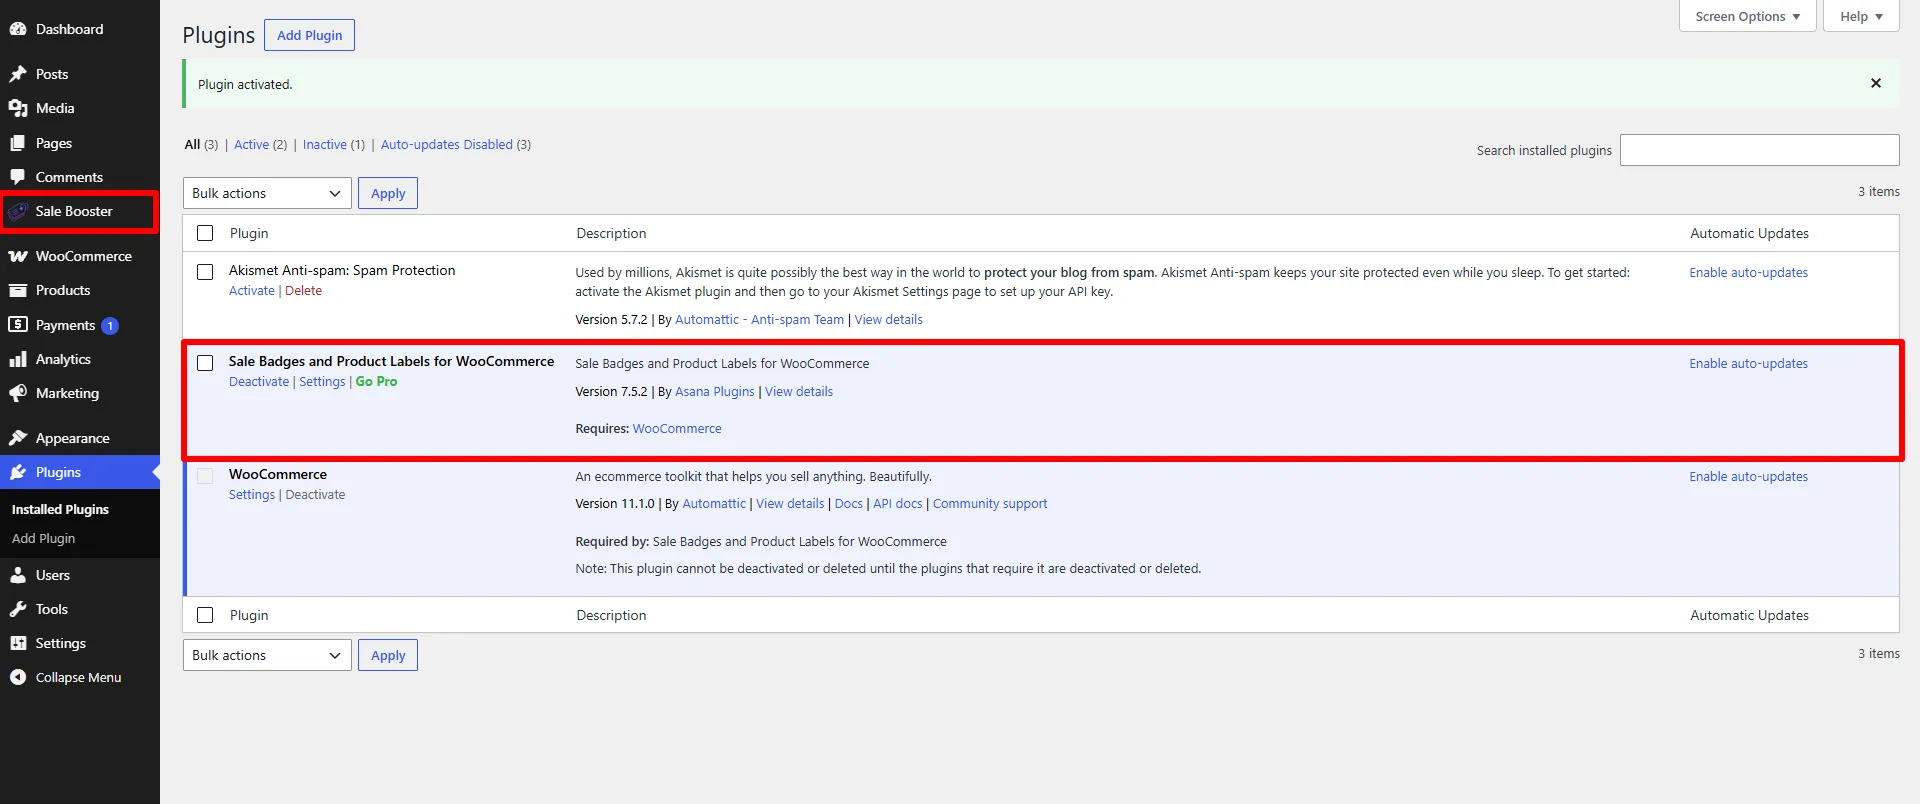
Step 5: Once activated, open the Sale Booster menu from your dashboard to start configuring the plugin.
Pro Version
Step 1: Download the Product Badge, Label, Countdown Timer for WooCommerce PRO plugin from your account.
Step 2:
In your WordPress dashboard, go to Plugins → Add Plugin → Upload Plugin, choose the easy-sale-badges-for-woocommerce-pro.zip file, then click Install Now. You can leave the Free version installed — your existing settings and badges carry over.
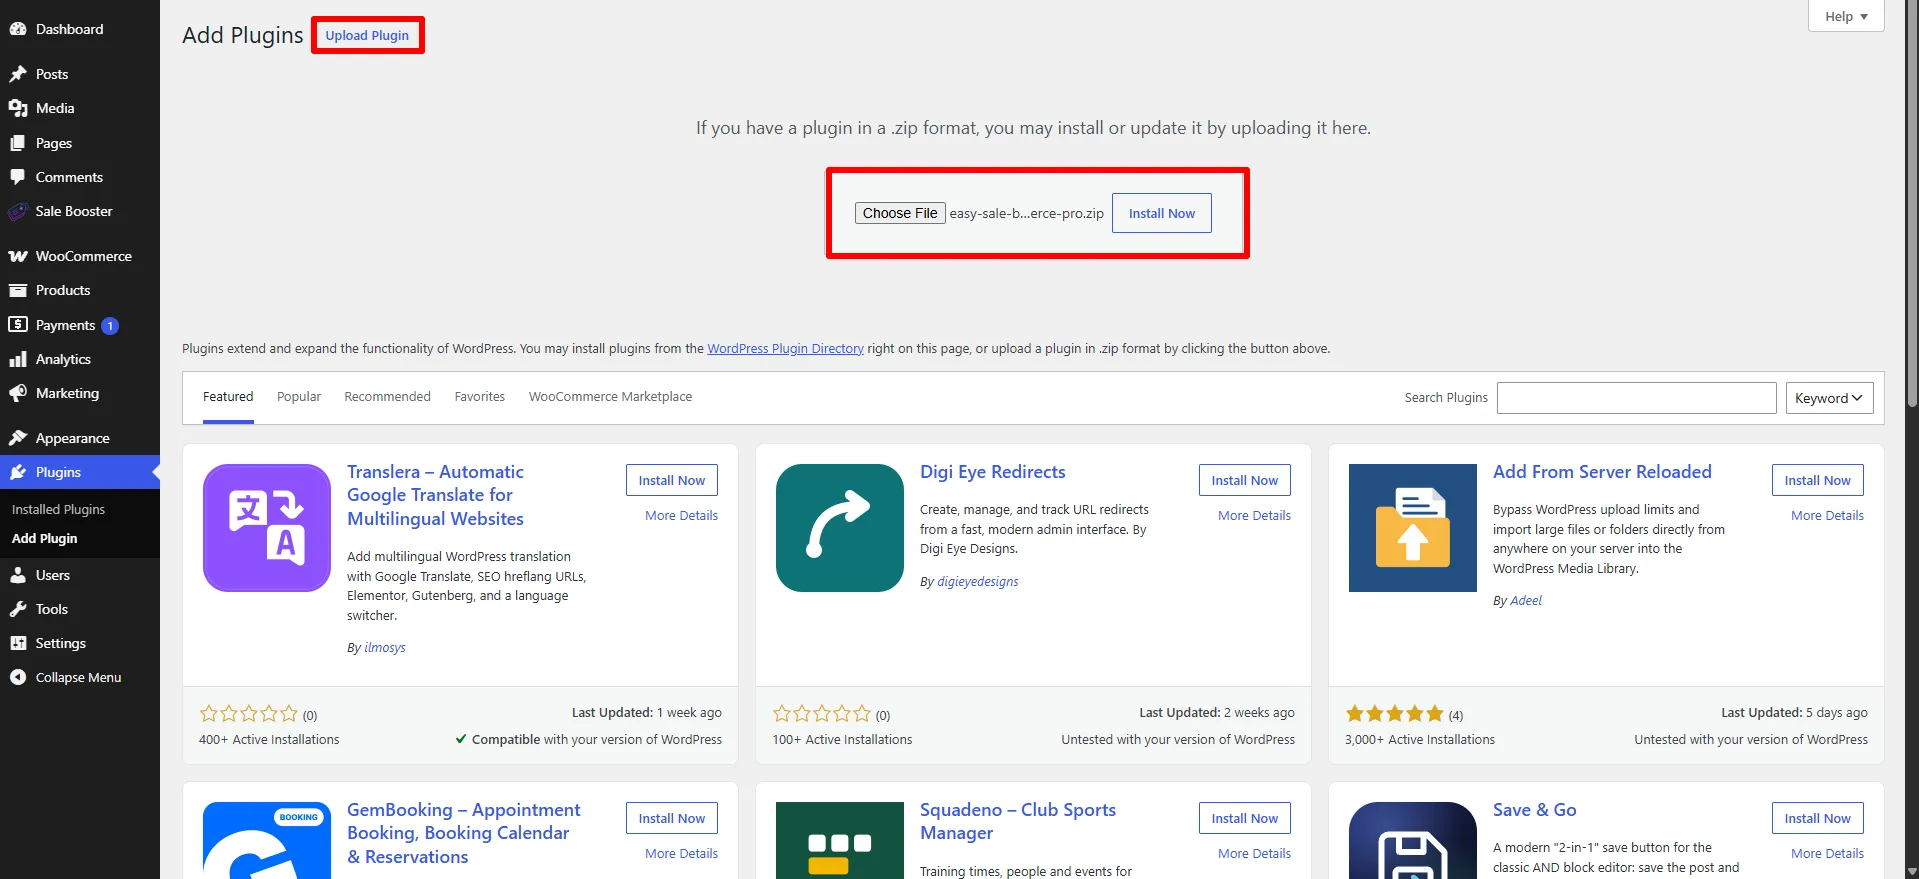
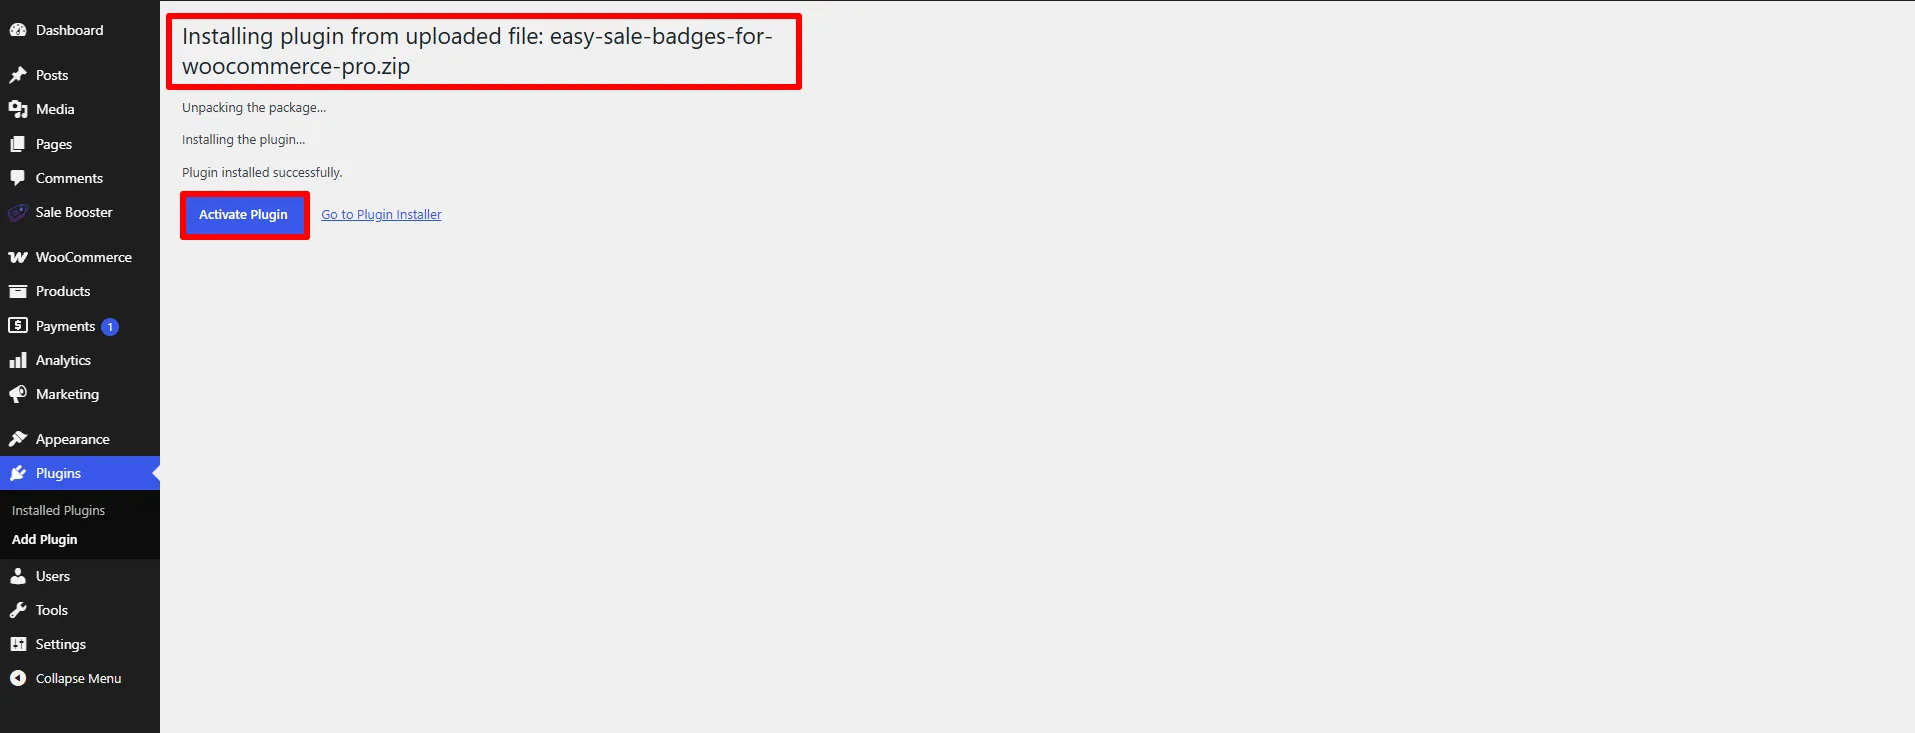
Step 3: When the plugin is installed, click Activate Plugin.
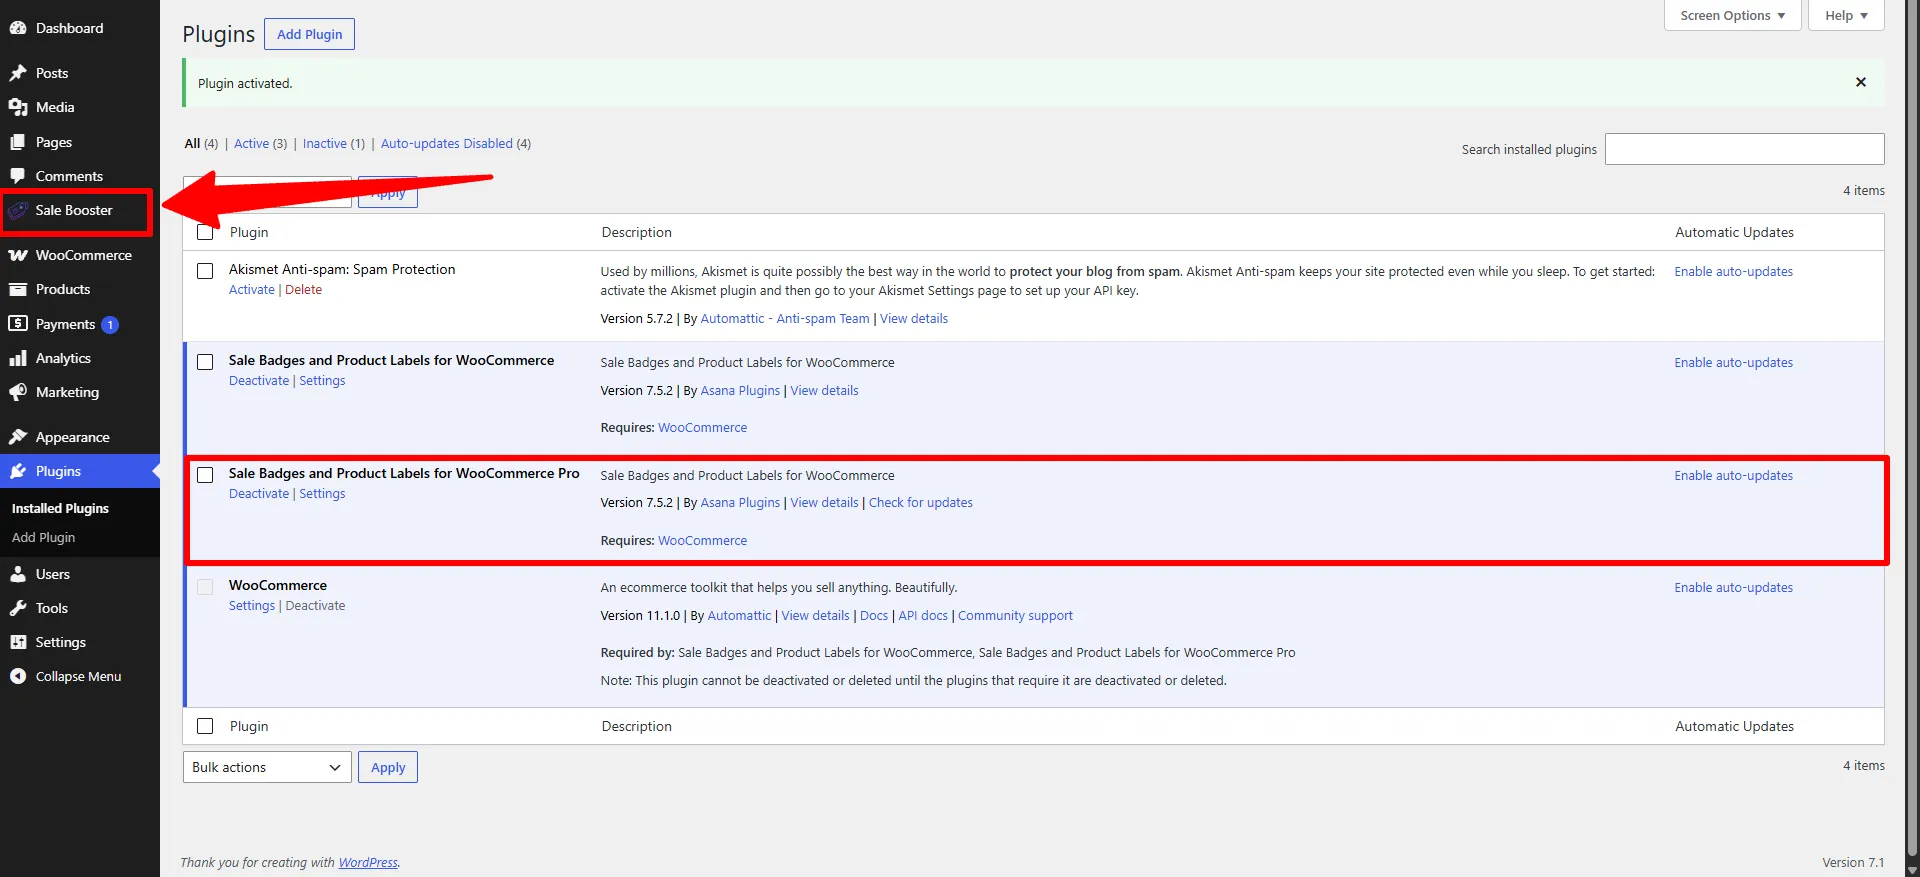
Step 4: Open the Sale Booster menu from your dashboard to configure the plugin.
Activate Your License (Pro)
To receive automatic updates and premium support, activate your license key:
- Go to Sale Booster → Settings → Enable Updates.
- Paste your License Key.
- Click Save.
You can find your license key in your account on asanaplugins.com or in your purchase confirmation email.
Next Steps
- Admin Overview — tour the dashboard and learn how badges appear on your store.
- Create Your First Badge