Managing WooCommerce Product Badges
Overview
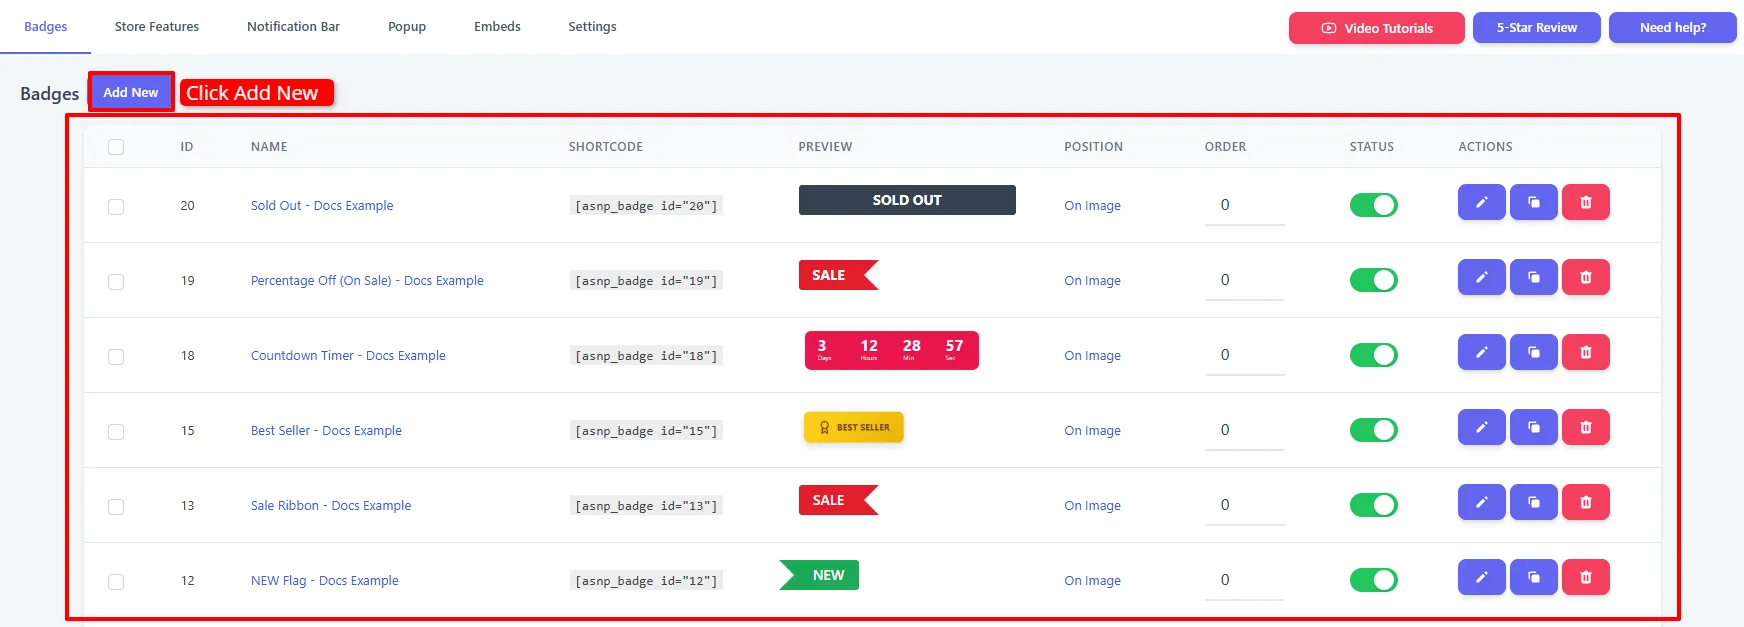
The Badges tab is your control center for every product badge and label on your store. From here you create new badges, edit and duplicate existing ones, enable or disable them in one click, control the order they appear in, and copy the shortcode to place a badge anywhere manually.
Think of a badge as a single, reusable design (for example a "Sale" ribbon or a "Only a few left" countdown) plus the rules that decide which products show it. Create it once, and the plugin applies it automatically everywhere it matches.
This guide explains how to manage WooCommerce product badges and WooCommerce sale badges with the Sale Booster WooCommerce badge plugin, including how to manage product badges and organize each reusable WooCommerce product label used for promotions.
How it works
Imagine you run a clothing store. You create one badge called "Weekend Sale" — a red ribbon that reads {saved_percent} OFF. You set its rule to Category = Clothing. The moment you save, every clothing product that's on sale shows the correct percentage automatically — no editing individual products, no theme code. Next week you toggle it off with one click, and it's gone everywhere.
Creating and managing badges is available in the Free version. Bulk actions and advanced badge types (image, modern, countdown) are enhanced in Pro.
The Badges list
Open Sale Booster → Badges to see every badge you've created.
| Column | What it shows | Why it matters |
|---|---|---|
| ID | The badge's unique number. | Used in the shortcode [asnp_badge id="12"]. |
| Name | Your internal label. | Click it to edit the badge. |
| Shortcode | Ready-to-copy shortcode. | Paste it to place the badge manually in any page or template. |
| Preview | A thumbnail of the design. | Confirm the look at a glance. |
| Position | On Image or Out of Image. | Tells you where it renders relative to the product image. |
| Order | A number (lower = first). | Controls sequence when several badges apply to one product. |
| Status | Enable/disable toggle. | Pause a badge without deleting it. |
| Actions | Edit, Duplicate, Delete. | Manage the badge. |
Everyday actions
- Add New — start a brand-new badge.
- Duplicate (copy icon) — clone a badge to reuse its design as a starting point (great for seasonal variants).
- Delete (trash icon) — remove a badge; a confirmation dialog protects against mistakes.
- Order — type a number to reorder badges that stack on the same product.
Bulk actions
Tick the checkboxes next to several badges, choose an action from Bulk Actions, and click Apply:
- Activate — enable all selected badges at once.
- Deactivate — pause them all.
- Delete — remove them all.

After a big sale, select every promotional badge and Deactivate them together instead of switching each off individually.
Creating a badge — step by step
1. Start a new badge
Click Add New. The editor opens with the general settings at the top.

2. Pick a Quick Badge (optional shortcut)
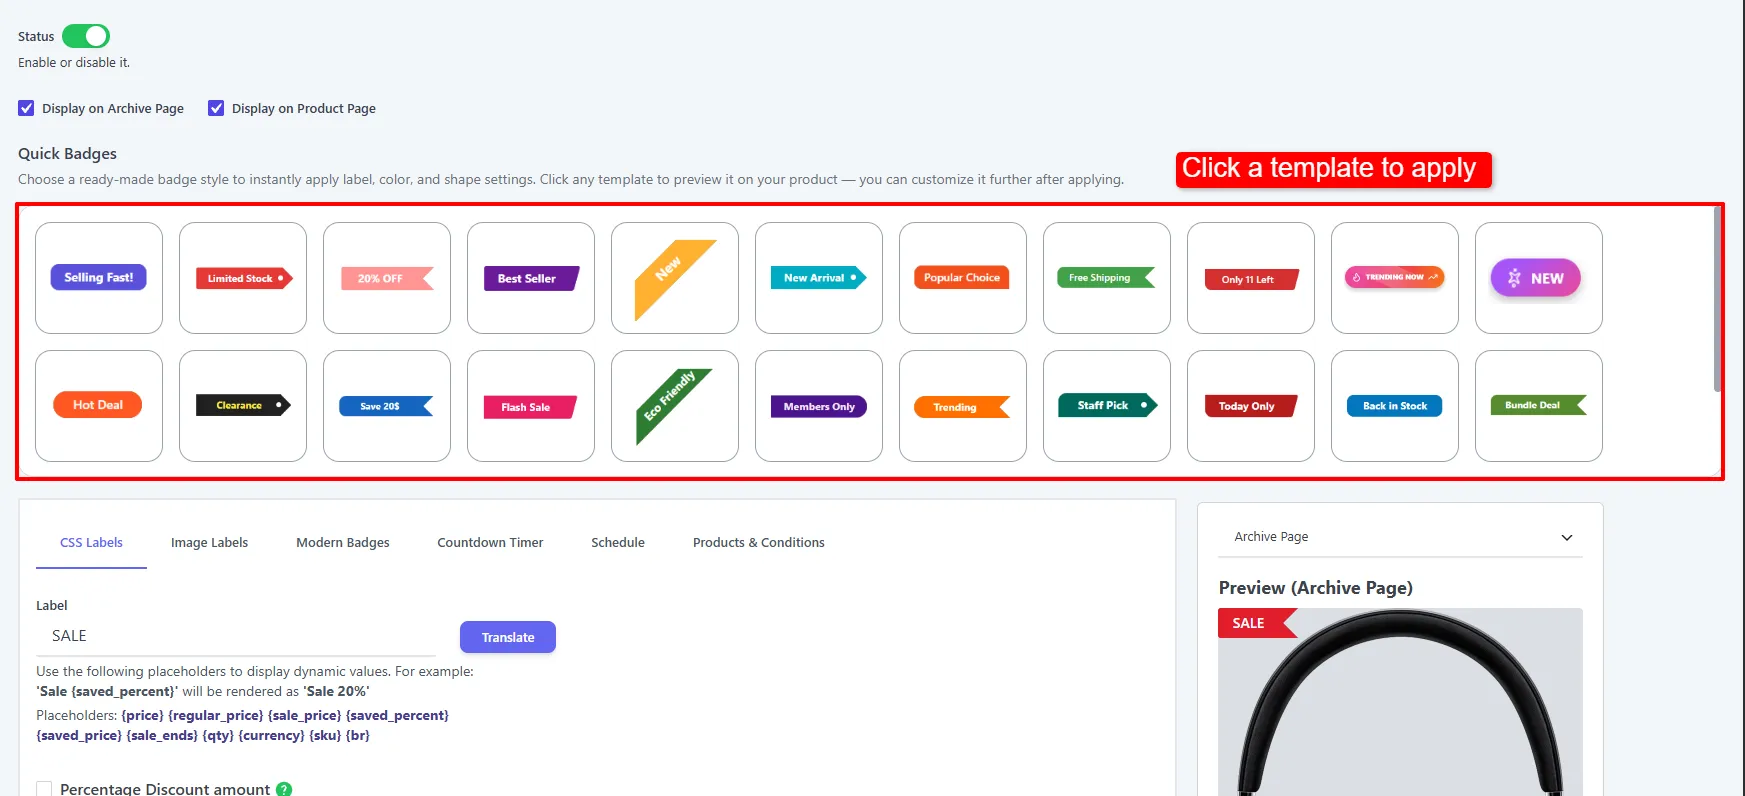
Below the general settings, the Quick Badges gallery offers ready-made styles. Click one to instantly apply its label, colors, and shape — then fine-tune it in the design tabs.
3. Design it in the tabs
Each tab is documented on its own page:
| Tab | Purpose | Guide |
|---|---|---|
| CSS Labels | Fast, text-based badges (15+ shapes). | CSS Labels |
| Image Labels | Ready-made graphics (200+) or your own image. | Image Labels |
| Modern Badges | Gradient, animated, icon badges. | Modern Badges |
| Countdown Timer | Turn the badge into a live timer. | Countdown Timer |
| Schedule | Run the badge for a set time window. | Scheduling Badges |
| Products & Conditions | Choose who sees it. | Products & Conditions |
4. Save
Click Save. New badges appear in the list immediately; edits update in place.
🧪 Example configuration
Use this recipe to create a simple, reliable "Sale" badge:
| Setting | Value |
|---|---|
| Name | Sale Ribbon |
| Status | Enabled |
| Display | Archive + Product page |
| Tab | CSS Labels |
| Label | SALE |
| Shape / Color | Corner ribbon / red |
| Targeting | Is On Sale → Yes |
What customers see
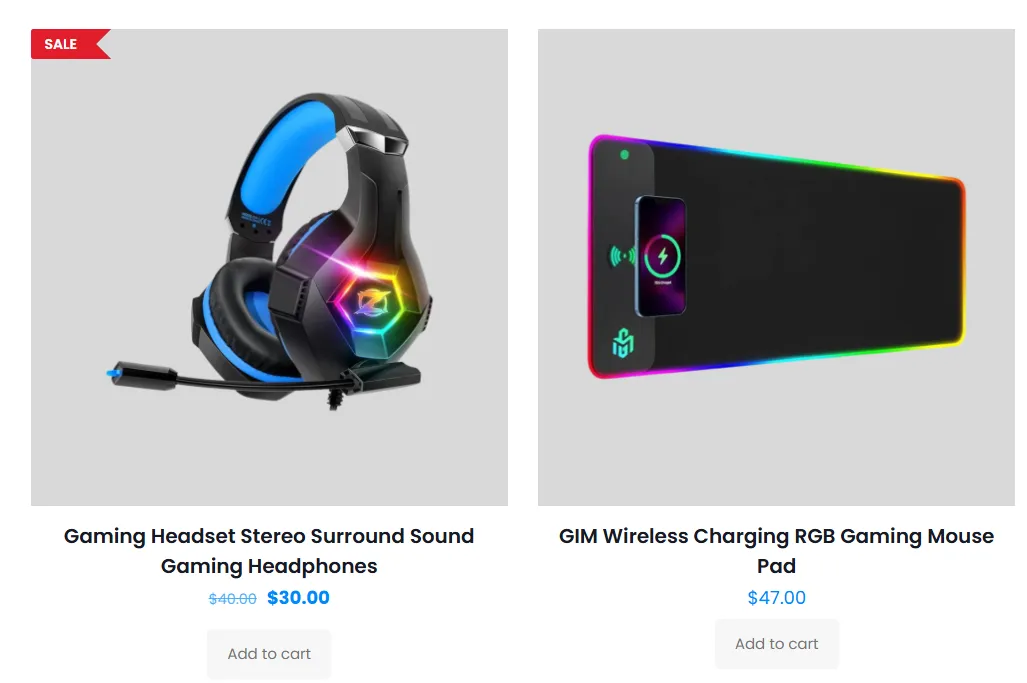
Any product that's on sale now shows your red "SALE" ribbon on both the shop grid and the product page.
- Give badges clear internal names so a busy list stays manageable.
- Duplicate a working badge to build seasonal variants instead of starting over.
- Use the Order field when a product has several badges (e.g. "Sale" + countdown) so the most important one leads.
Next Steps
Frequently Asked Questions
How do I create a WooCommerce product badge?
Go to Sale Booster → Badges, click Add New, configure the badge design and display settings, add any schedule or targeting rules, and click Save.
How do I temporarily disable a product badge?
Use the badge’s Status toggle in the Badges list. This pauses the badge without deleting its design, schedule, or targeting settings.
Can I display a badge with a shortcode?
Yes. Copy the badge’s shortcode from the Shortcode column and paste it into a supported page, post, widget, or template. The format is [asnp_badge id="12"], using your badge ID.