Countdown Timer Bar
Overview
The Countdown Timer Bar is an announcement bar with a live countdown — a message, an optional button, and a ticking clock that counts down to the end of your offer. It's the most effective bar for creating urgency around a time-limited sale.
How it works
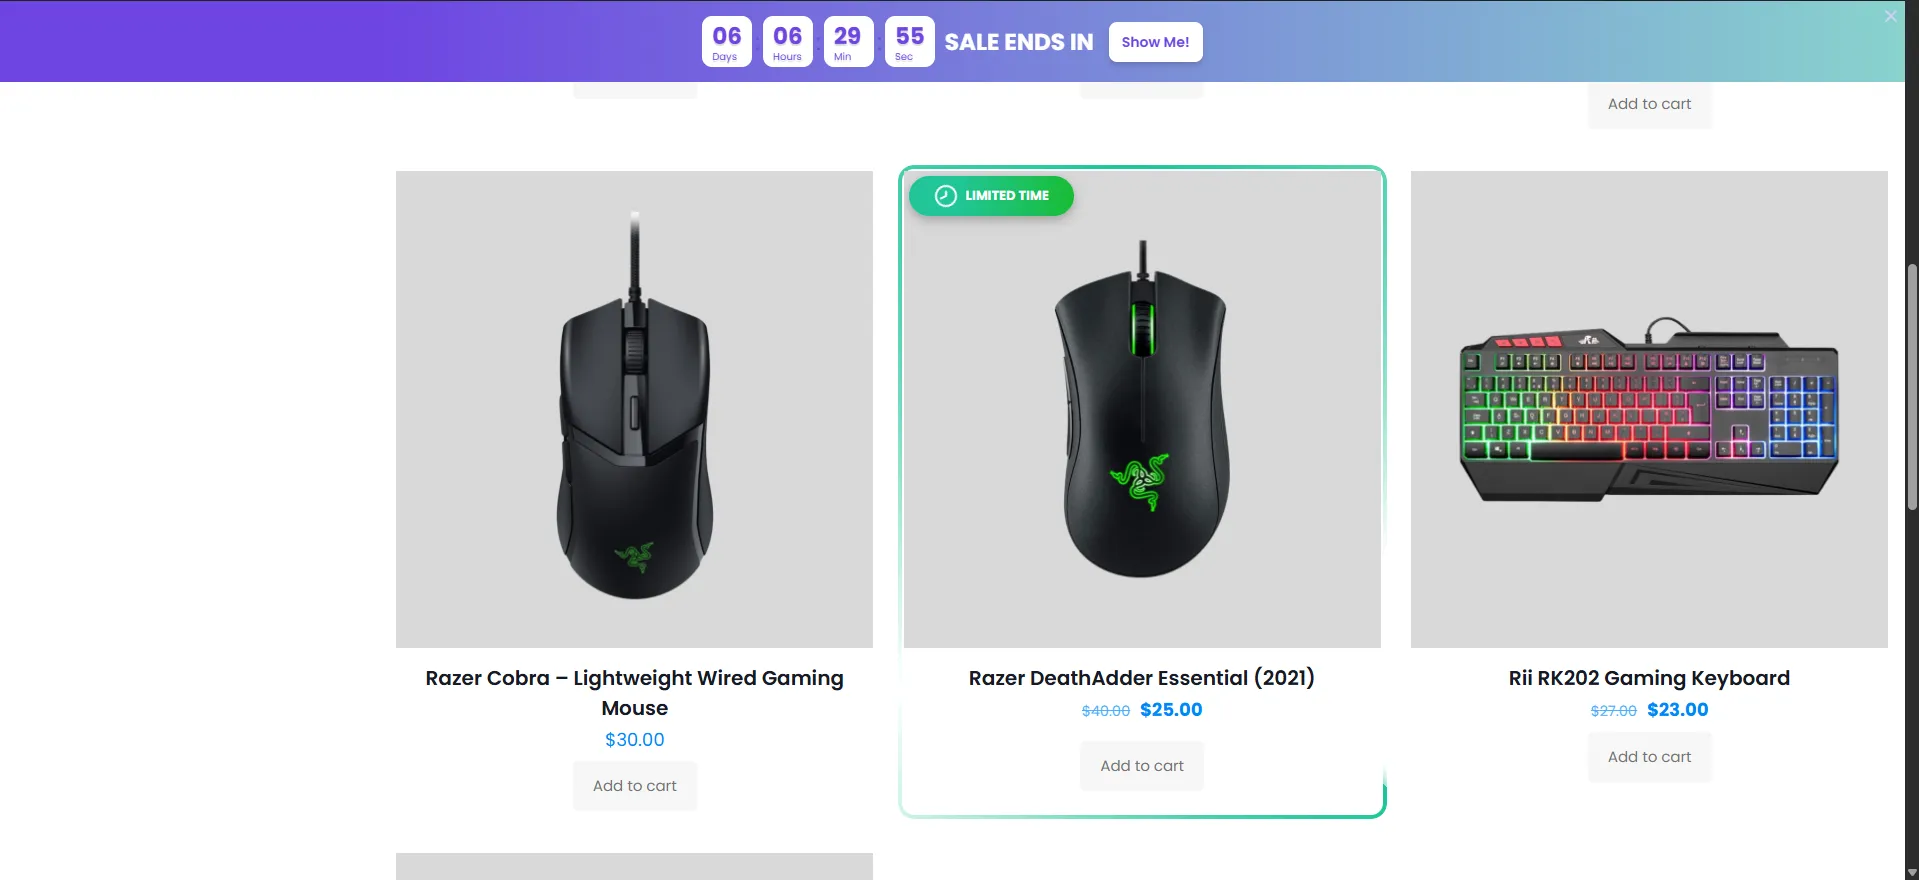
Your sale is live. The bar reads "SALE ENDS IN" with a countdown ticking "06d : 10h : 55m : 16s" and a "Show Me!" button. When the clock hits zero the timer stops — and if you also set a Schedule, the whole bar disappears.
The Notification Bar module is available in Sale Booster Pro.
Step-by-step setup
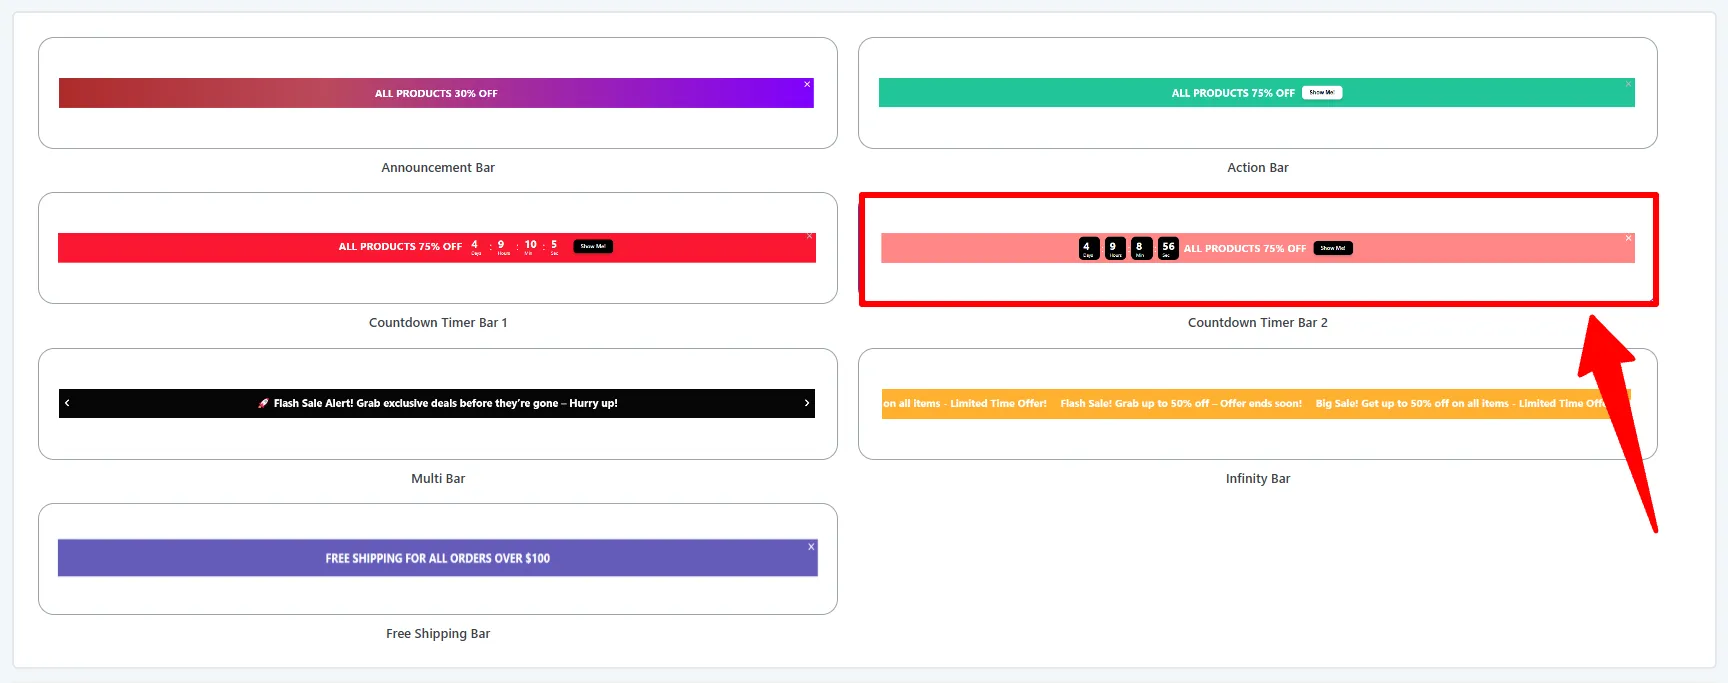
1. Pick the Countdown Timer Bar template
Open Sale Booster → Notification Bar → Add New, name the bar, and pick a Countdown Timer Bar template from the gallery (two layouts are available).
2. Write your message and add a button
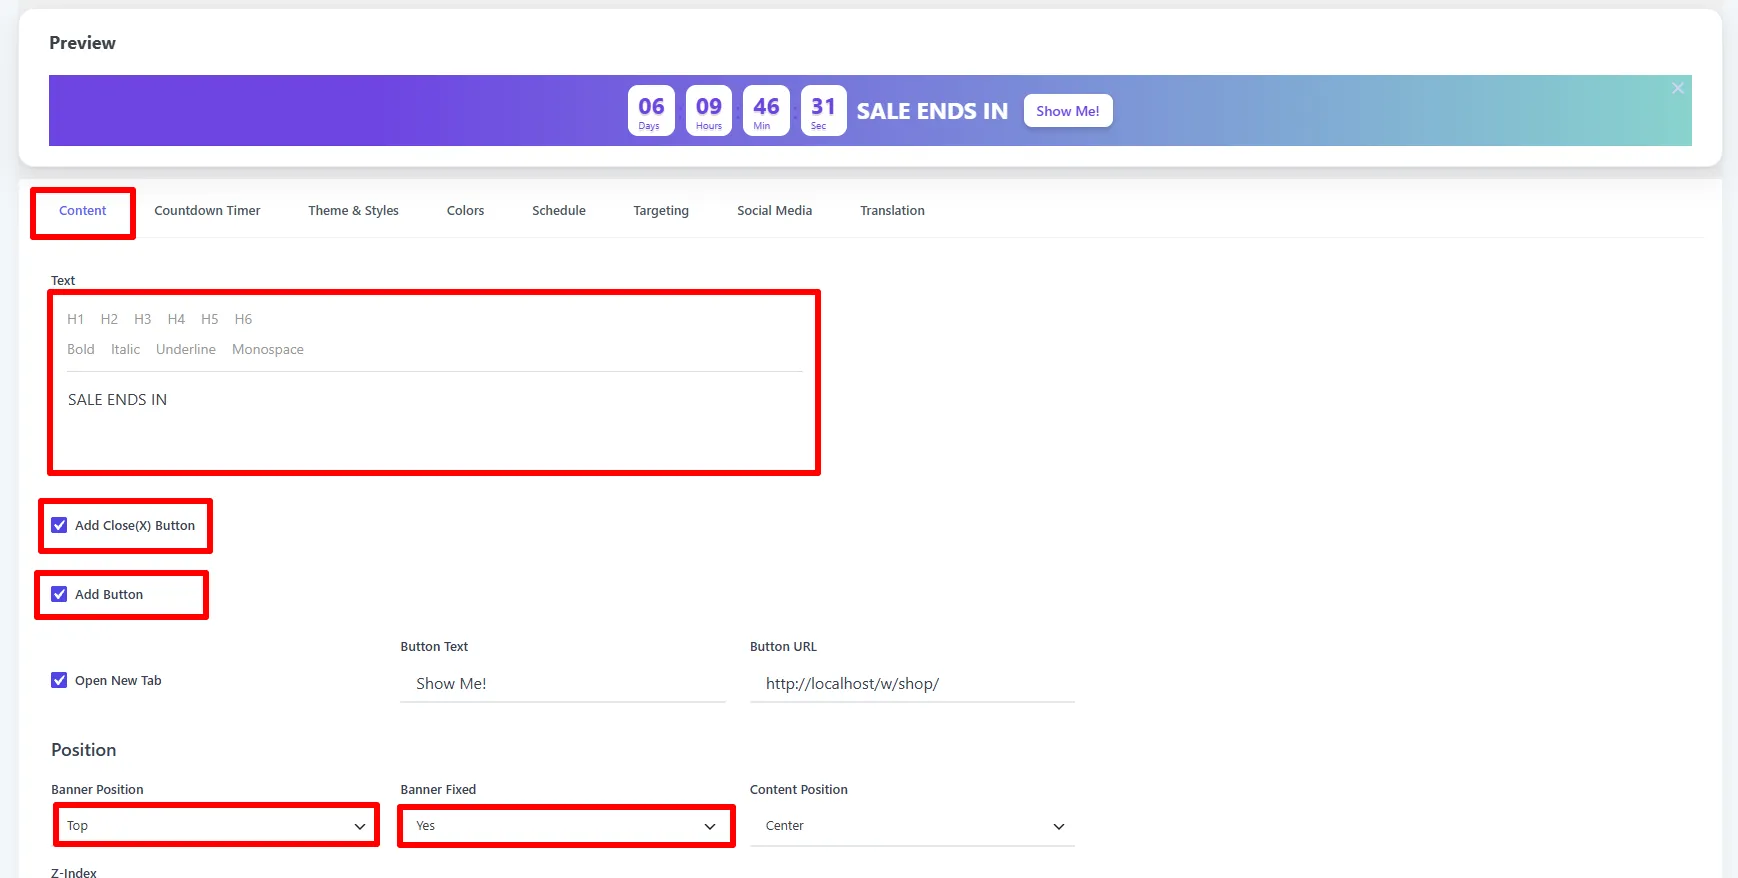
On the Content tab, write the Text message (e.g. SALE ENDS IN), optionally enable Action Button—shown as Add Button in older screenshots—choose Button under Action Type, and enter Button Text, Button URL, and Open New Tab. Then set the Position.
3. Set the timer
Open the Countdown Timer tab and configure the clock:
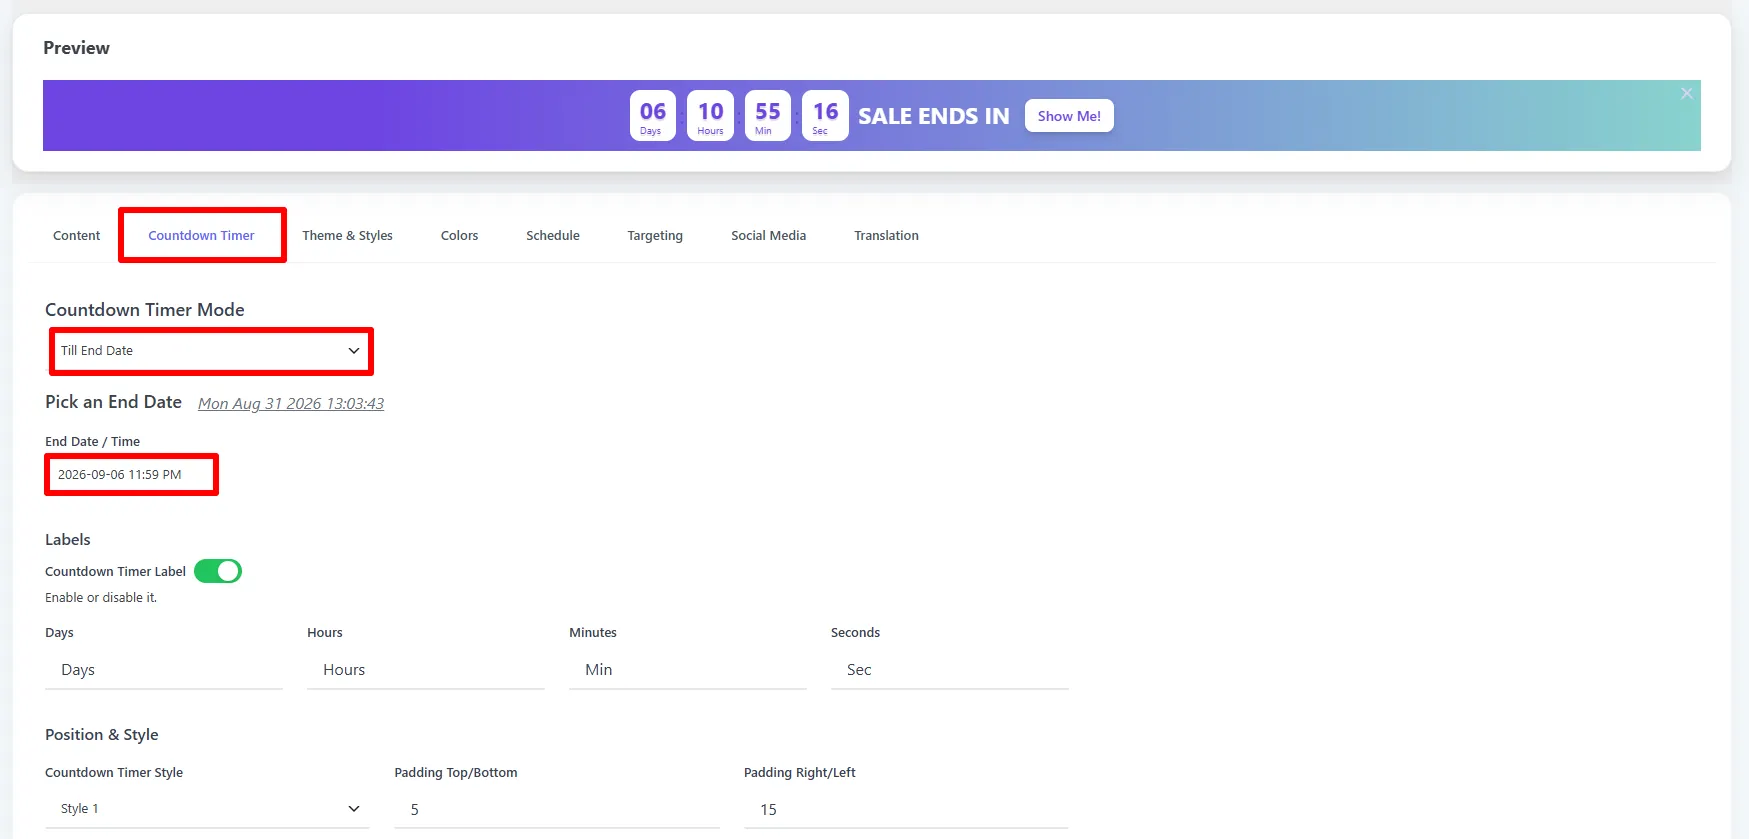
- Countdown Timer Mode — Till End Date (a fixed deadline) or Evergreen (a per-visitor timer).
- Pick an End Date — the End Date / Time the timer counts down to (the editor shows your store's current server time).
- Labels — toggle the Countdown Timer Label and rename Days / Hours / Minutes / Seconds.
- Position & Style — choose a Countdown Timer Style and set the padding.
4. Choose where it shows, then Save
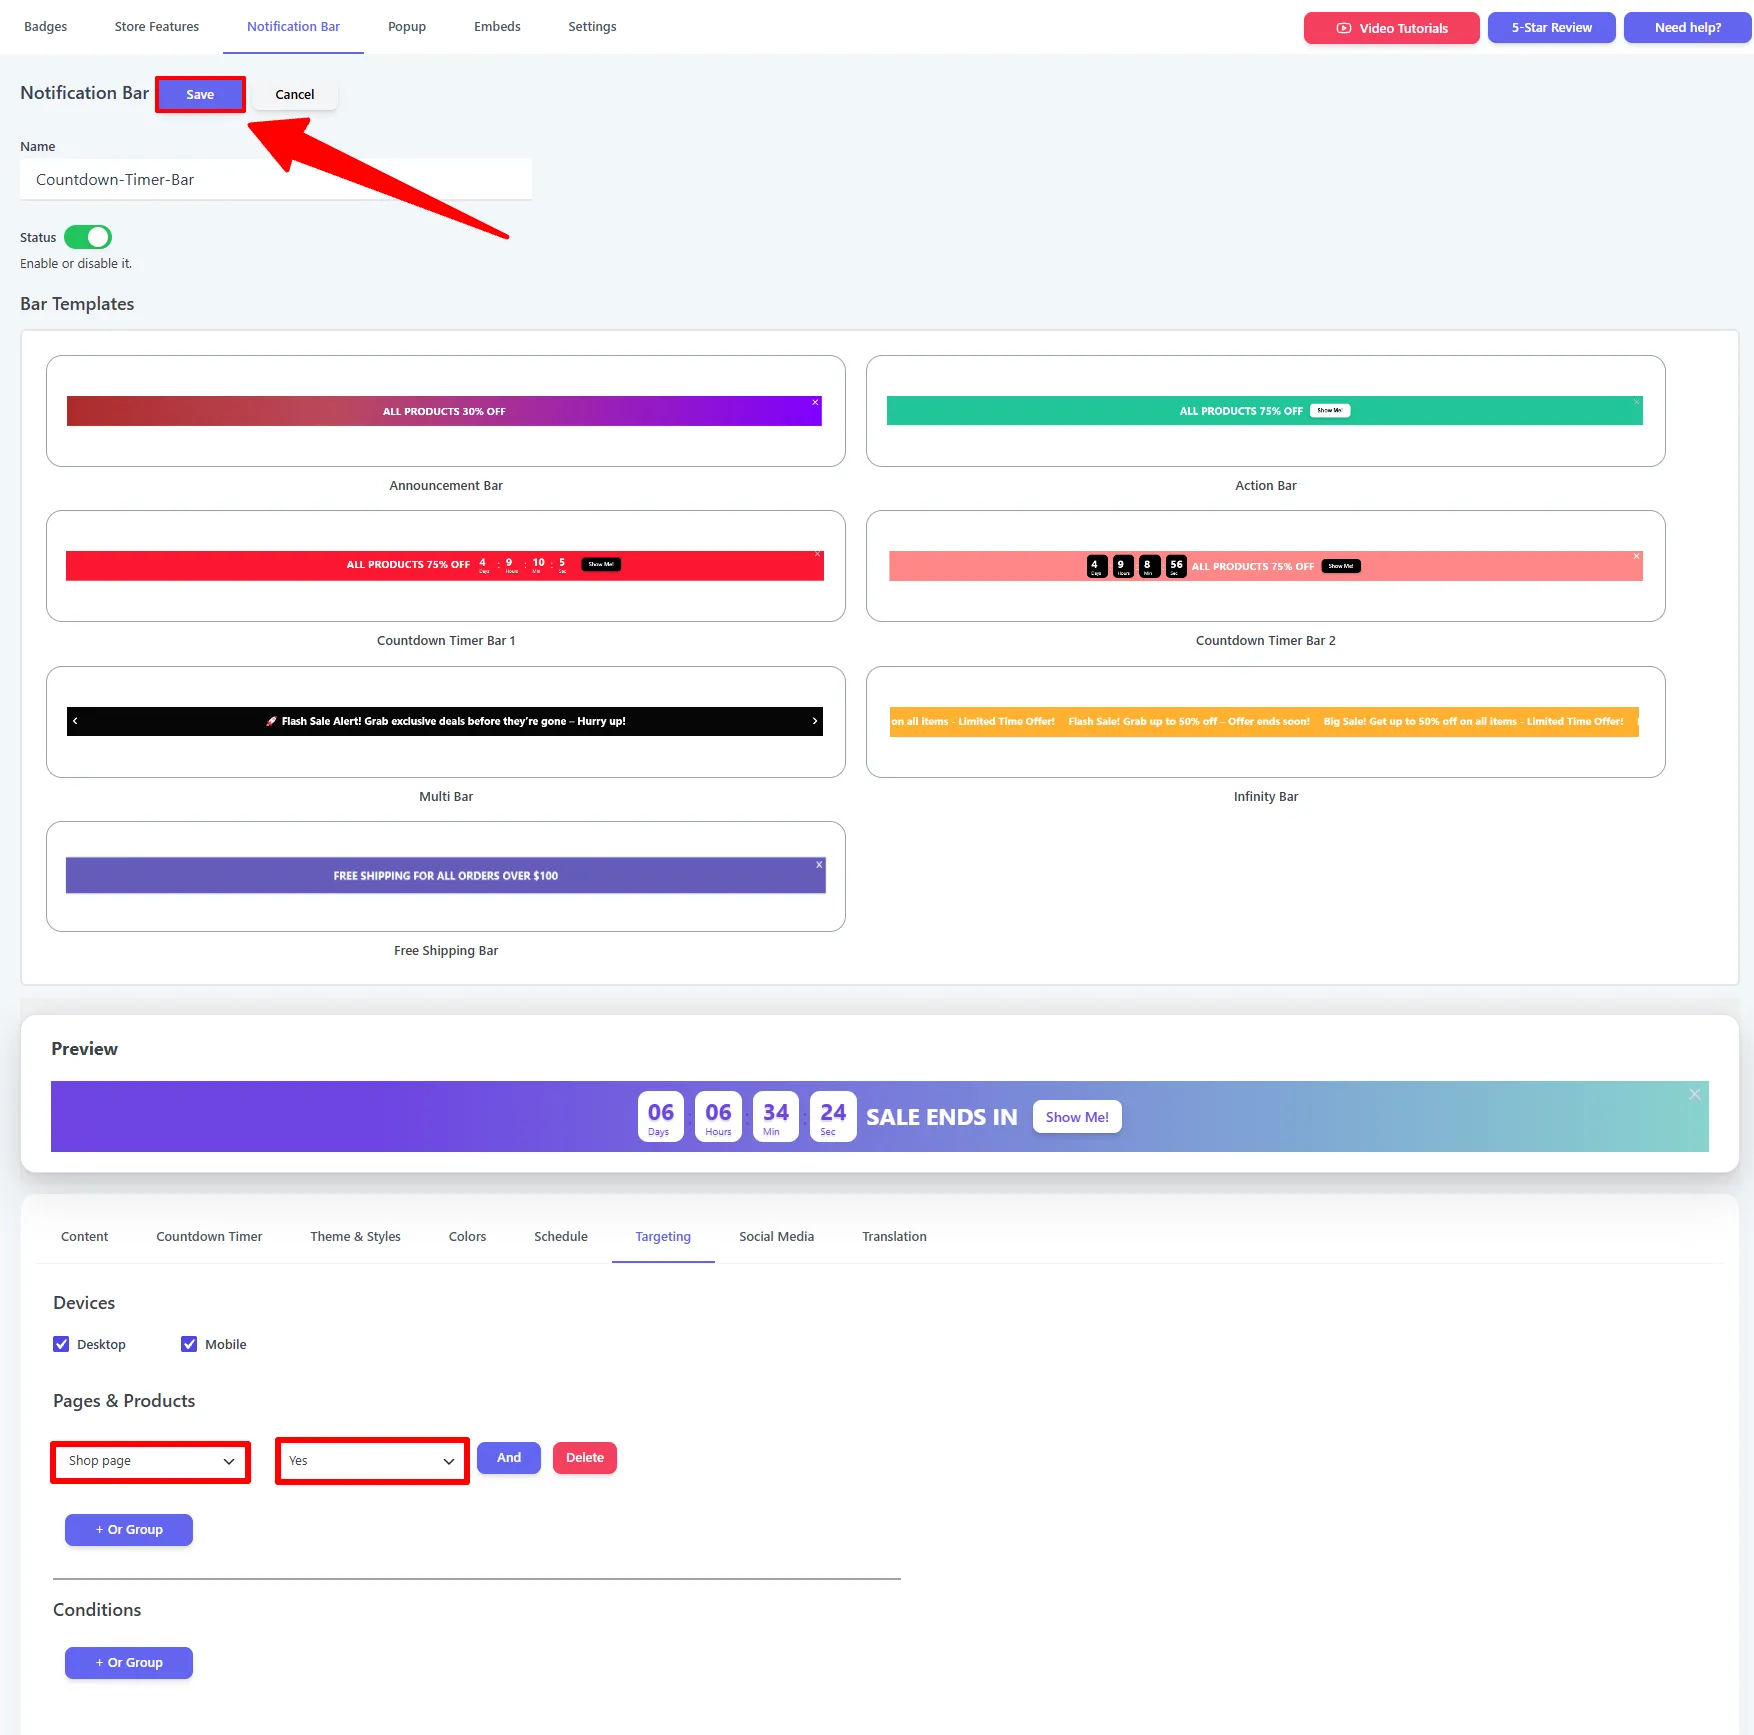
On the Targeting tab, pick the Devices (Desktop / Mobile) and add Pages & Products rules, then click Save.
The Countdown Timer tab
| Option | What it does | When & why to use |
|---|---|---|
| Countdown Timer Mode | Till End Date (a fixed deadline for everyone) or Evergreen (a per-visitor timer, stored in the browser). | End date for real sales; evergreen for always-on urgency. |
| End Date / Time | The date/time the timer counts down to. | Set the moment the offer ends. |
| Countdown Timer Label | Show/hide the unit labels and rename Days / Hours / Minutes / Seconds (translatable). | Localize or simplify. |
| Countdown Timer Style | The timer's visual style (Style 1, 2, …). | Match your bar's look. |
| Padding Top/Bottom · Right/Left | Spacing around the timer digits. | Fine-tune the fit. |
Options explained (Content tab)
| Option | What it does |
|---|---|
| Text | The bar message (rich text). |
| Action Button | Enables an optional CTA or coupon action. |
| Action Type → Button | Adds button text, URL, and open-in-new-tab controls. |
| Action Type → Coupon | Adds a copyable coupon chip to the bar. |
| Text / Banner Position, Fixed | Alignment, placement, and sticky behavior. |
| Close (X) Button | Lets visitors dismiss the bar. Older screenshots may display this as Add Close (X) Button. |
See Shared settings for position, close-behavior, targeting, schedule, and translation.
🧪 Example configuration
| Setting | Value |
|---|---|
| Type | Countdown Timer Bar |
| Text | SALE ENDS IN |
| Timer mode | Till End Date → 2026-09-06 11:59 PM |
| Style | Style 1 |
| Button | Show Me! → /shop |
| Position | Top, fixed |
What customers see
A sticky bar with a live countdown ticking toward the deadline and a button to act now.
- Use Till End Date for genuine sales, and Evergreen for always-on urgency.
- Pair a fixed-date bar with the Schedule tab so it removes itself when the sale ends.
Next Steps
- Free Shipping Bar
- Countdown Timer badge — the same countdown on the product image.
Frequently asked questions
How do I add a countdown timer to WooCommerce?
Open Sale Booster → Notification Bar → Add New, select a Countdown Timer Bar, configure the message and timer mode, set the end date or evergreen duration, then save the bar.
What is the difference between Till End Date and Evergreen?
Till End Date uses one shared deadline for the campaign. Evergreen starts a separate timer for each visitor and is suited to always-on promotions.