Scheduling WooCommerce Product Badges
Overview
The Schedule tab runs a badge only during a time window you define — perfect for flash sales, holidays, and limited-time offers. Outside the window the badge hides itself, so there's nothing to switch off manually and no risk of a "sale" badge lingering after the event.
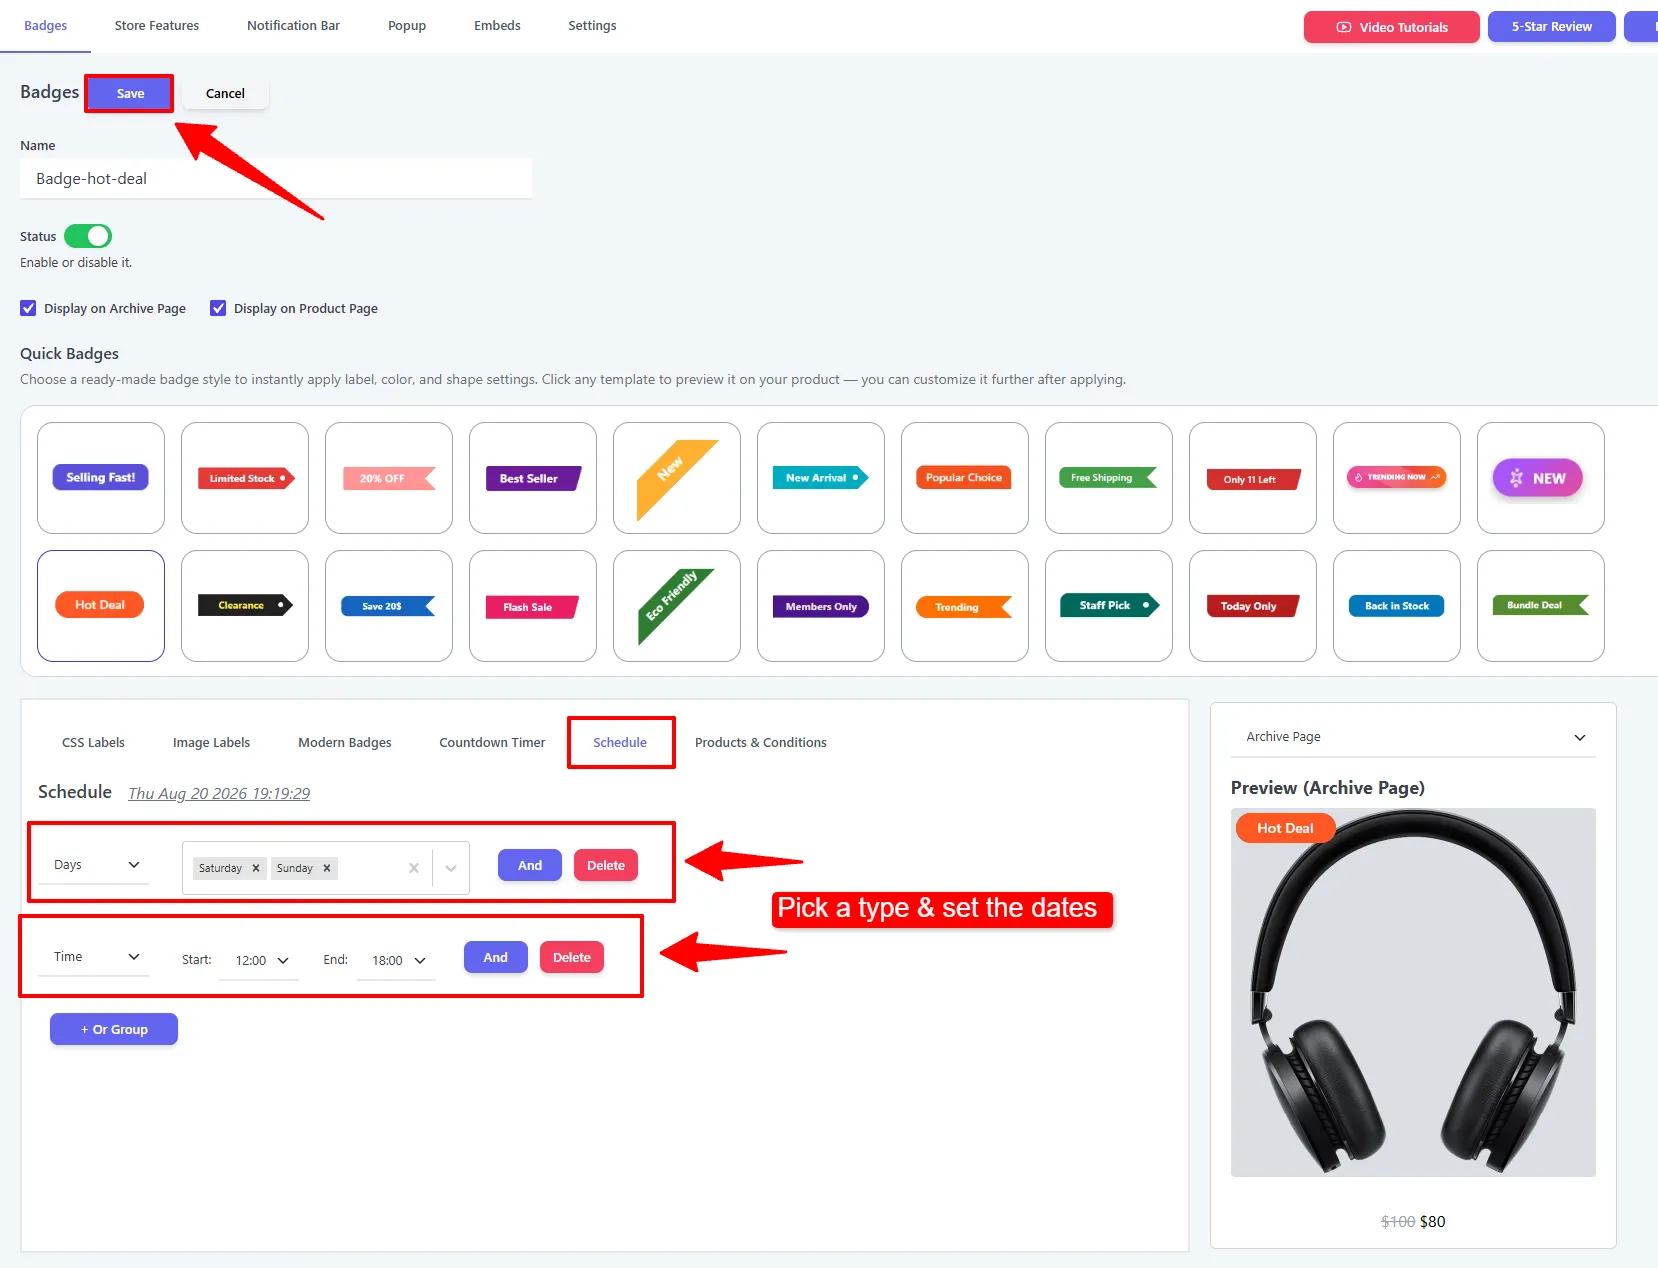
Use this guide to schedule WooCommerce product badges, configure a WooCommerce badge schedule, create a timed sale badge, launch a WooCommerce flash sale badge, or set a recurring product badge for repeating campaigns.
How it works
Your Black Friday sale runs Fri–Mon. You set the Schedule to that weekend. The badge appears automatically at midnight Friday and disappears on its own Monday night — even if you're away from your computer.
Basic date scheduling is available in the Free version. Recurring Time windows and Days-of-week scheduling are enhanced in Pro.
Schedule types
Add one or more schedule rules. Each rule is one of four types, combinable with And (all must match) and + Or Group (any group can match):
| Type | What it does | When & why to use |
|---|---|---|
| Date | A start/end date range. | A multi-day sale (e.g. Nov 27 → Dec 1). |
| Date Time | A start/end range with date and time. | Precise flash sales that start at a set hour. |
| Time | A recurring daily time window. | A daily "happy hour" (e.g. 14:00–16:00 every day). |
| Days | Recurring days of the week. | "Weekend only" deals (Sat & Sun). |
The editor shows your store's current server time so you can set accurate deadlines.
Step-by-step setup
- Open the Schedule tab and click Add Schedule.
- Choose a type (e.g. Date Time).
- Set the From and To values.
- (Optional) Click And to add another condition, or + Or Group for a separate window.
- Save.
🧪 Example configuration
A weekend-only flash sale that runs every Saturday and Sunday afternoon:
| Setting | Value |
|---|---|
| Rule 1 (Days) | Saturday, Sunday |
| Rule 2 (Time) | 12:00 → 18:00 |
| Logic | Days And Time |
Result: the badge shows only on Sat/Sun between 12:00 and 18:00.
What customers see
During the scheduled window the badge is live across the store; outside it, customers see the product with no badge at all — automatically.
Combine a schedule with a Countdown Timer so shoppers see exactly how long is left. The timer creates urgency; the schedule cleans up after the sale ends.
Next Steps
Frequently Asked Questions
How do I schedule a WooCommerce product badge?
Open a badge, go to Schedule, click Add Schedule, choose a schedule type, set the From and To values, and save the badge.
Can WooCommerce badges run on a recurring schedule?
Yes. Use Time for a daily time window or Days for recurring days of the week. Combine them with And when both the day and time must match.
Which time zone does a product badge schedule use?
Use the server time shown in the Schedule editor when setting deadlines. Confirm the store’s WordPress time-zone setting if a campaign needs to start or end at a precise local time.