WooCommerce Image Product Badges
Overview
Image Labels display a graphic badge on your products — either one of the plugin's 200+ ready-made designs or your own uploaded image (a logo, seasonal sticker, or custom graphic). Image labels are the best choice when you want a polished, illustrated look that plain text can't achieve.
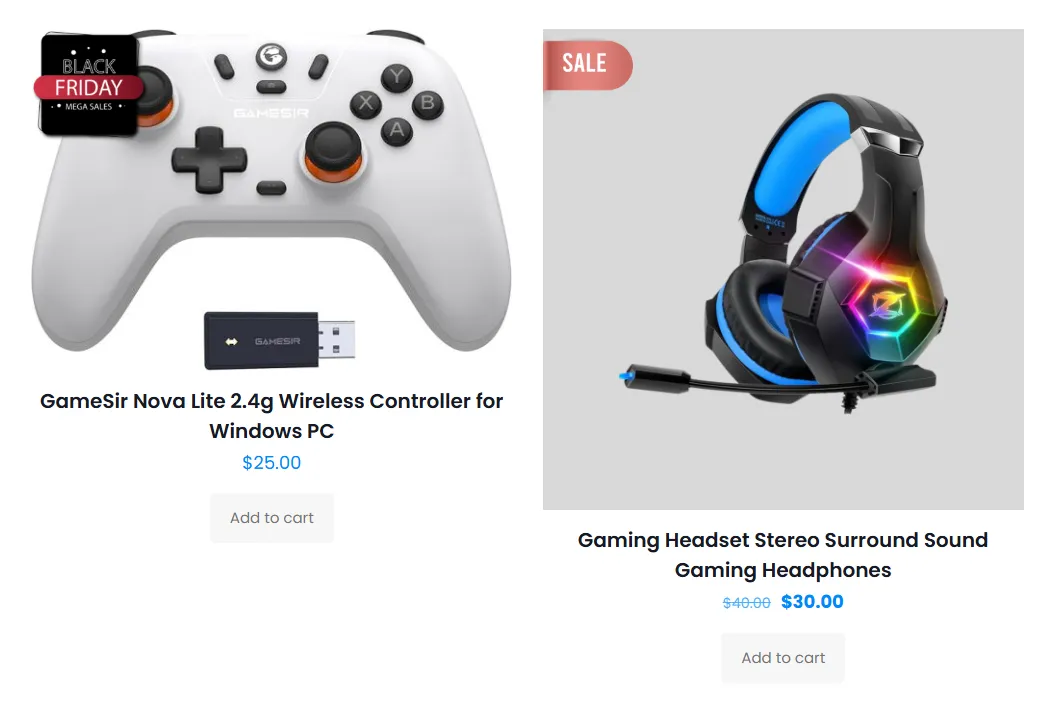
Use WooCommerce image badges and WooCommerce image labels when a visual WooCommerce product sticker will communicate a promotion faster than text. Sale Booster also supports a custom product badge and a branded WooCommerce sale sticker uploaded from the Media Library.
How it works
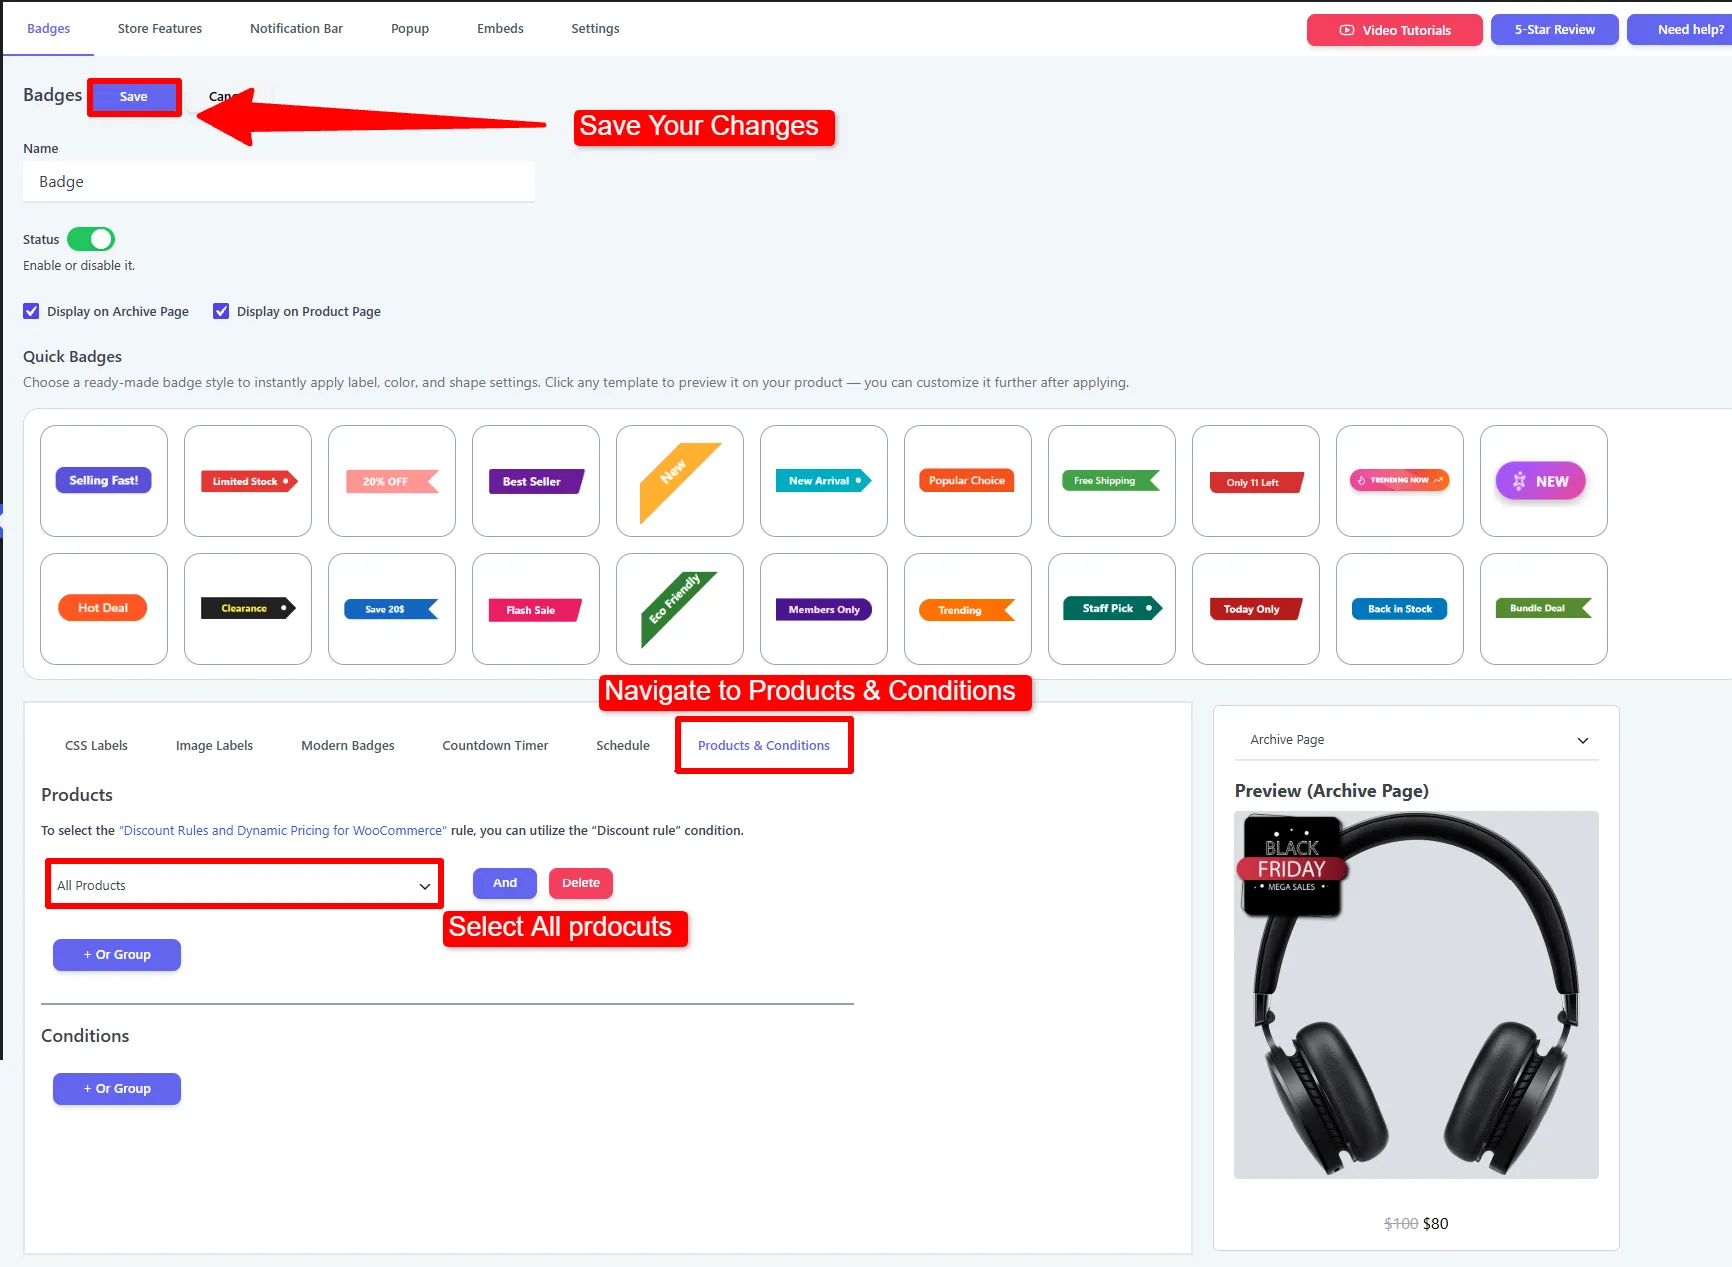
Black Friday is coming. Instead of designing anything, you open the Image Labels tab, pick the ready-made "Black Friday" graphic from the library, place it in the top-left corner, and target All Products. Every product instantly wears a professional holiday badge — and after the event you simply disable the badge.
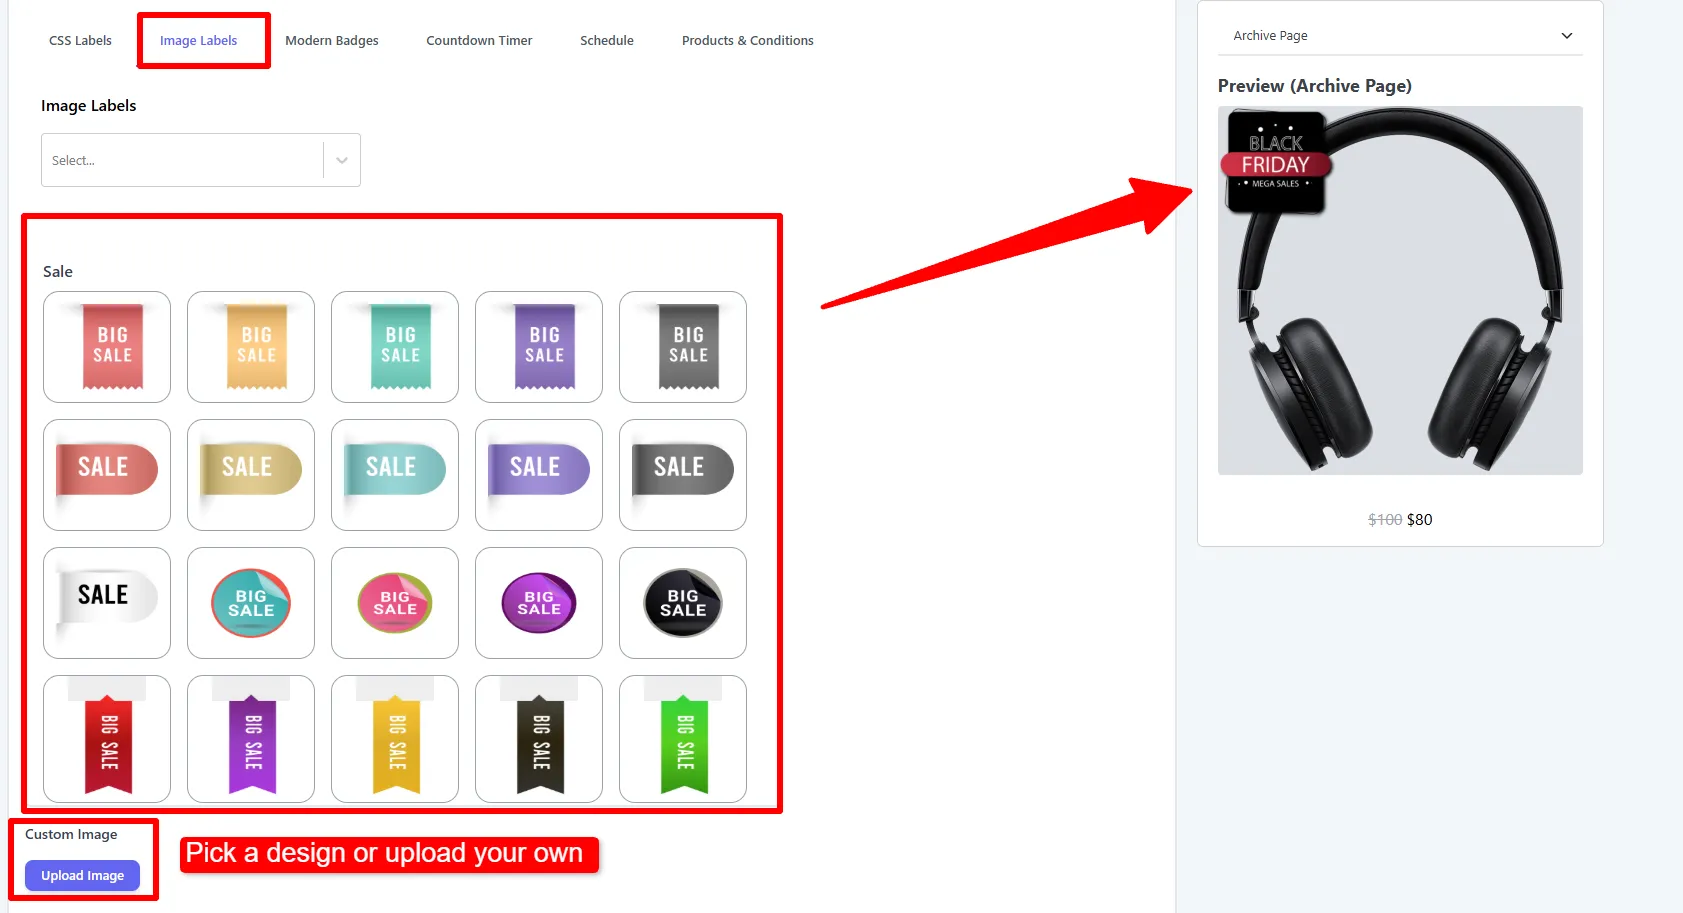
A small set of image labels ships with the Free version. The full library is a Pro feature, organized into these categories: Sale, Percentage Off, Buy One Get One, Cyber Monday, Coming Soon, Pre-Order, Free, New, Shipping, Sold Out, Offer, Black Friday, Valentine's Day, and Xmas — each with multiple ready-made designs. Use the category filter at the top of the gallery to jump to a set.
Step-by-step setup
1. Choose or upload an image
In the Image Labels tab:
- Use the library — browse the categorized gallery and click a design to apply it.
- Upload your own — click Upload Image and pick a graphic from the Media Library (a PNG with a transparent background looks best).
2. Size and position it
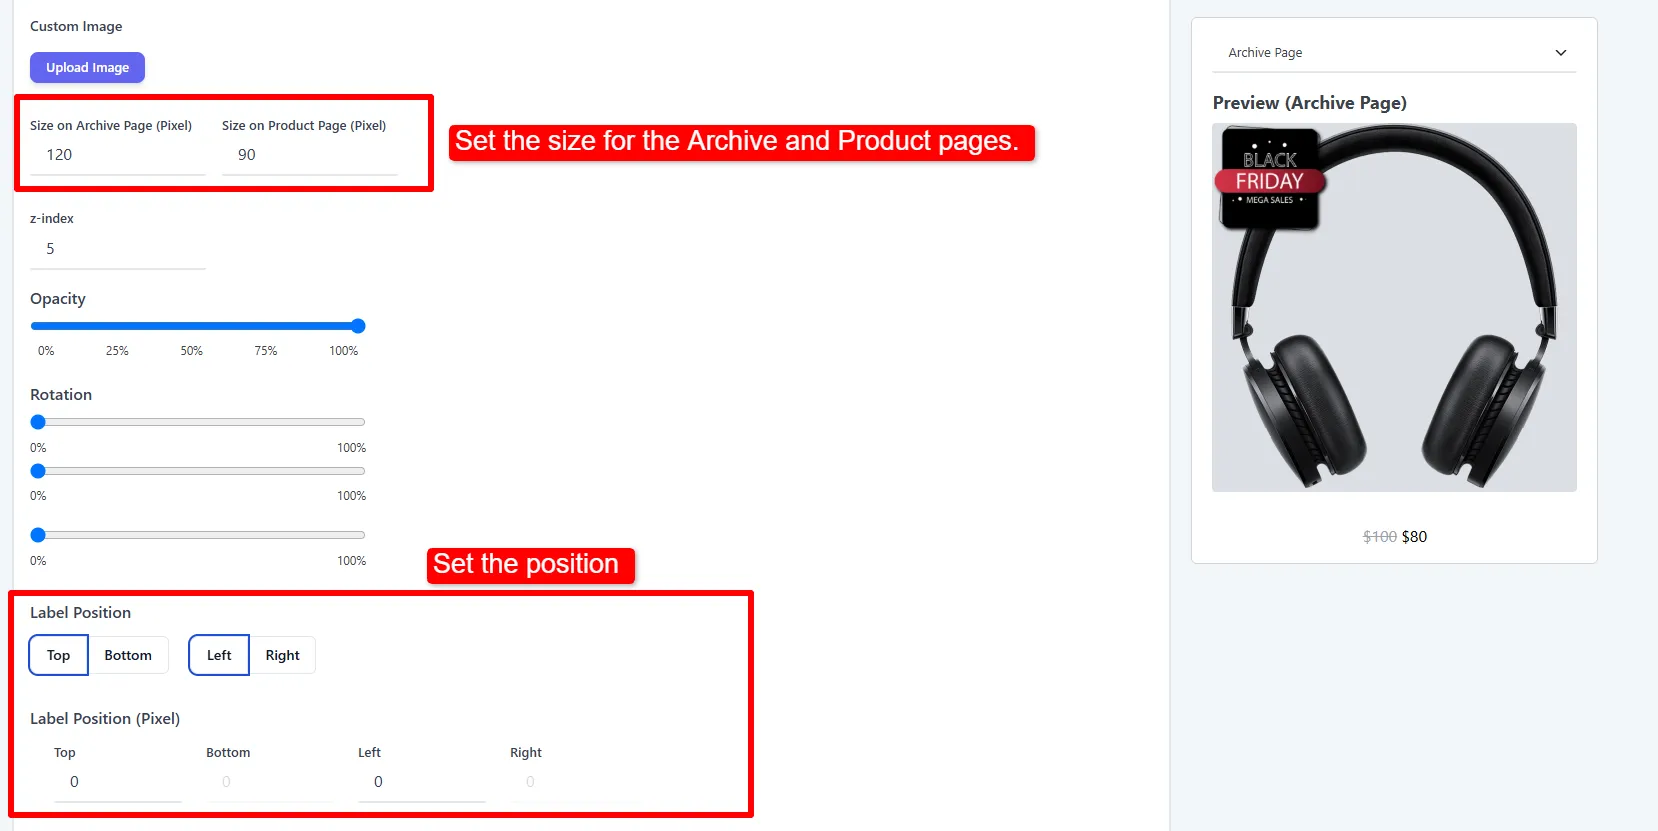
Set the width, corner, and offsets so the badge sits neatly on the image, then Save.
Options explained
| Option | What it does | When & why to use |
|---|---|---|
| Size on Archive Page / Product Page | Badge width in pixels, set separately for the shop grid and the product page. | Make it a little larger on product pages. |
| Opacity | Fades the image 0–100%. | Lower slightly so a bold sticker doesn't overpower the photo. |
| Rotation X / Y / Z | Tilts/flips the image in 3D. | Angle a "sale" sticker for a hand-placed look. |
| z-index | Stacking order. | Raise if the theme covers the badge. |
| CSS Label Position | On Image or Out of Image. | Move it out of the image when it would hide the product. |
| Position | Corner + exact offset. | Keep it clear of price/title overlays. |
| Animation | Entrance/looping effect, duration, repeat. | A gentle Pop on load adds life to a static graphic. |
🧪 Example configuration
A holiday sale sticker on everything:
| Setting | Value |
|---|---|
| Image | "Black Friday" (from library) |
| Position | Top-Left |
| Width | 120px (archive) / 90px (product) |
| Animation | Pop, 1 iteration |
| Targeting | All Products |
| Schedule | Nov 27 → Nov 30 |
What customers see
Every product shows the professional sticker in the corner during the sale window.
- Upload badges at 2× the display size (e.g. a 180px PNG for a 90px badge) so they stay sharp on retina screens.
- Use transparent PNGs so the badge blends with any product photo.
- Pair image labels with a Schedule so seasonal graphics turn off by themselves.
Next Steps
Frequently Asked Questions
How do I add a custom image product badge in WooCommerce?
Create or edit a badge, open Image Labels, click Upload Image, and choose the graphic from the Media Library. A transparent PNG usually blends best with product photography.
Are WooCommerce image labels available in the free version?
The Free version includes a small set of image labels. The complete ready-made image badge library and its category collections require Sale Booster Pro.
What size should a WooCommerce sale sticker be?
Upload the image at about twice its intended display size—for example, a 180px PNG for a 90px badge—so it stays sharp on high-density screens.