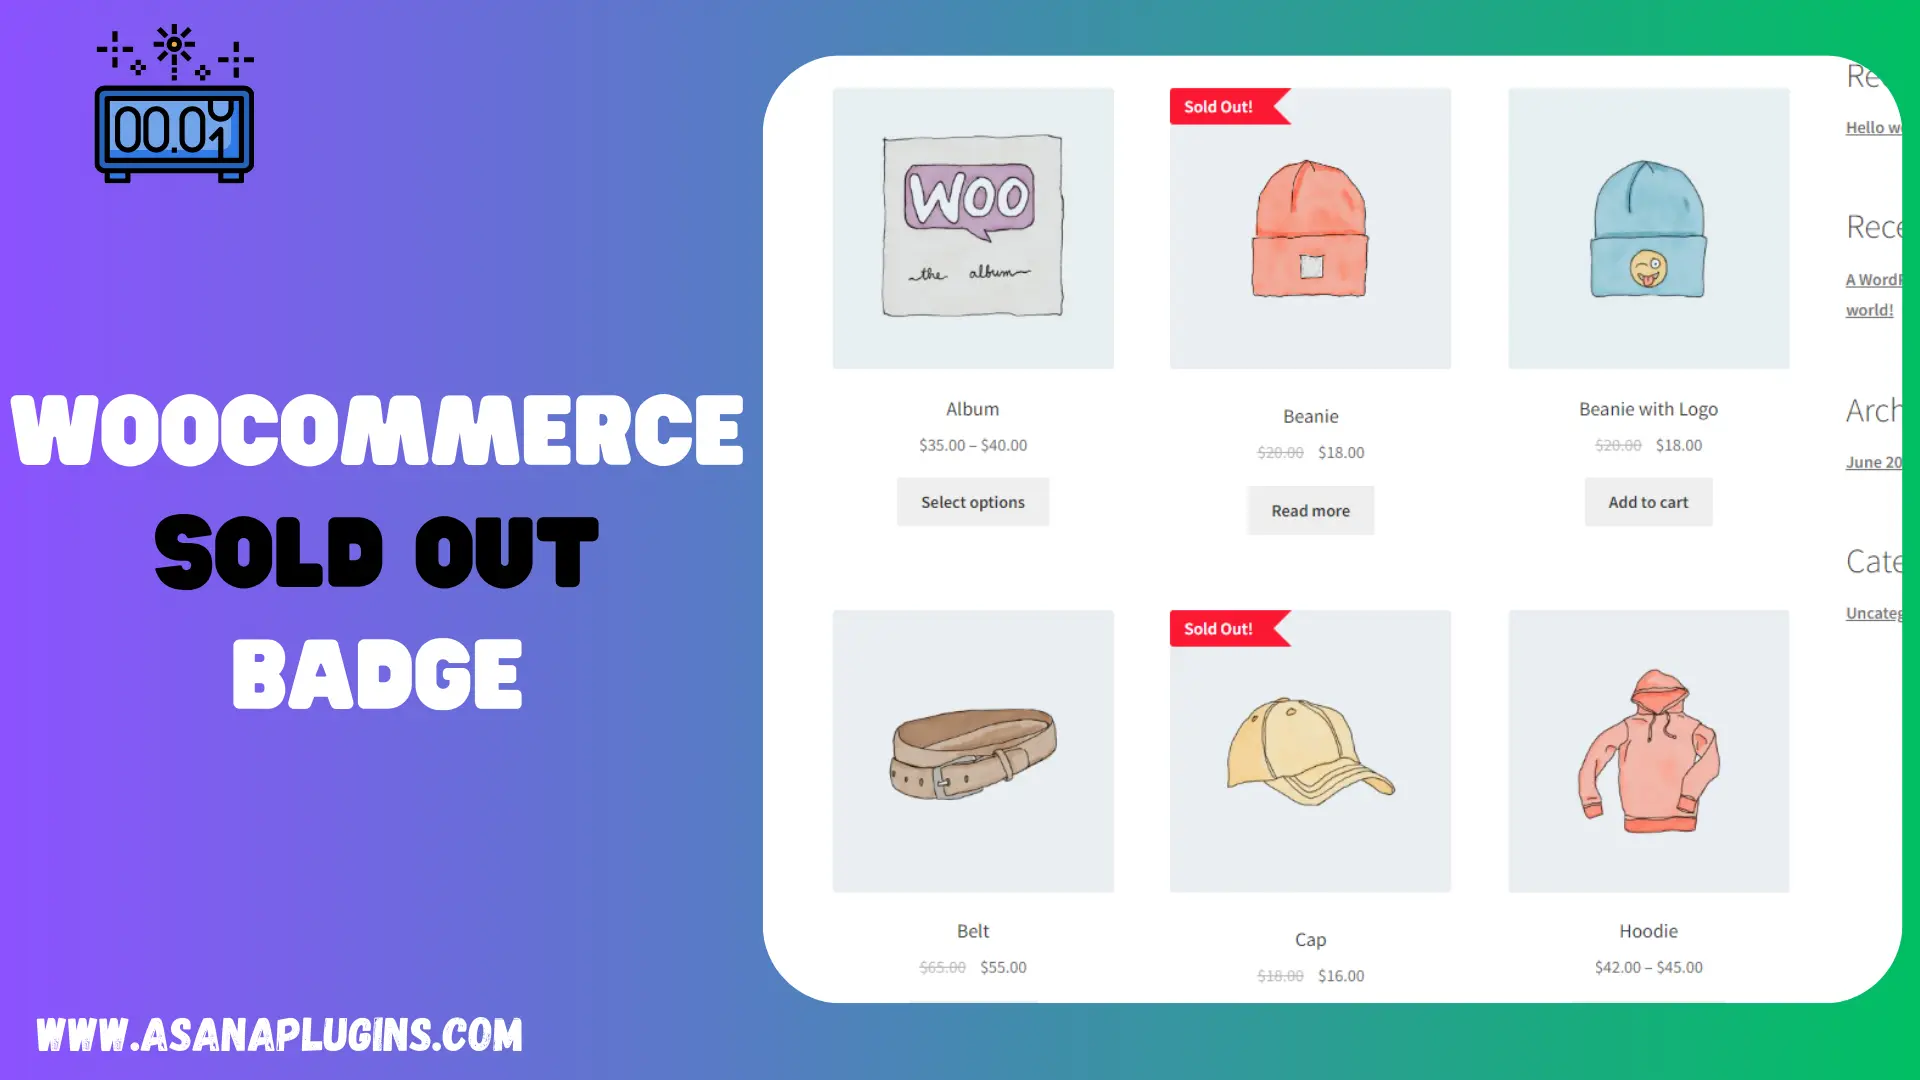
The WooCommerce Sold Out Badge is a visual indicator designed to enhance your online store’s product presentation by seamlessly integrating with the popular WooCommerce platform. This badge serves as a clear and eye-catching signal to inform customers when a product is no longer available for purchase. As an essential tool for managing inventory and improving user experience, the Sold Out Badge automatically appears on product pages when stock levels reach zero. This intuitive feature not only prevents customers from attempting to order out-of-stock items but also adds a professional touch to your storefront. With its easy integration and customizable settings, the WooCommerce Sold Out Badge effortlessly contributes to a streamlined and customer-friendly online shopping experience, helping you efficiently manage inventory and keep your customers informed. Elevate your e-commerce store with this invaluable tool that combines functionality with visual appeal, ensuring a seamless shopping journey for your customers.
Introduction
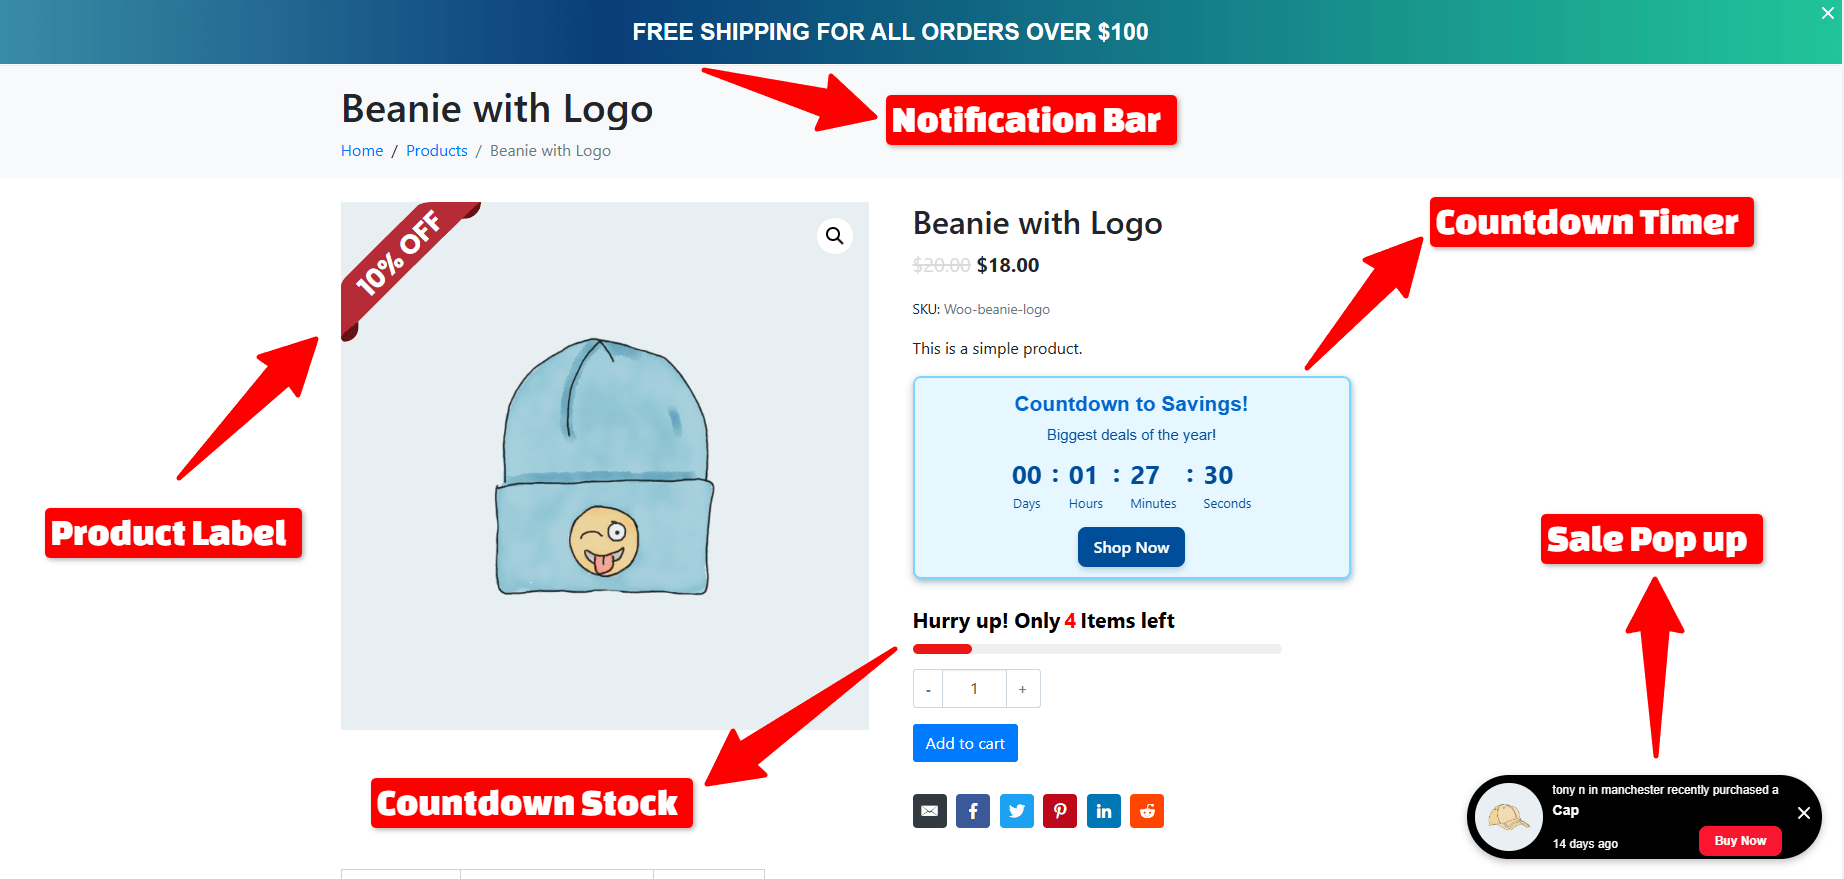
As e-commerce continues to thrive, businesses leveraging WooCommerce, a powerful and widely-used platform, recognize the importance of features like Sold Out Badges to enhance the online shopping experience. Introducing Sold Out Badges in WooCommerce is a valuable tool for merchants and customers. These badges play a crucial role in providing clear signals about the availability status of products, ensuring that potential buyers are promptly informed when an item is no longer in stock. This feature is particularly beneficial in managing customer expectations and fostering transparency, contributing to a more positive and efficient shopping environment.
Benefits of Incorporating Sold Out Badges in Your Woocommerce Store
Including Sold Out Badges in your WooCommerce store provides numerous benefits, resulting in a more efficient business operation and enhanced customer experience. Firstly, these badges serve as clear visual cues, instantly notifying customers when a product is out of stock, thereby managing expectations and reducing potential frustration. The urgency created by Sold Out Badges can prompt quicker purchasing decisions, potentially boosting sales. Moreover, these badges enhance your online store’s aesthetic and professionalism, creating a visually appealing and trustworthy shopping environment.
- Clear Communication:
The plugin provides clear visual indicators, instantly communicating to customers when a product is sold out, managing their expectations, and reducing potential frustration. - Improved User Experience:
Shoppers can make quicker decisions with transparent product availability information, enhancing the overall shopping experience. - Aesthetic Enhancement:
Adds a professional and polished look to your online store by incorporating visually appealing Sold Out Badges, contributing to a more attractive and trustworthy storefront. - Urgency and Sales Boost:
Encourages potential buyers to act quickly, promoting sales for available products. - Inventory Management:
Facilitates streamlined inventory management by offering real-time insights into product availability, preventing overselling, and minimizing order fulfillment errors. - Customization Options:
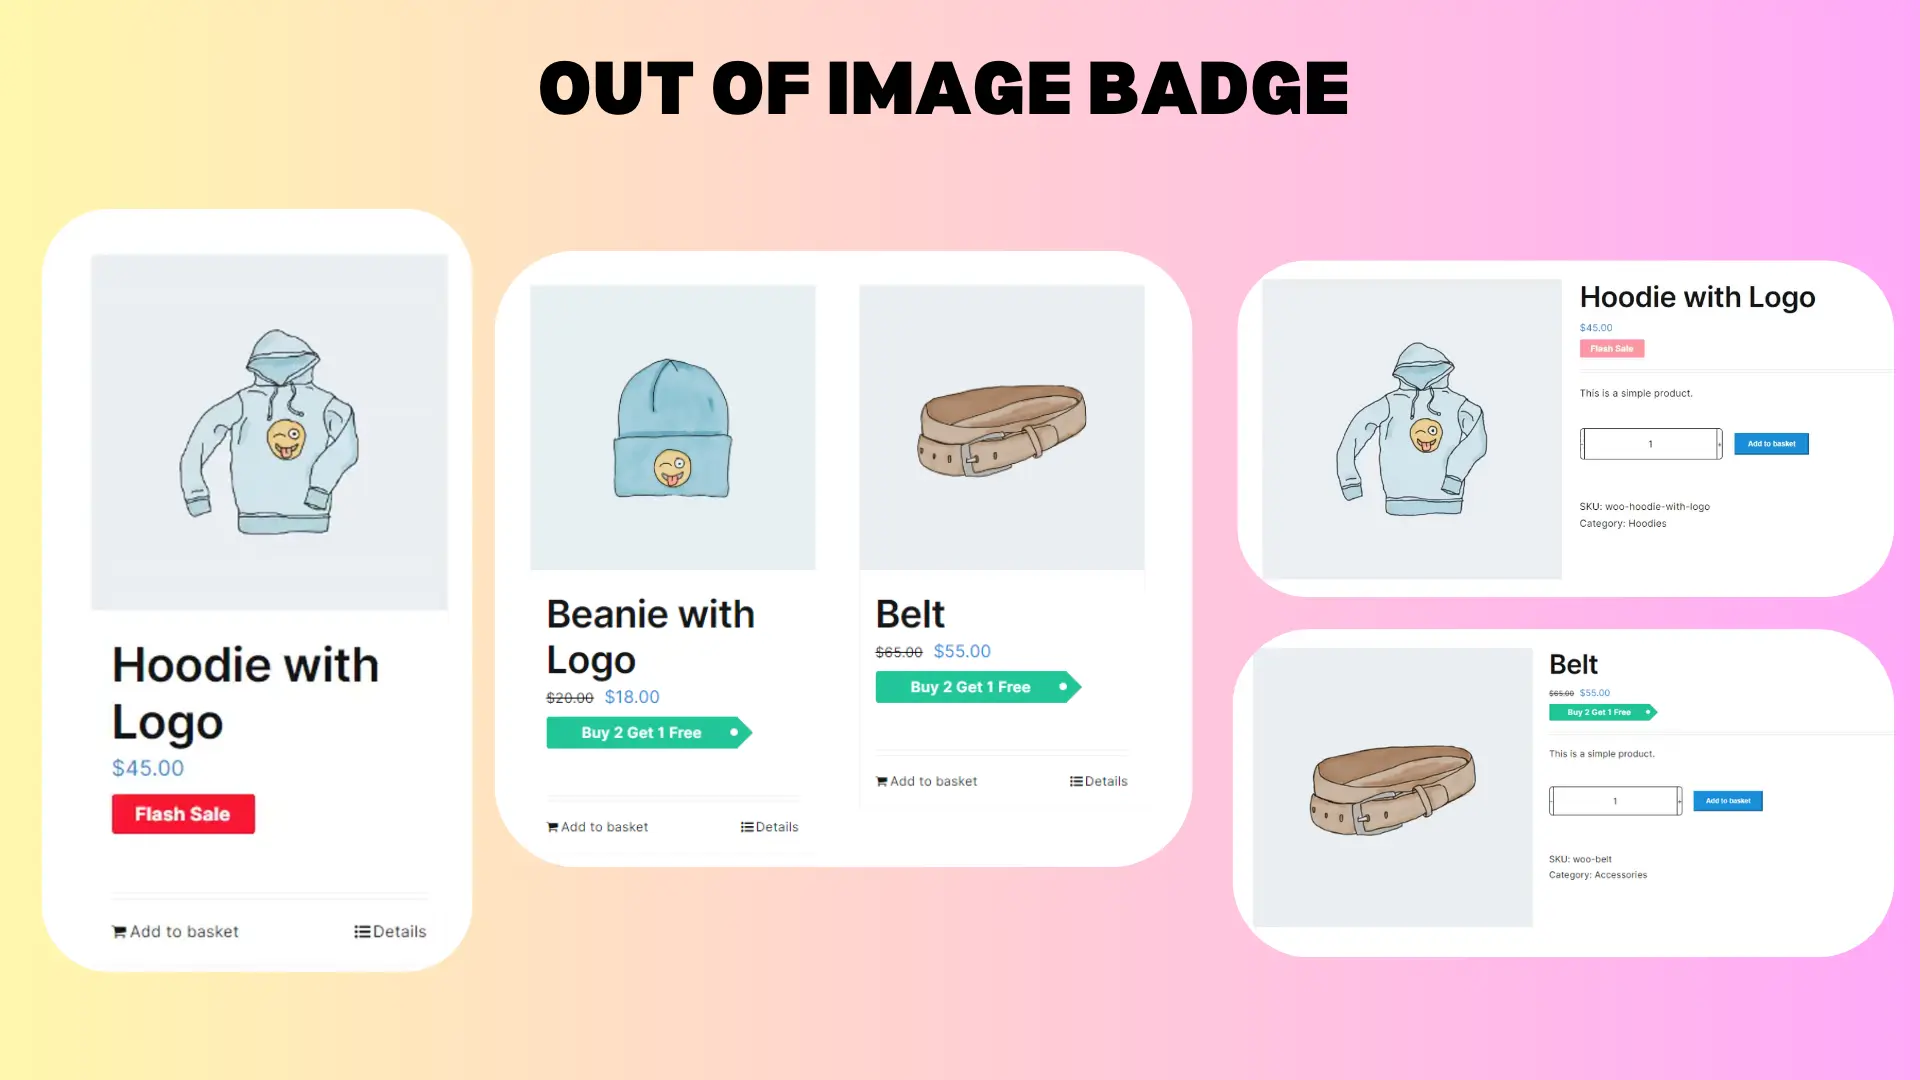
Many plugins come with customization features, allowing you to tailor the appearance of Sold Out Badges to align with your store’s branding and design. - Easy Implementation:
Generally, these plugins are easy to install and configure, requiring minimal technical expertise for seamless integration into your WooCommerce platform. - Compatibility:
Designed to work seamlessly with WooCommerce themes and other plugins, ensuring that the addition of Sold Out Badges doesn’t disrupt the overall functionality of your online store.
Step-by-Step Guide to Implementing Sold Out Badges in WooCommerce
Enhance your online store by quickly adding Sold Out Badges in WooCommerce. Follow this step-by-step guide to integrate these badges and improve customer experience seamlessly. First, ensure a reliable WooCommerce Sold Out Badges plugin is installed on your WordPress site. Numerous plugins offer customization options and various features to suit your specific needs.
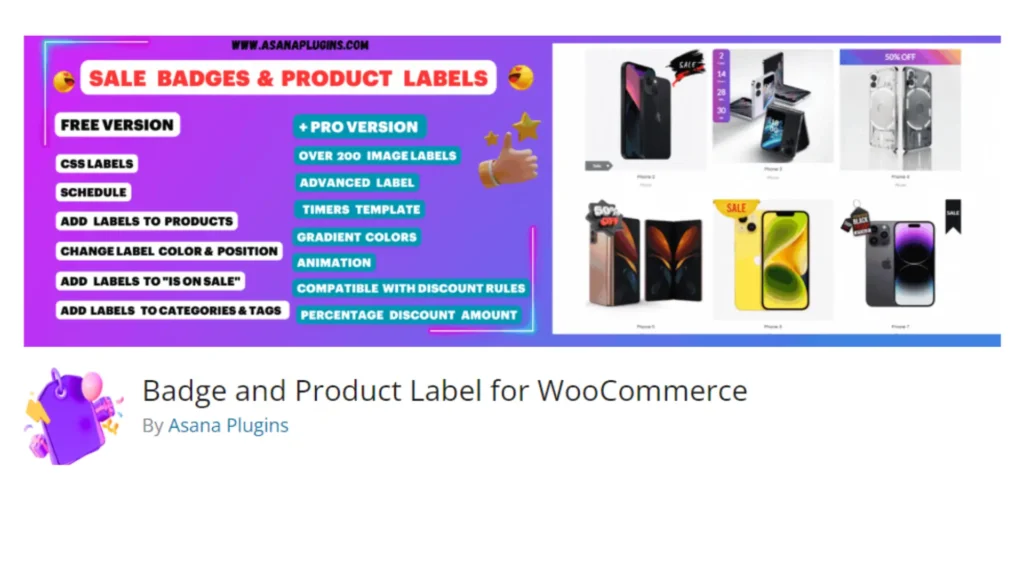
Install Sale Badges and Product Labels for WooCommerce
Follow these steps to install the Sale Badges and Product Labels for the WooCommerce plugin.
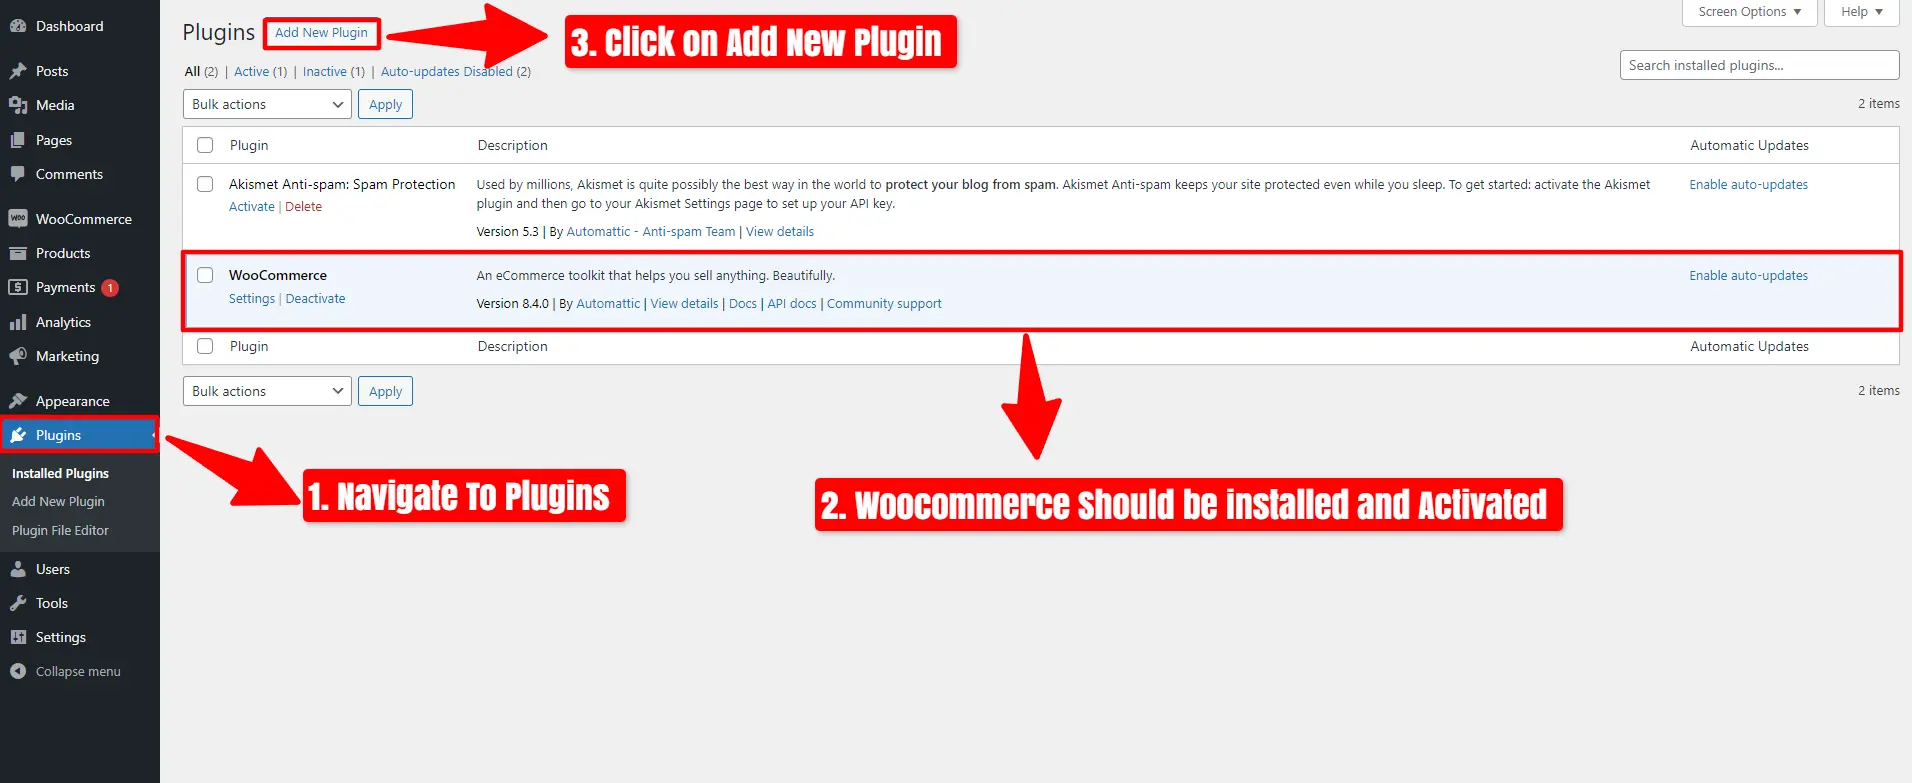
- Navigate To Plugins.
- Woocommerce Should be installed and Activated.
- Click on Add New Plugin.
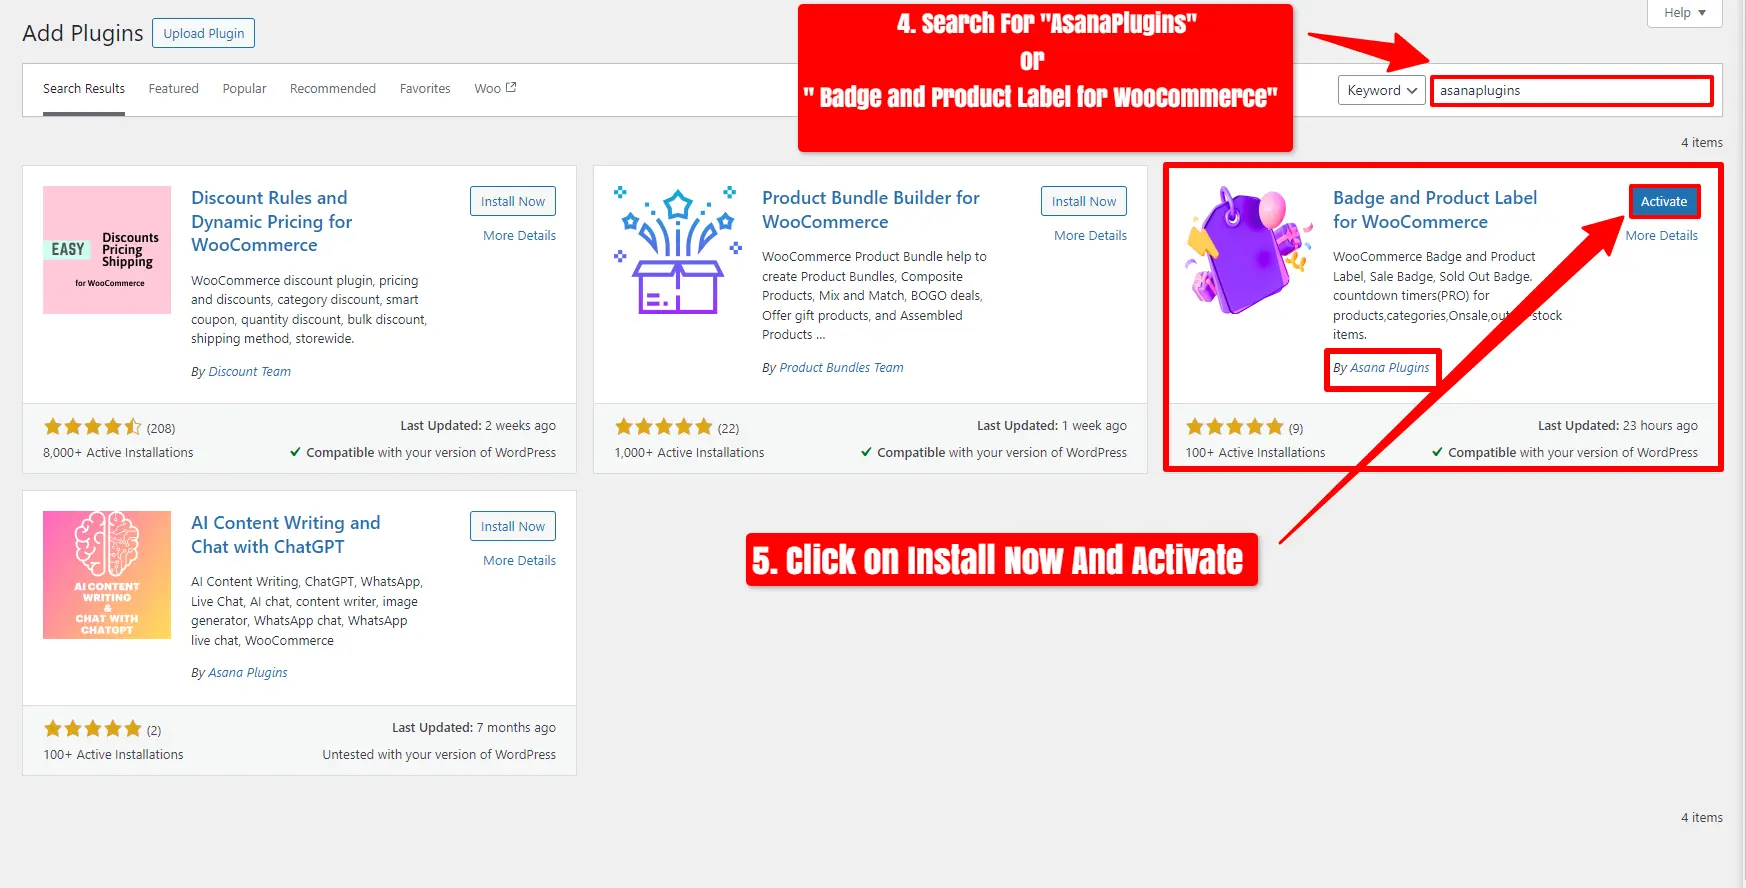
- Search For ‘Asanaplugins‘ or ‘Badge and Product Label for WooCommerce.’
- After seeing the plugin, click on “Install Now” and activate it.
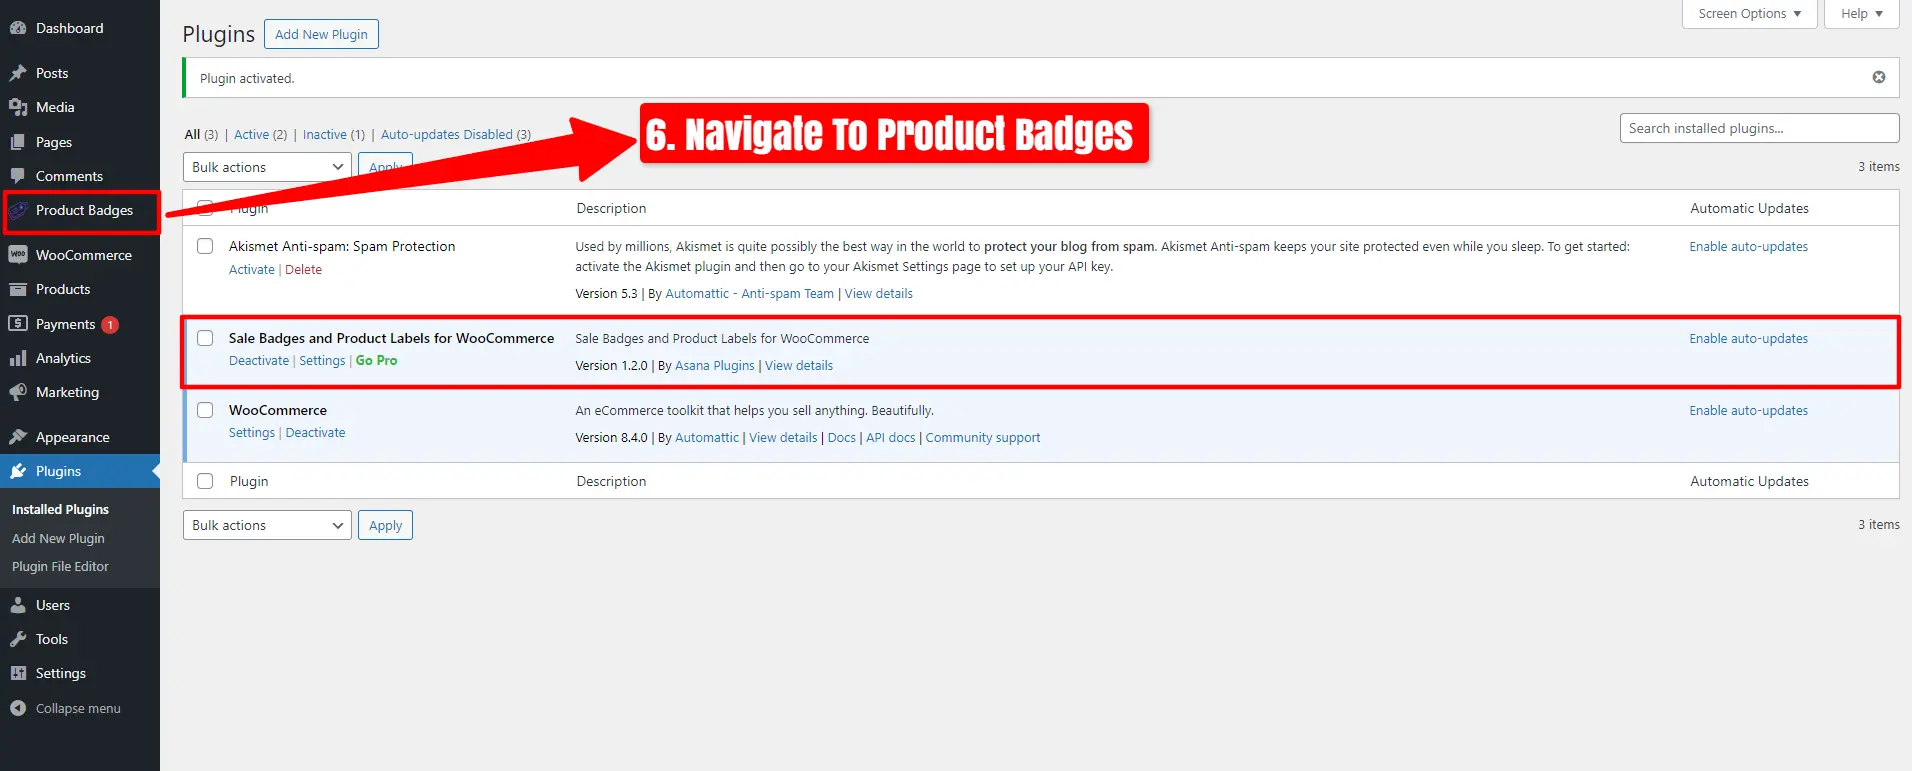
Now, Sale Badges and Product Labels for WooCommerce have been installed. Navigate to the Product Badges.
How To Add Sold out Badge in Woocommerce
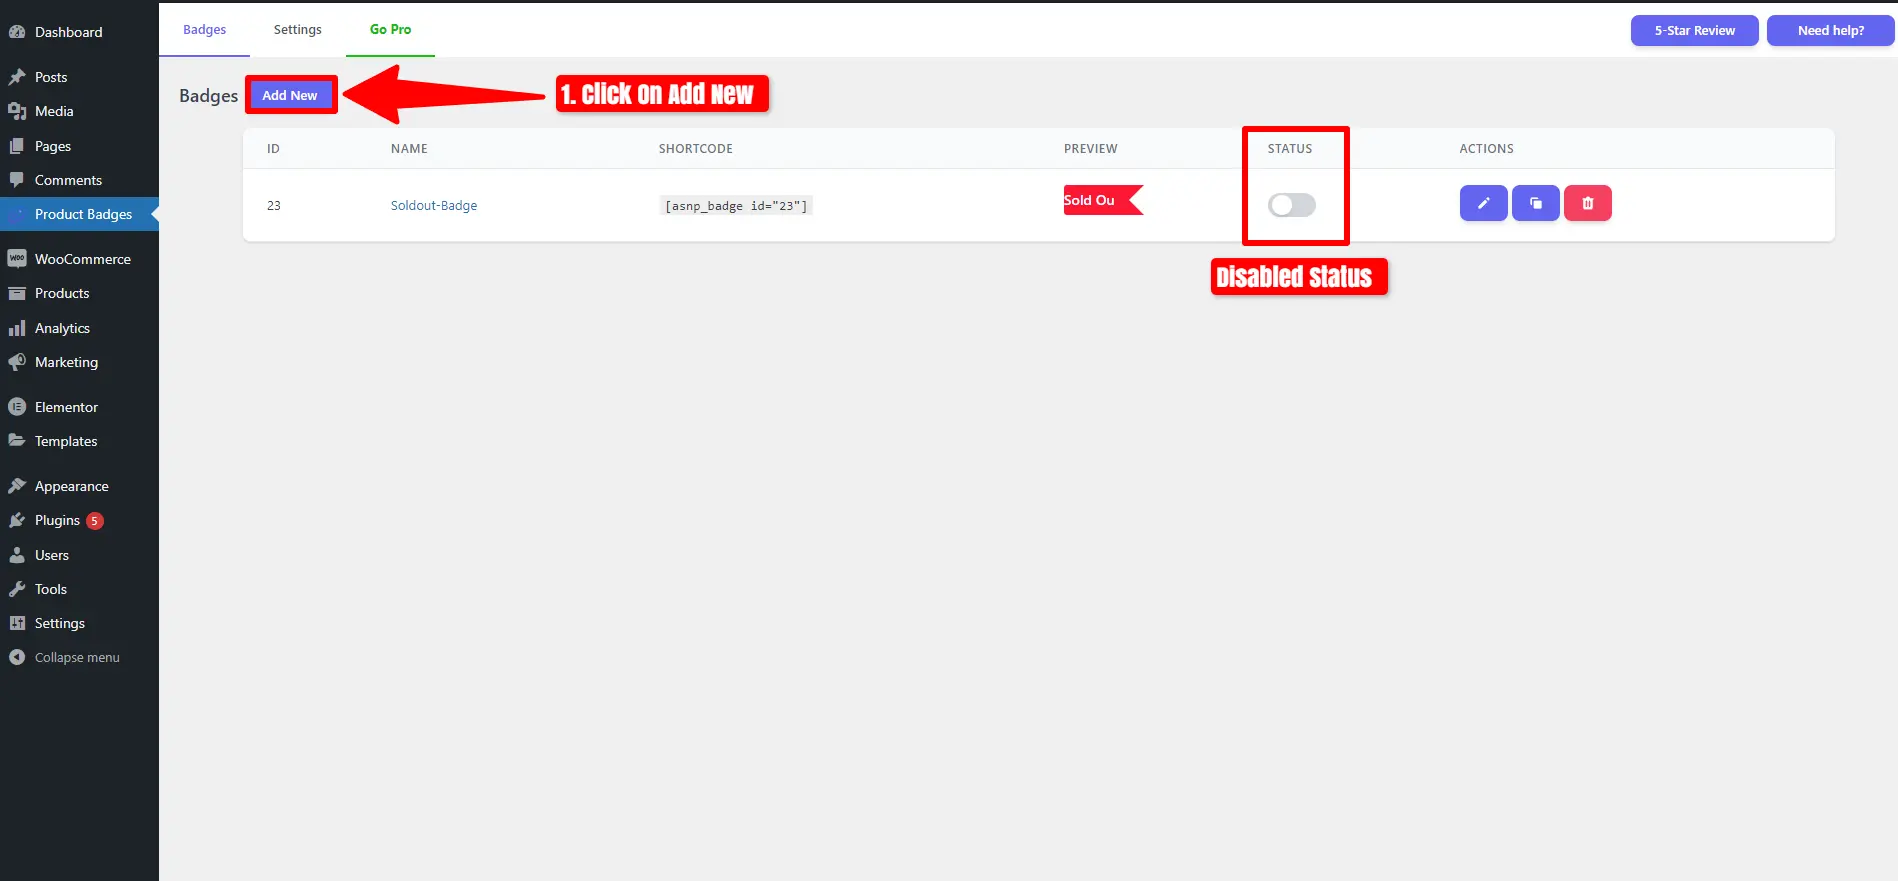
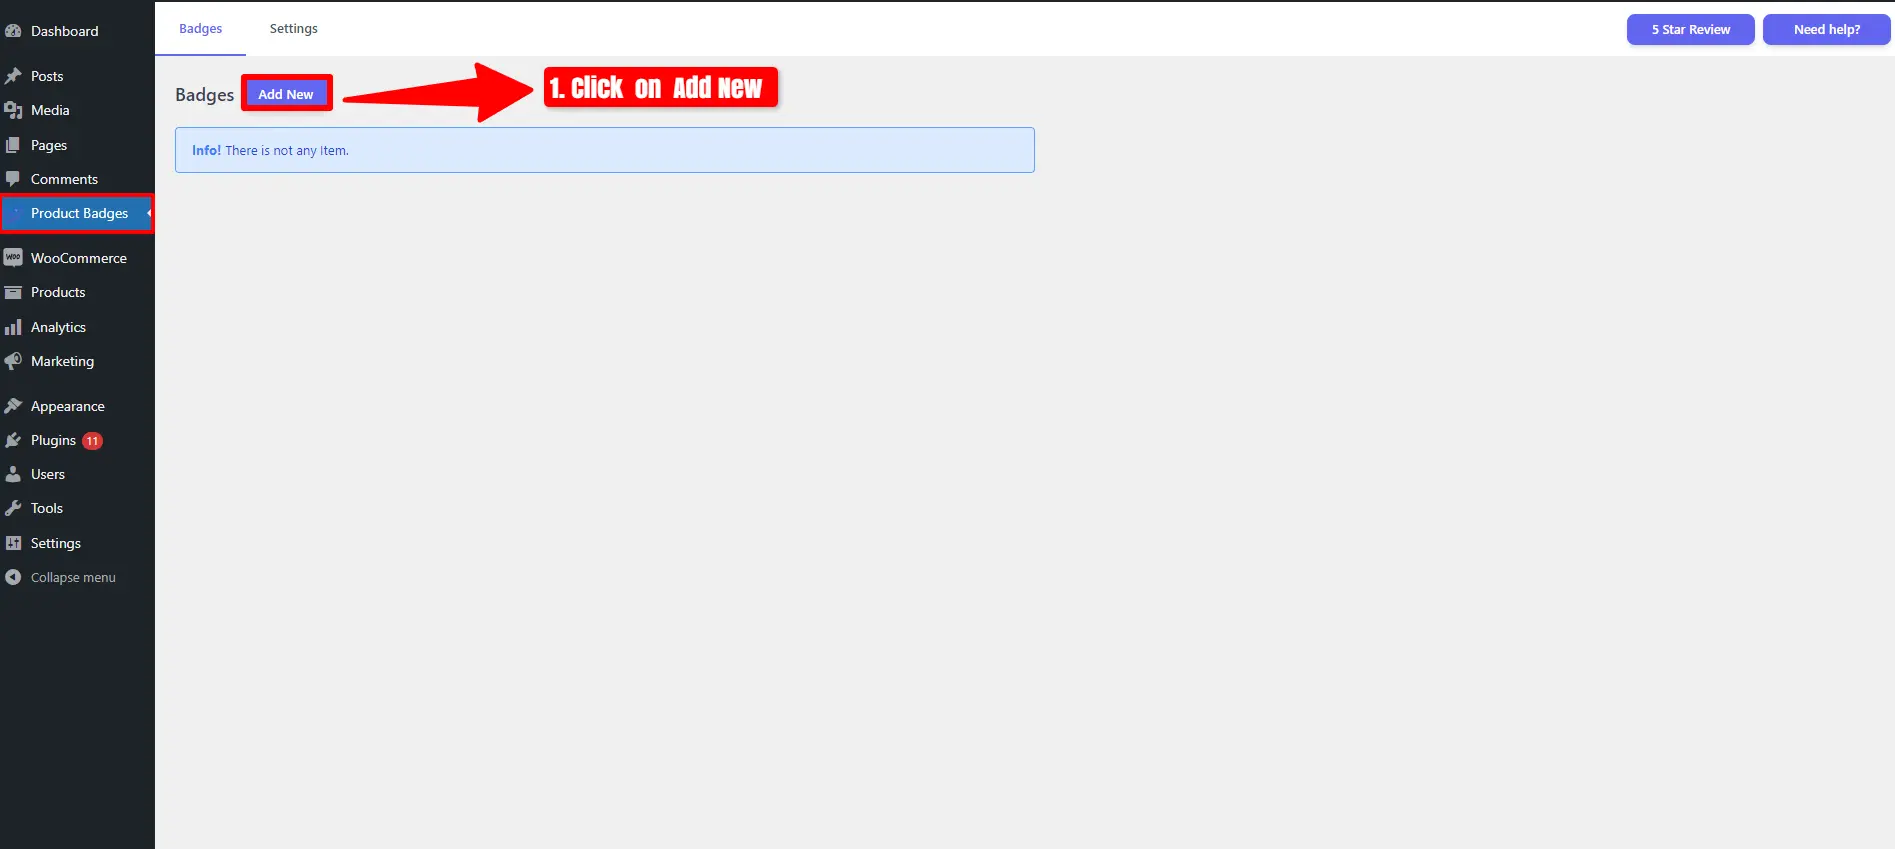
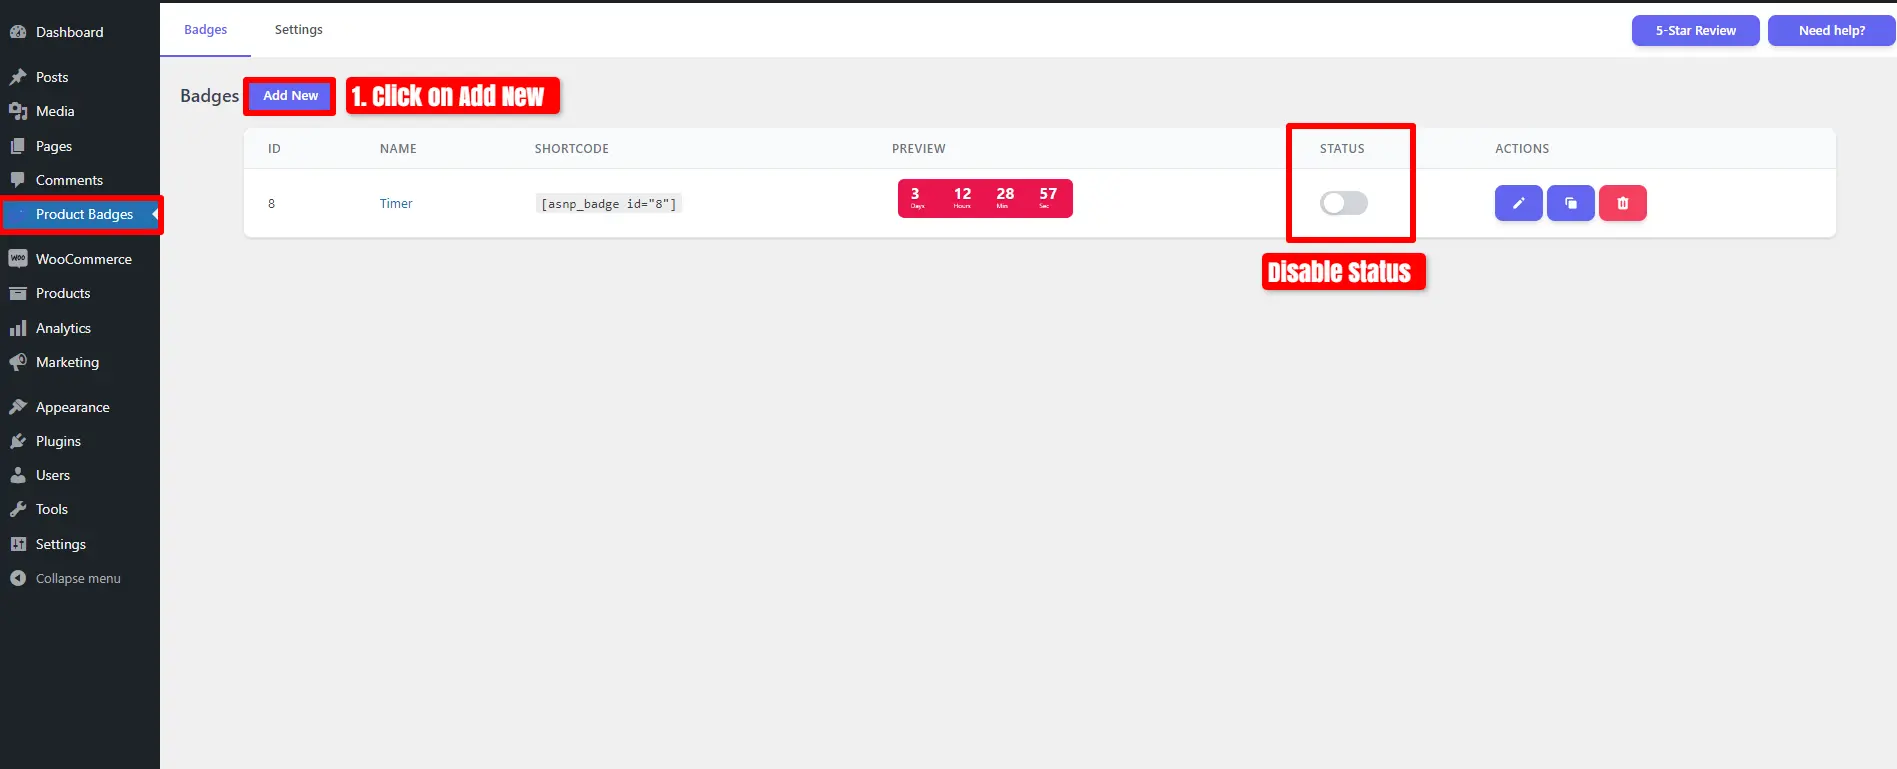
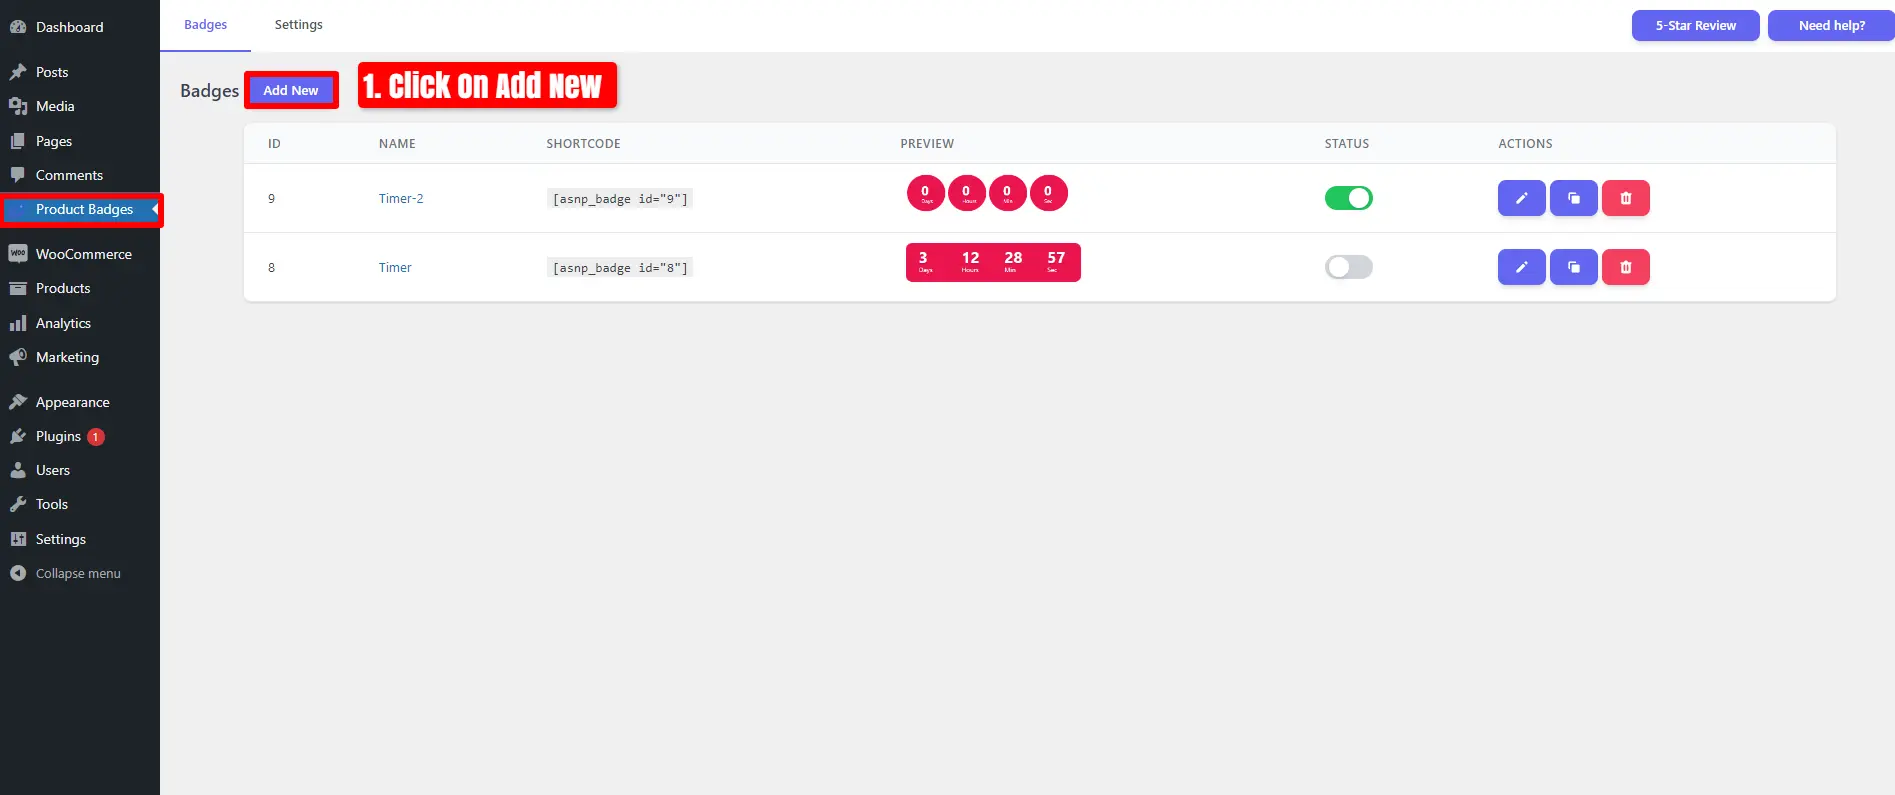
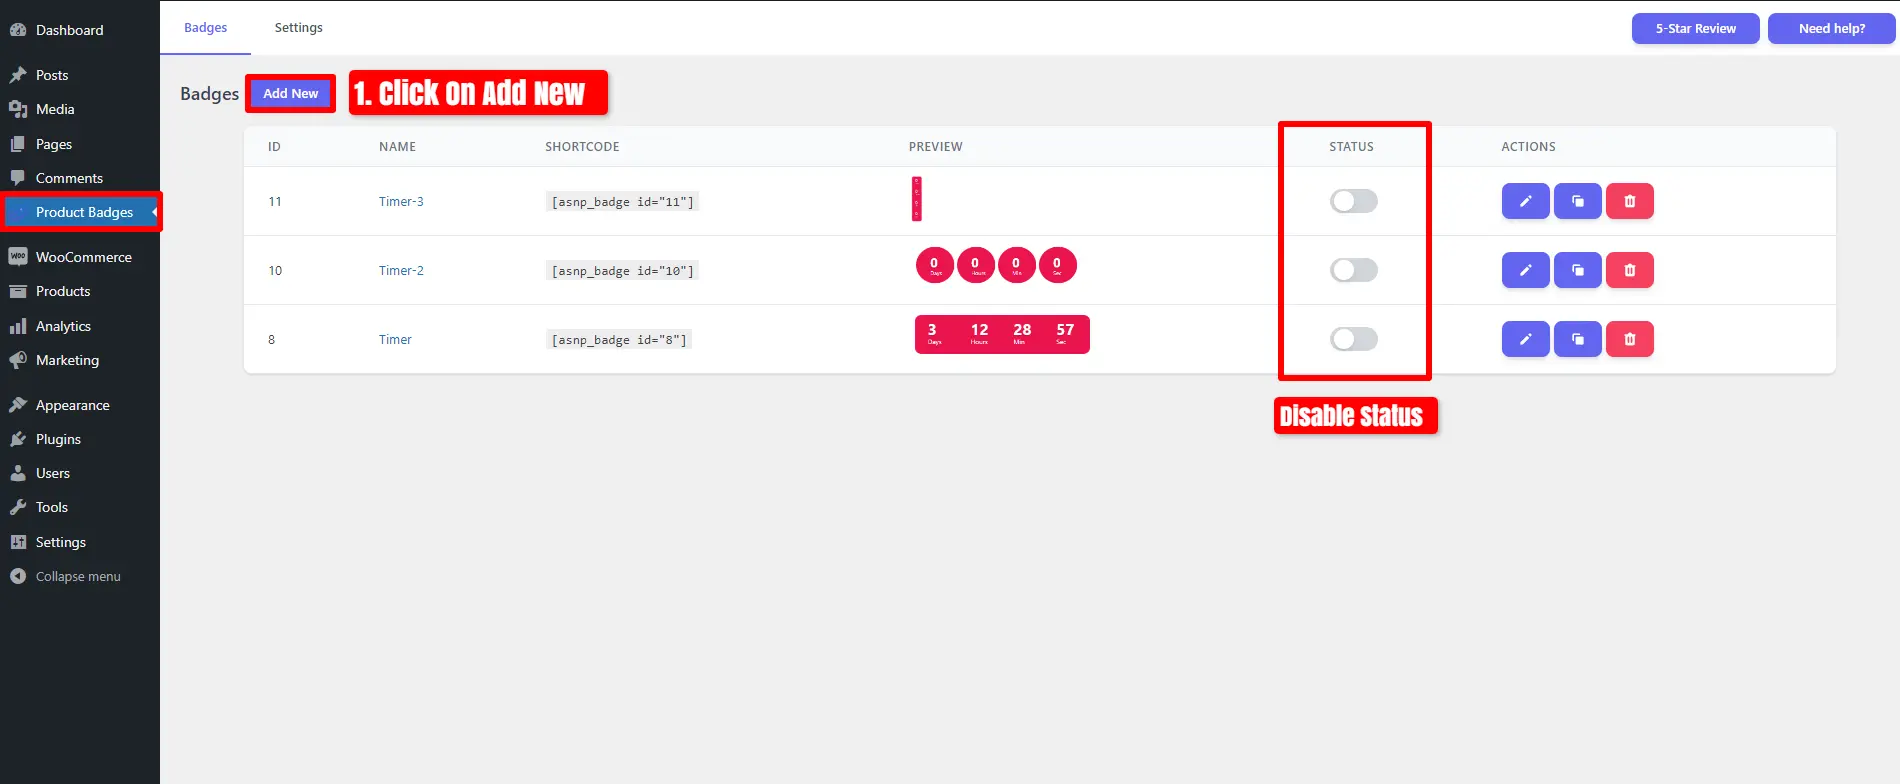
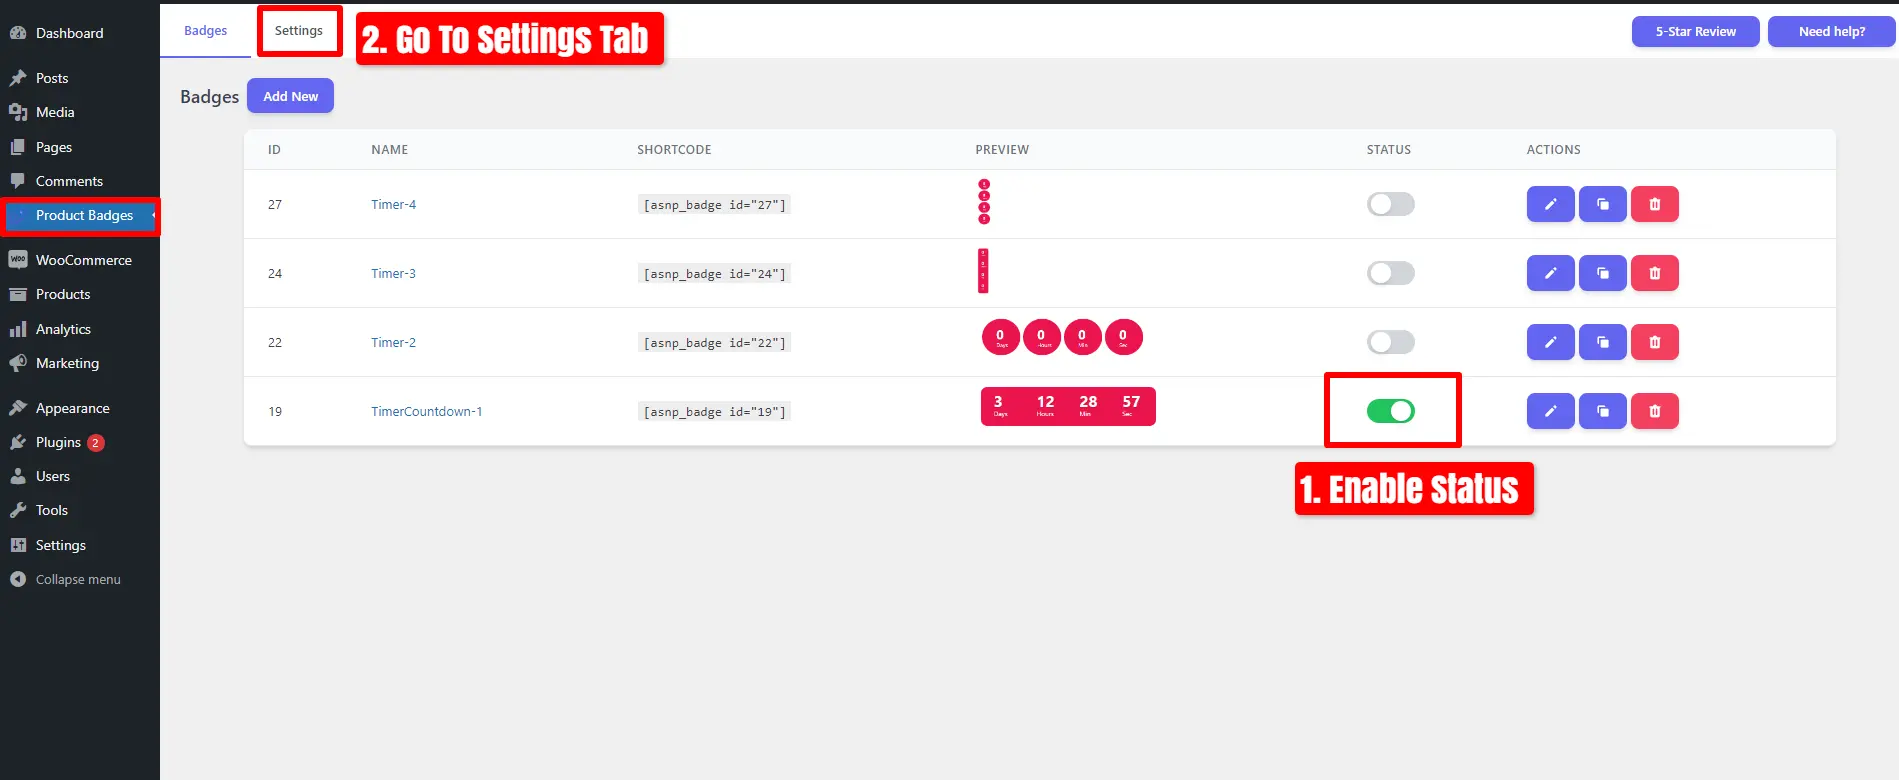
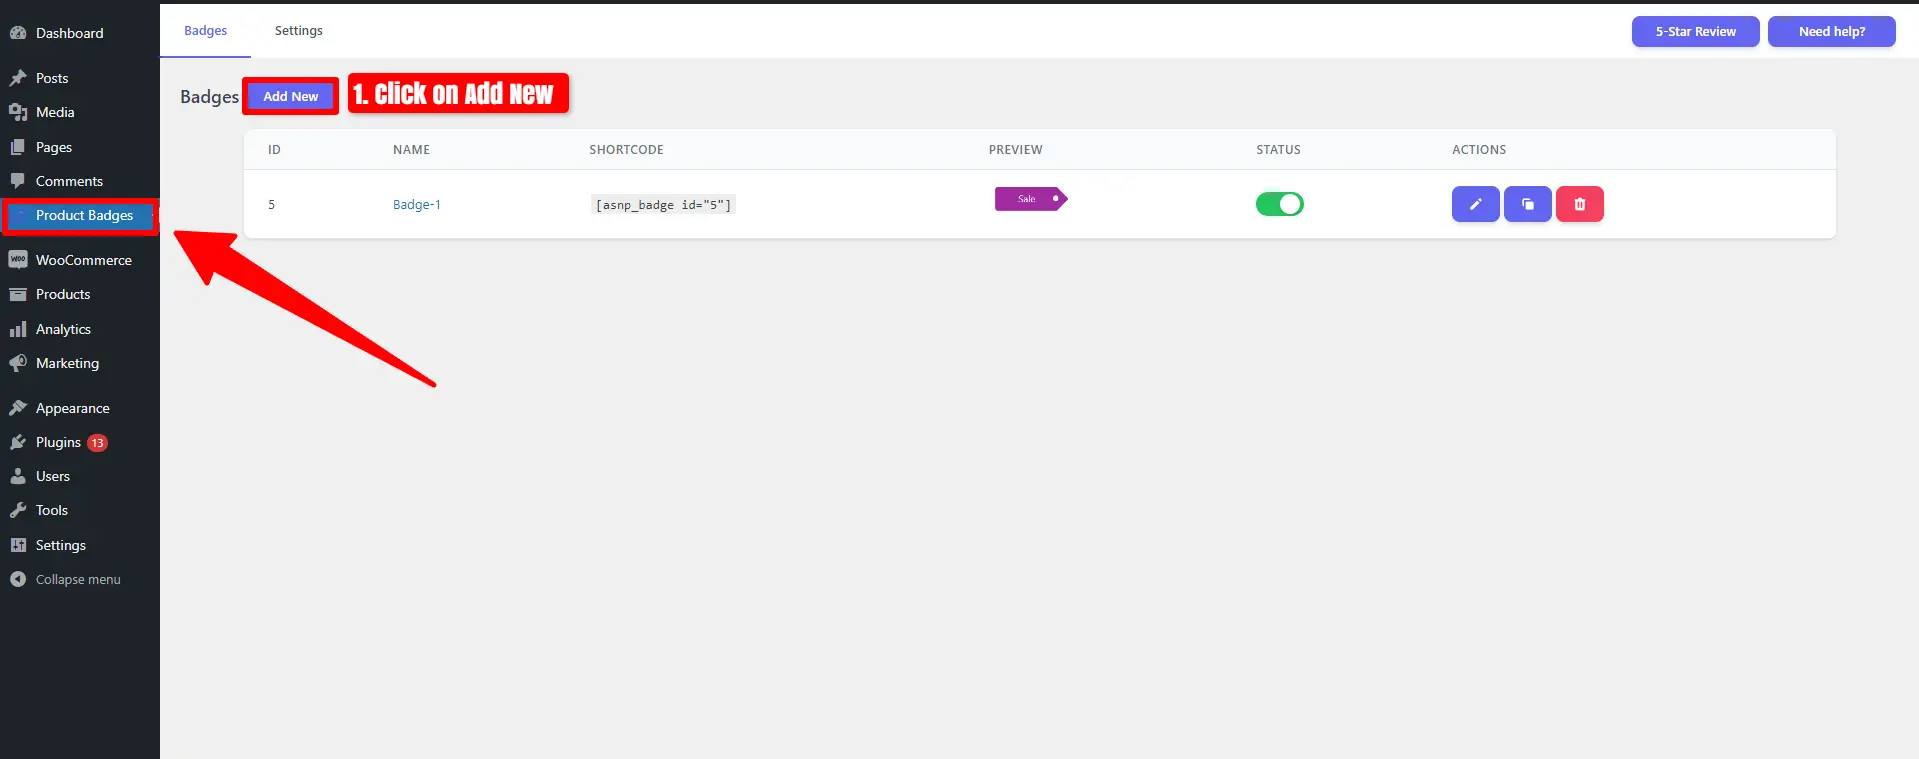
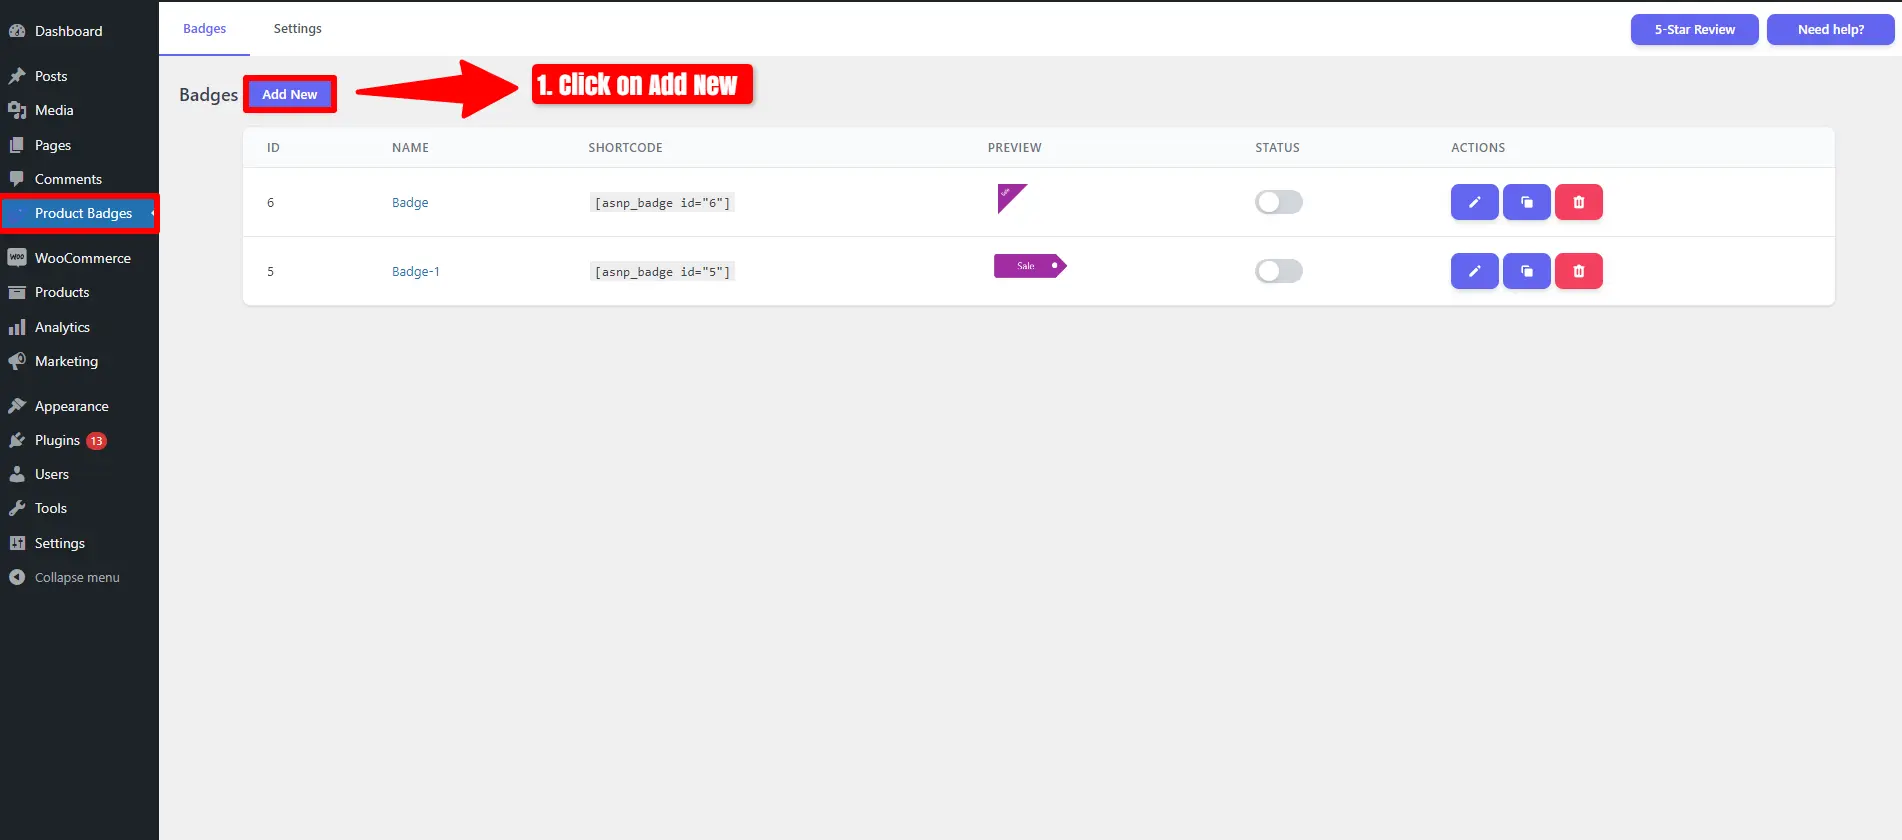
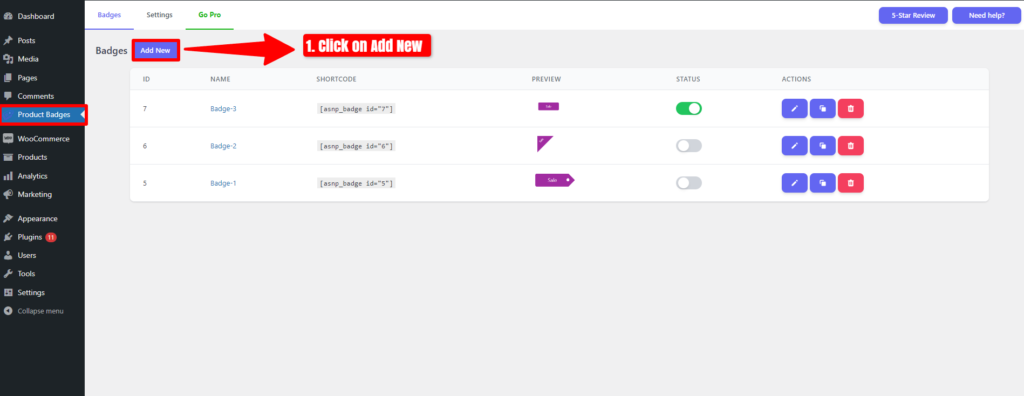
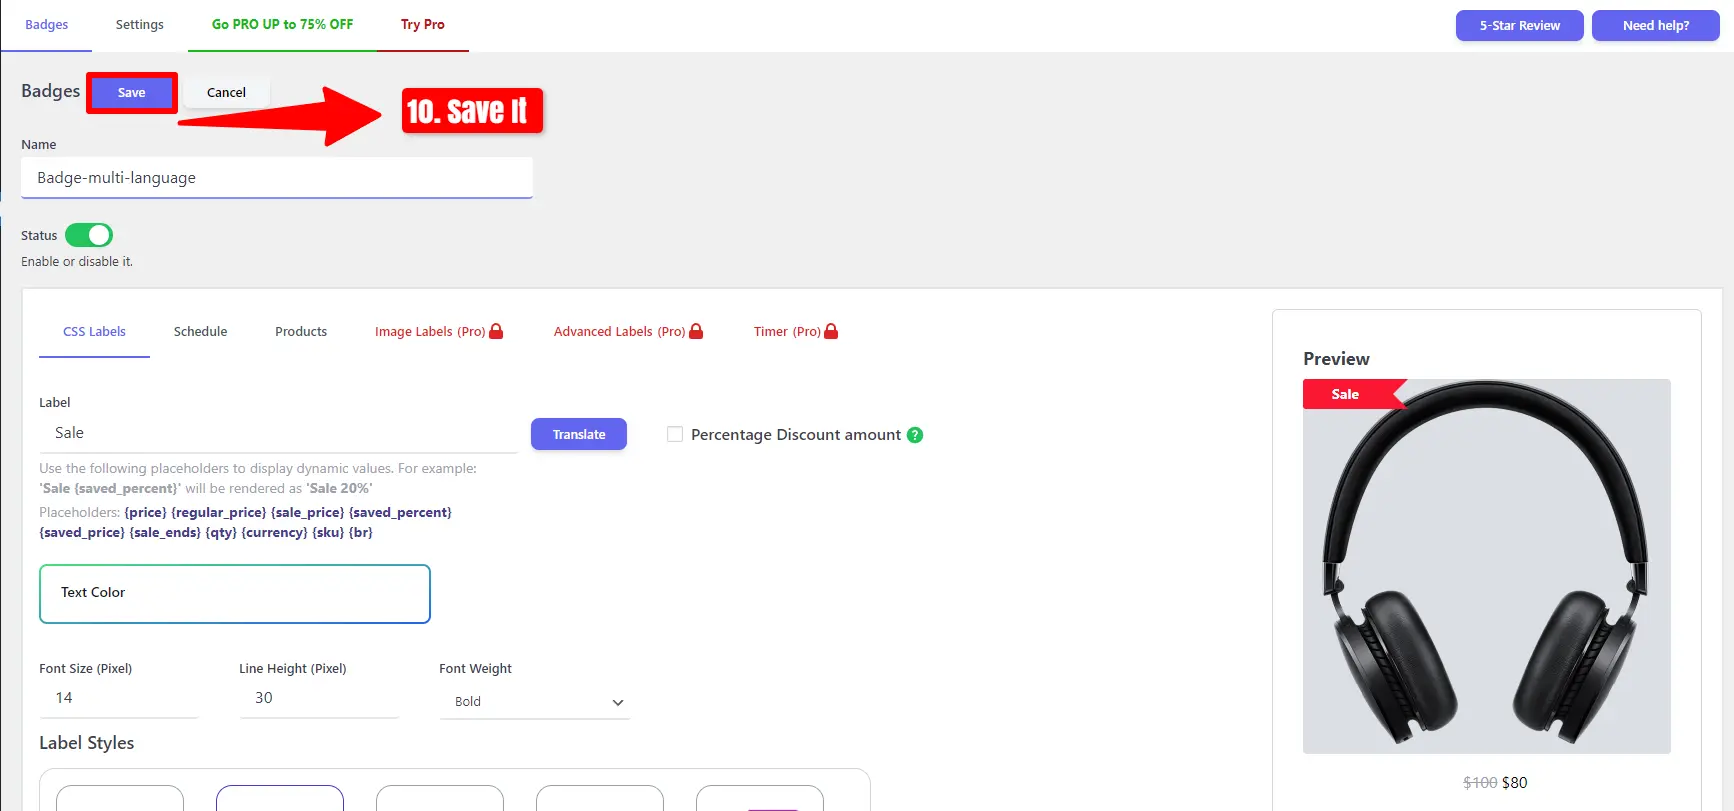
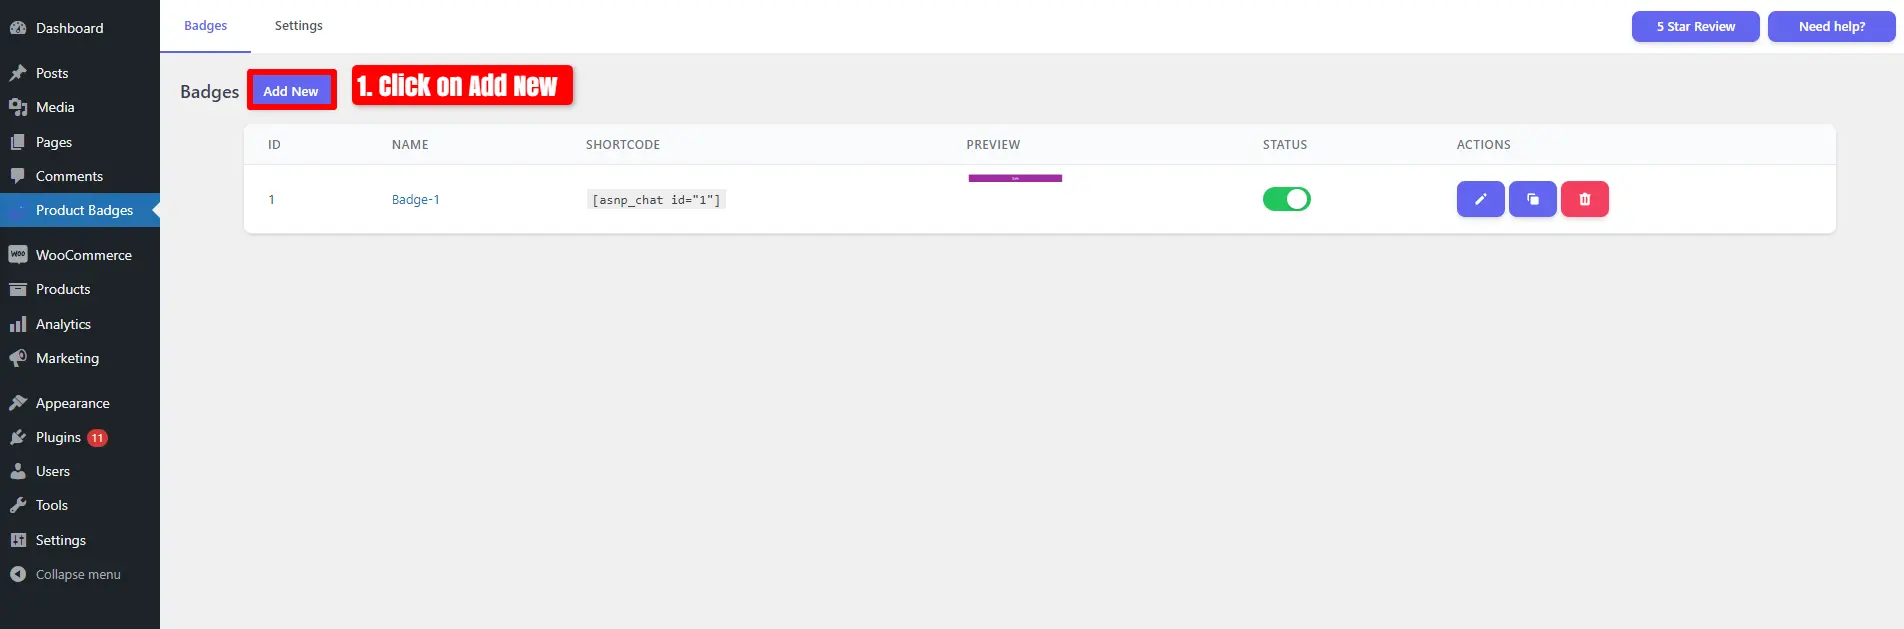
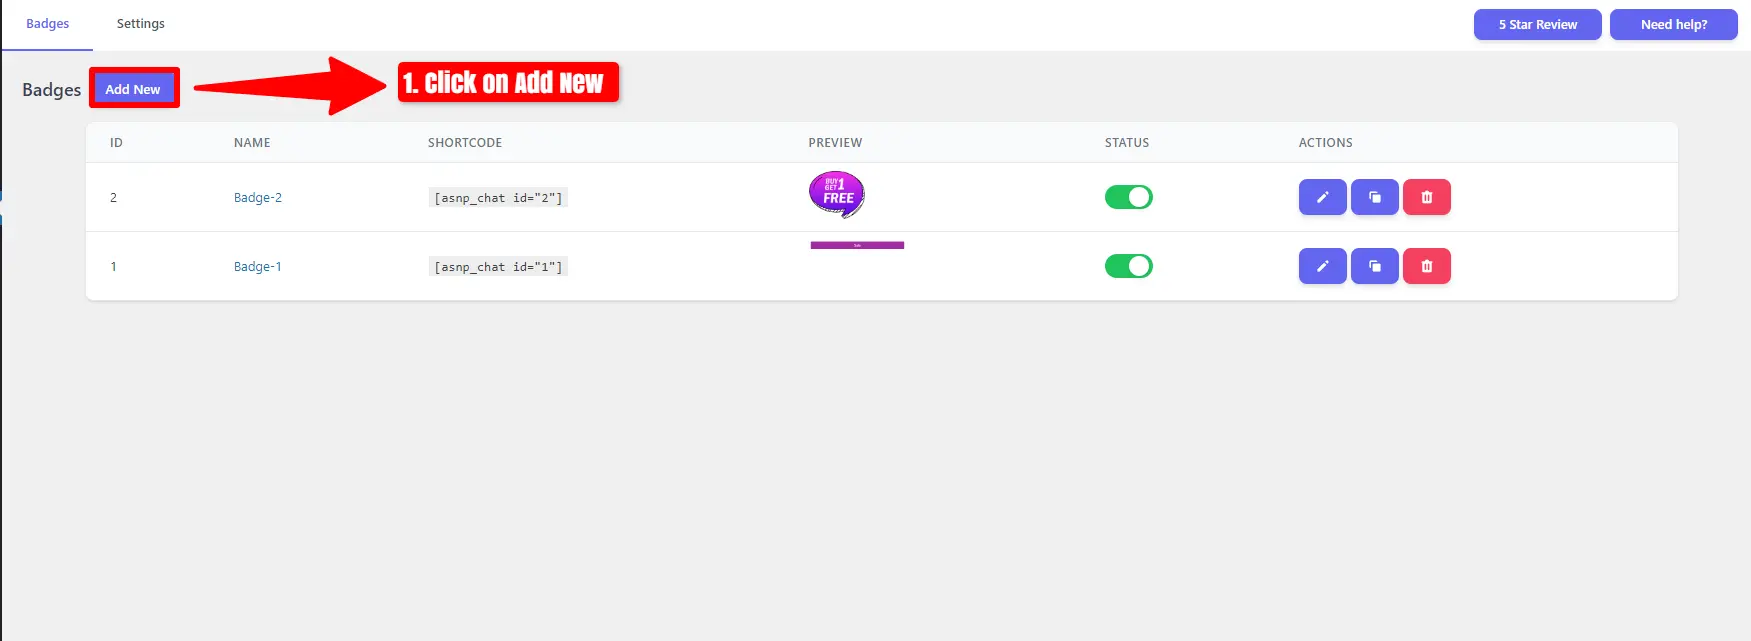
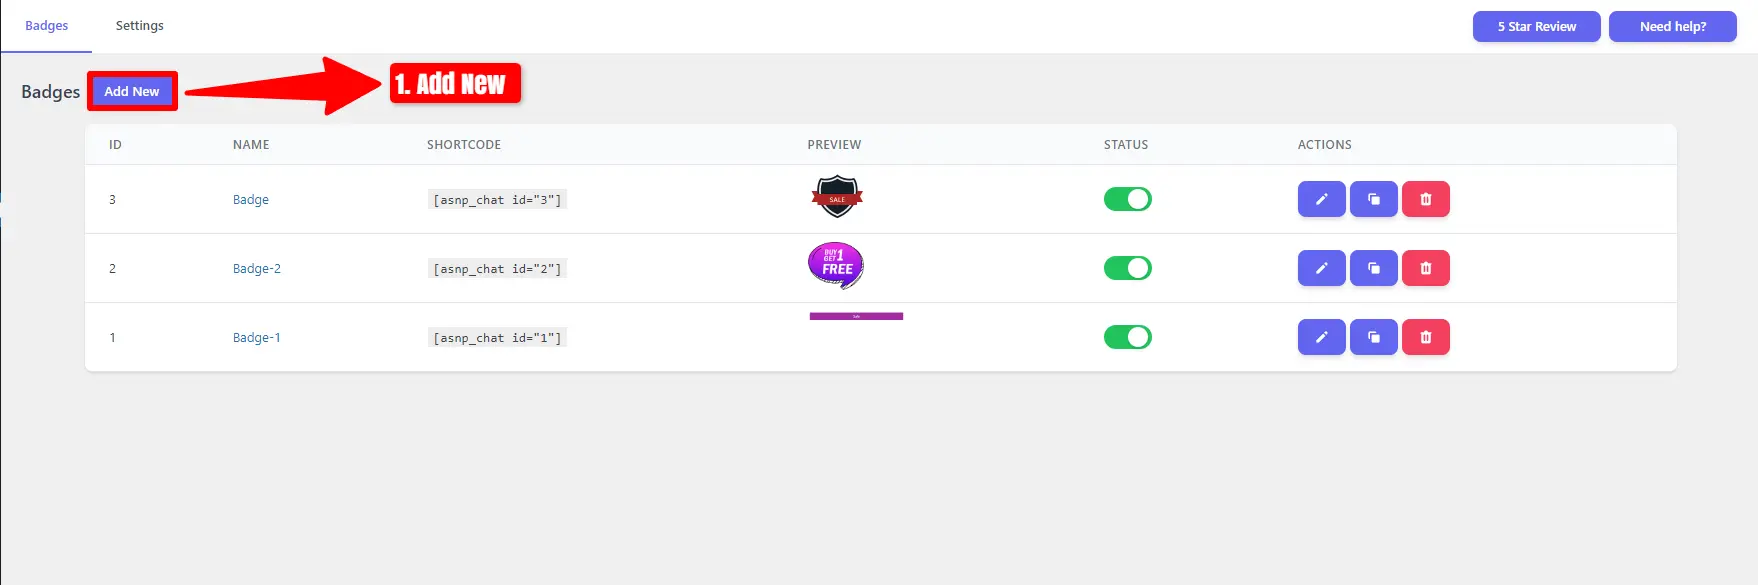
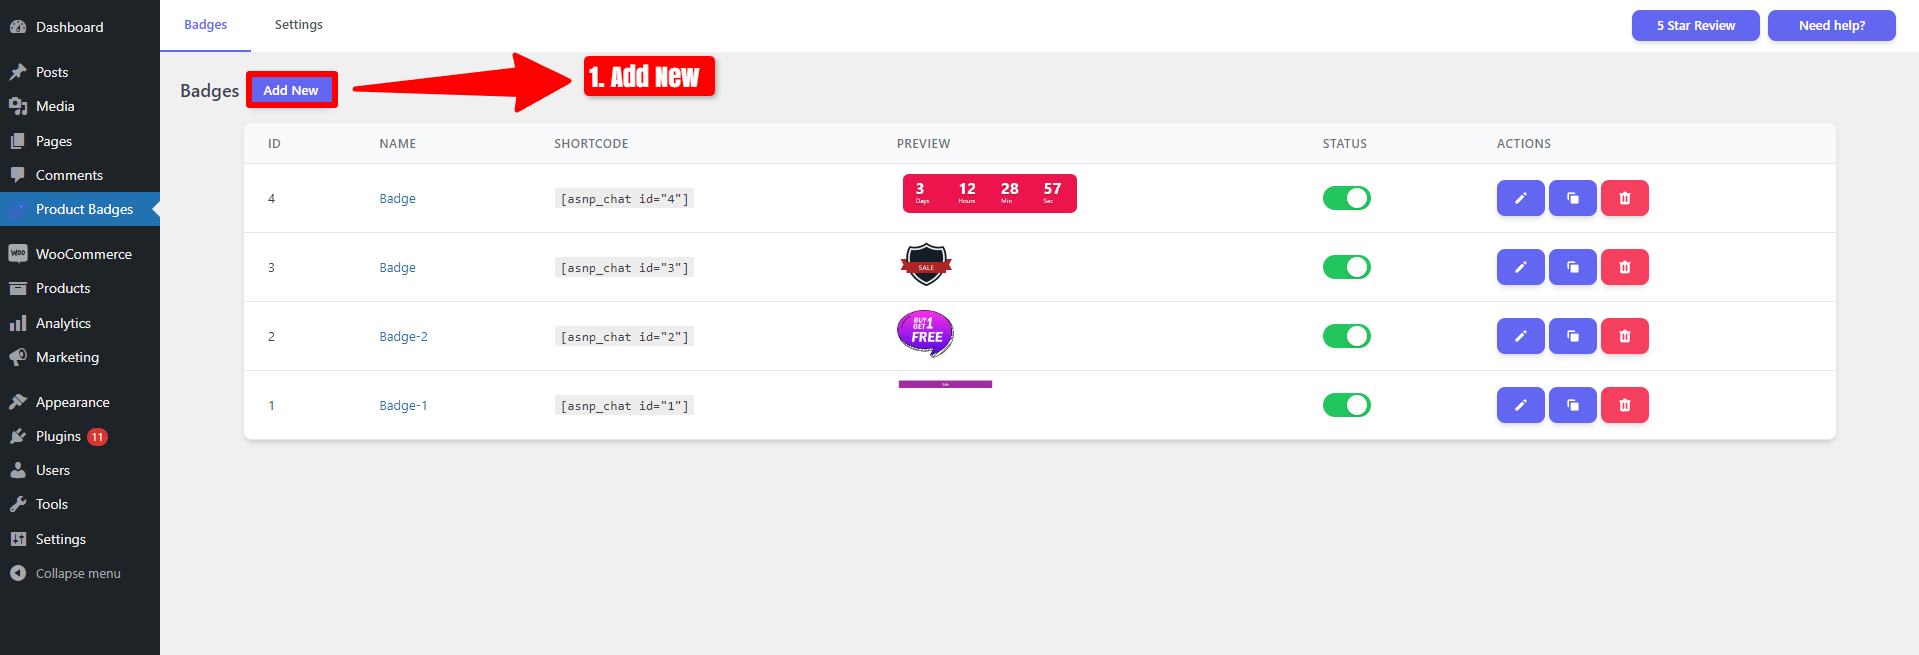
After installing the WooCommerce Sale Badges and Product Labels Plugin, Navigate To “Product Badges.”
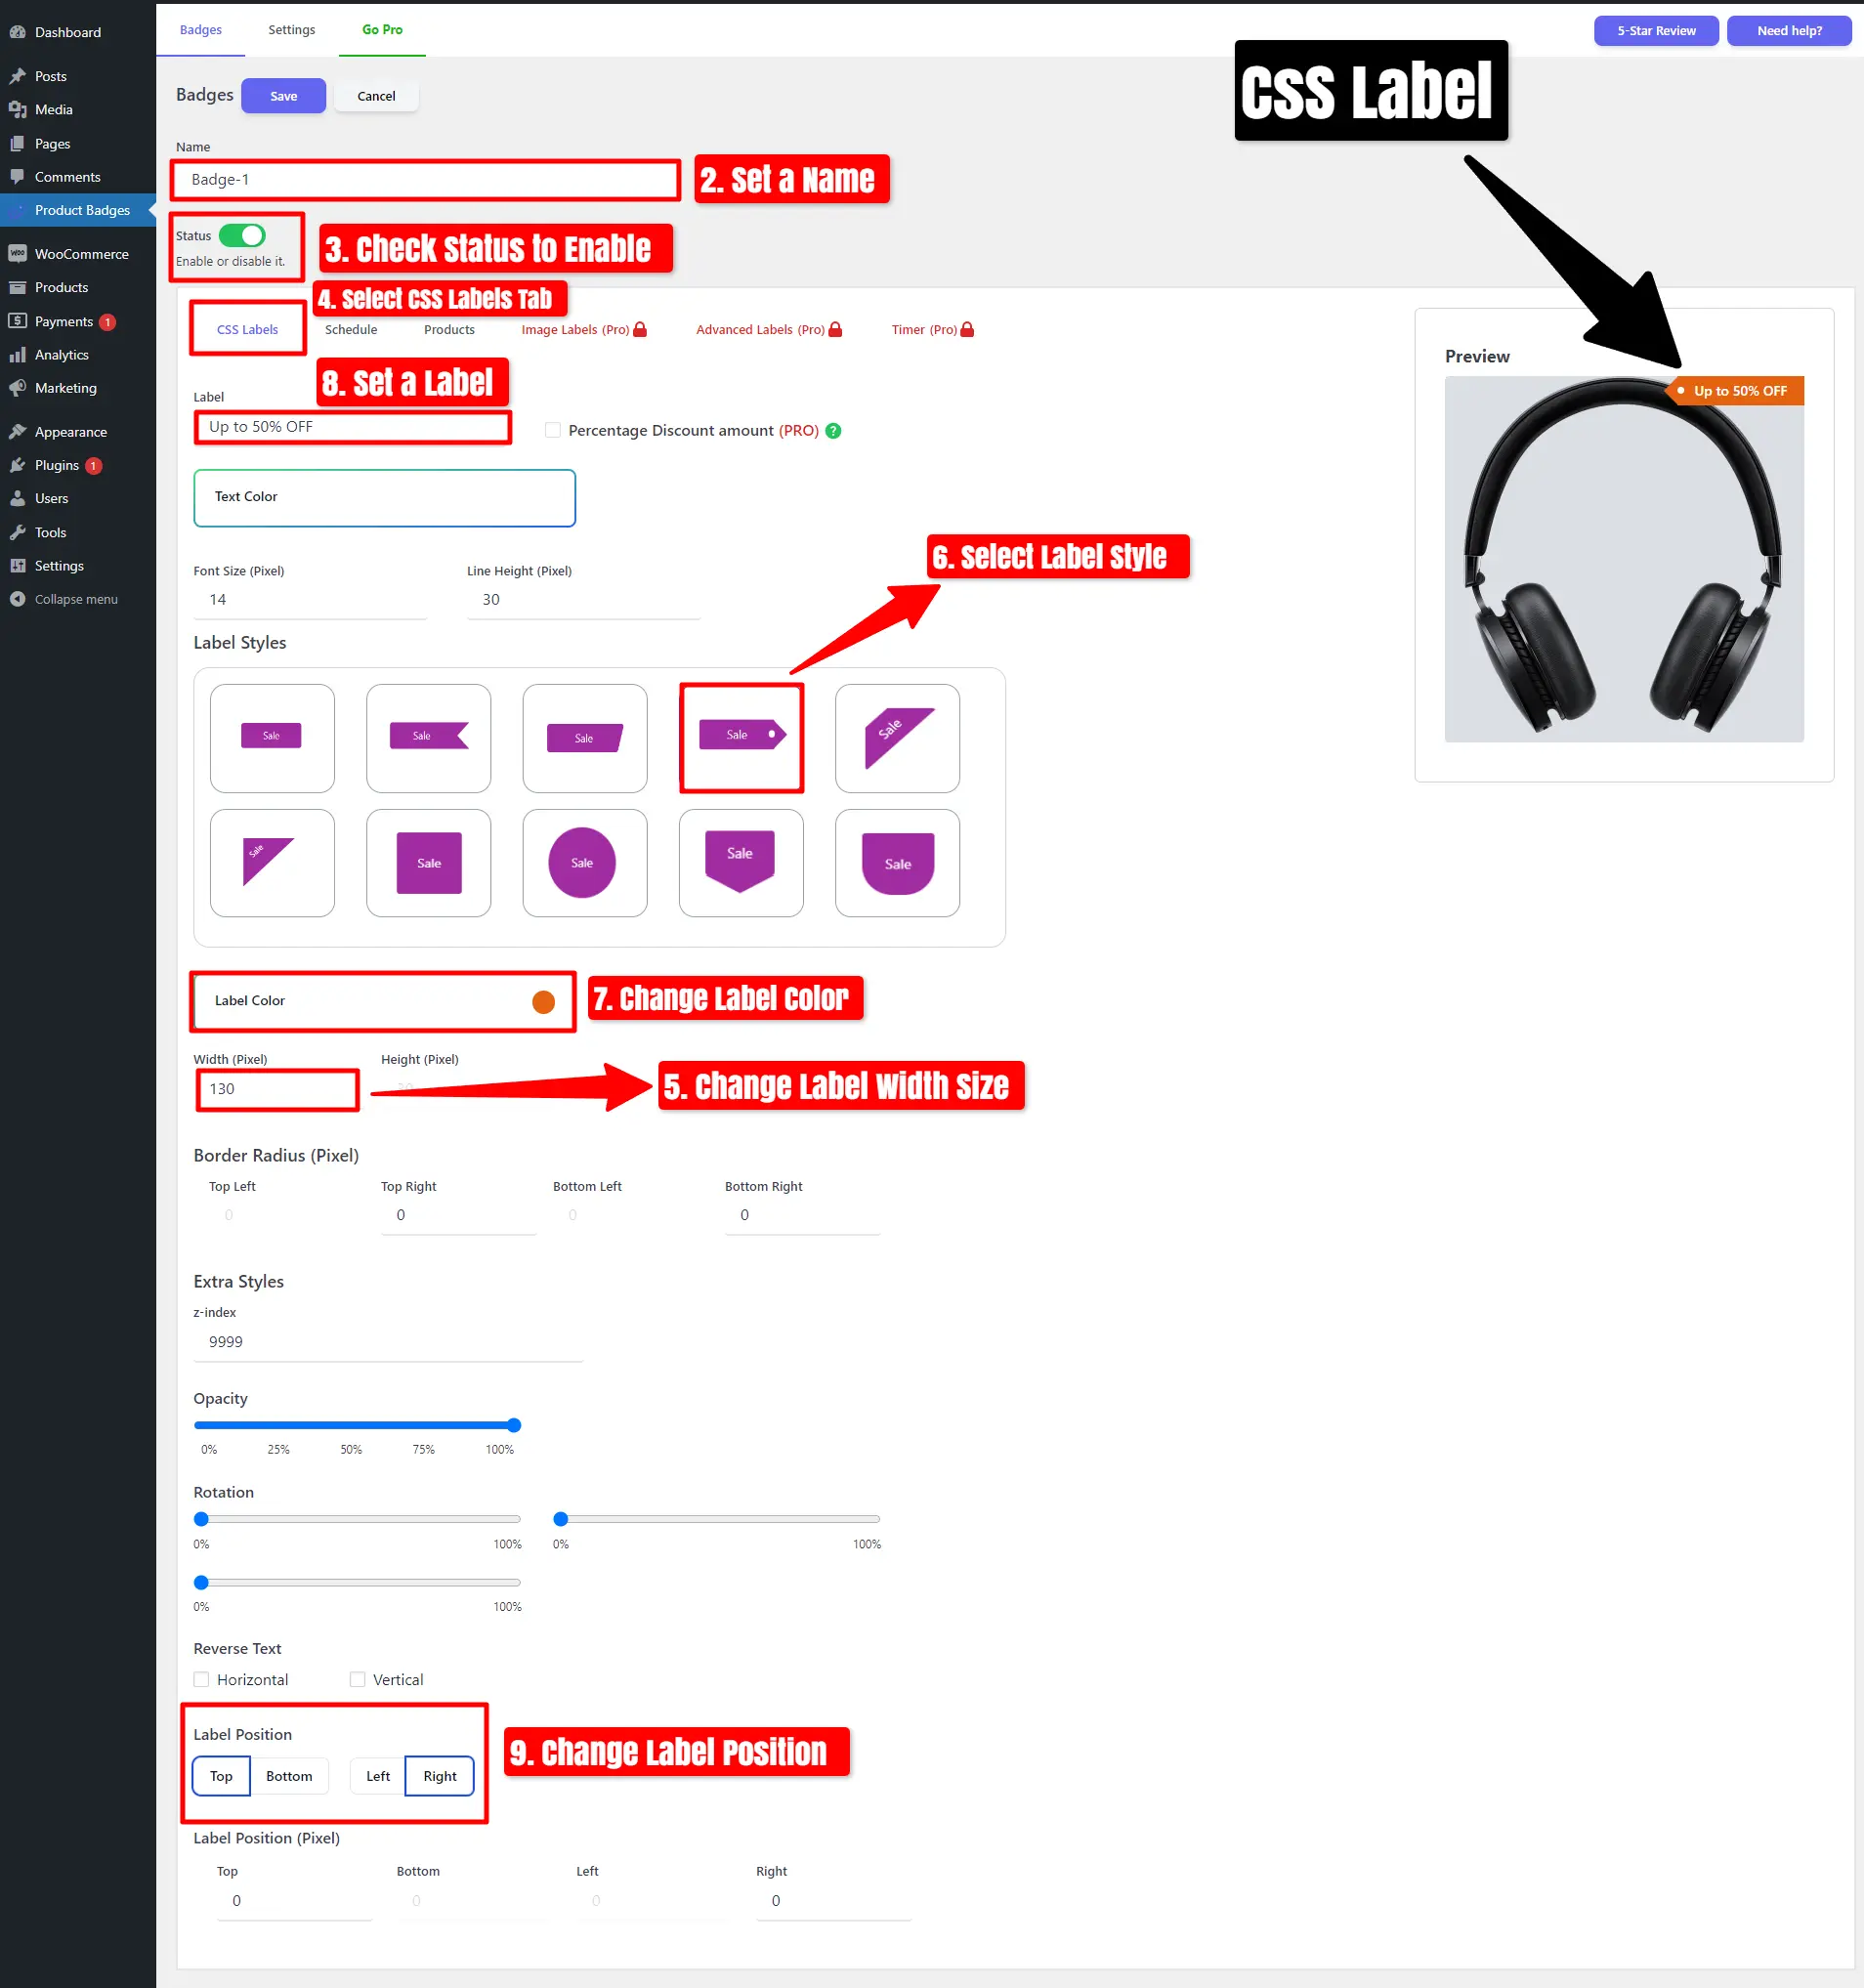
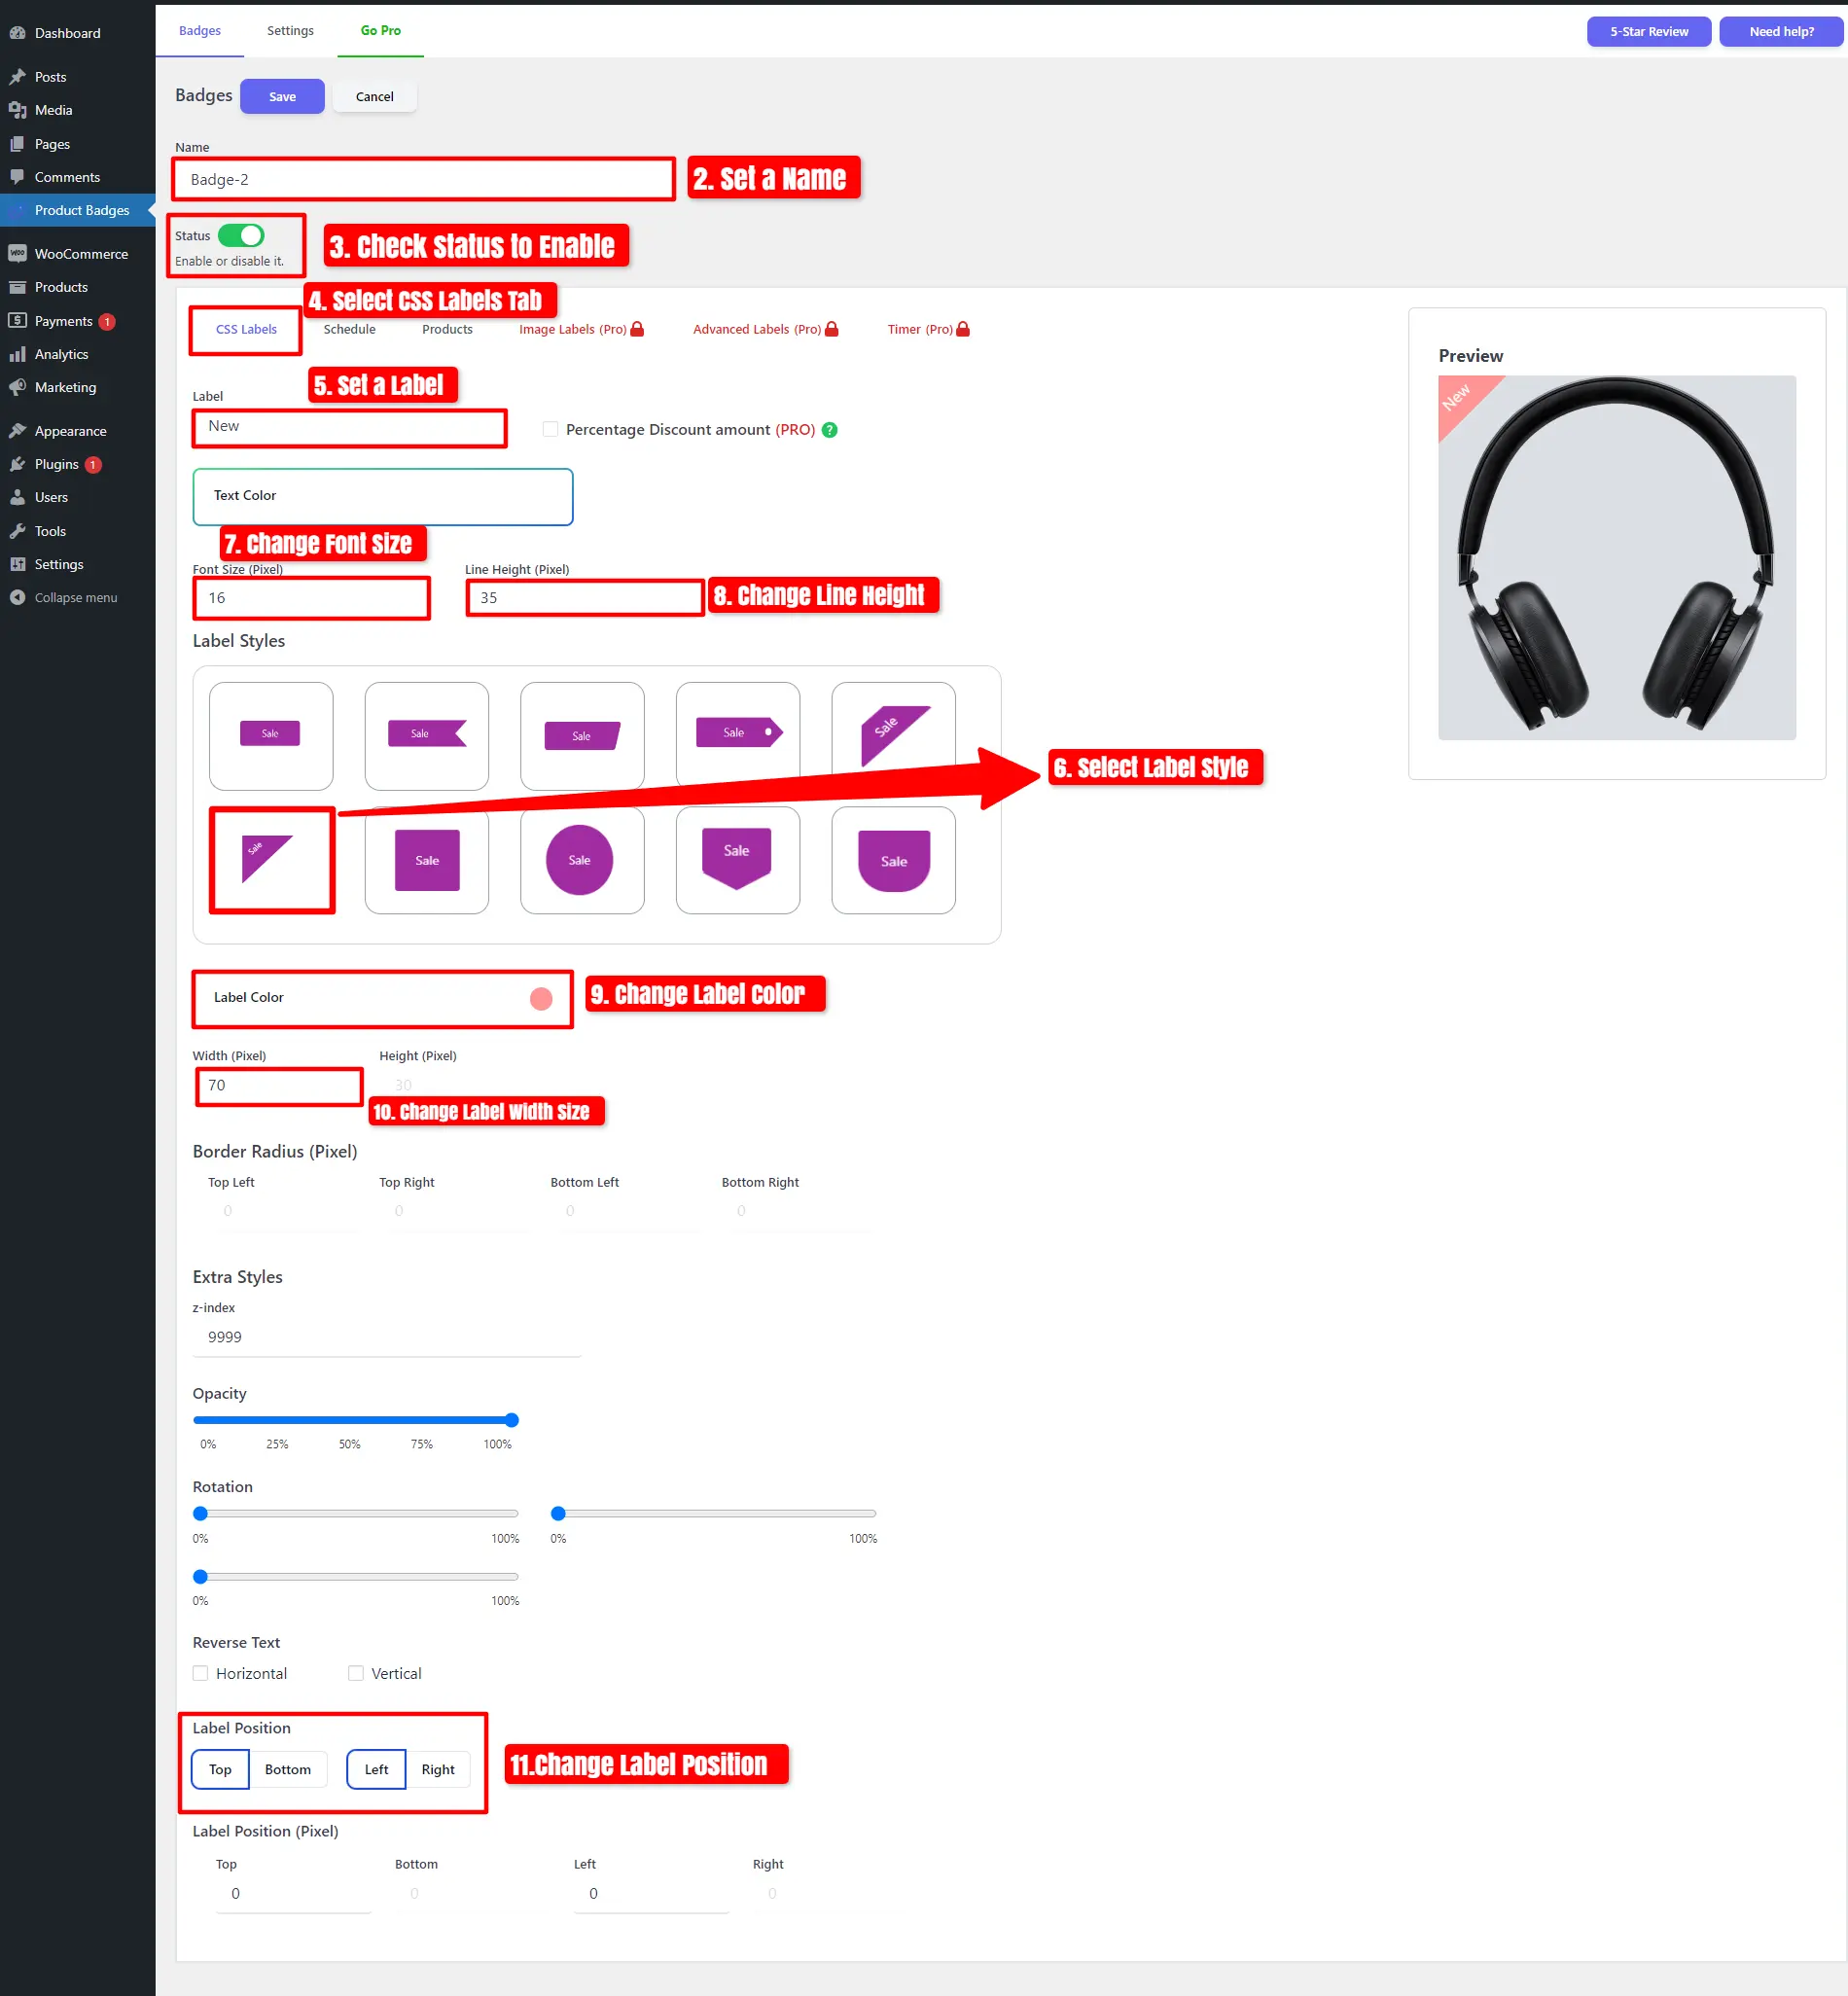
- Click on Add New

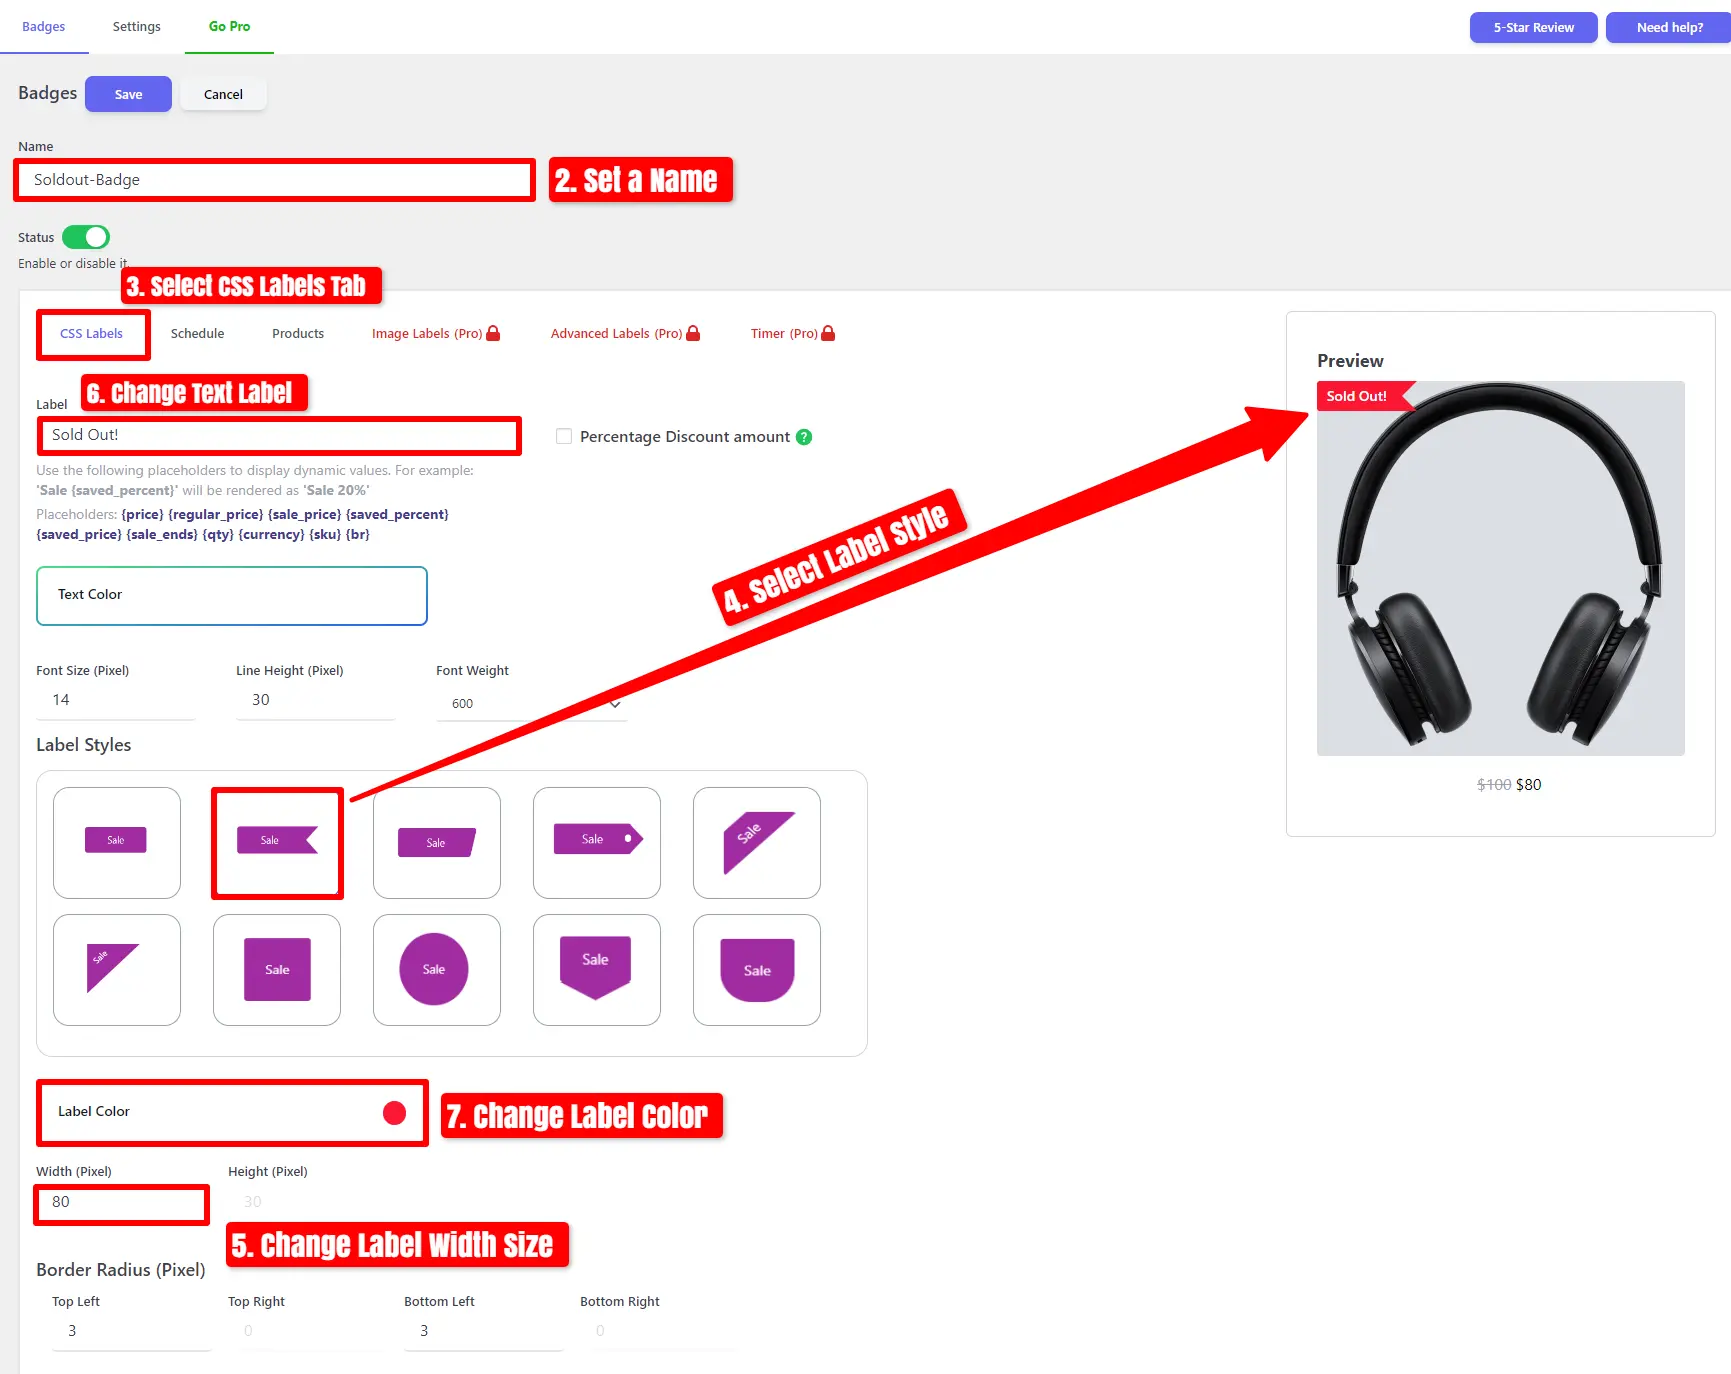
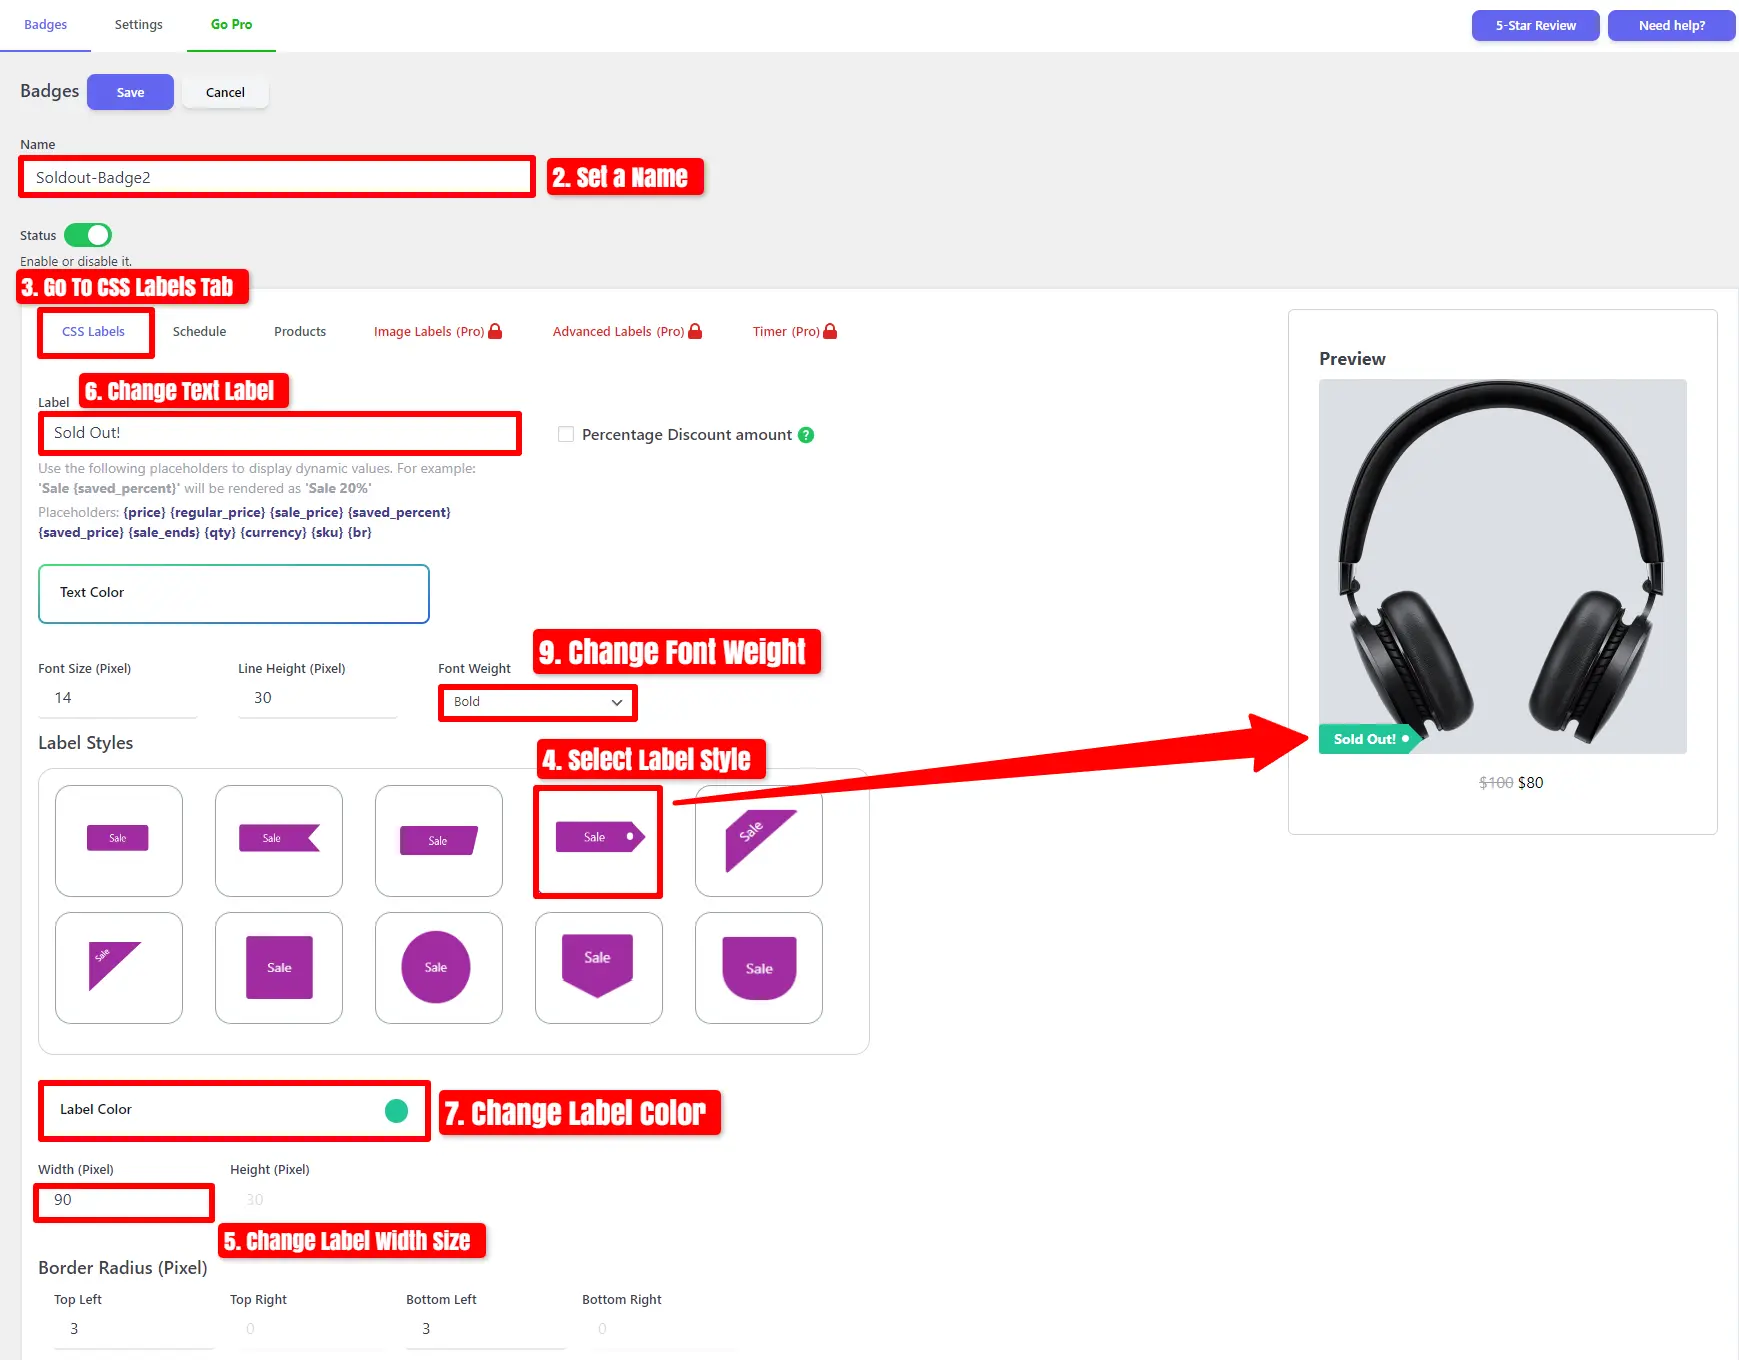
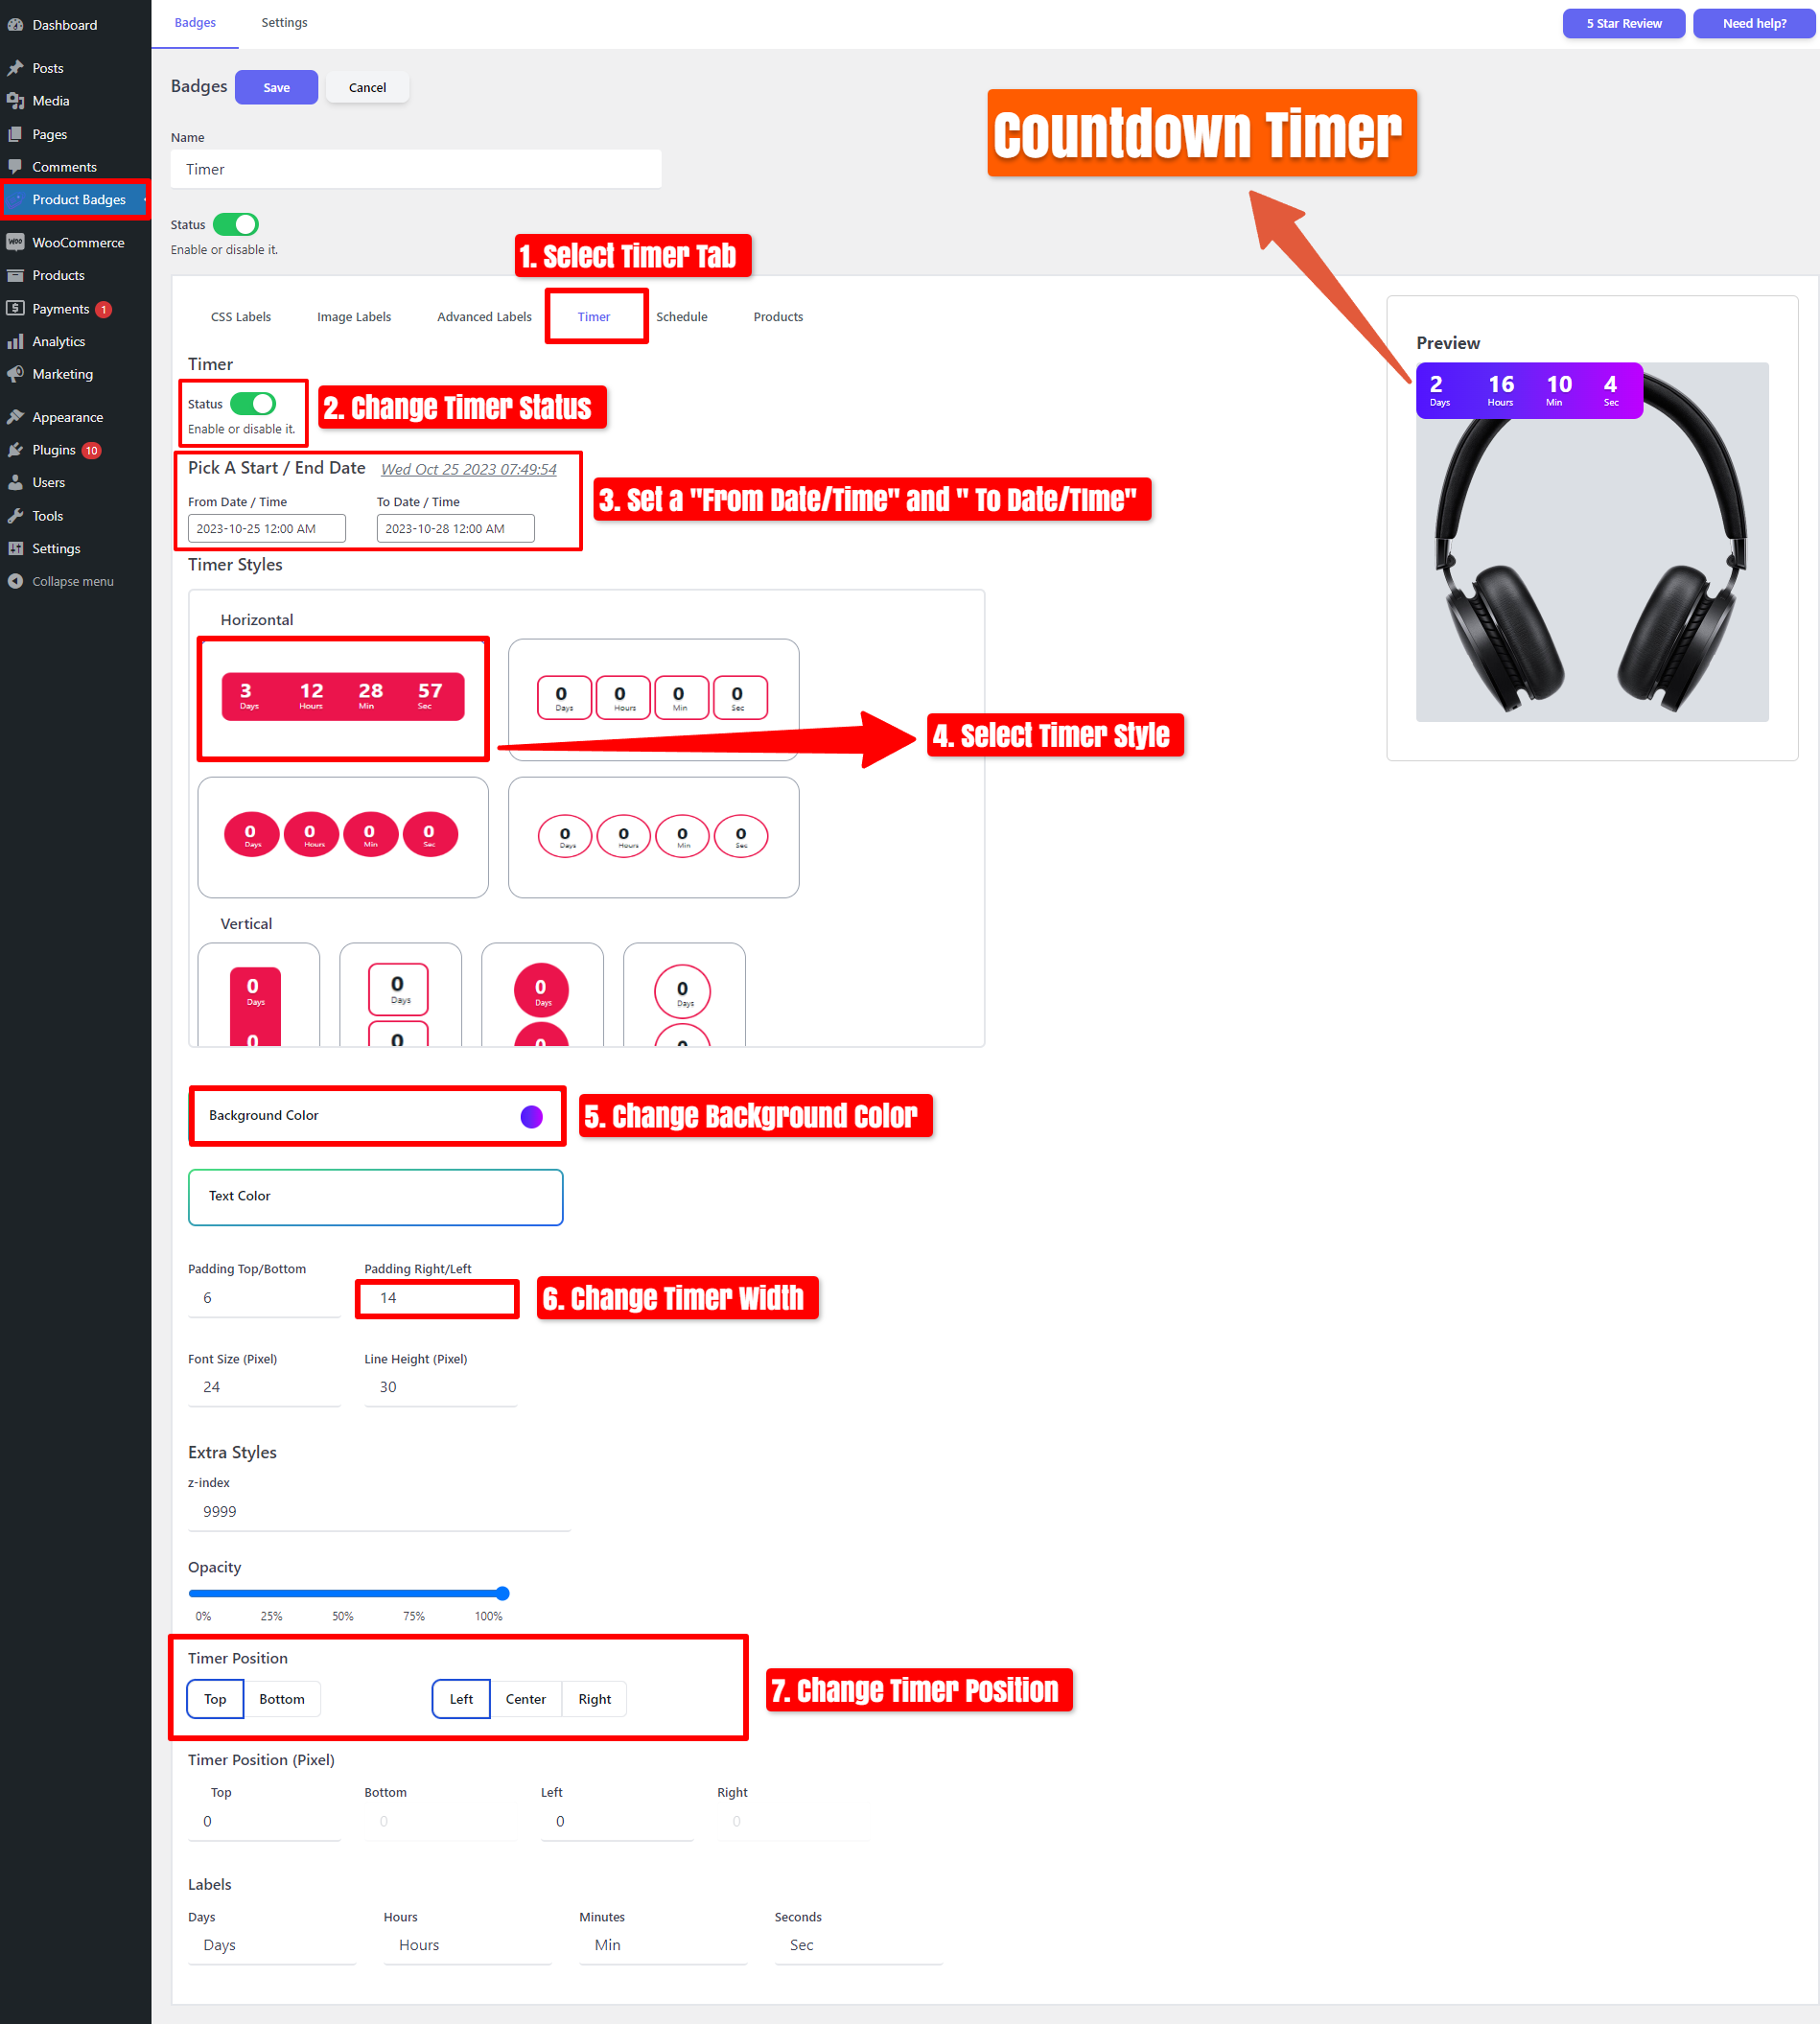
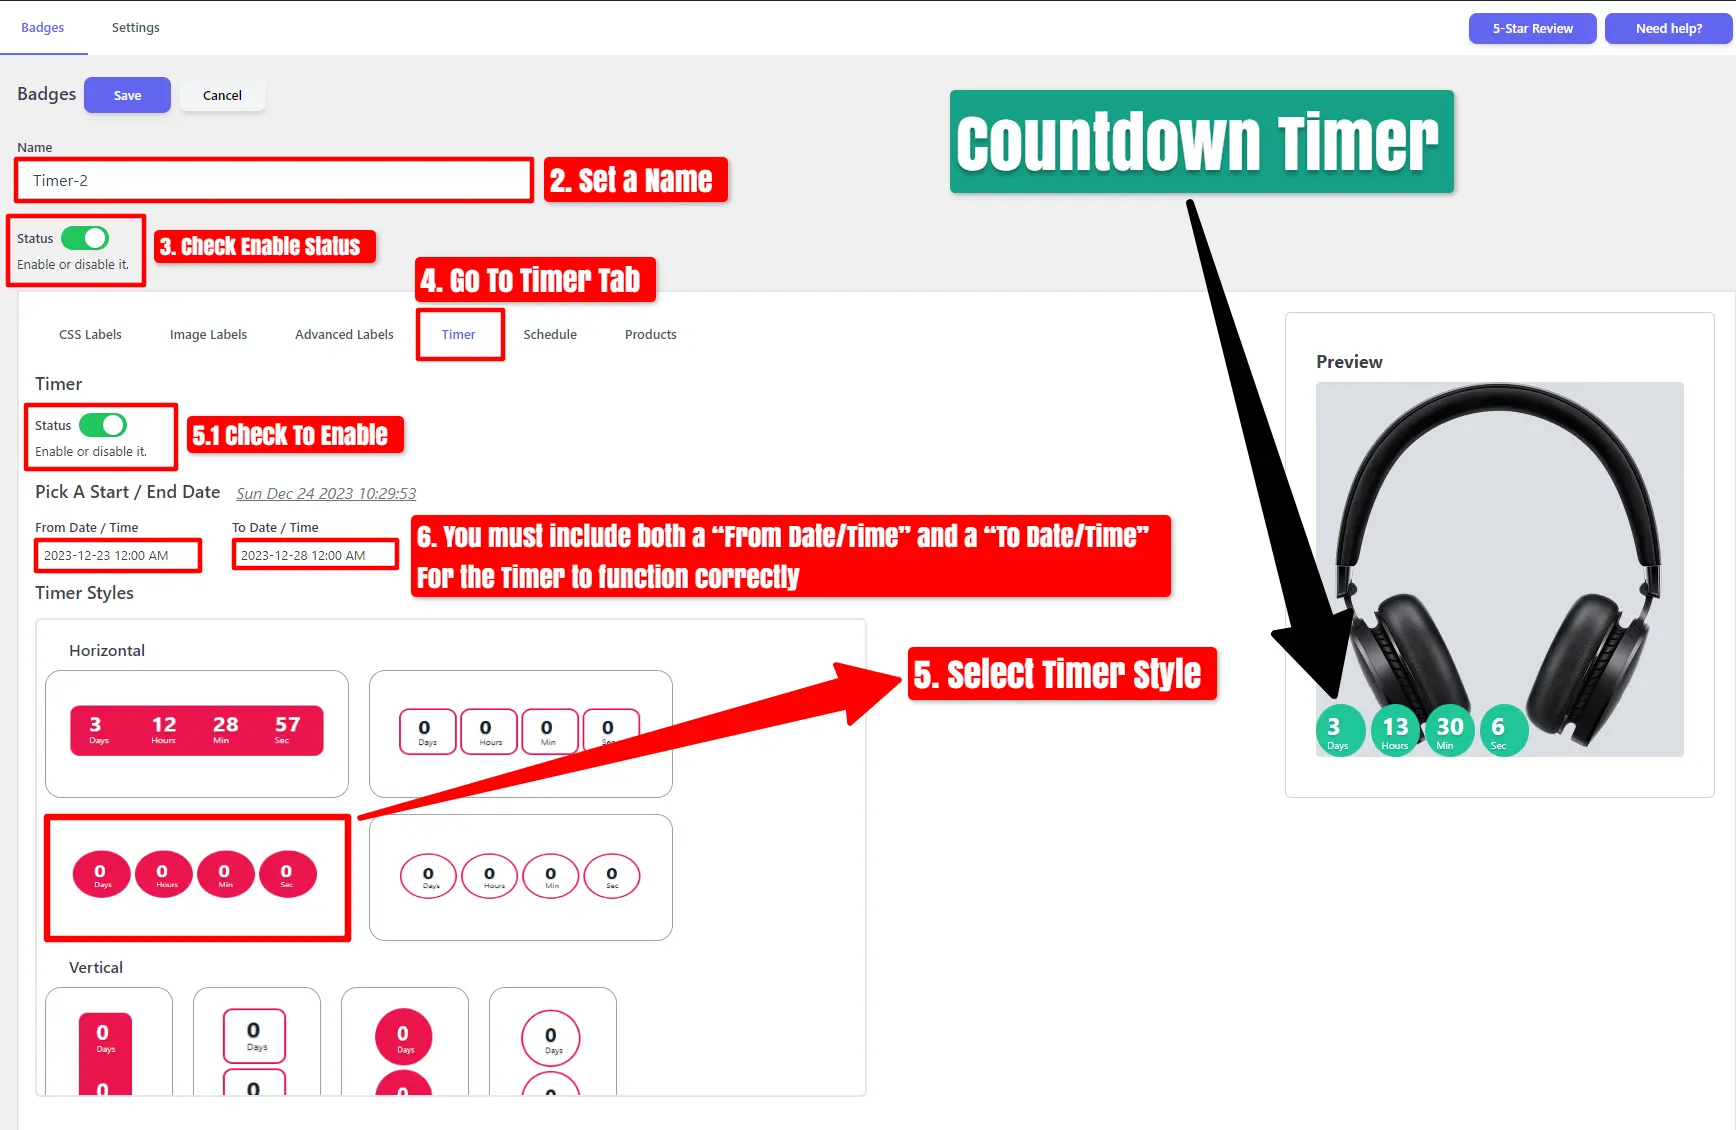
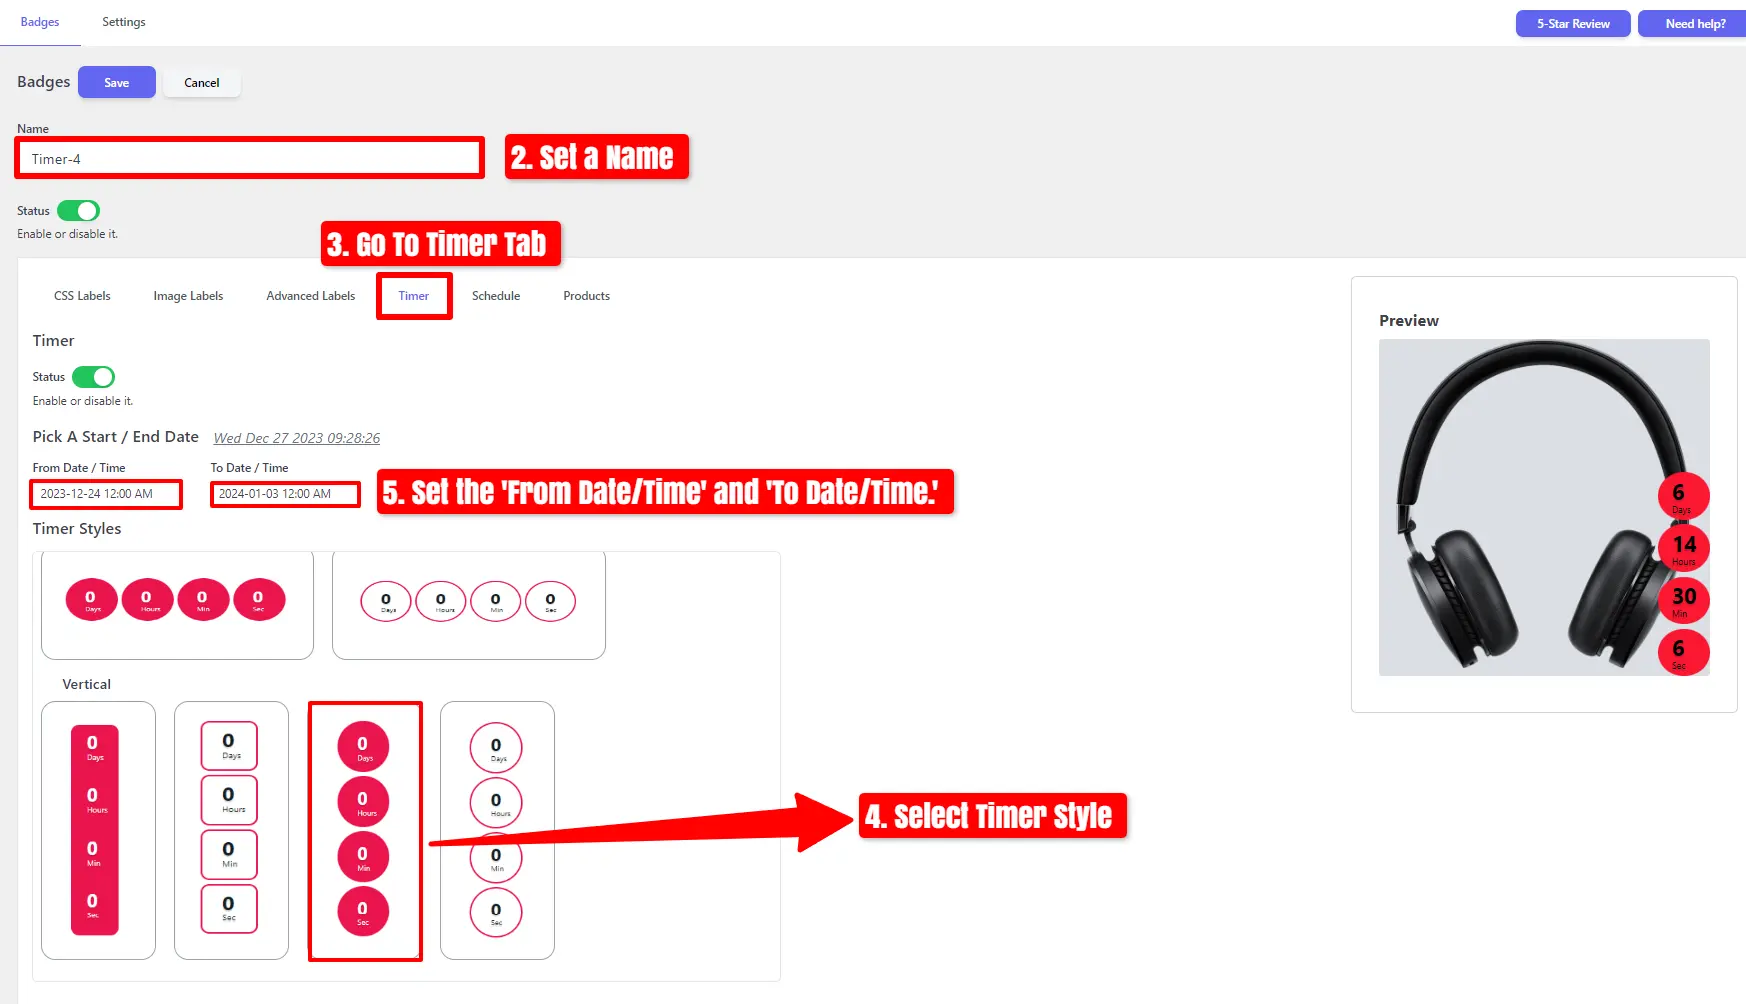
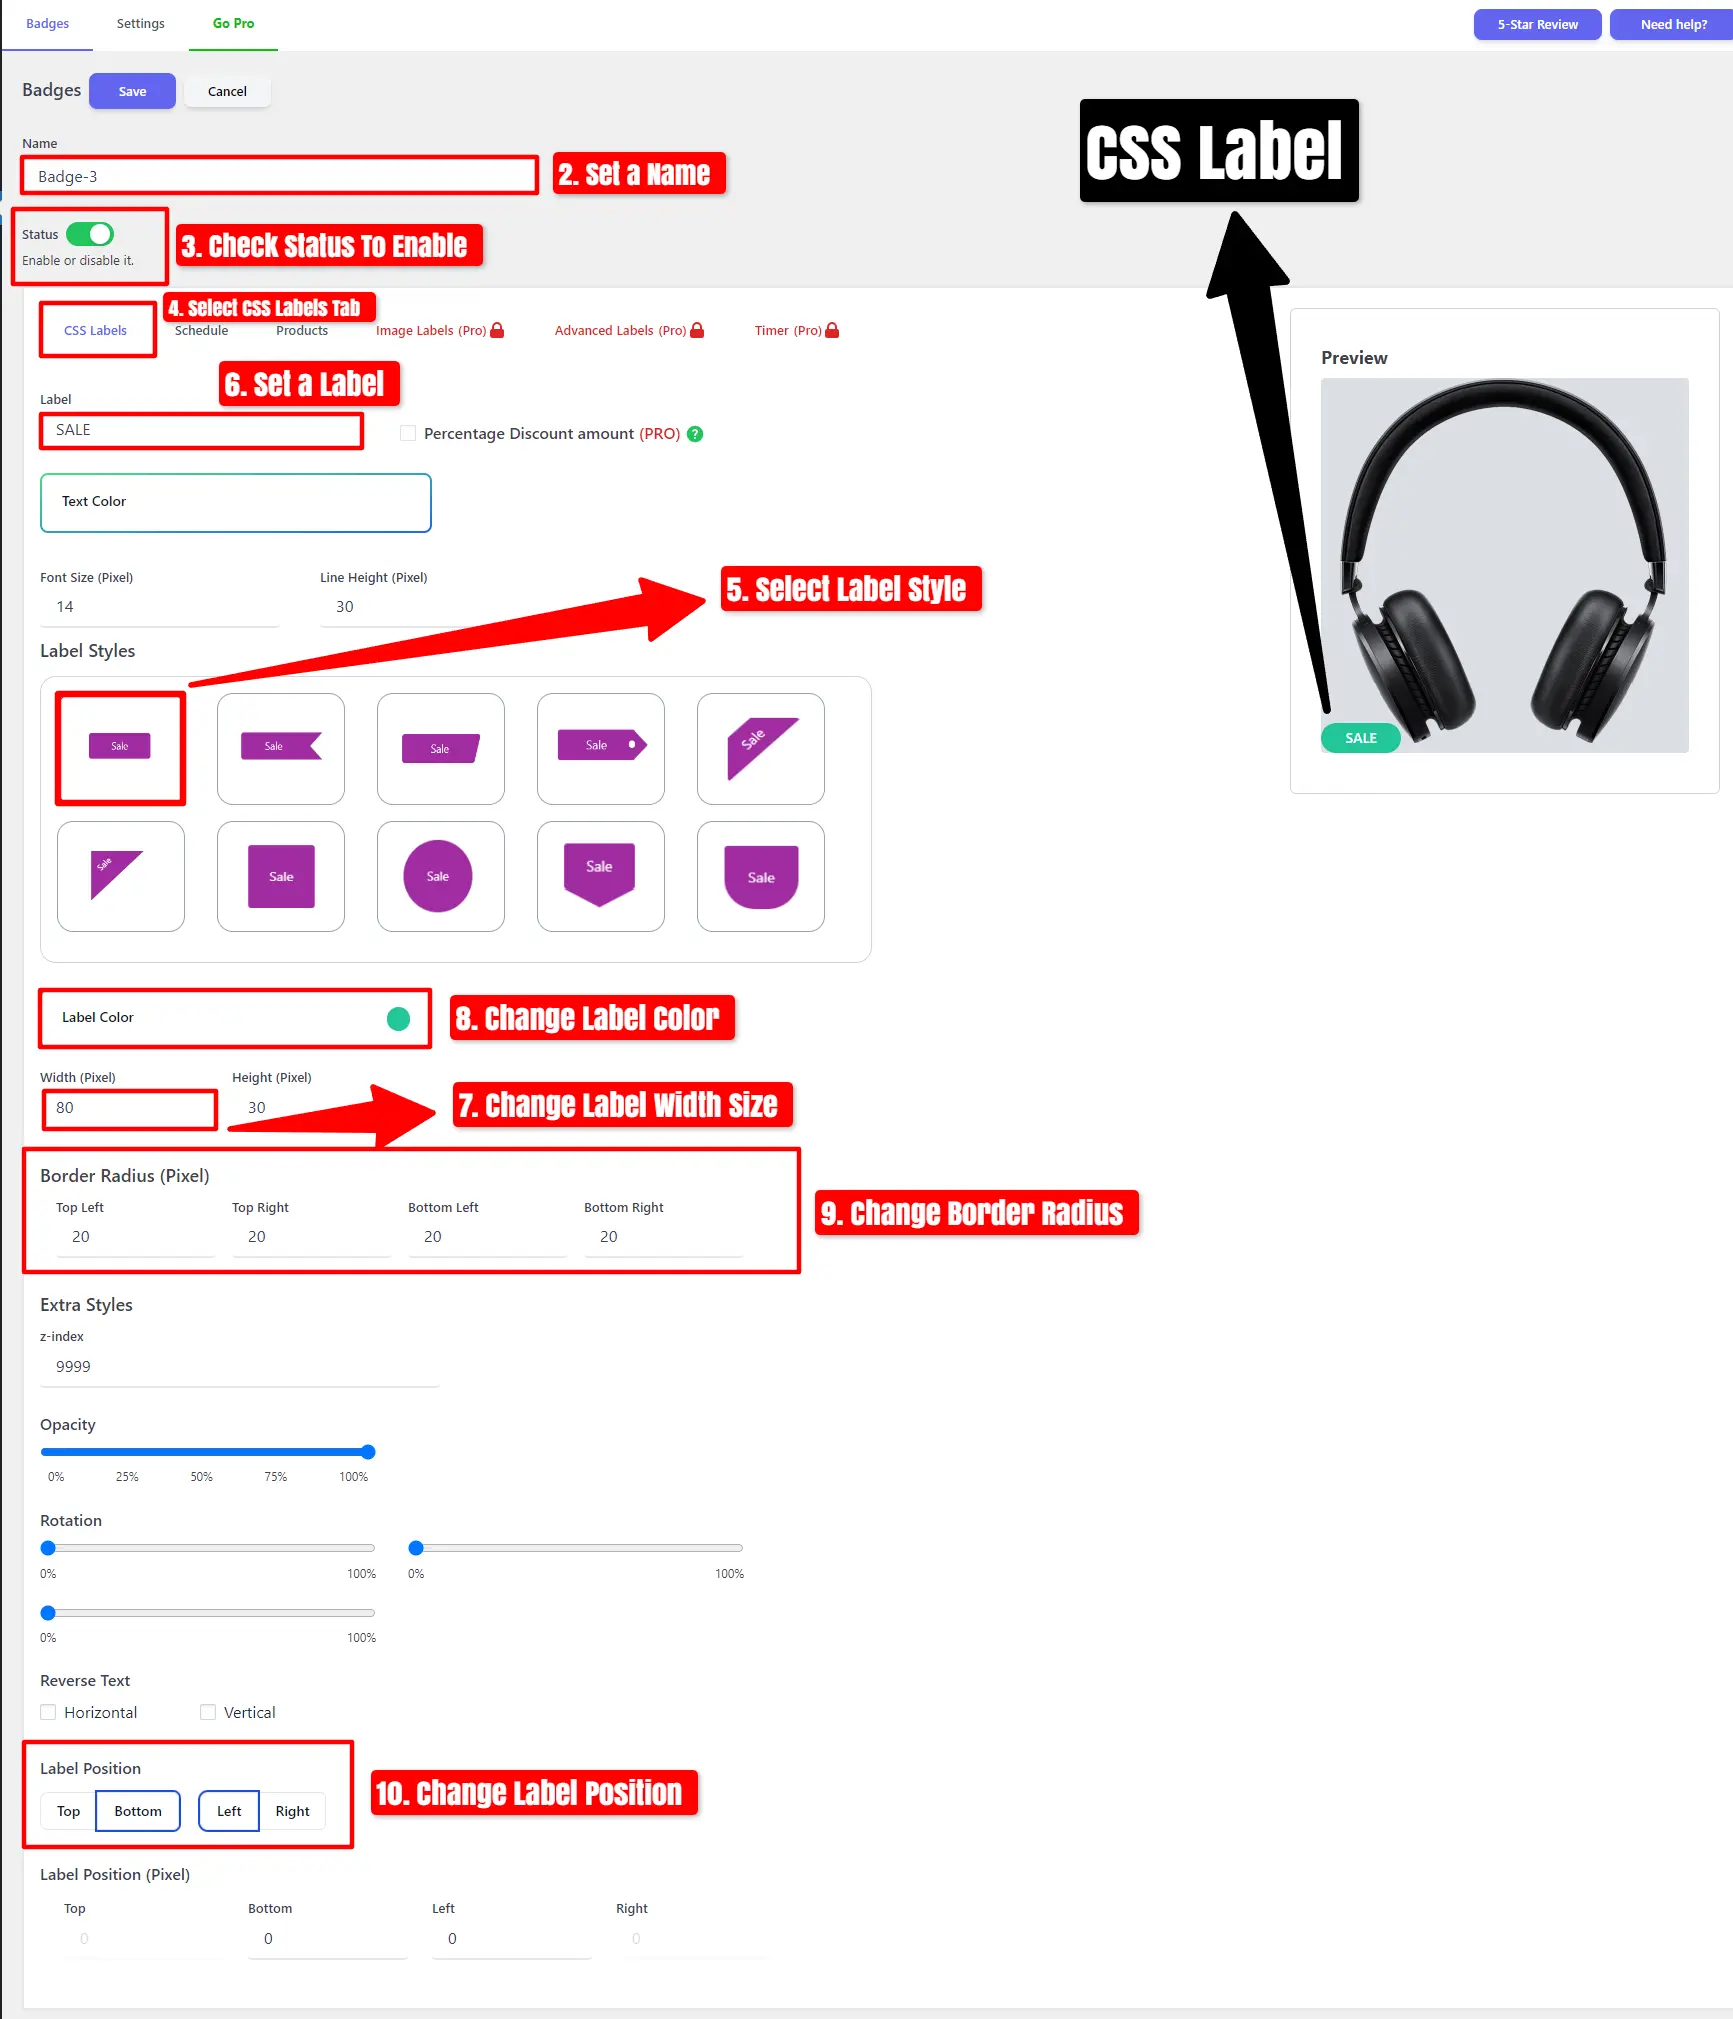
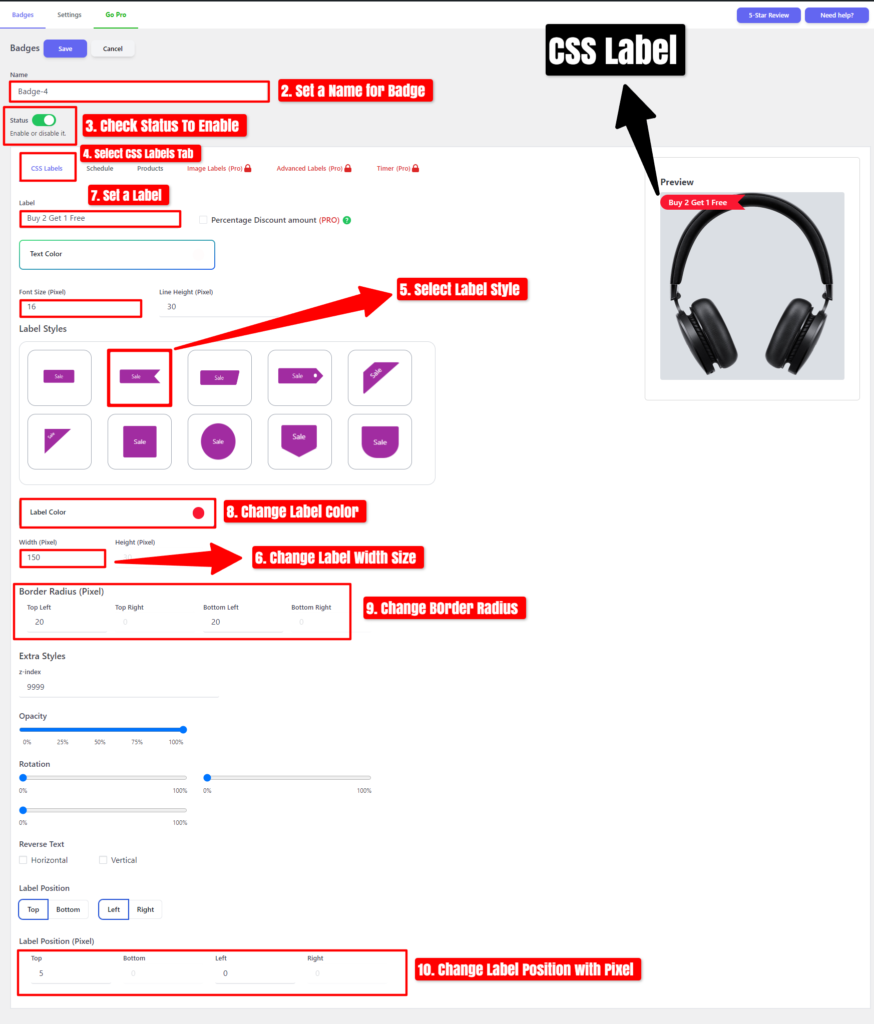
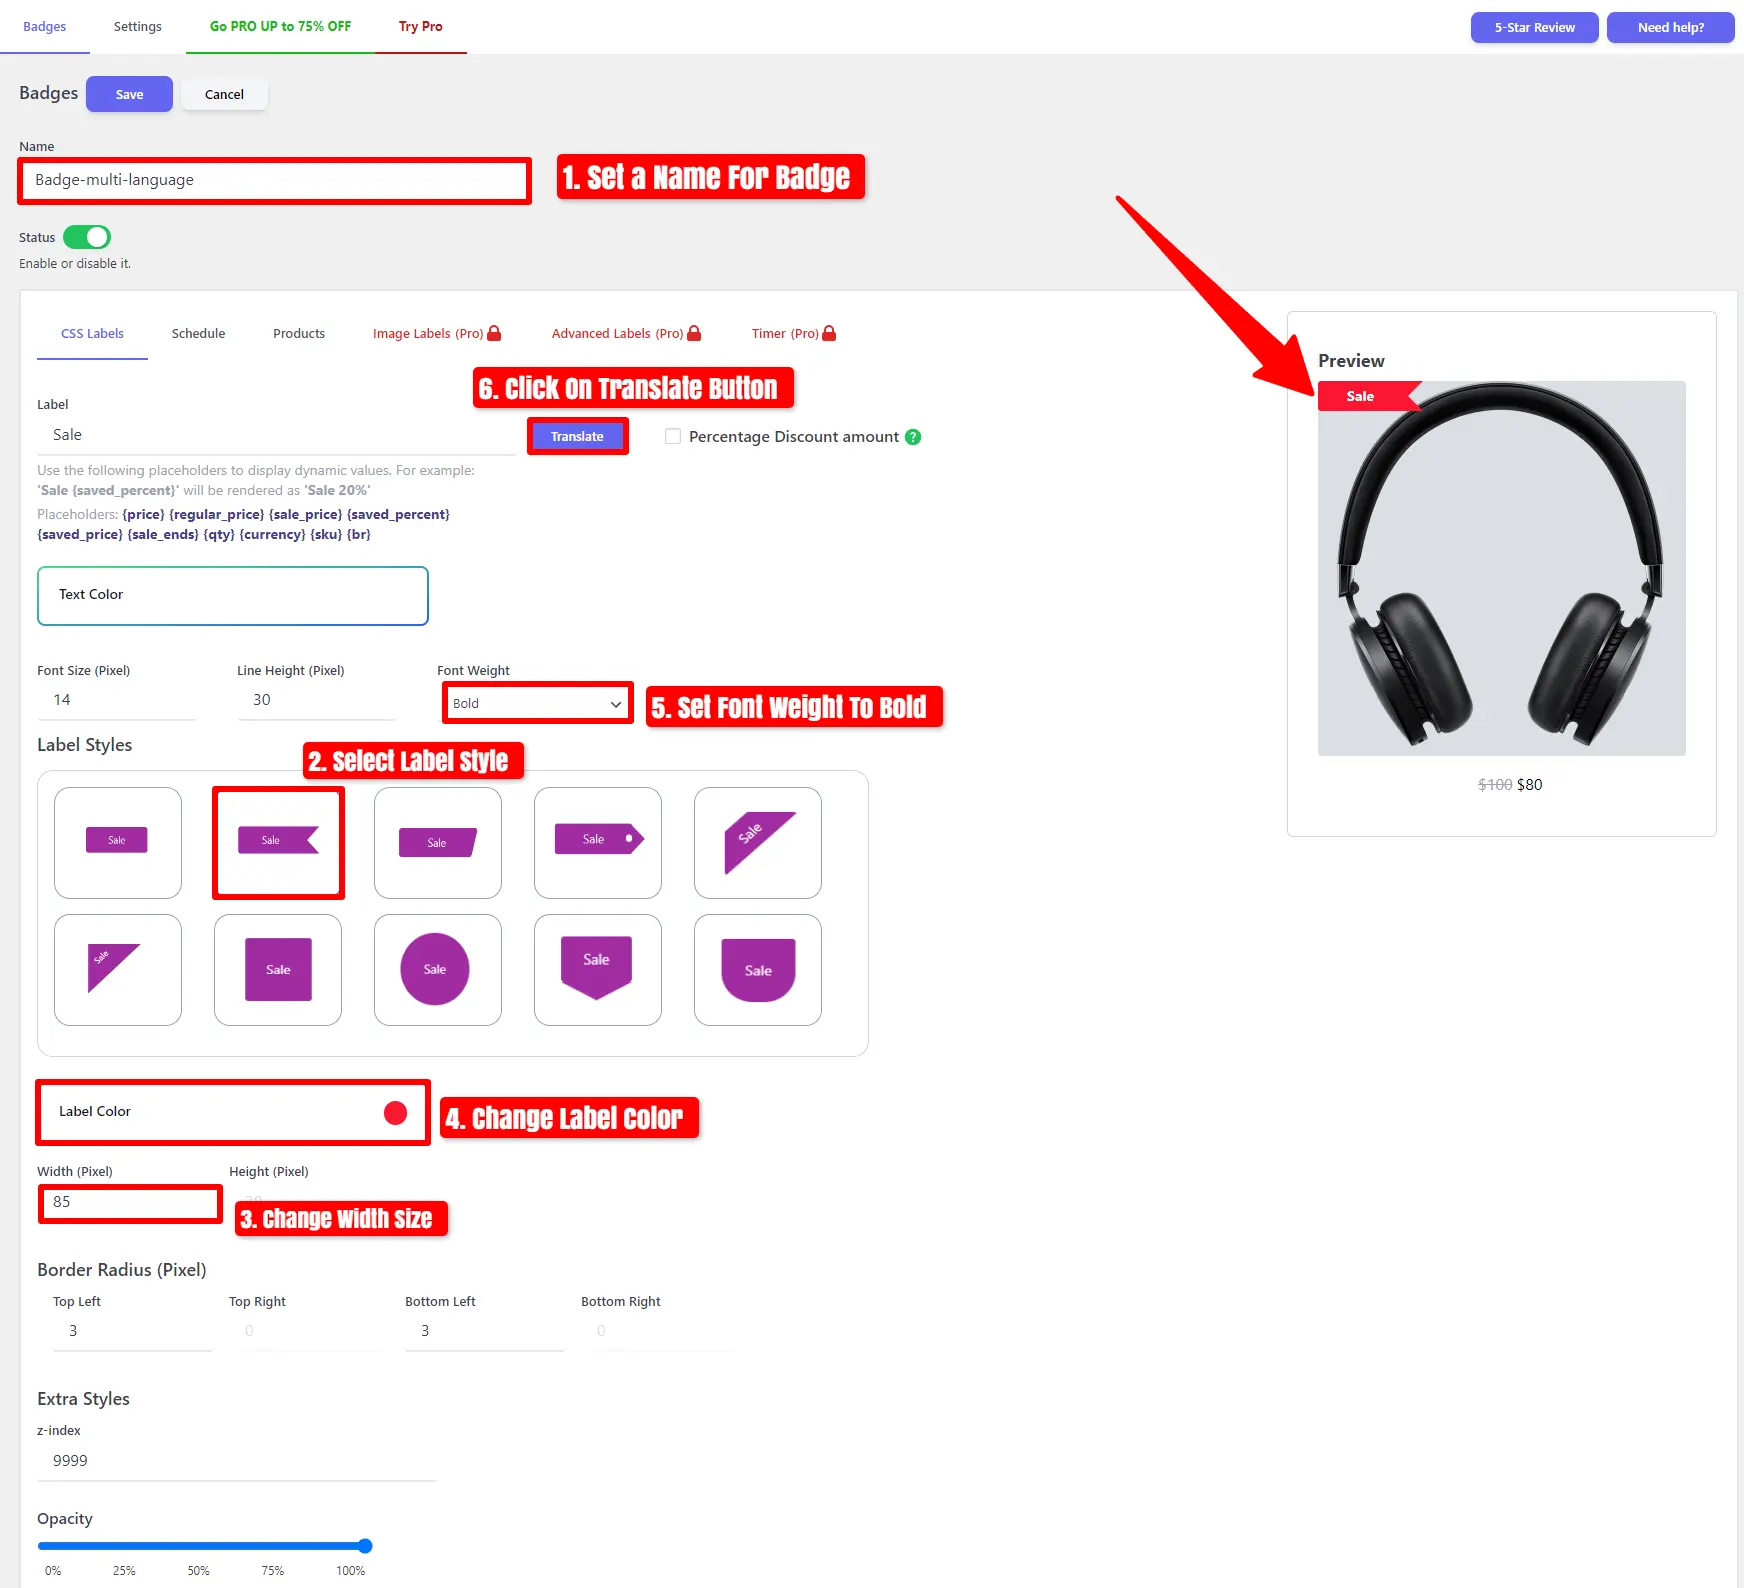
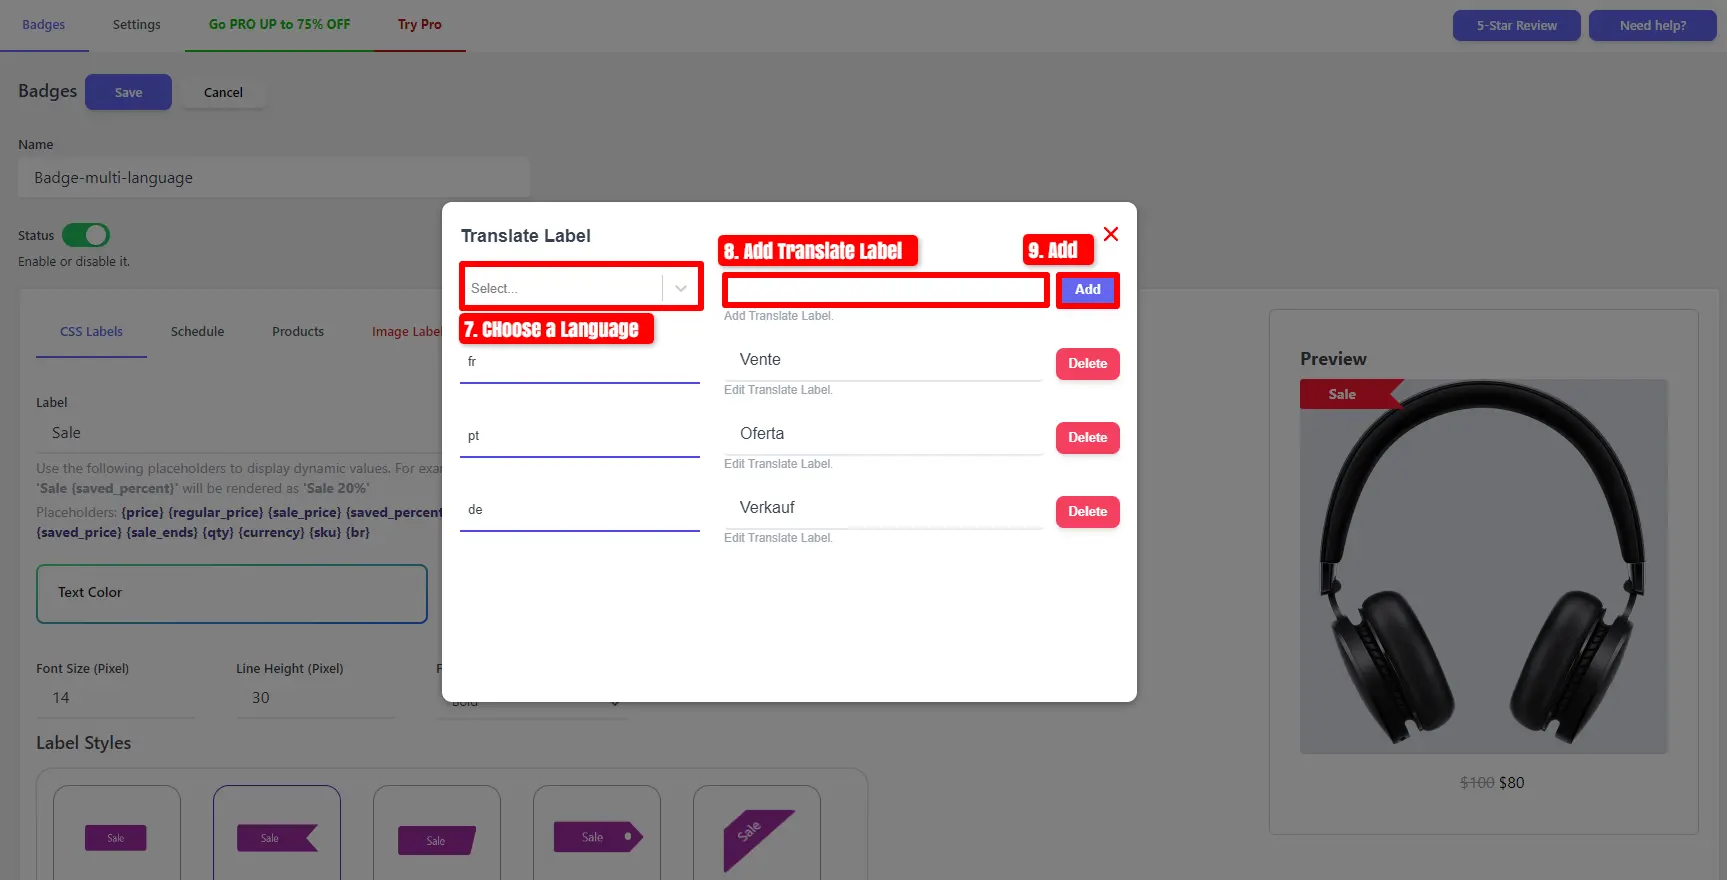
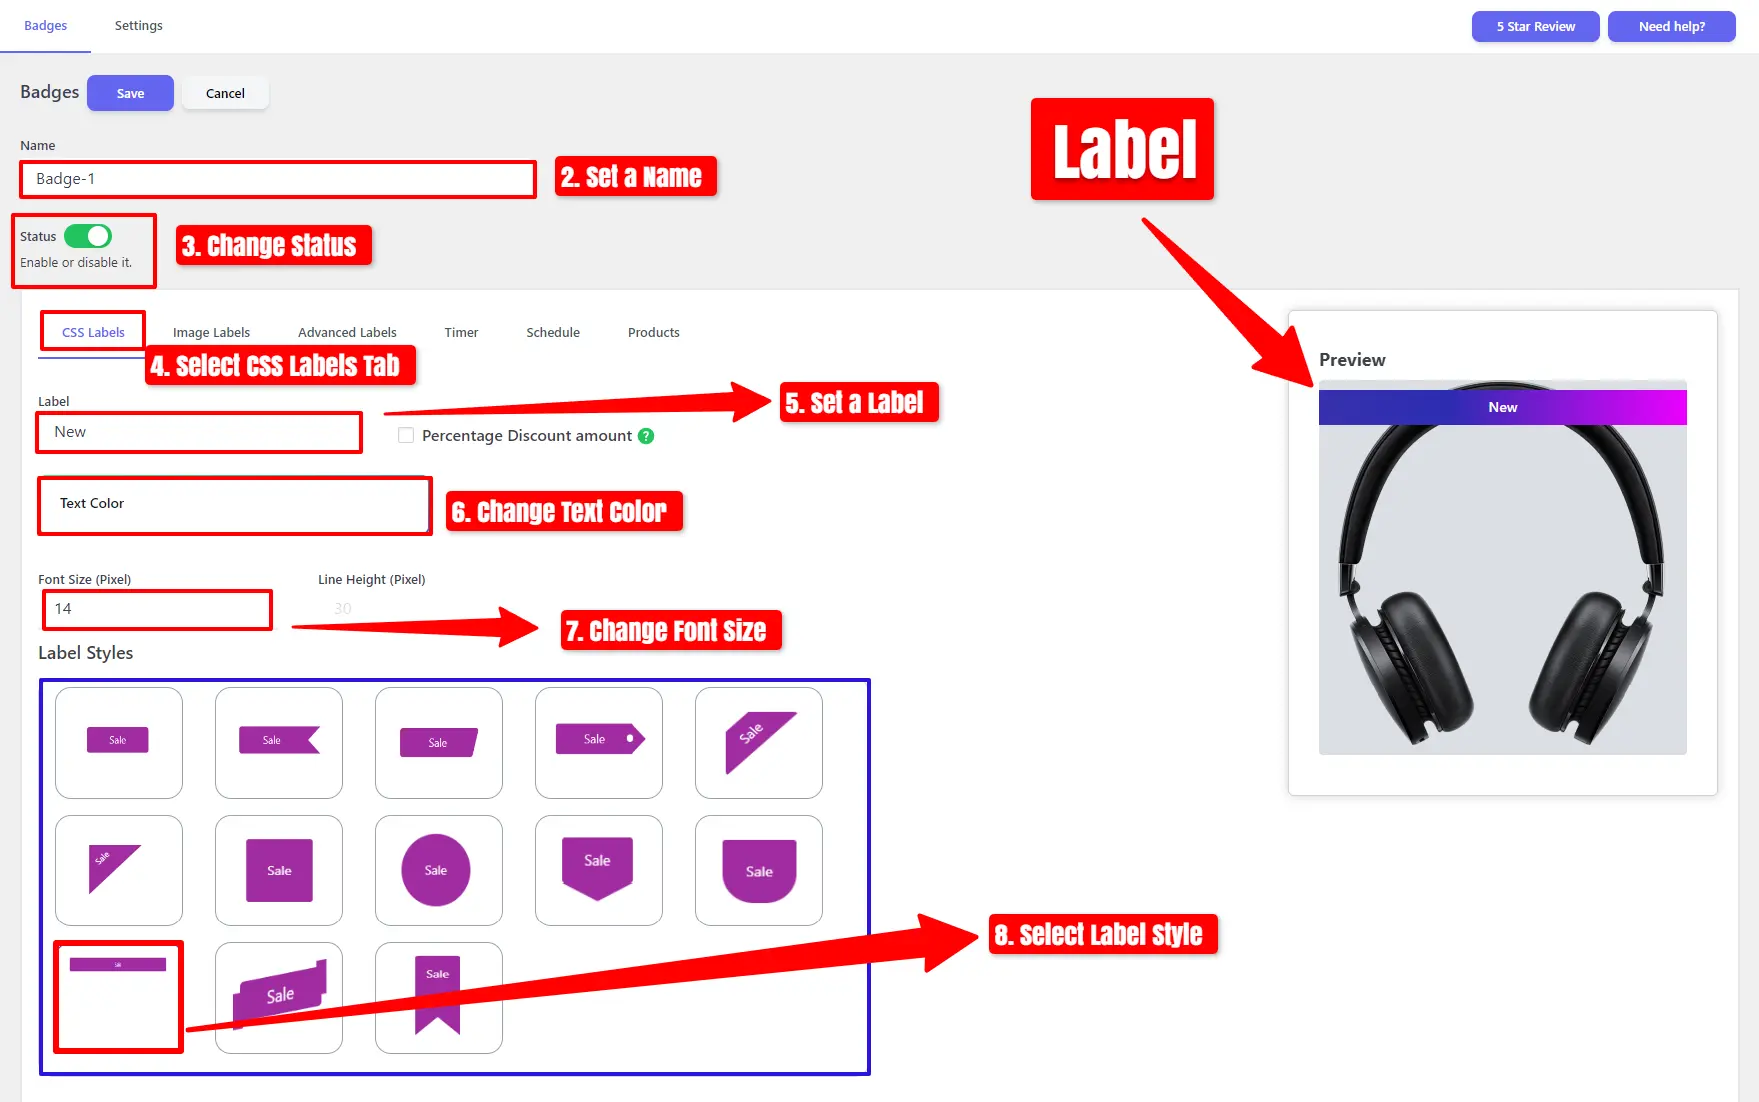
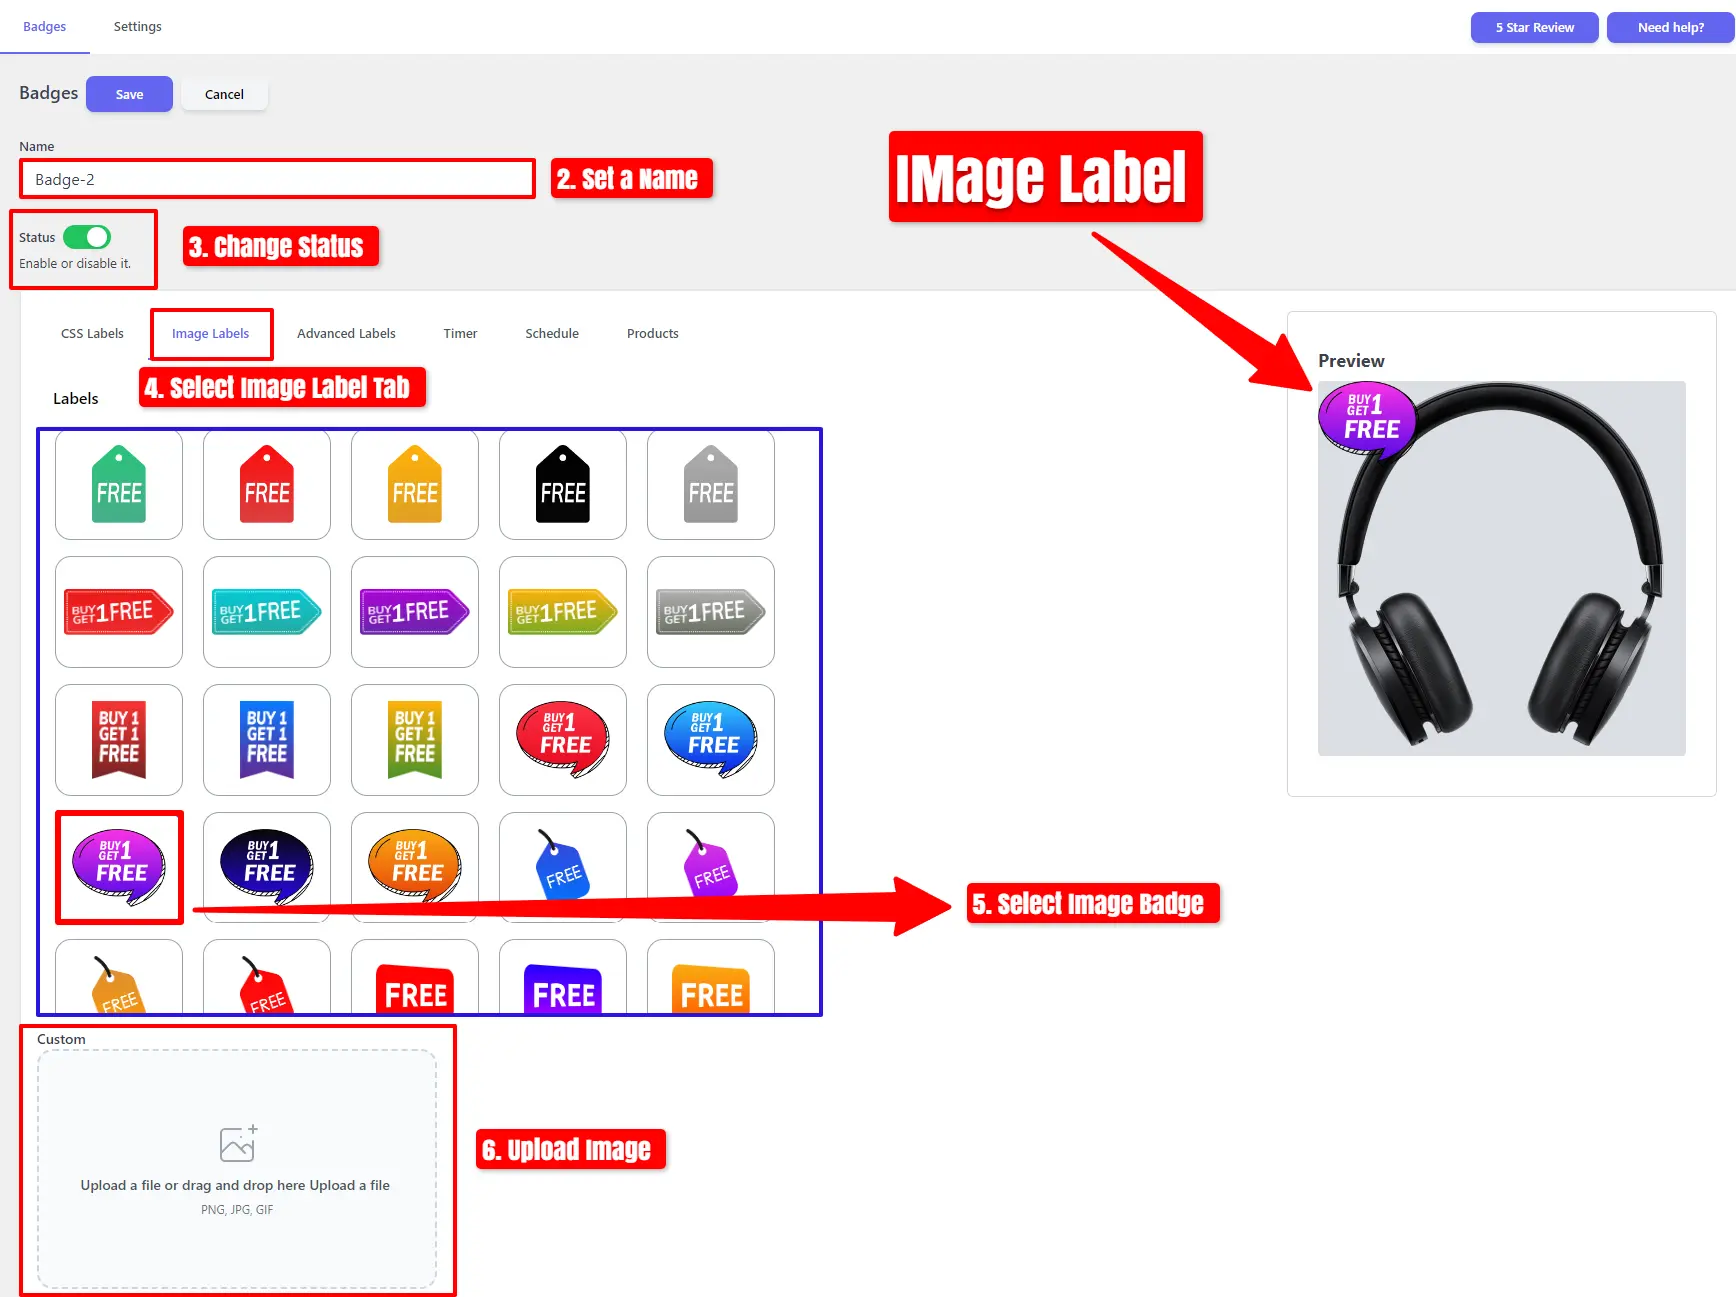
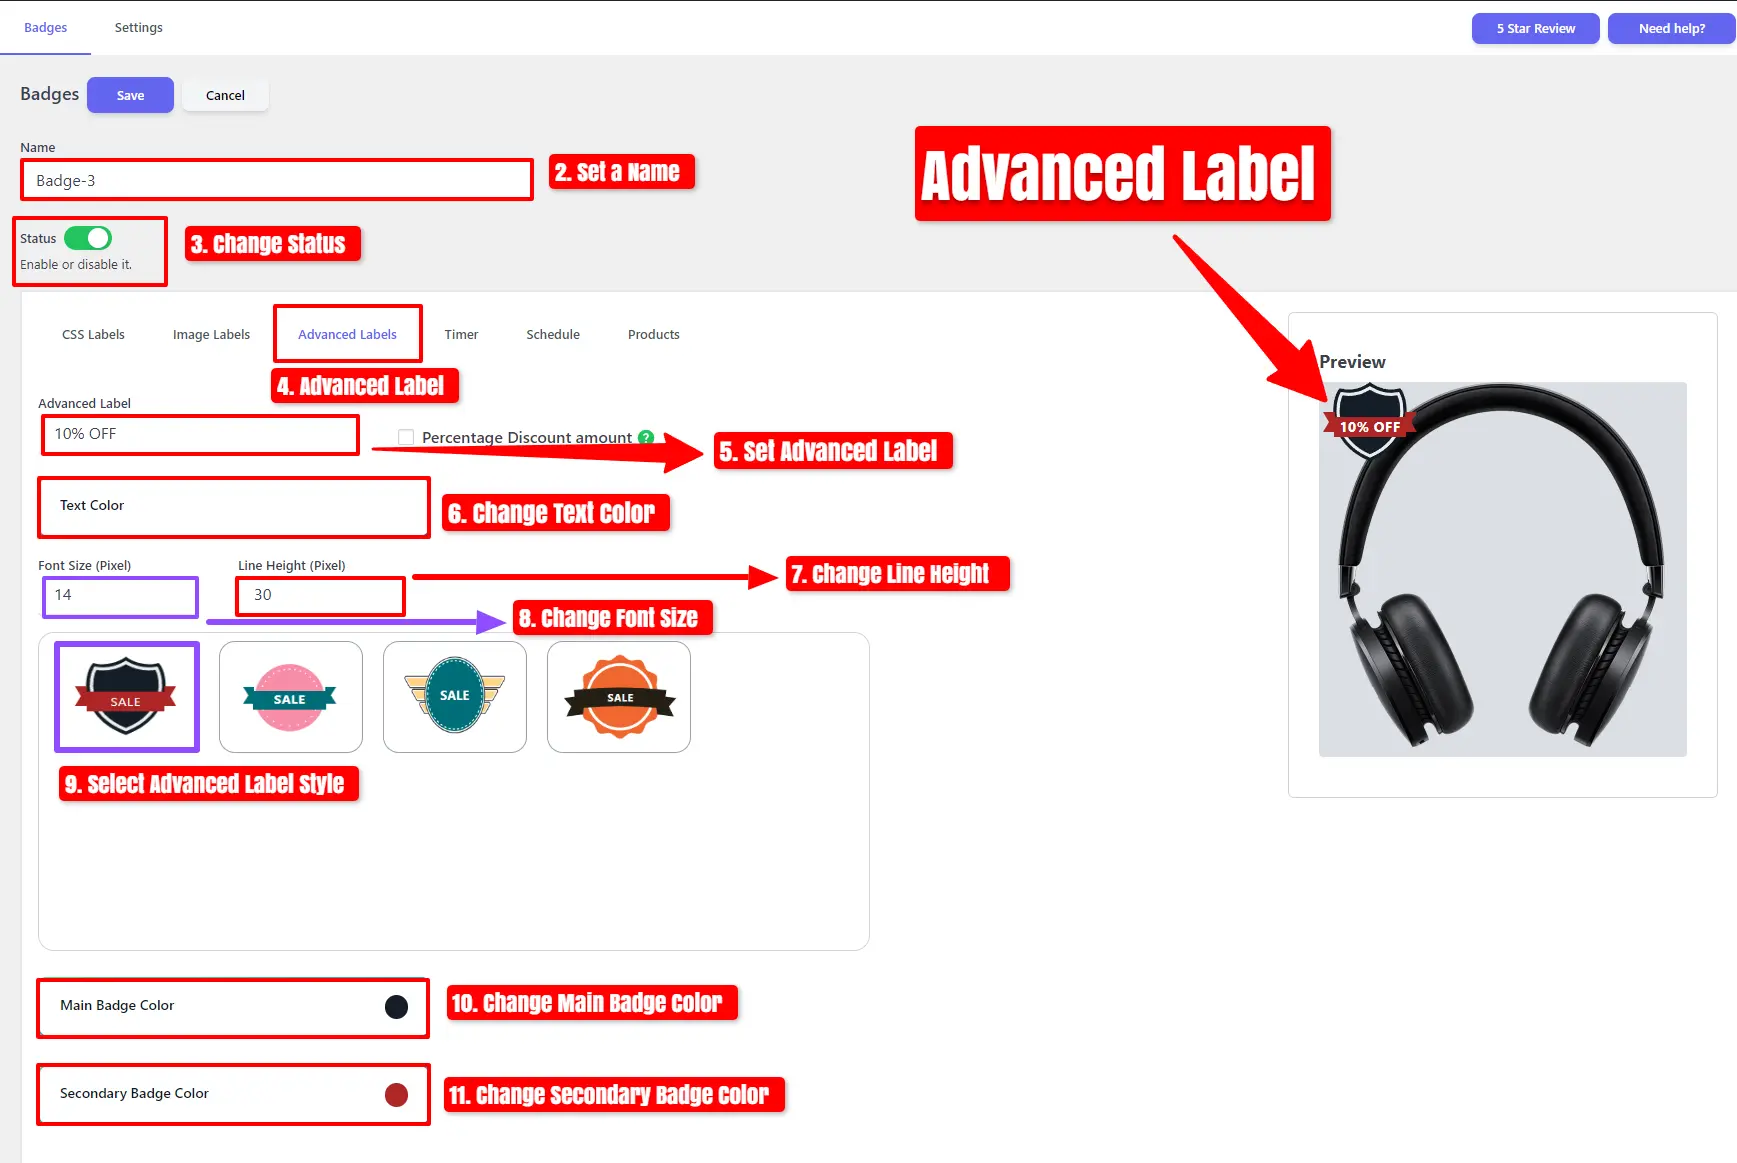
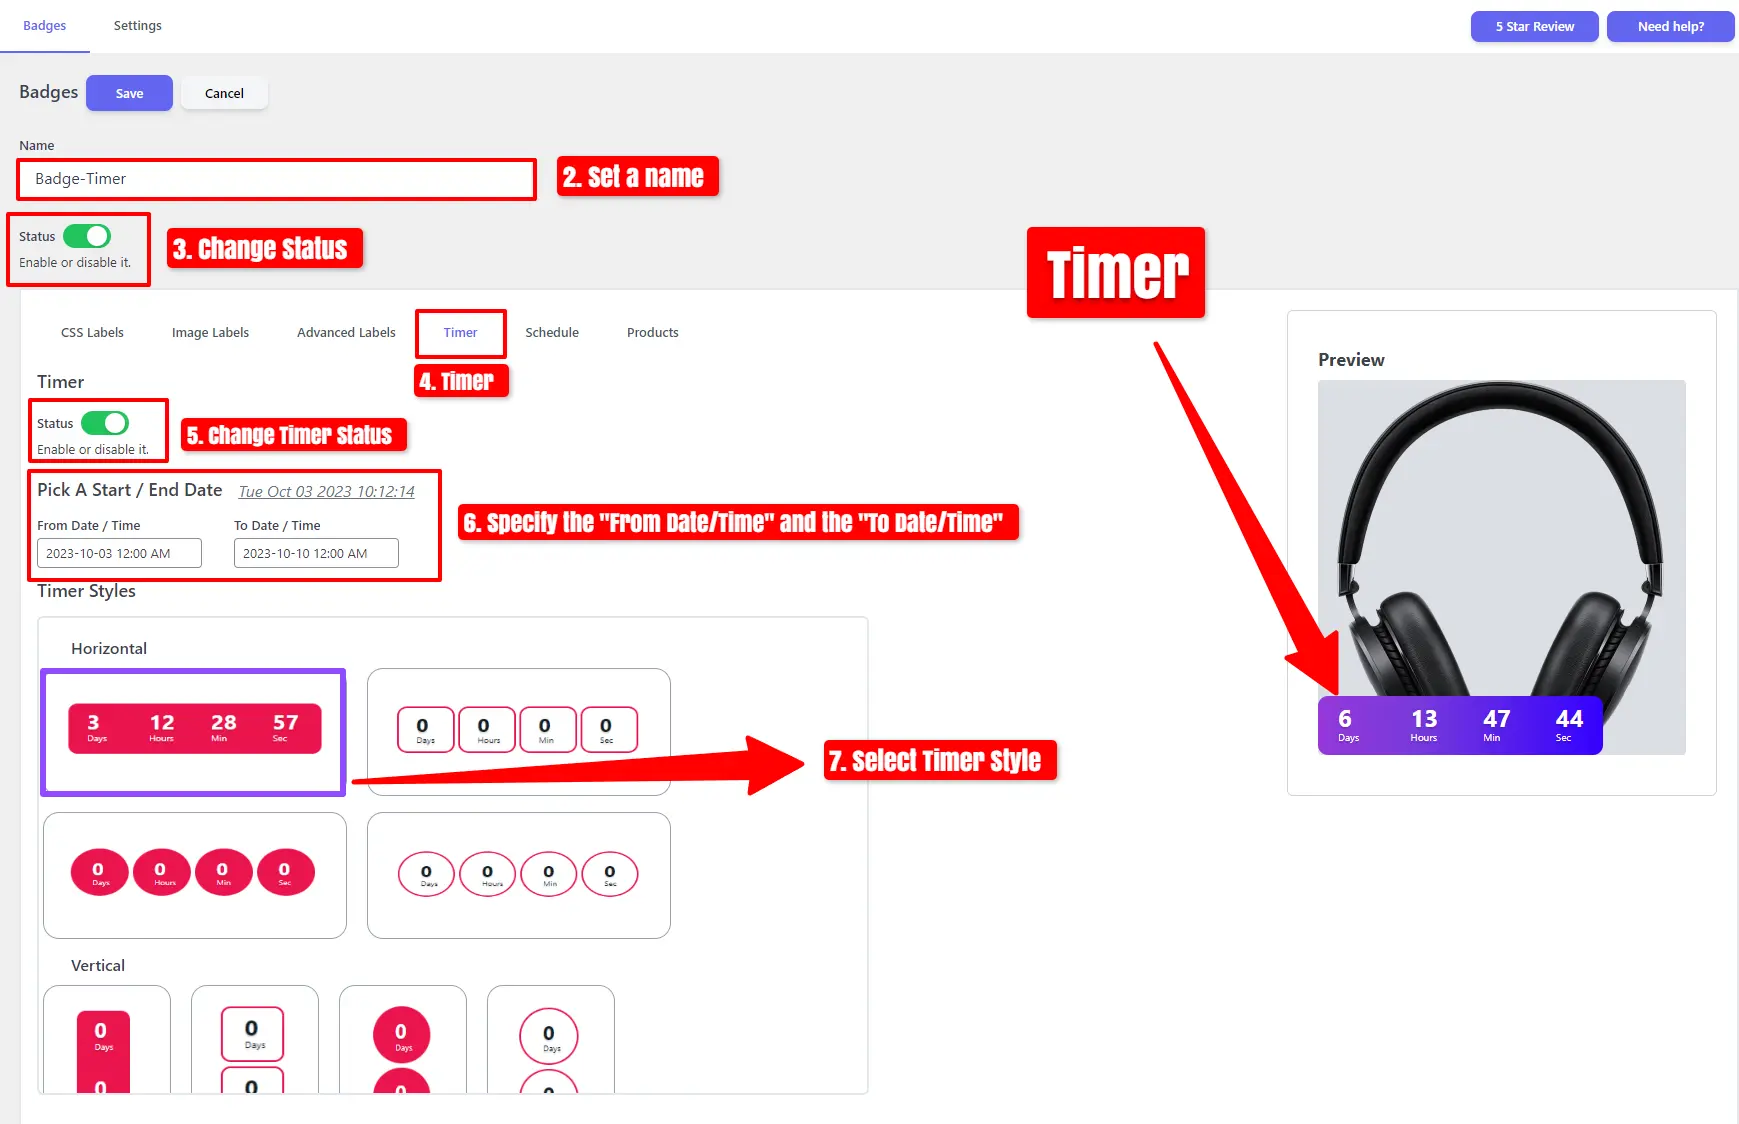
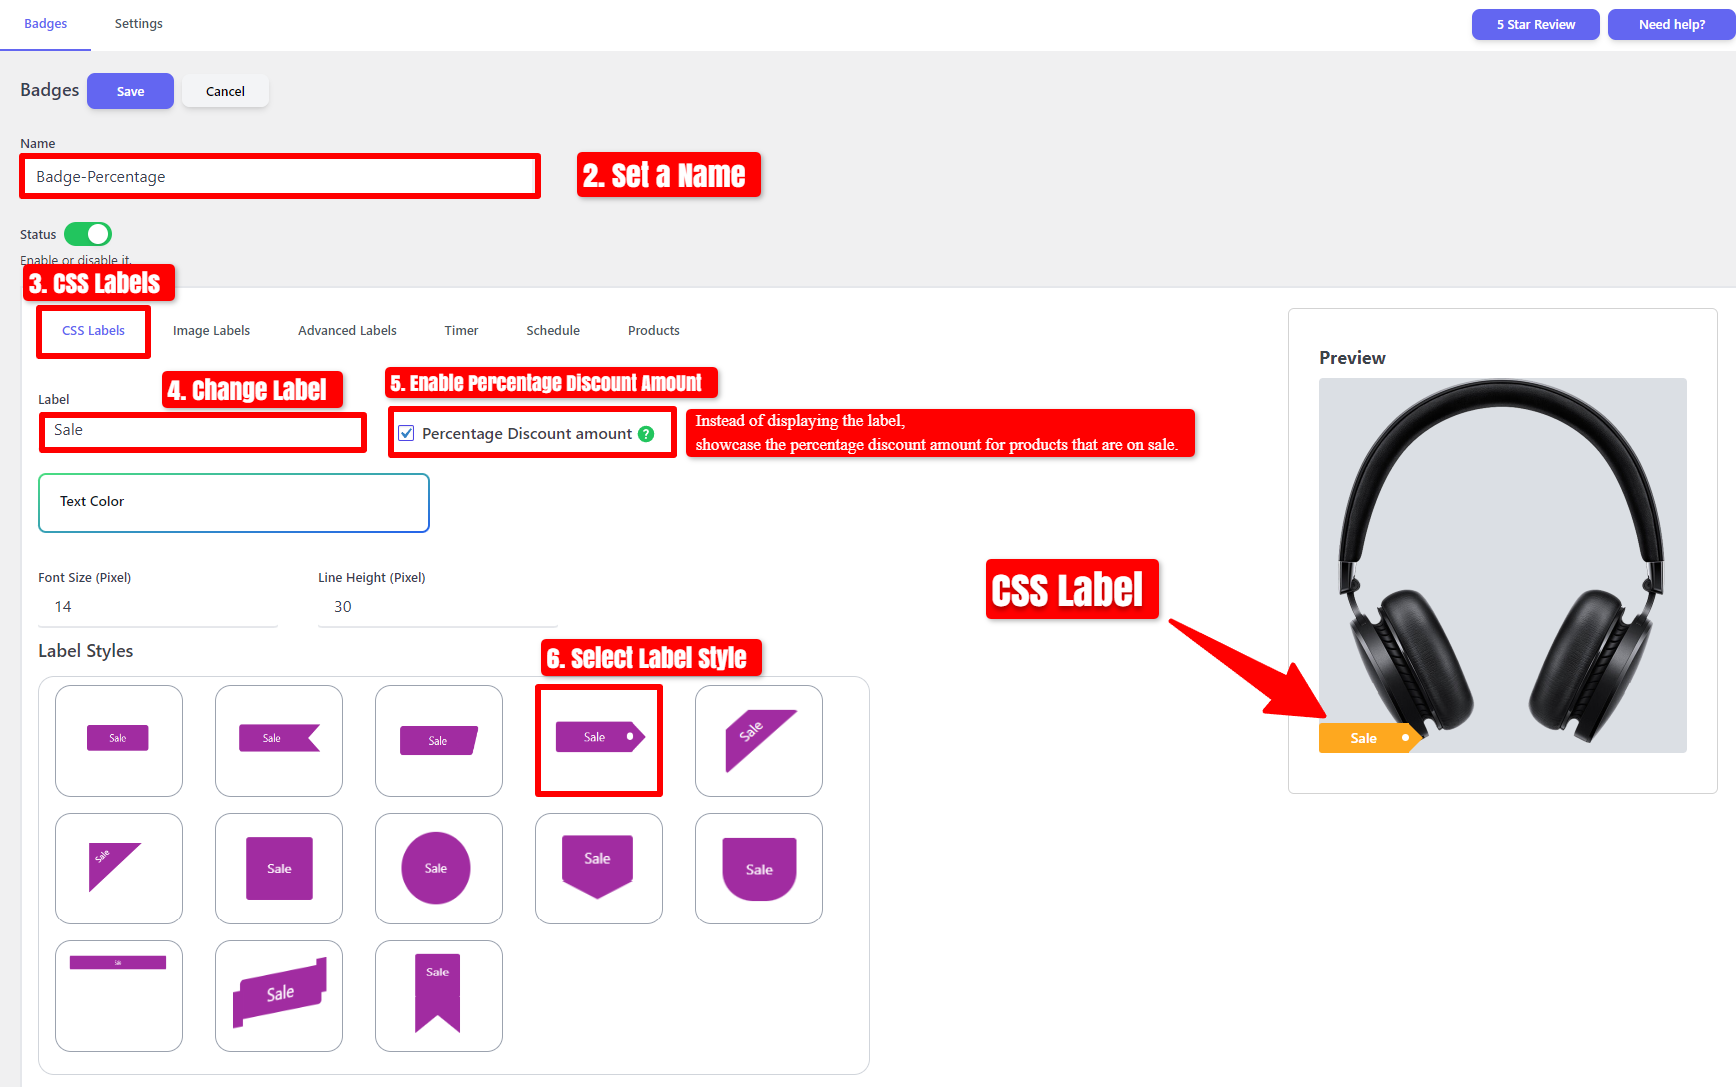
- Set a Name for your badge and check its status to enable it.
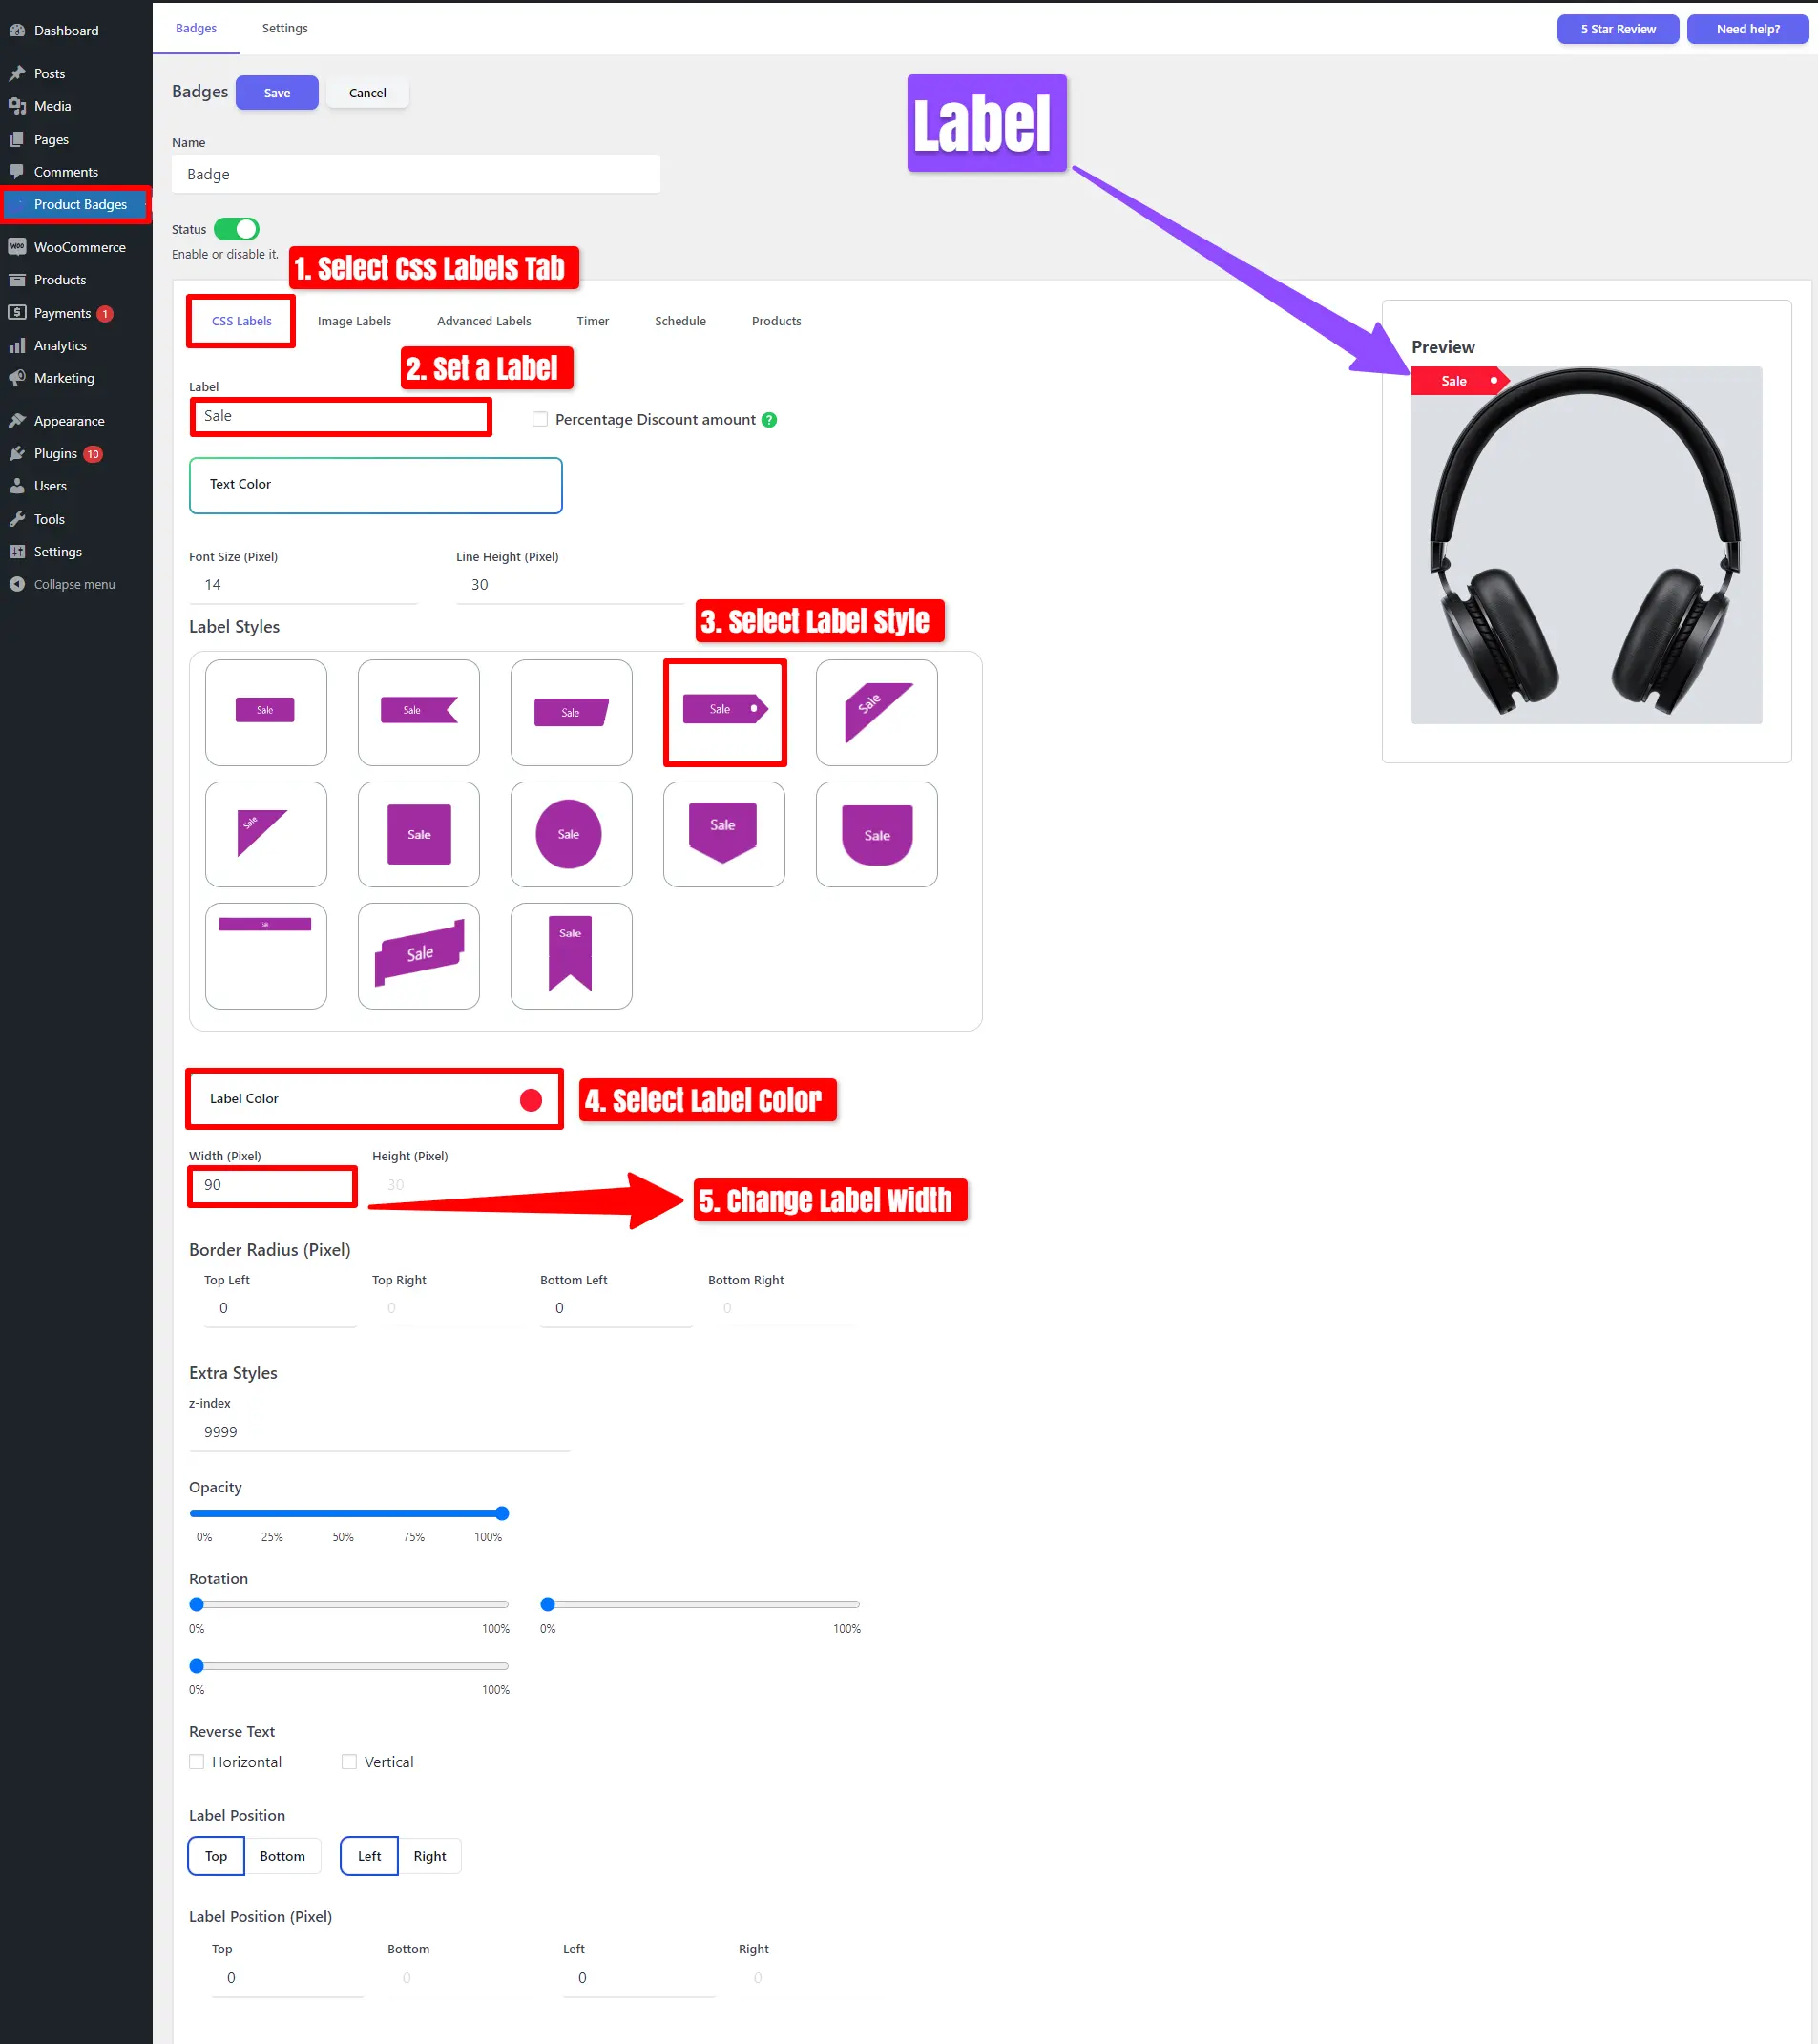
- Navigate to the CSS Labels Tab.
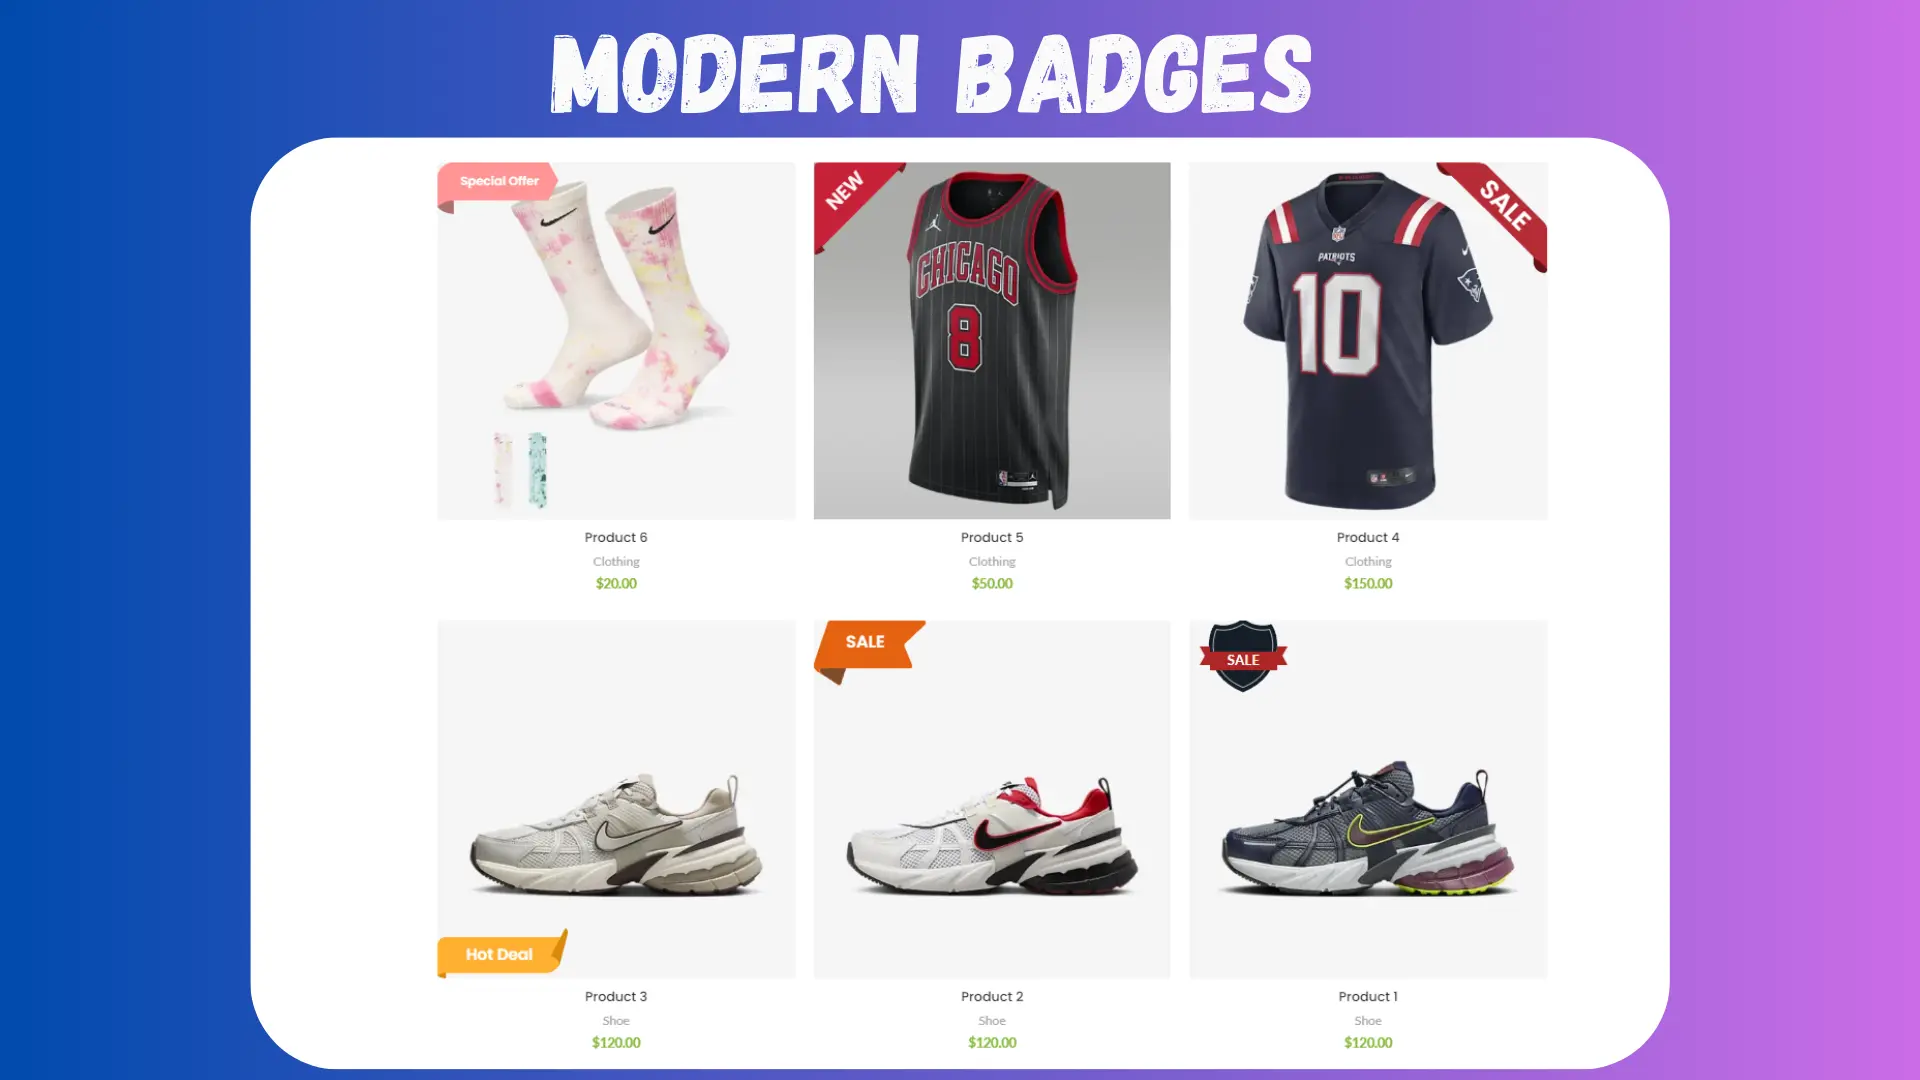
- Choose a label style.
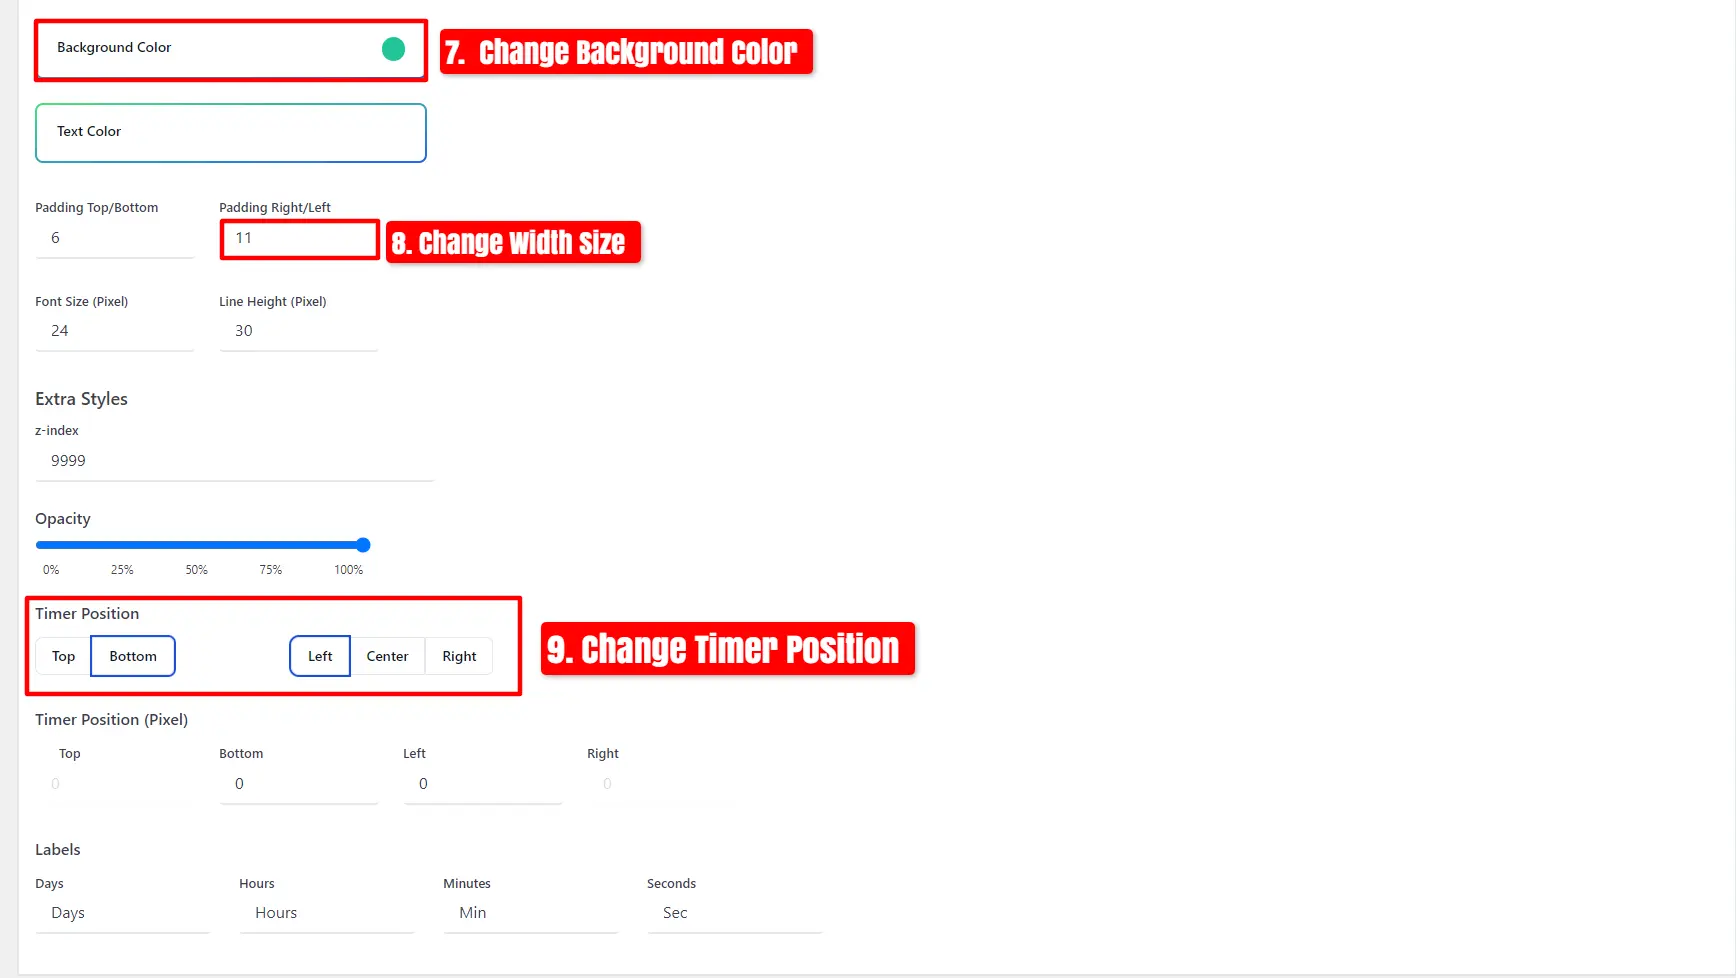
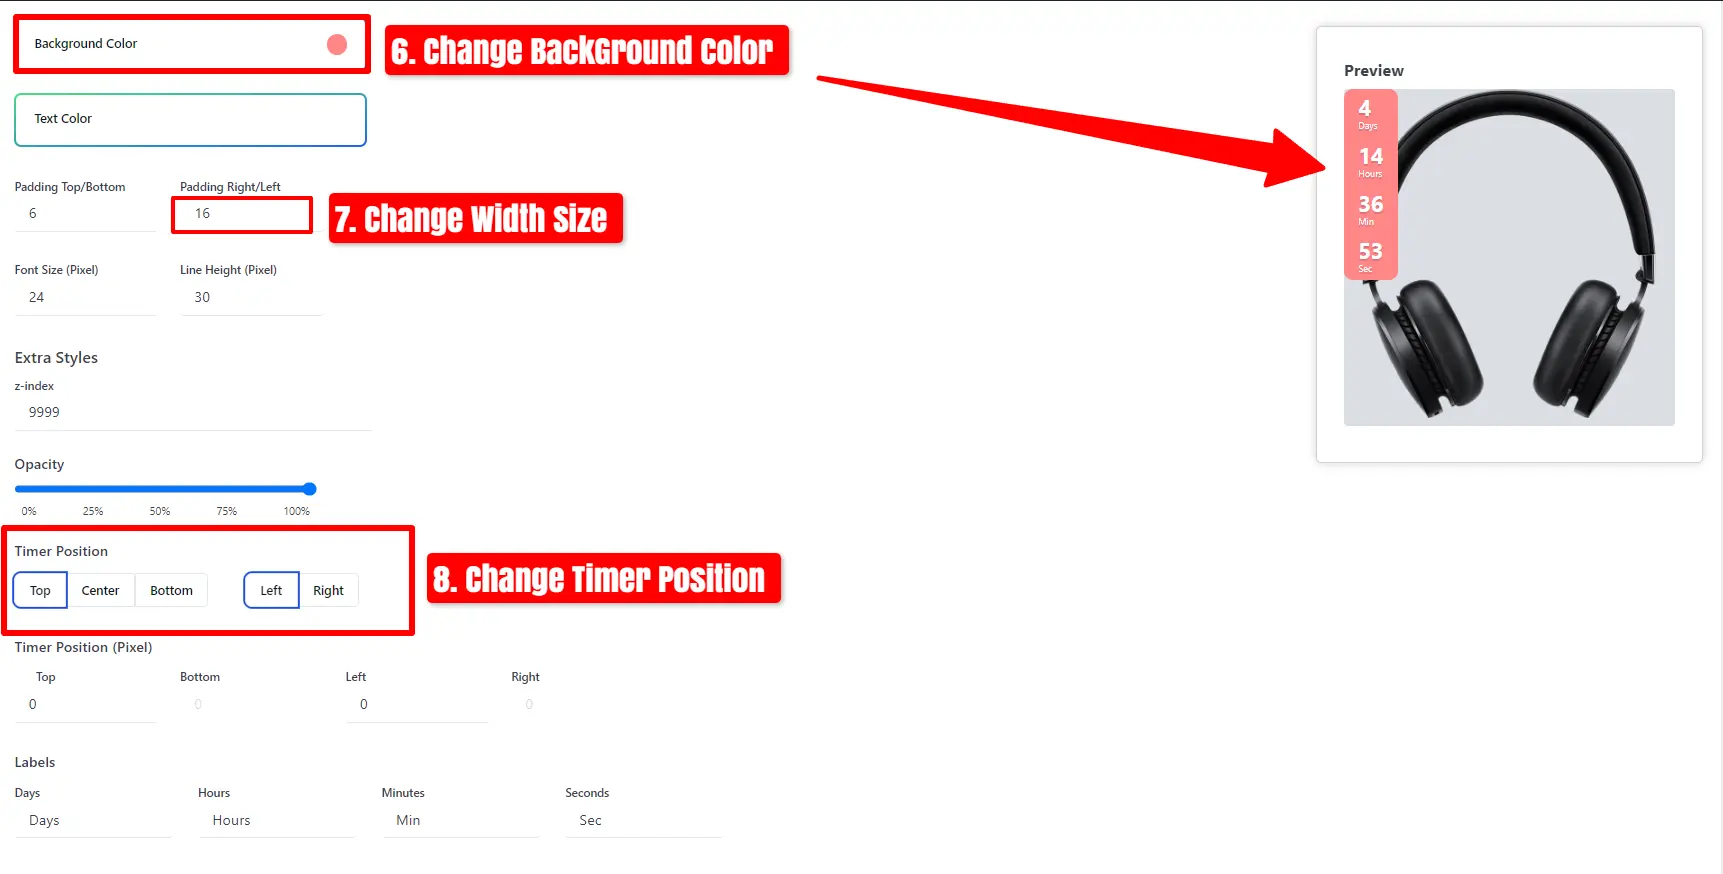
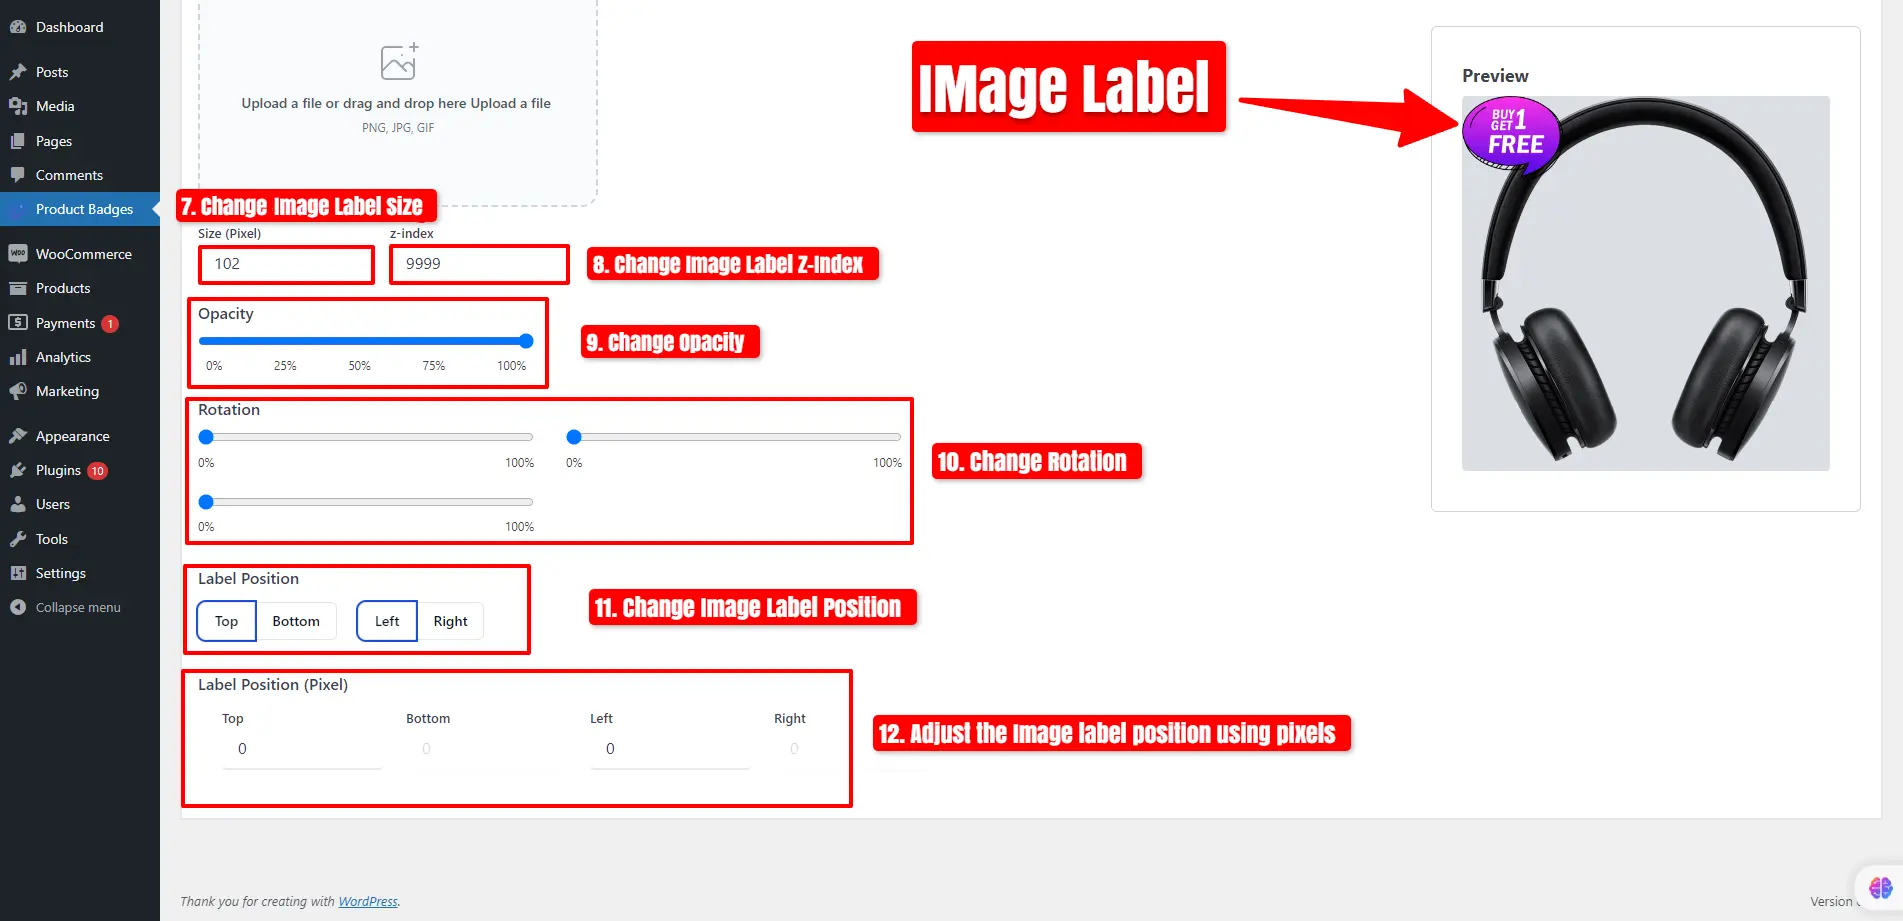
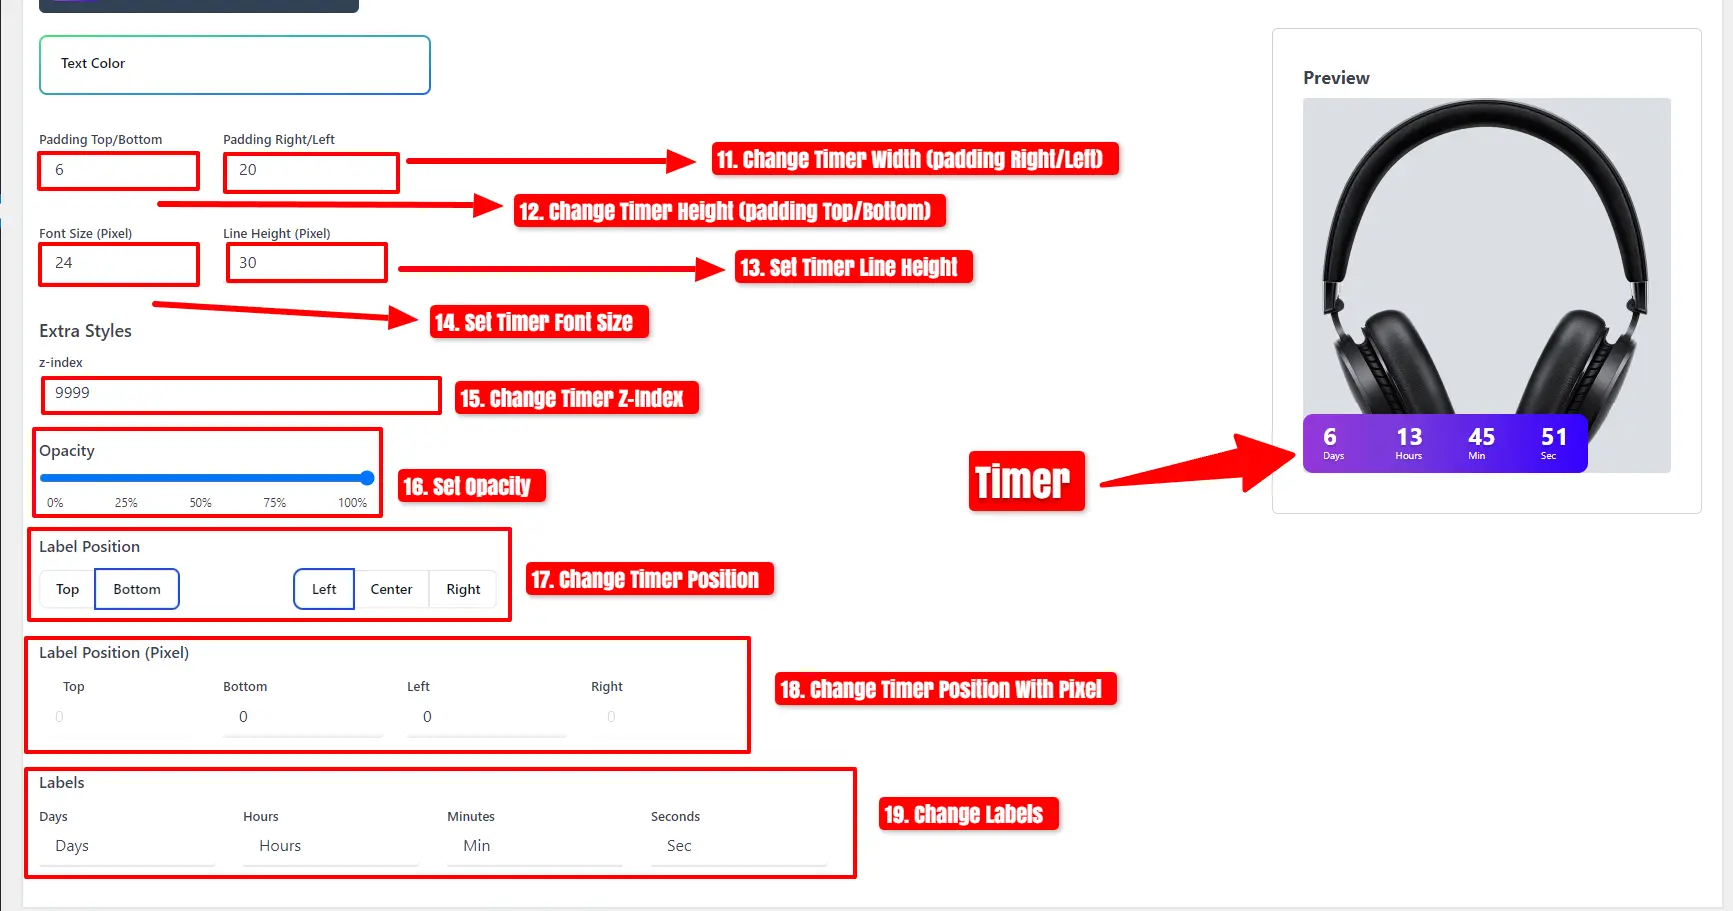
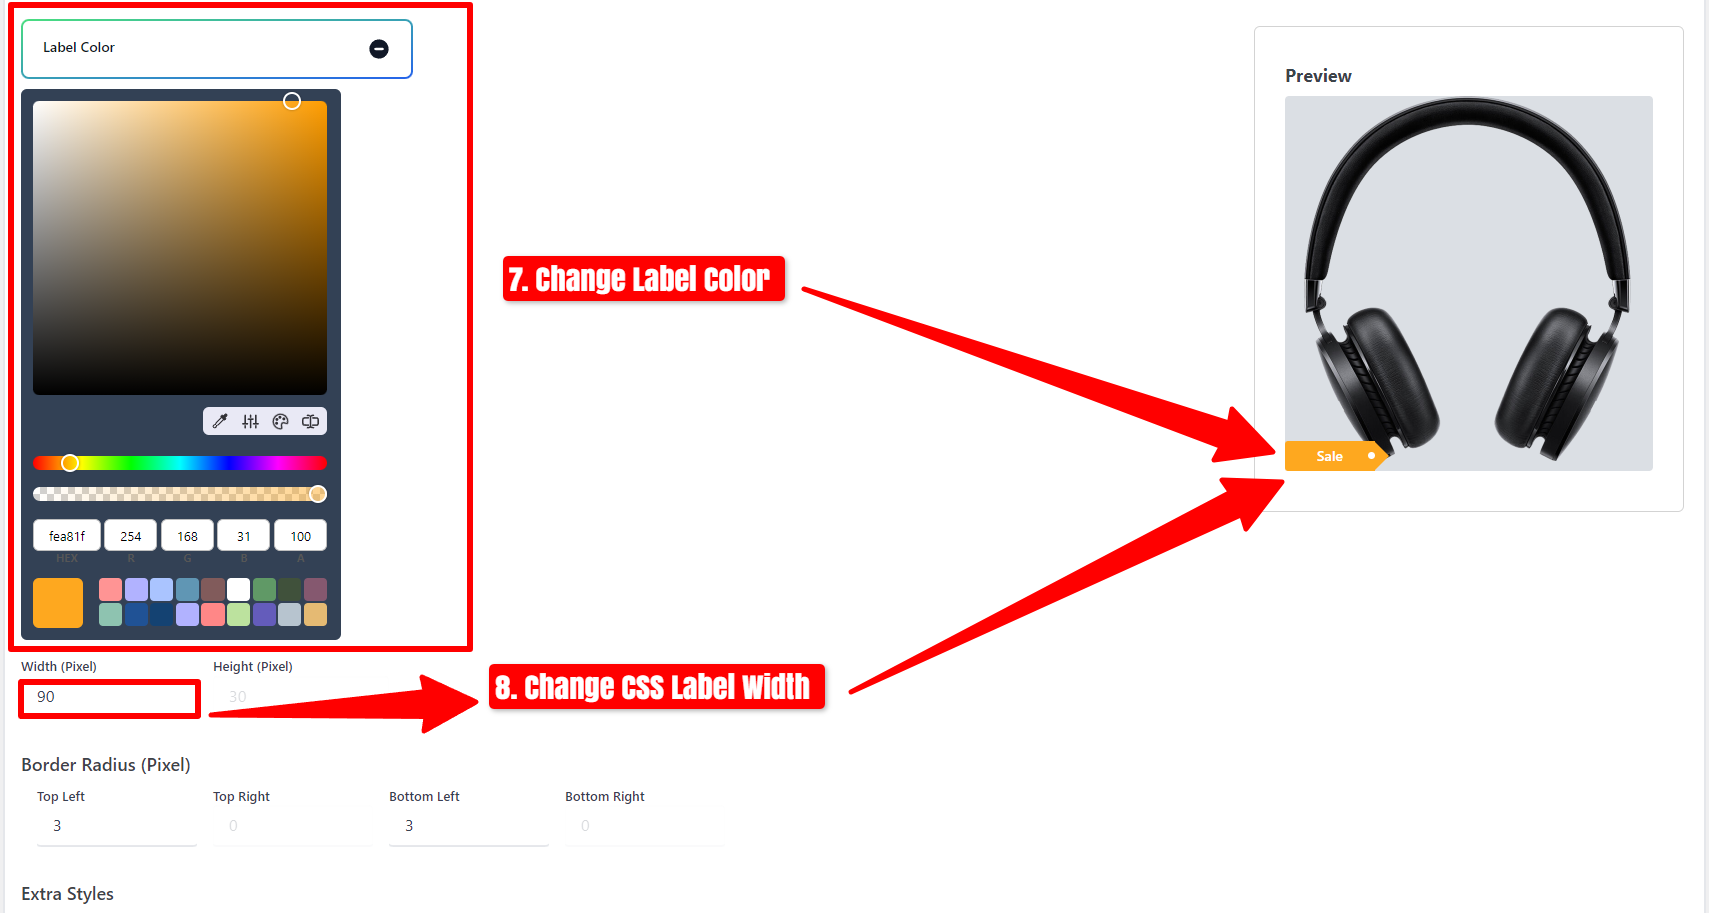
- Adjust the label width size and set the label text to “Sold Out!”.
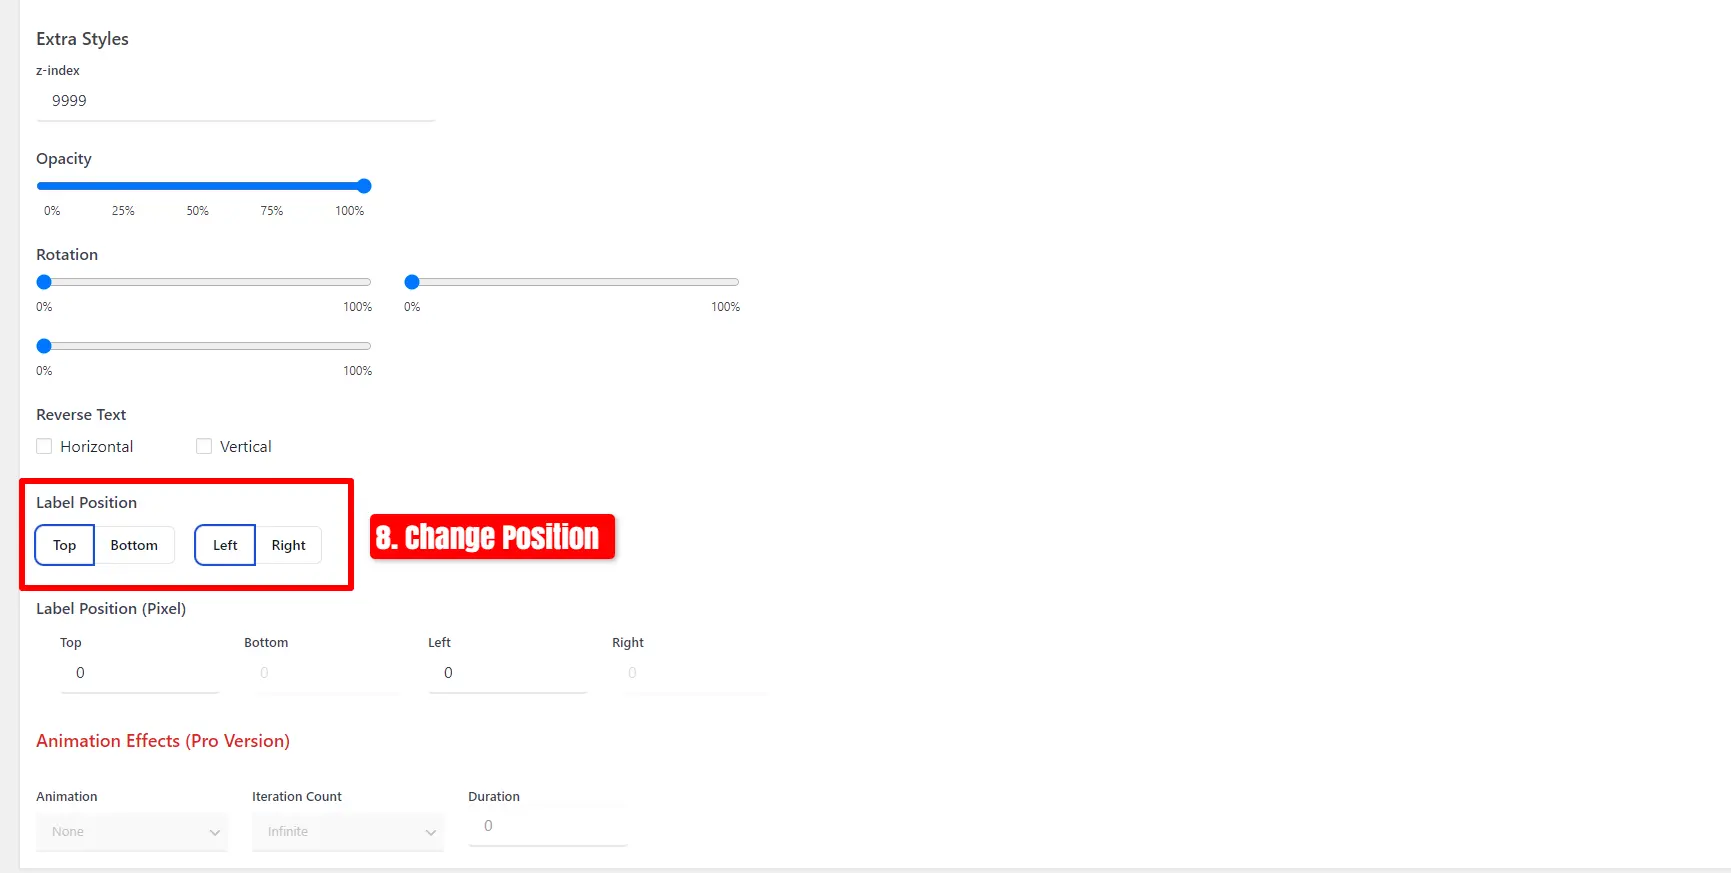
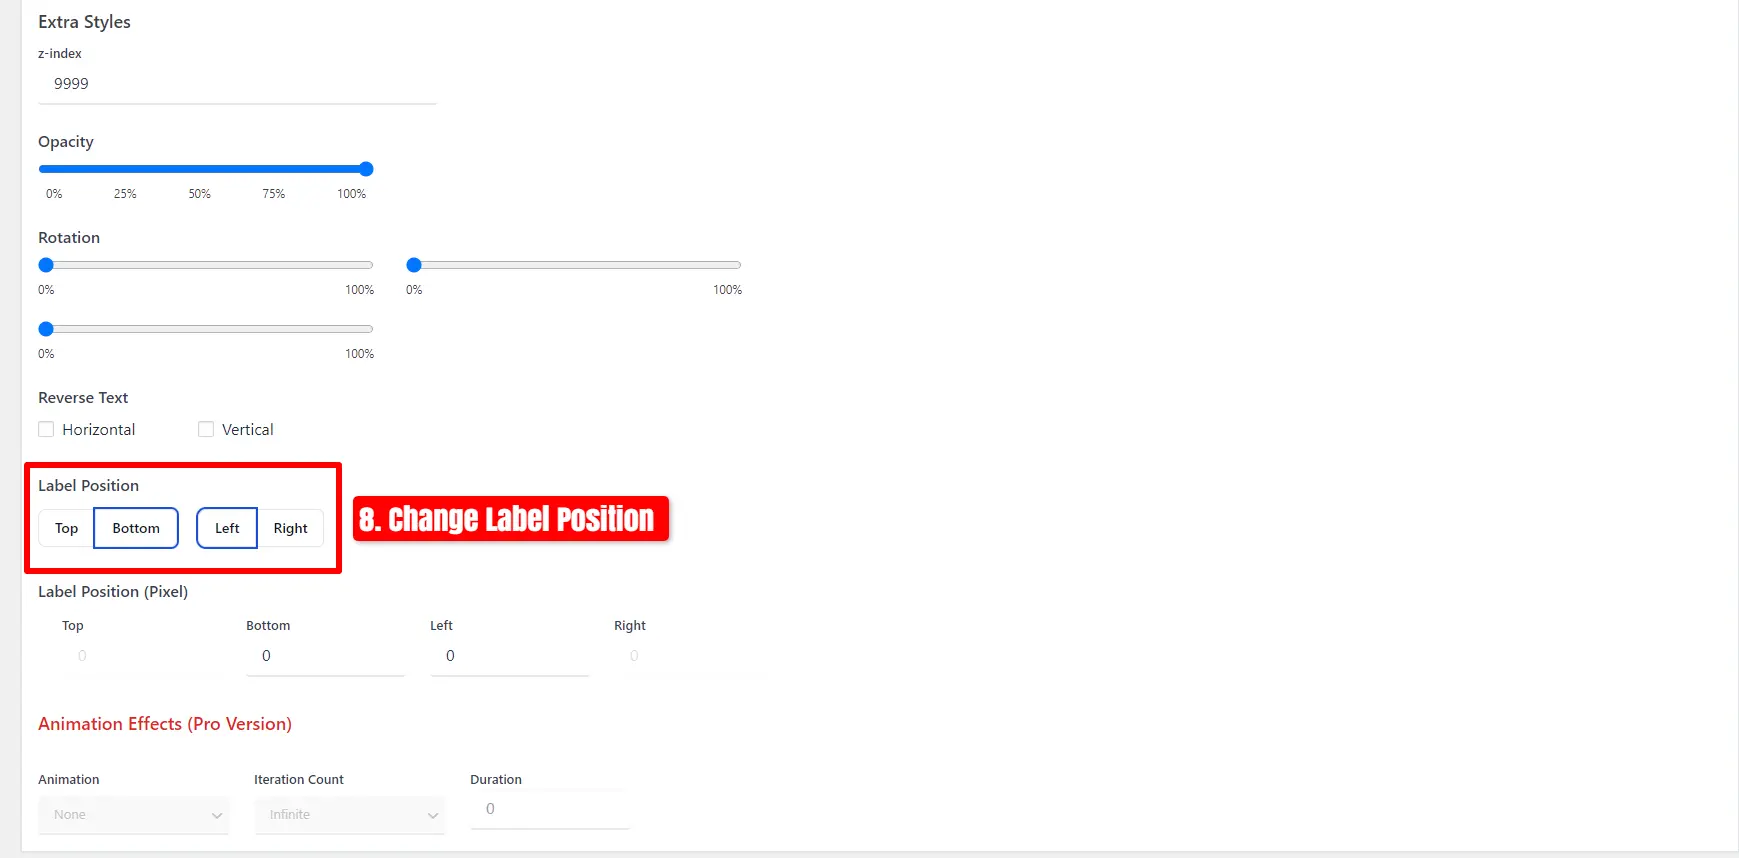
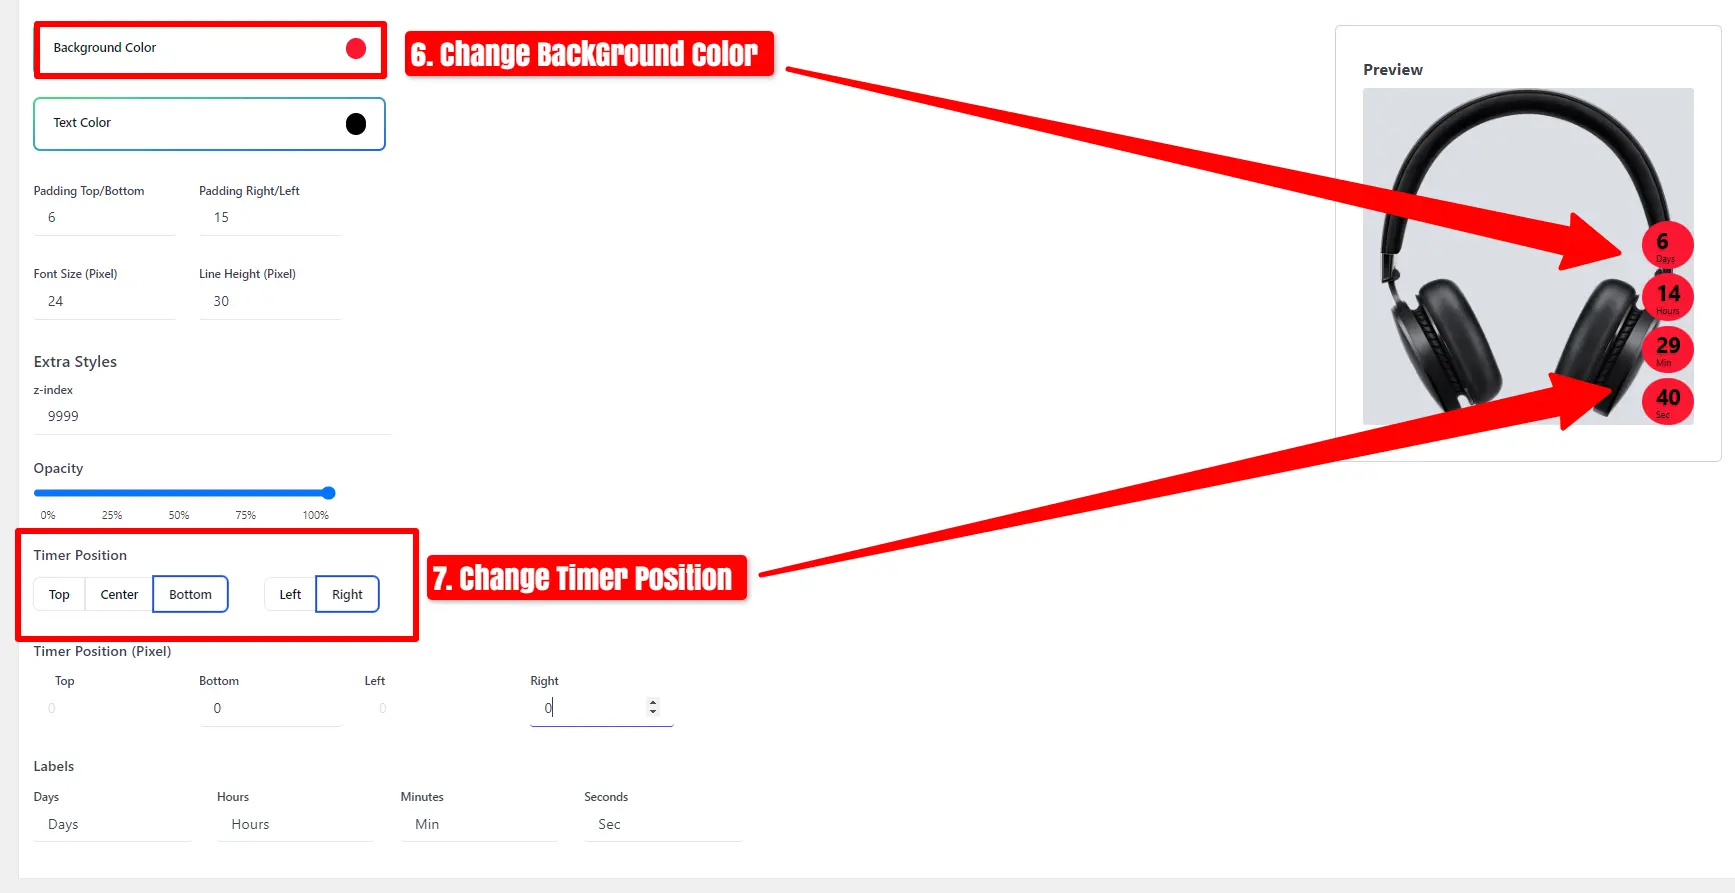
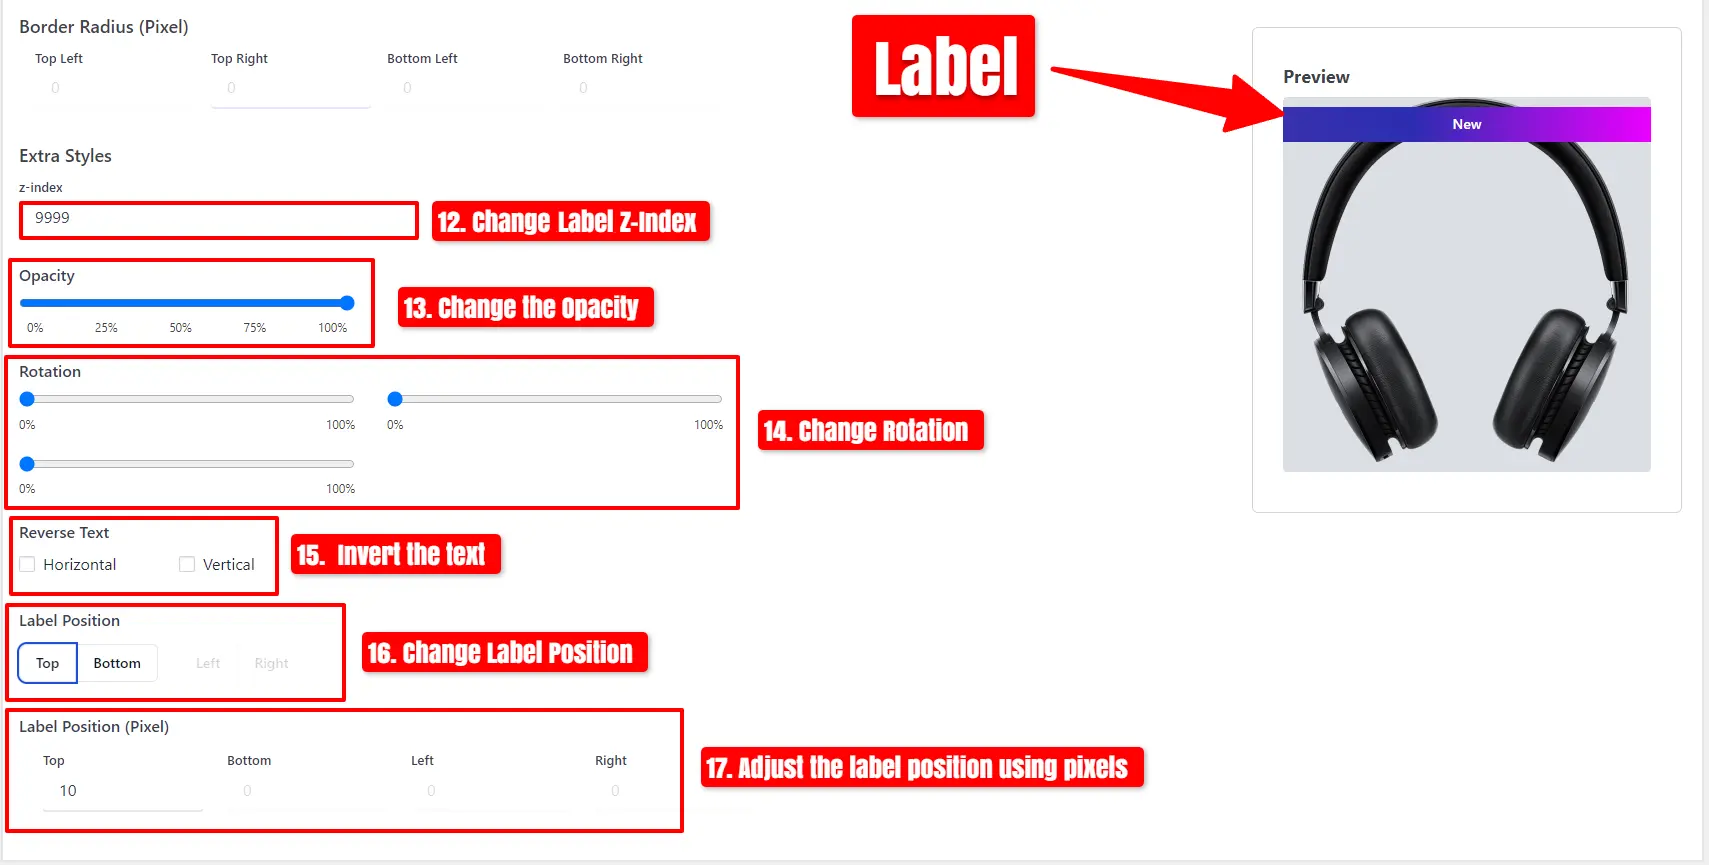
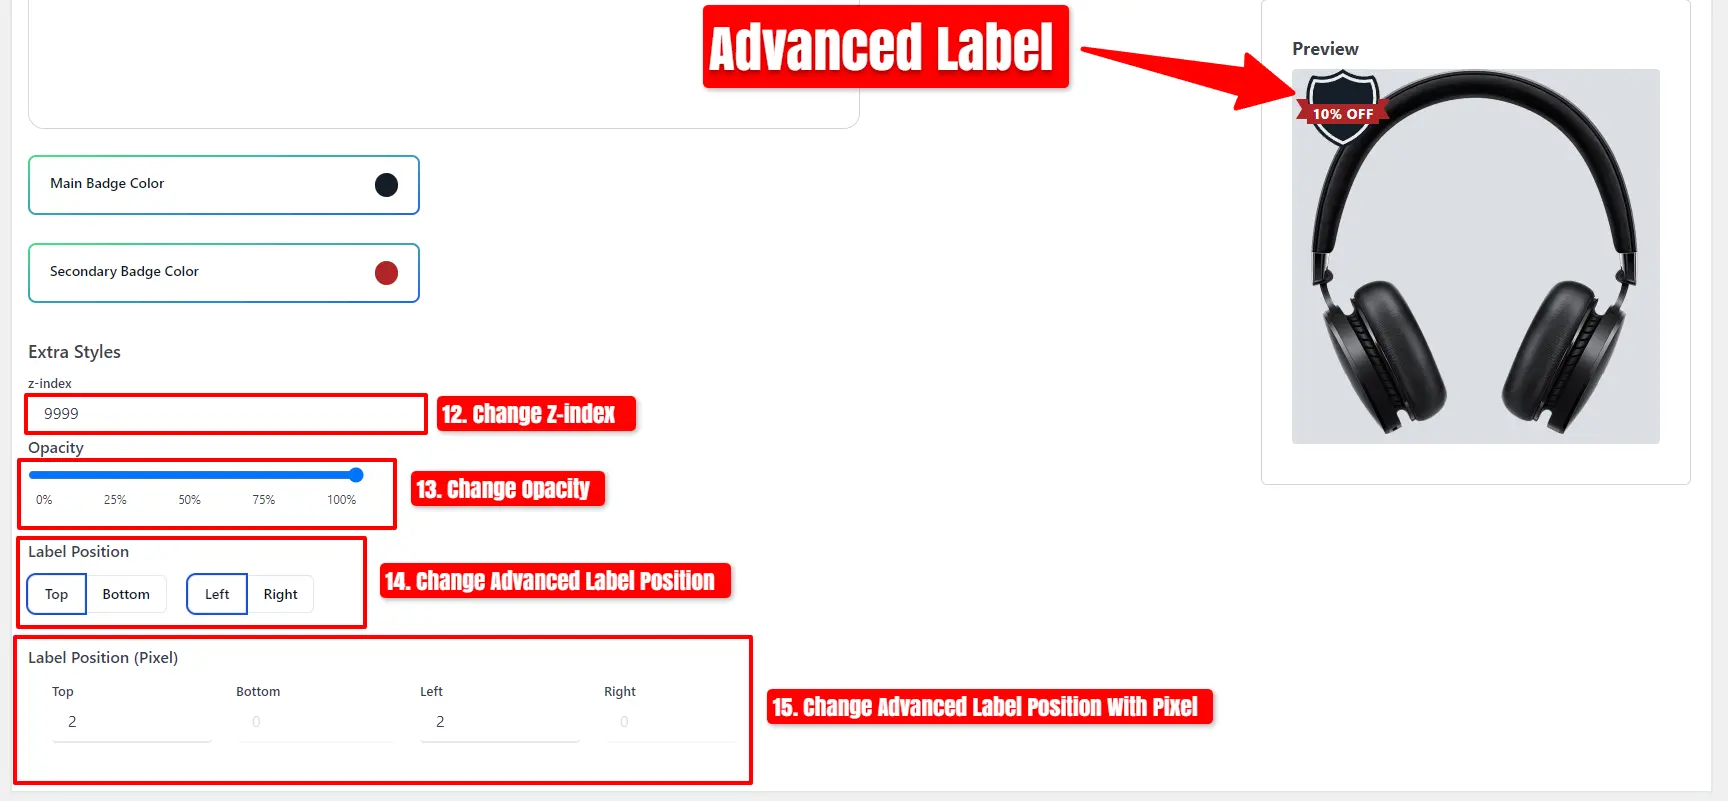
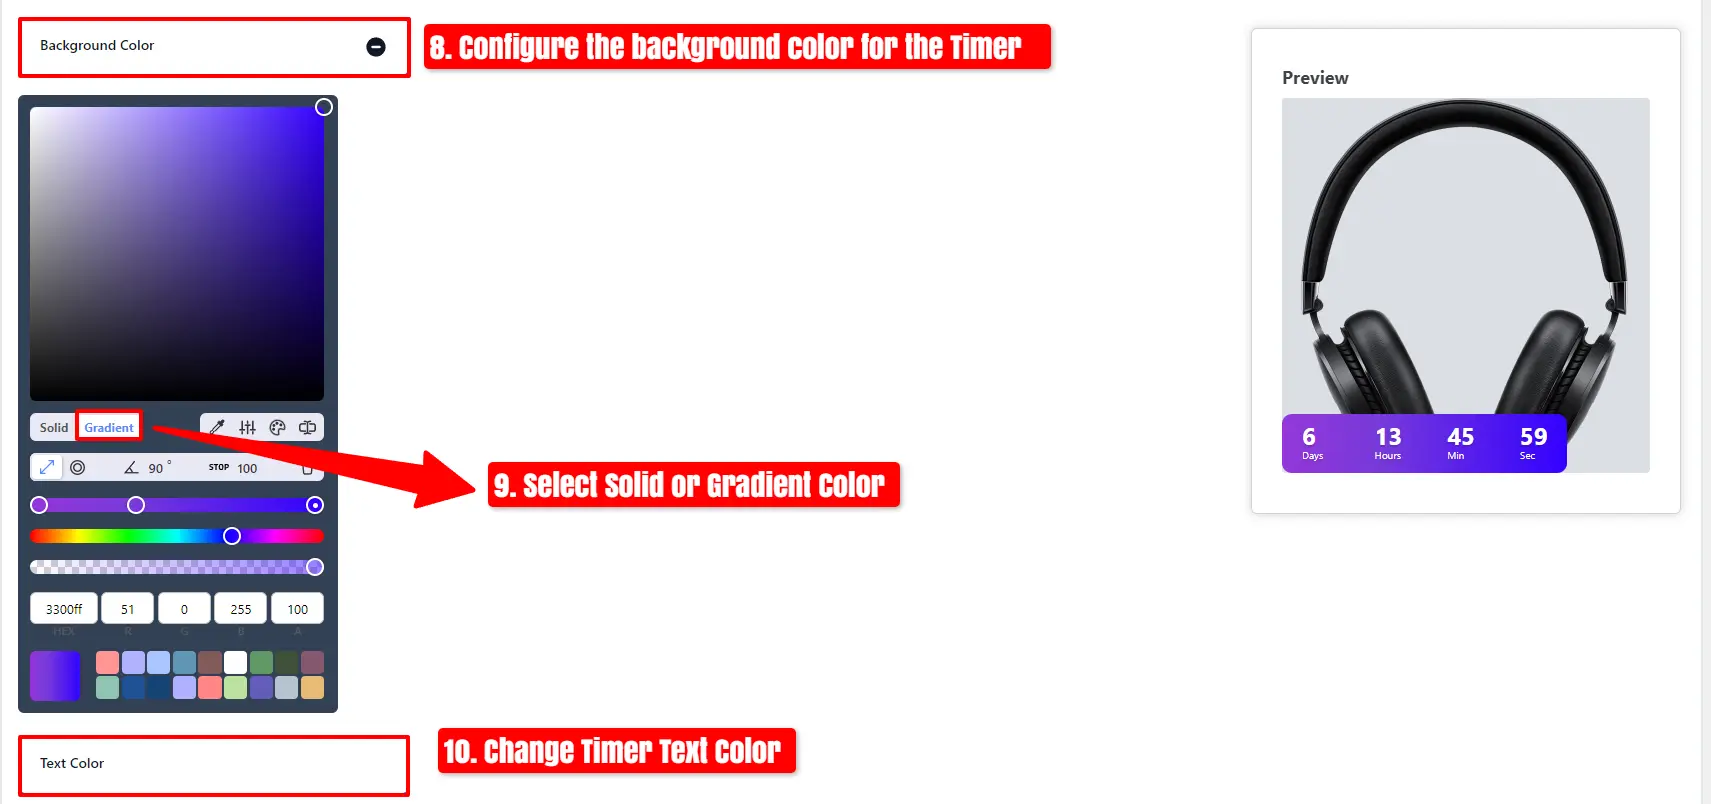
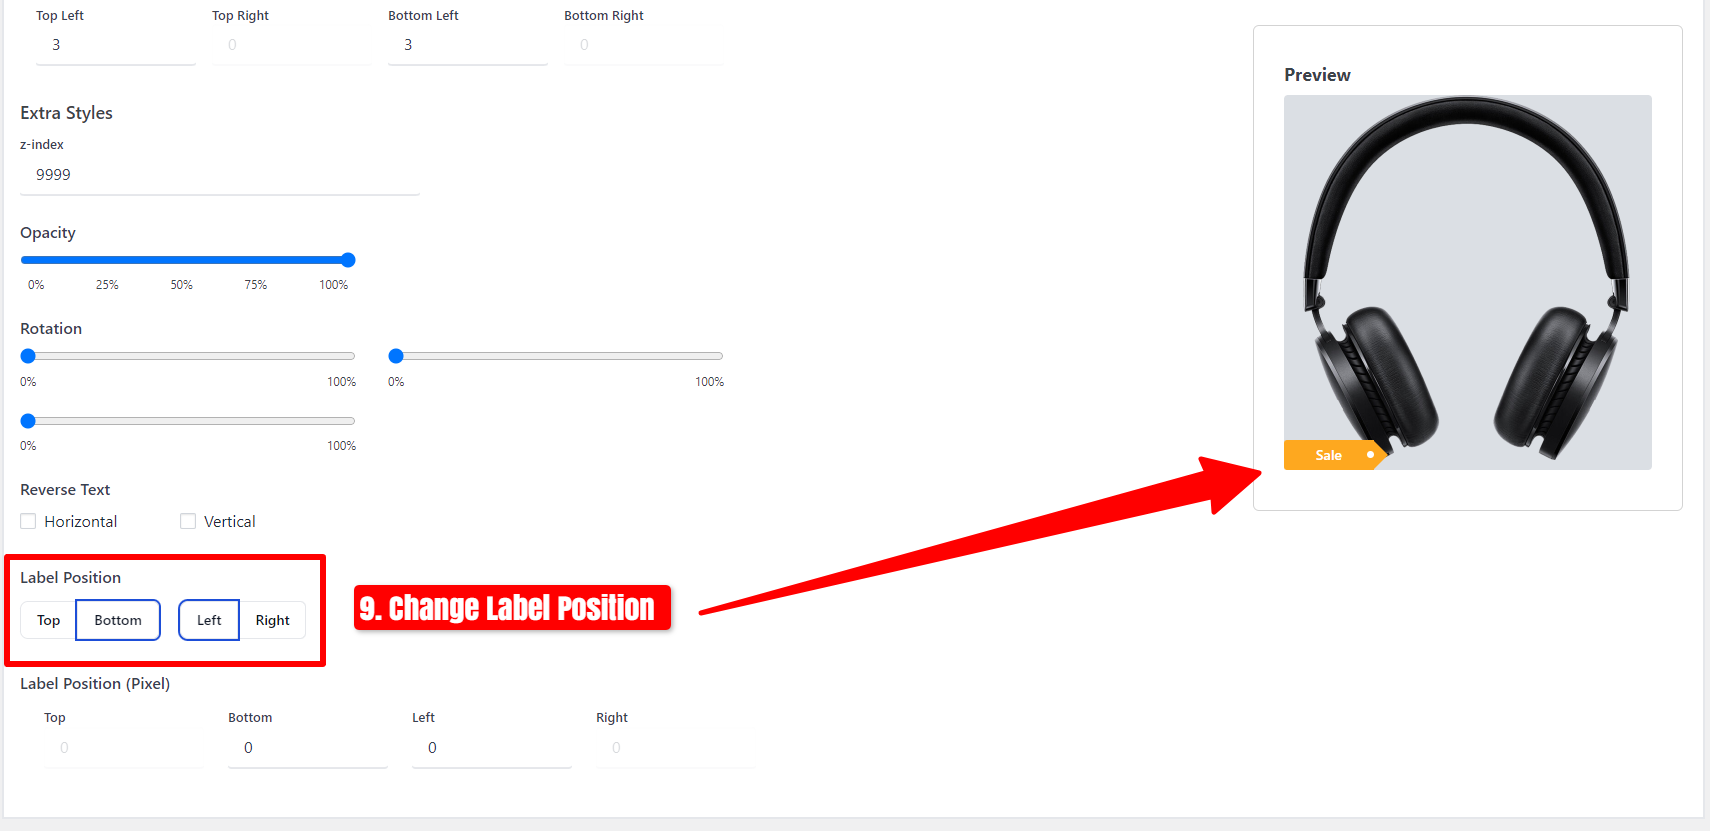
- Customize the label color and change its position.
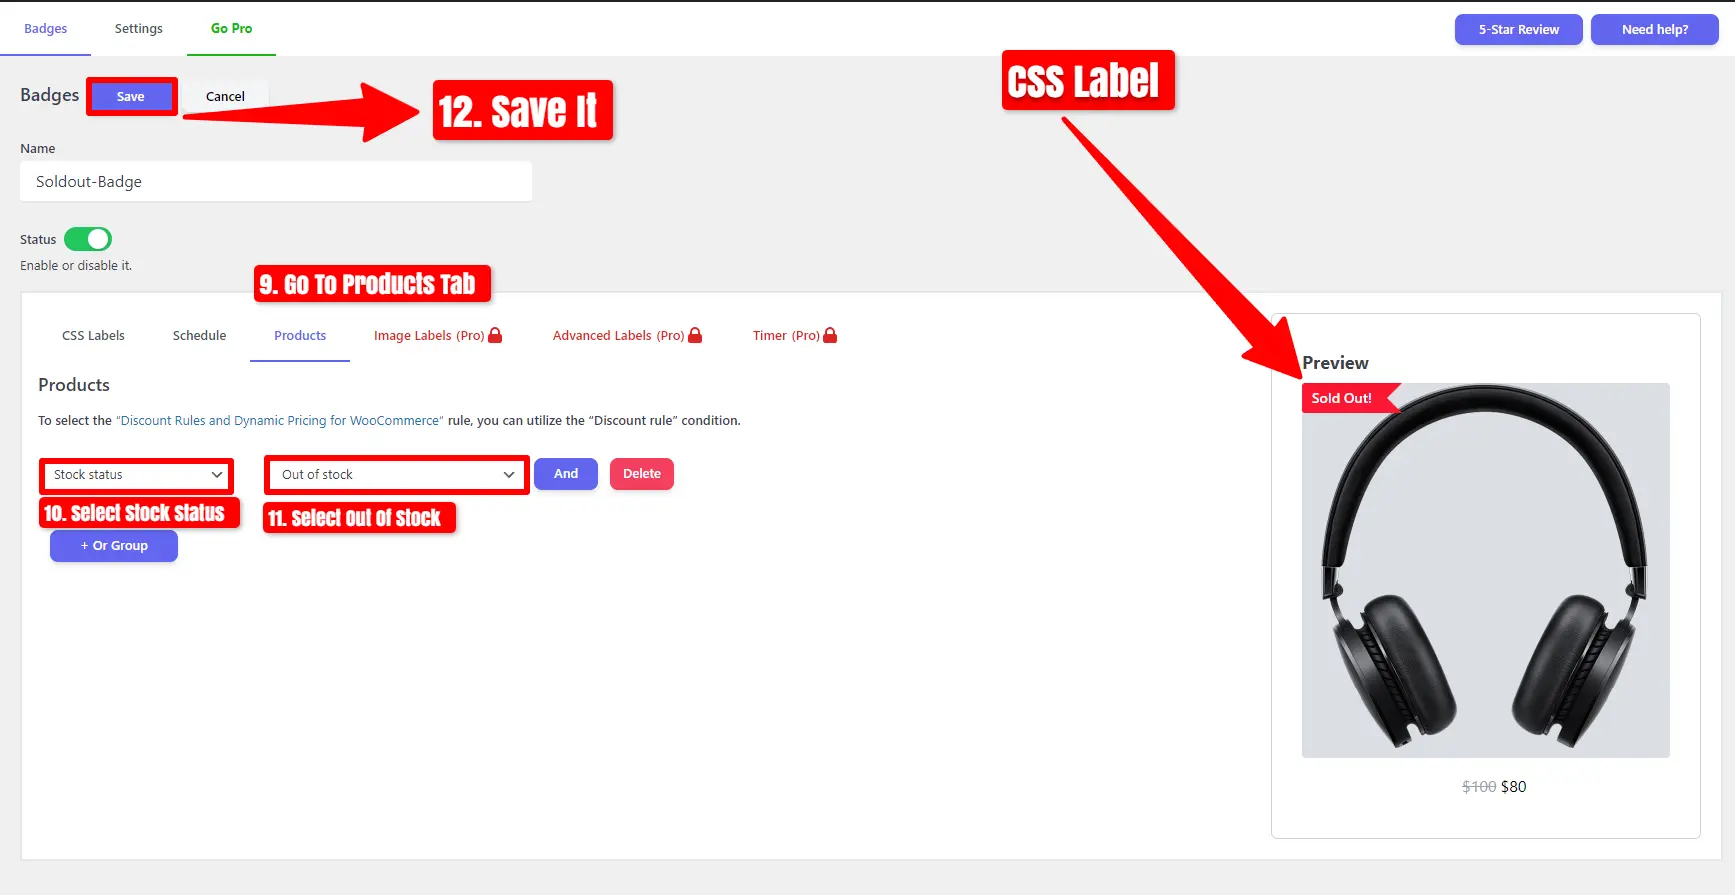
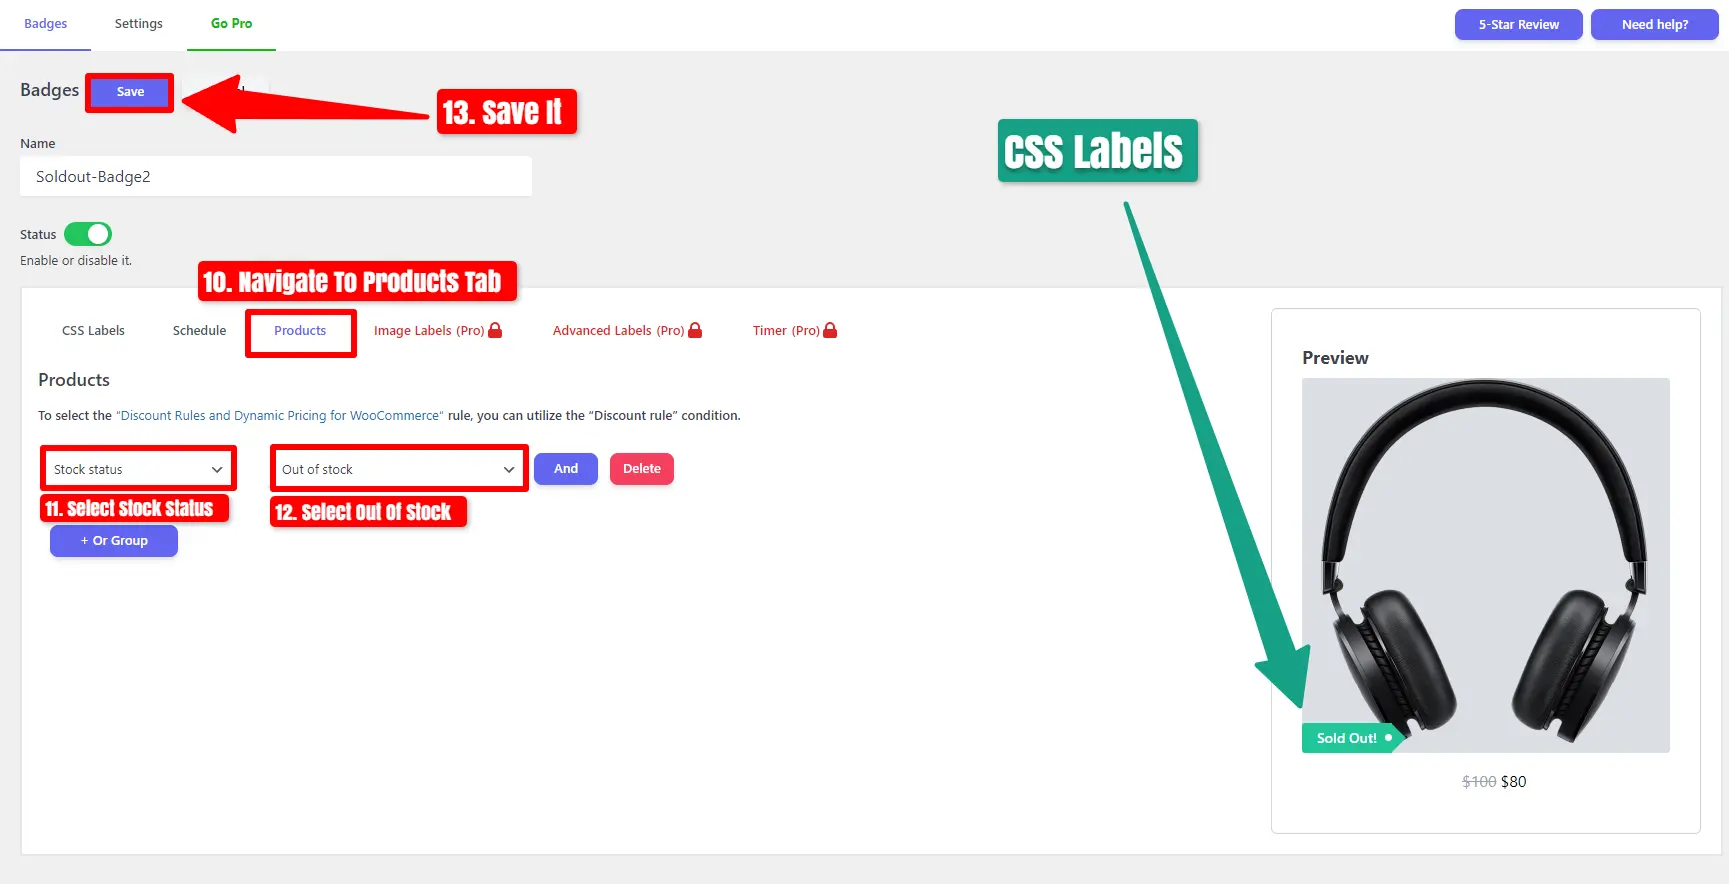
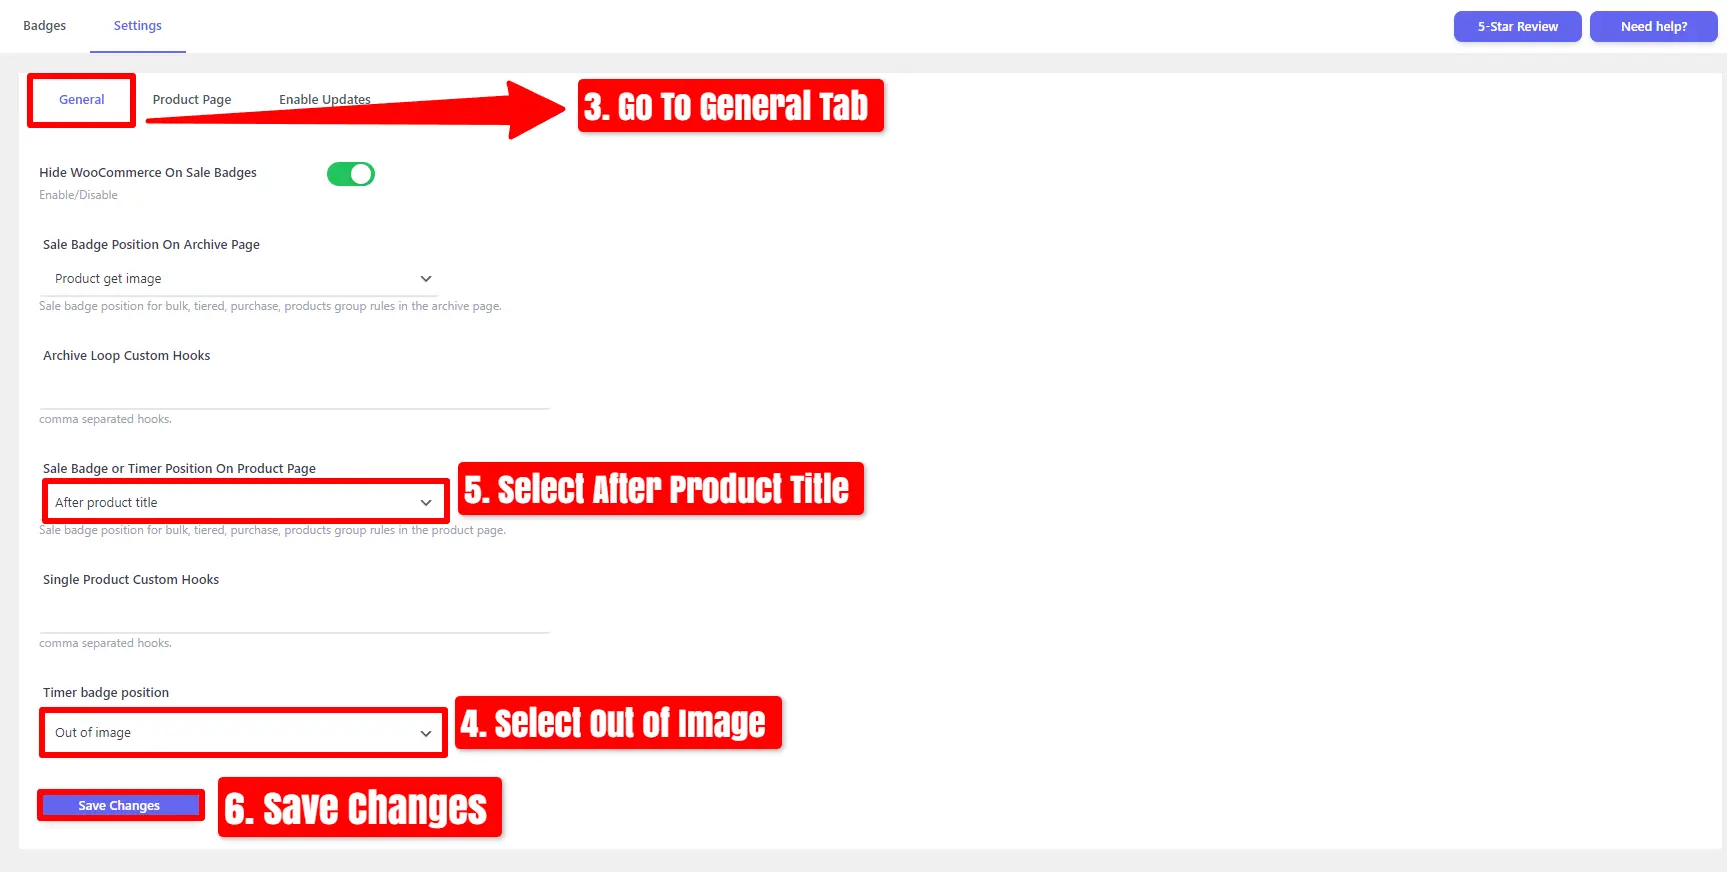
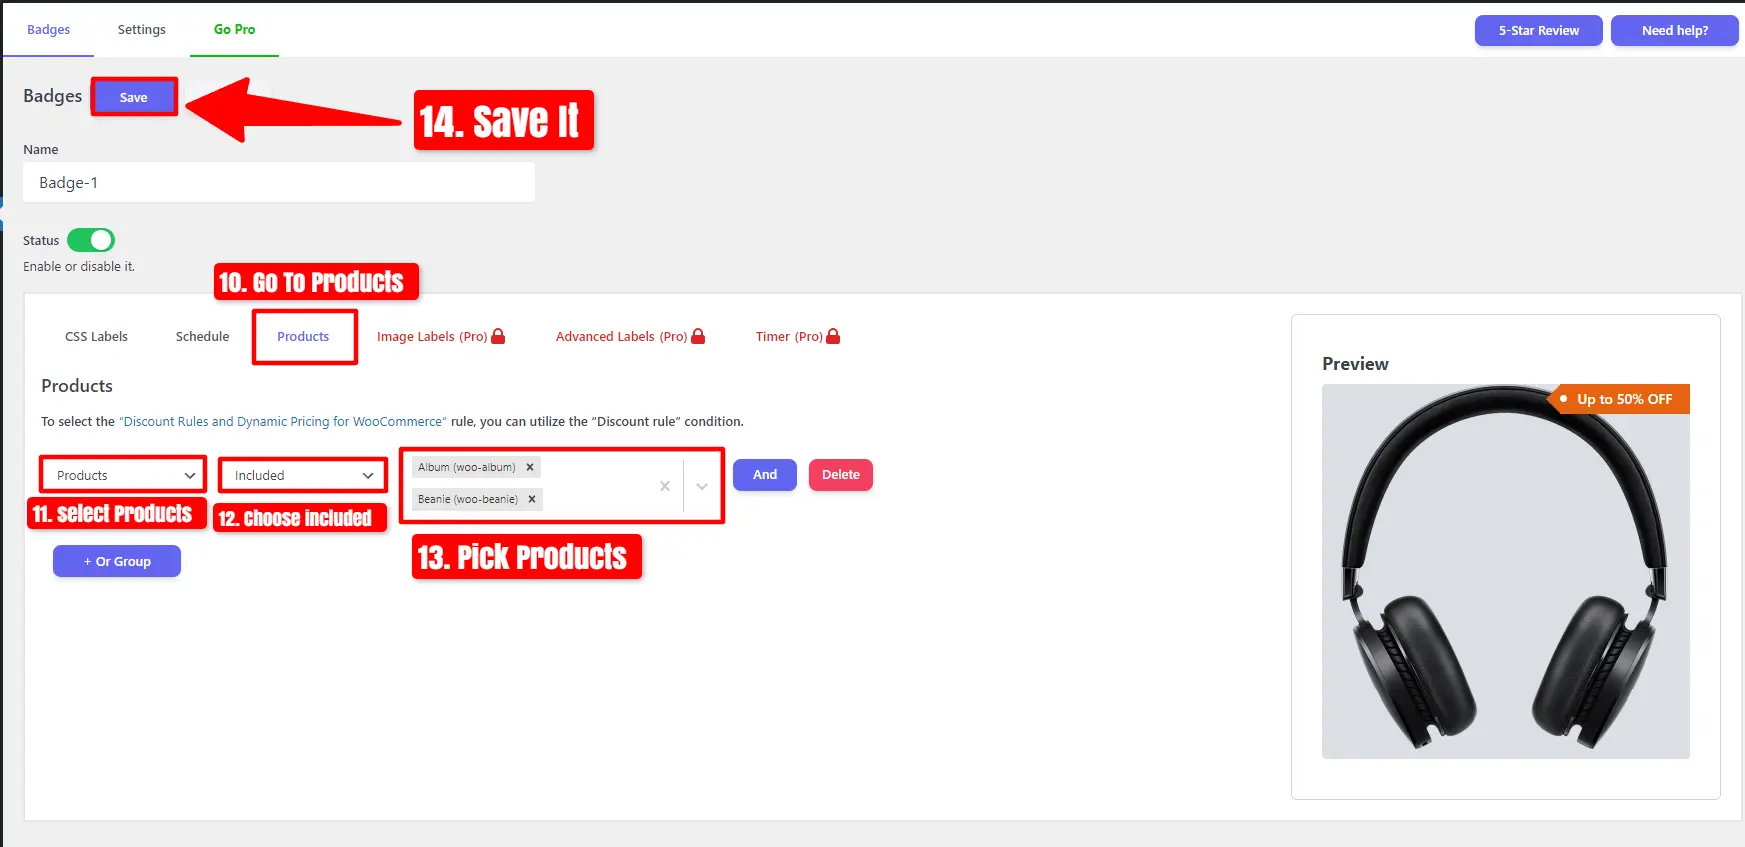
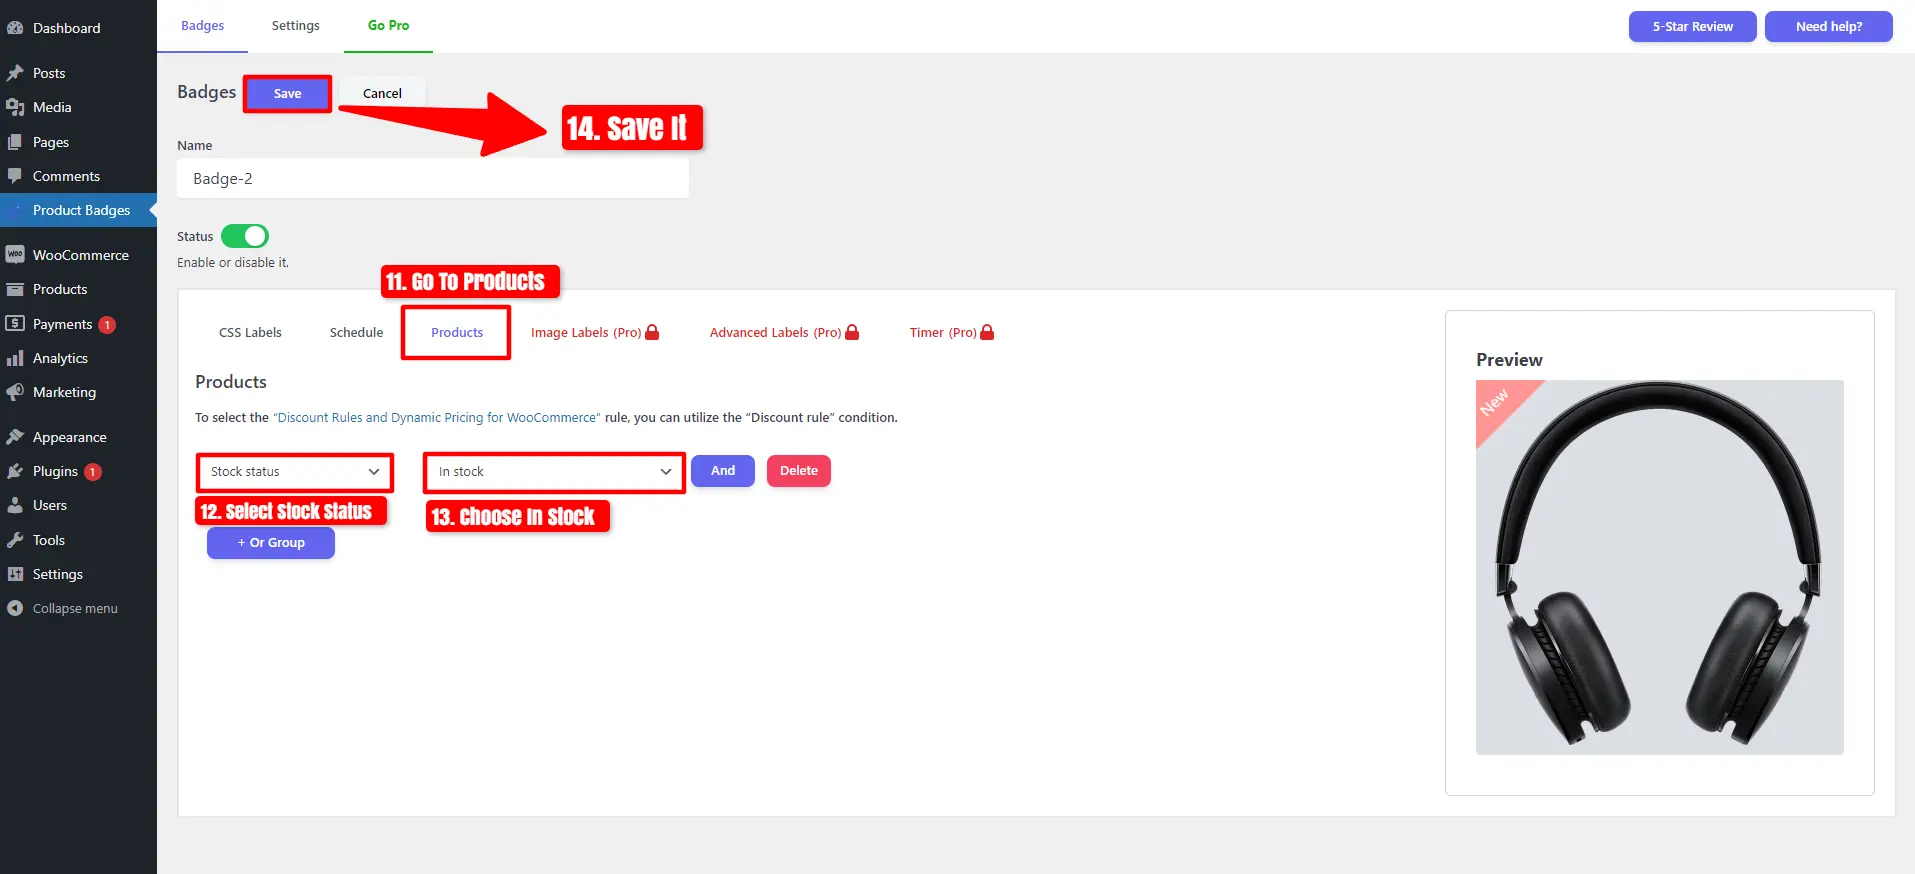
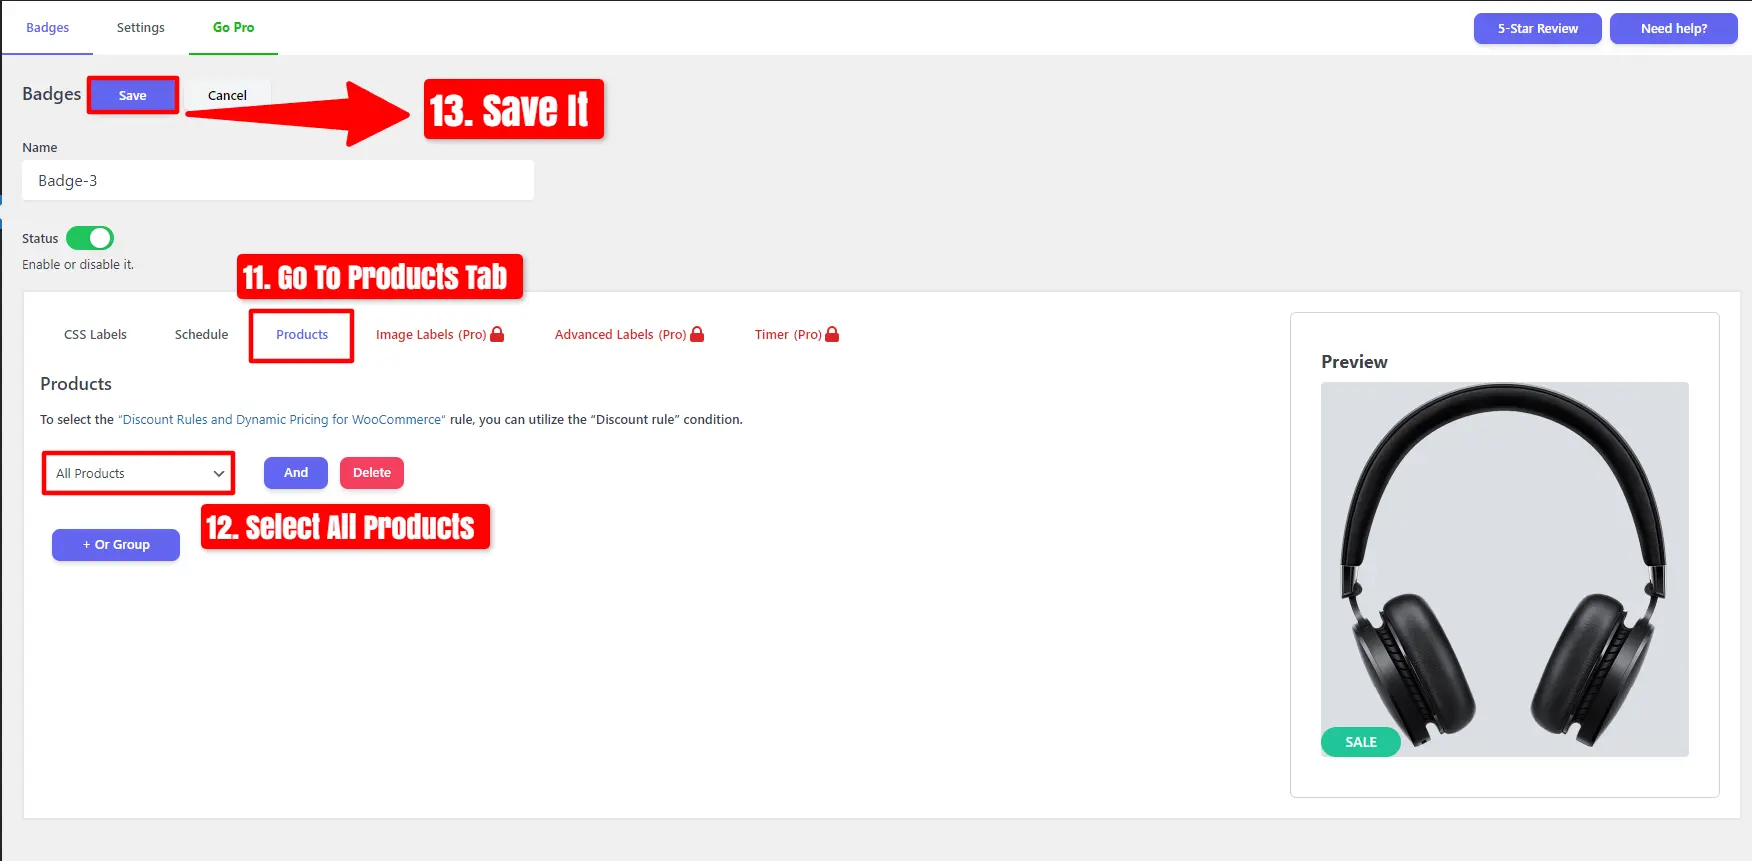
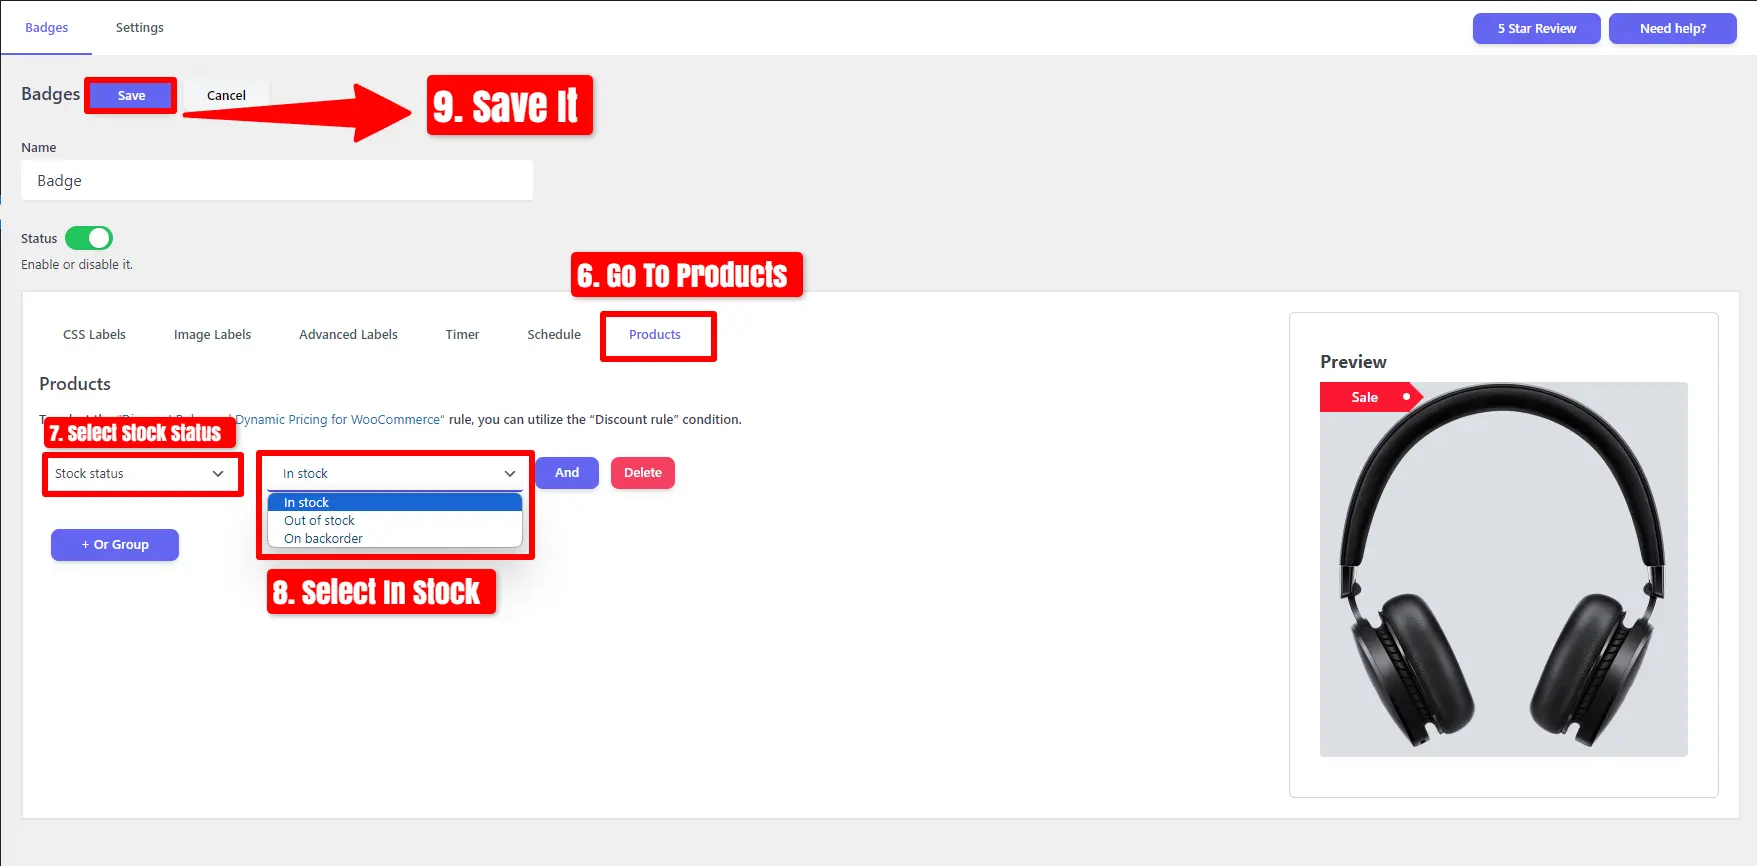
After modifying the Sold Out Label, follow these steps.
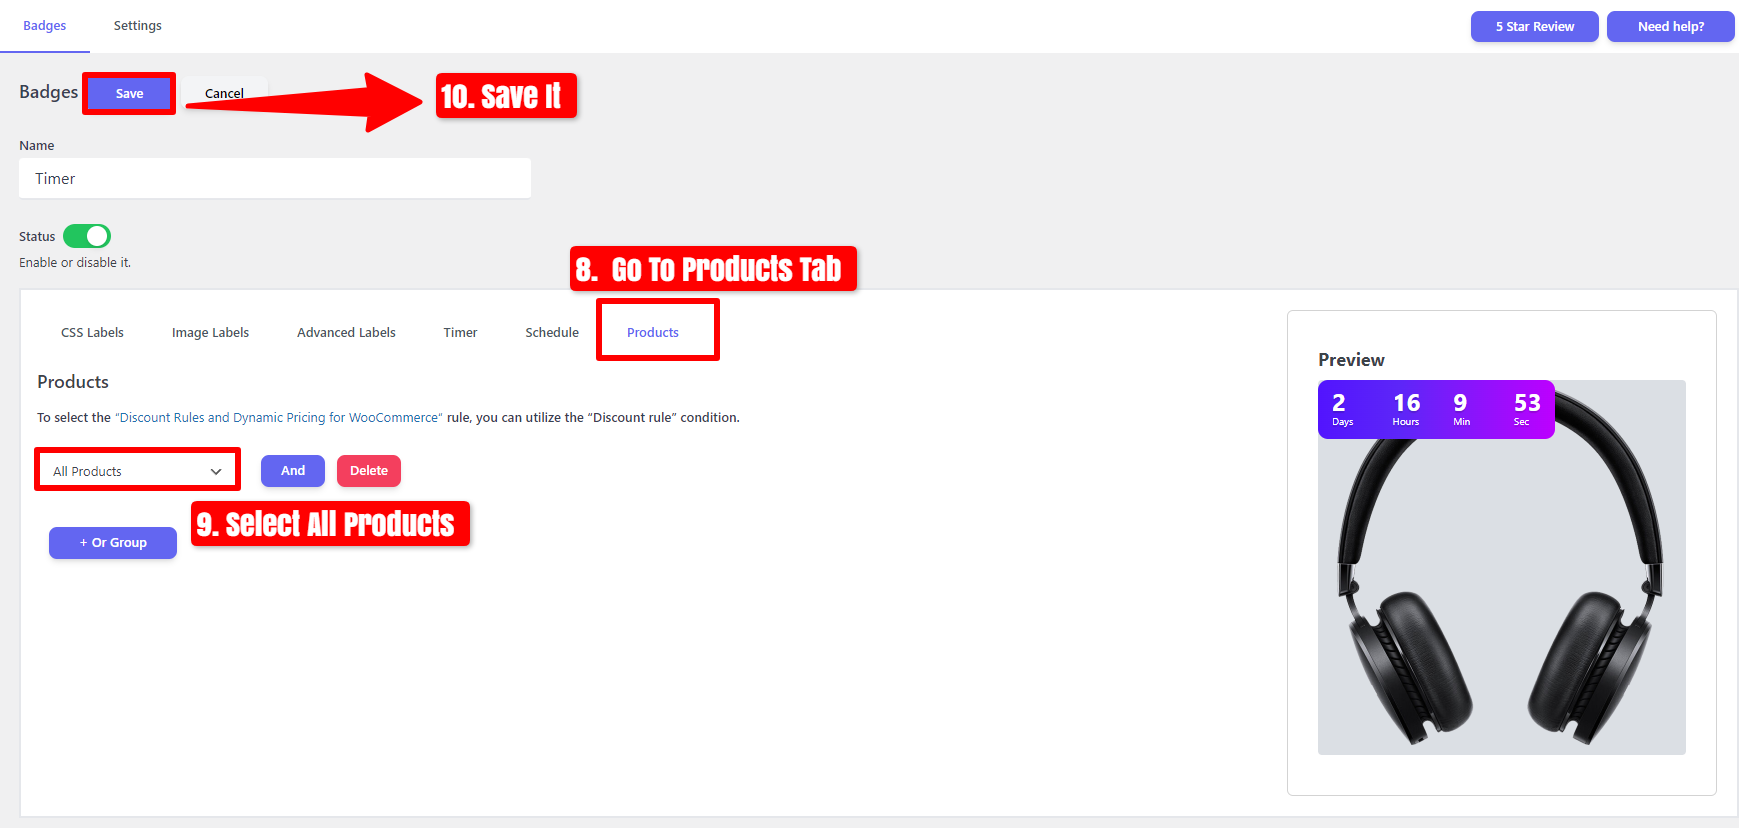
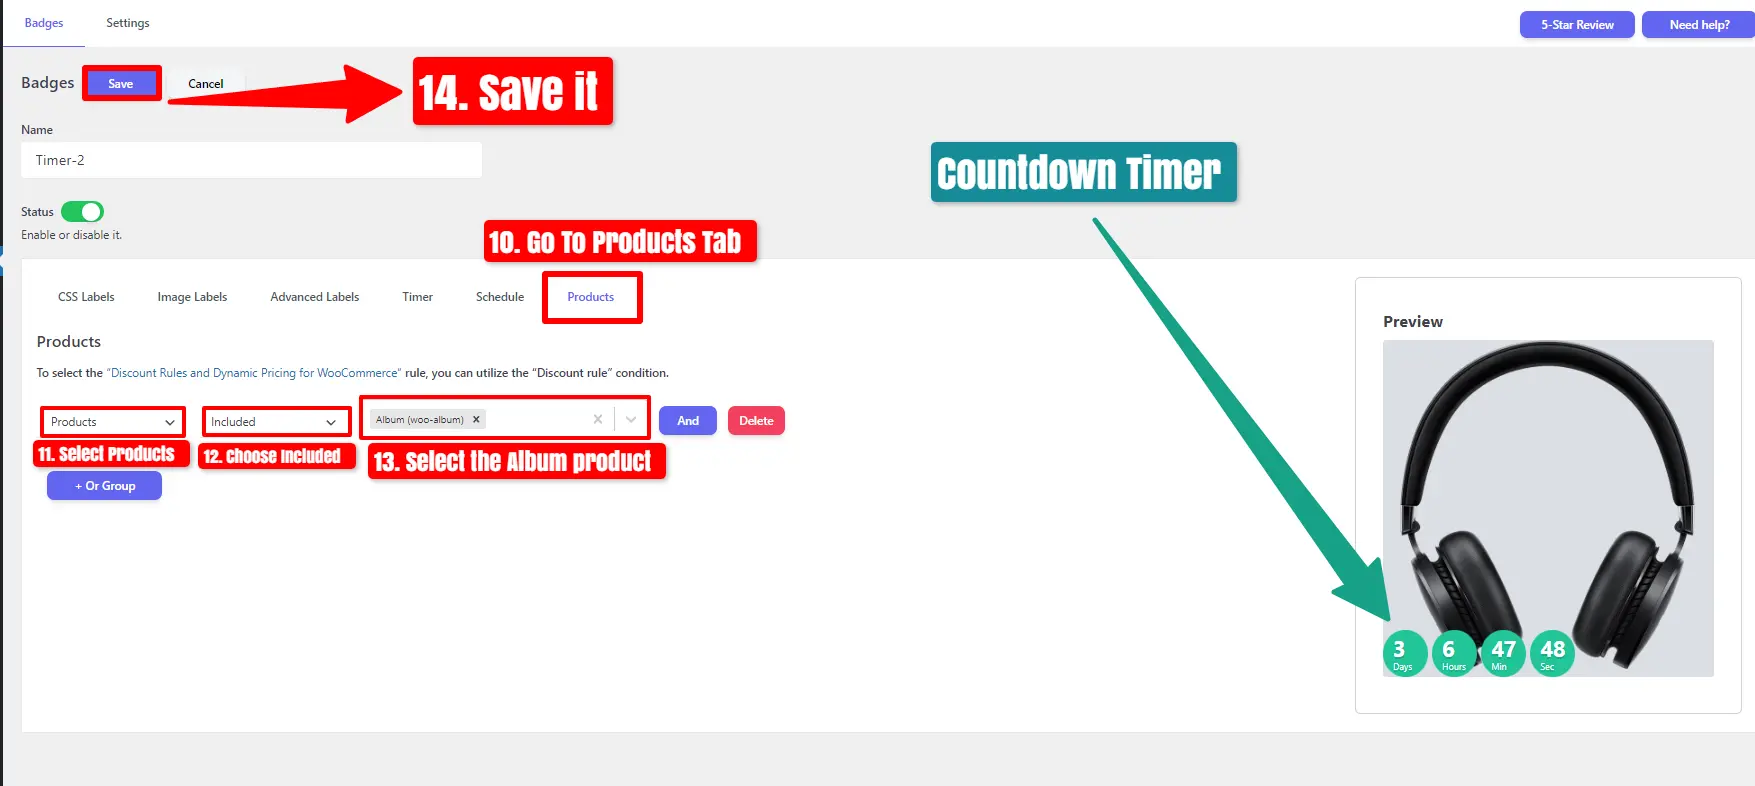
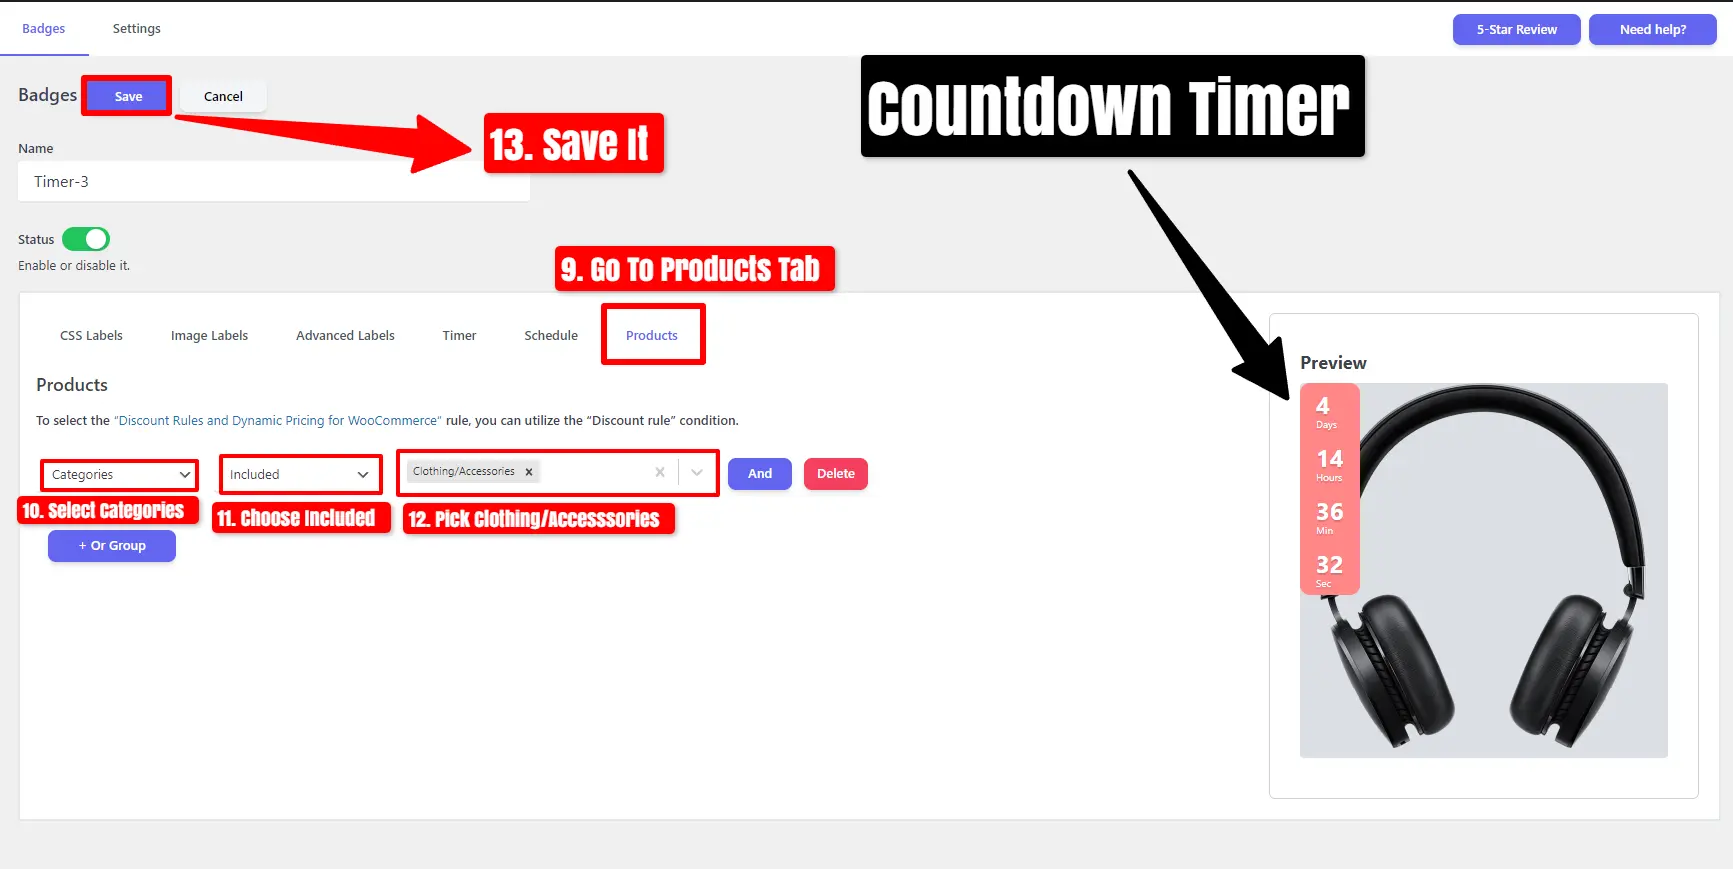
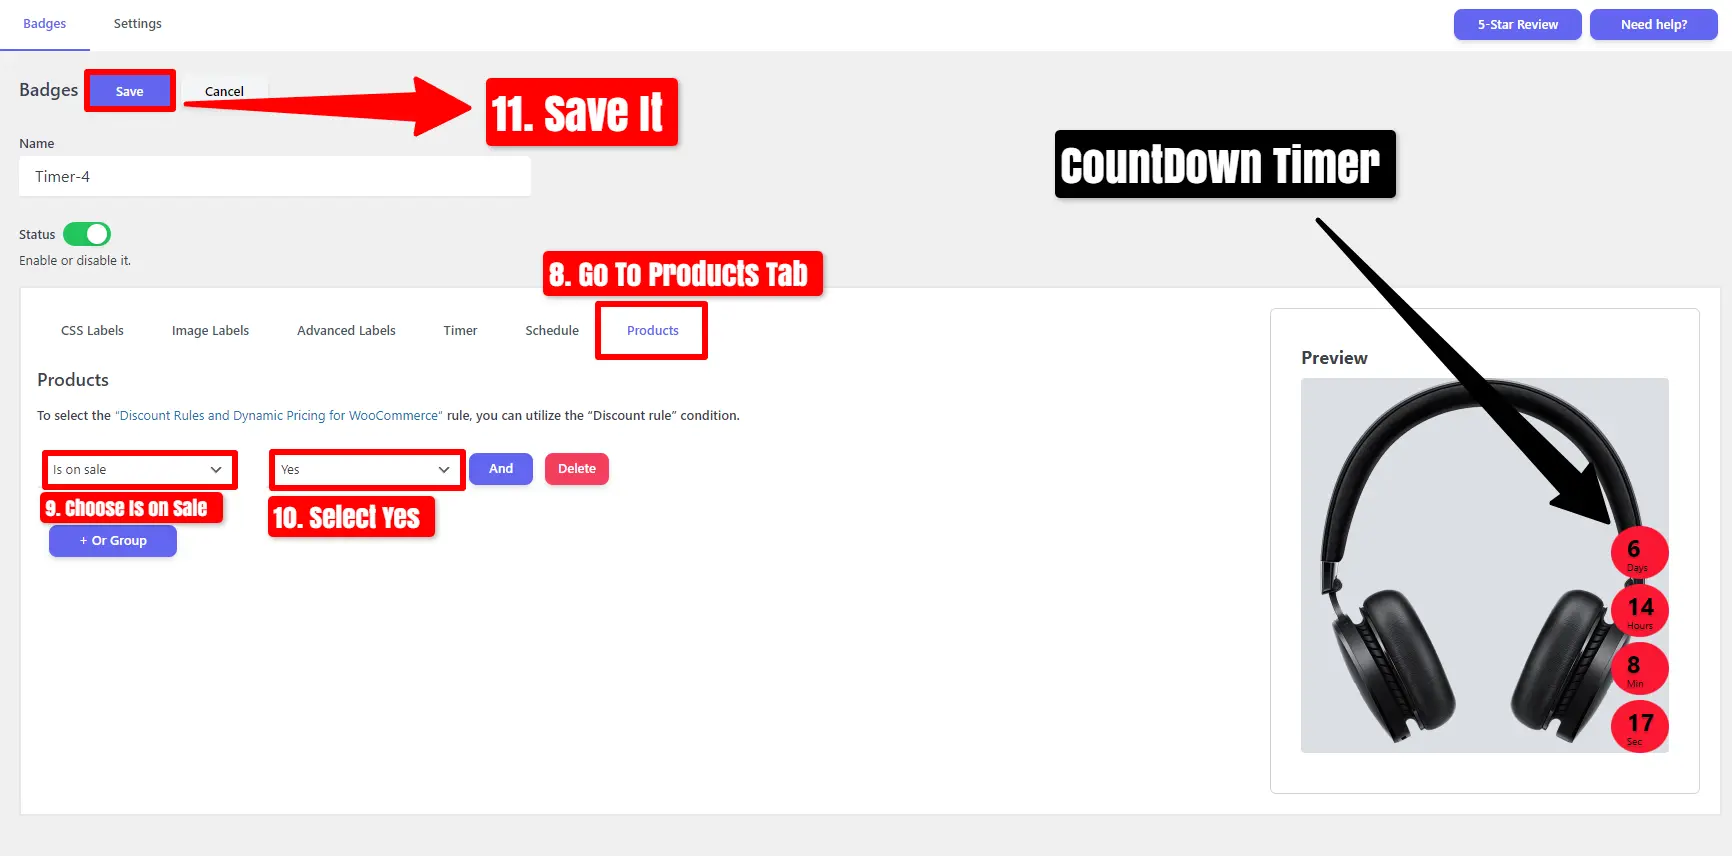
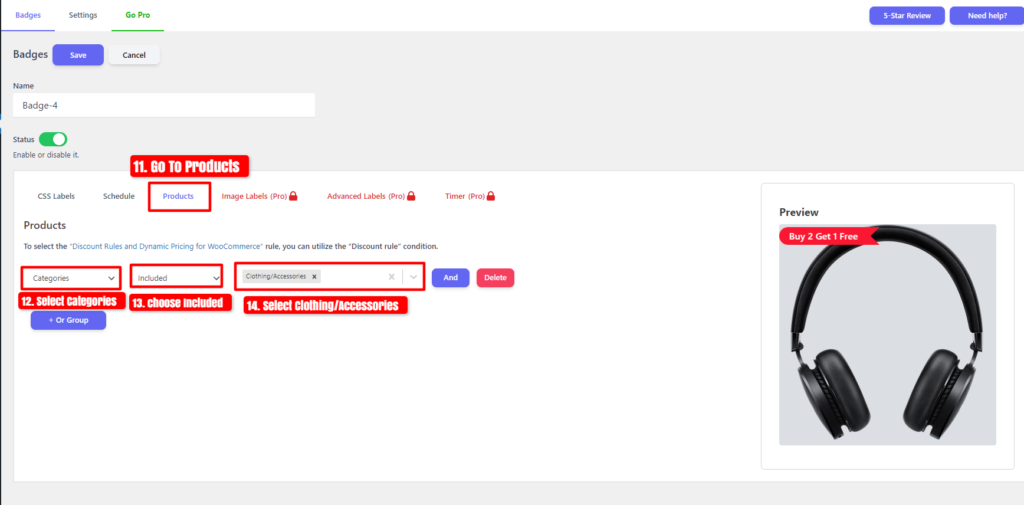
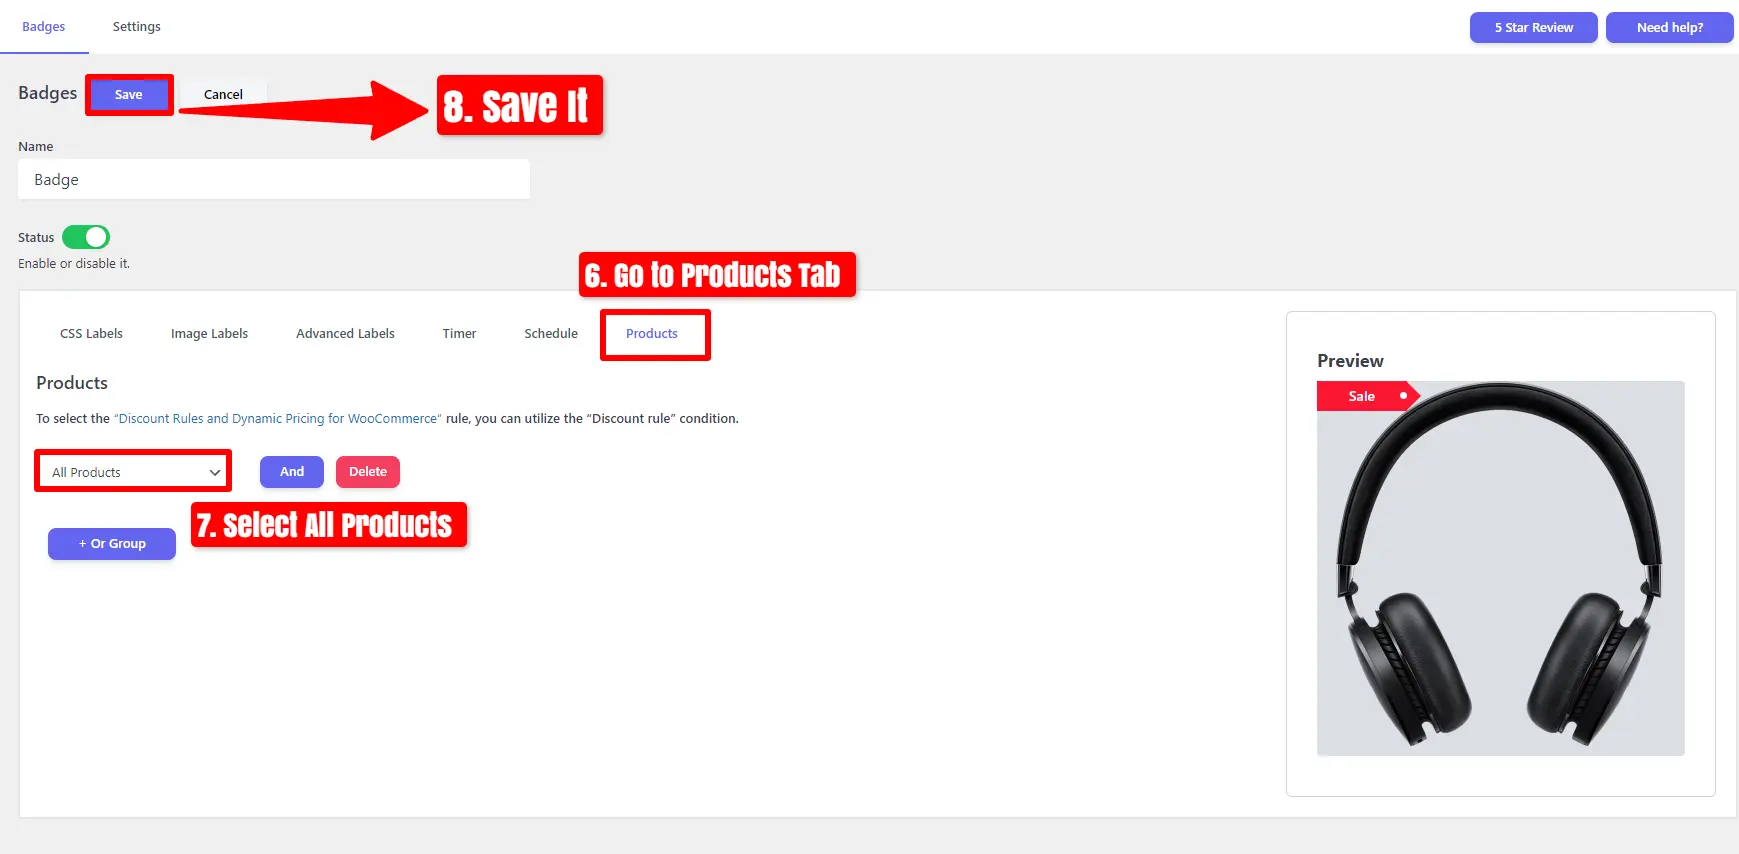
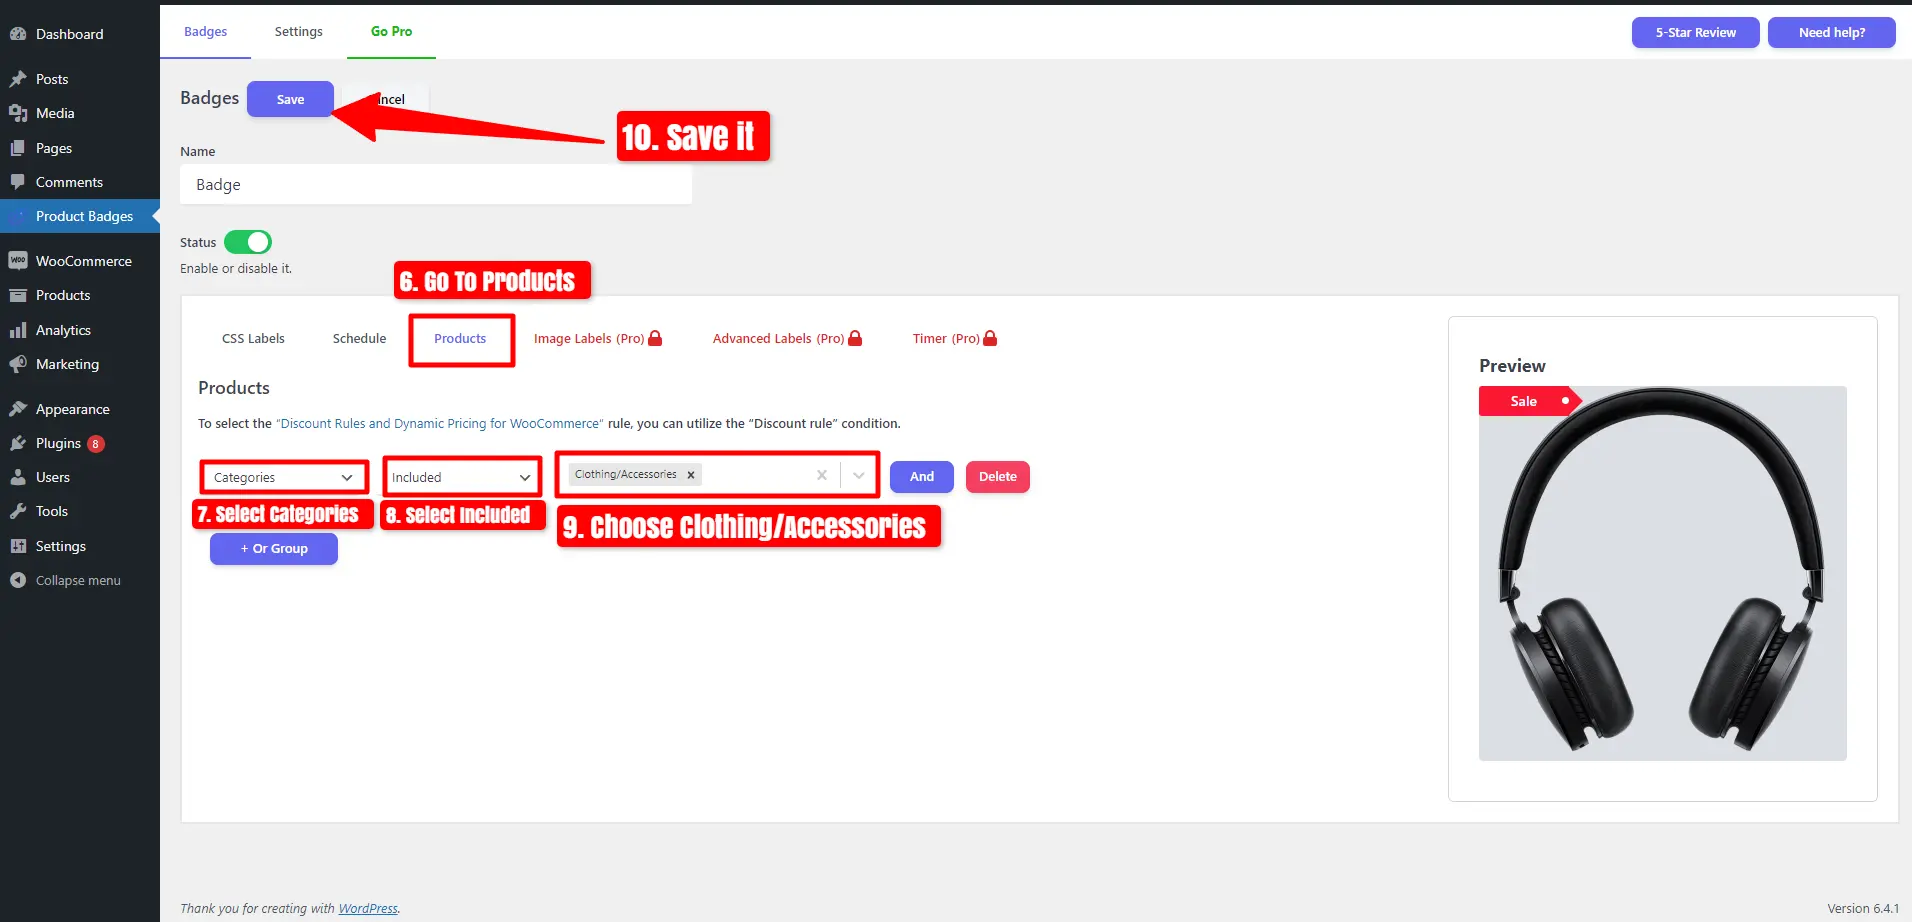
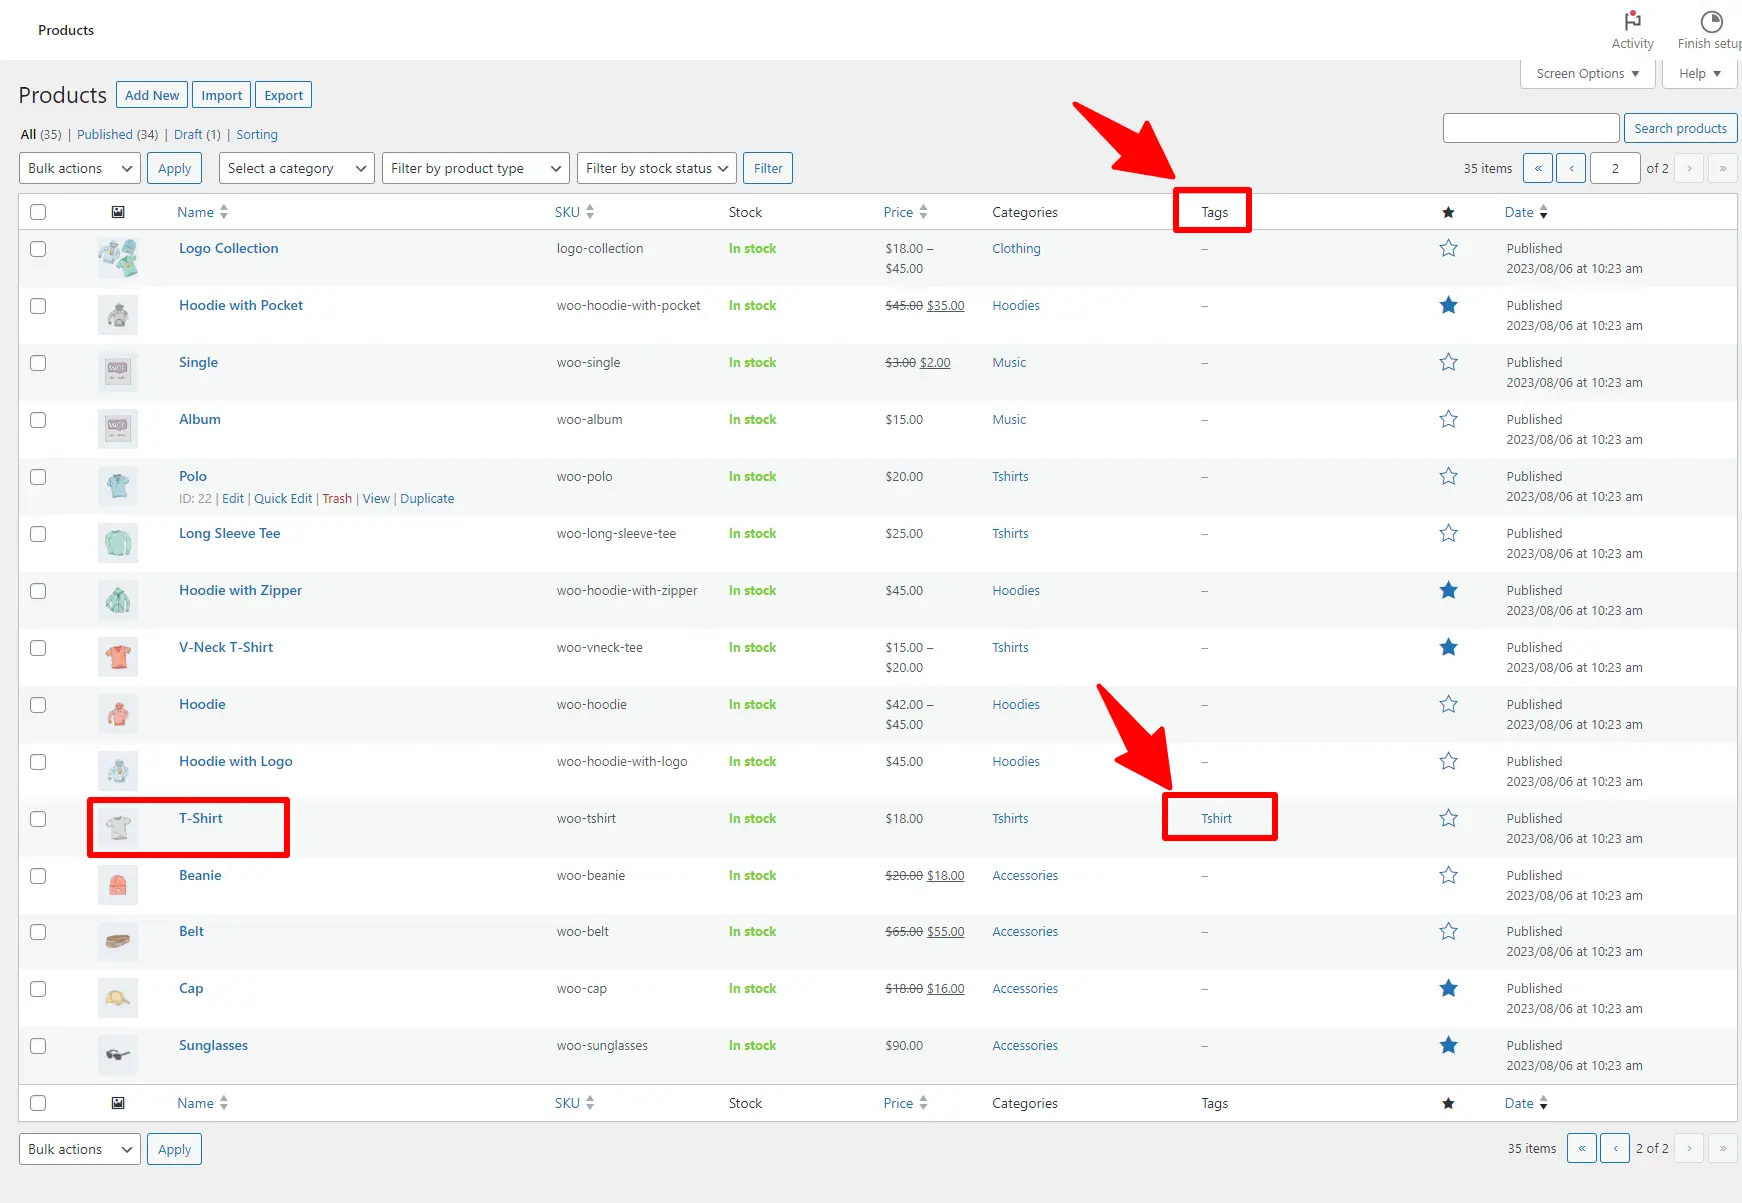
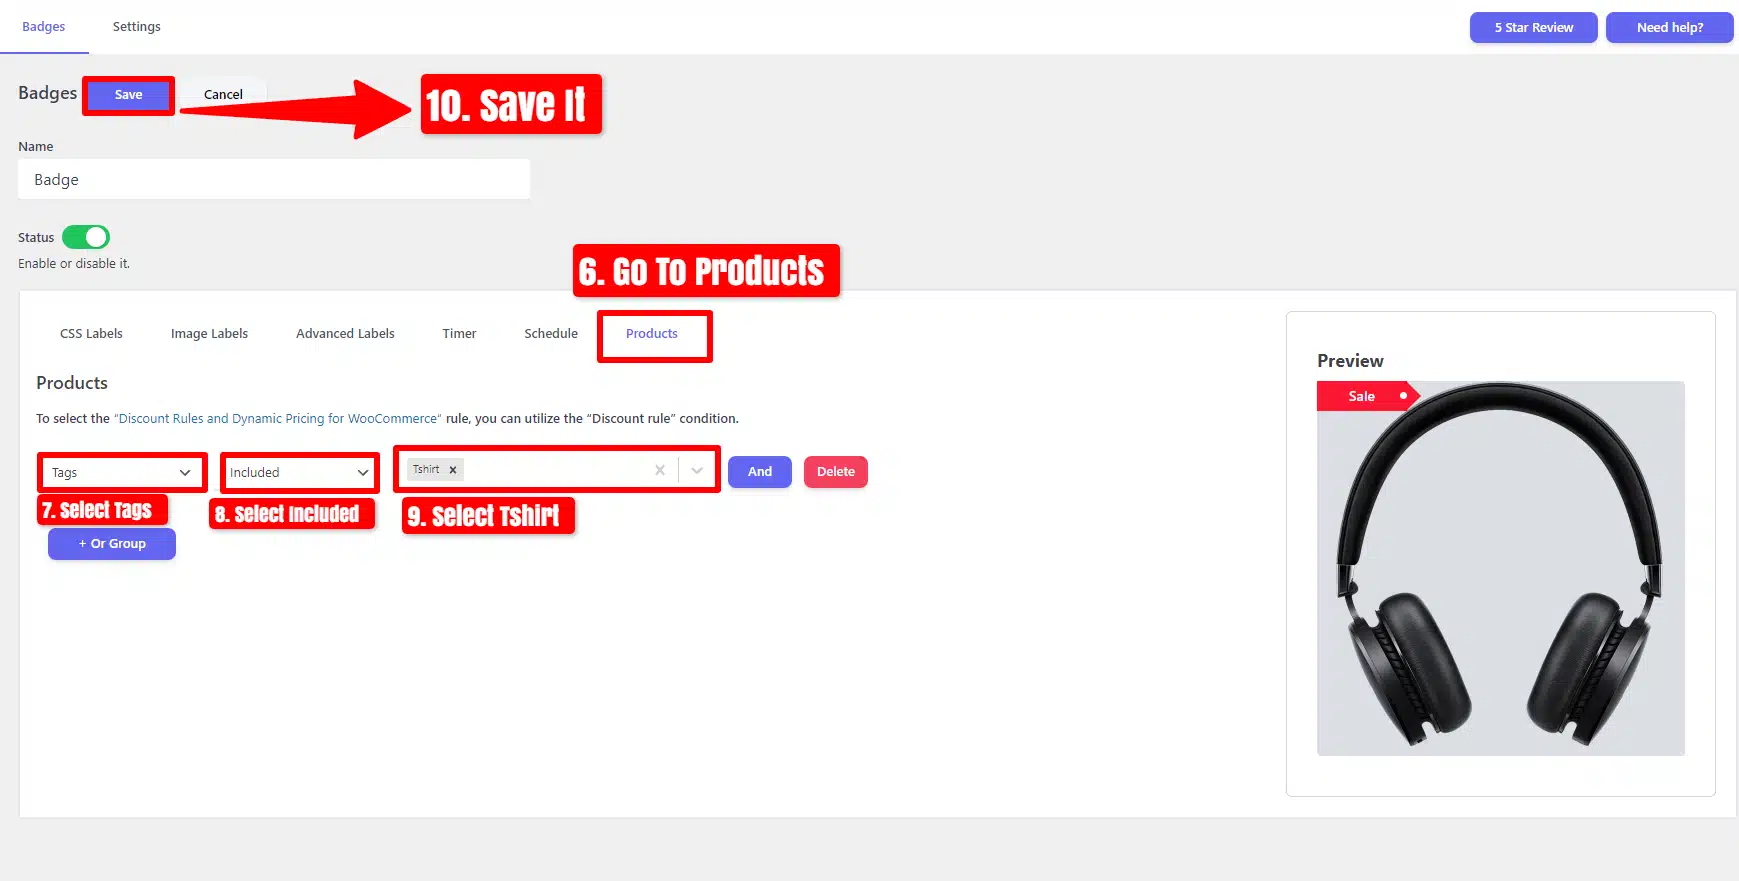
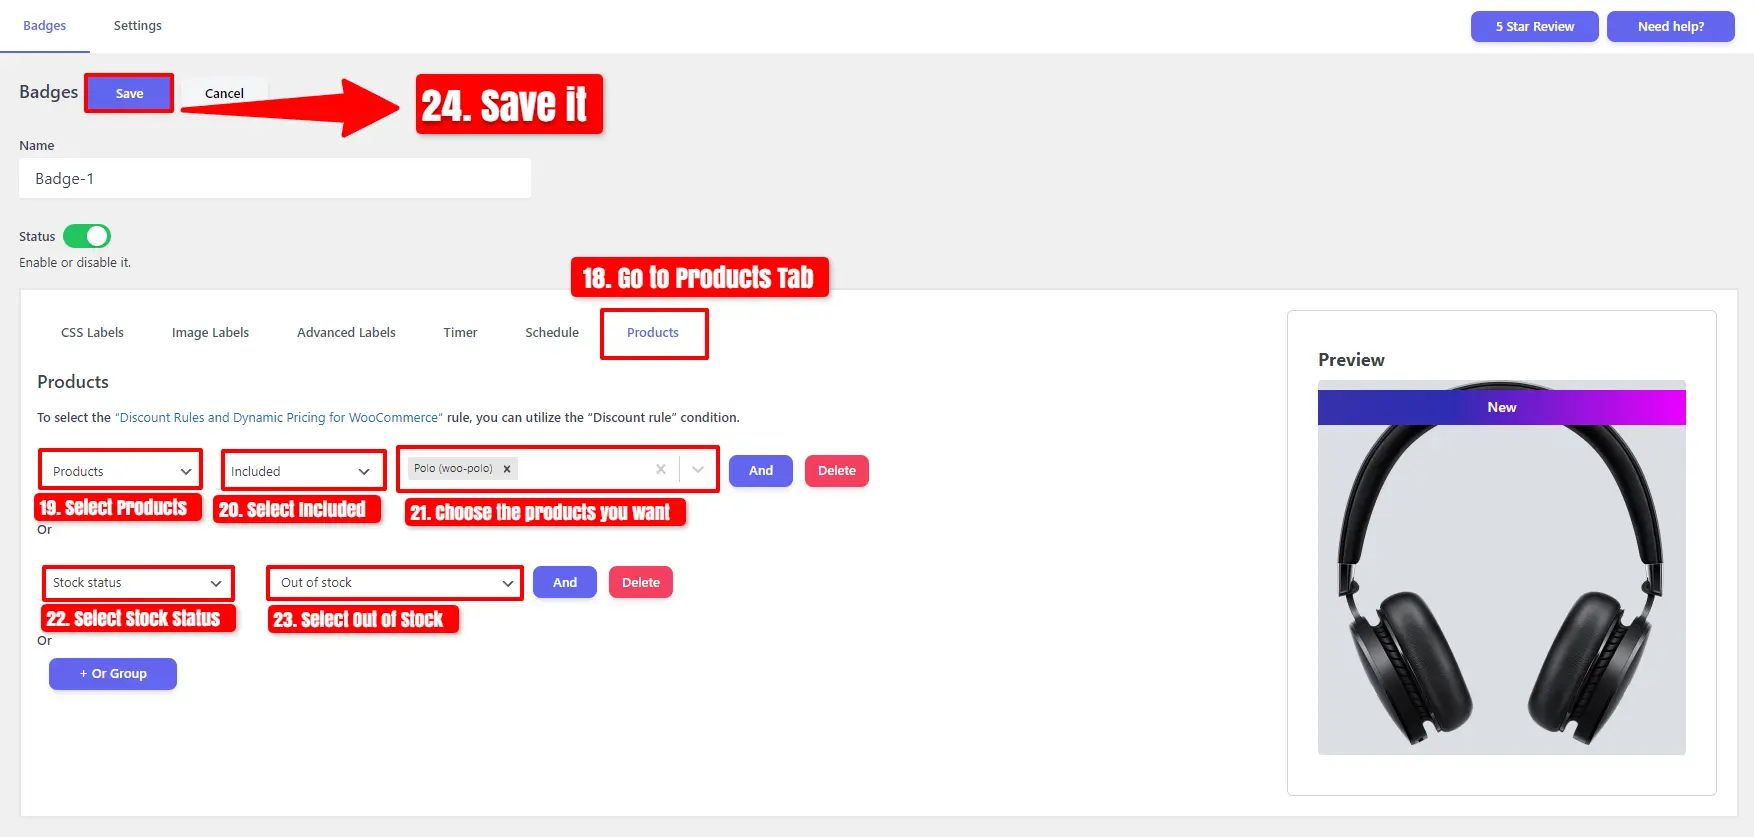
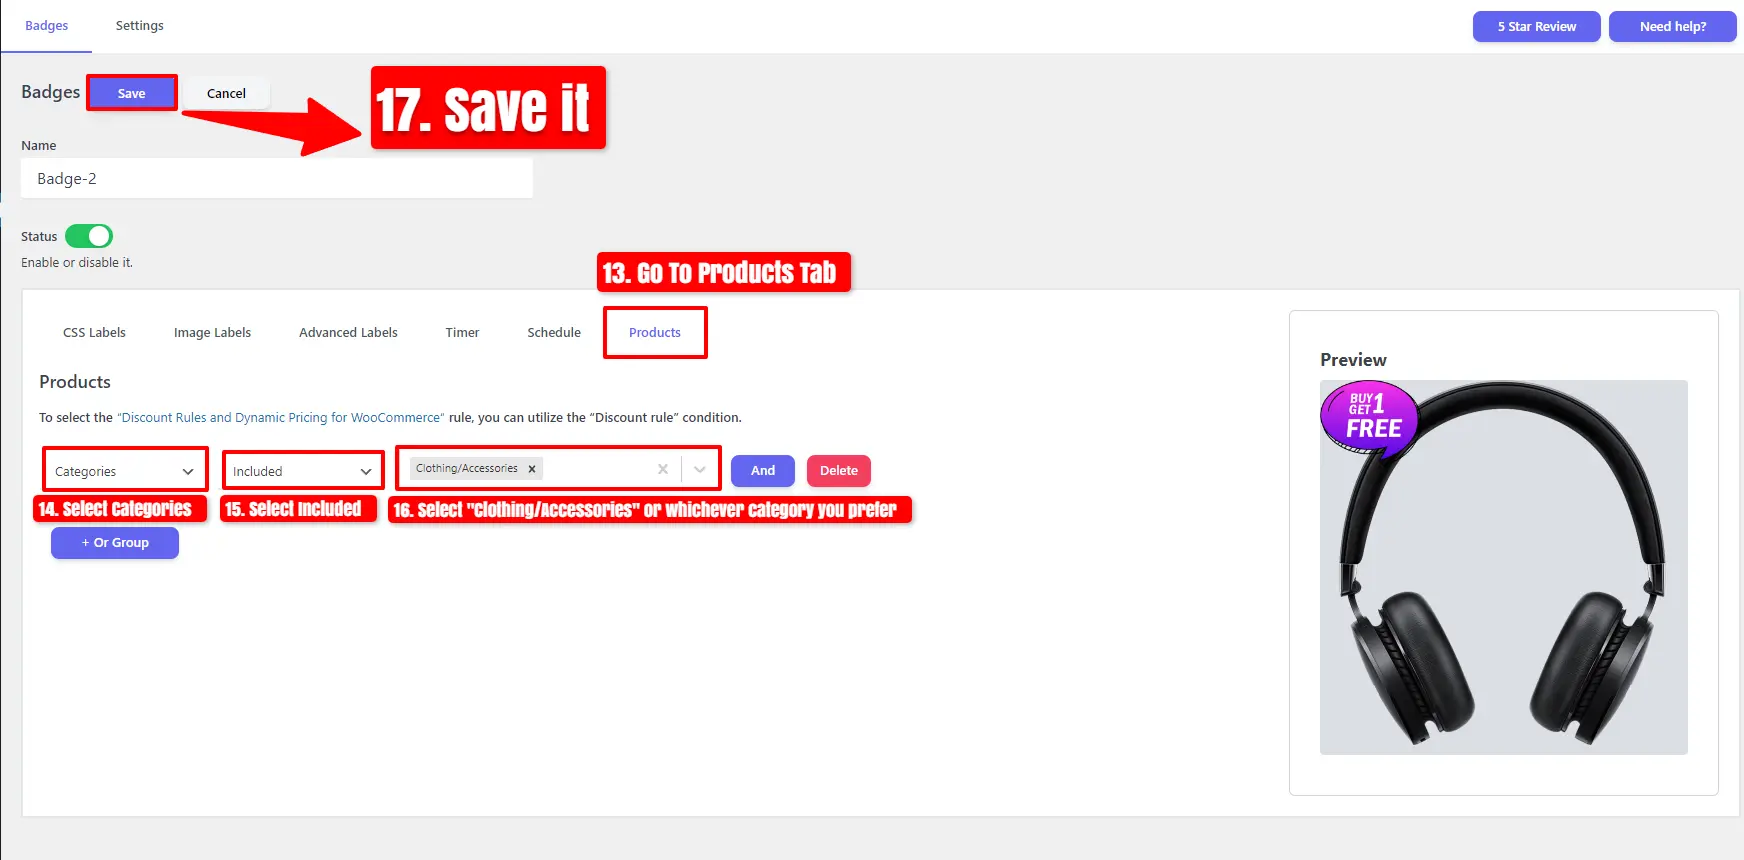
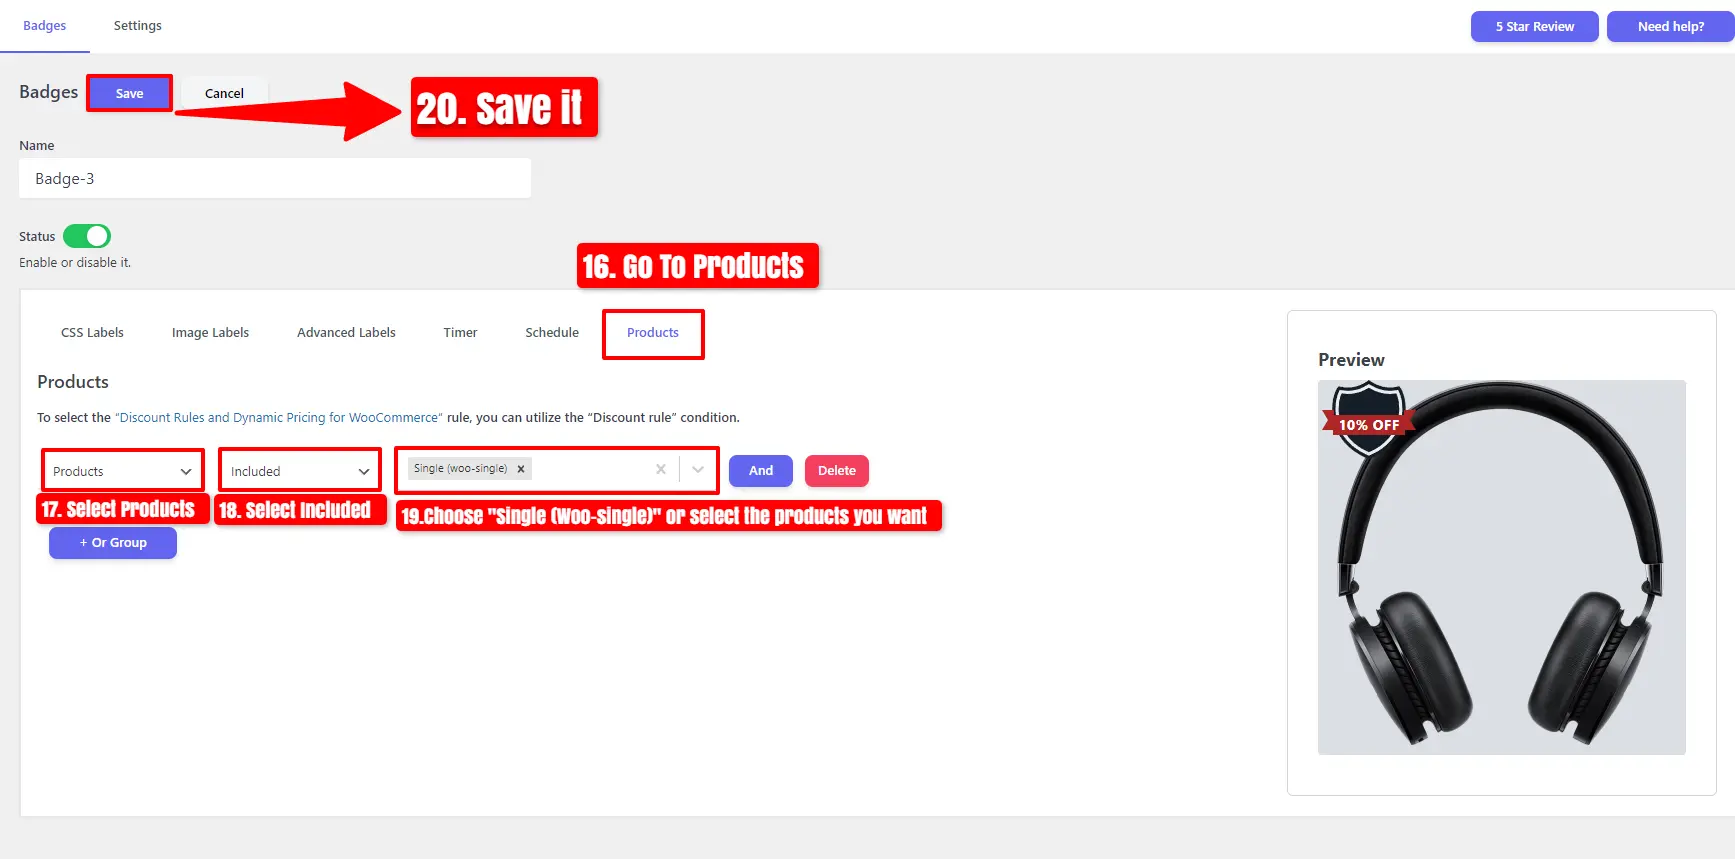
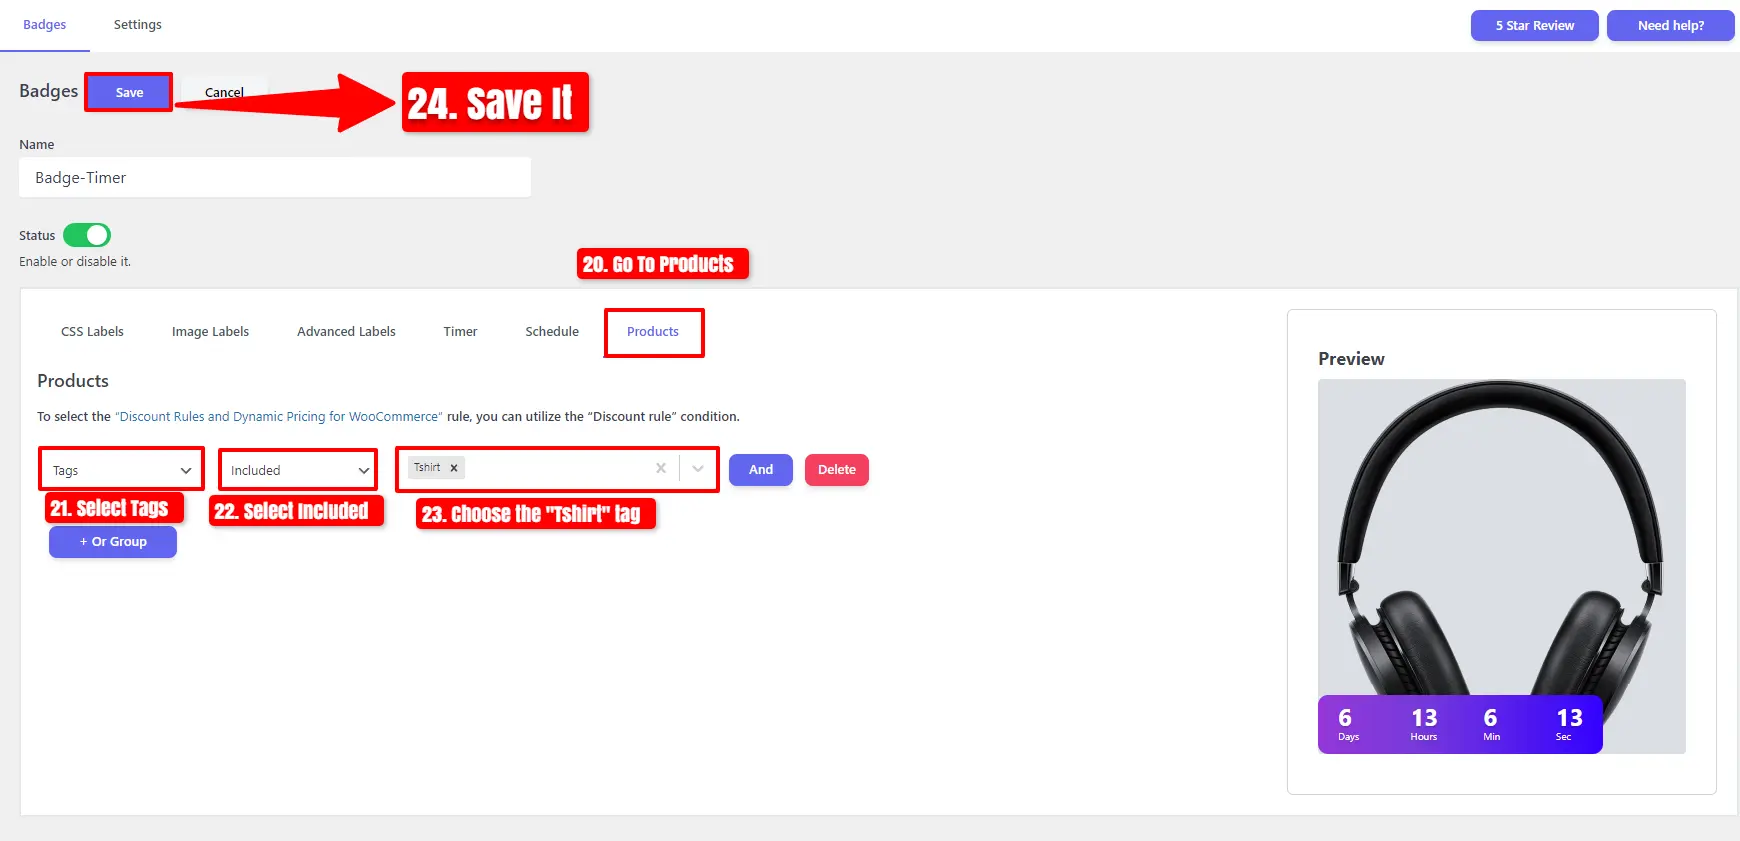
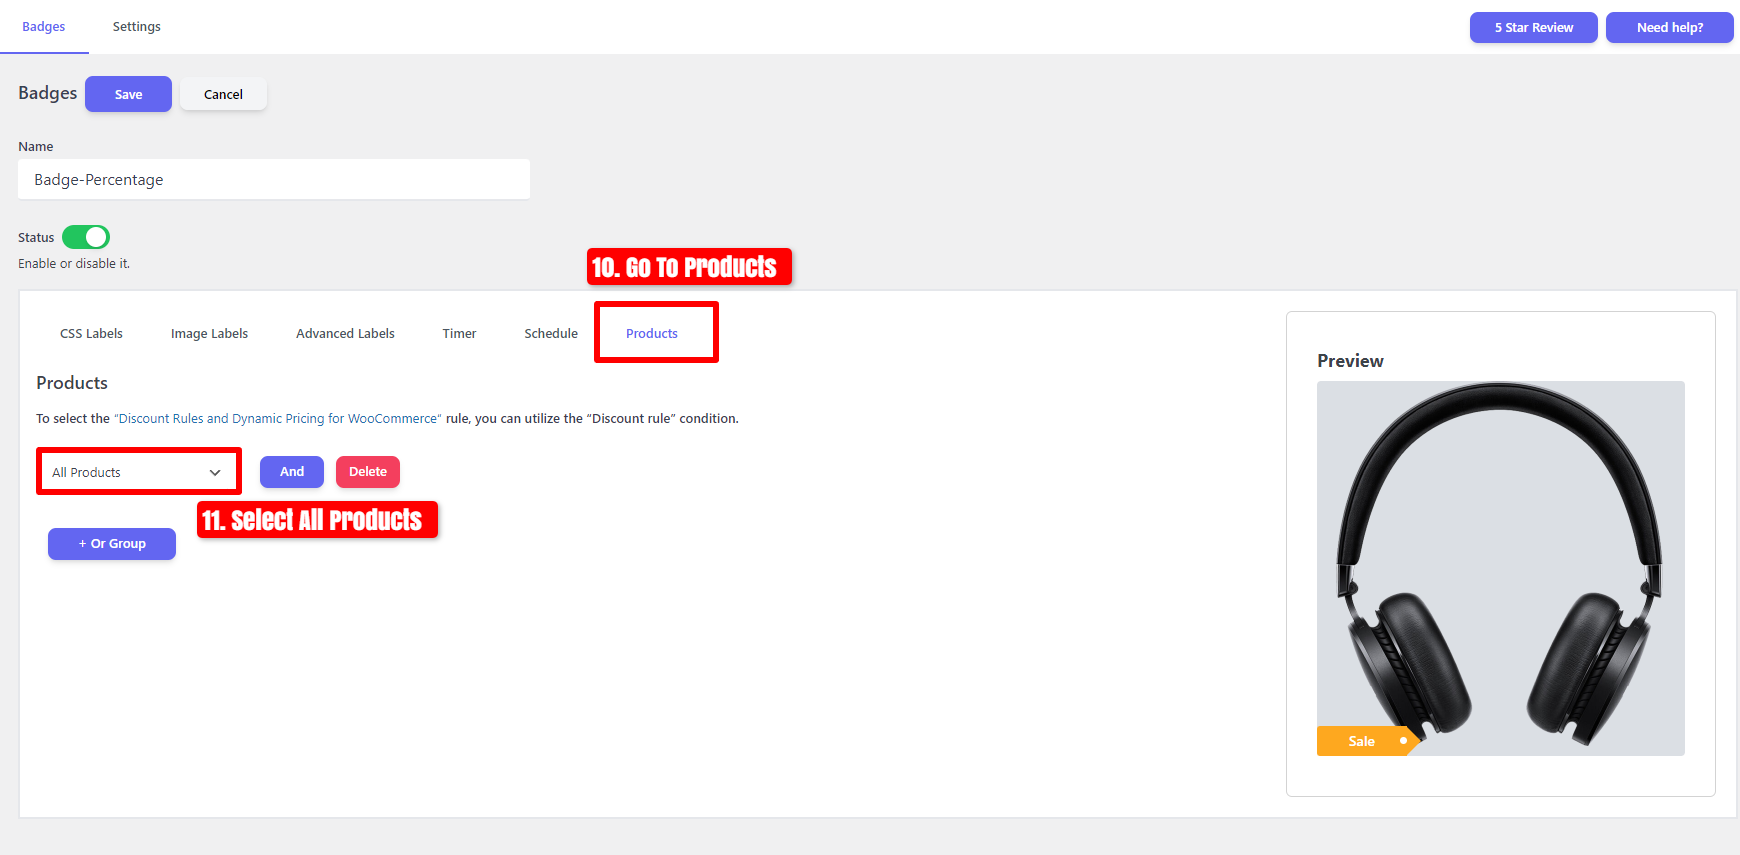
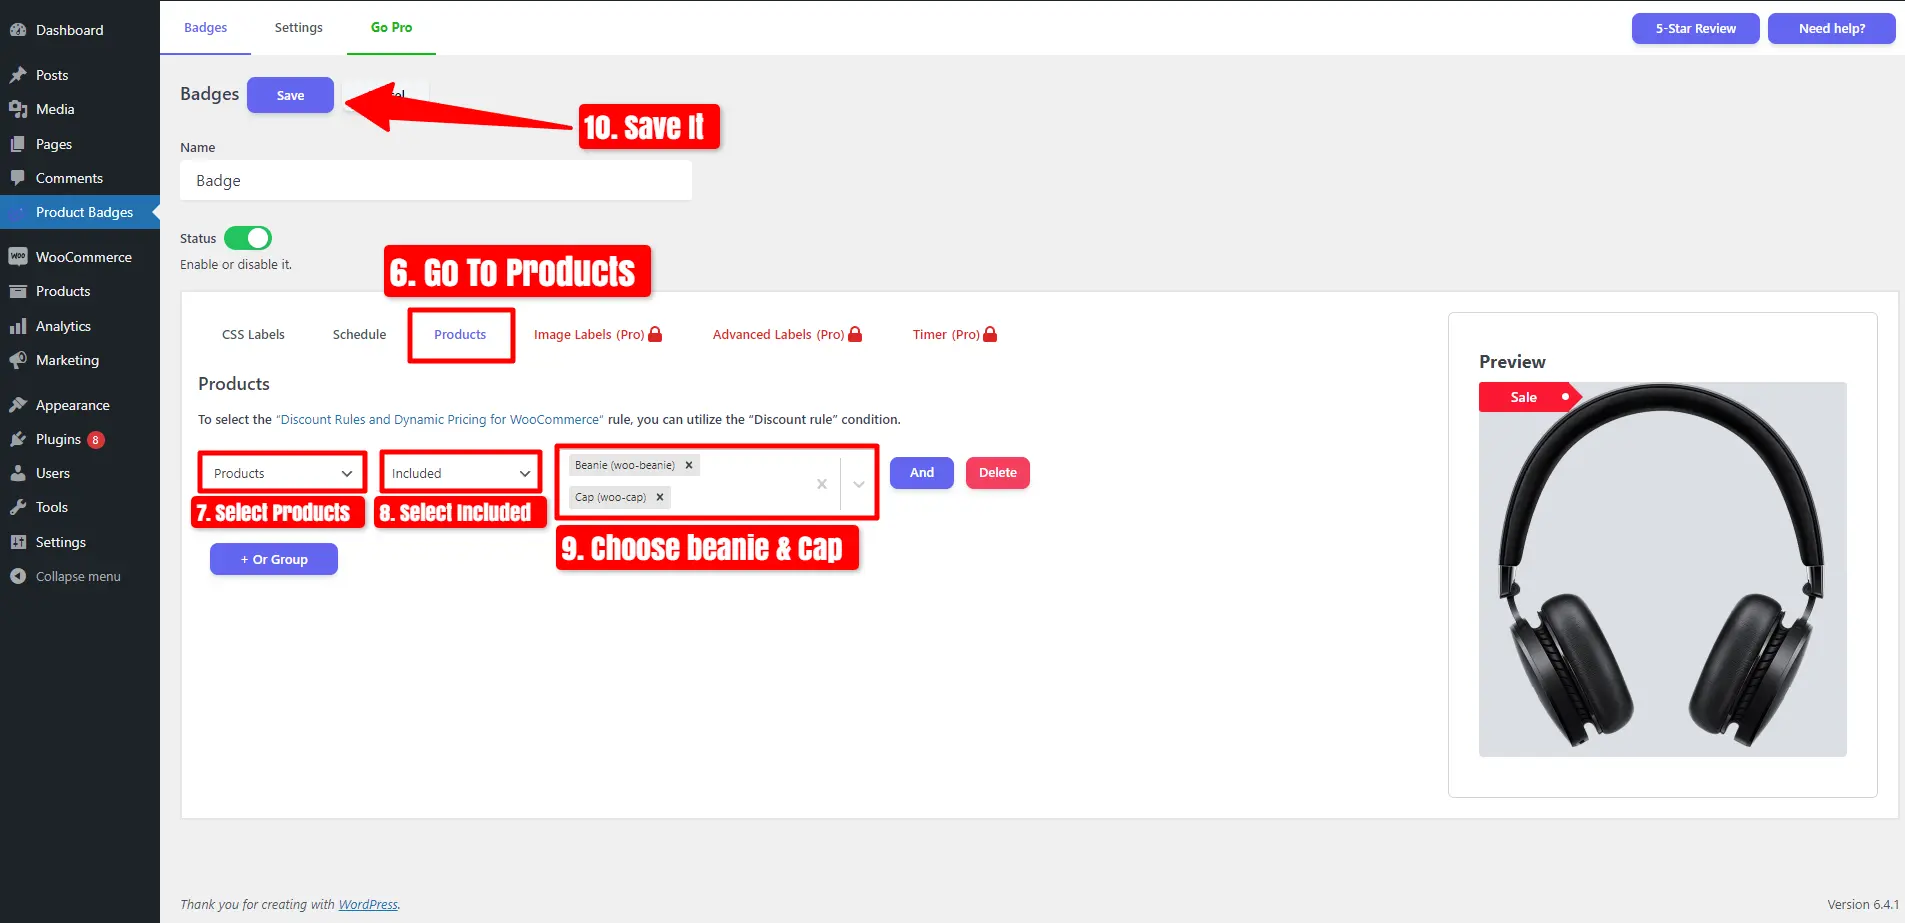
- Navigate to the ‘Products‘ tab.
- Select ‘Stock Status‘ and Choose ‘Out of Stock.’
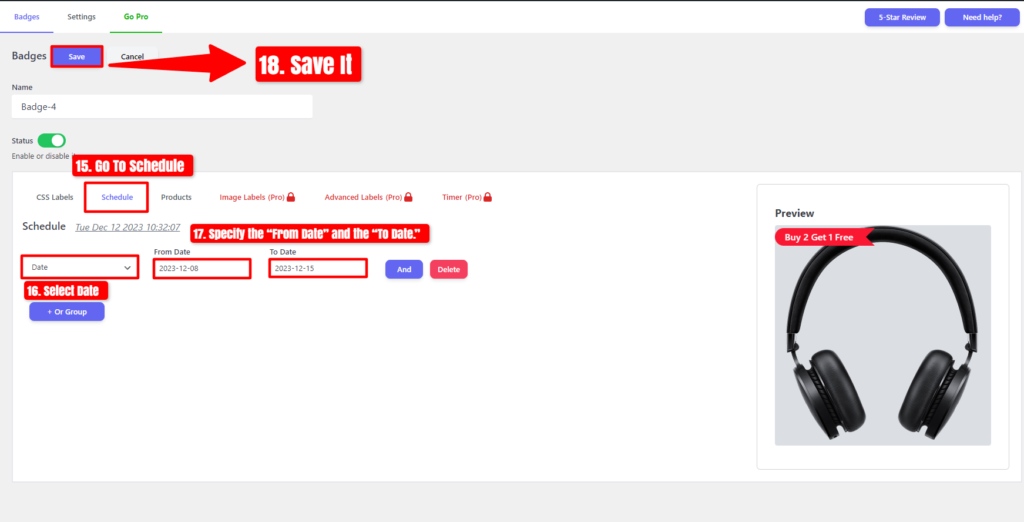
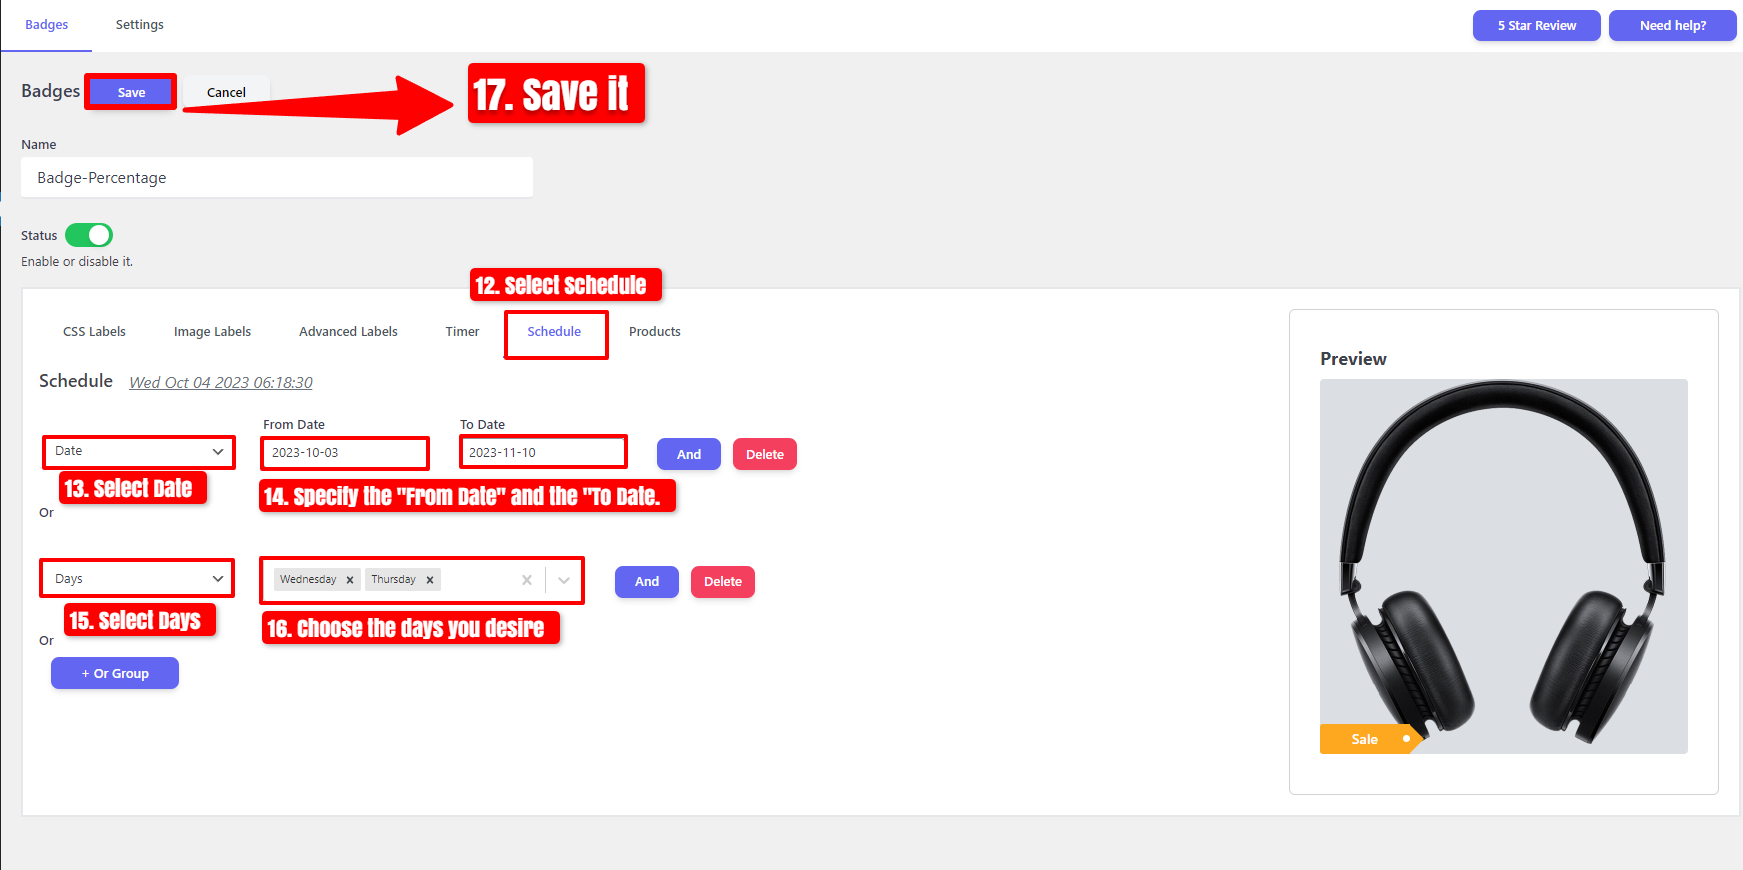
- Save your changes.
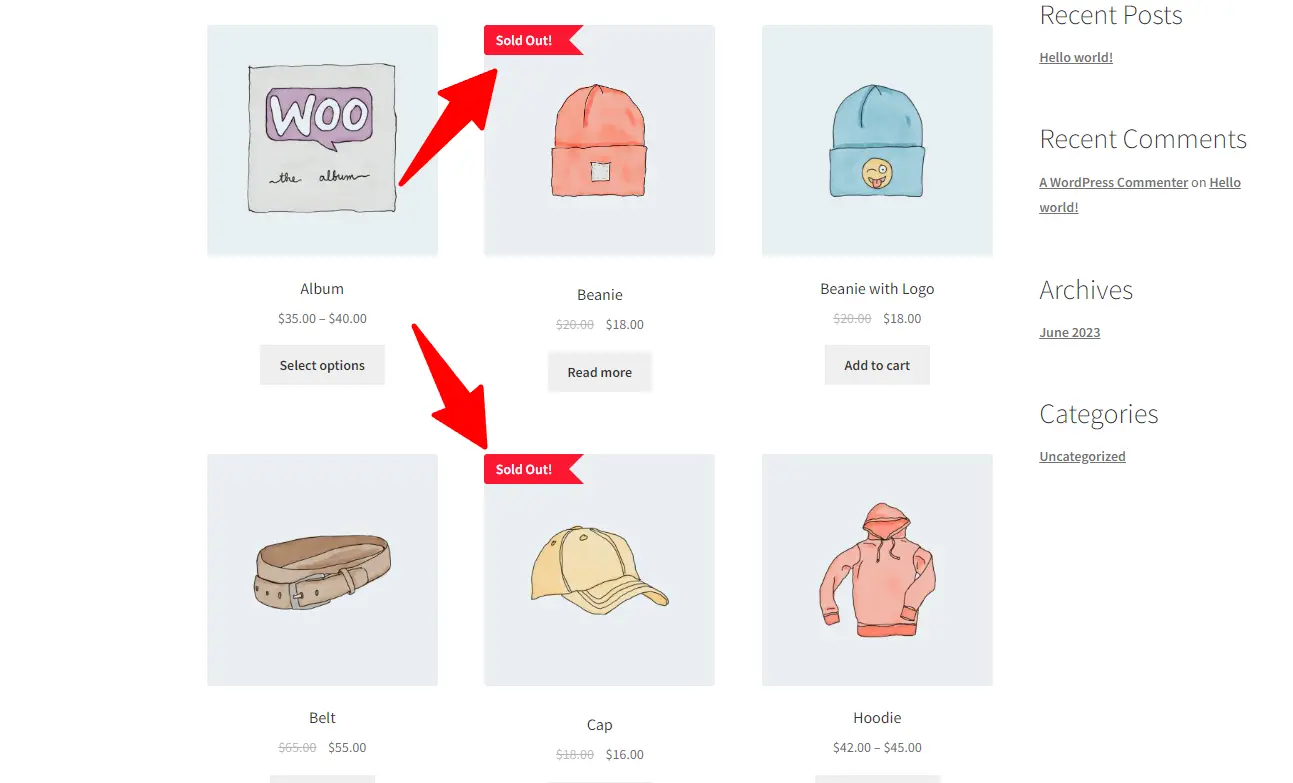
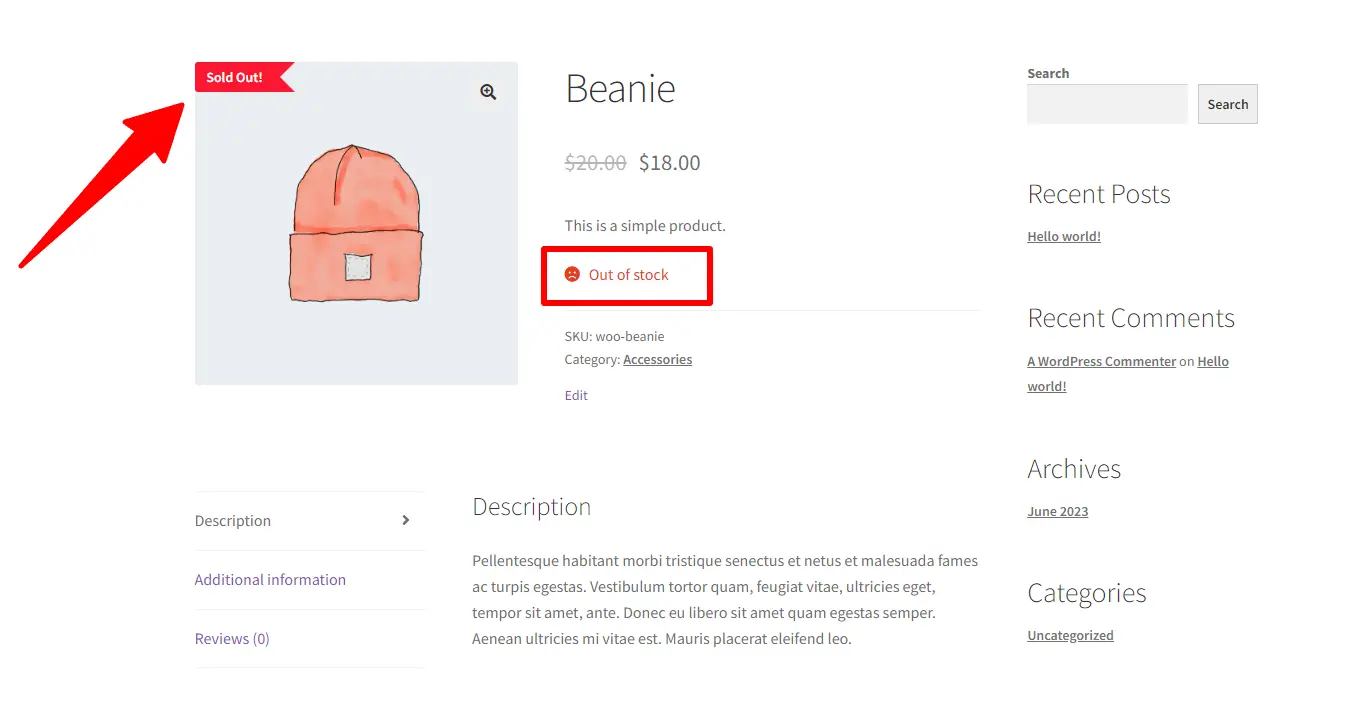
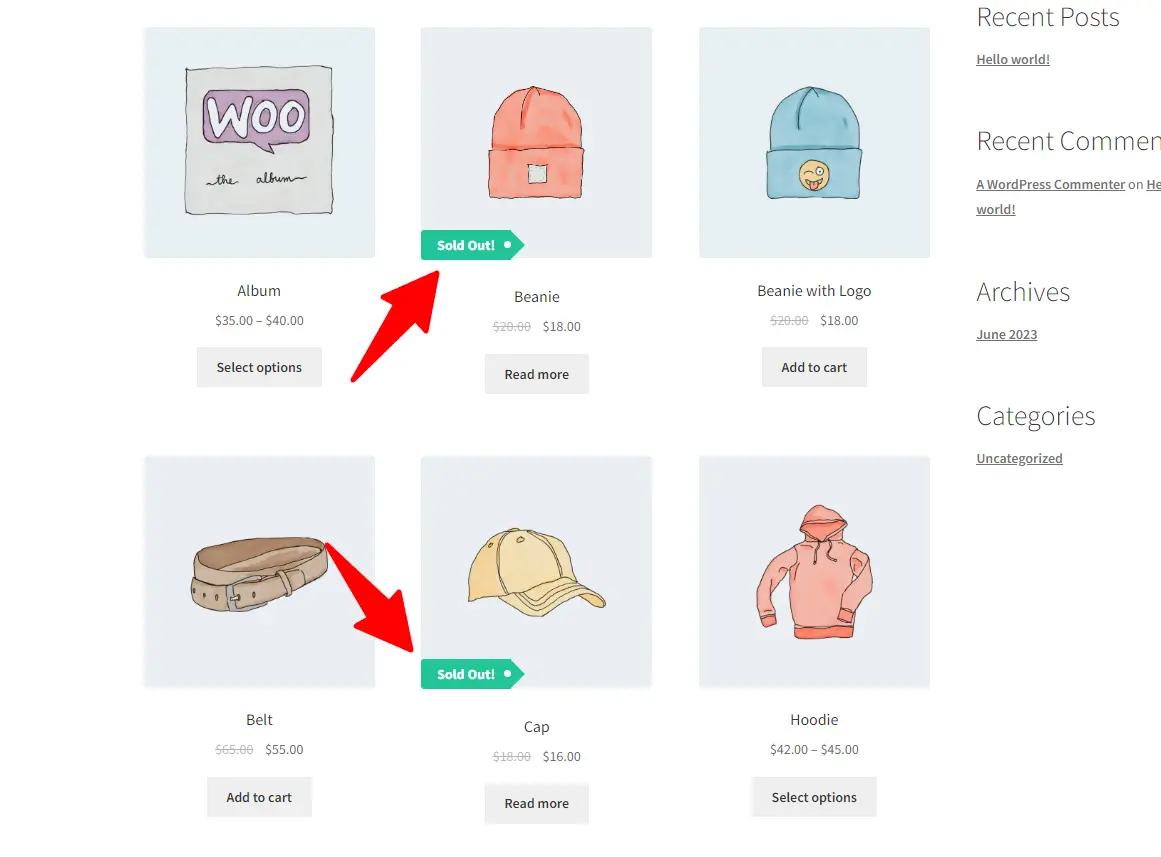
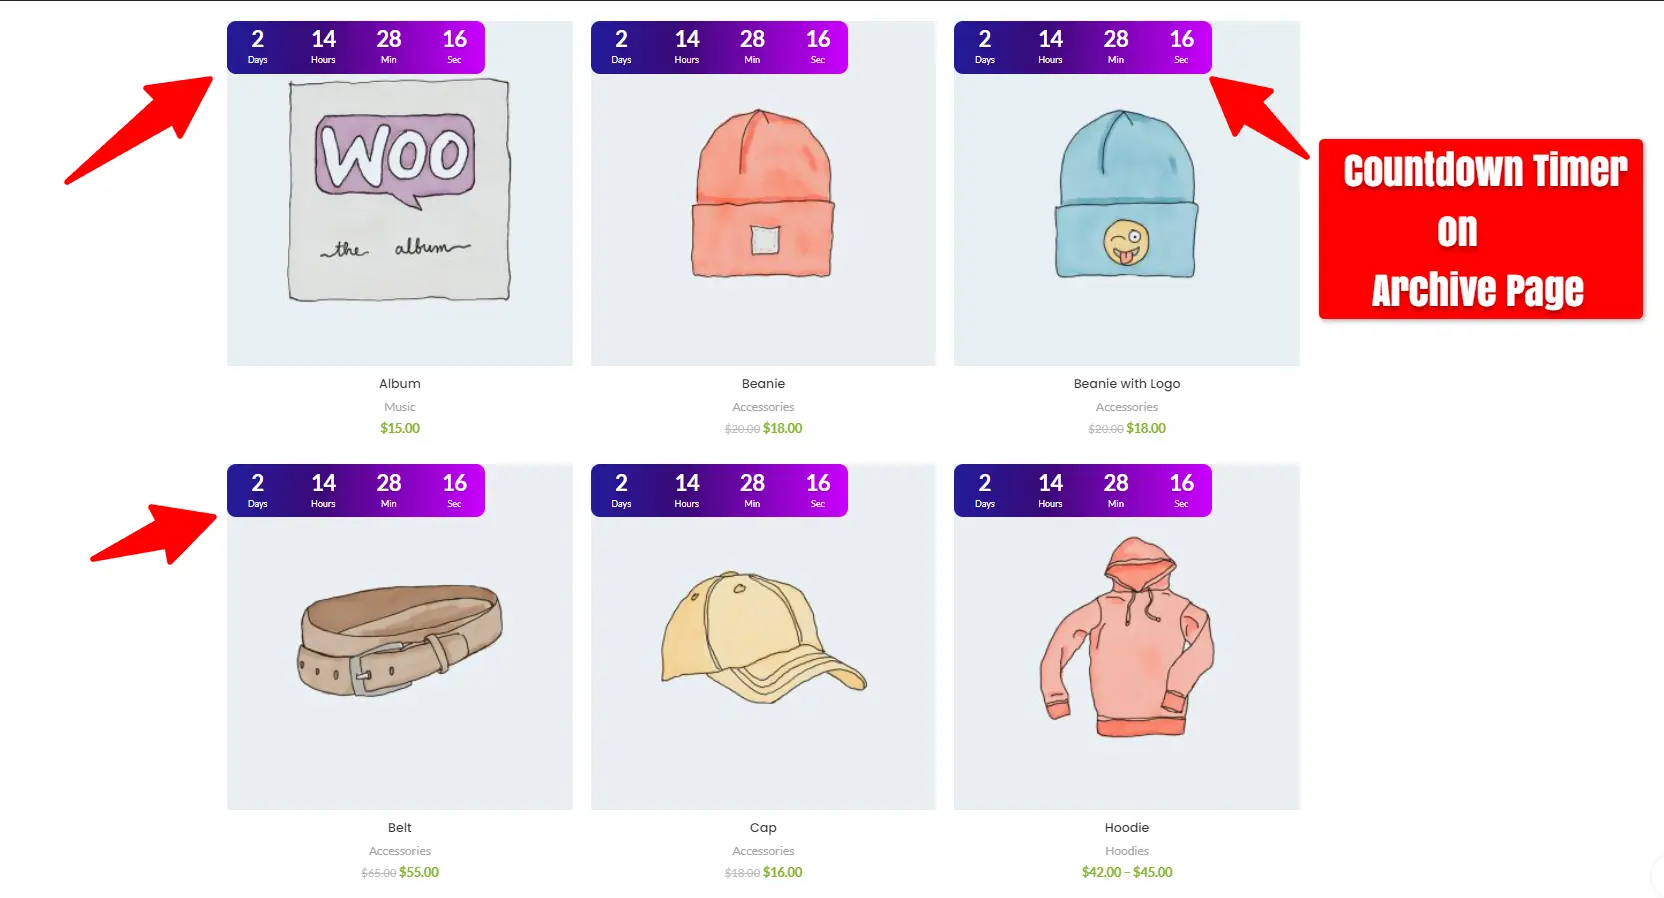
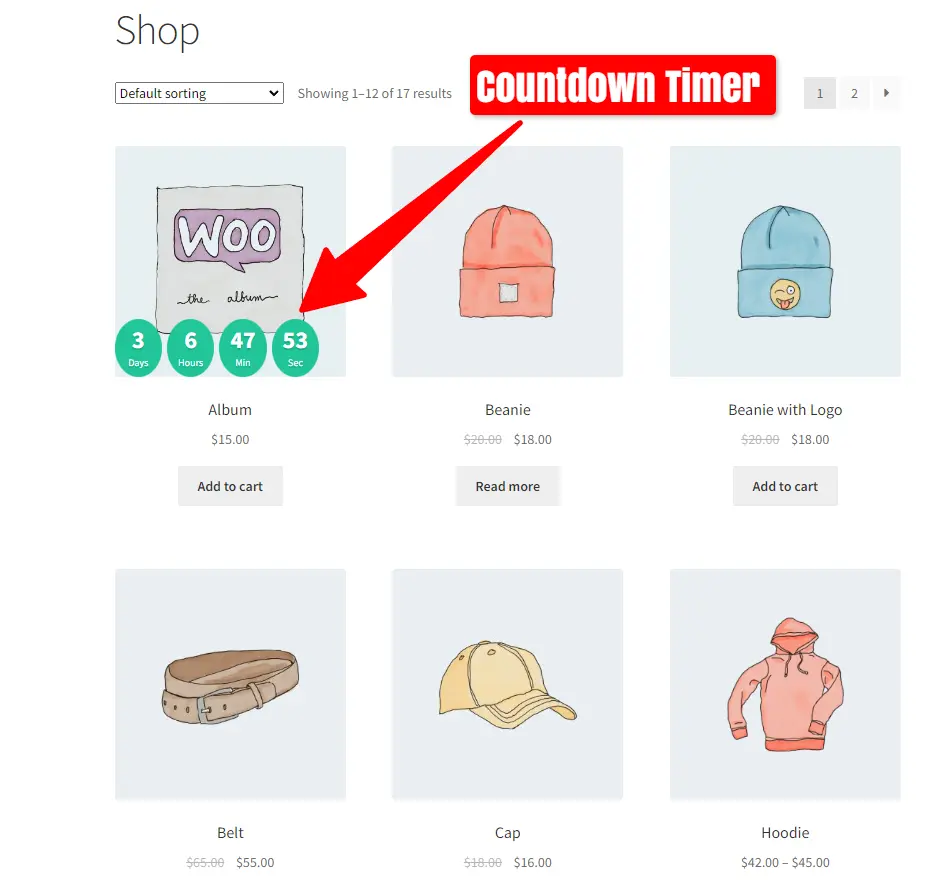
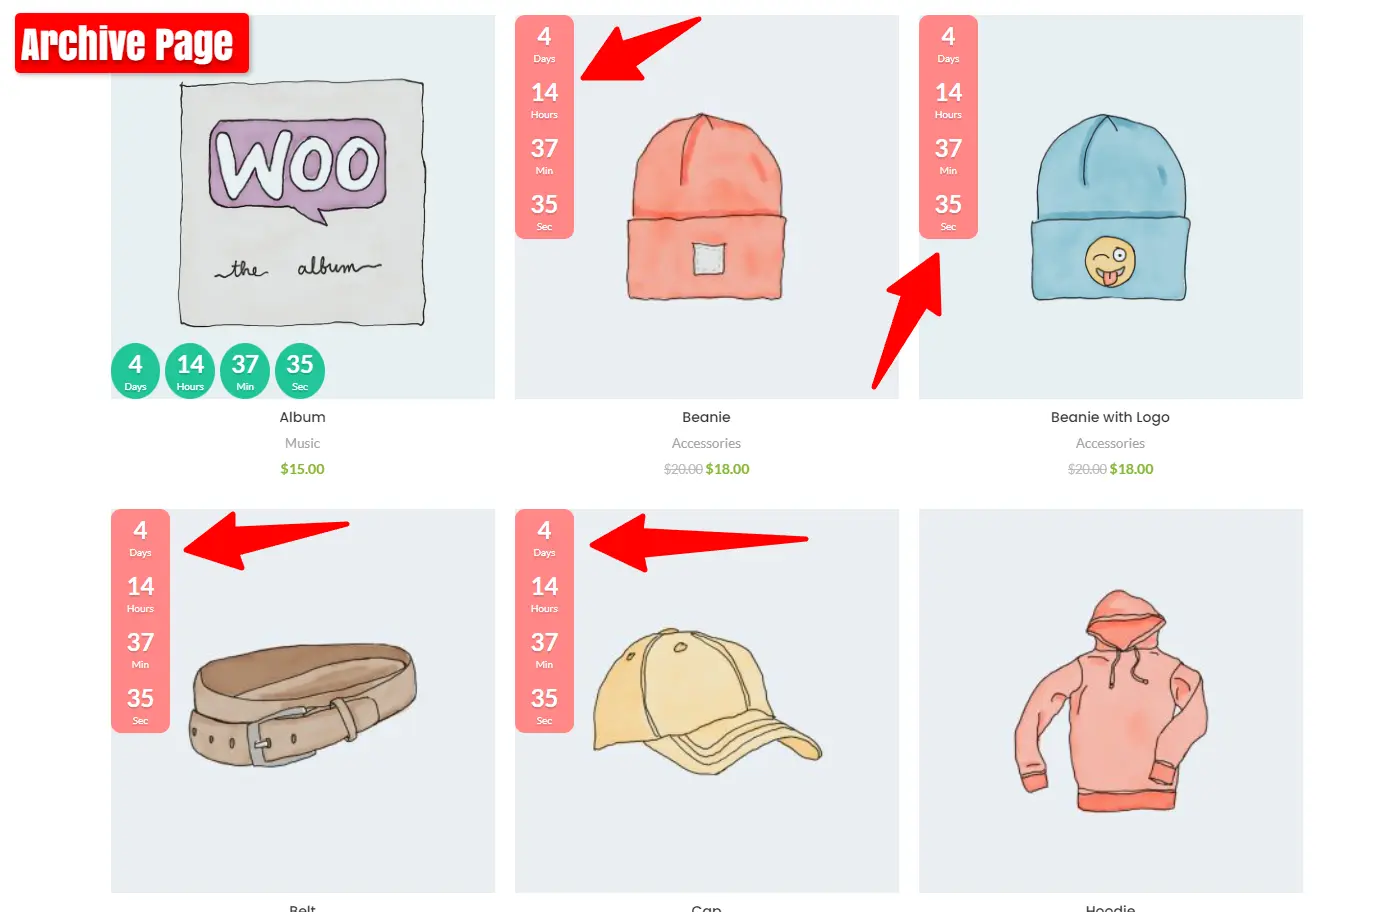
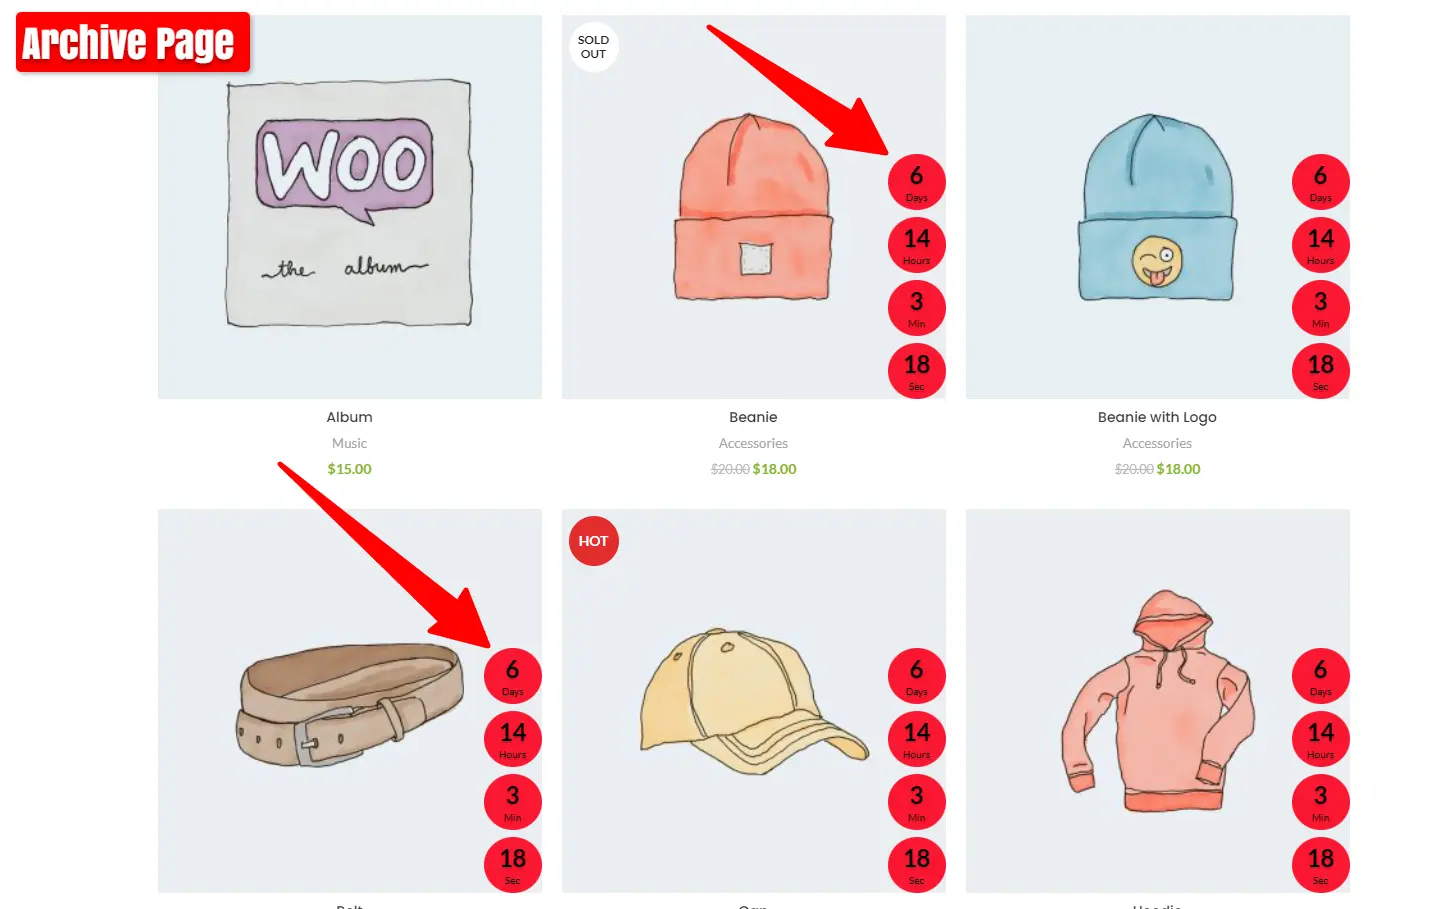
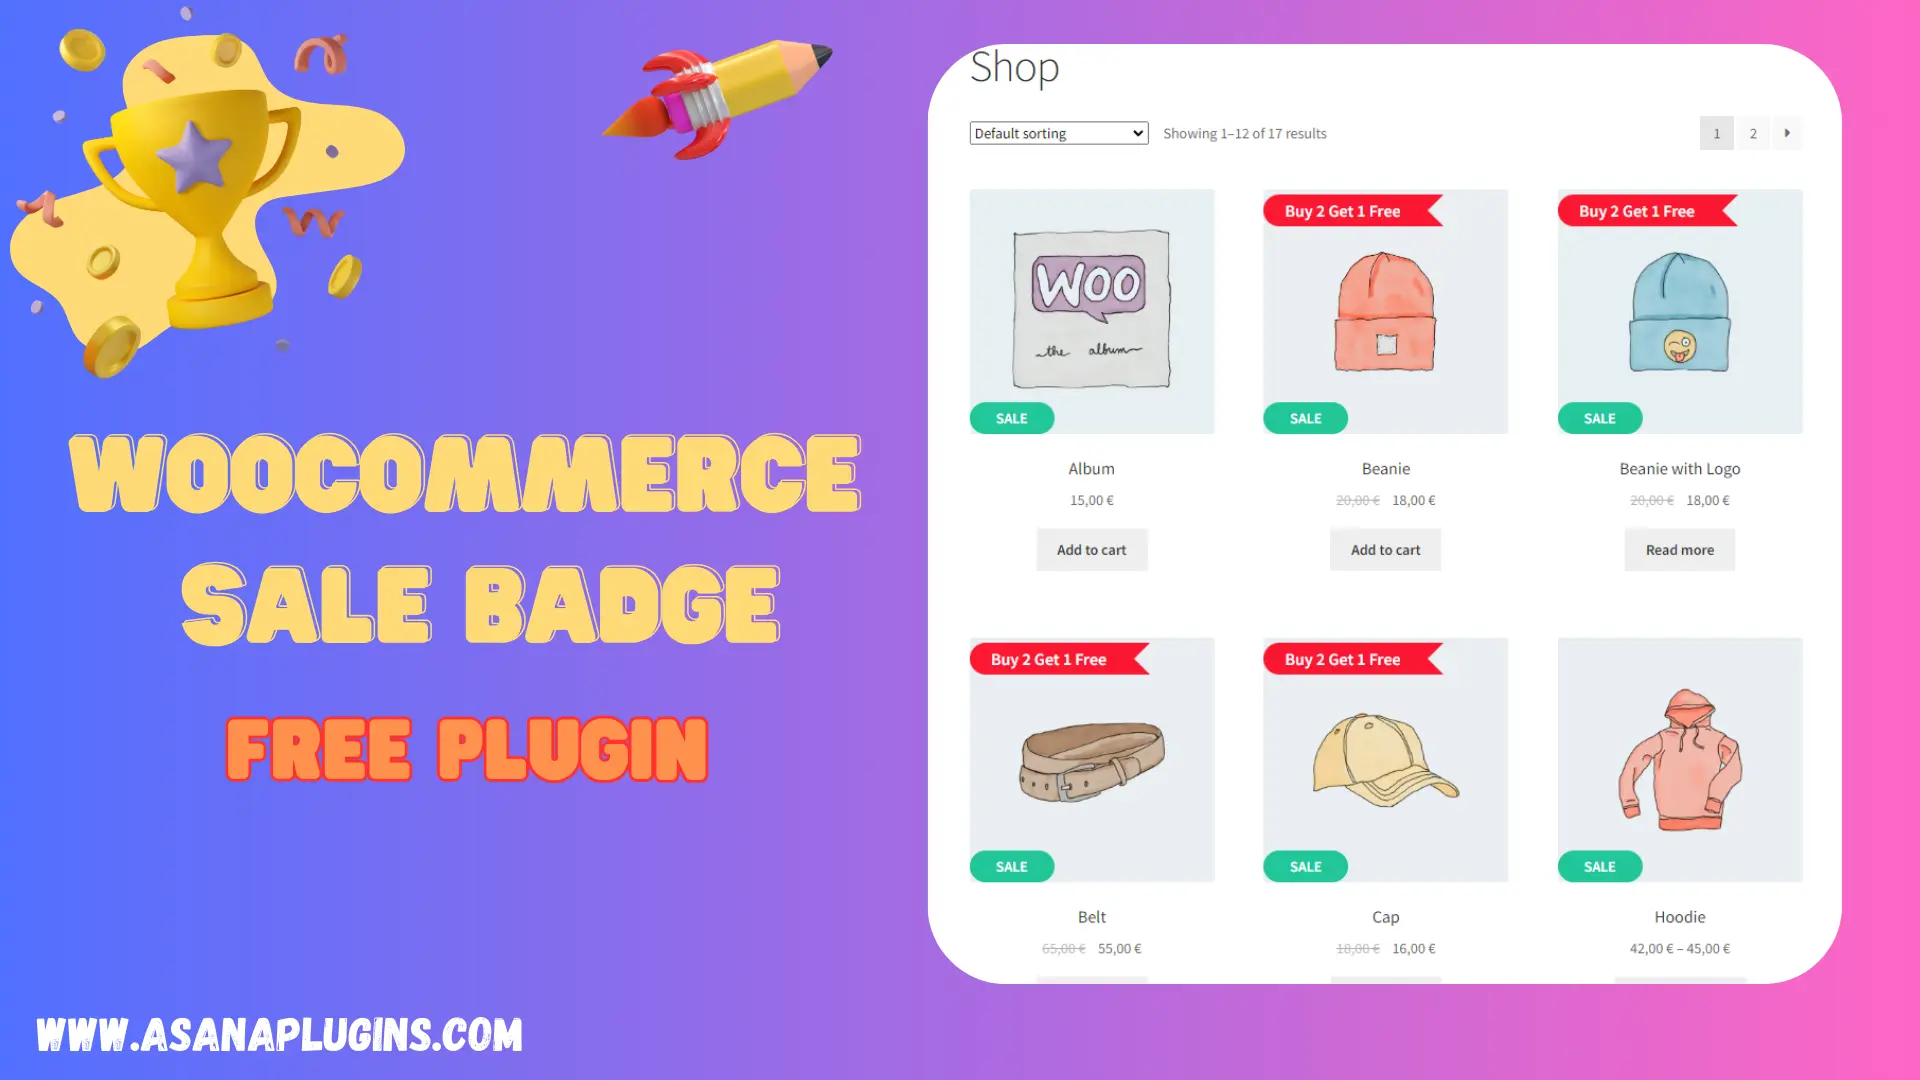
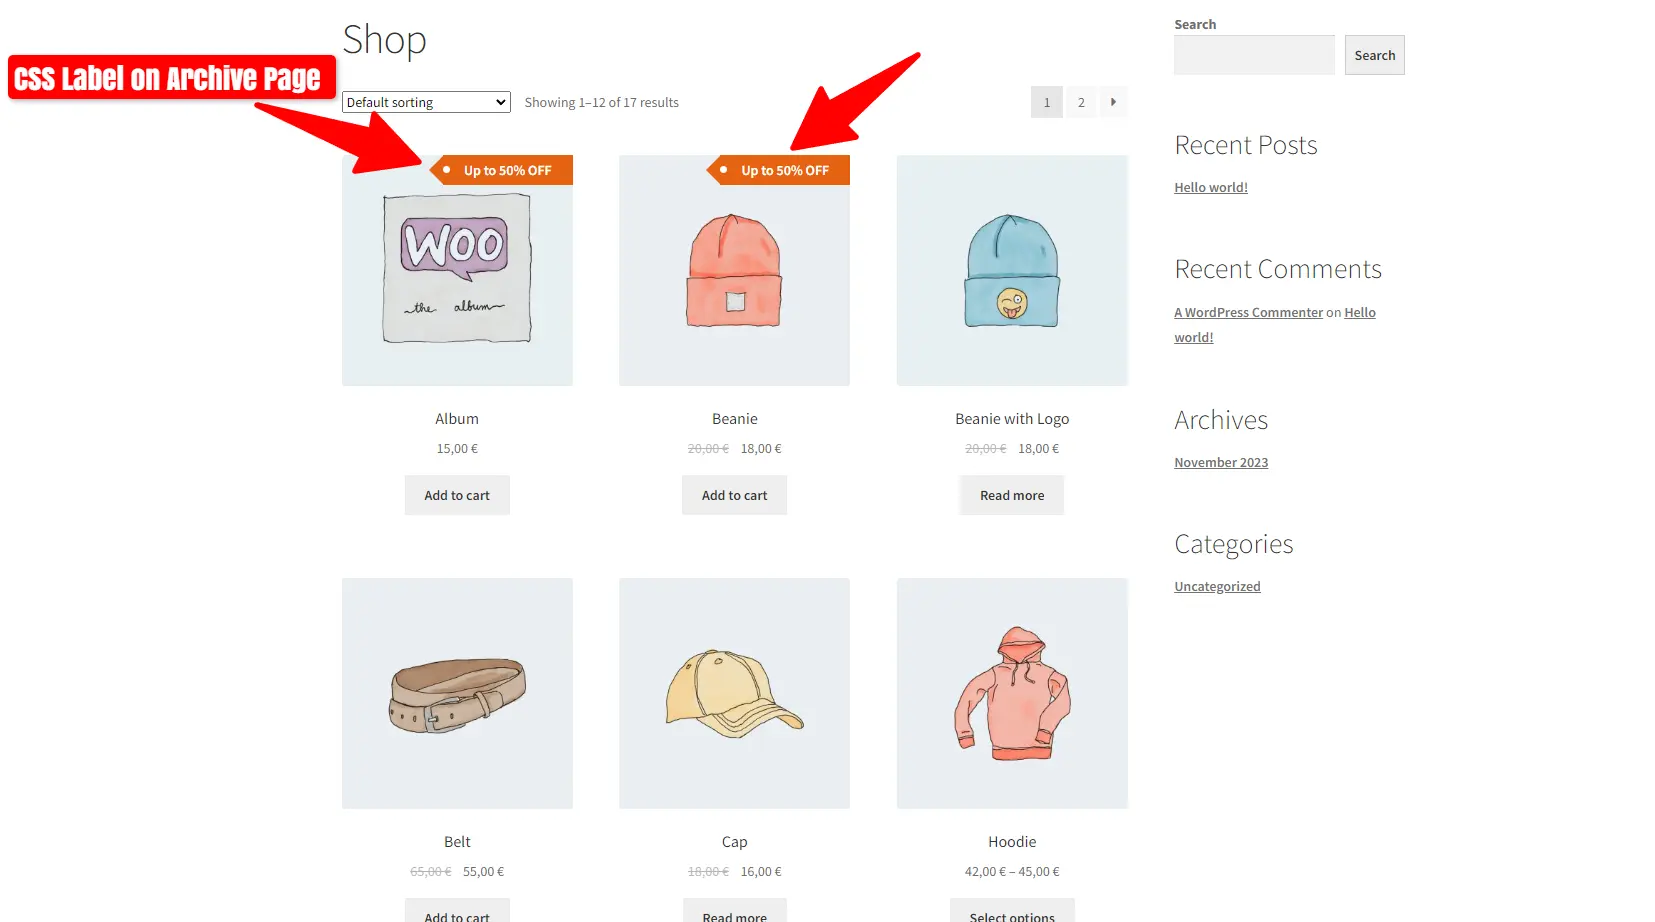
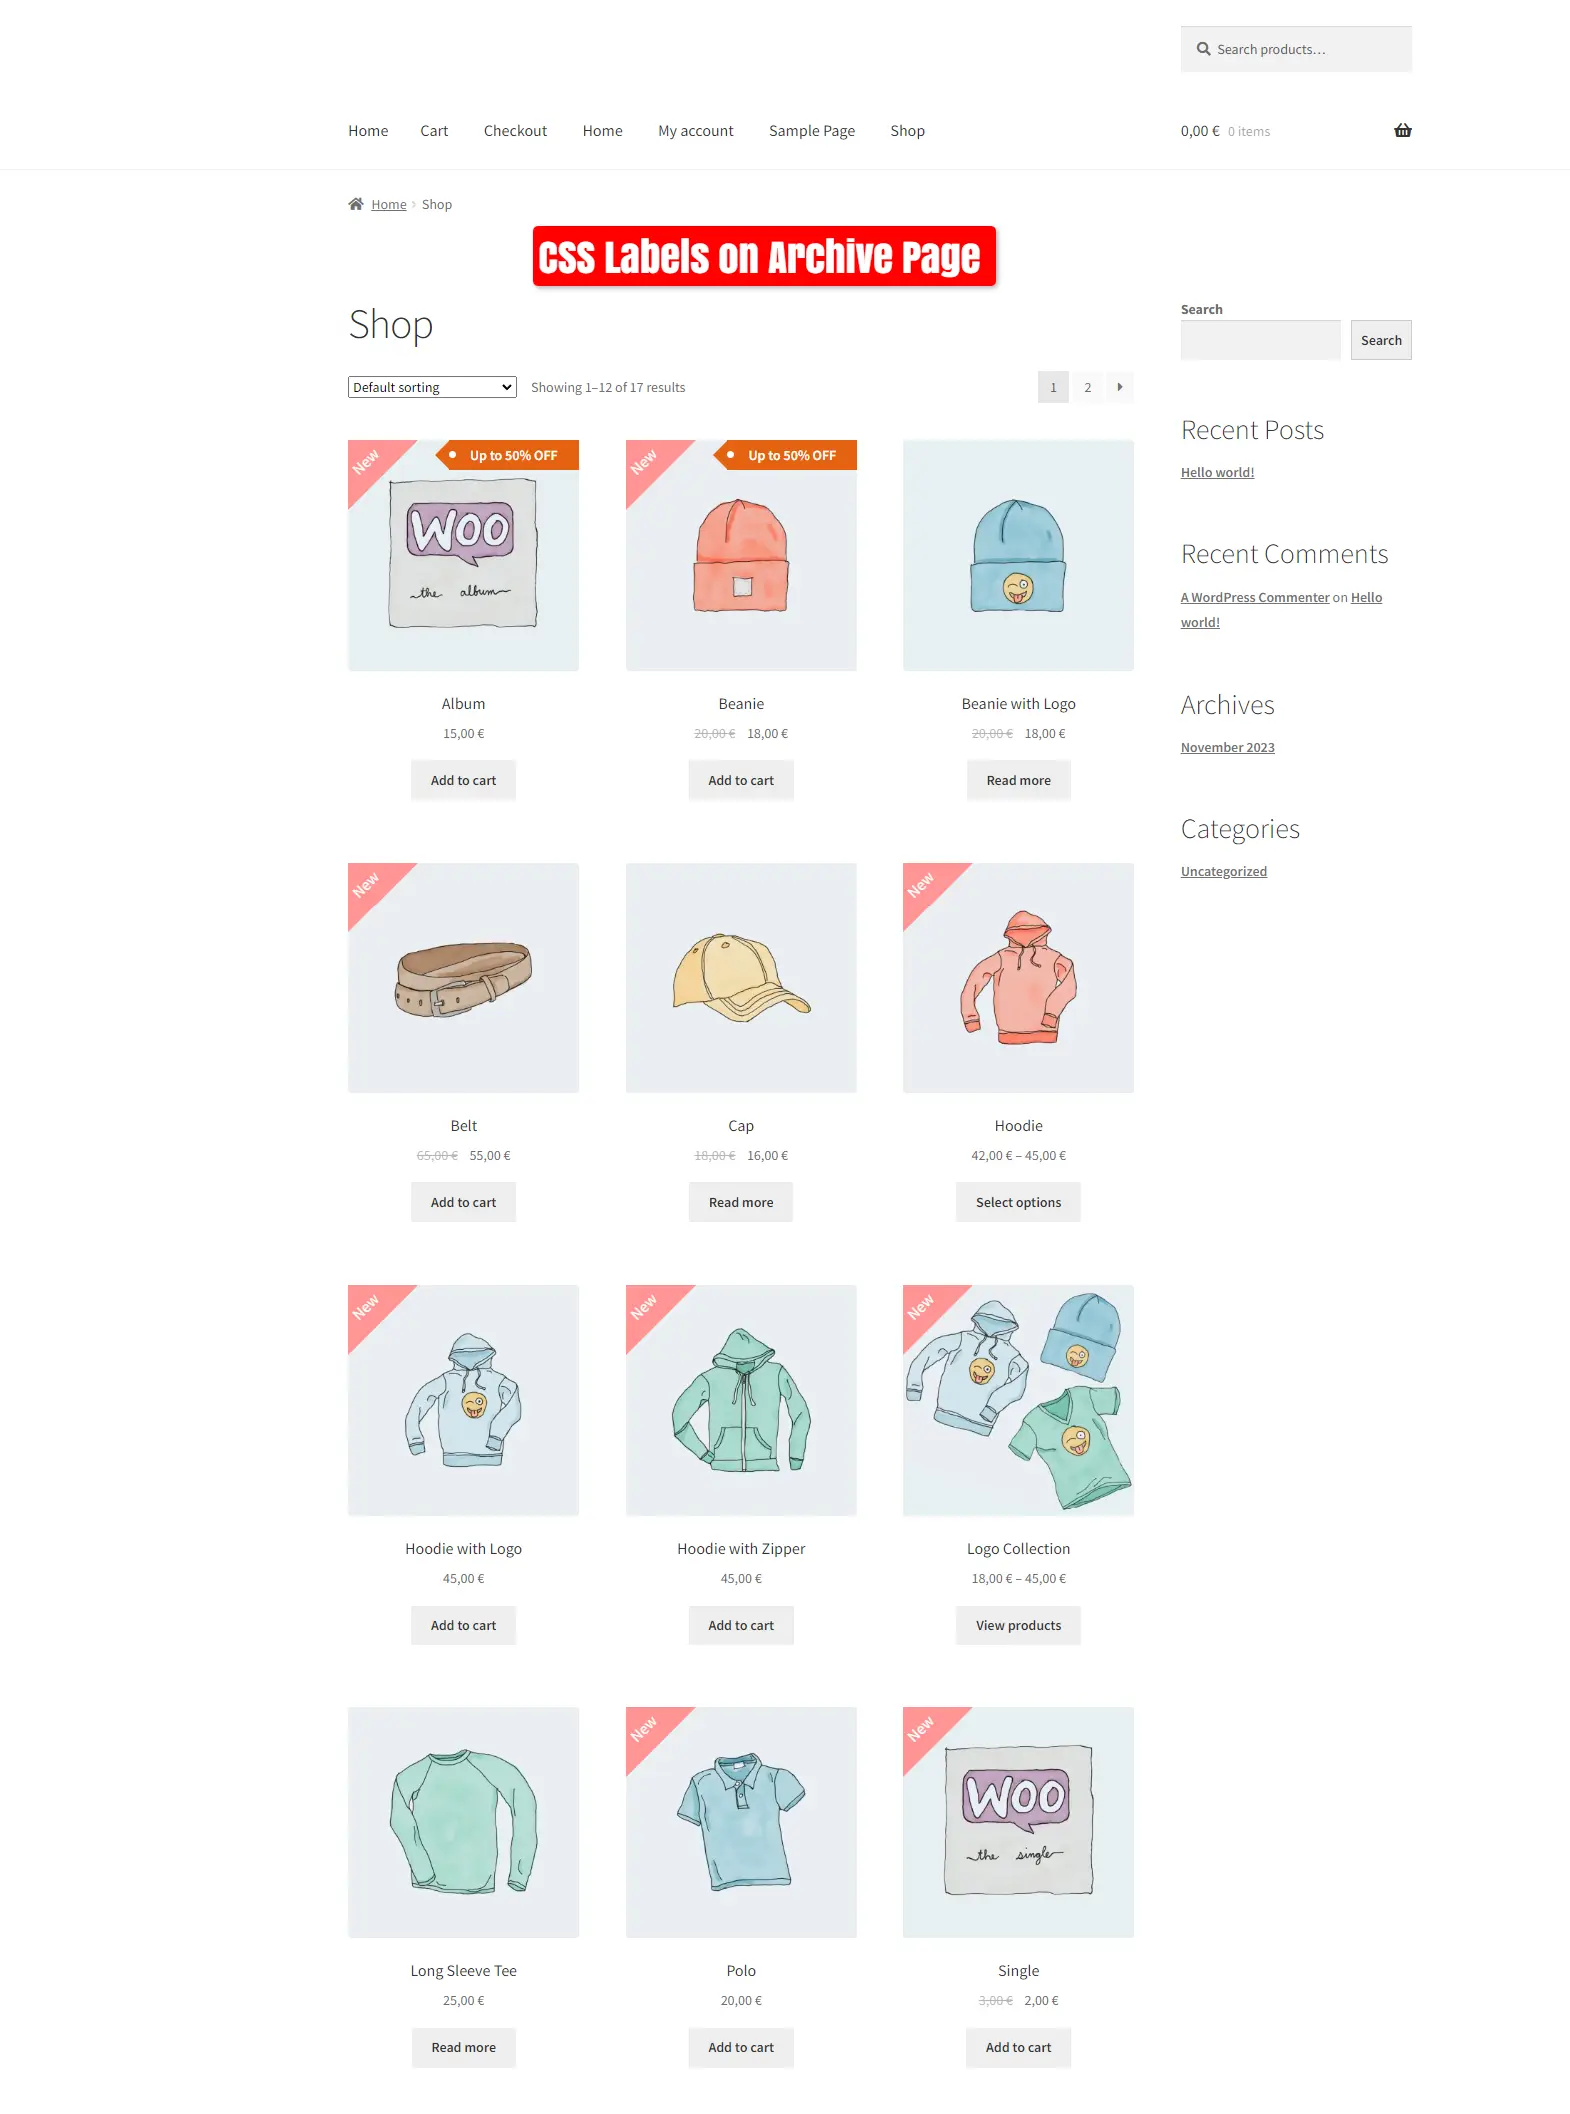
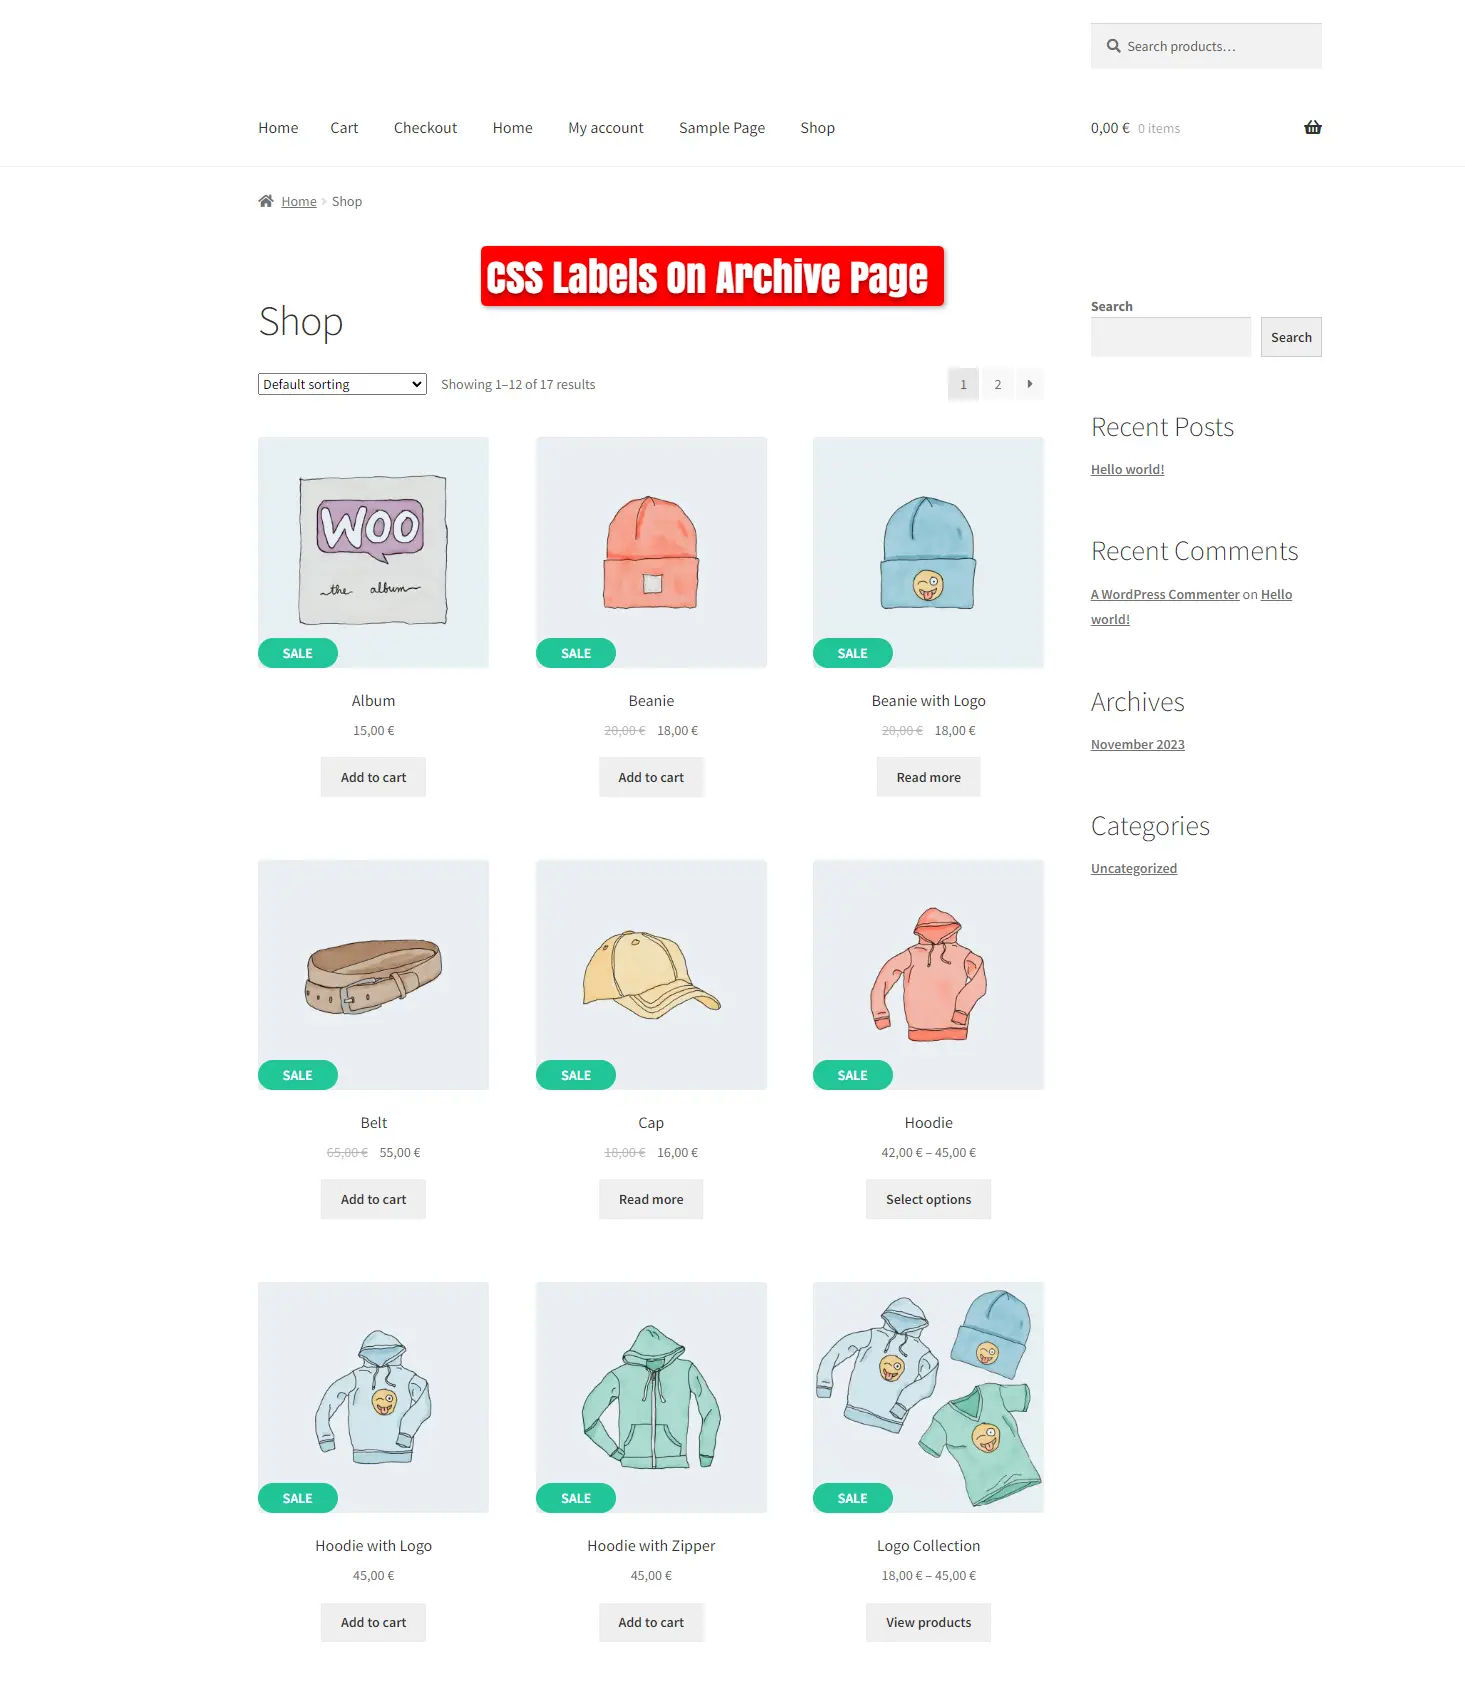
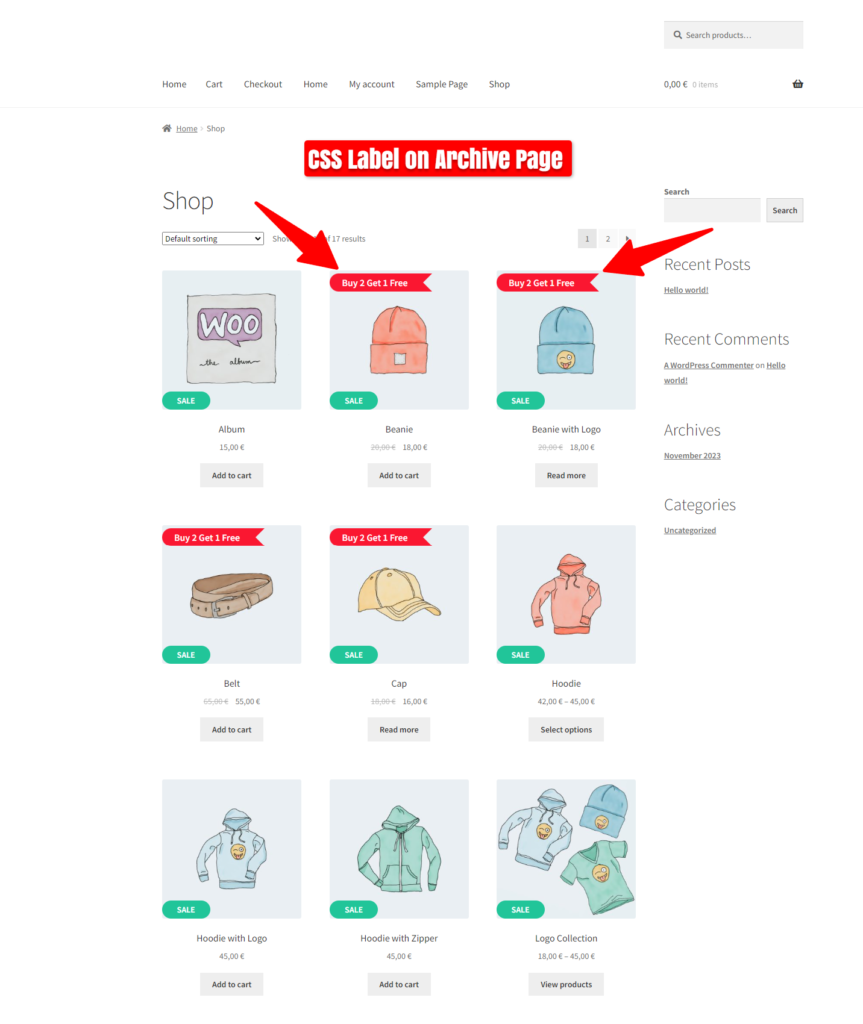
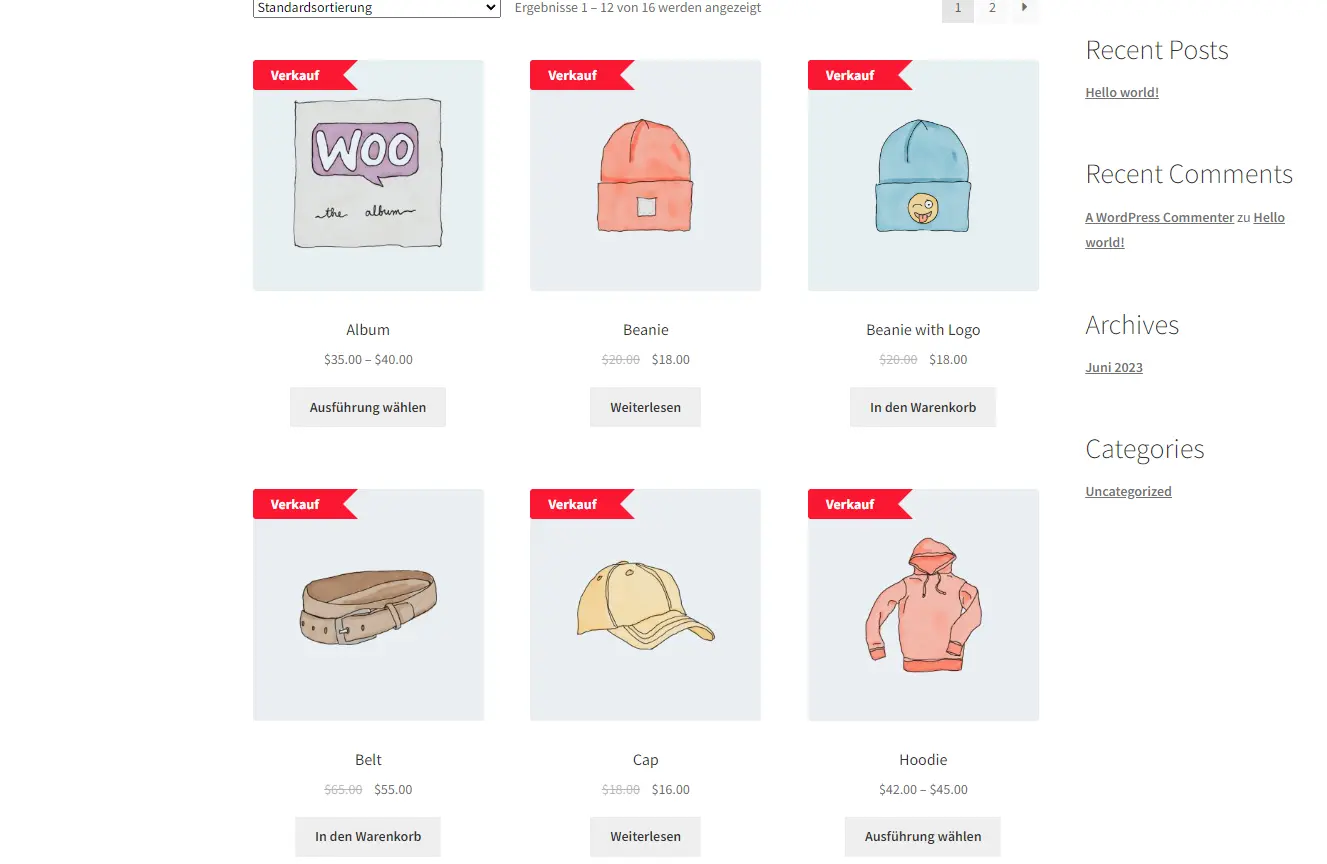
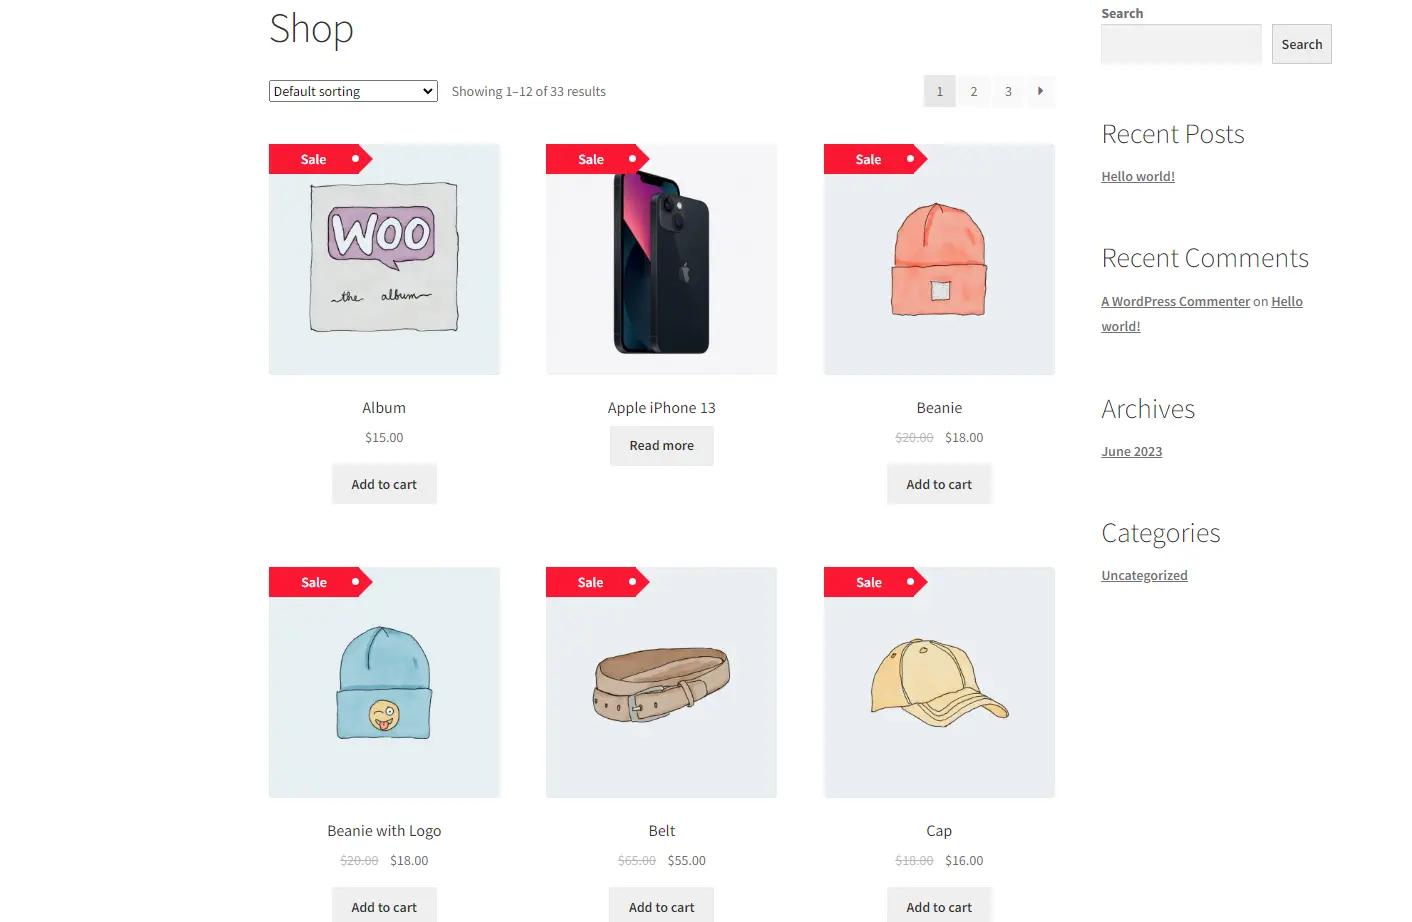
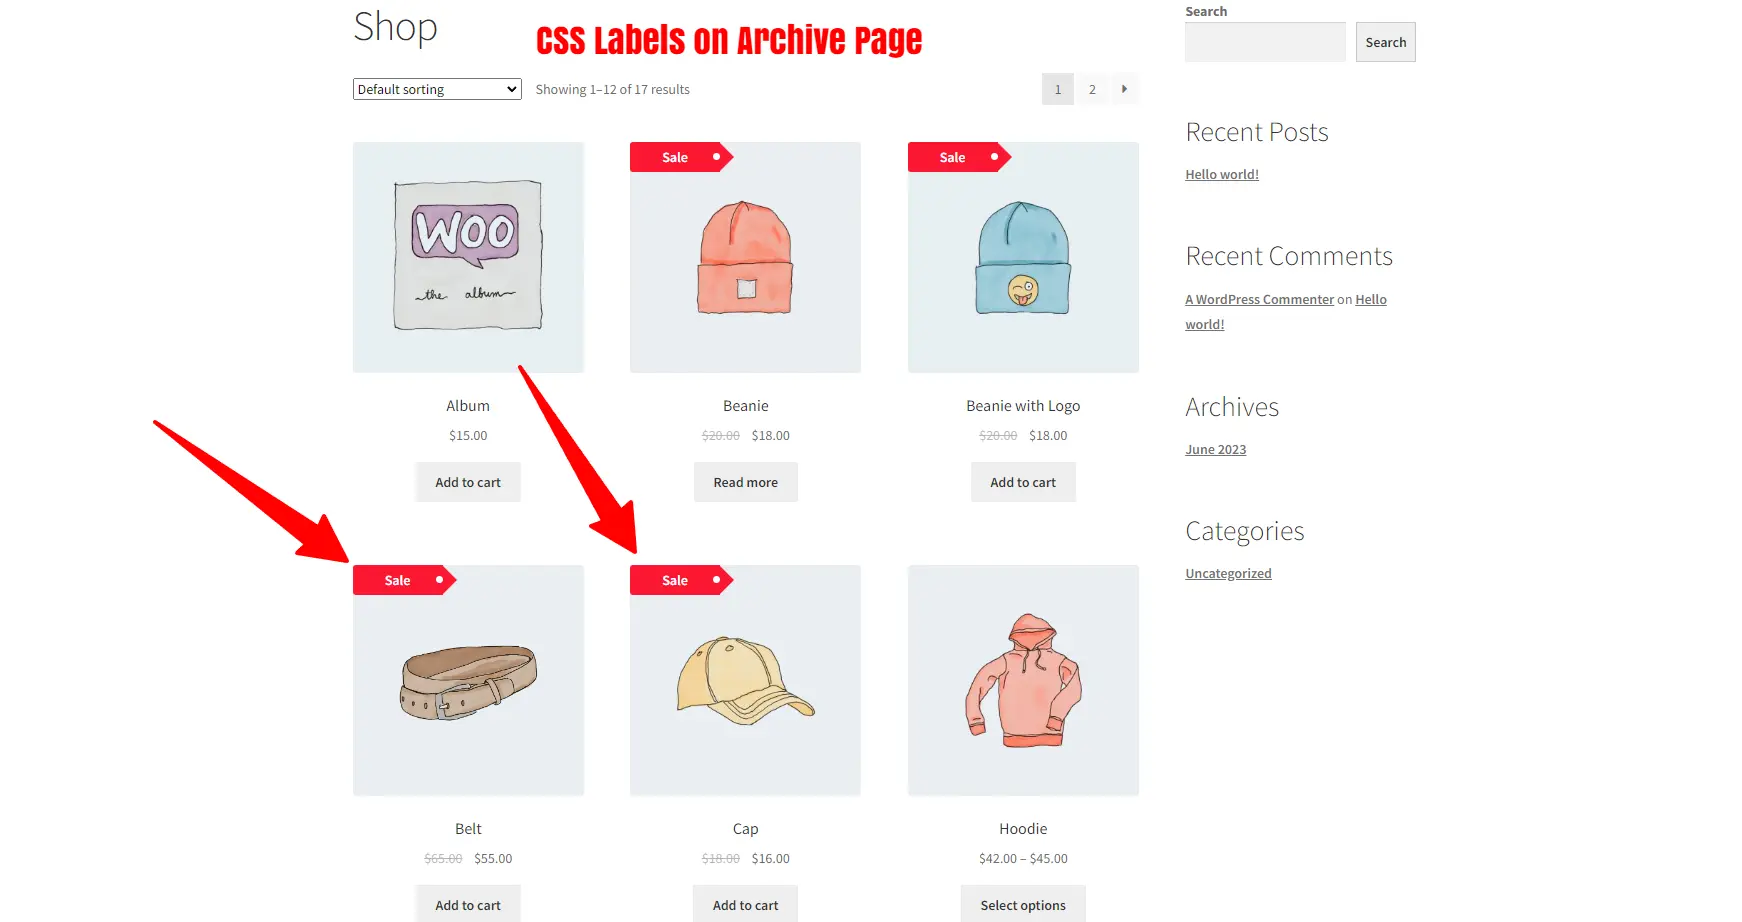
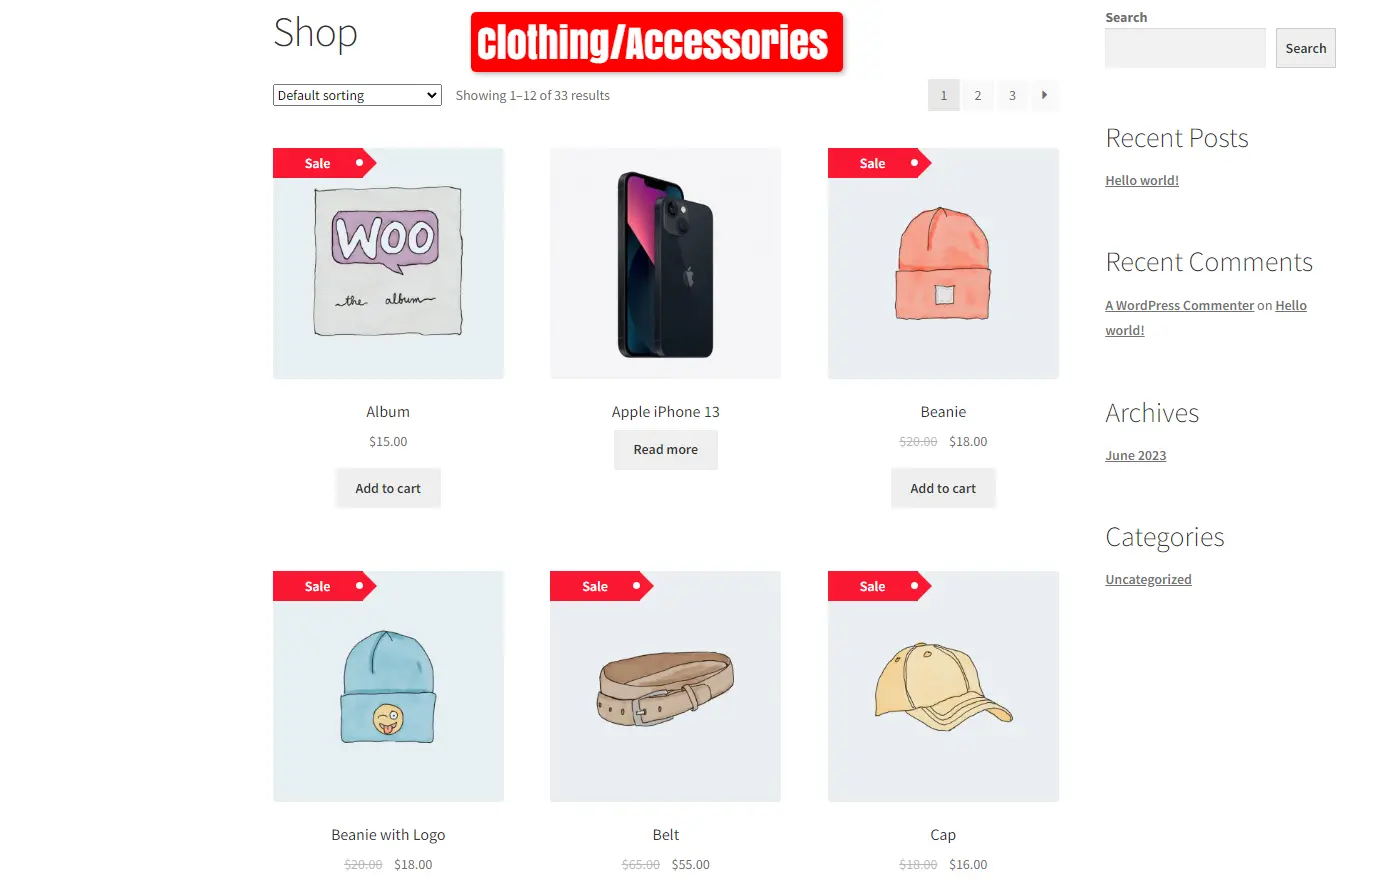
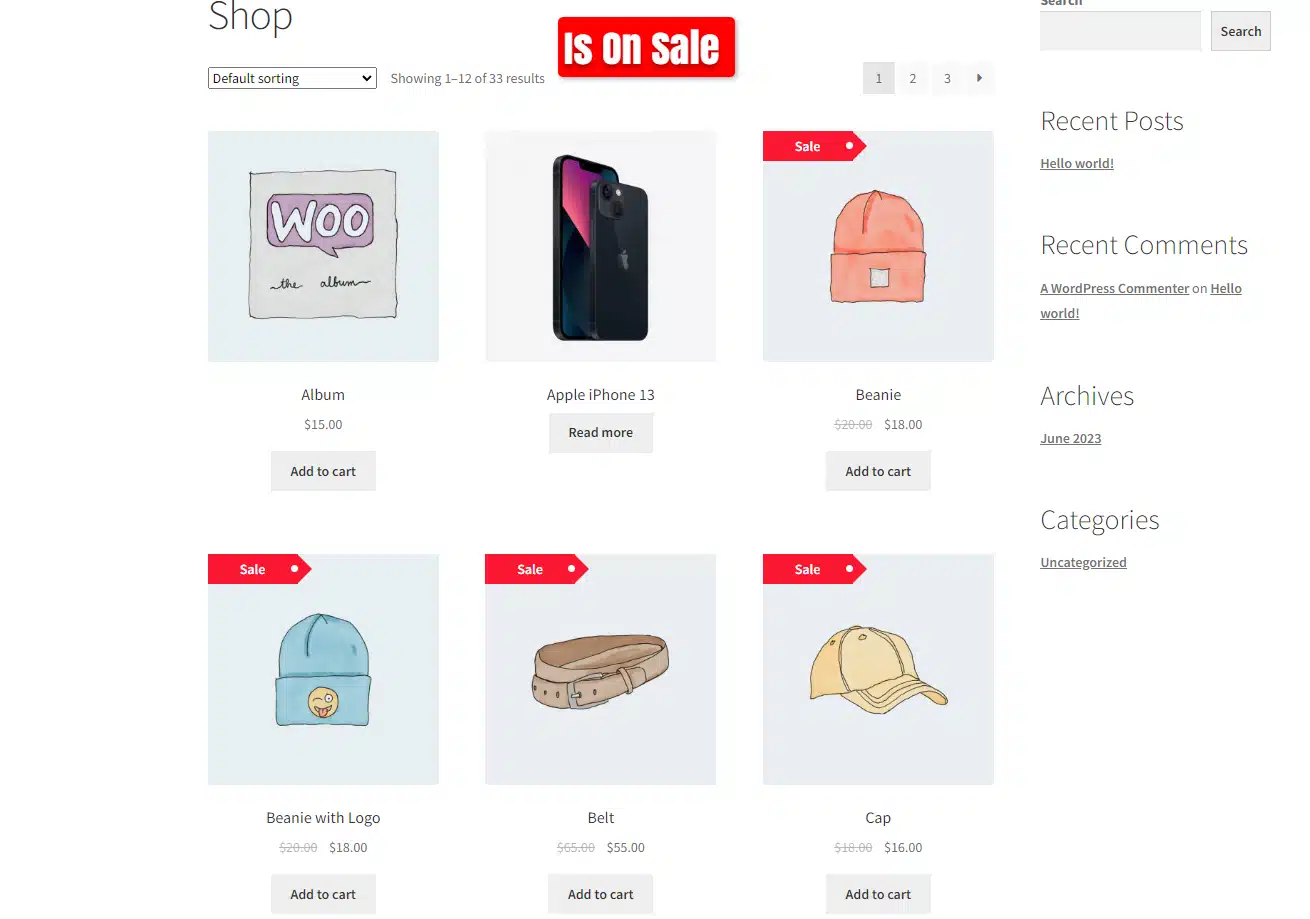
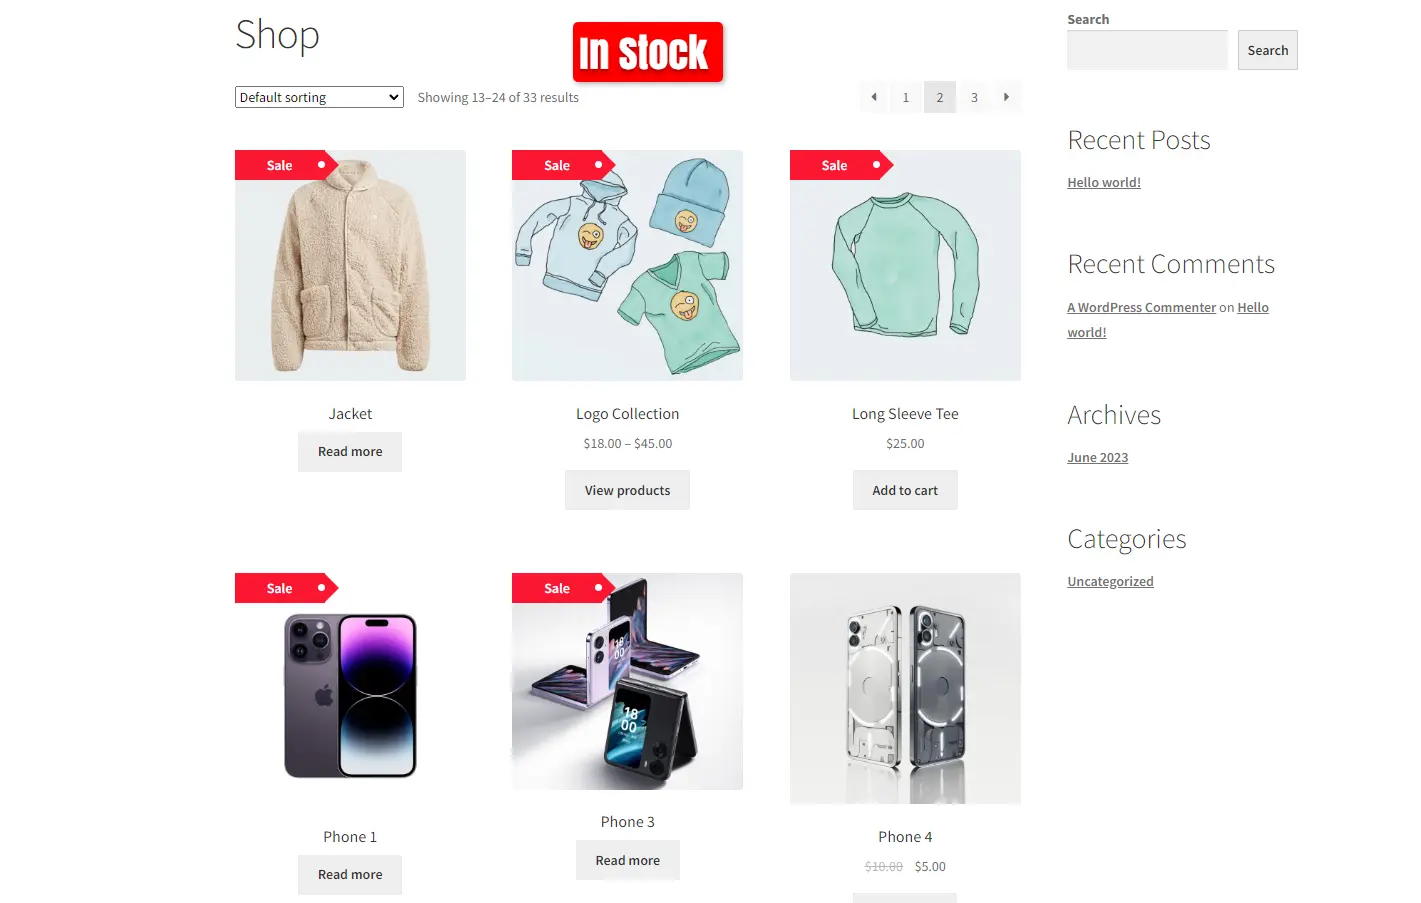
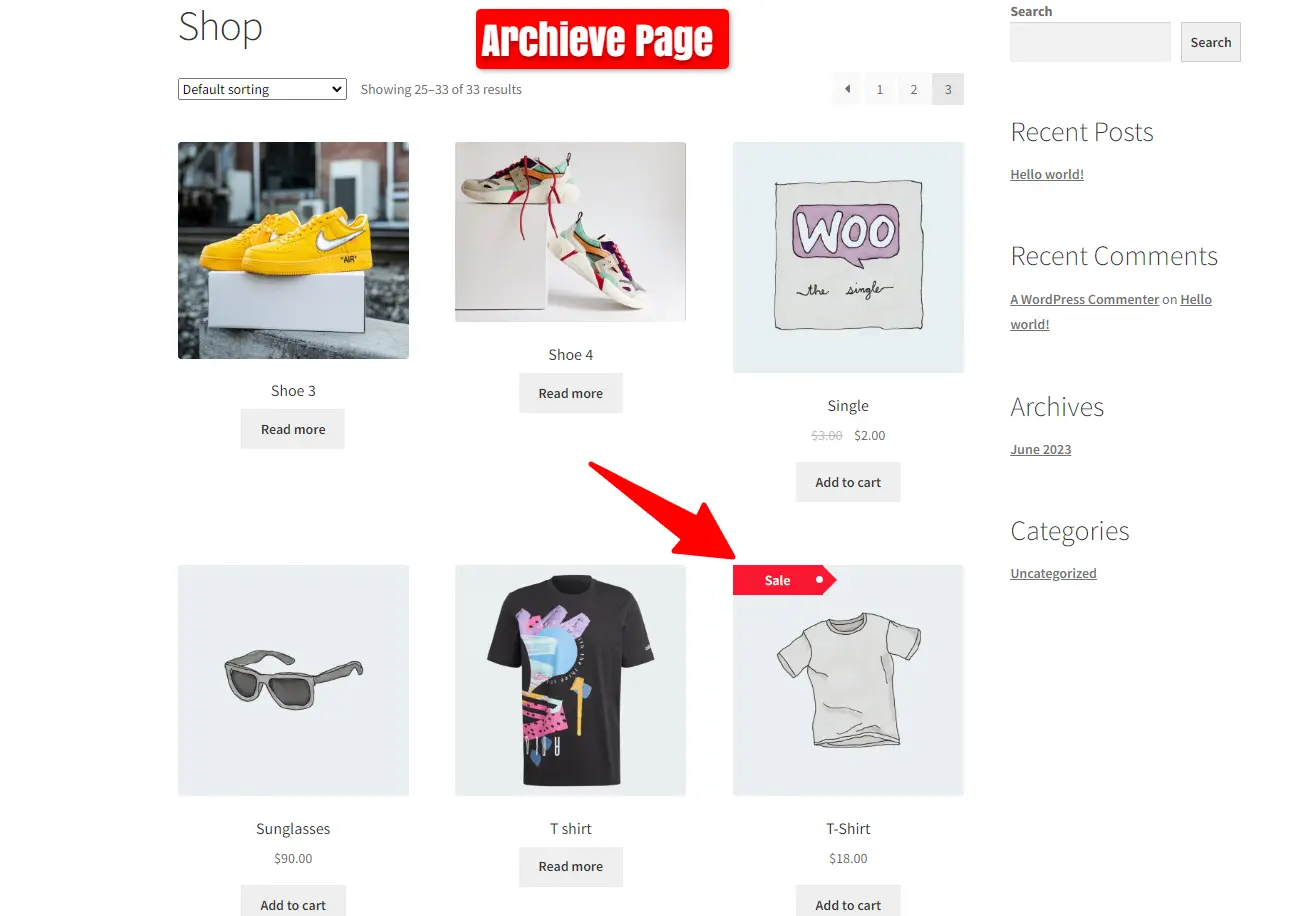
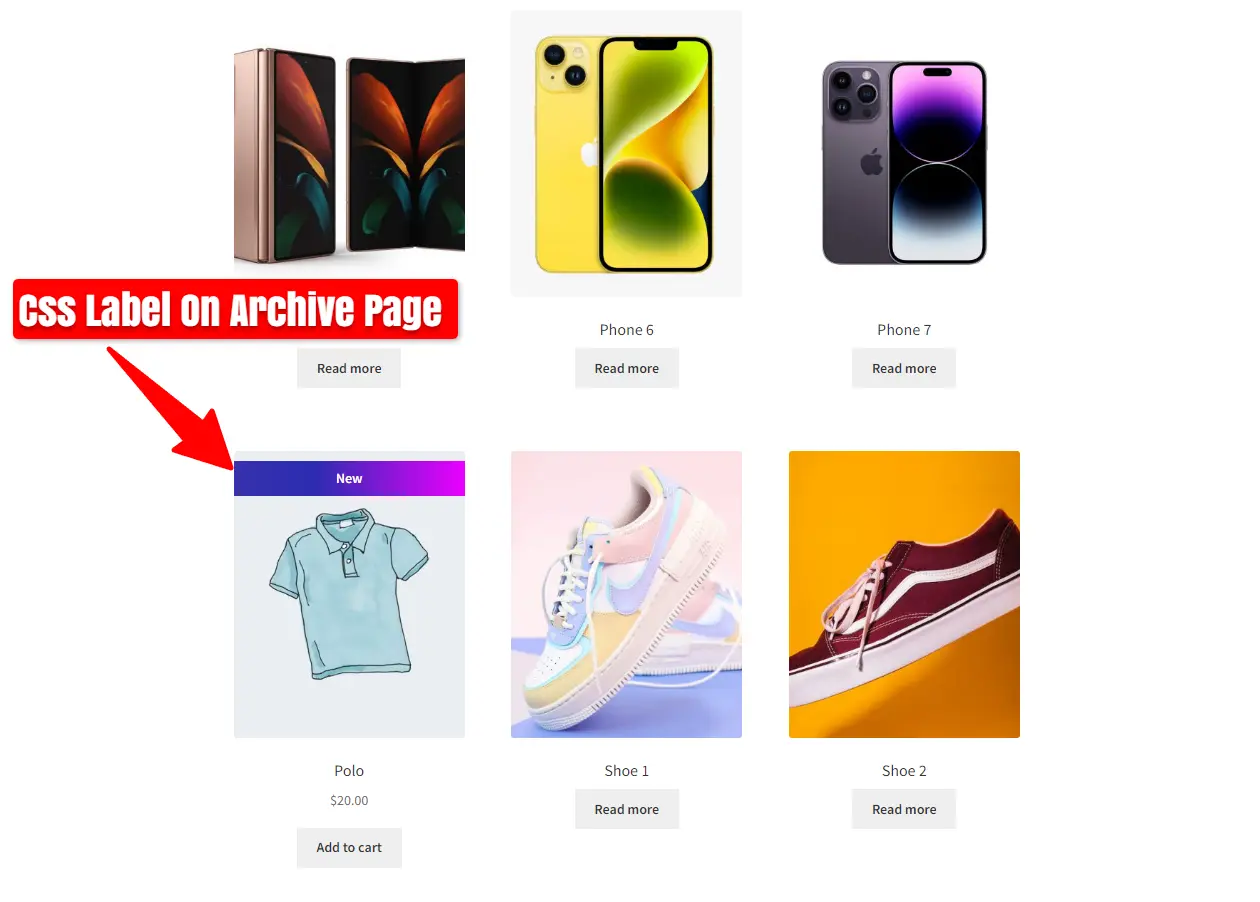
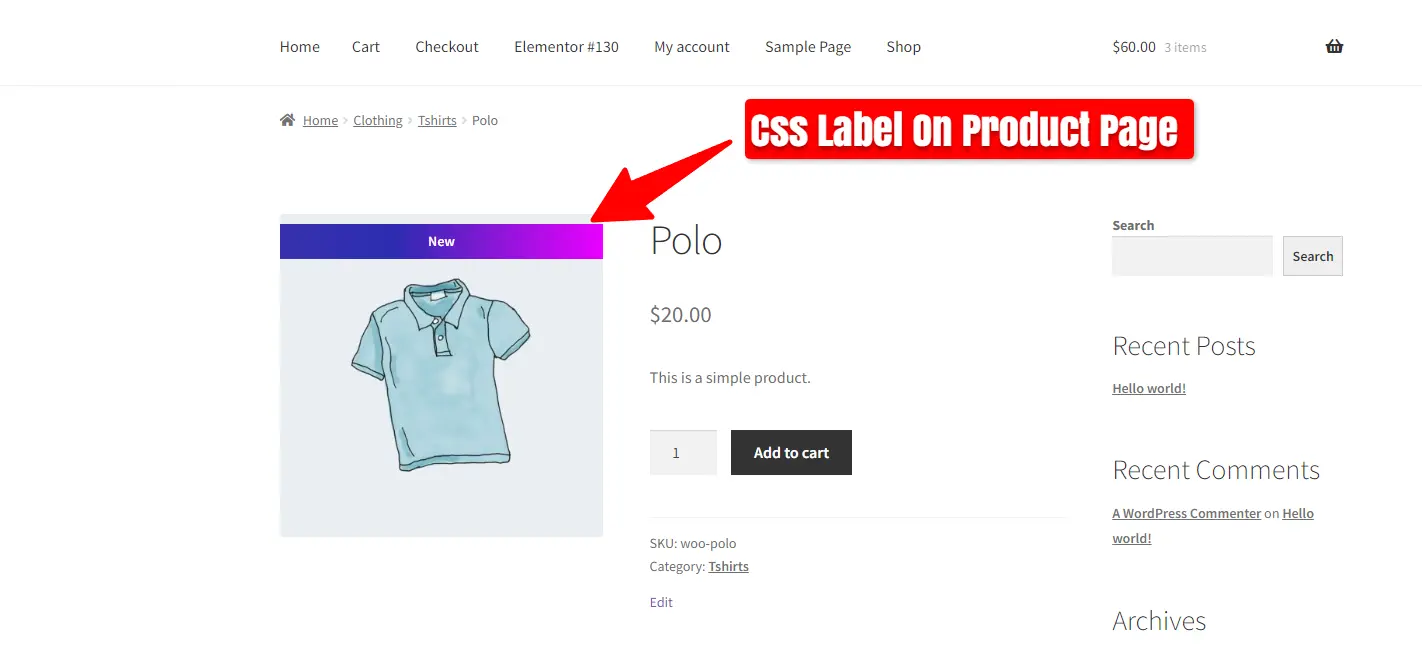
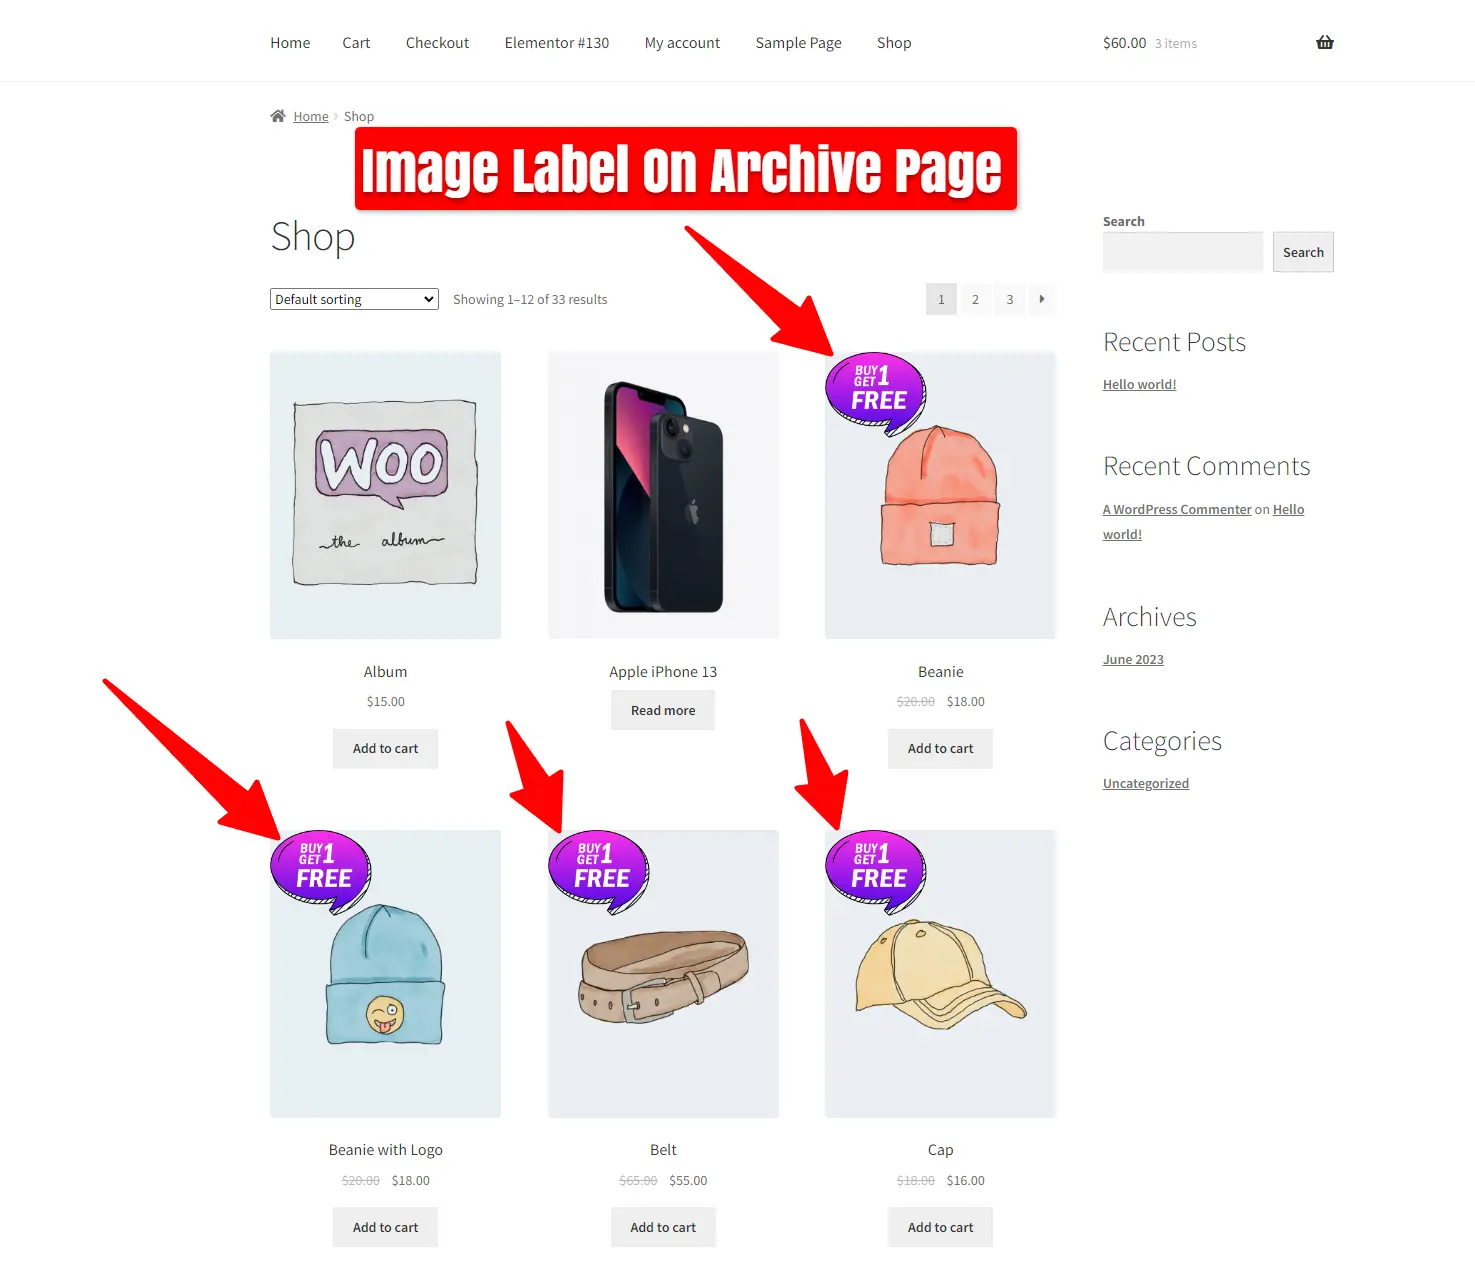
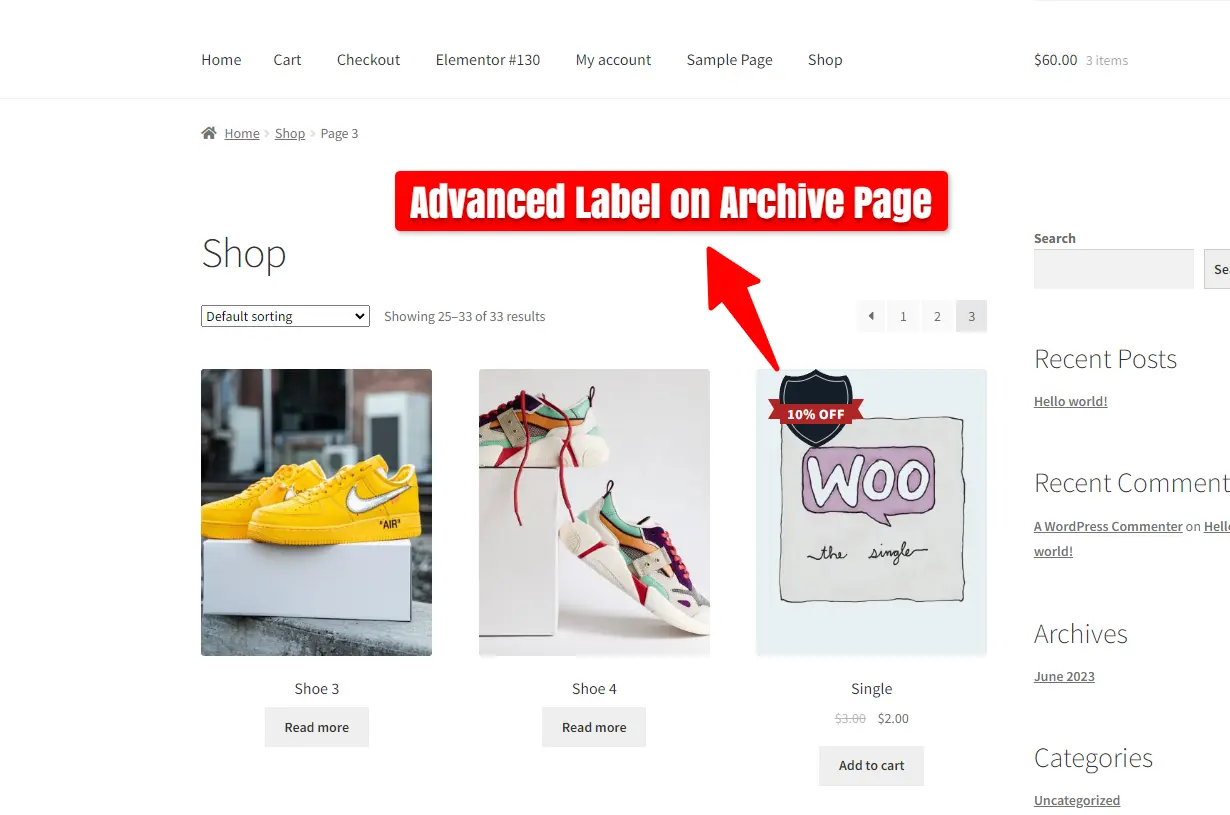
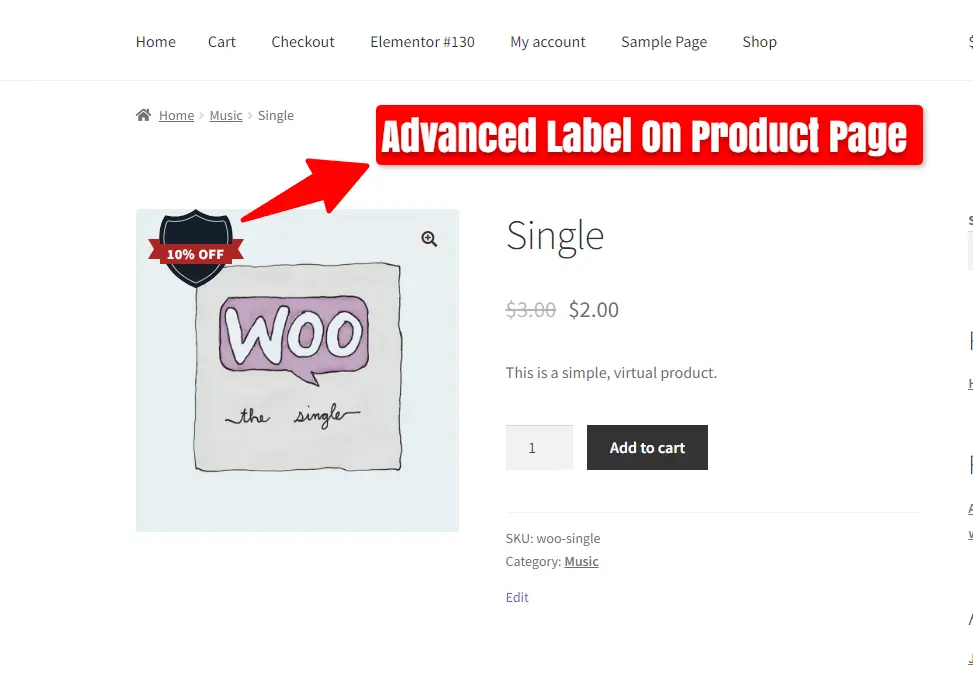
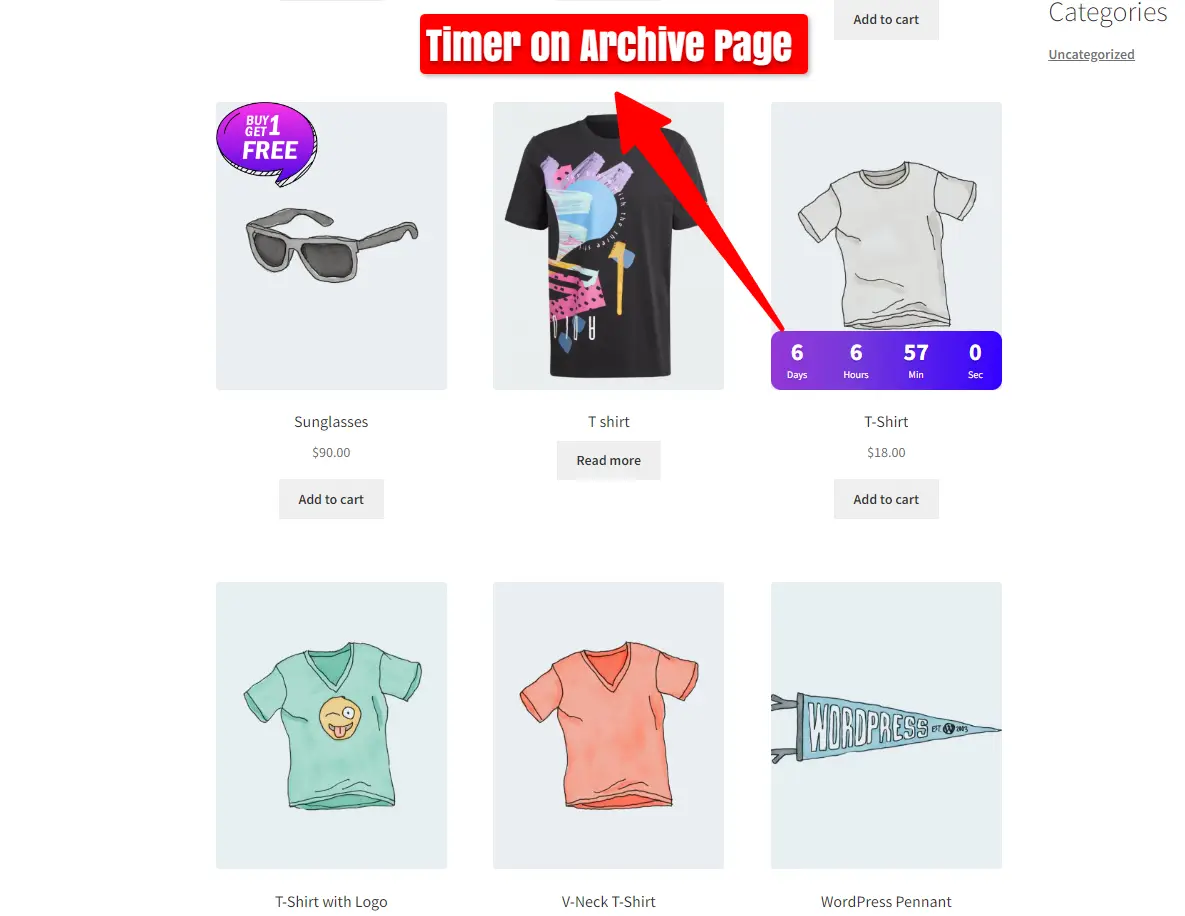
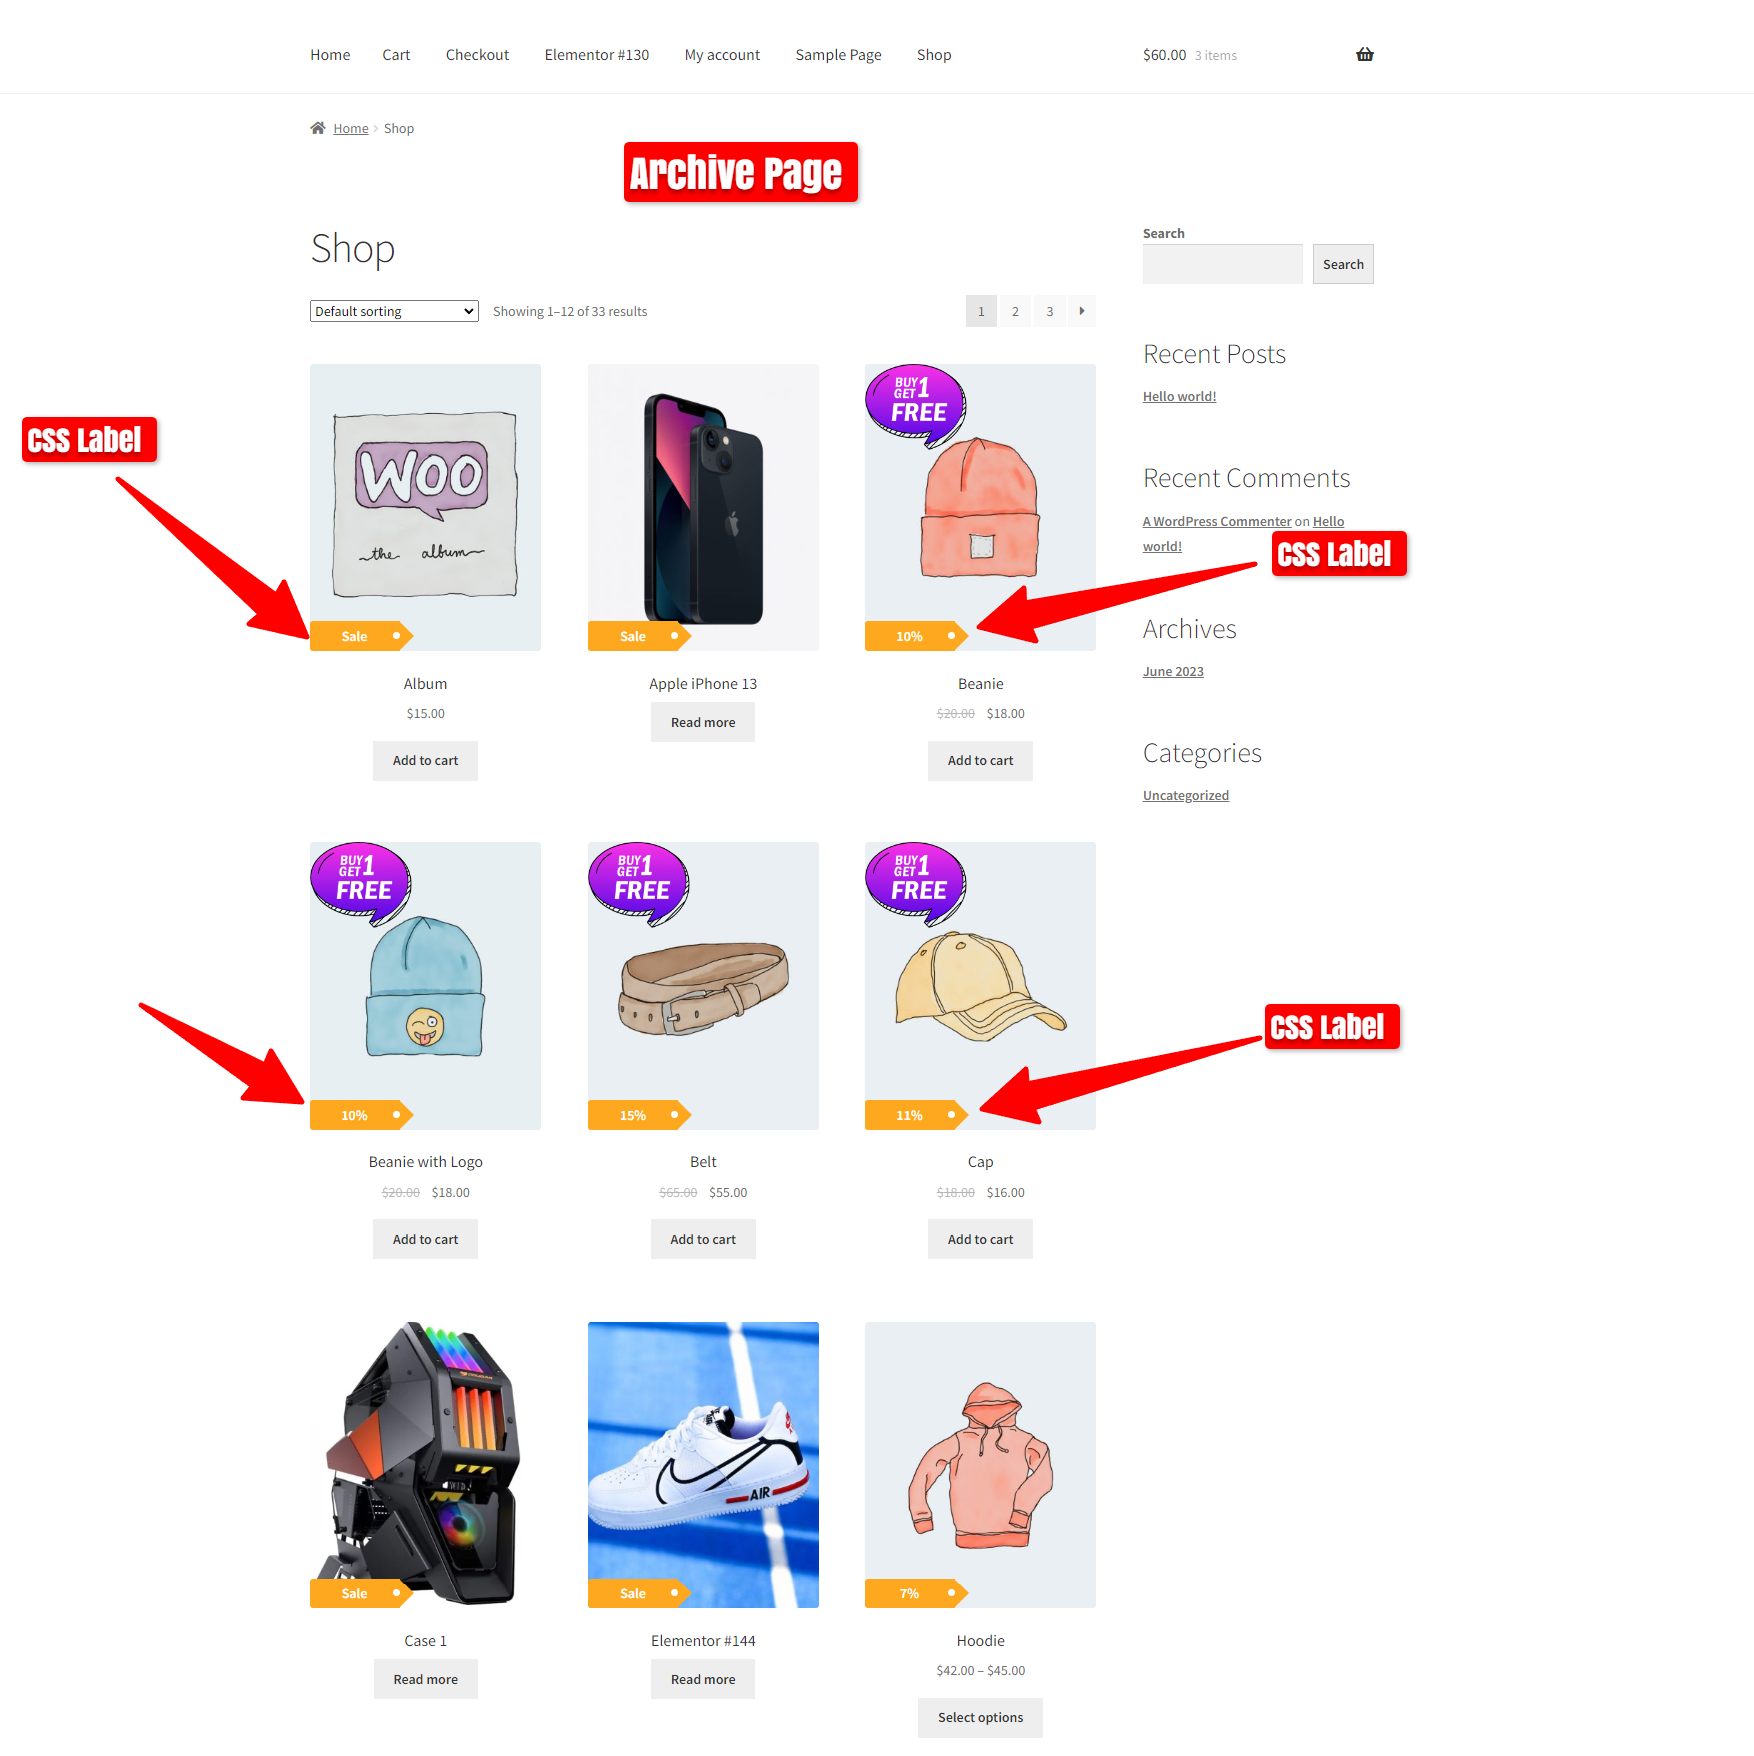
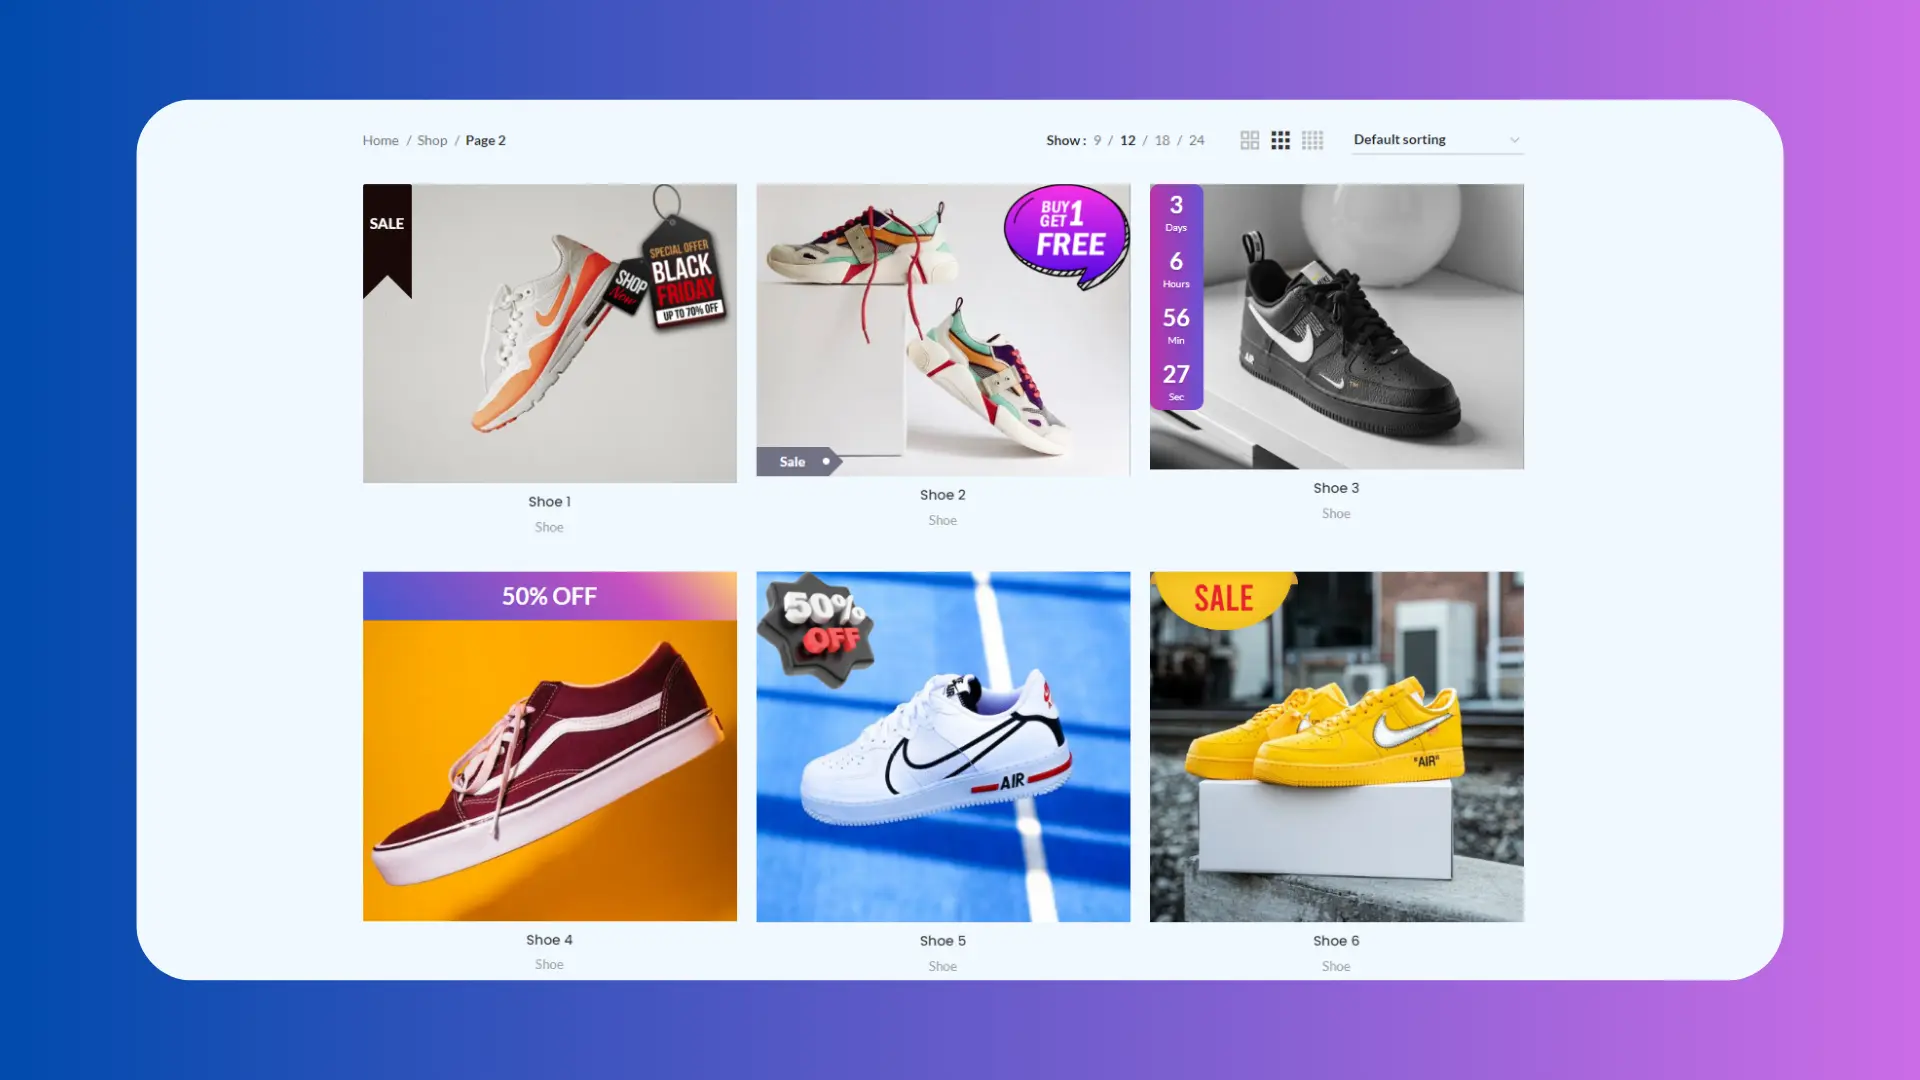
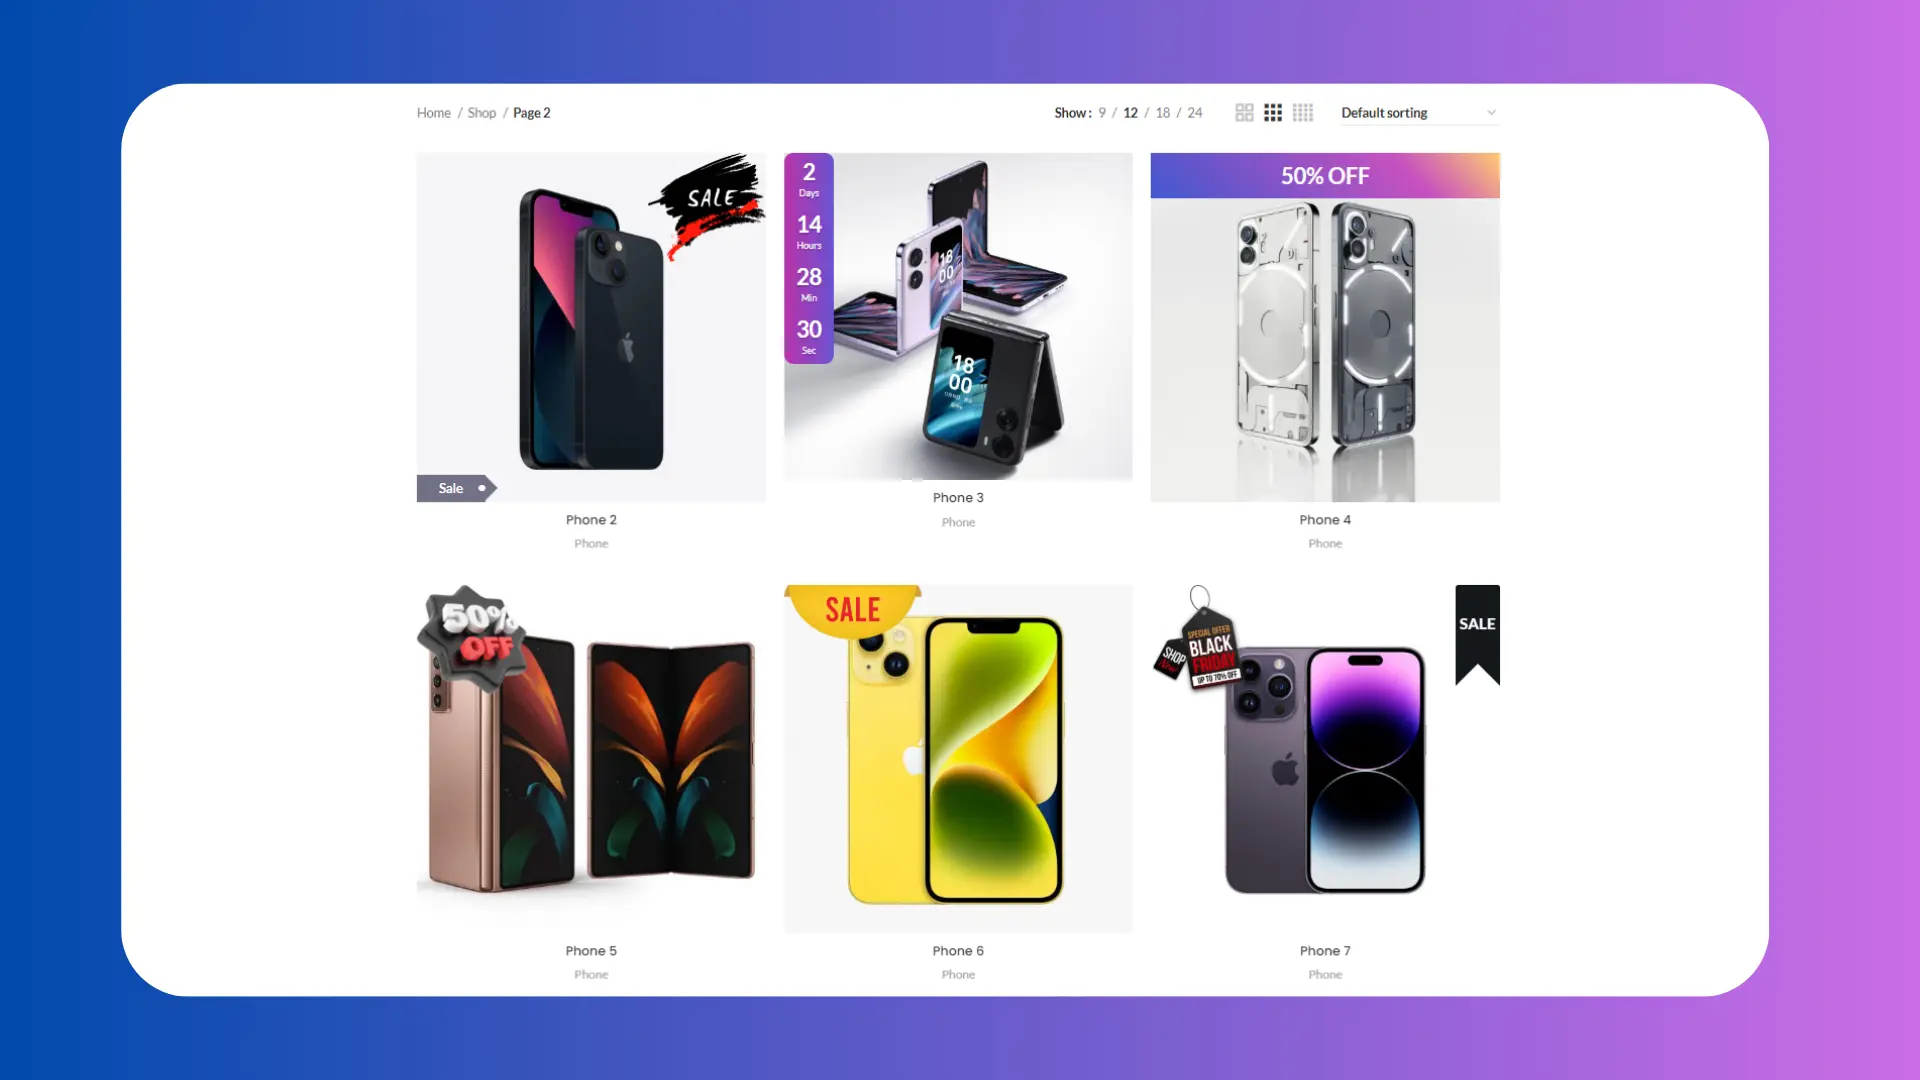
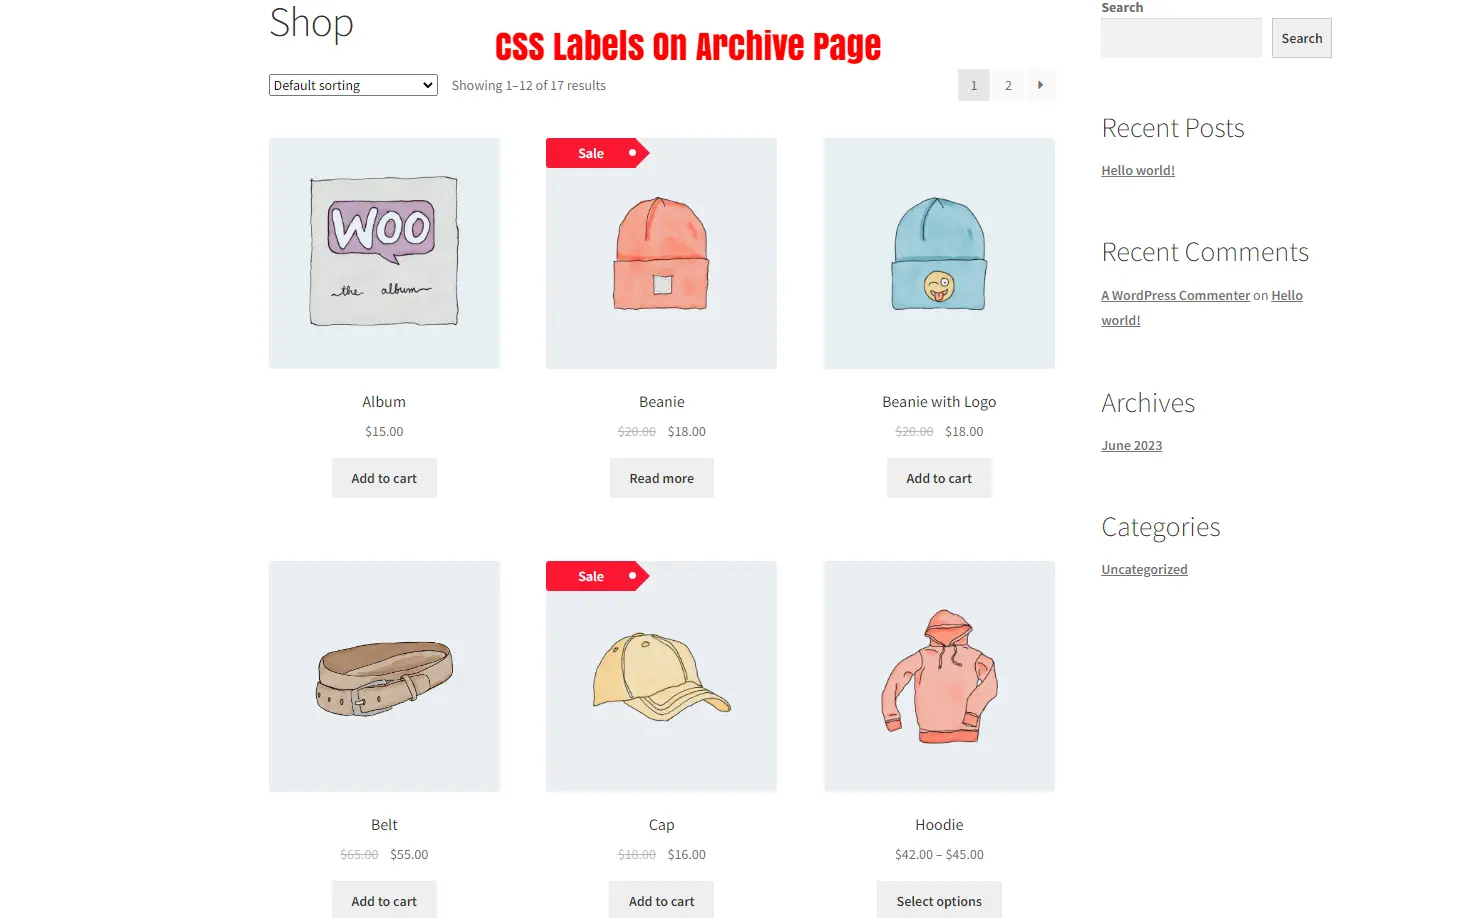
Display a “Sold Out” label on the archive page for products that are out of stock.
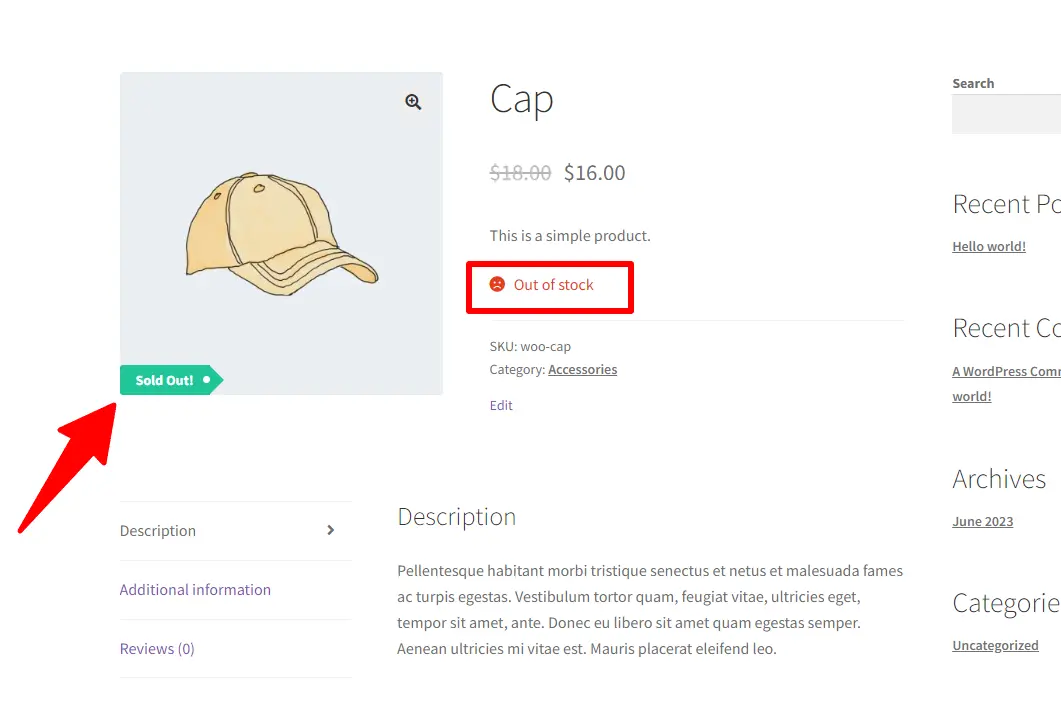
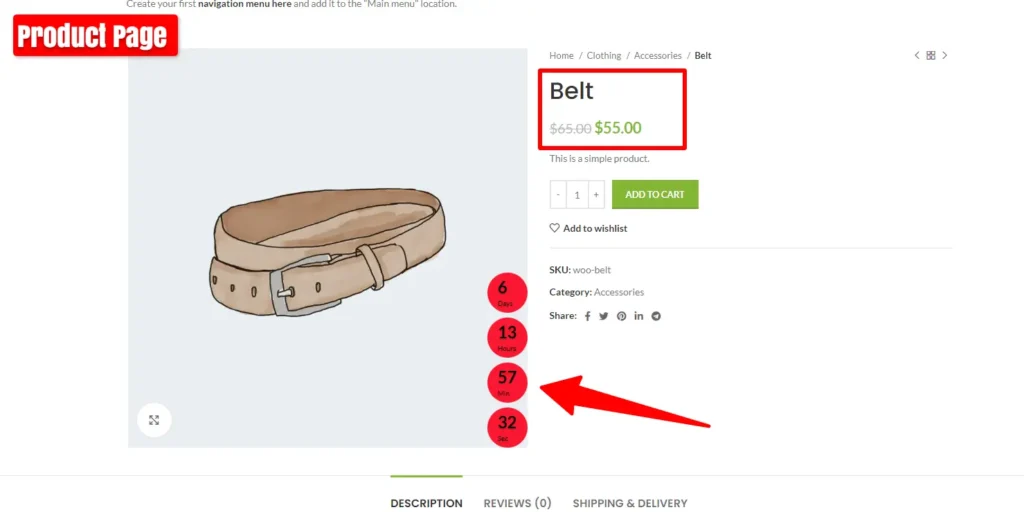
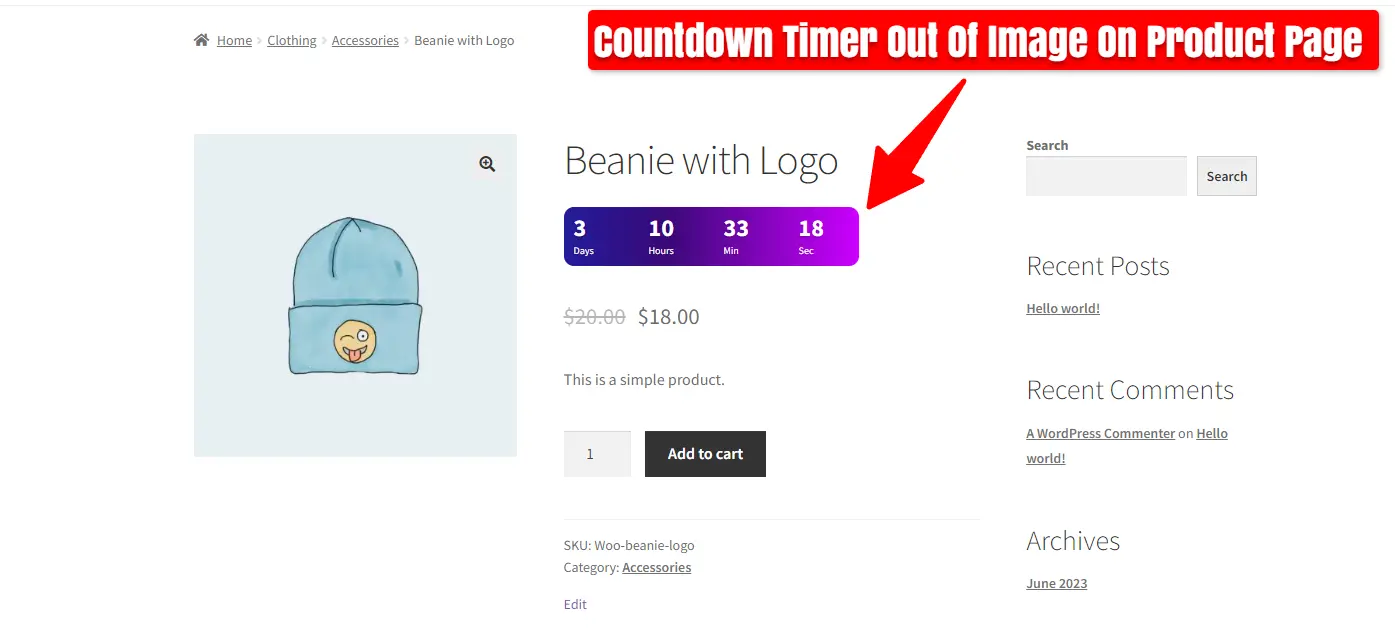
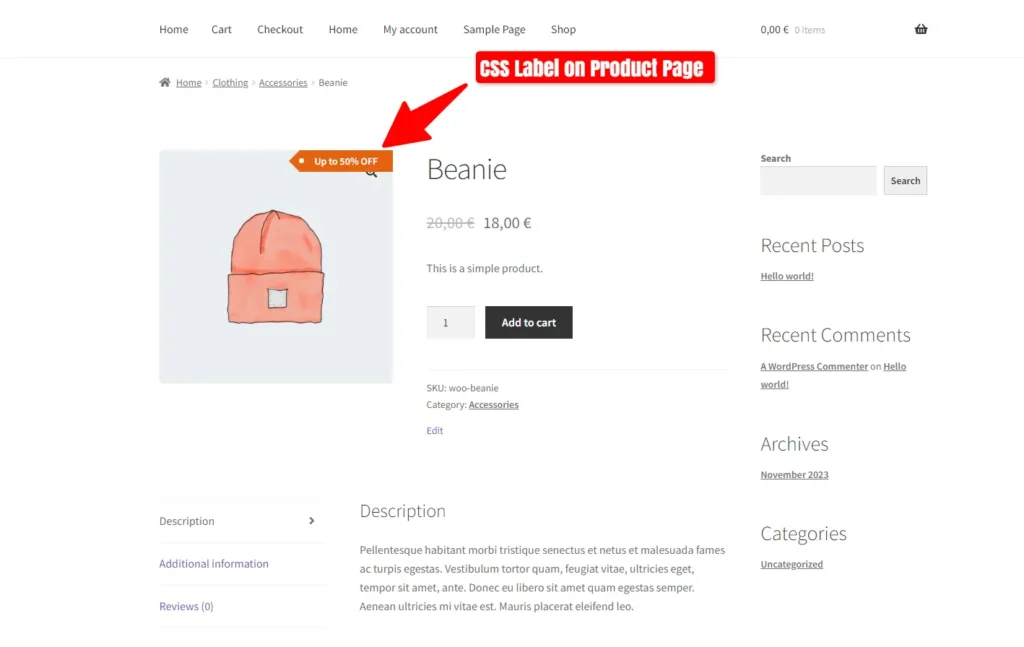
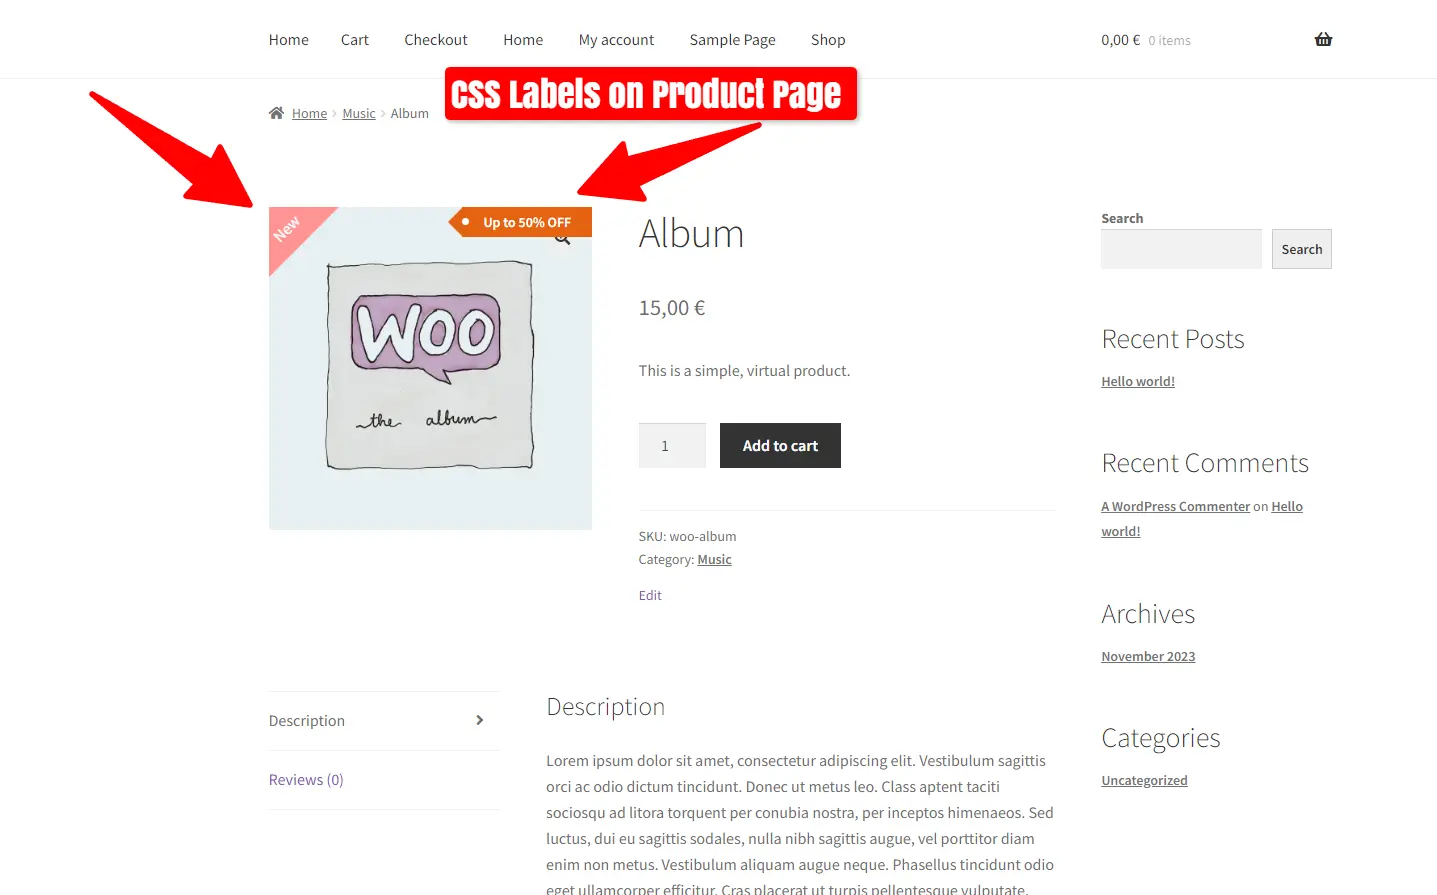
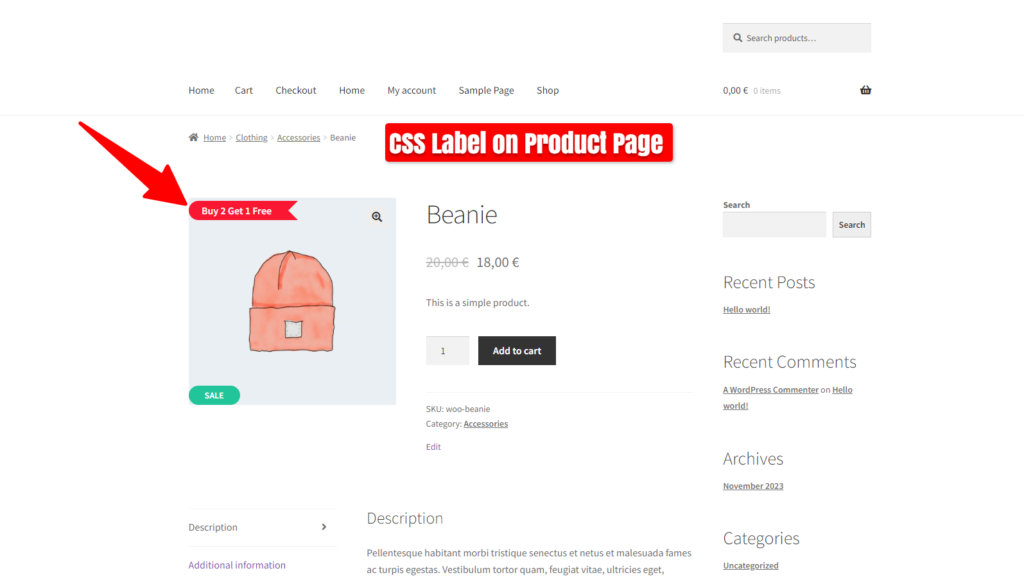
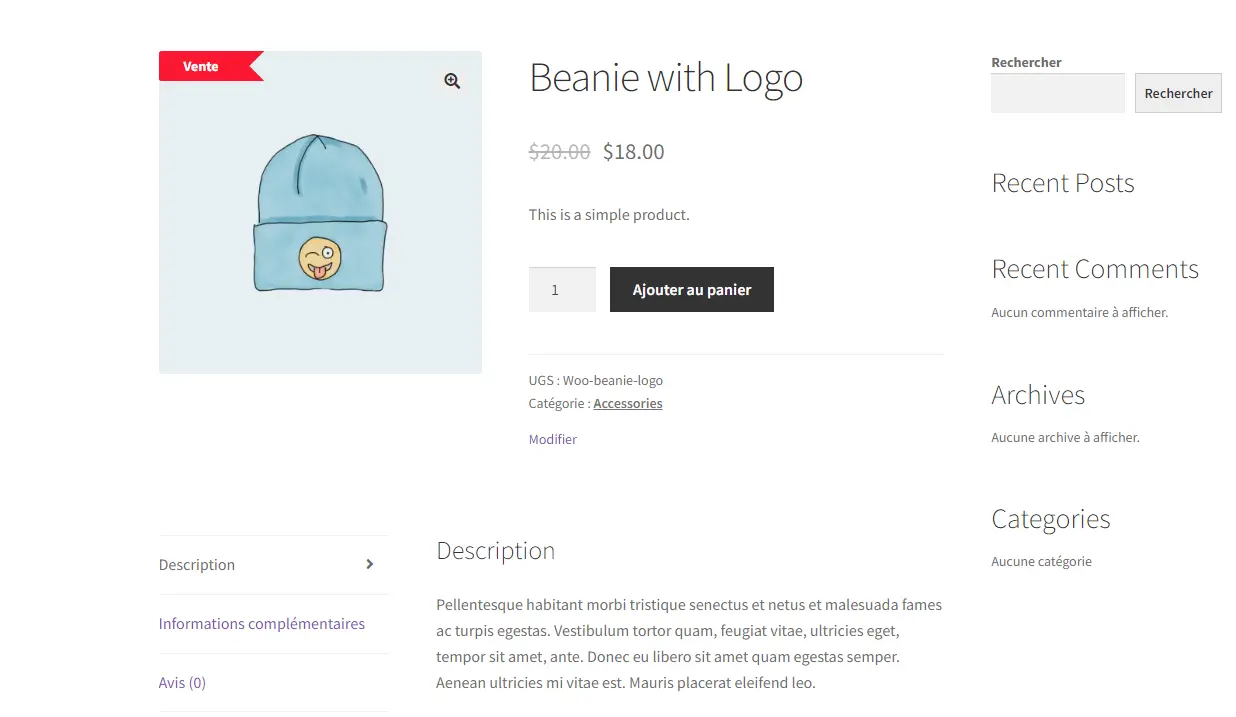
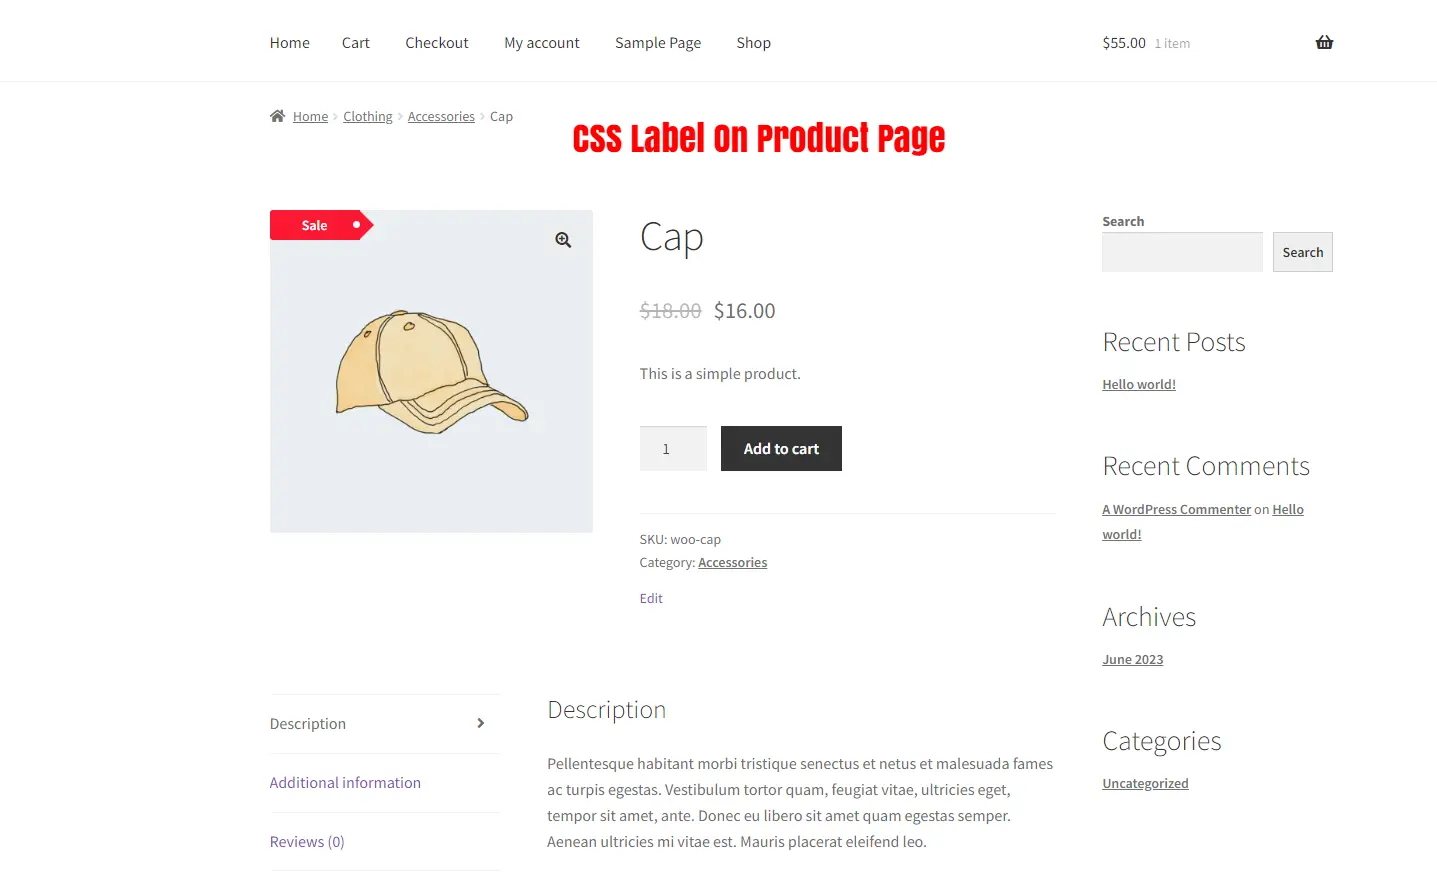
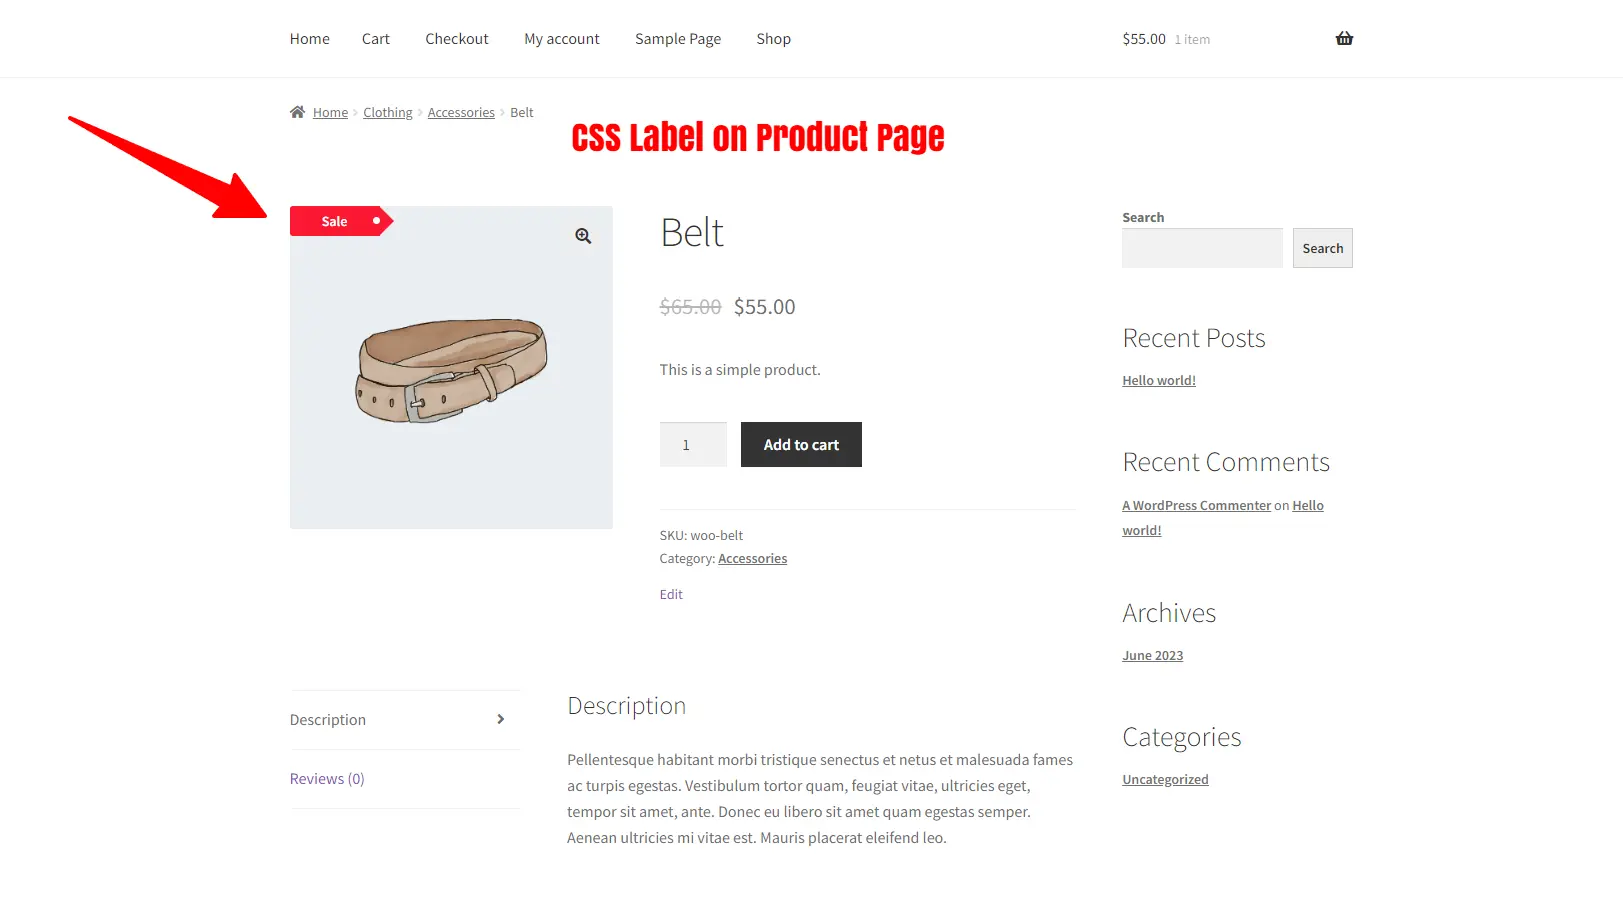
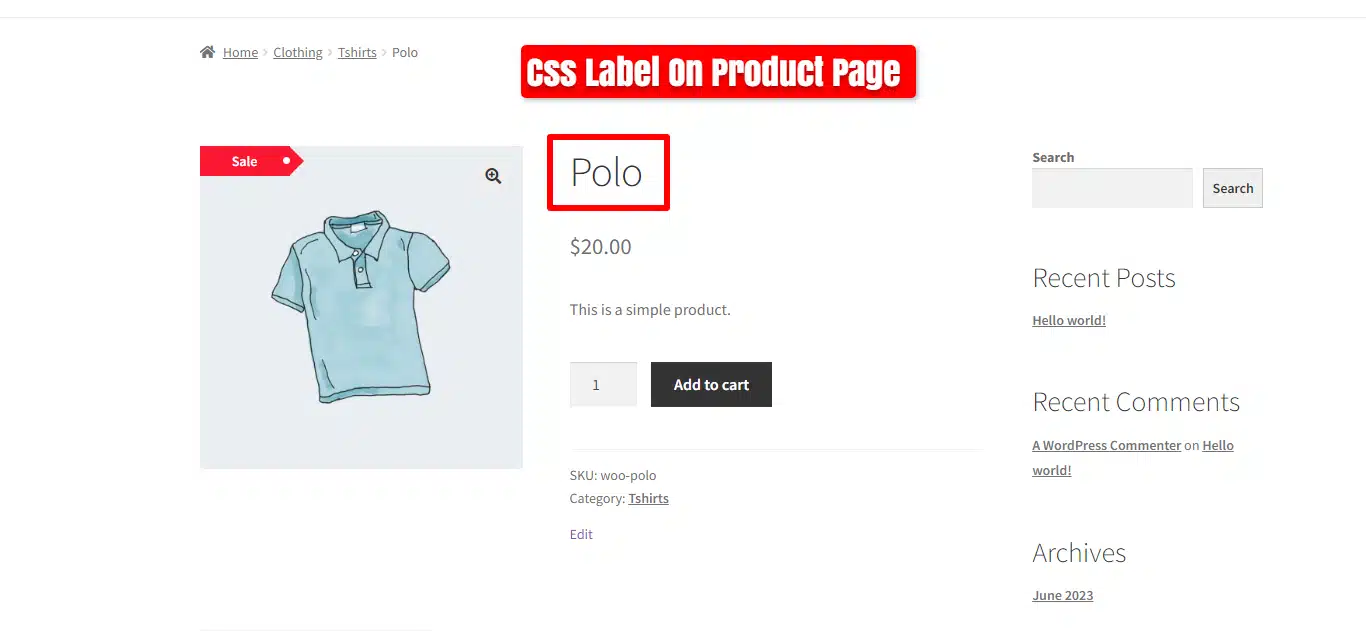
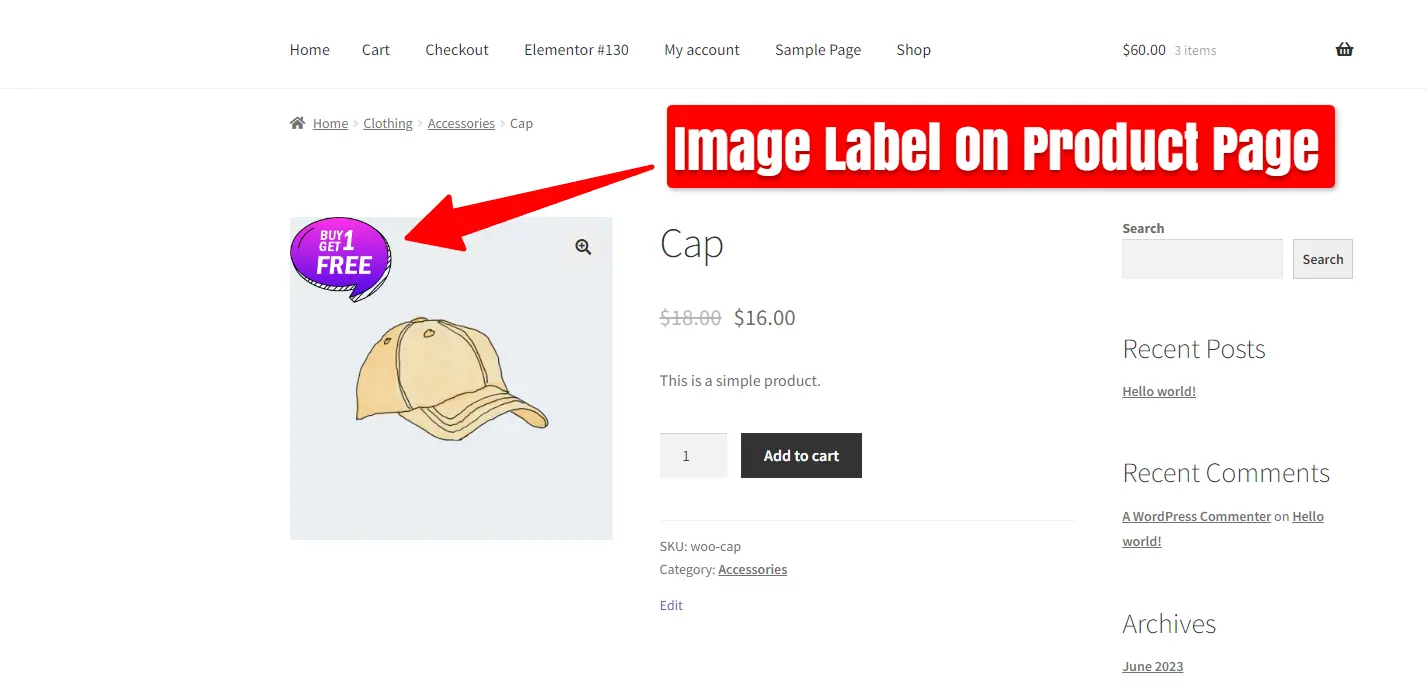
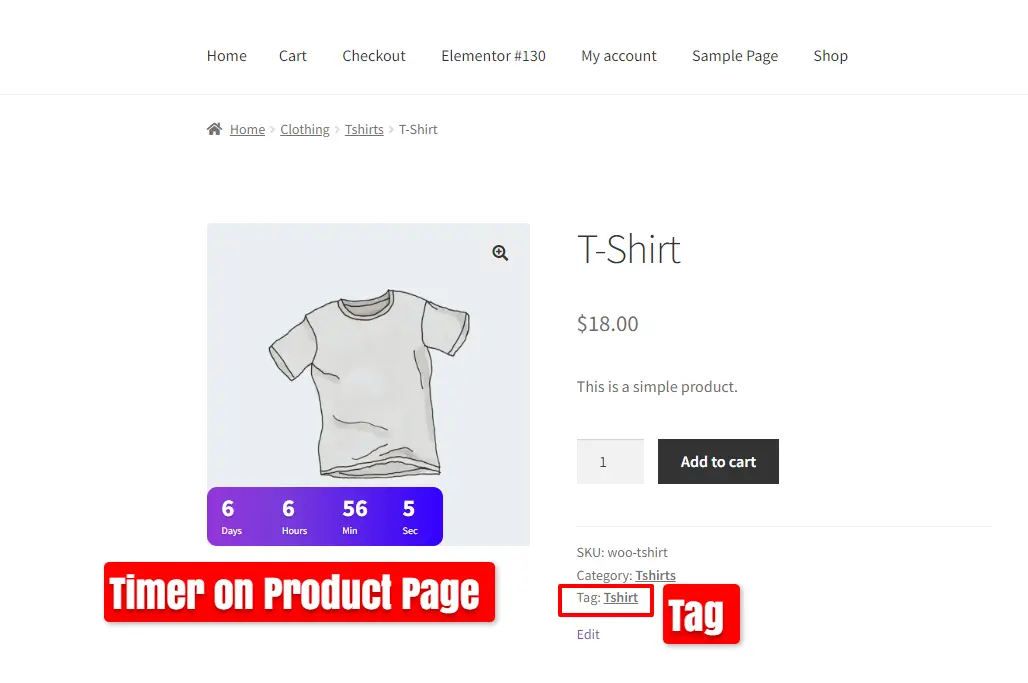
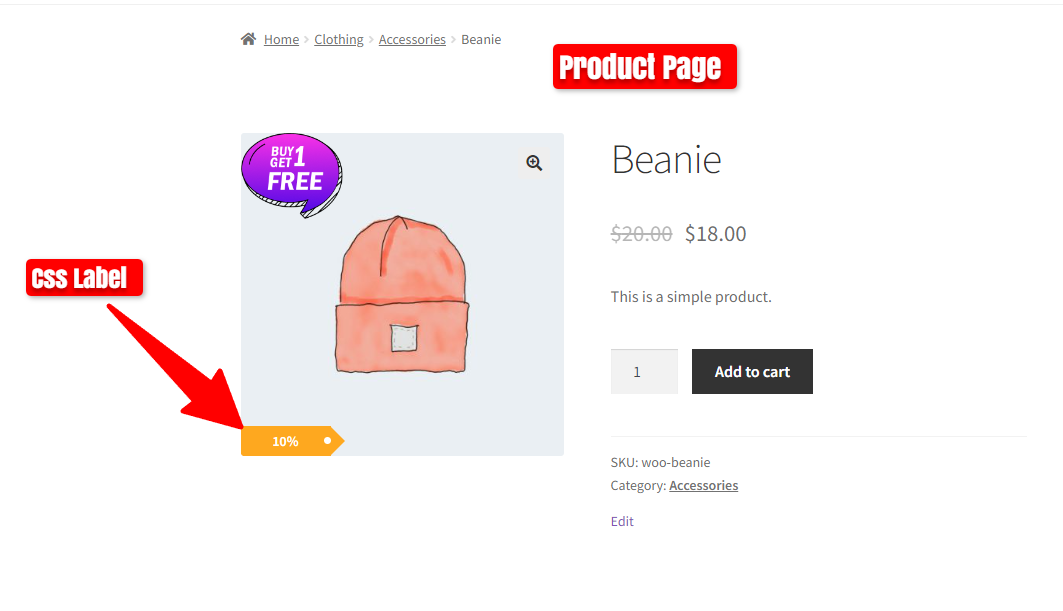
Display Sold out Label on Product Page.
How To Add Sold out Badge to Bottom Position in Woocommerce
First, deactivate the status and then click on “Add New.”
- Set a Name for your badge and check its status to enable it.
- Navigate to the CSS Labels Tab.
- Choose a Label Style.
- Adjust the label width size and set the label text to “Sold Out!“.
- Customize the label color and reposition it to the bottom left.
- Set the font weight to bold.
After modifying the Sold Out Label, follow these steps.
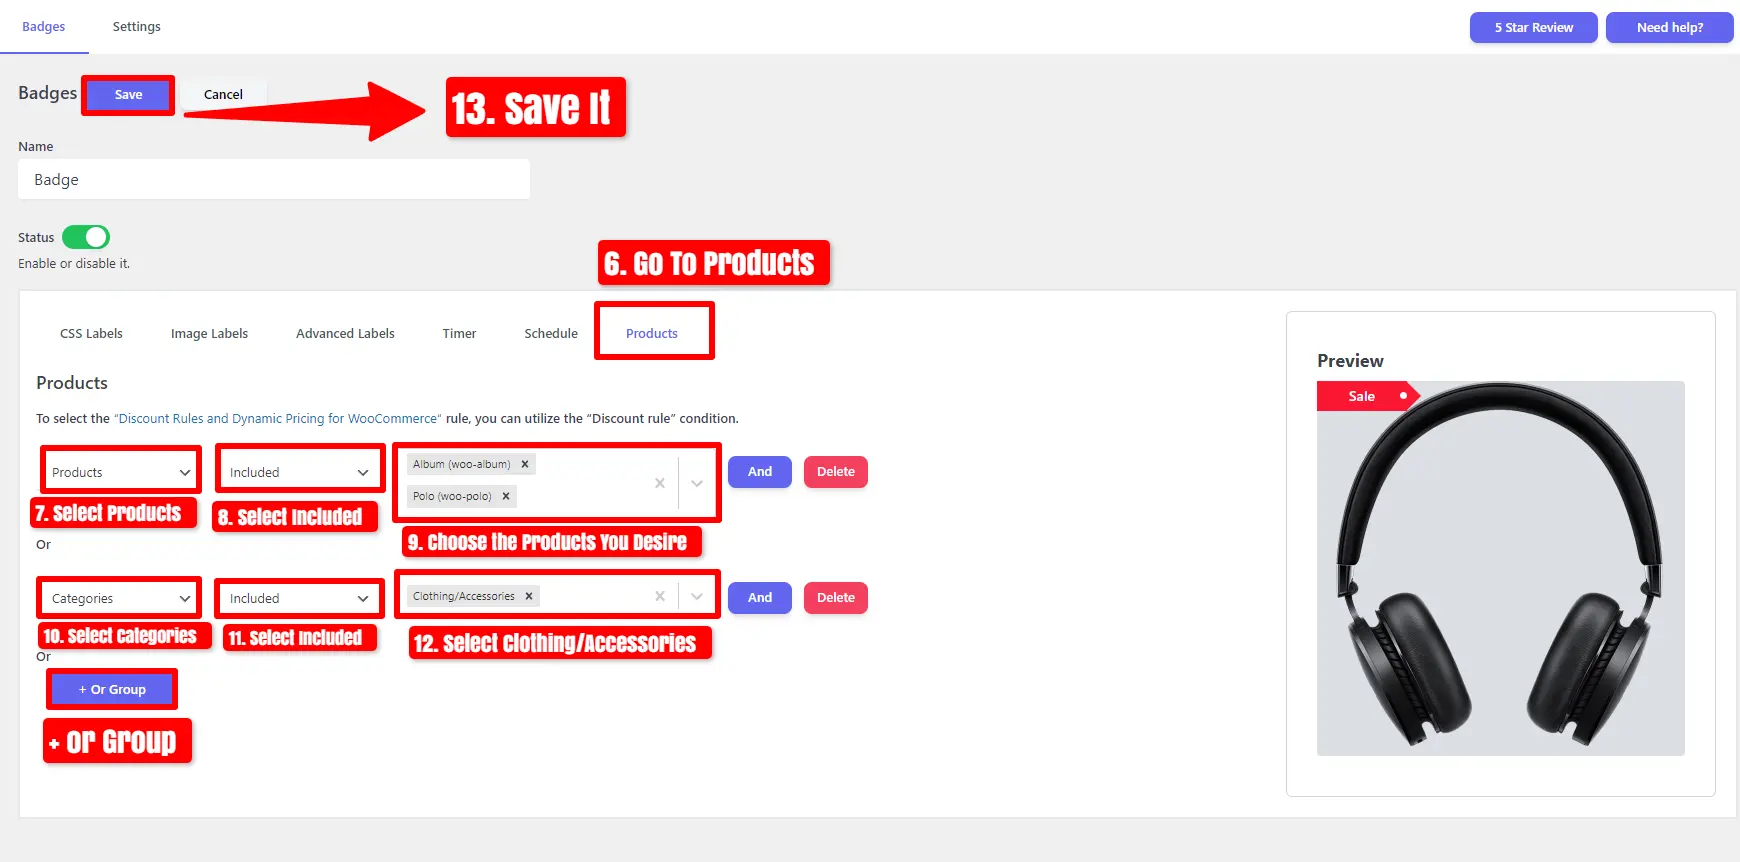
- Navigate to the ‘Products‘ tab.
- Select ‘Stock Status‘ and Choose ‘Out of Stock.’
- Save your changes.
Show a “Sold Out” label on the archive page for products that are currently Out of Stock.
Show the “Sold Out!” label on the product page.


