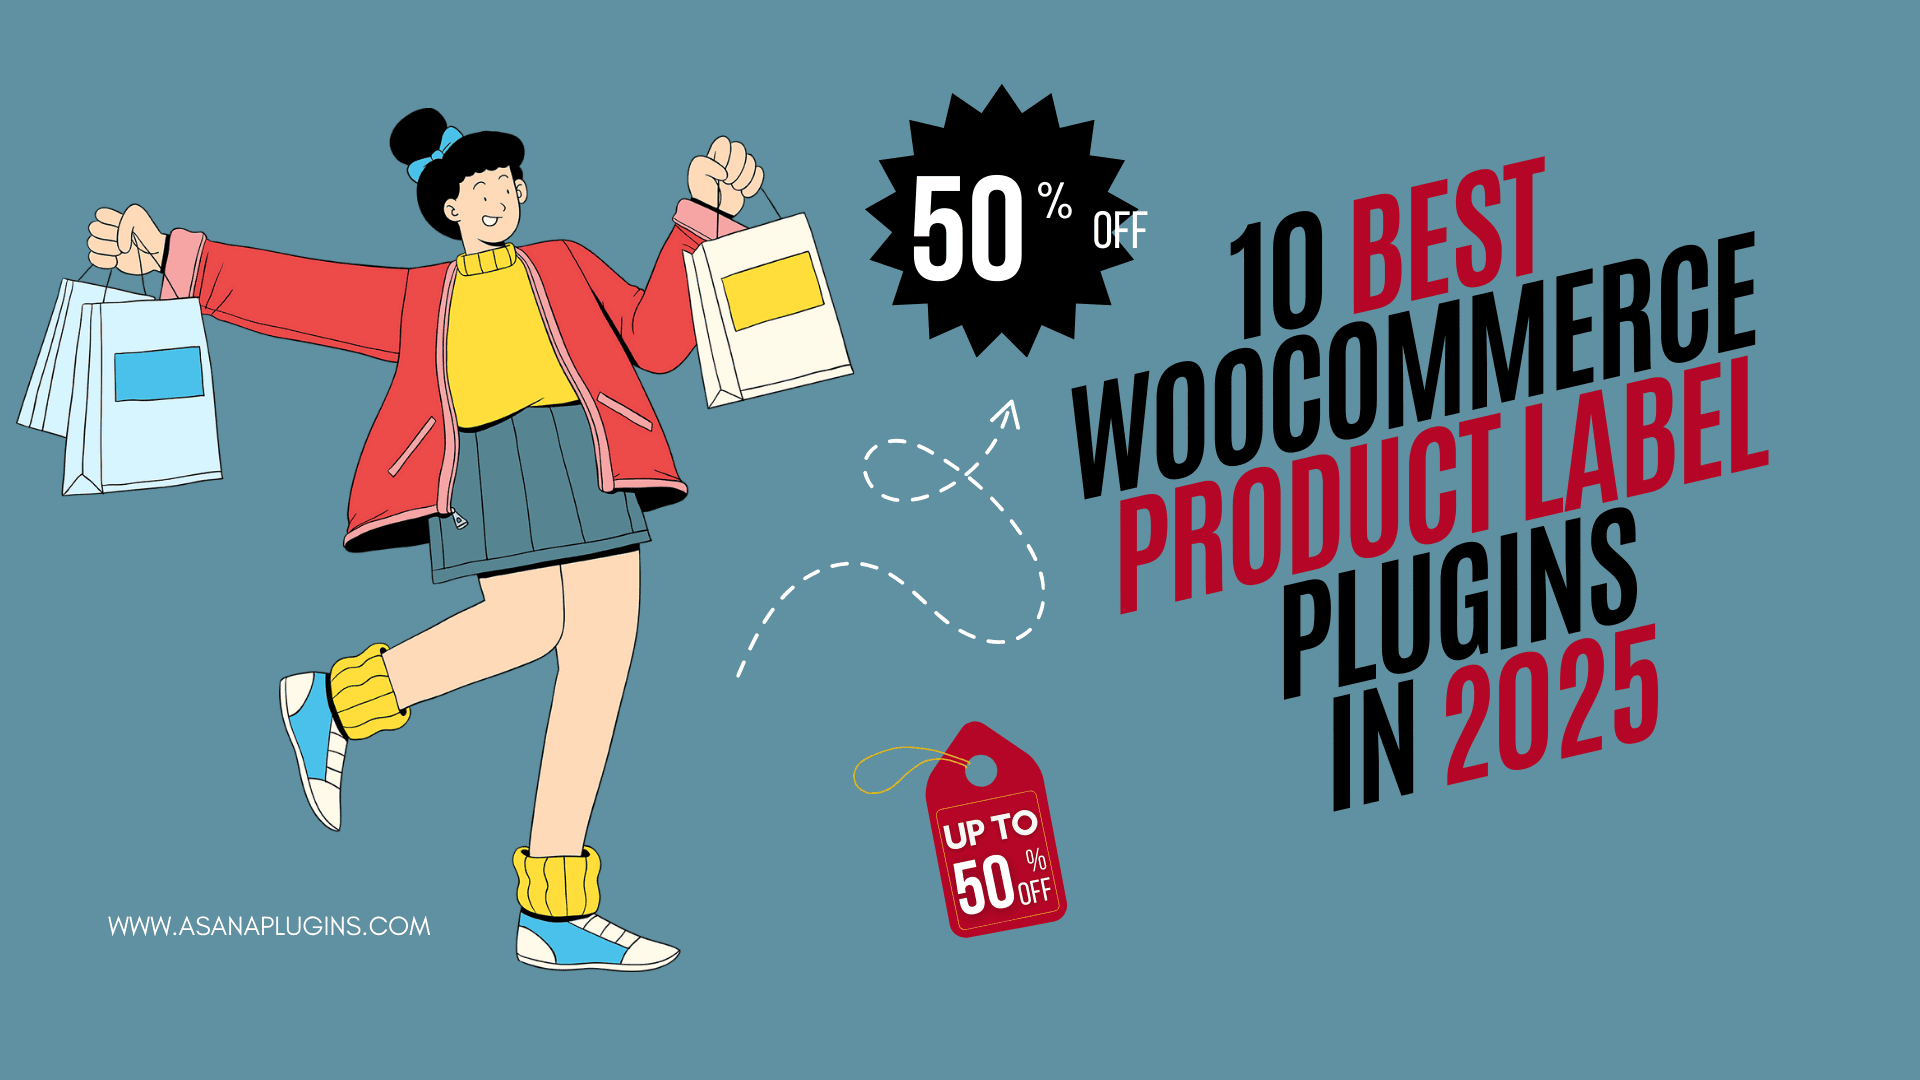
Unveiling the ultimate guide to the 10 best WooCommerce product label plugins in 2025! Elevate your online store’s visibility and customer engagement with these carefully curated product label solutions. Whether you’re highlighting discounts, showcasing bestsellers, or indicating product quality, these plugins offer unparalleled versatility and functionality. Explore this comprehensive list to find the perfect product label plugin tailored to your store’s needs and stay ahead of the competition in 2025.
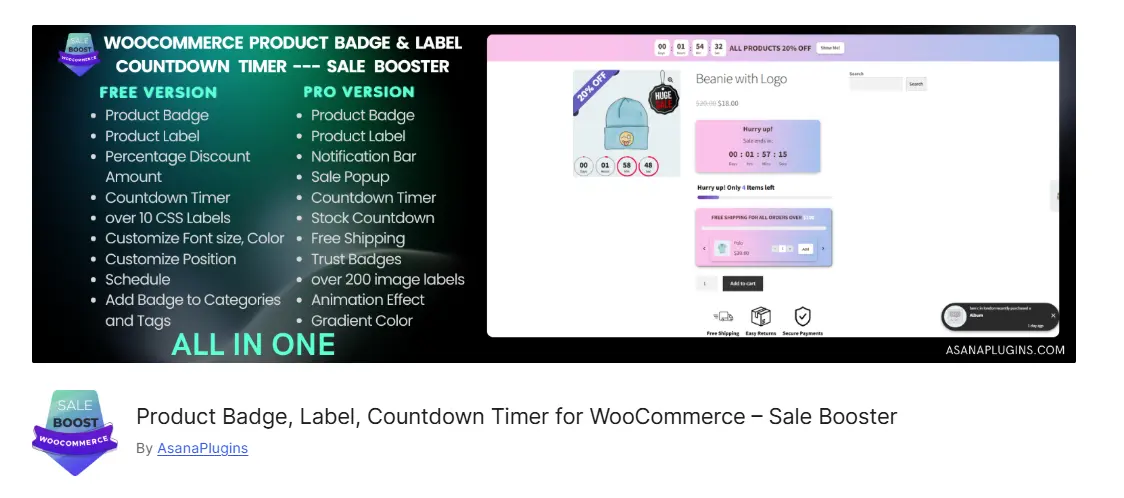
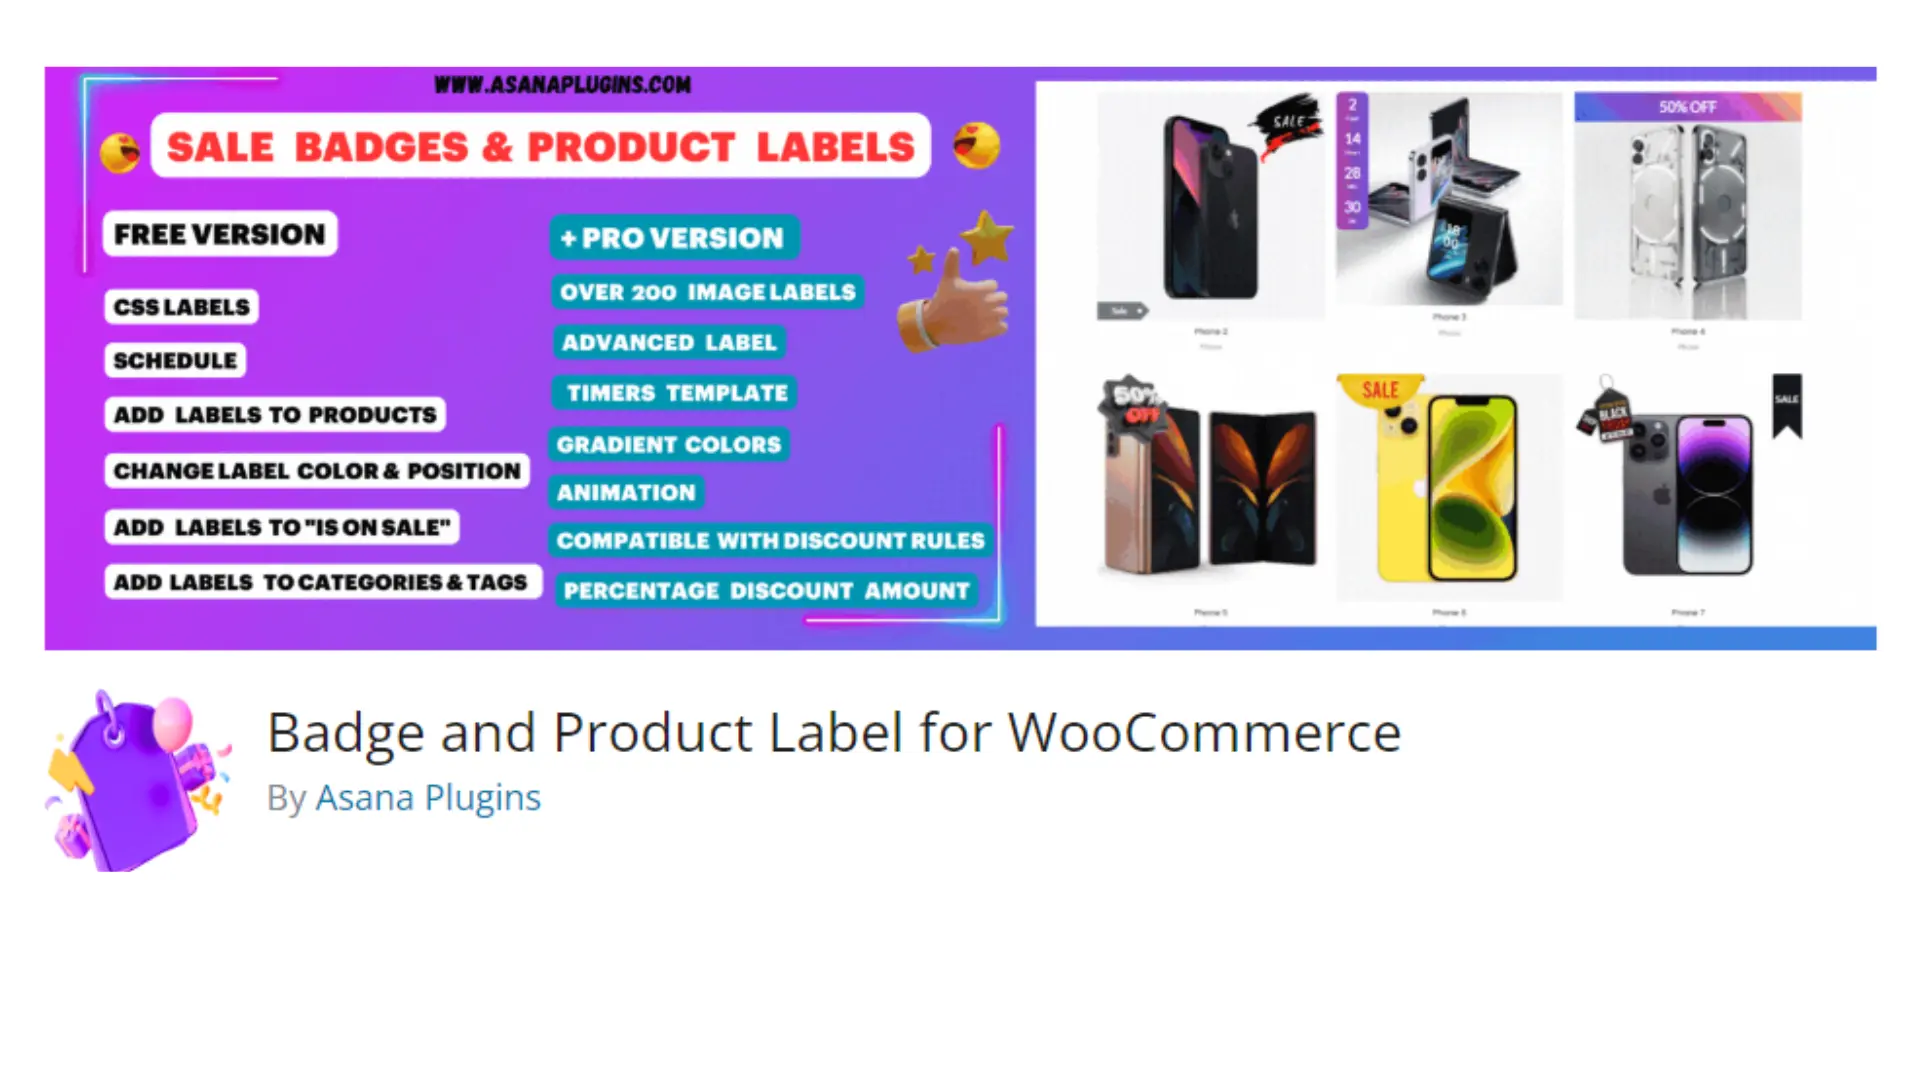
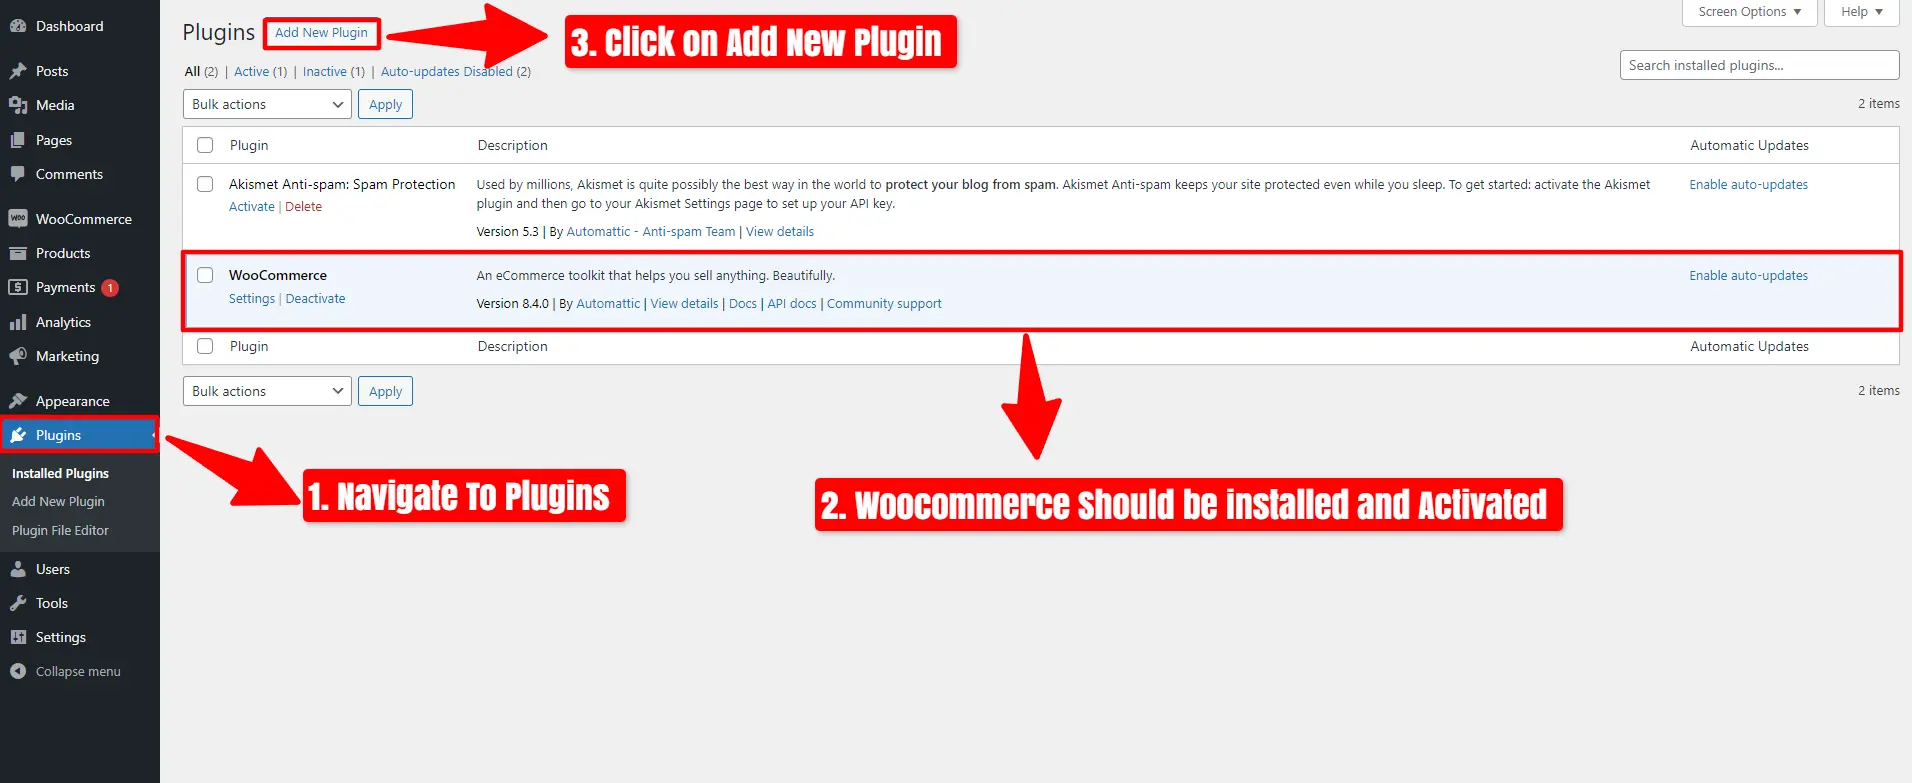
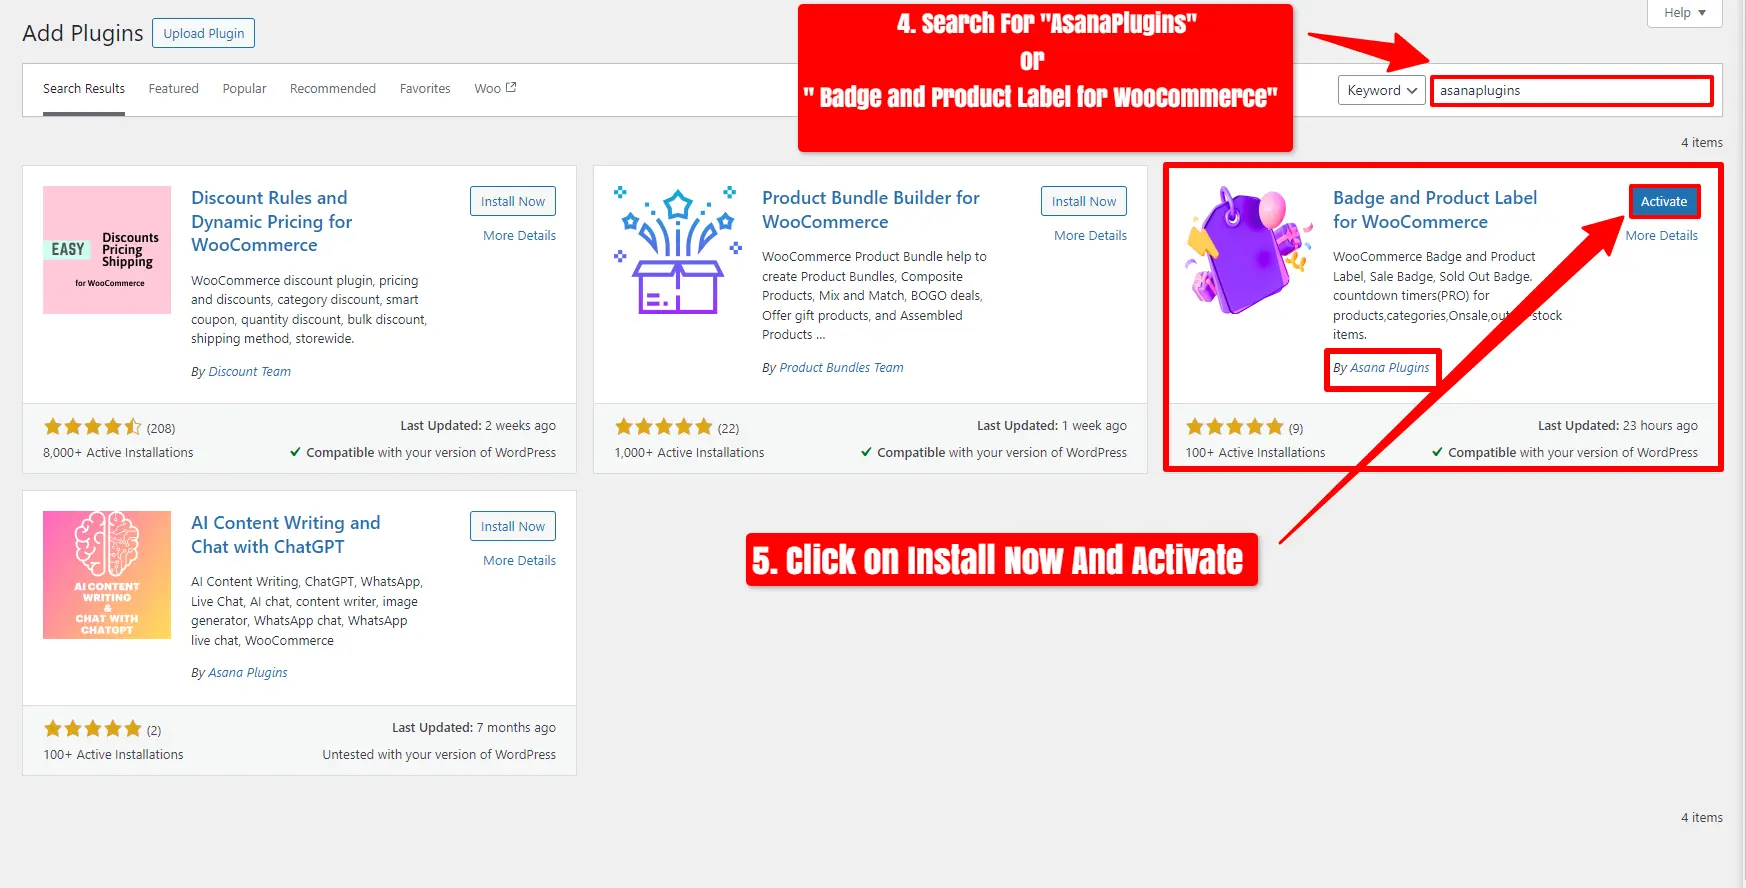
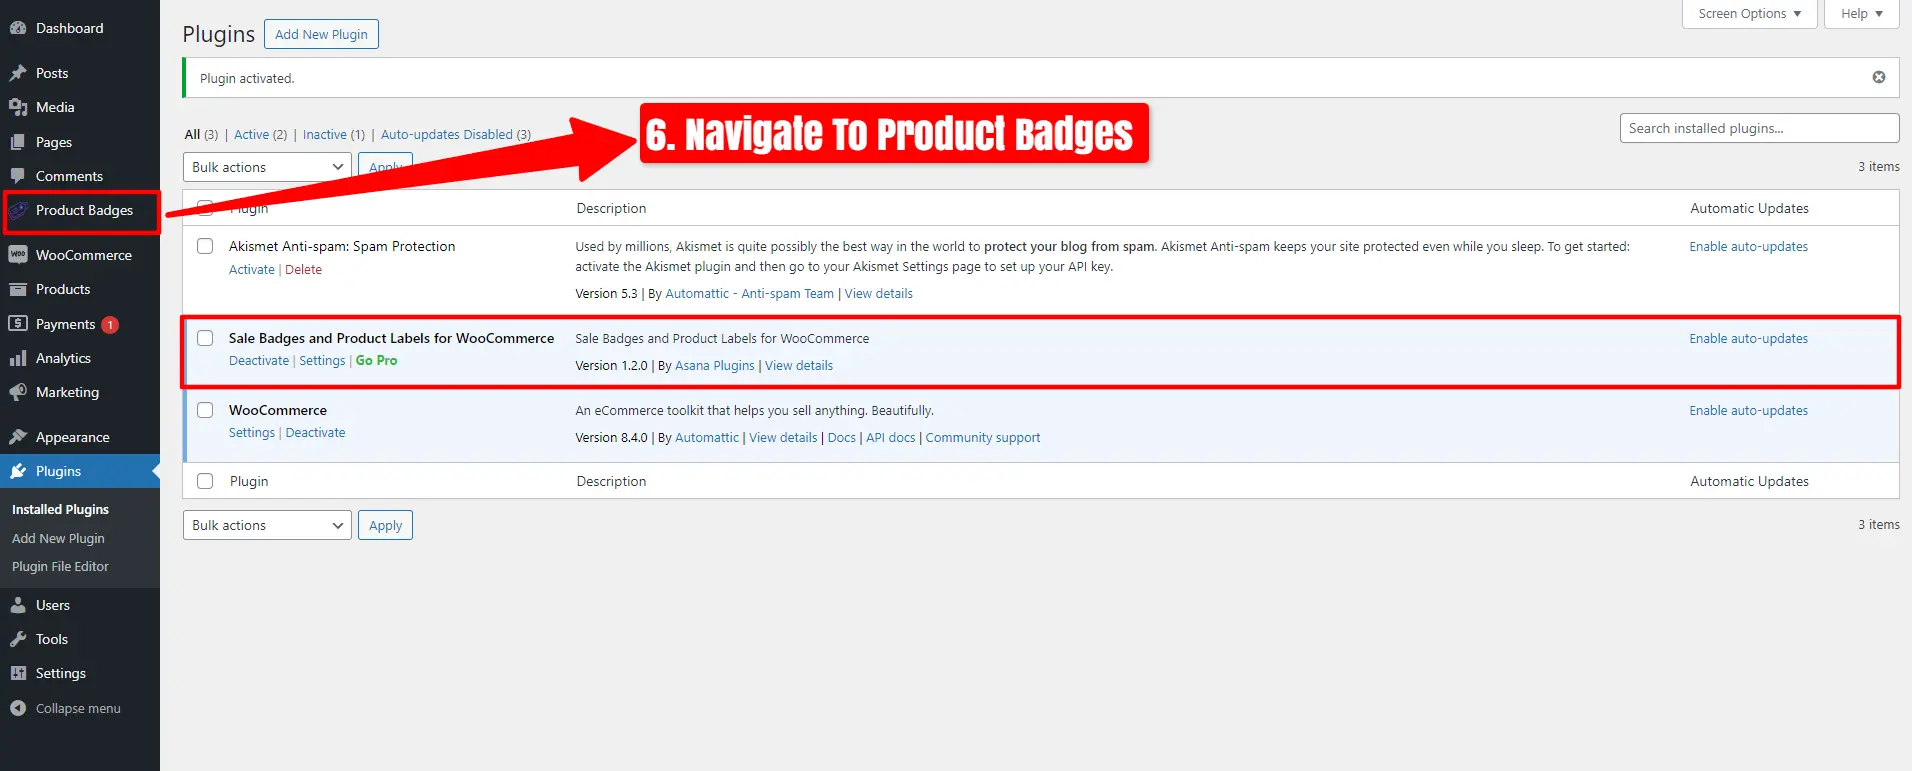
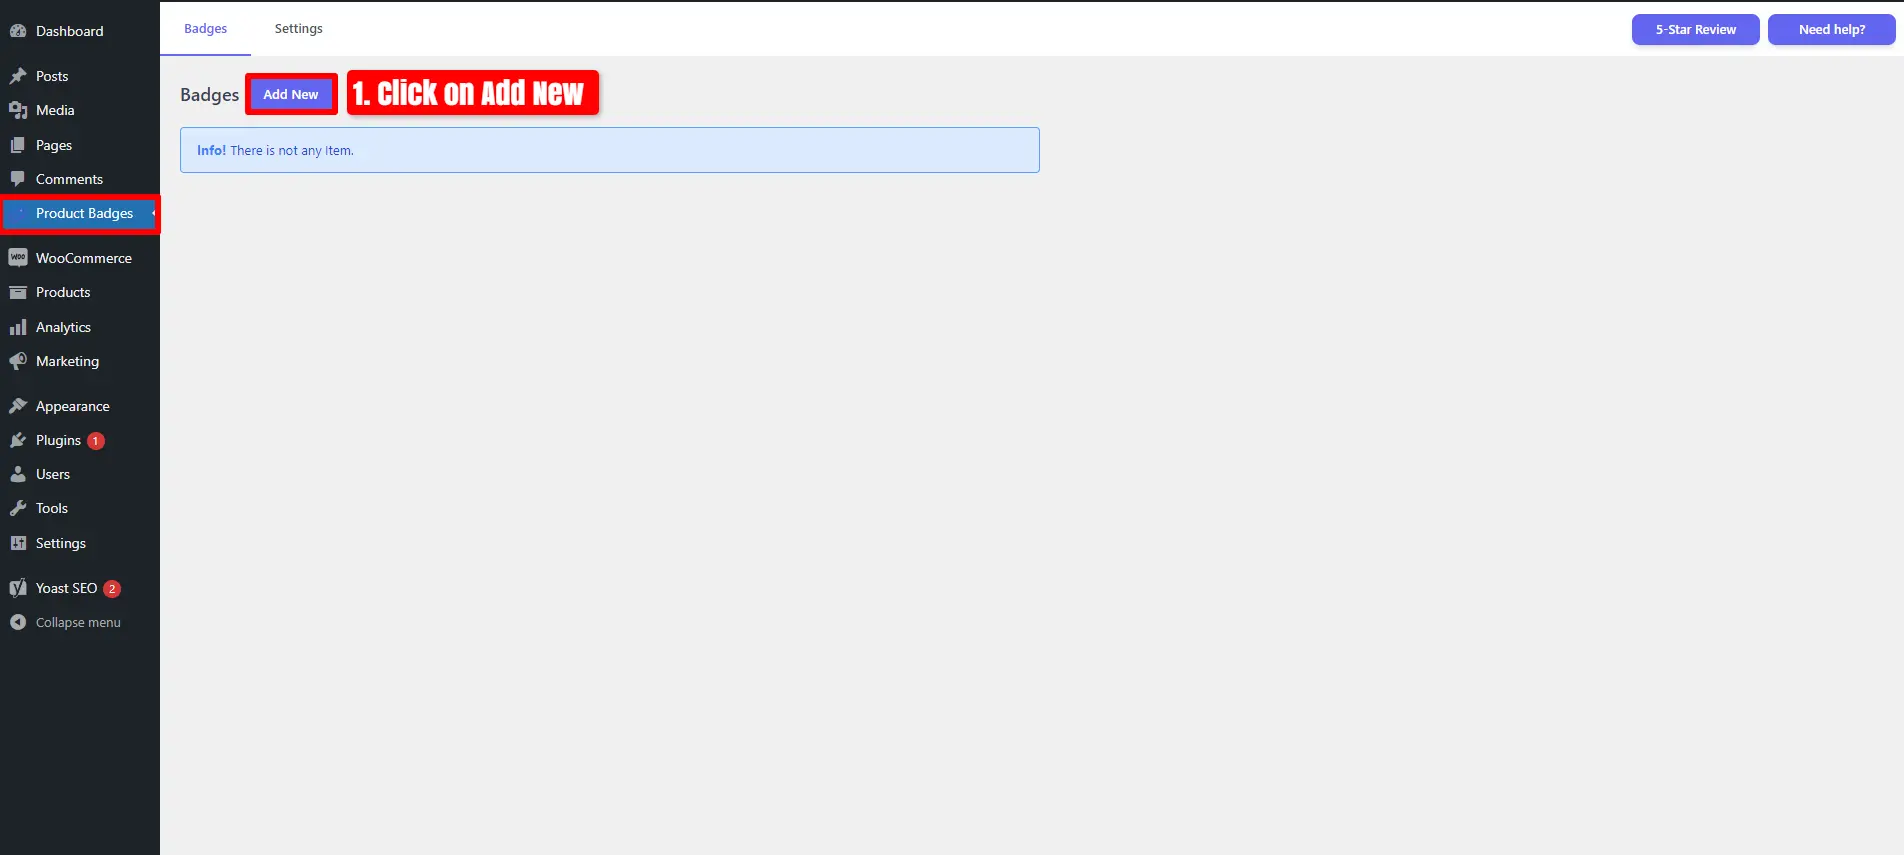
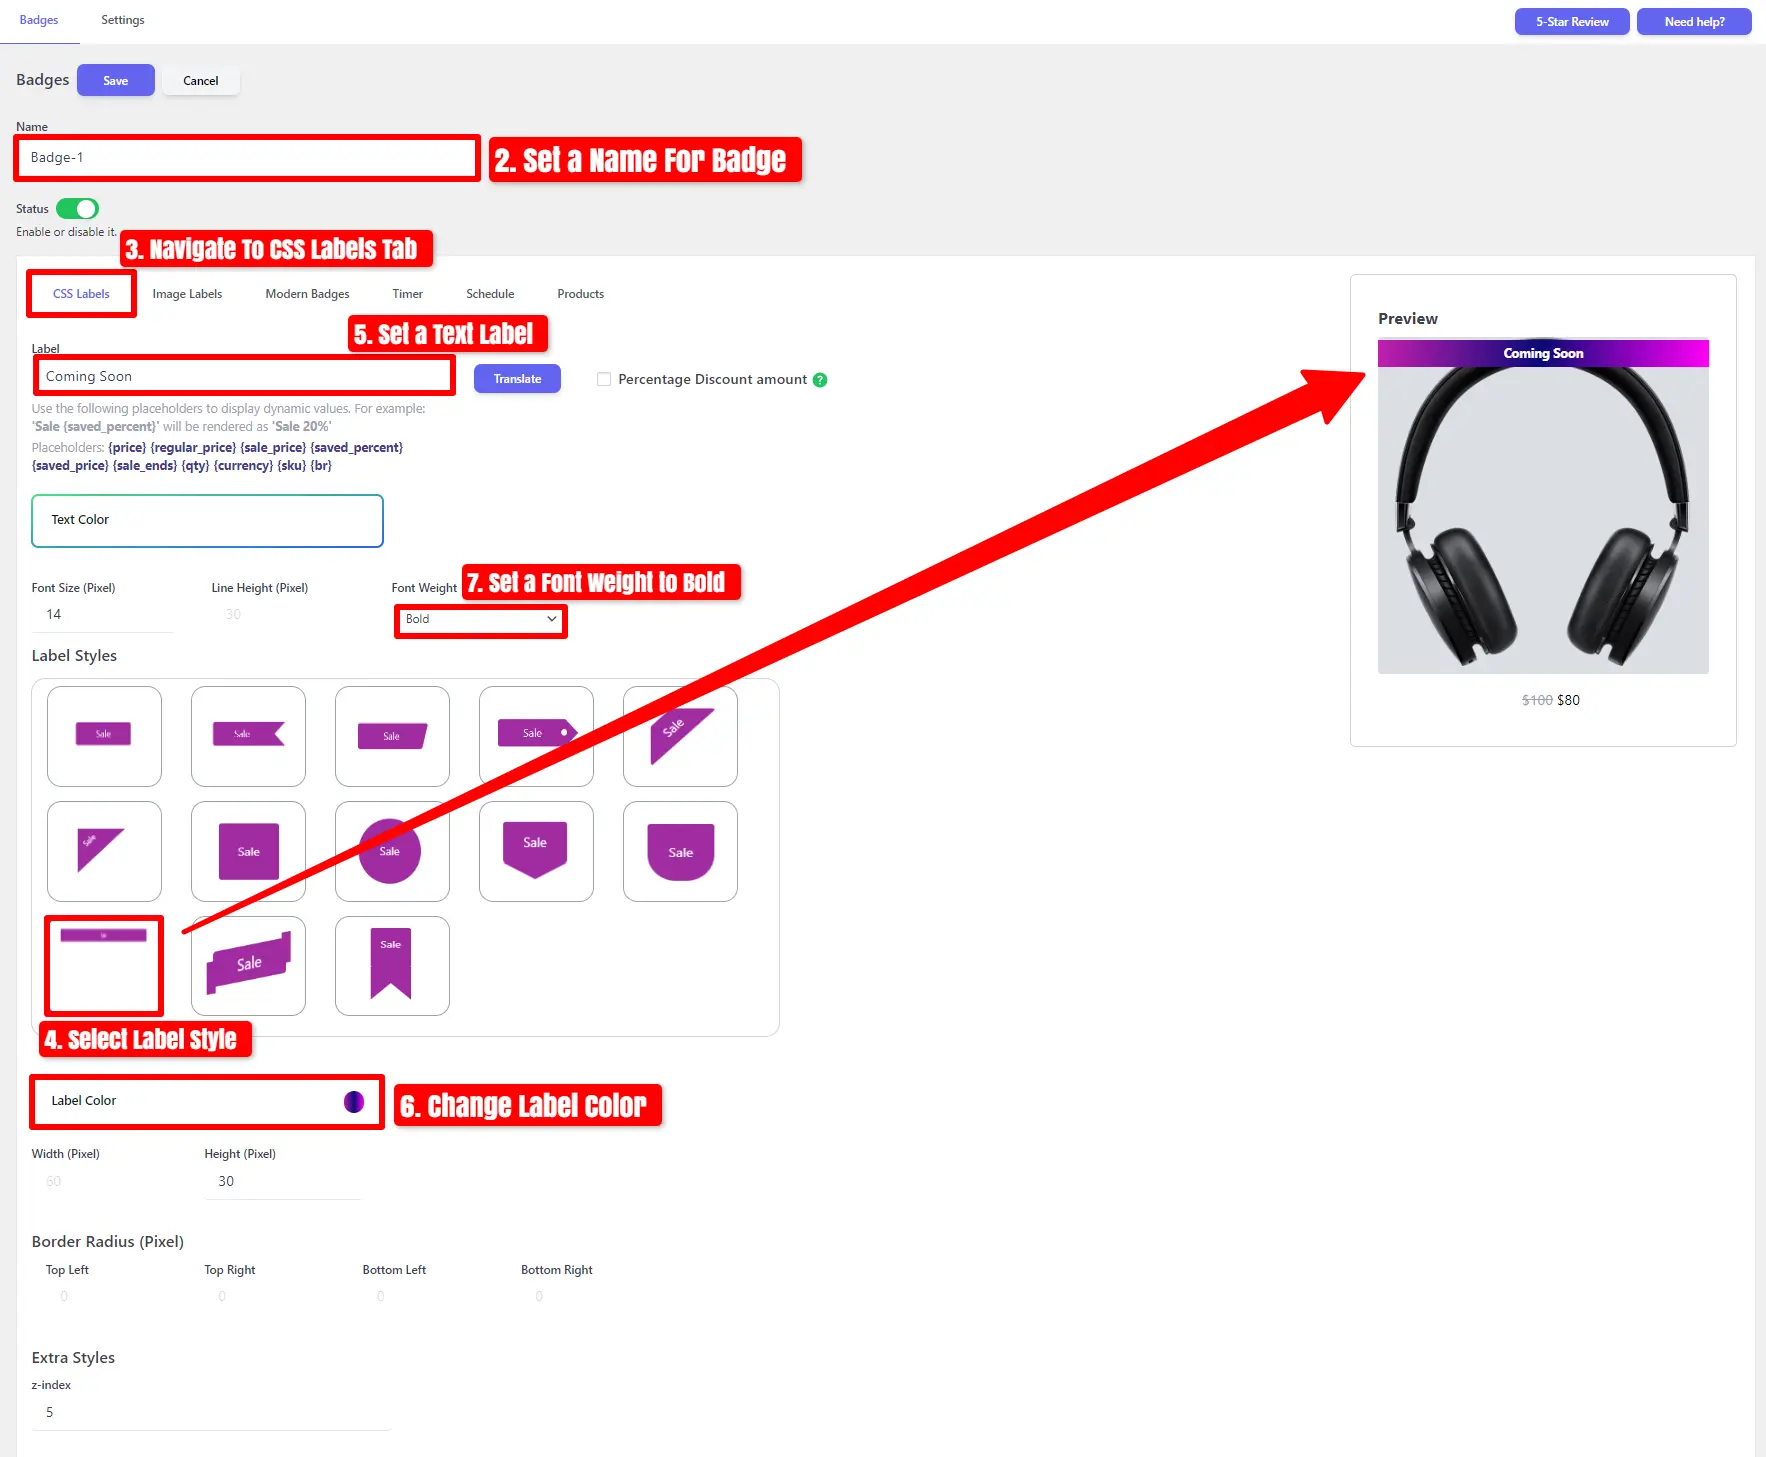
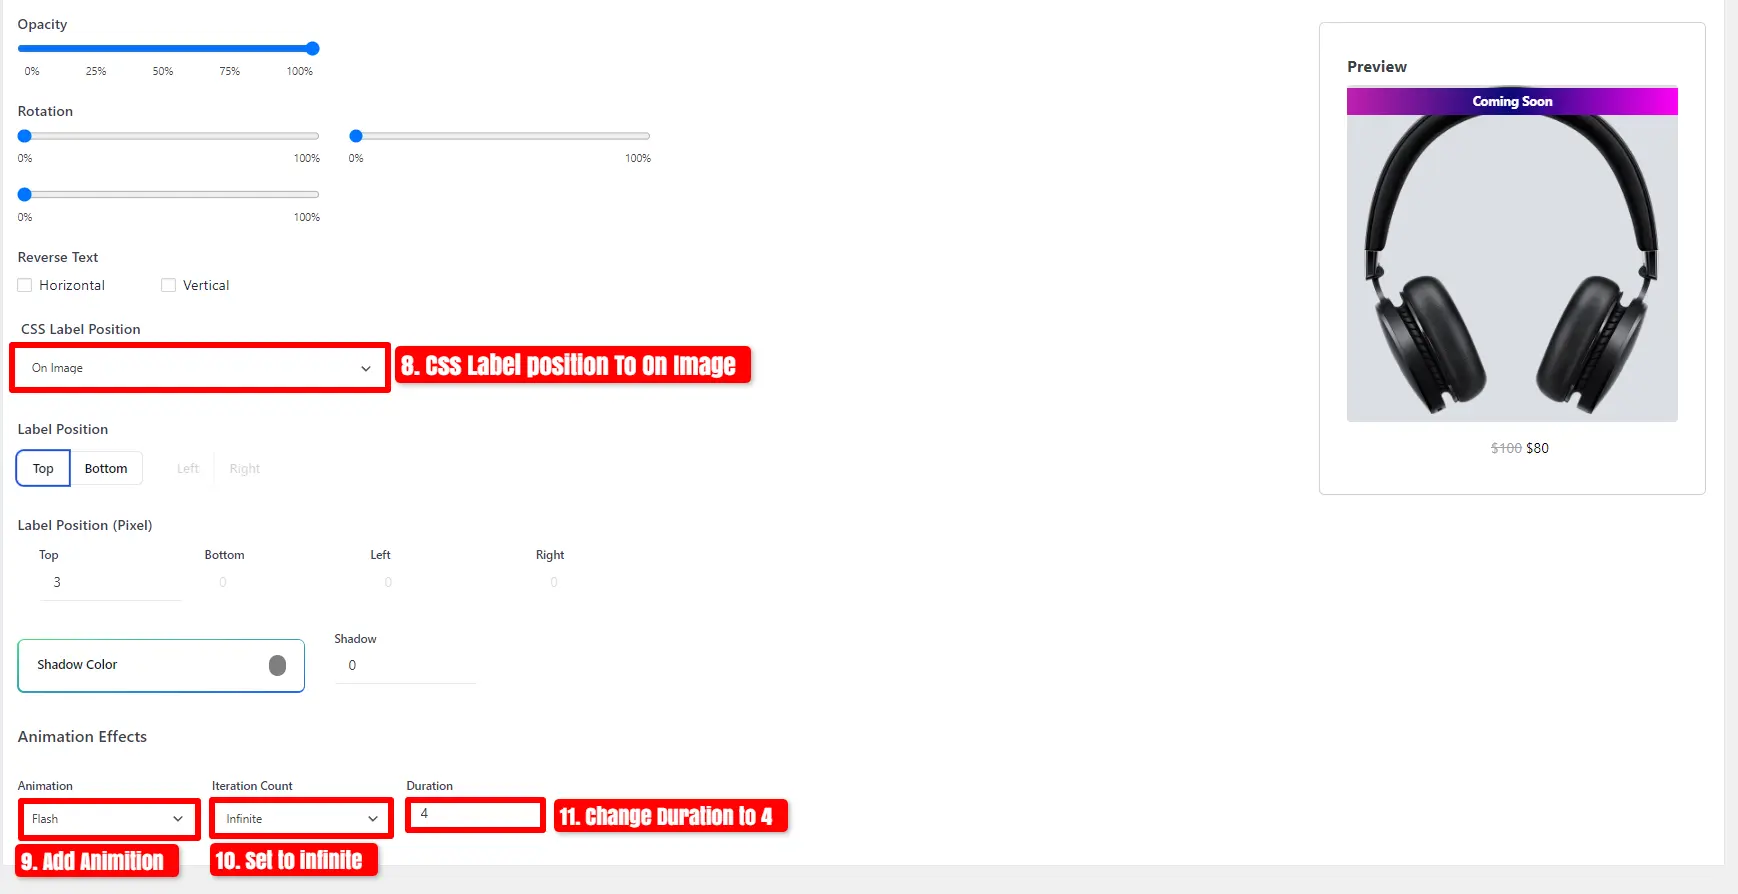
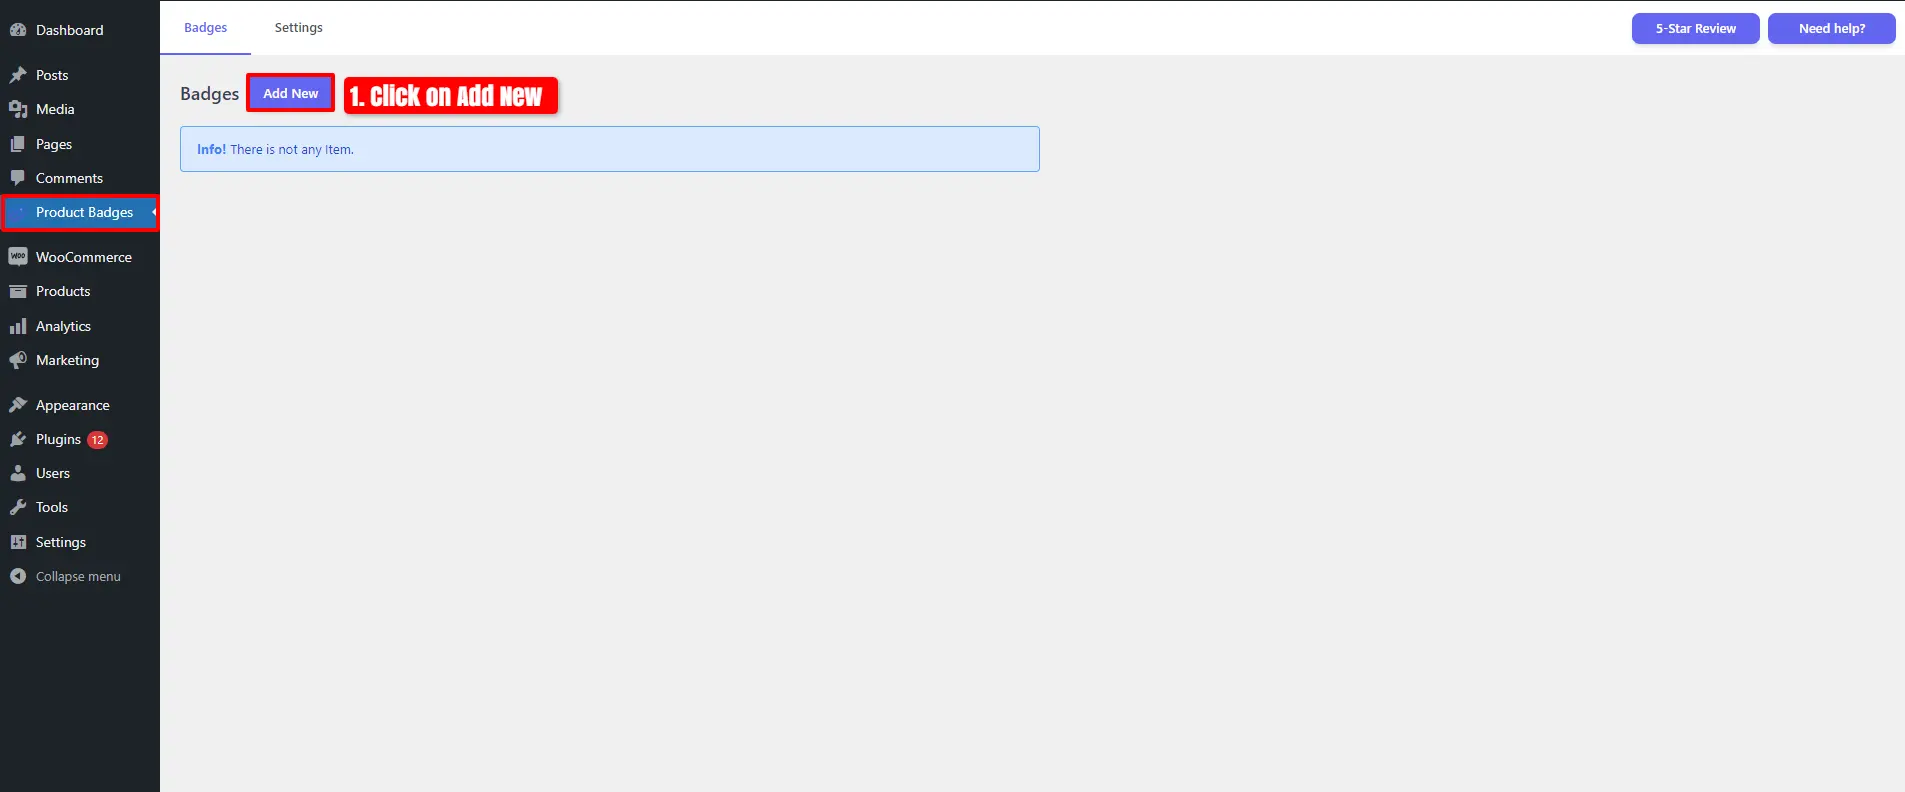
1. Badge and Product Label for WooCommerce
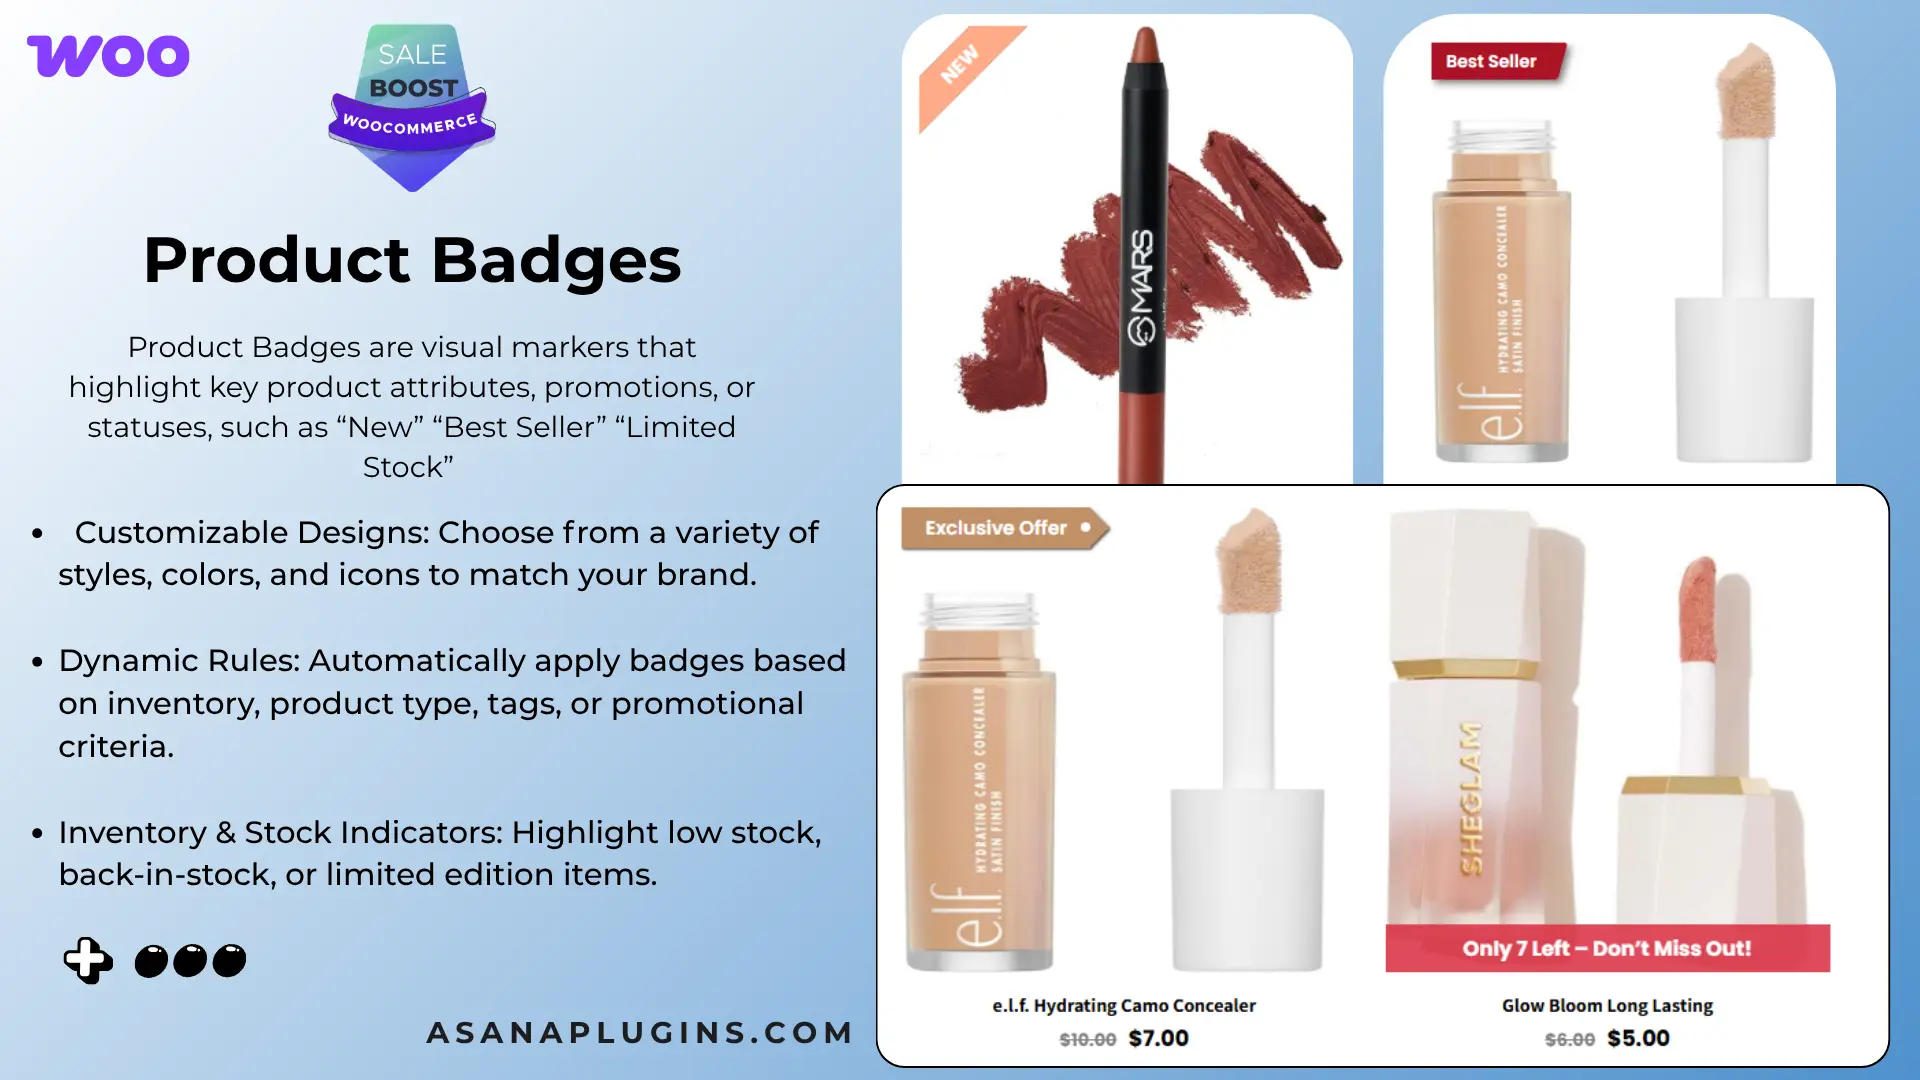
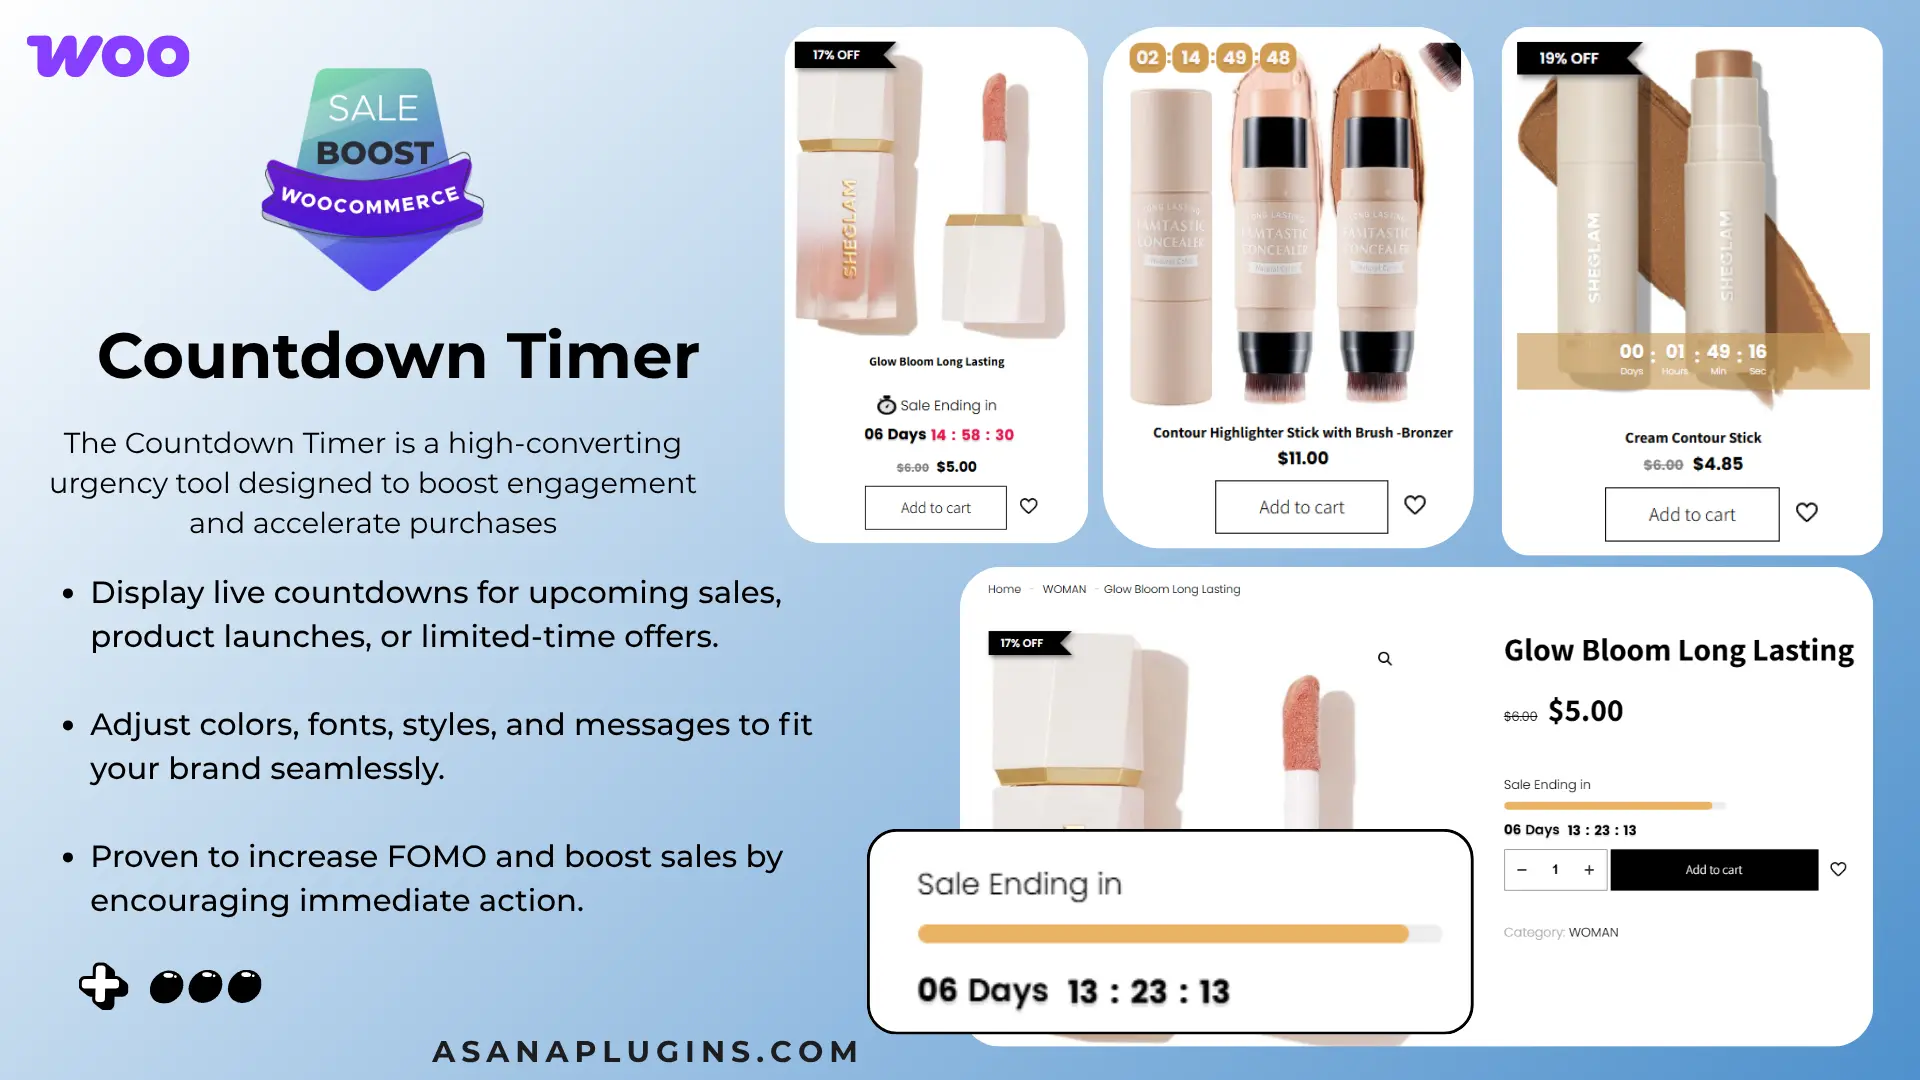
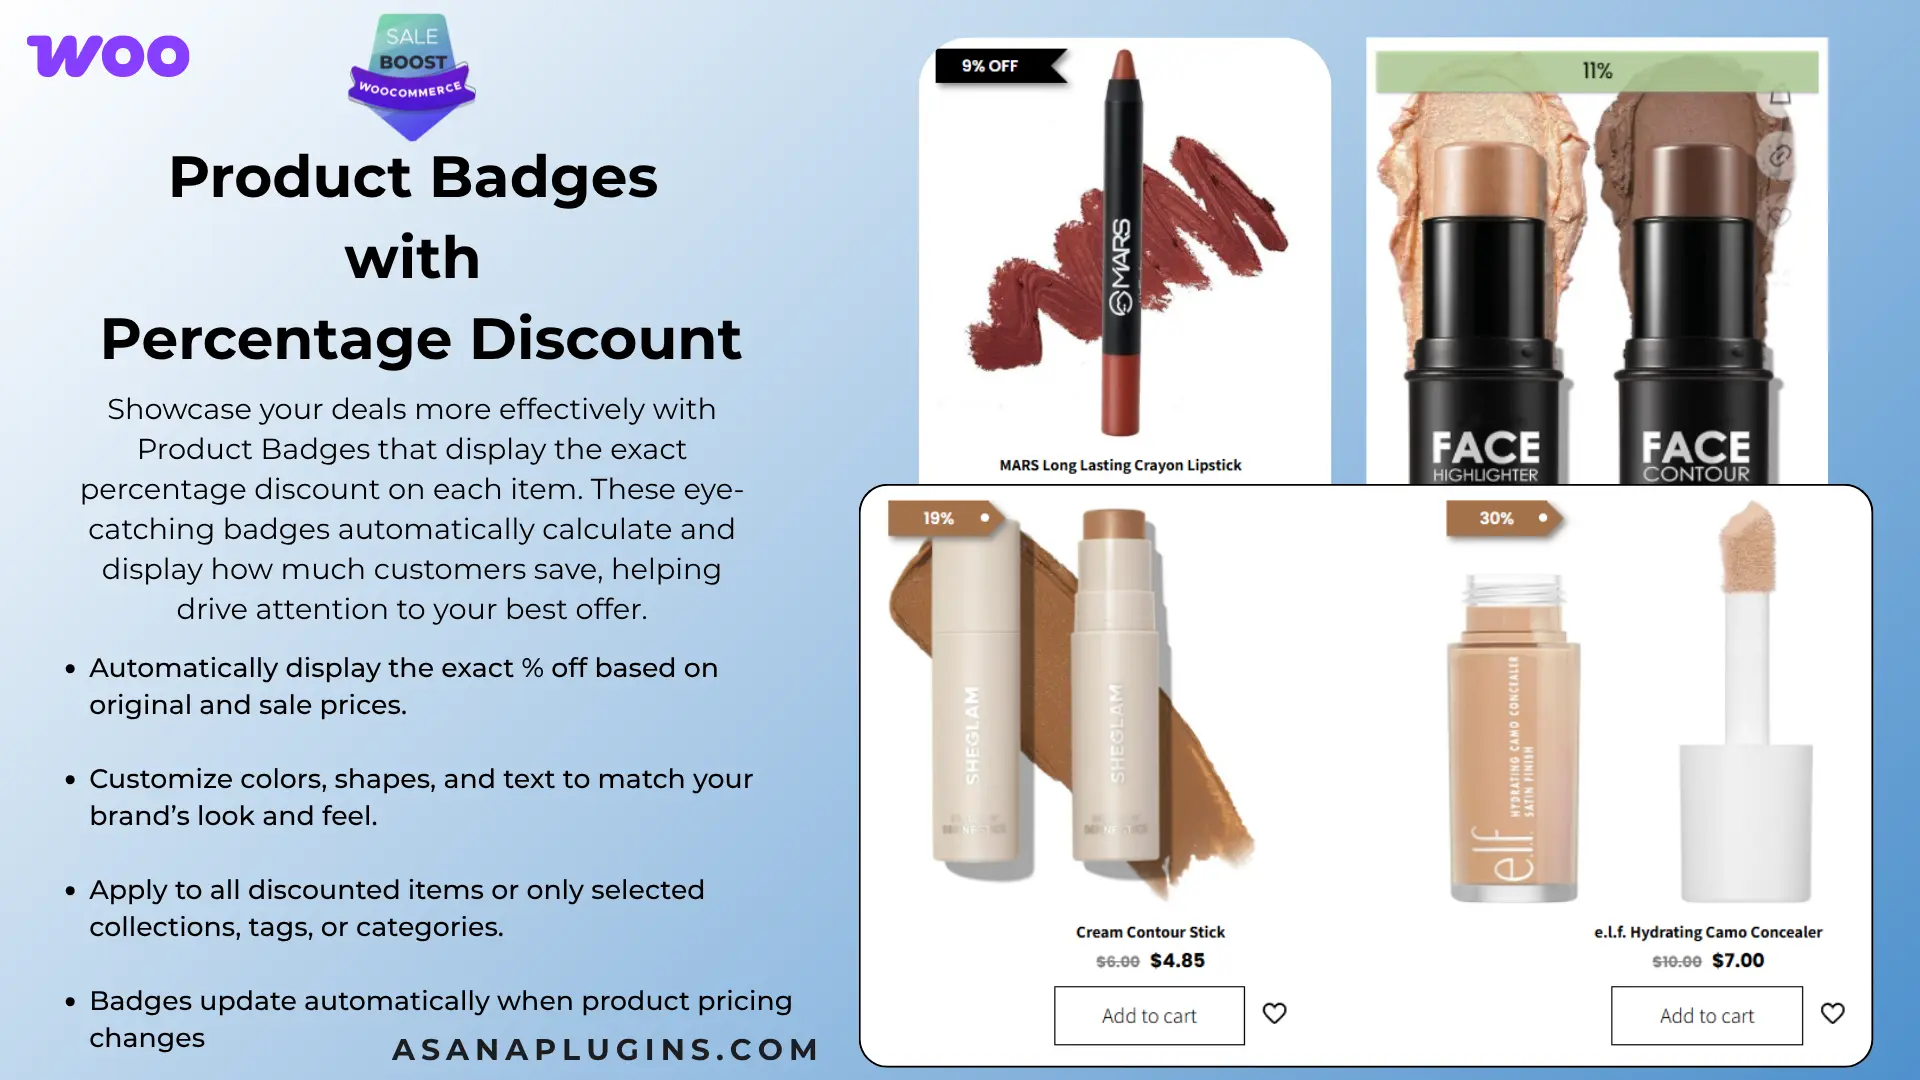
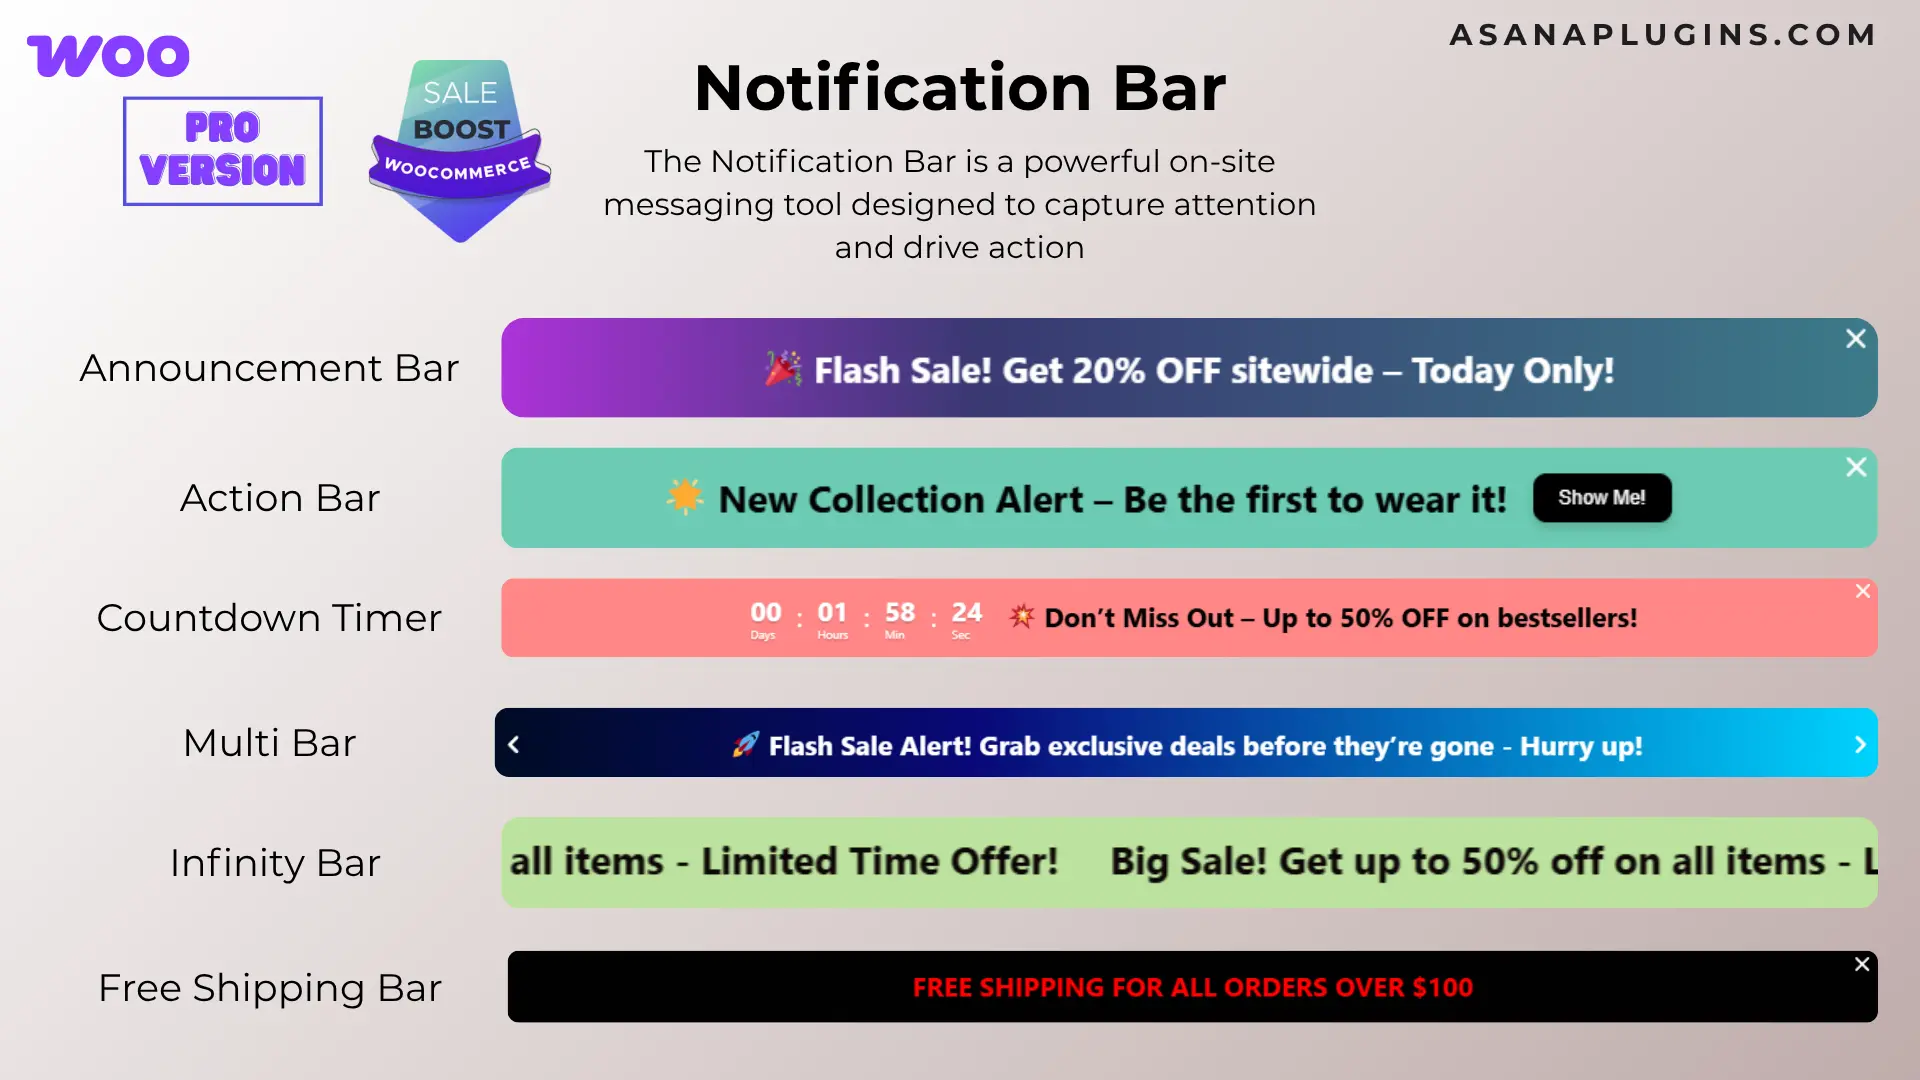
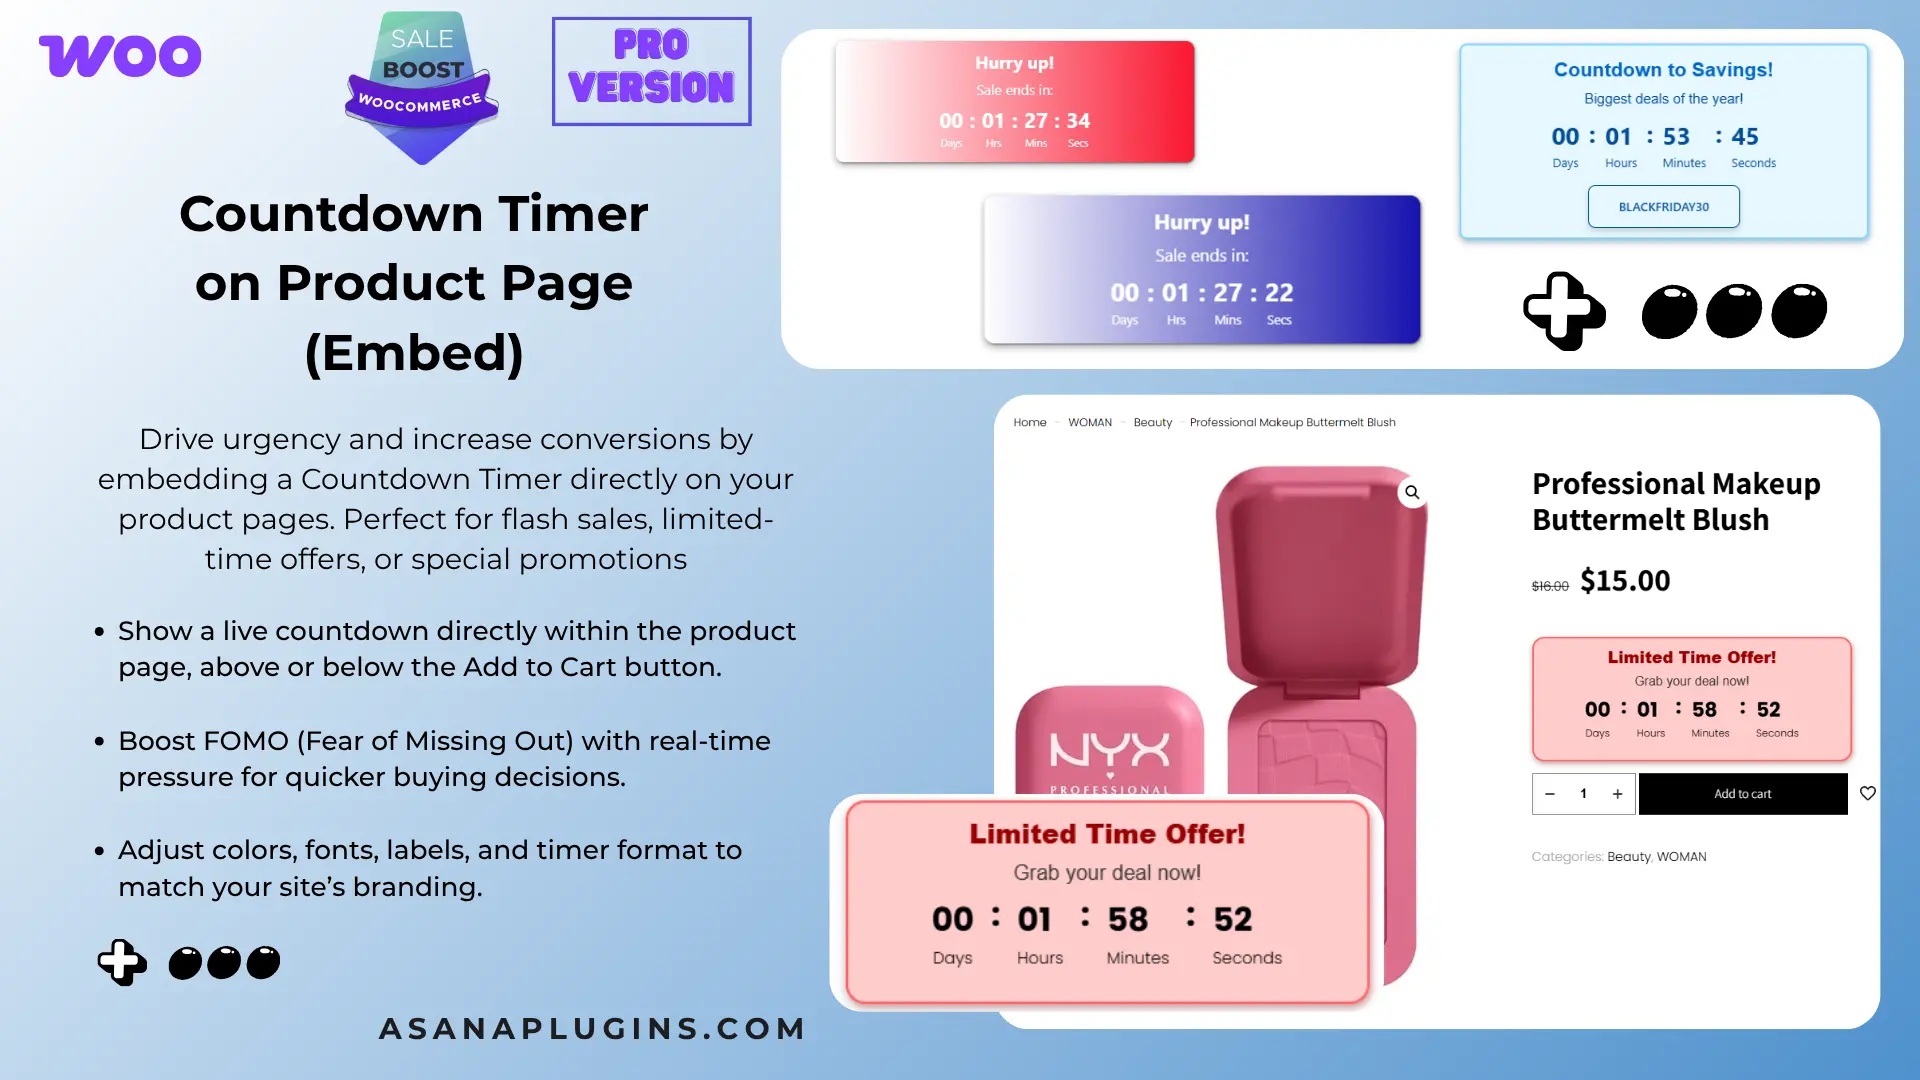
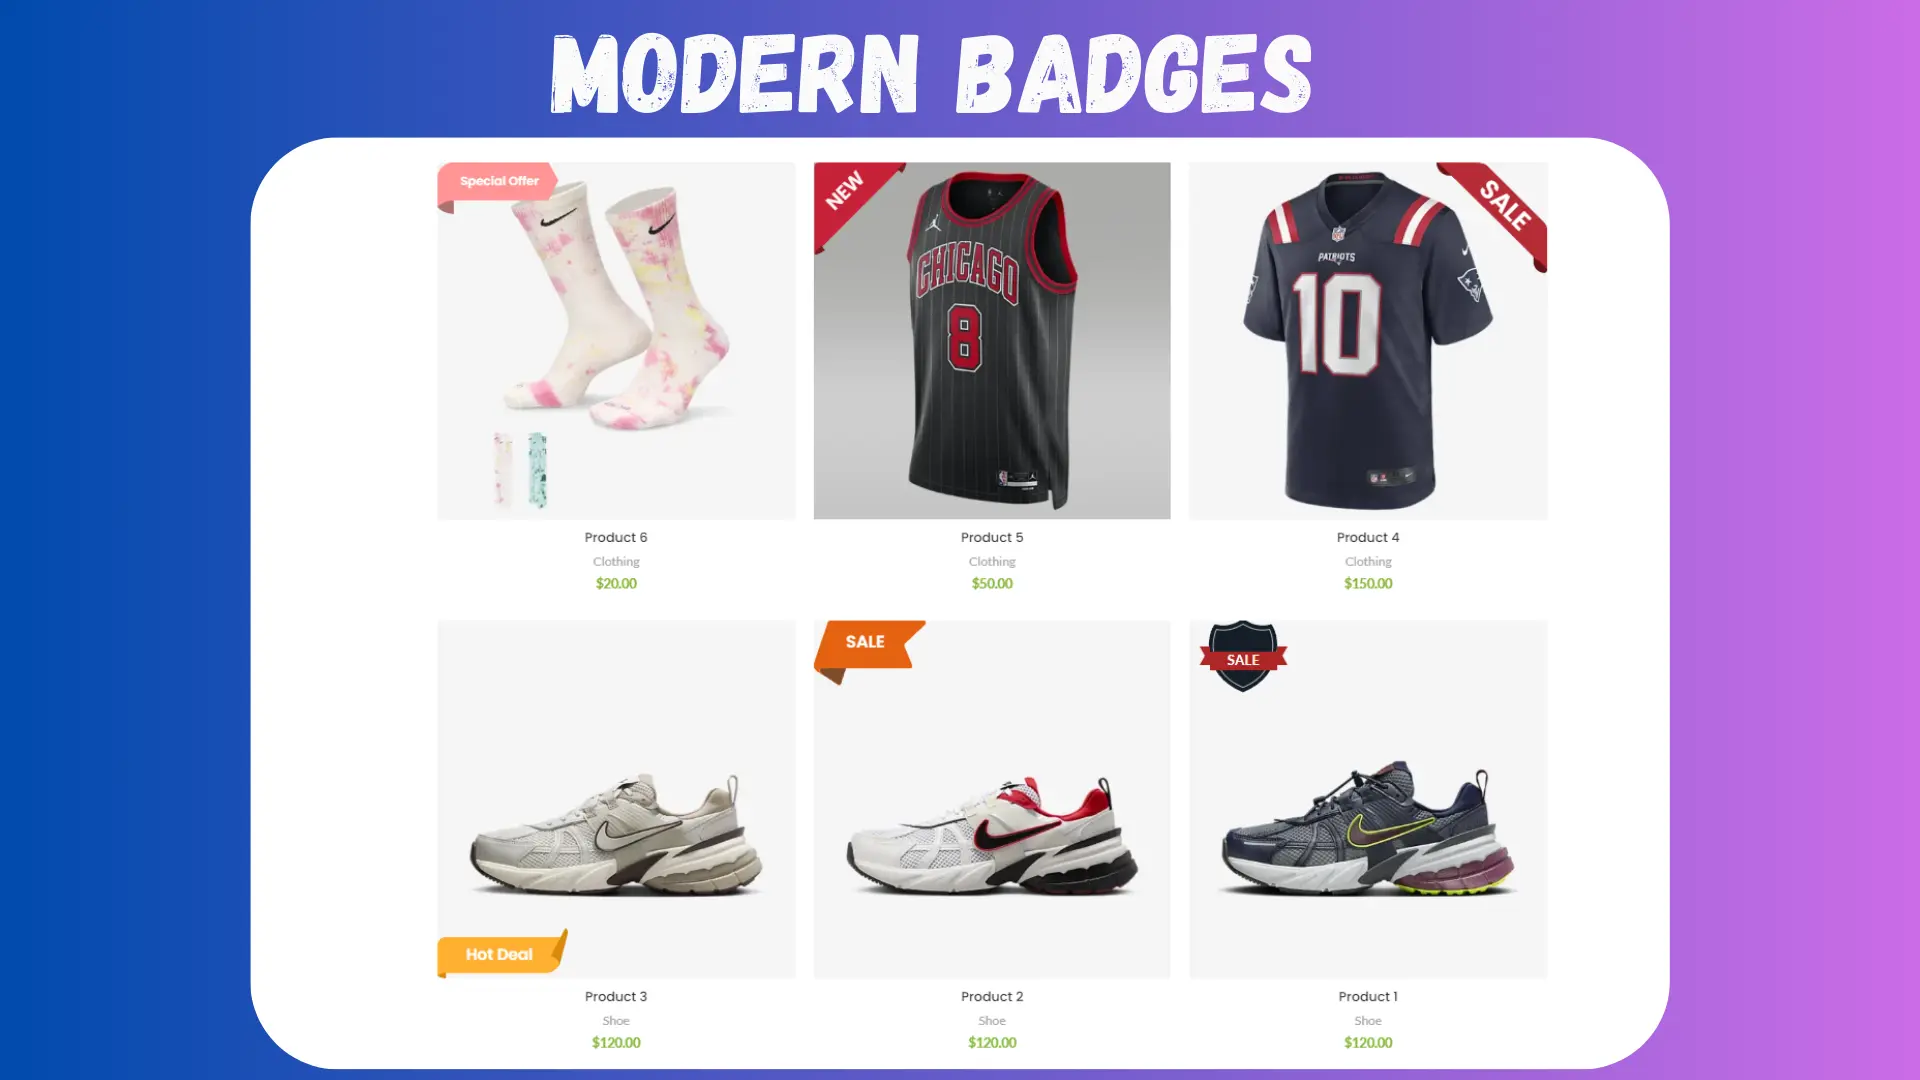
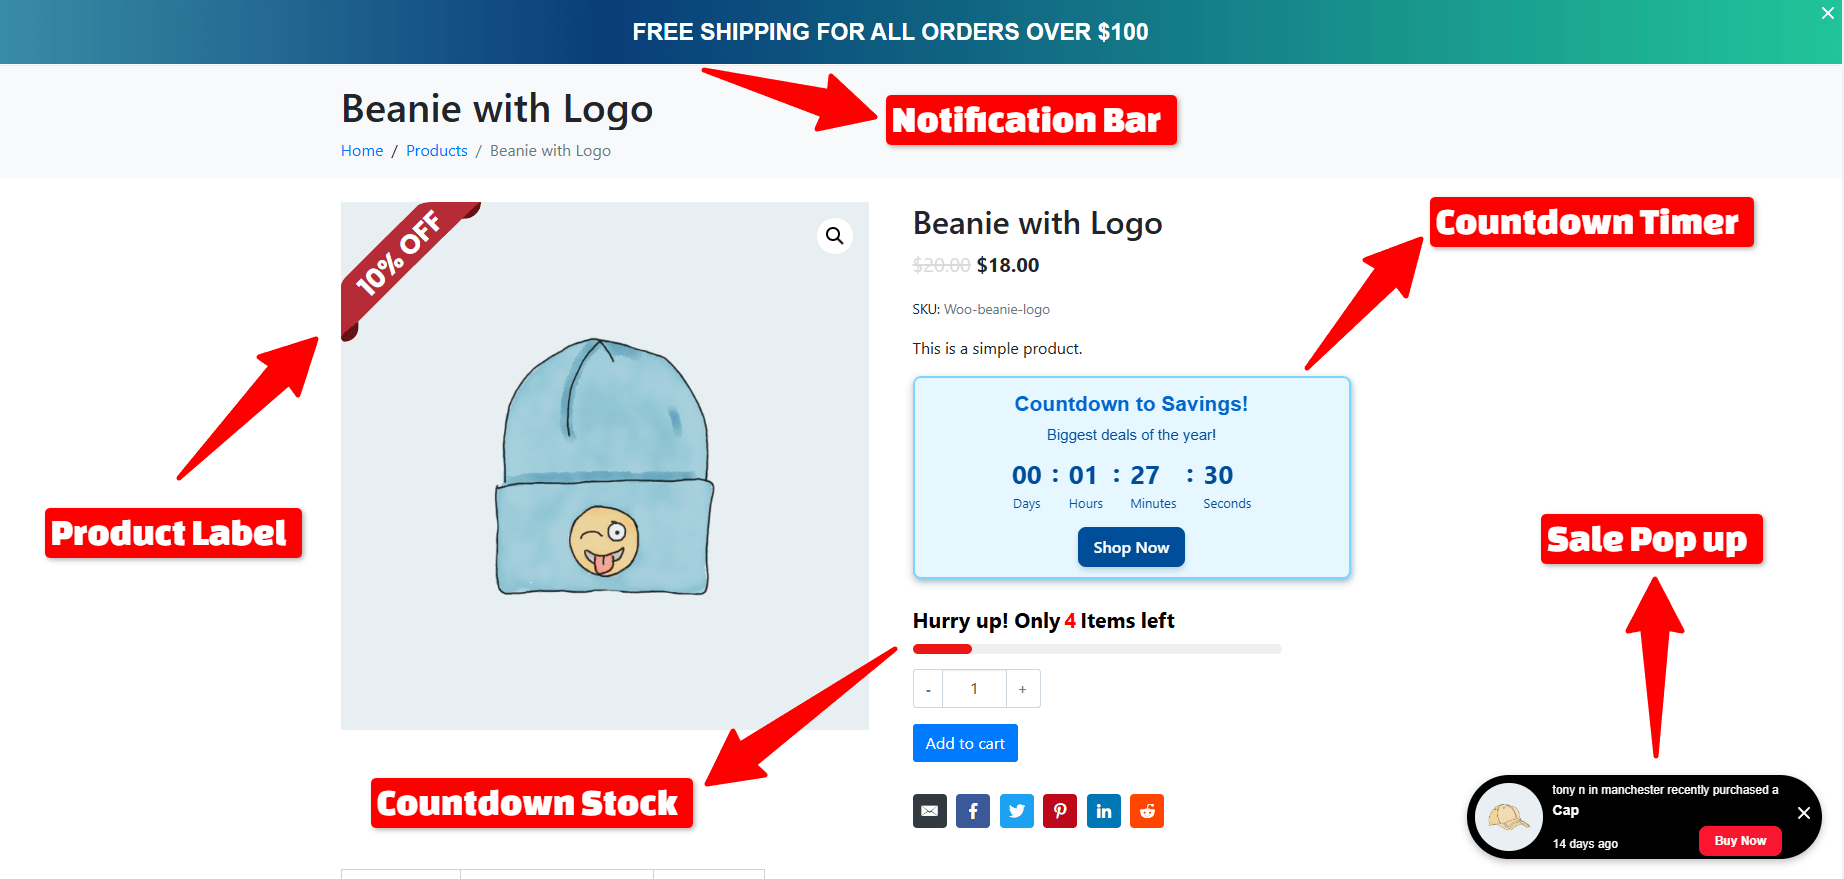
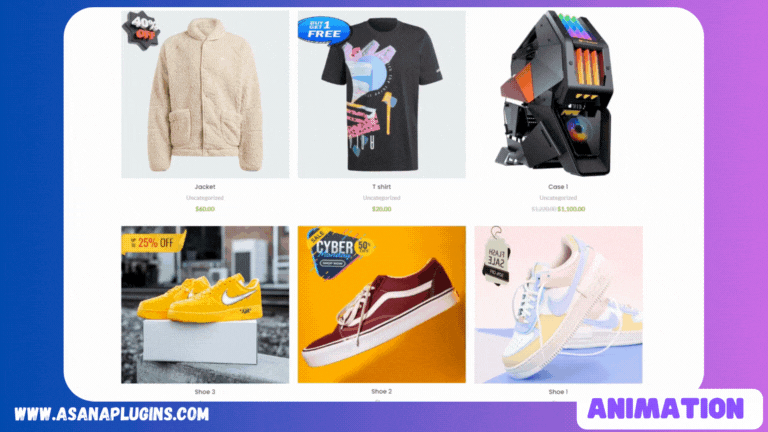
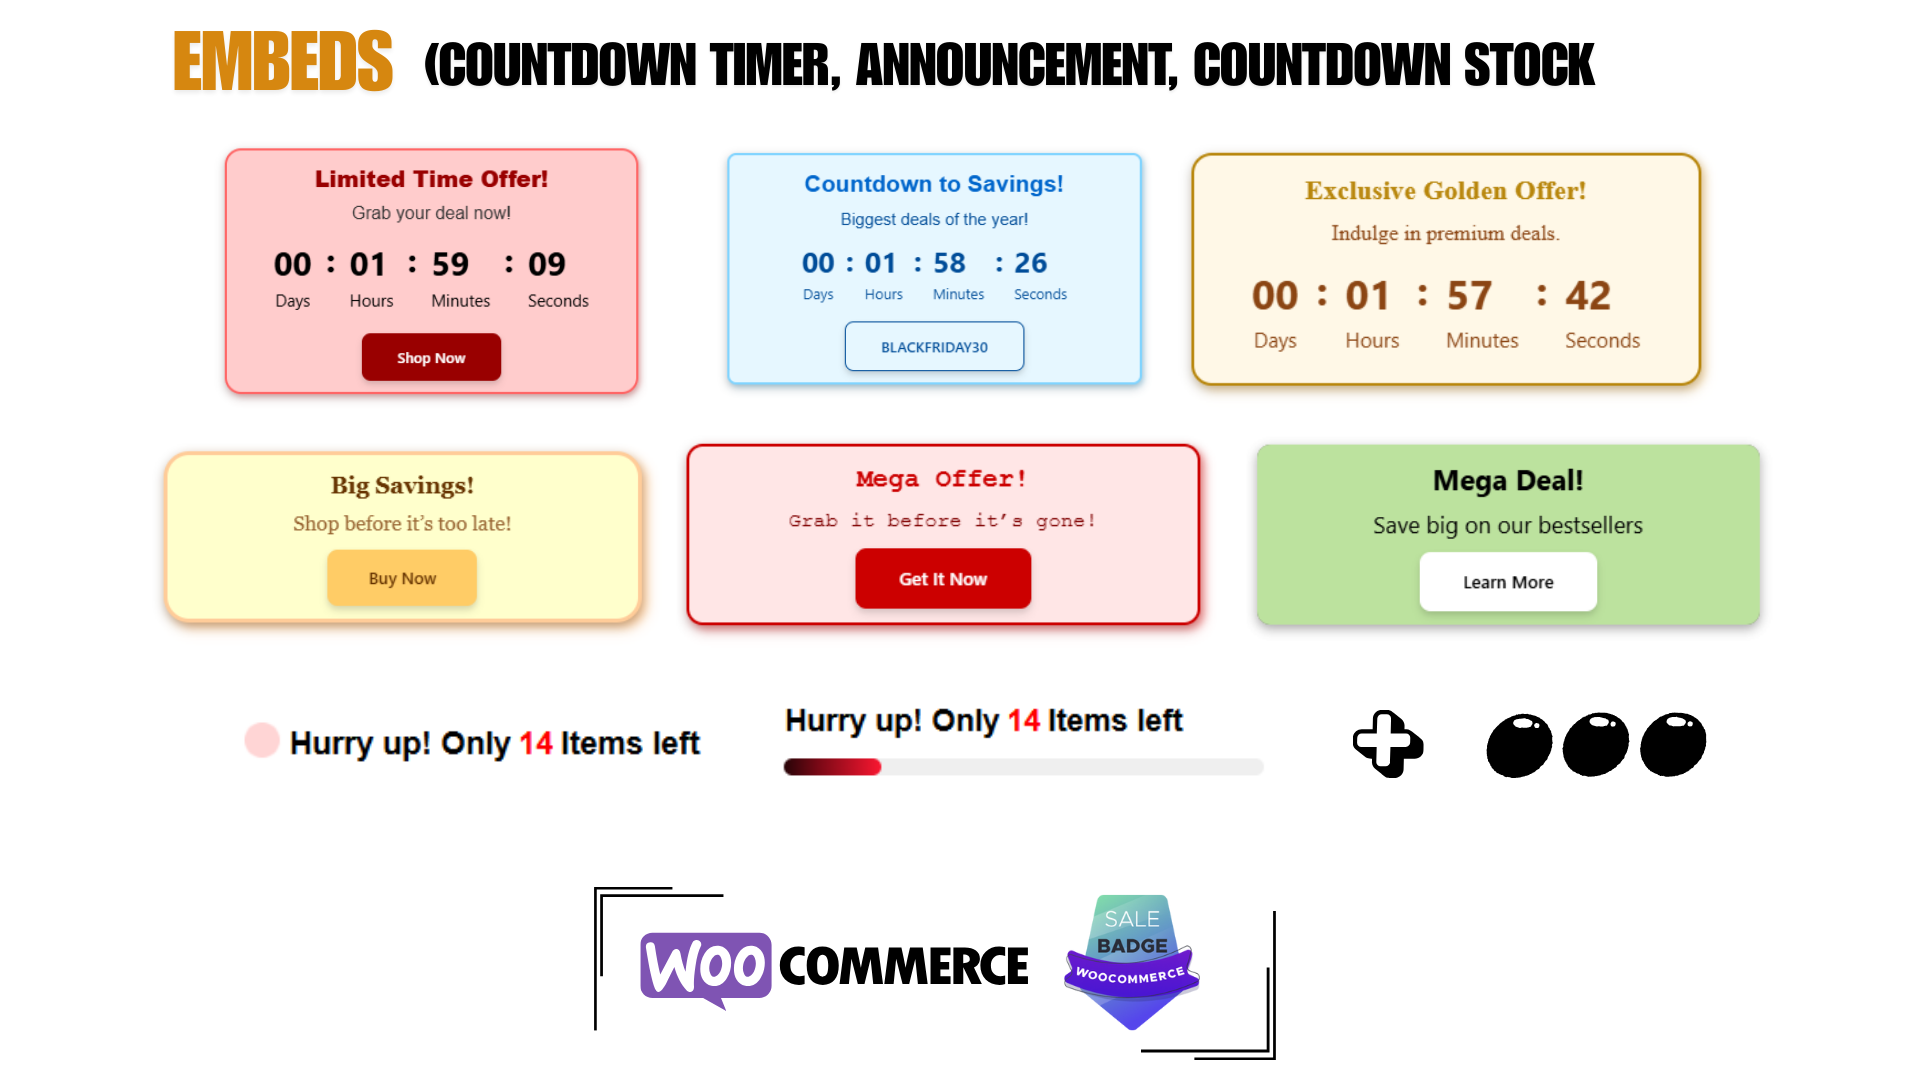
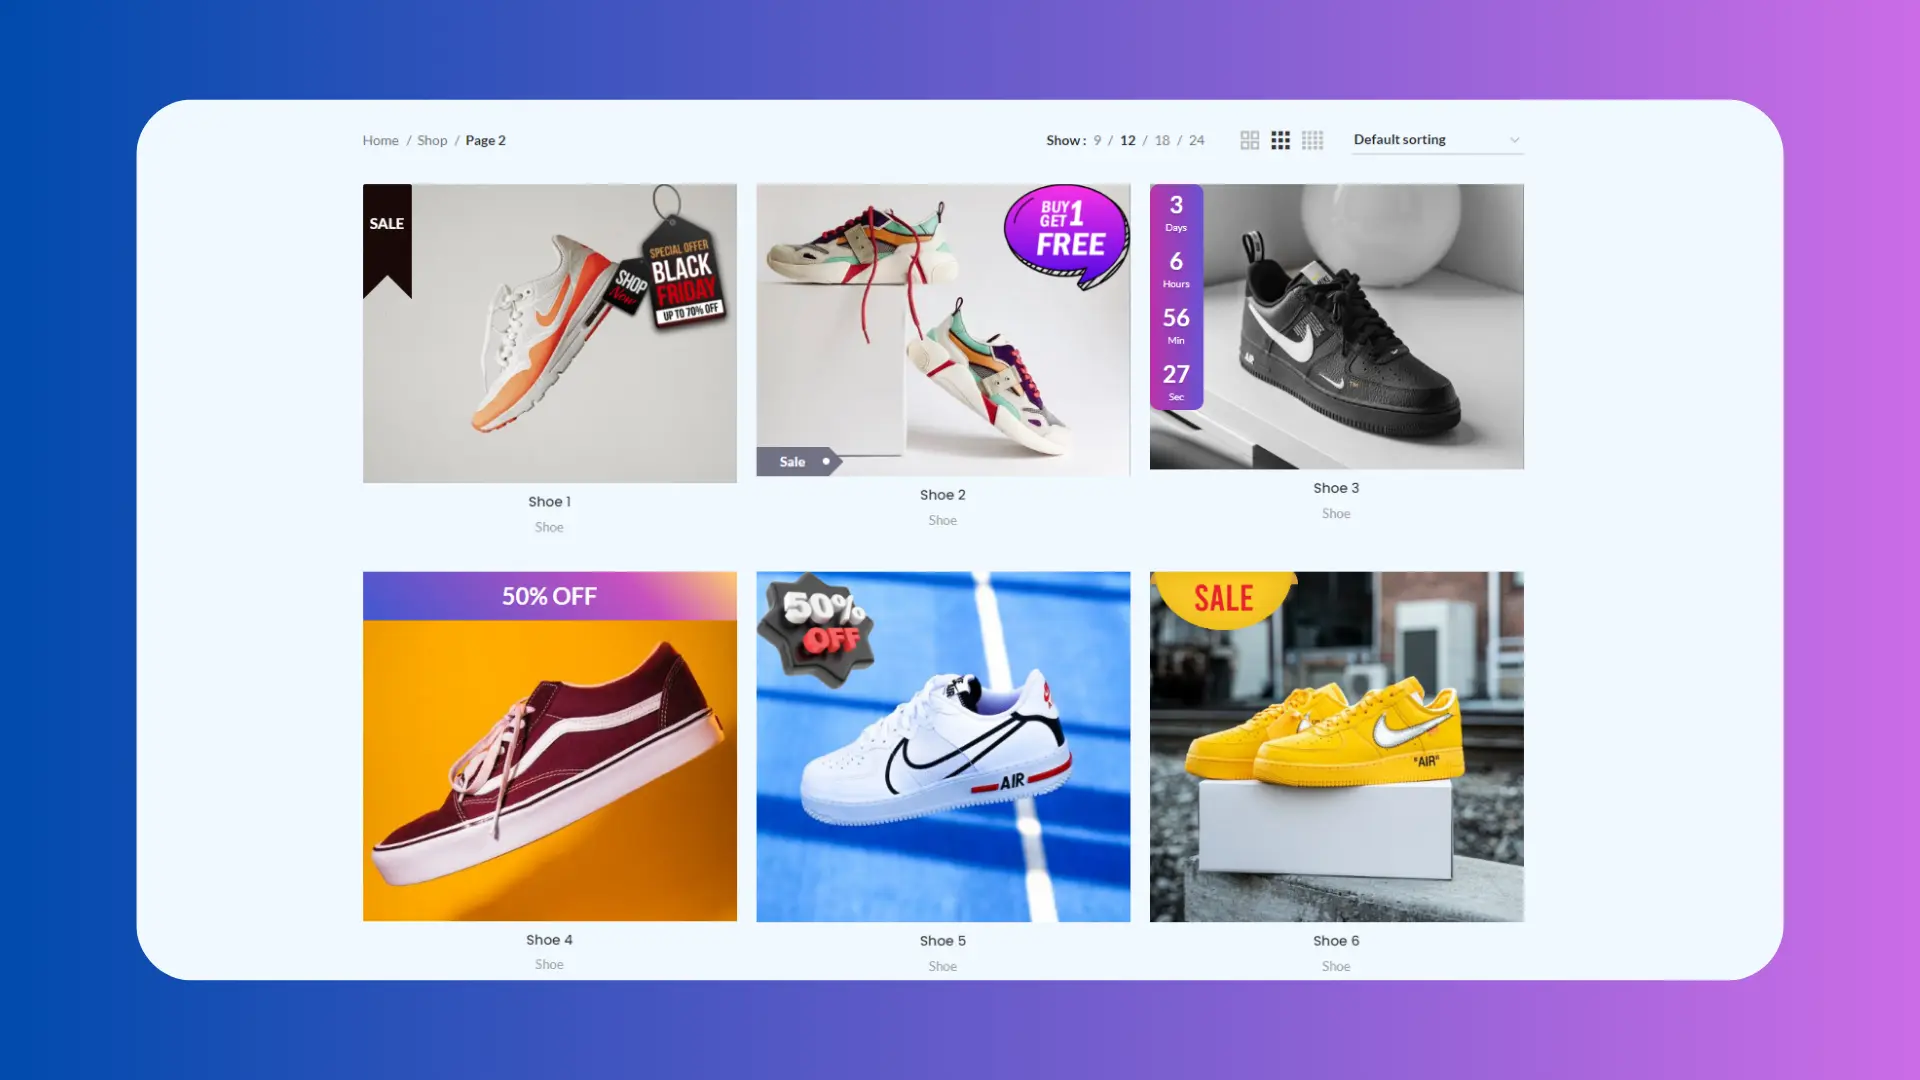
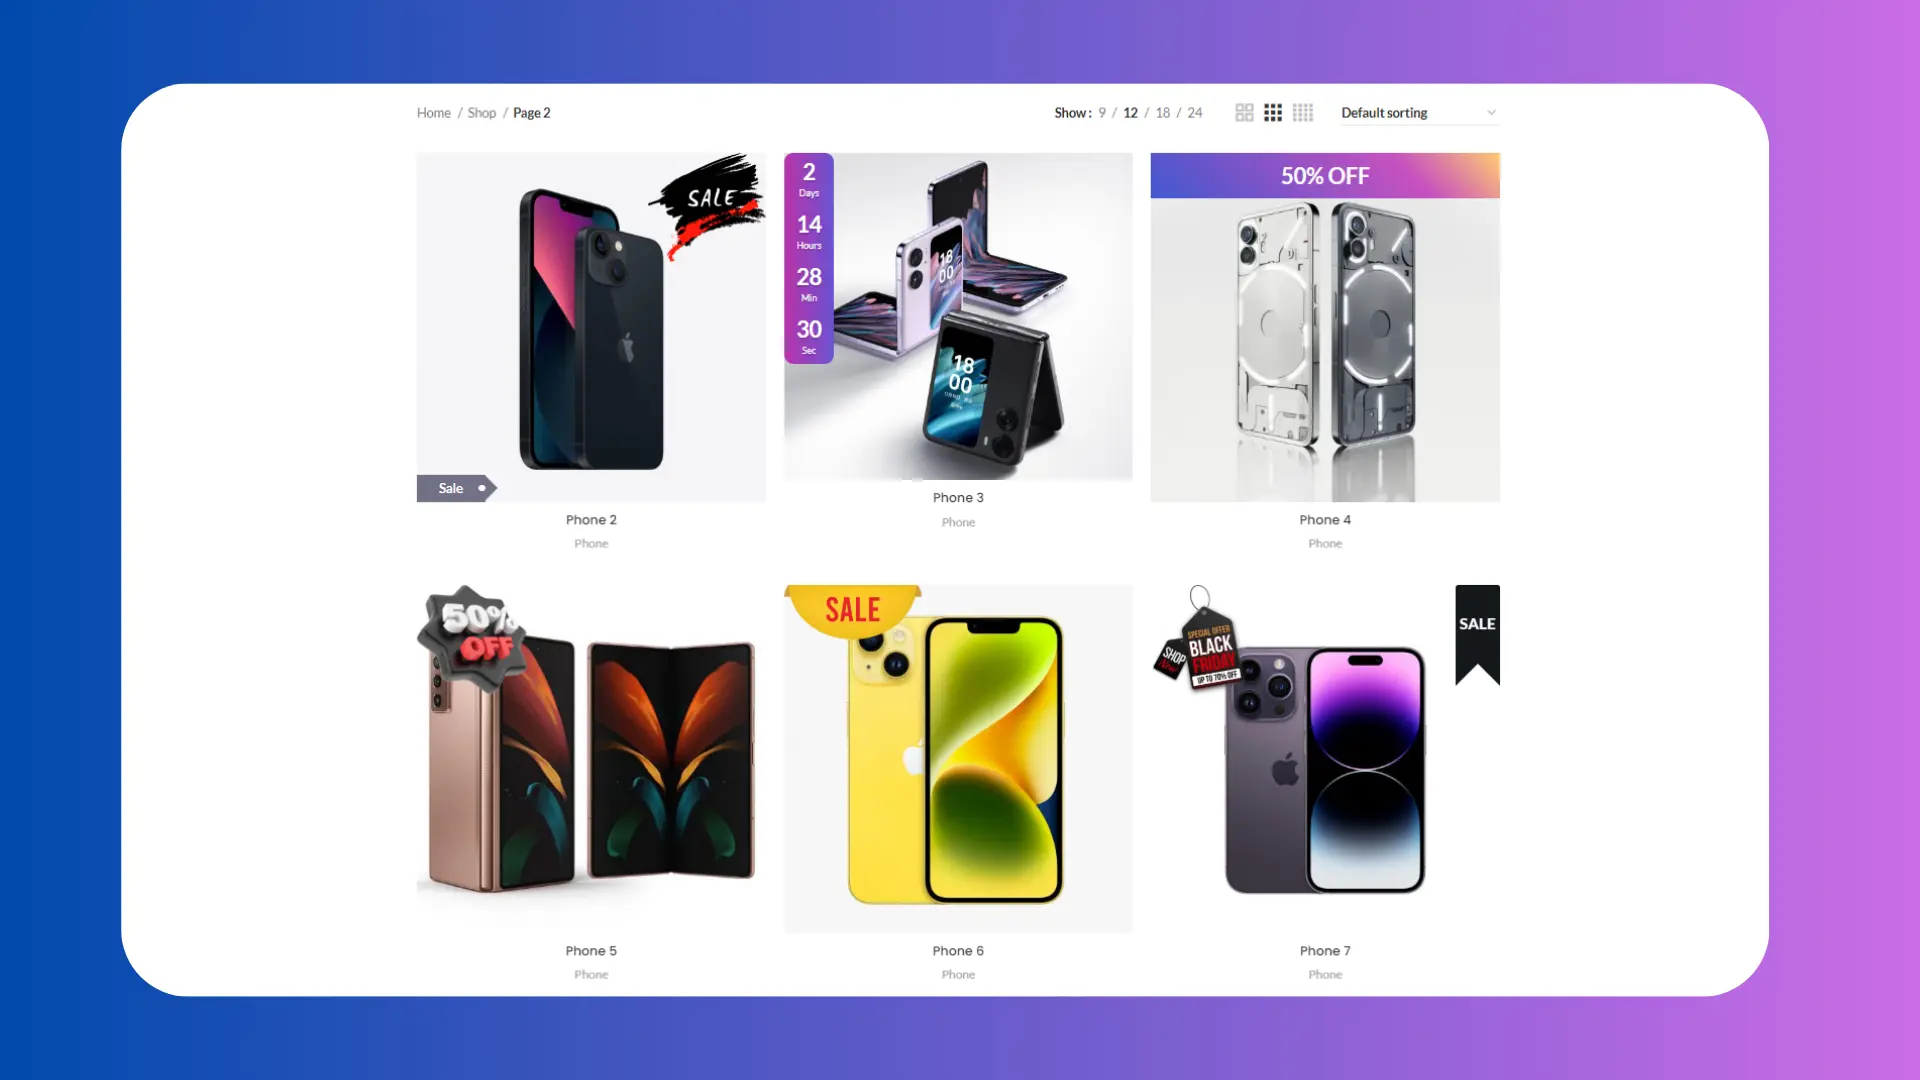
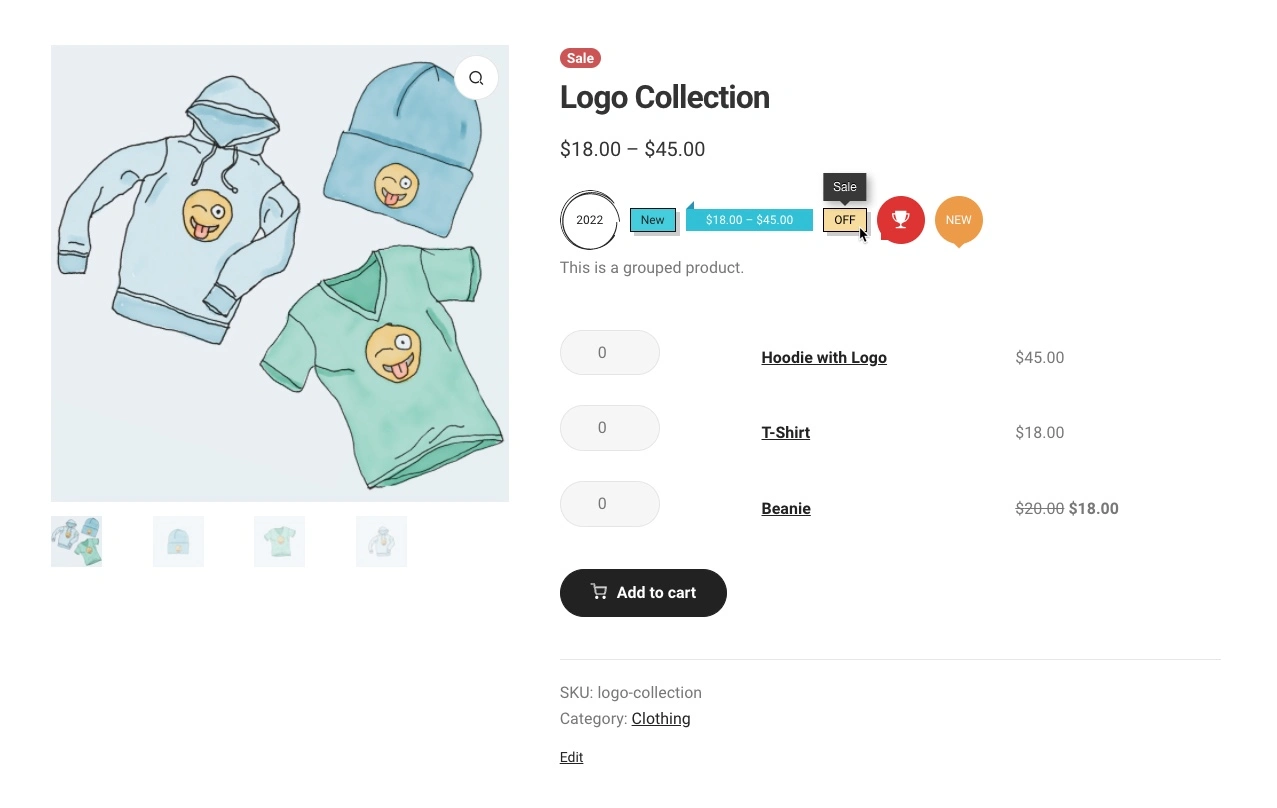
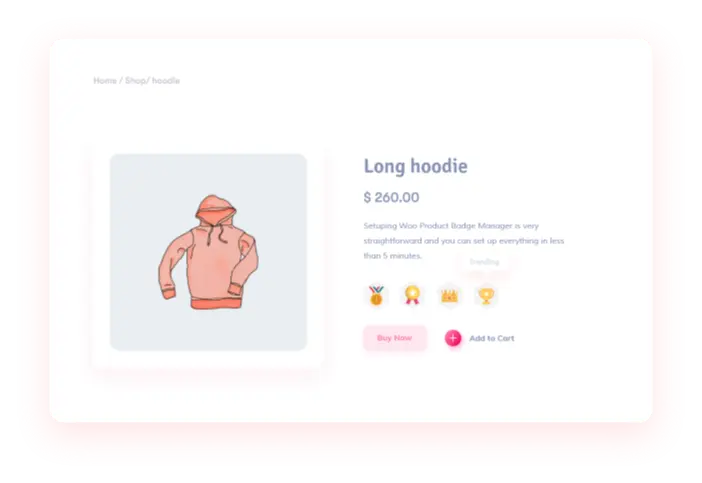
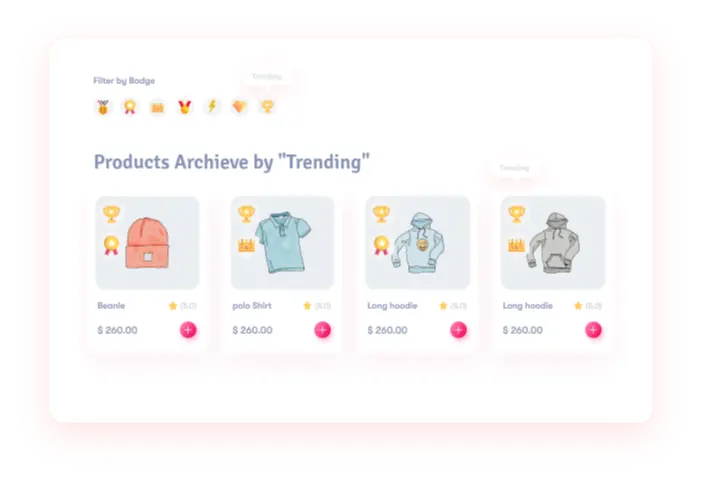
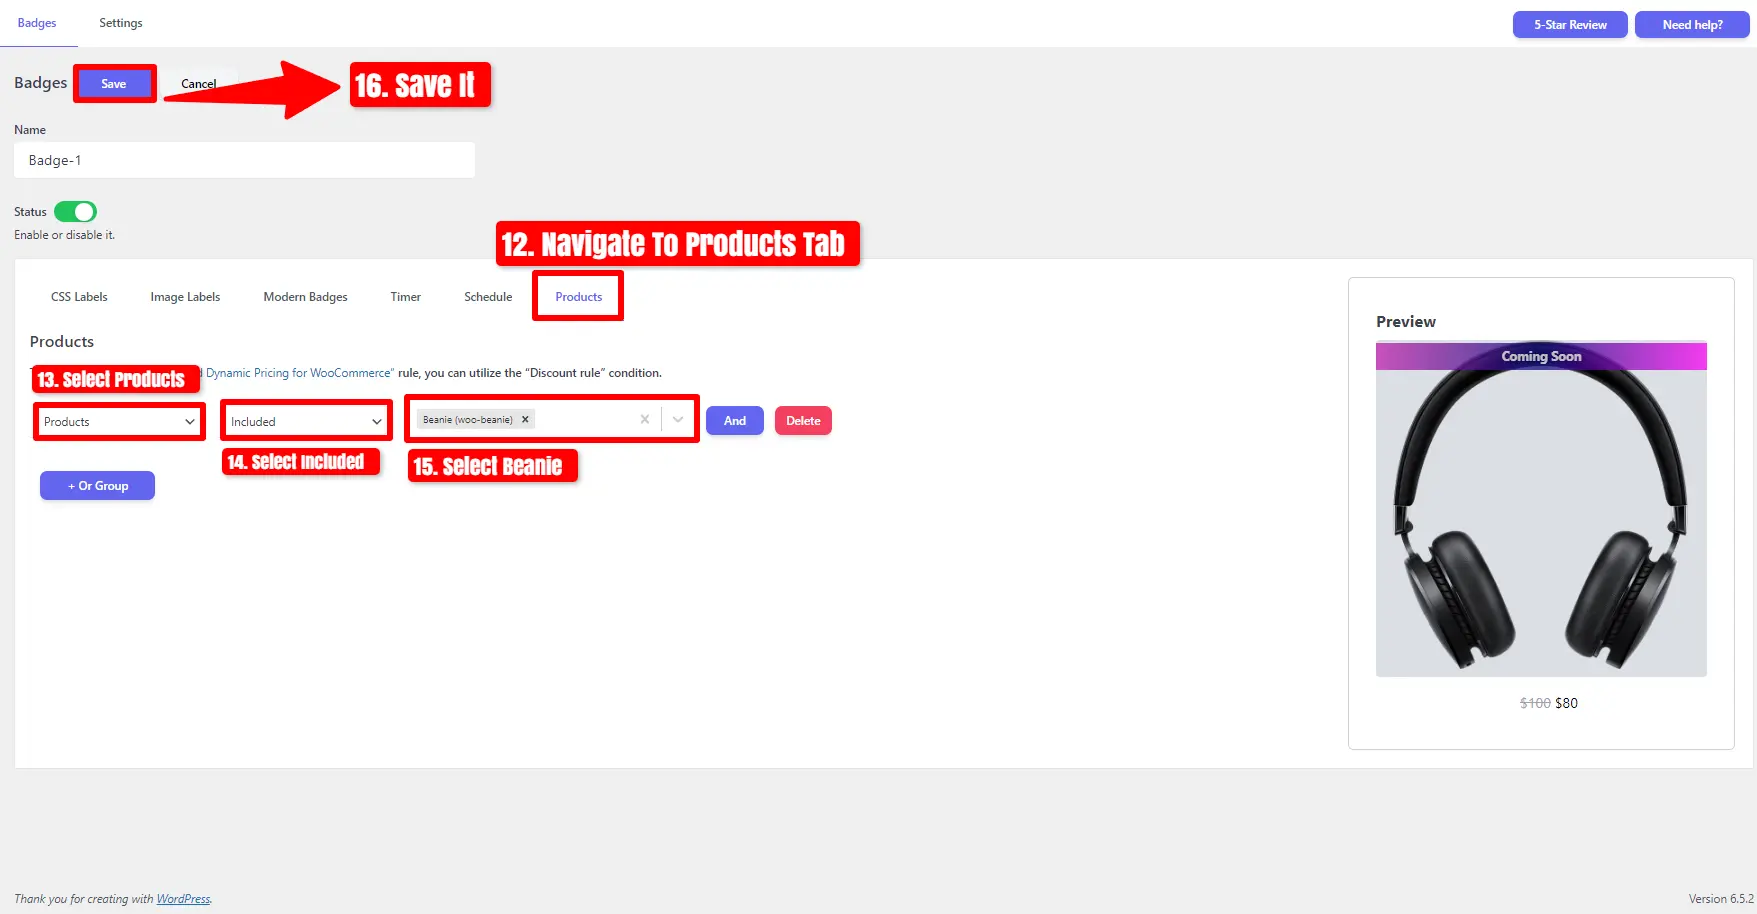
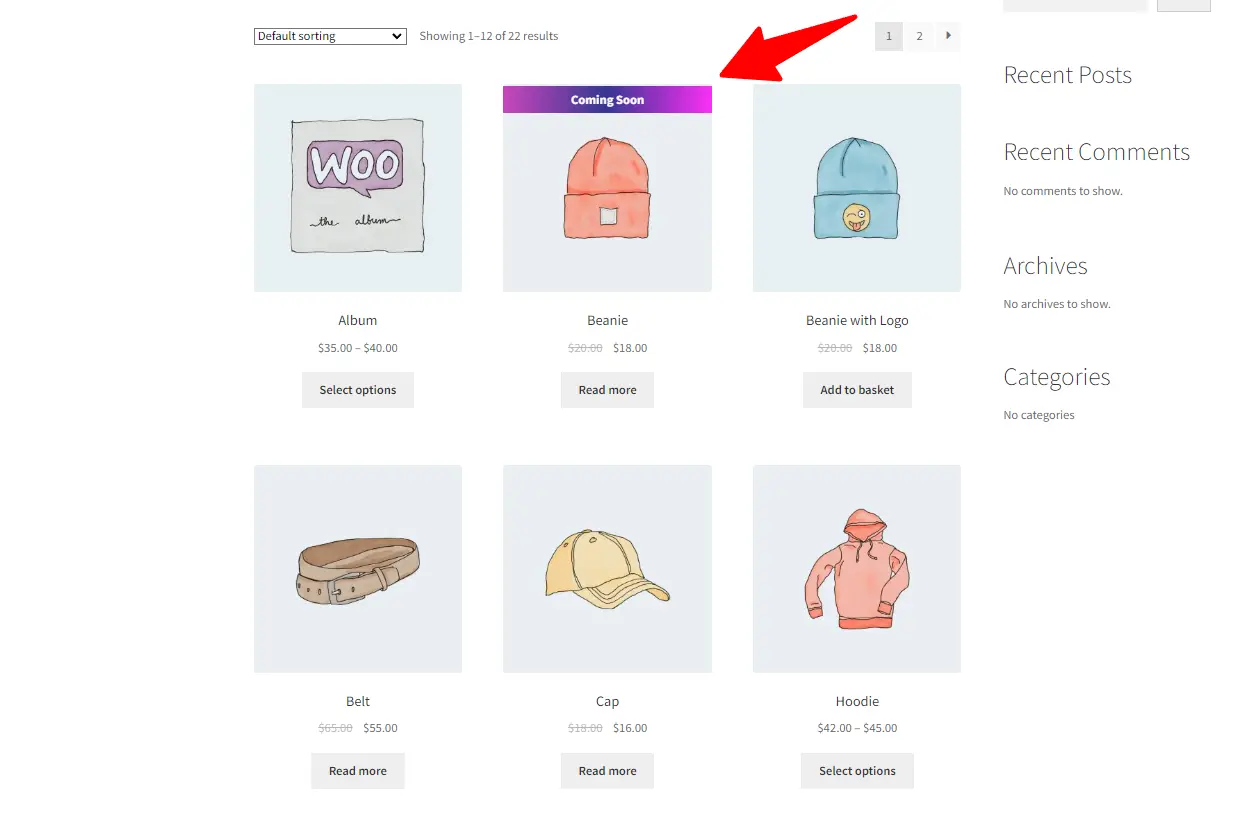
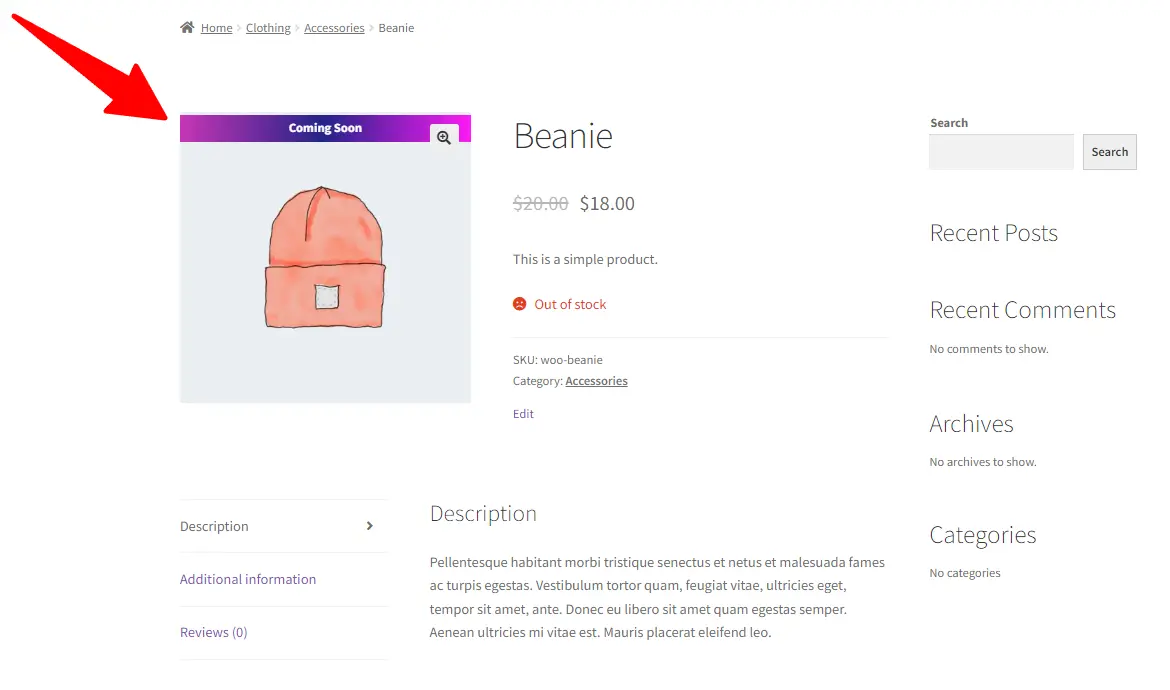
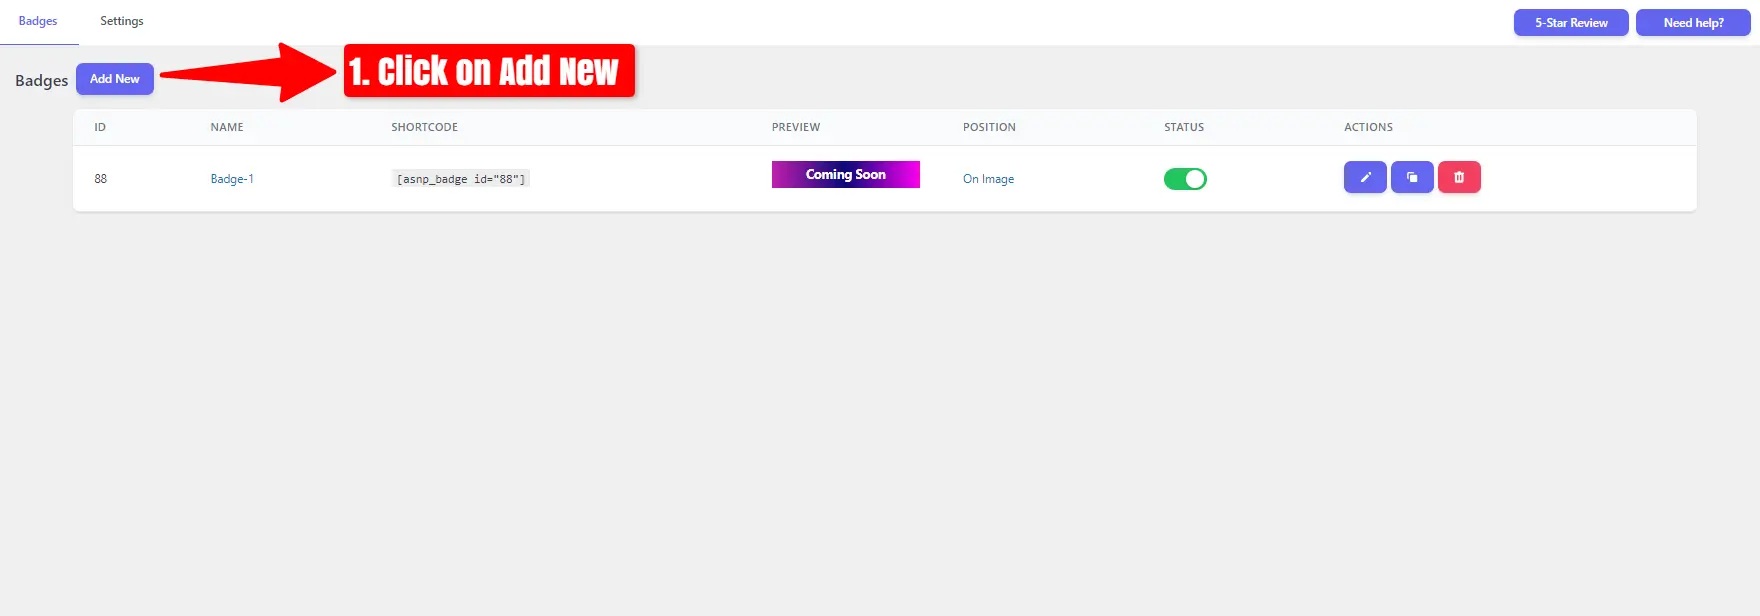
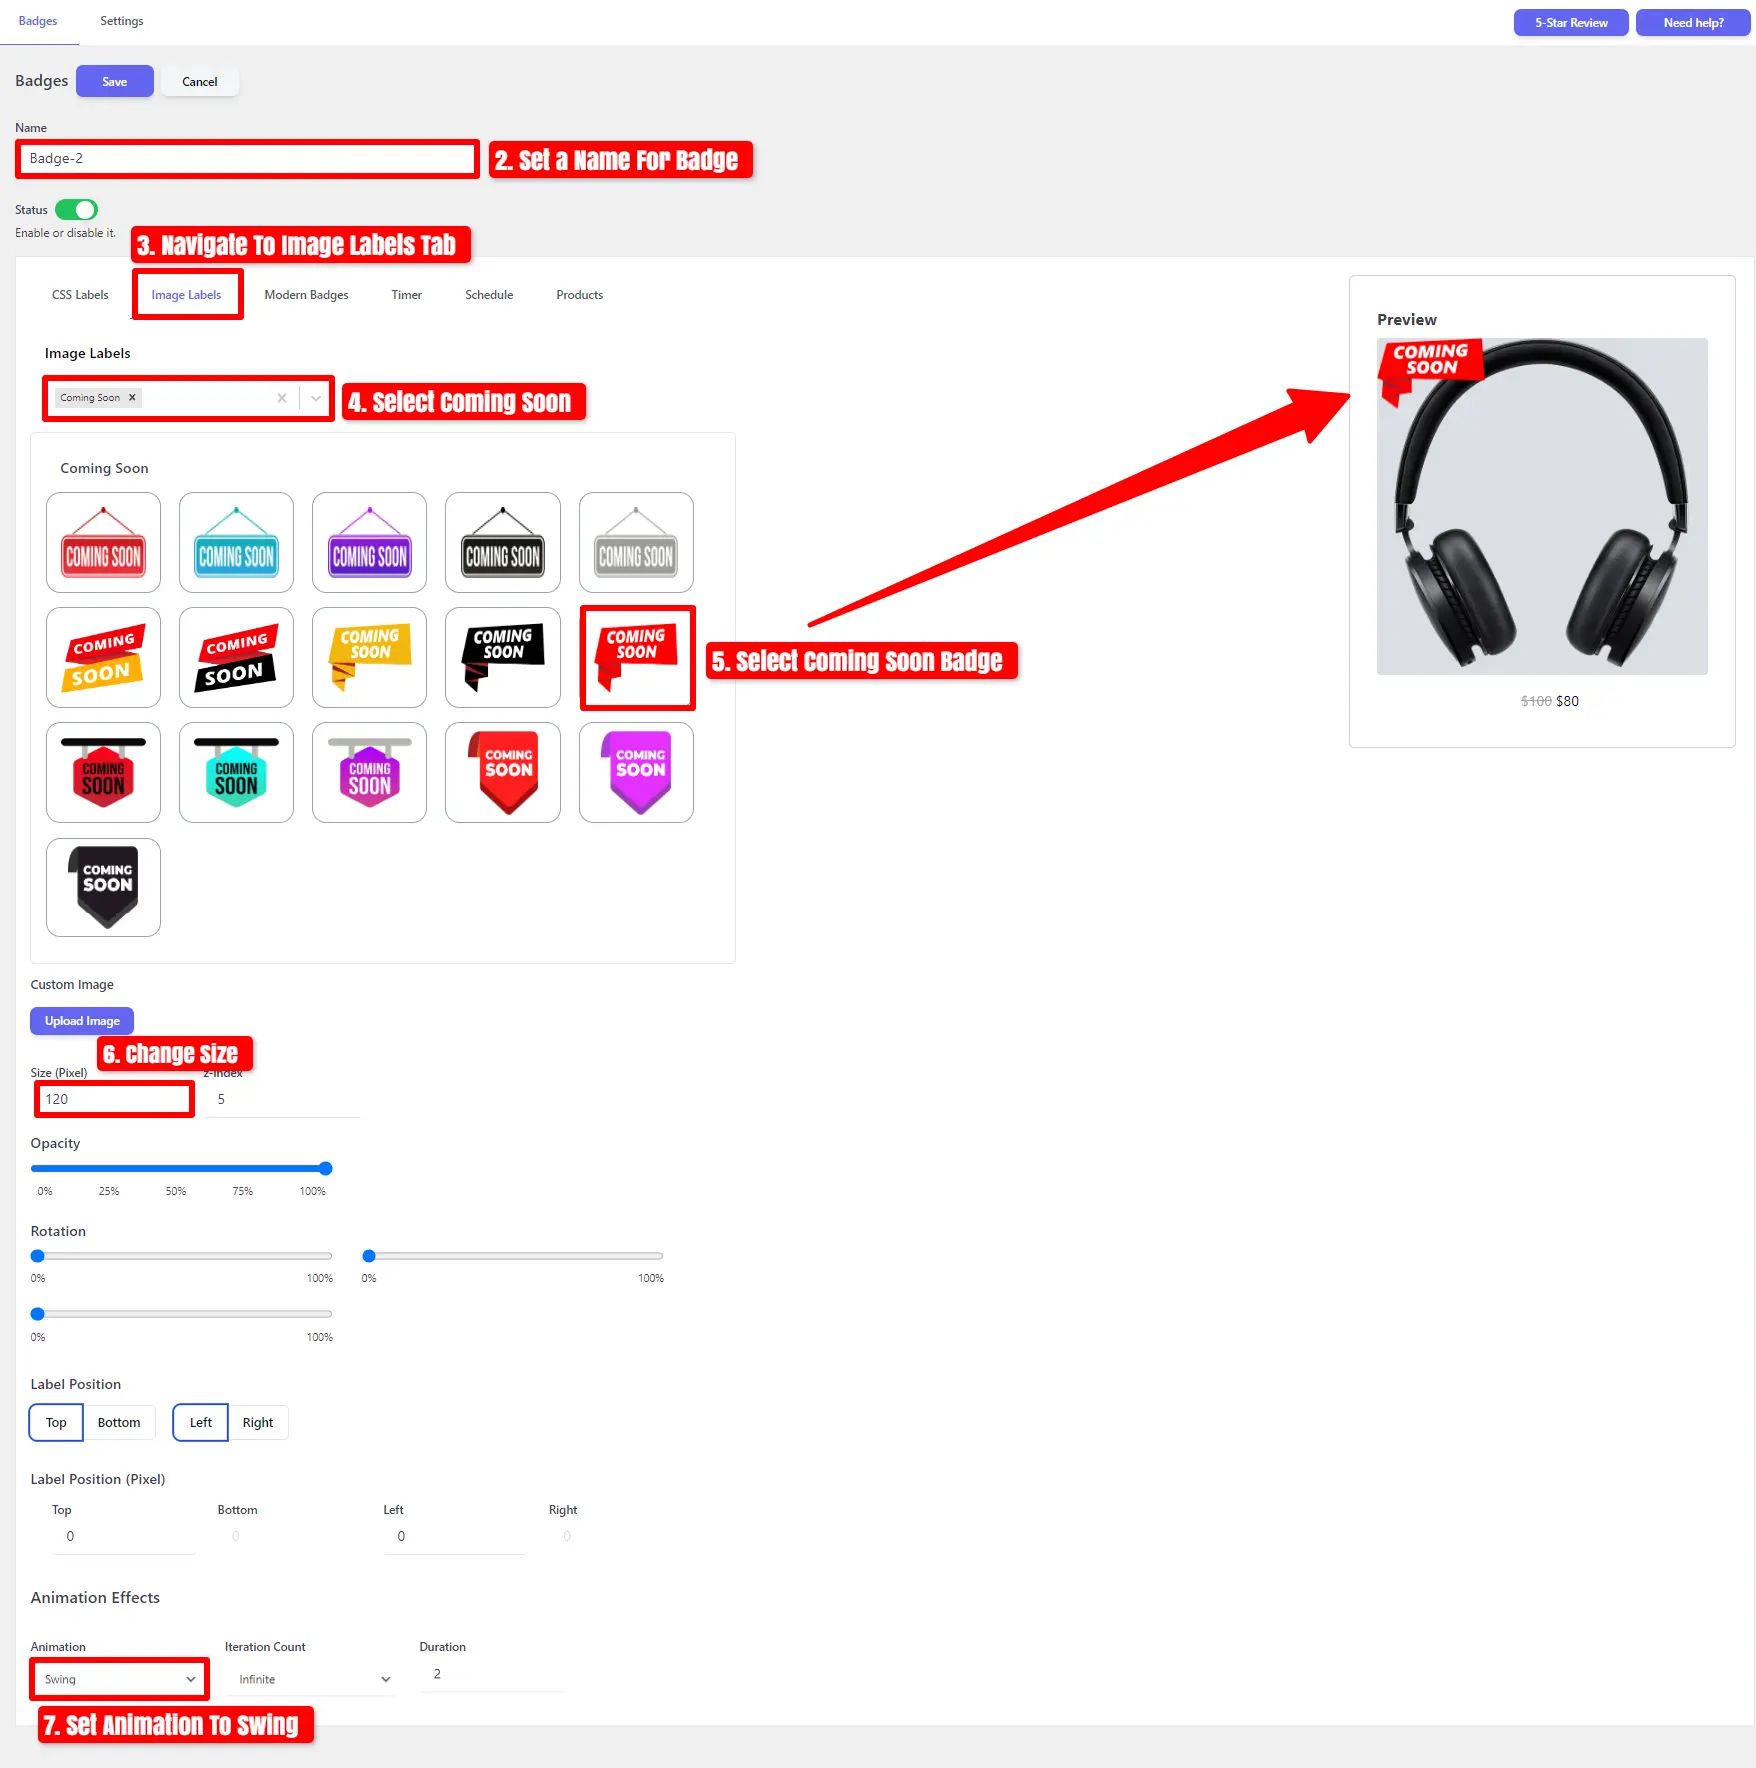
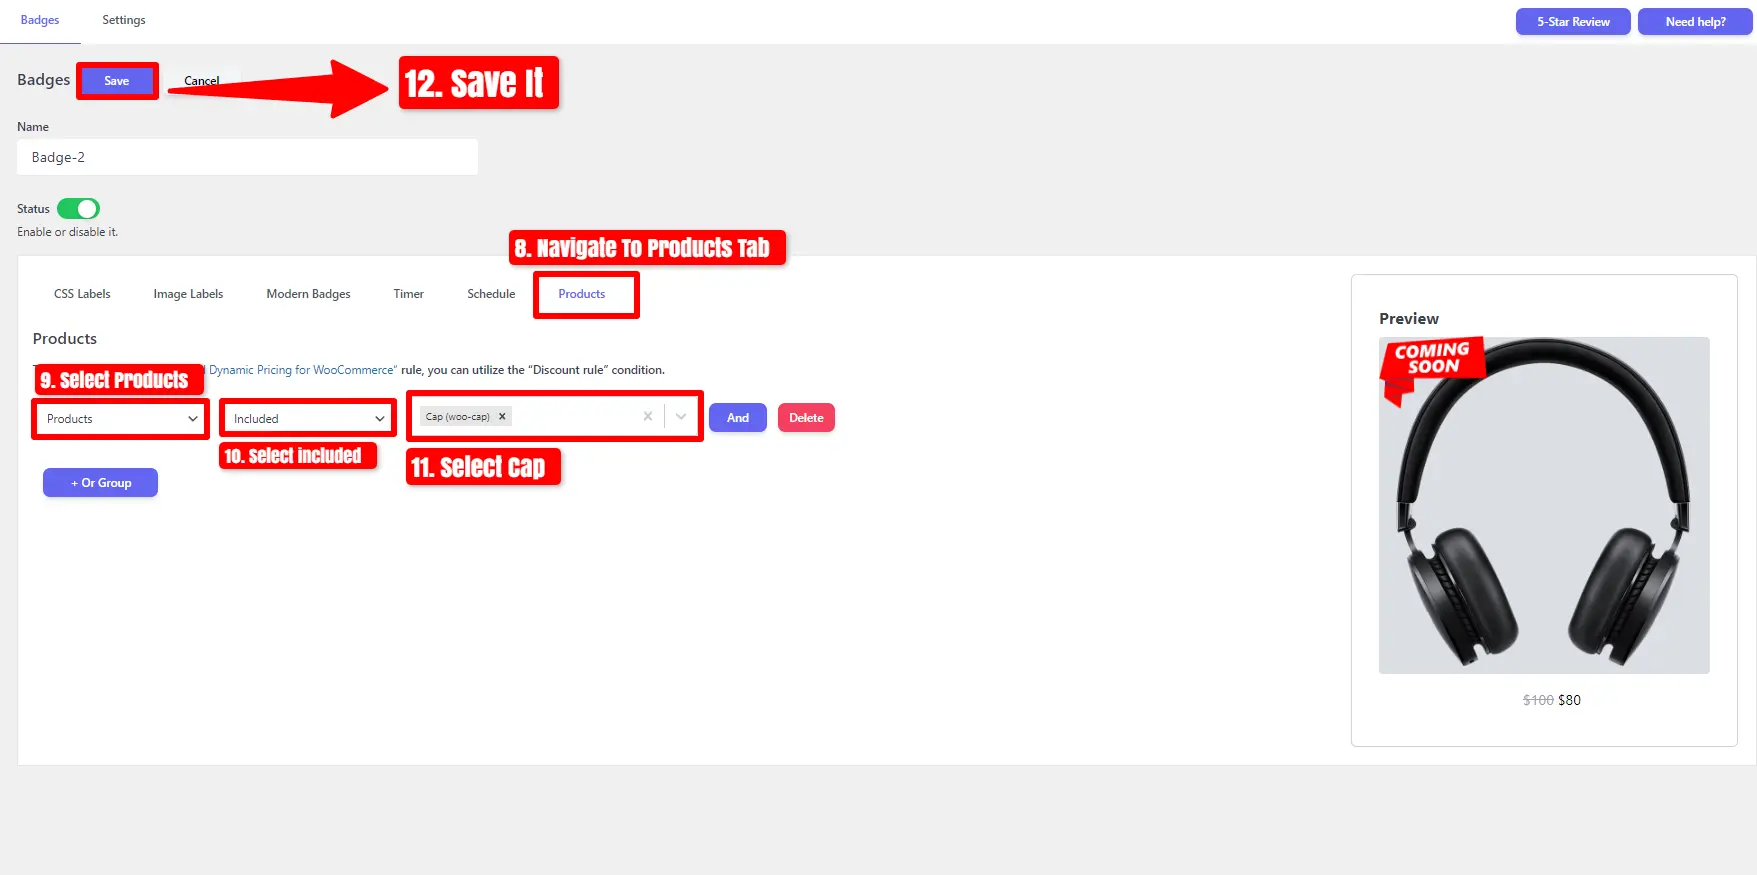
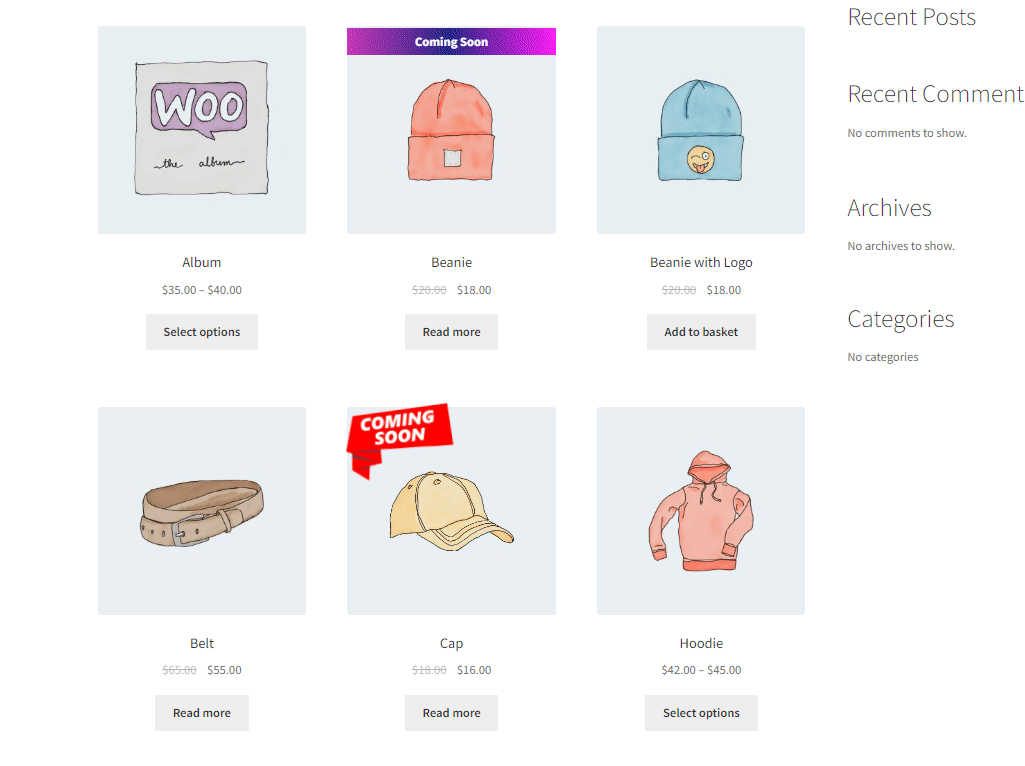
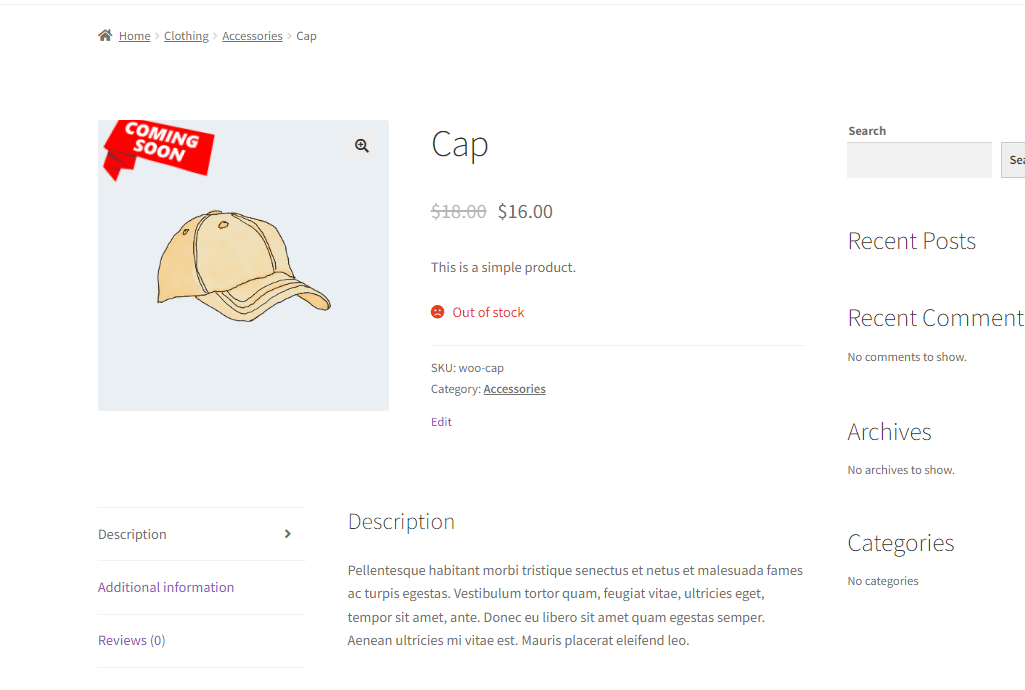
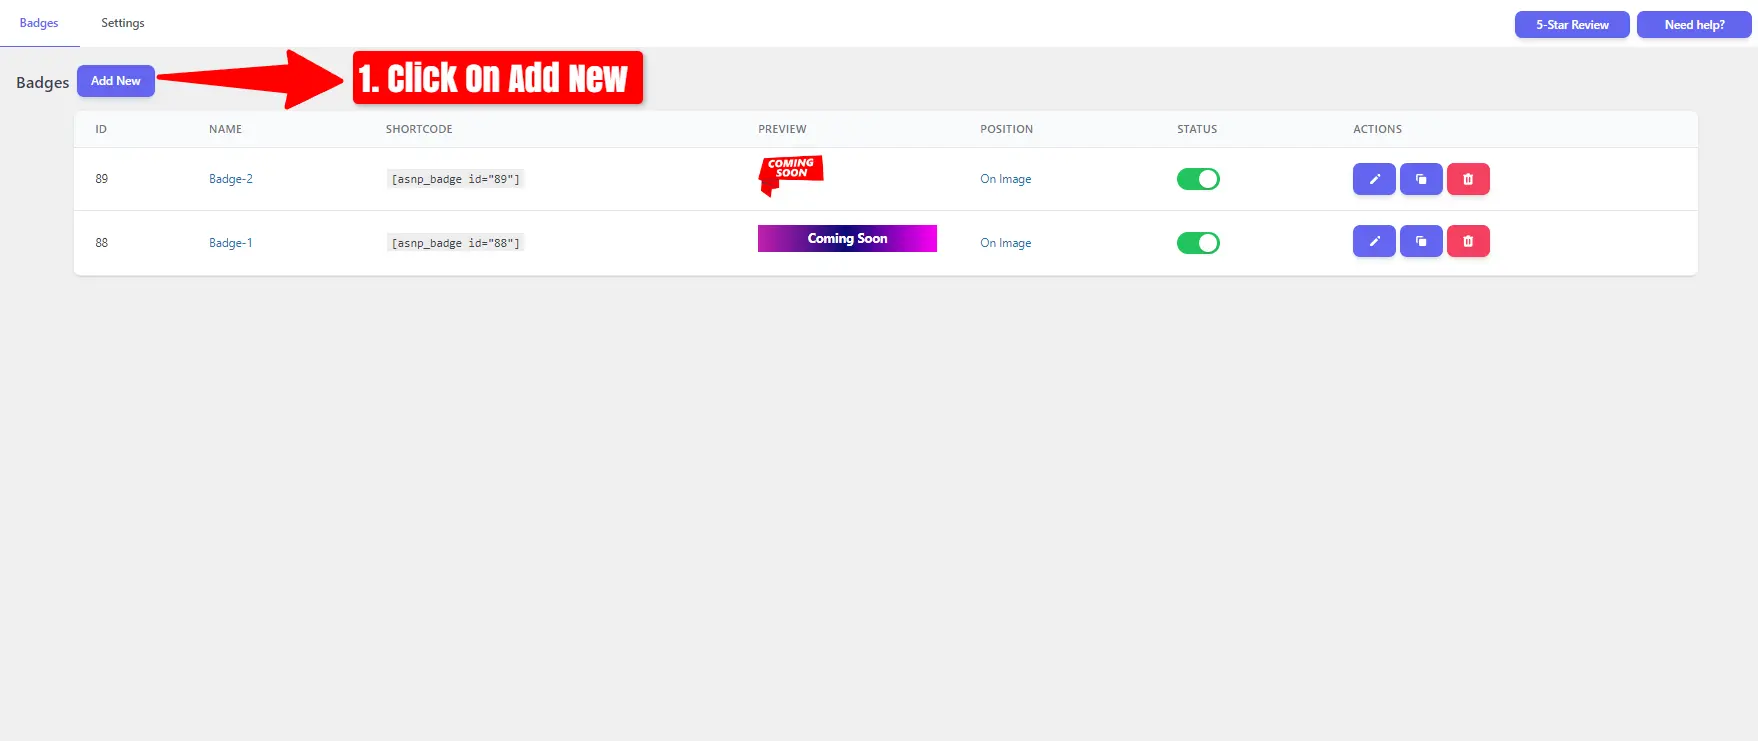
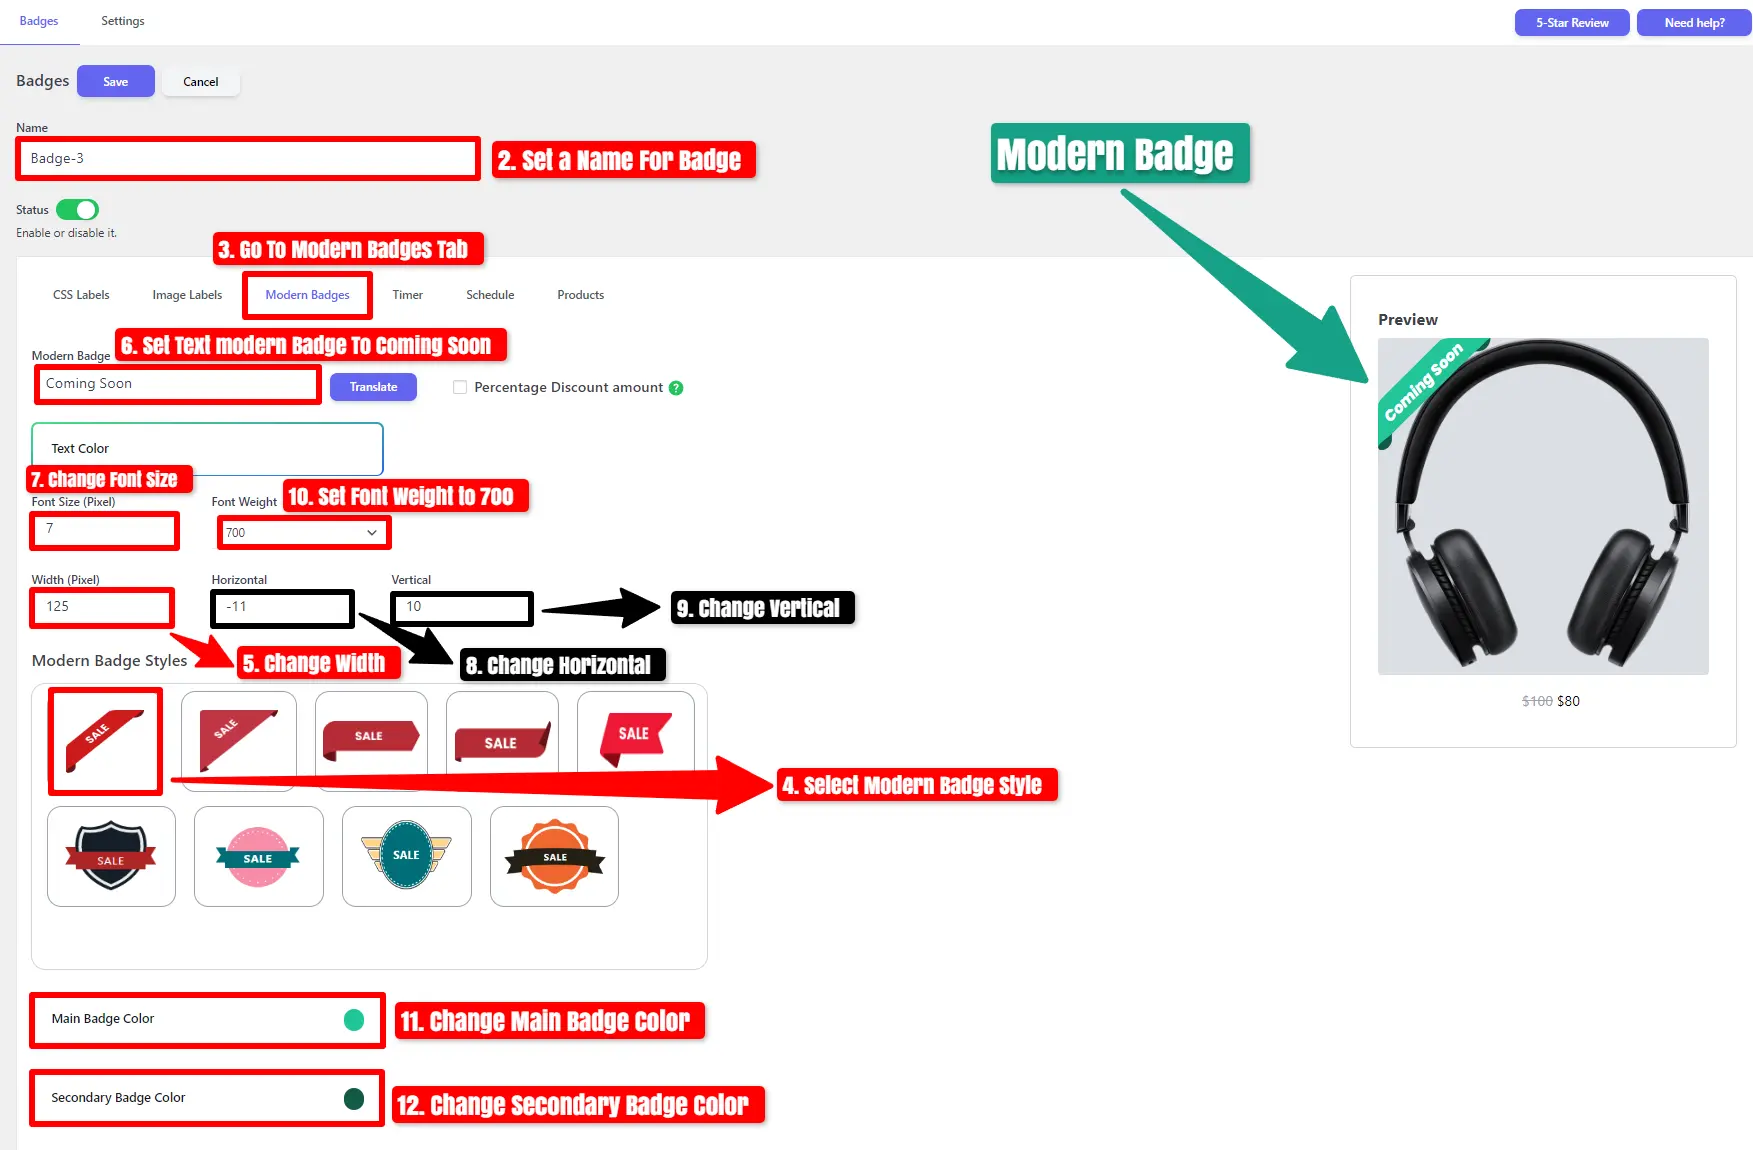
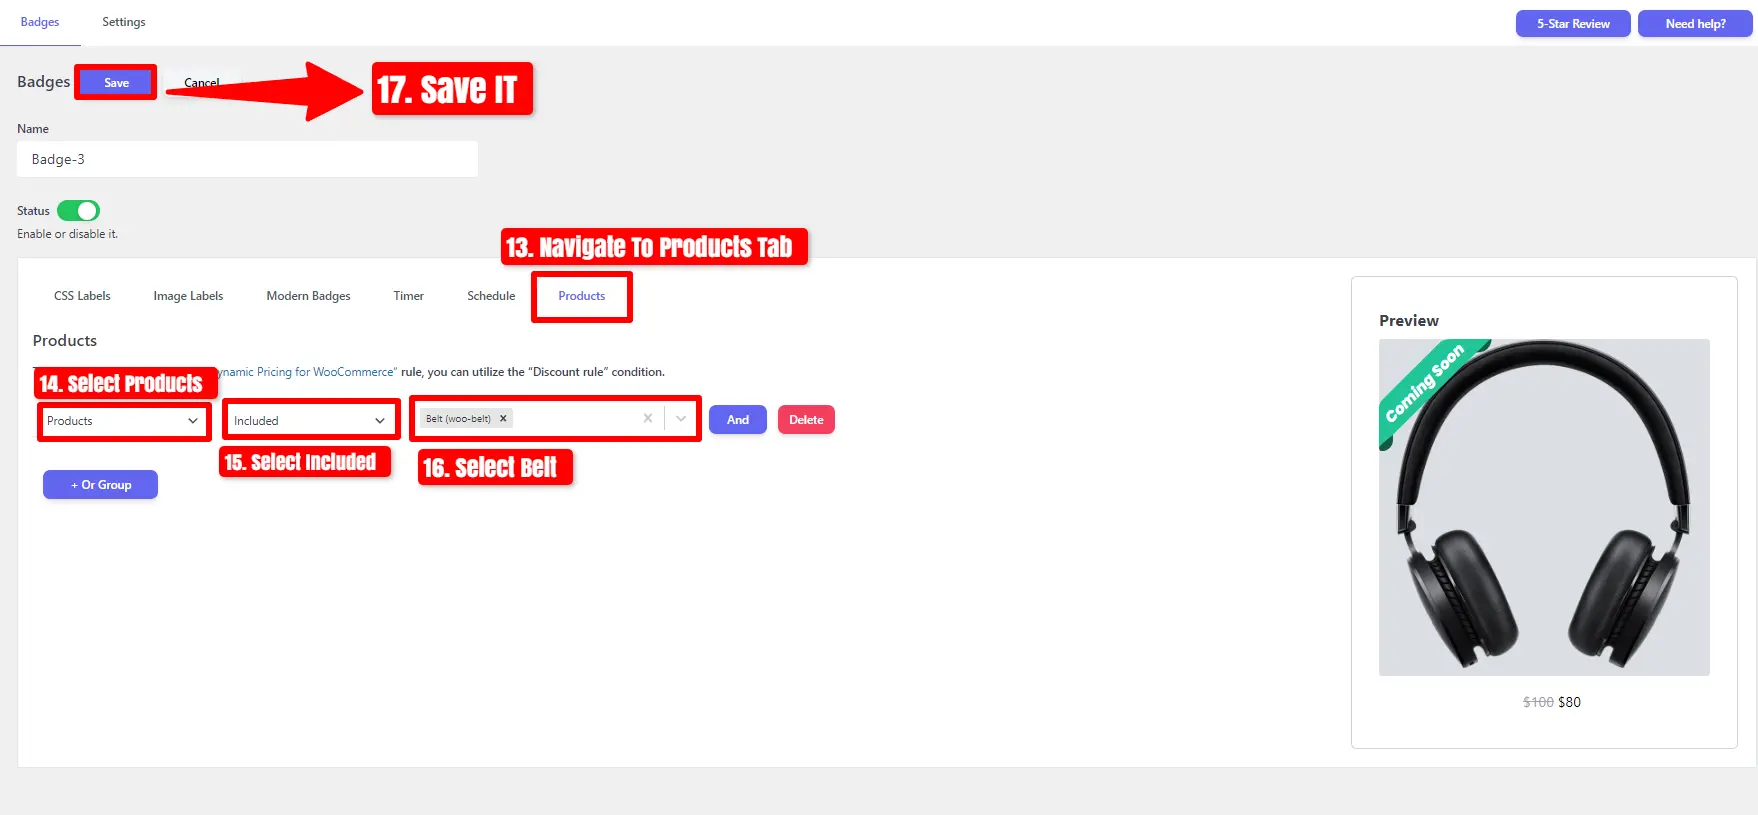
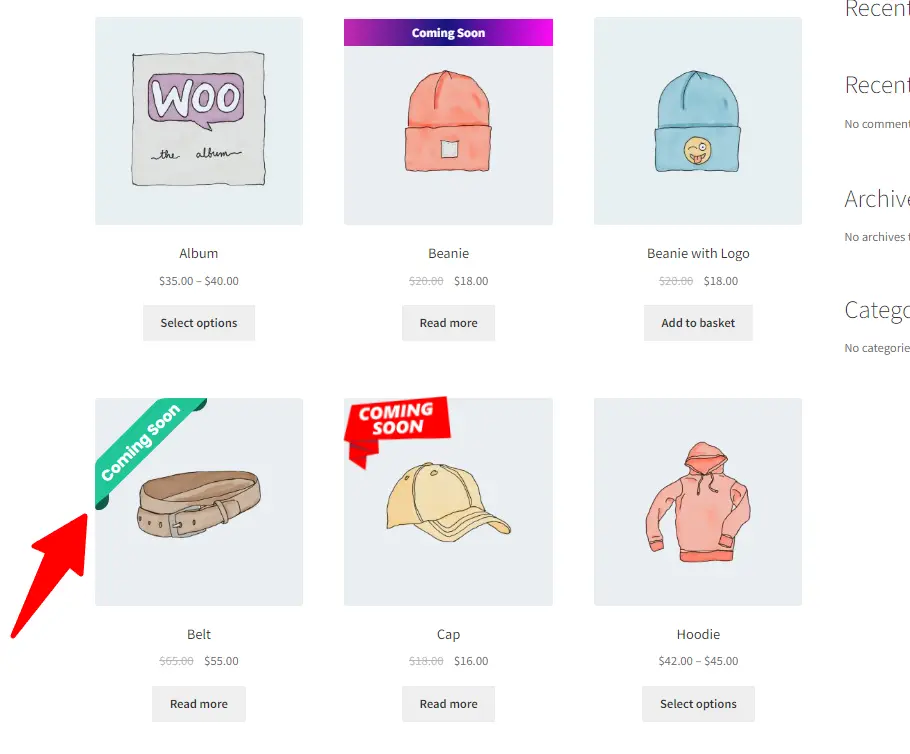
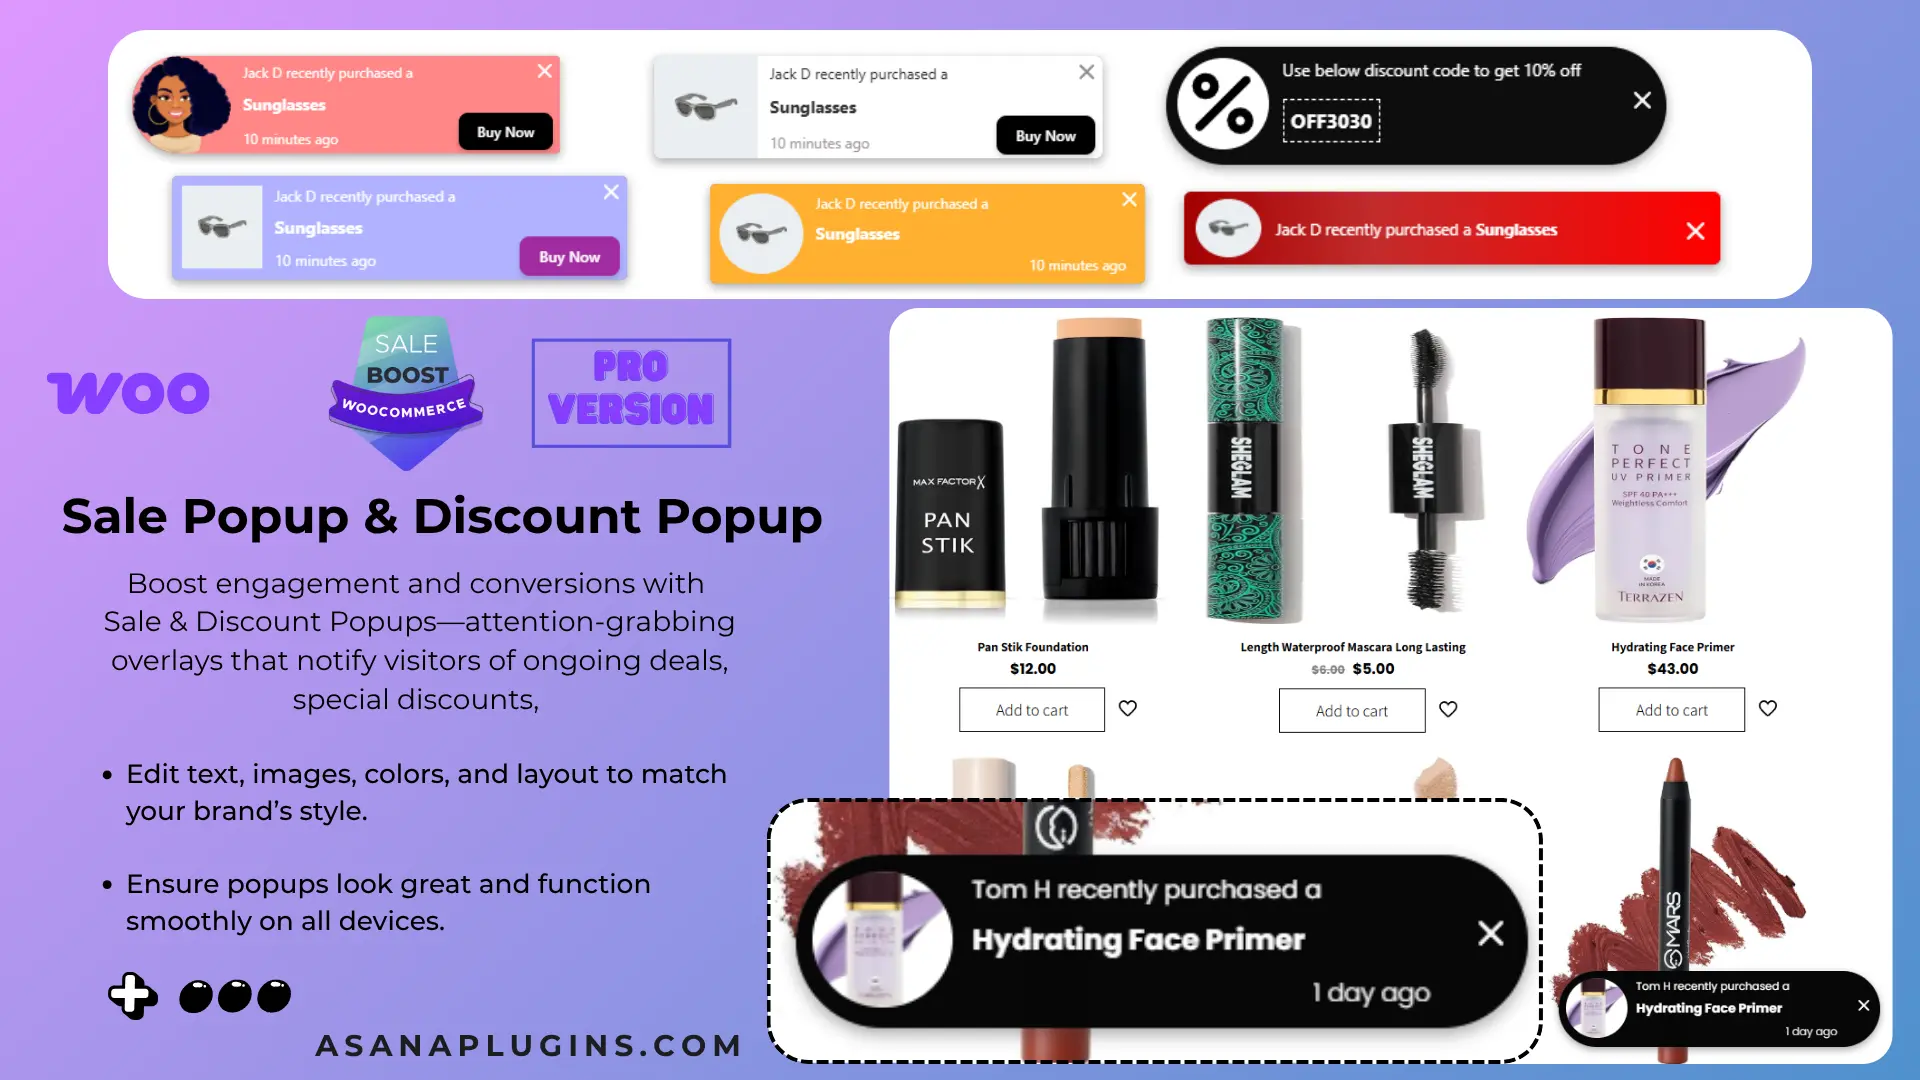
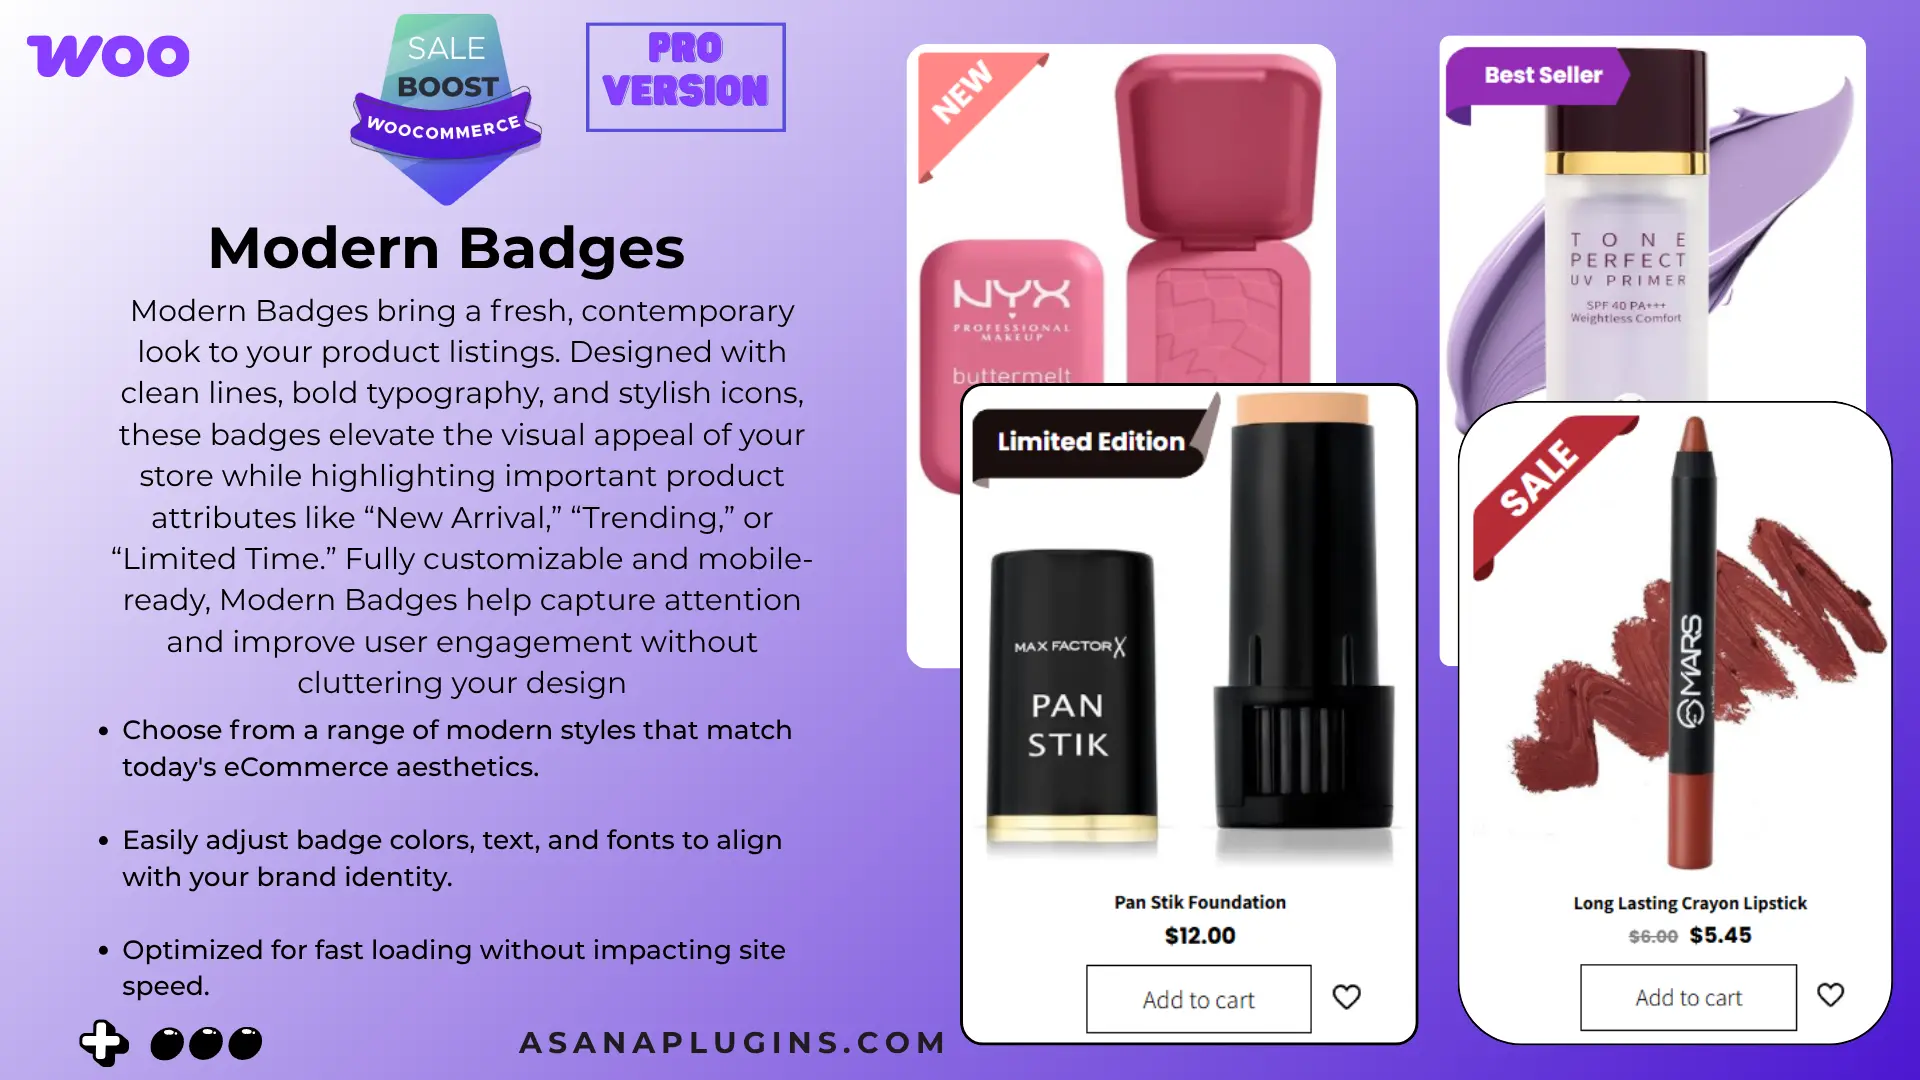
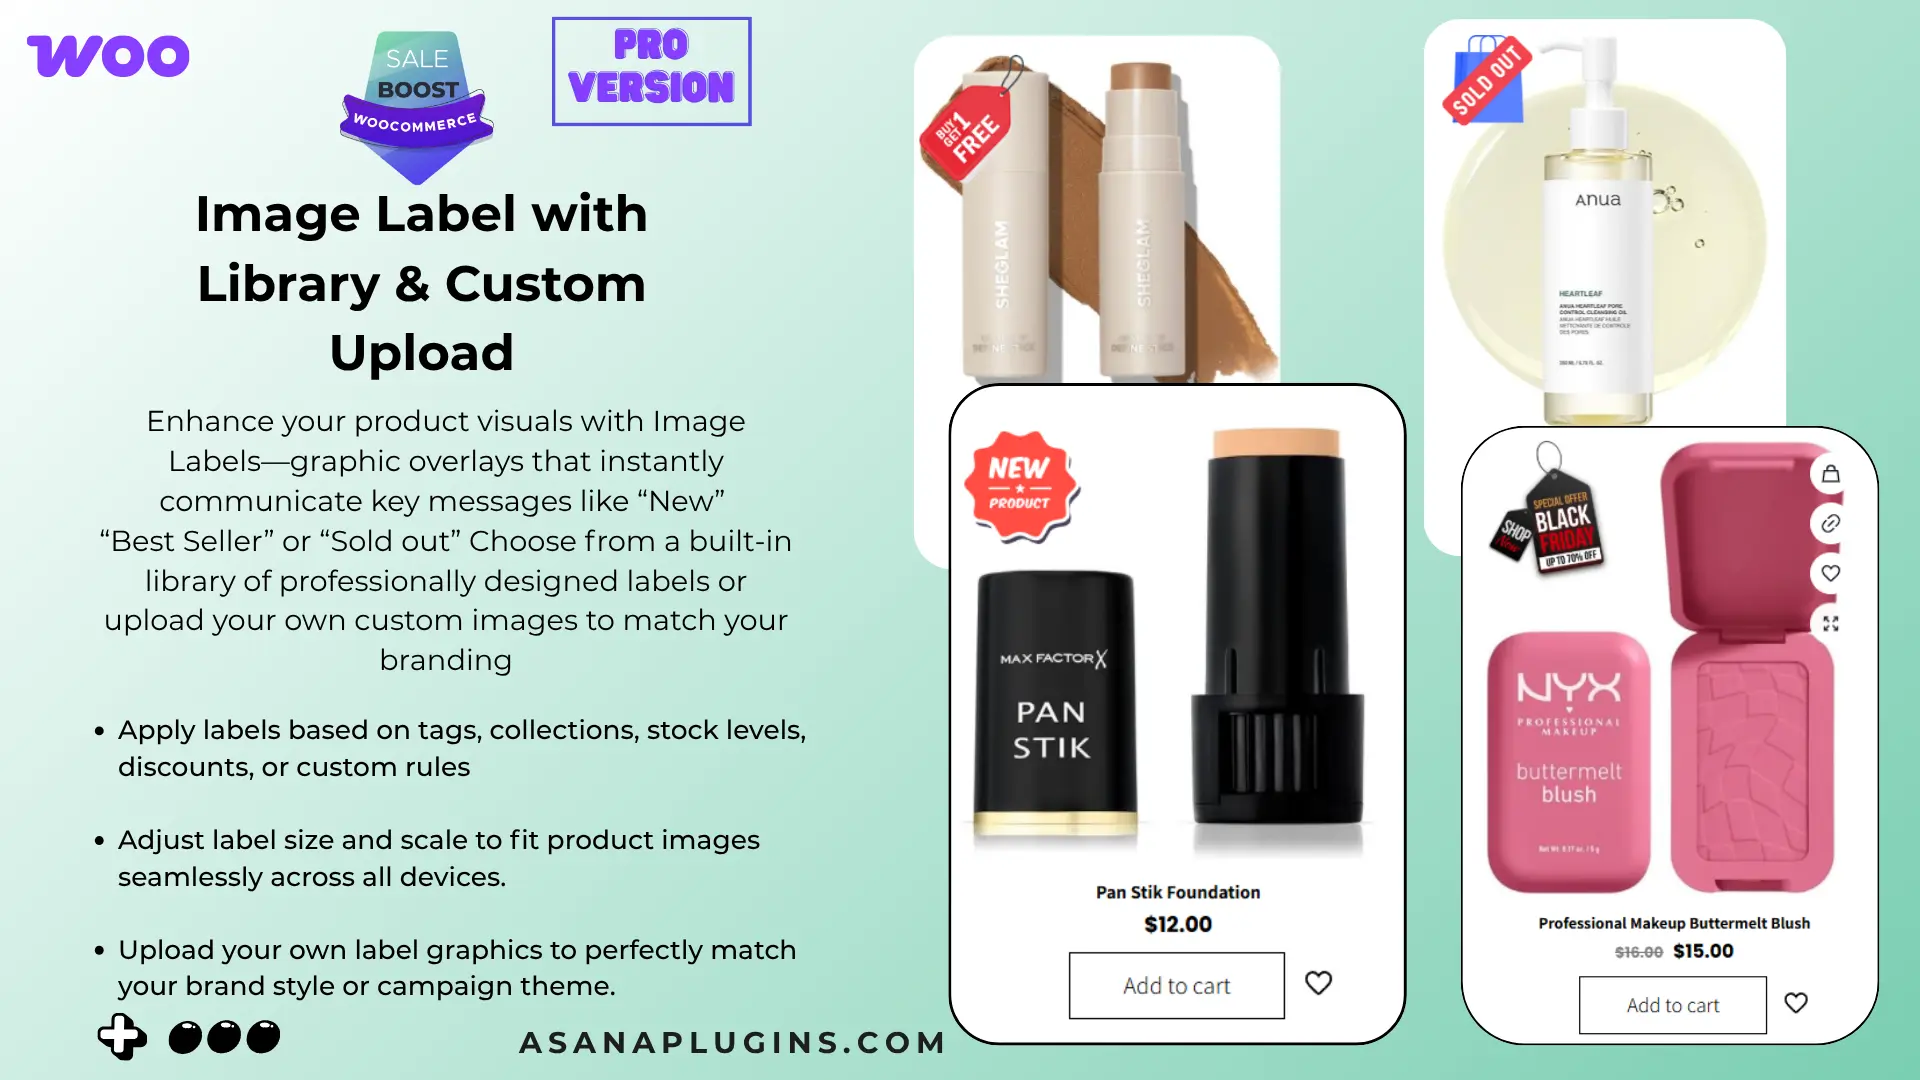
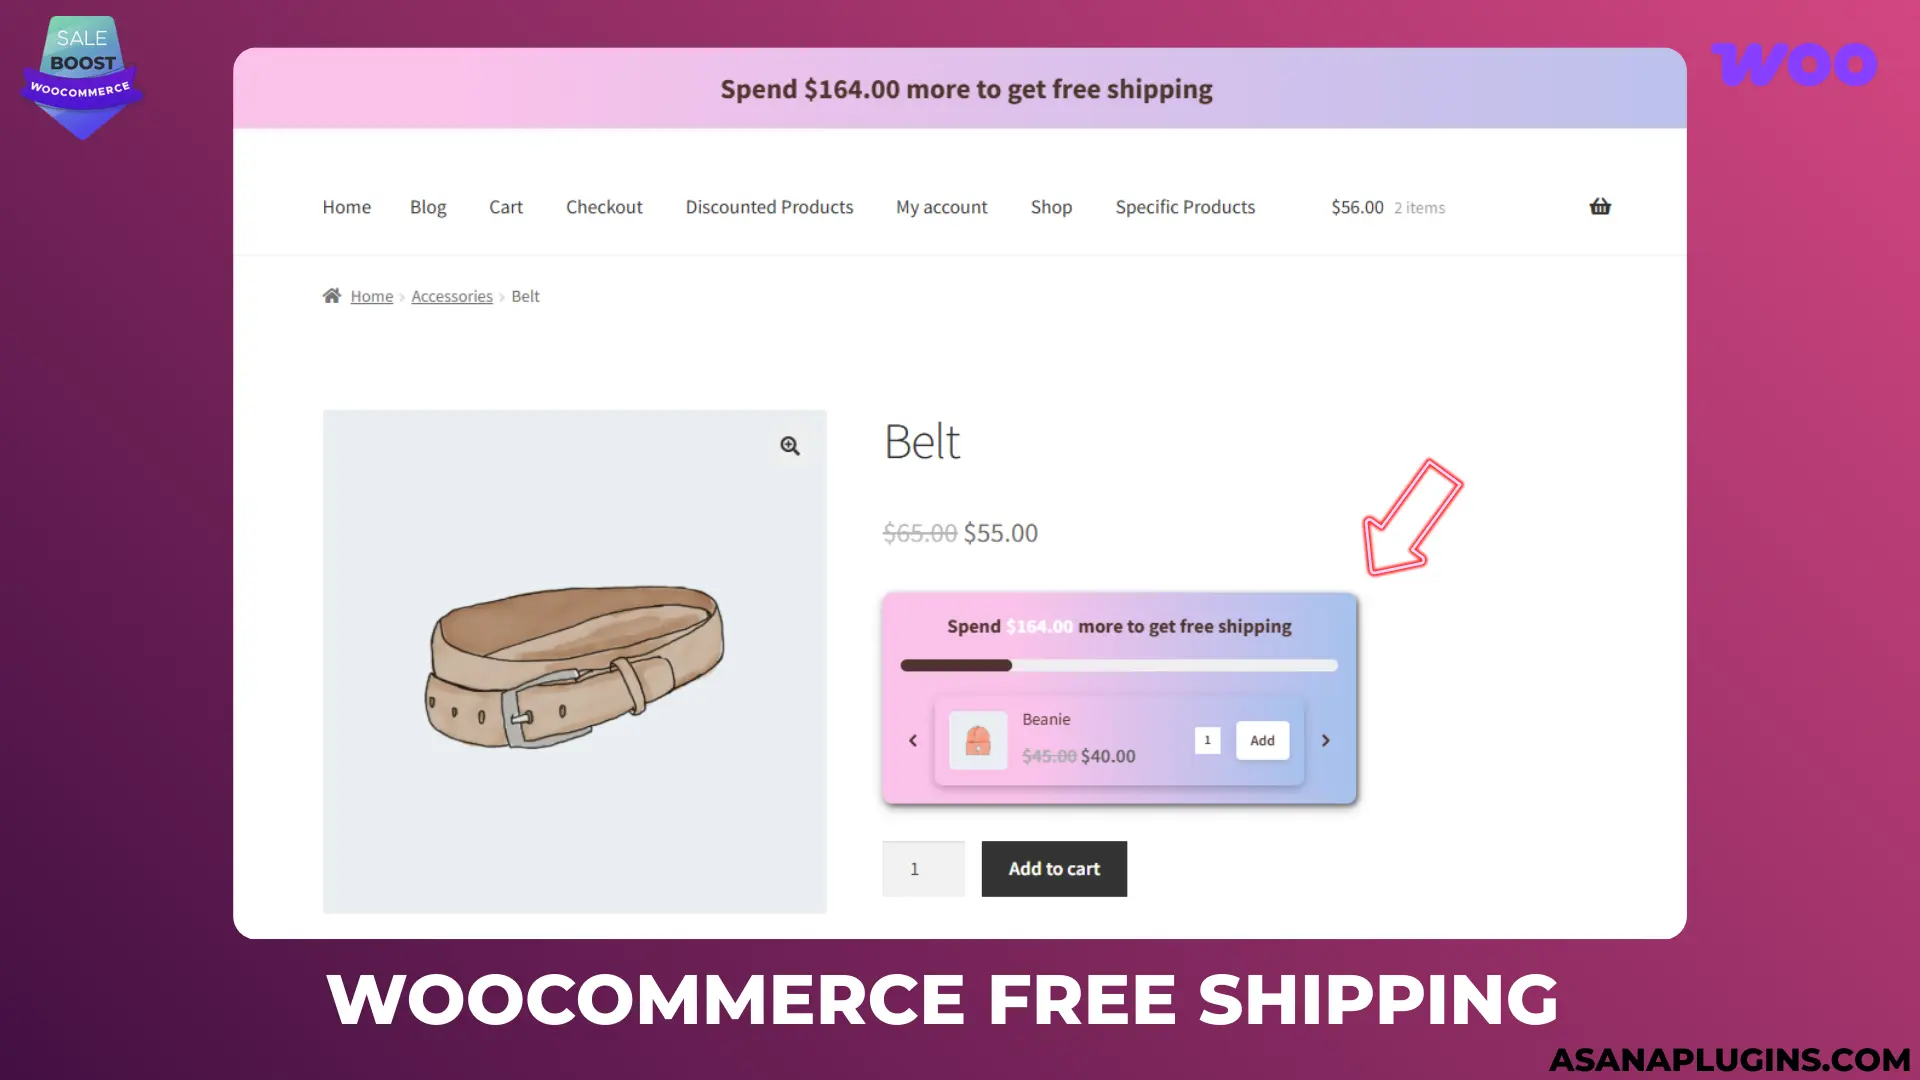
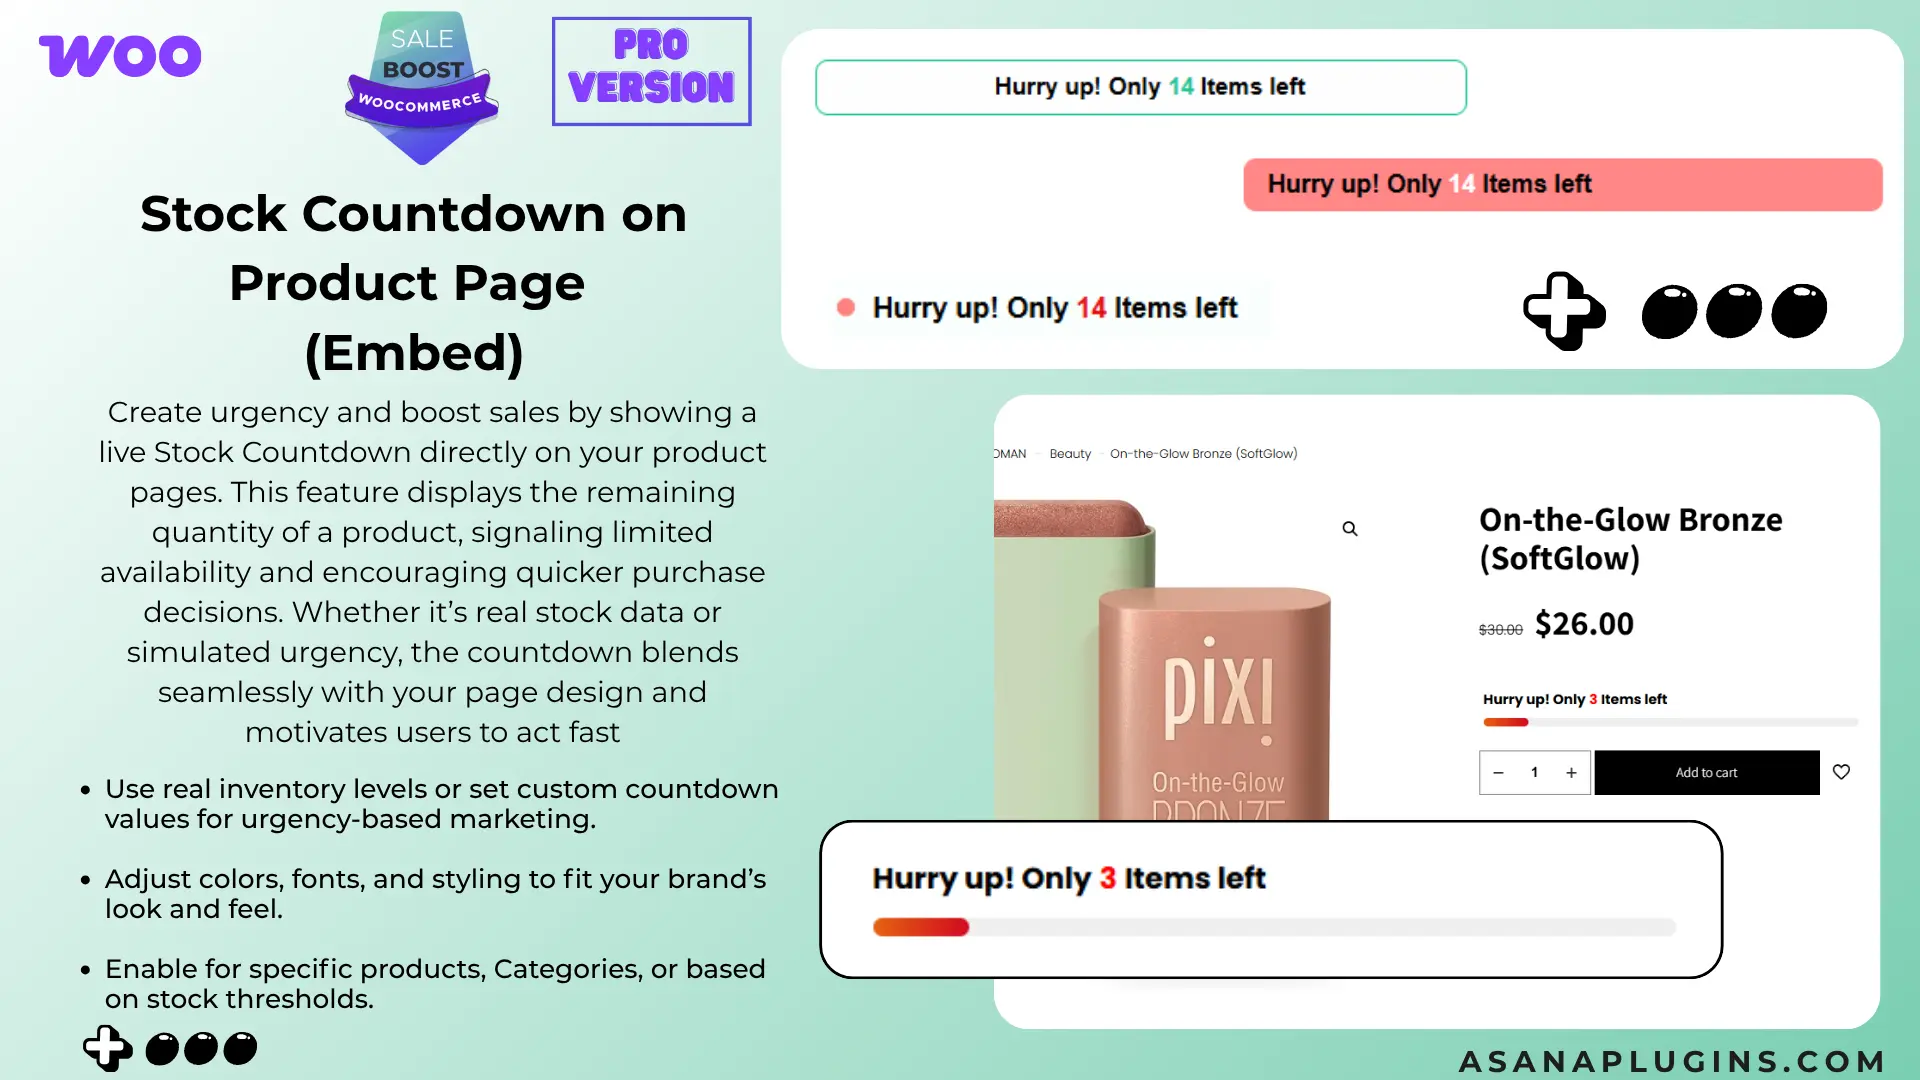
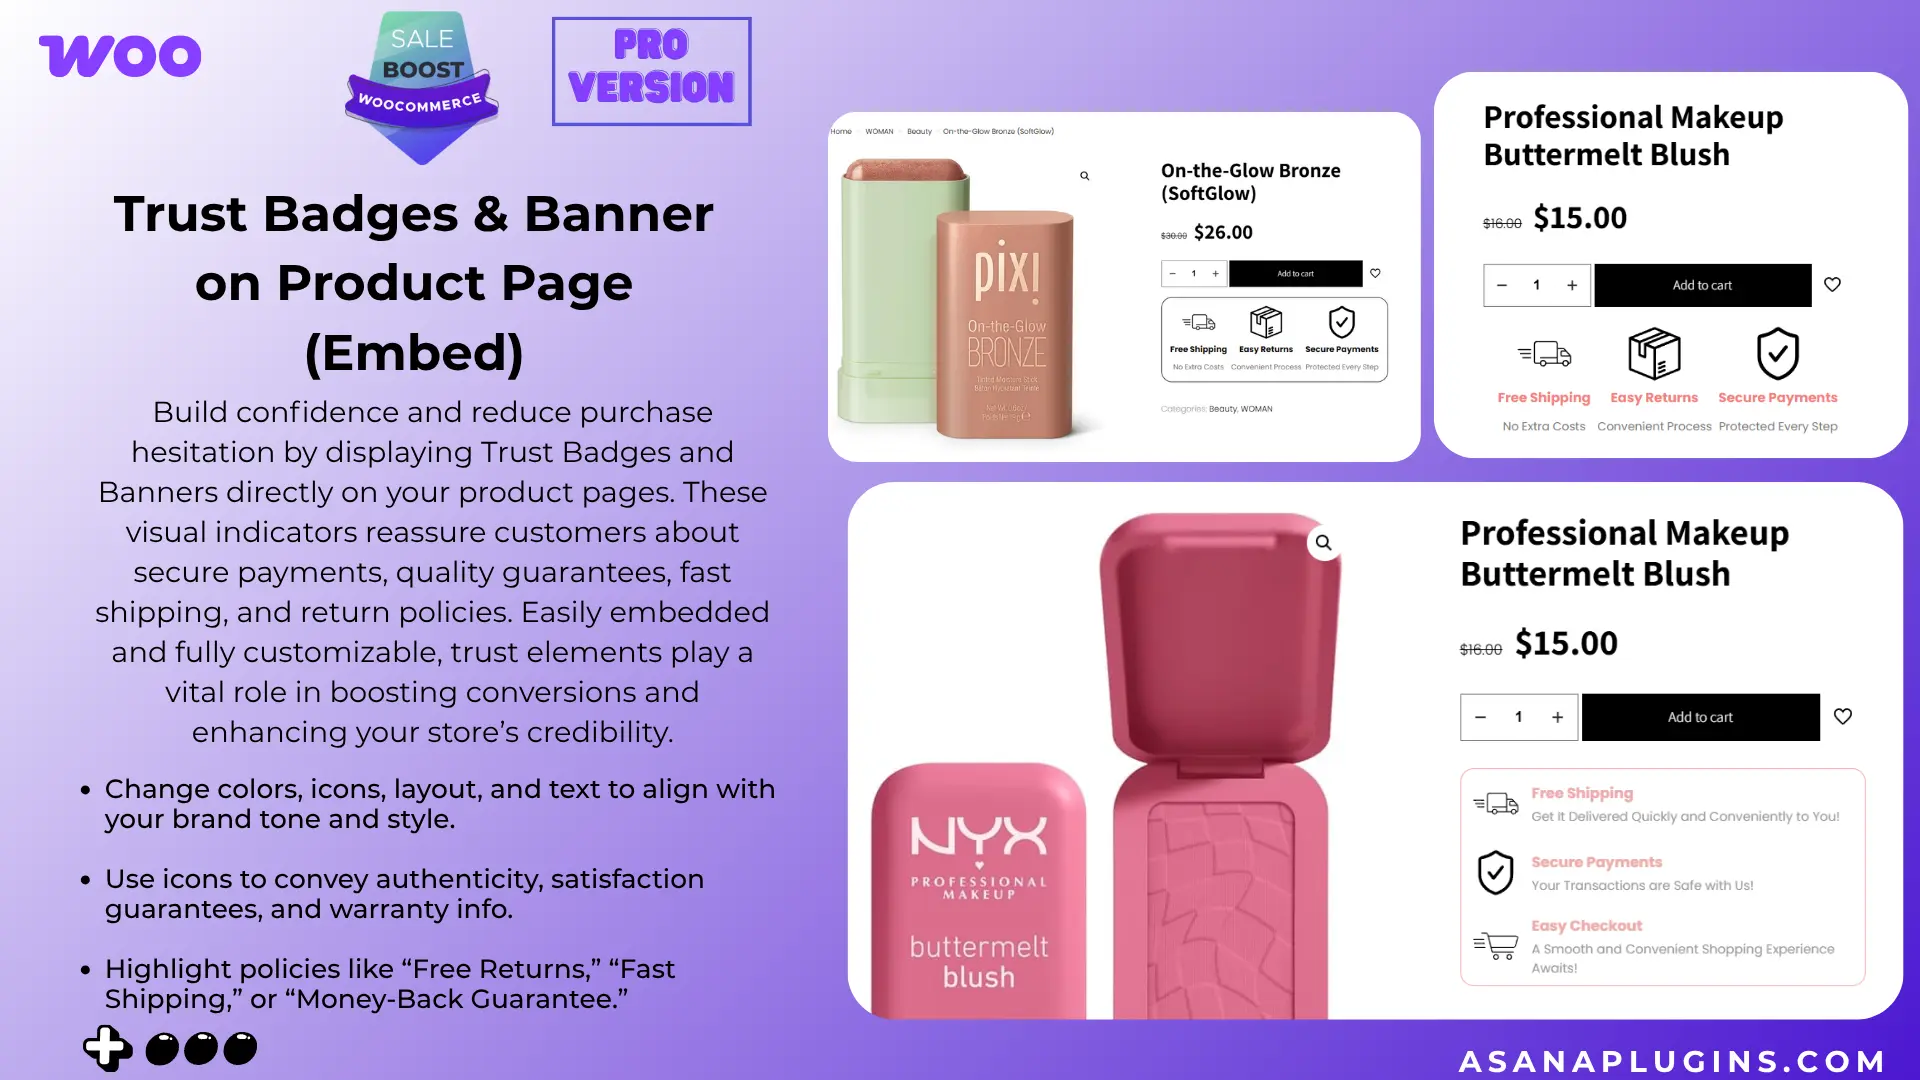
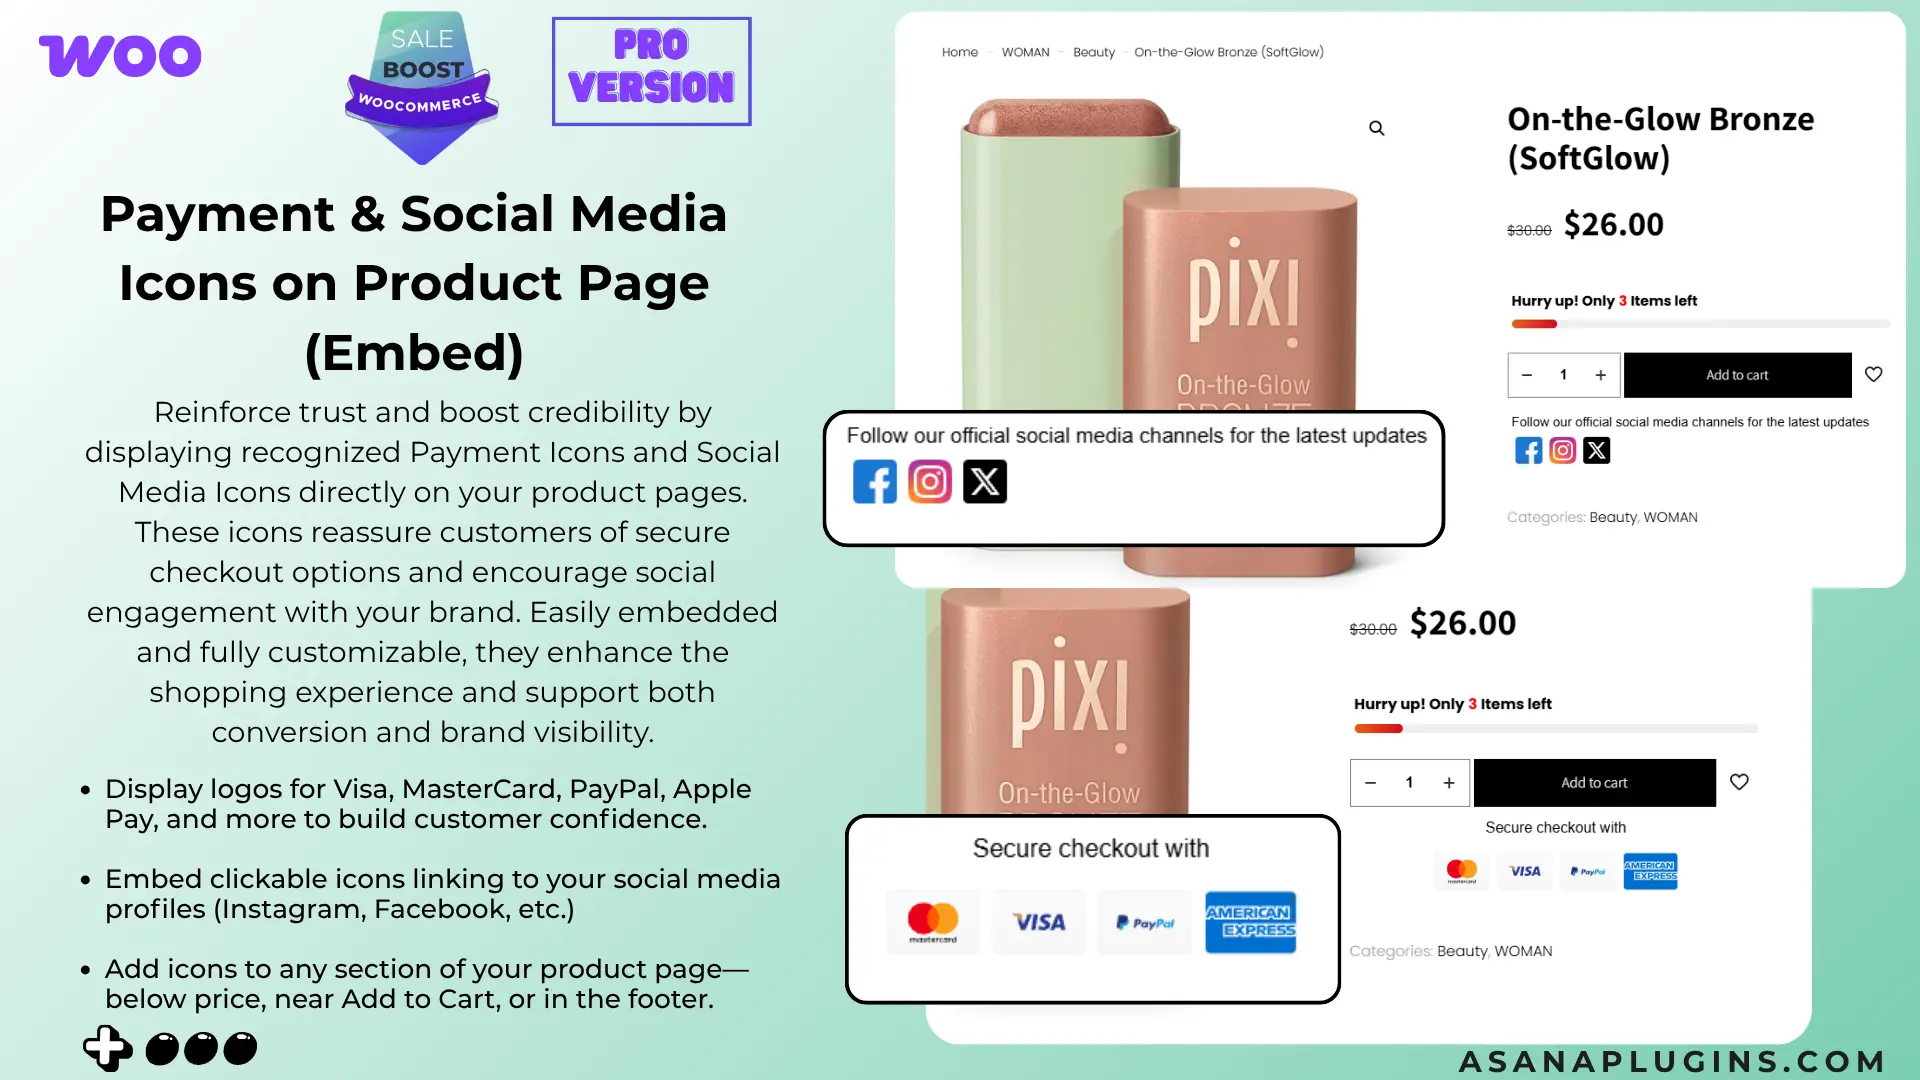
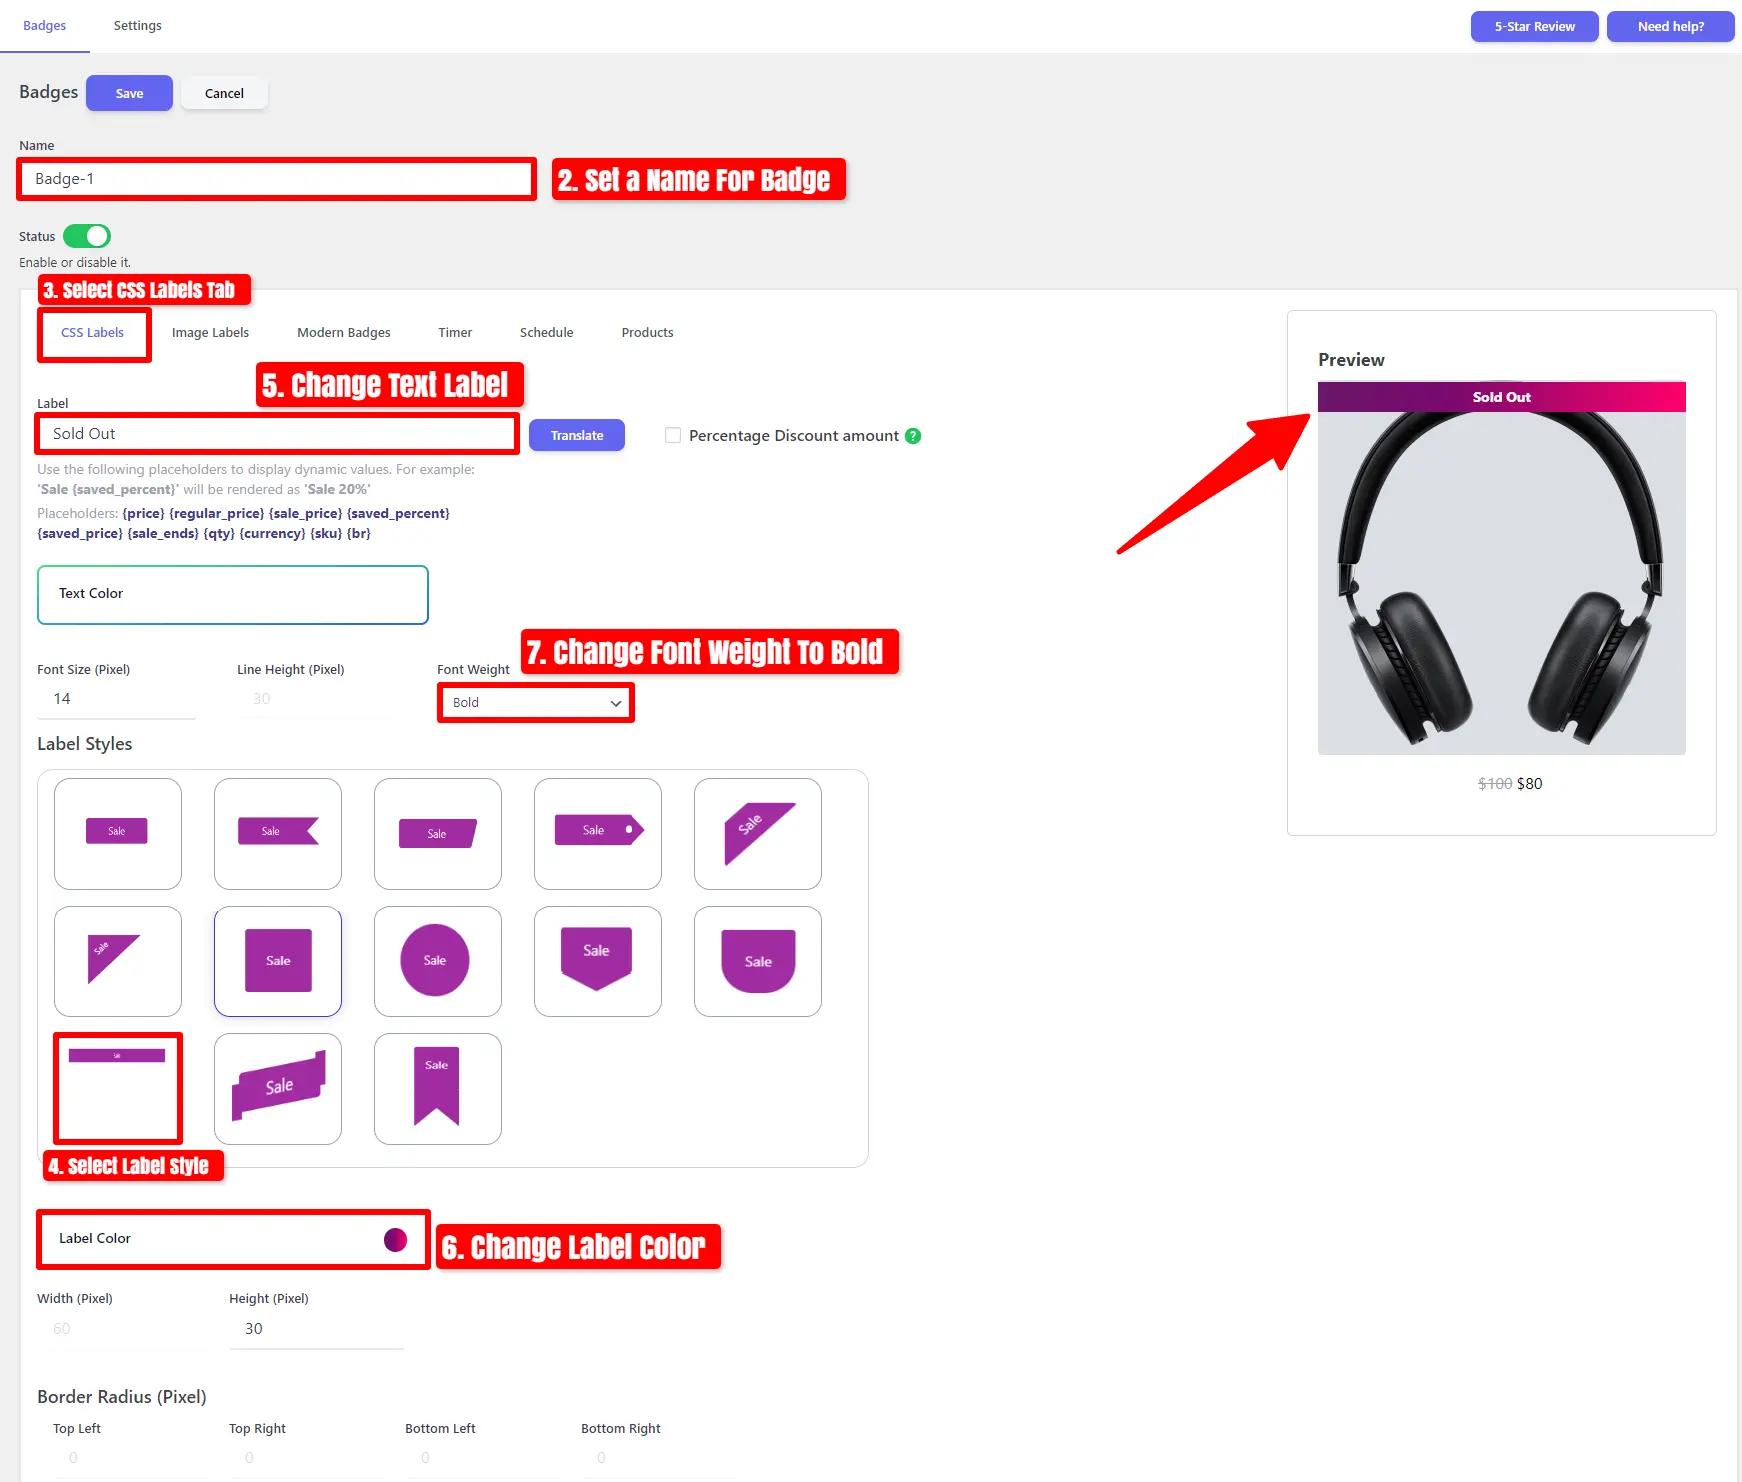
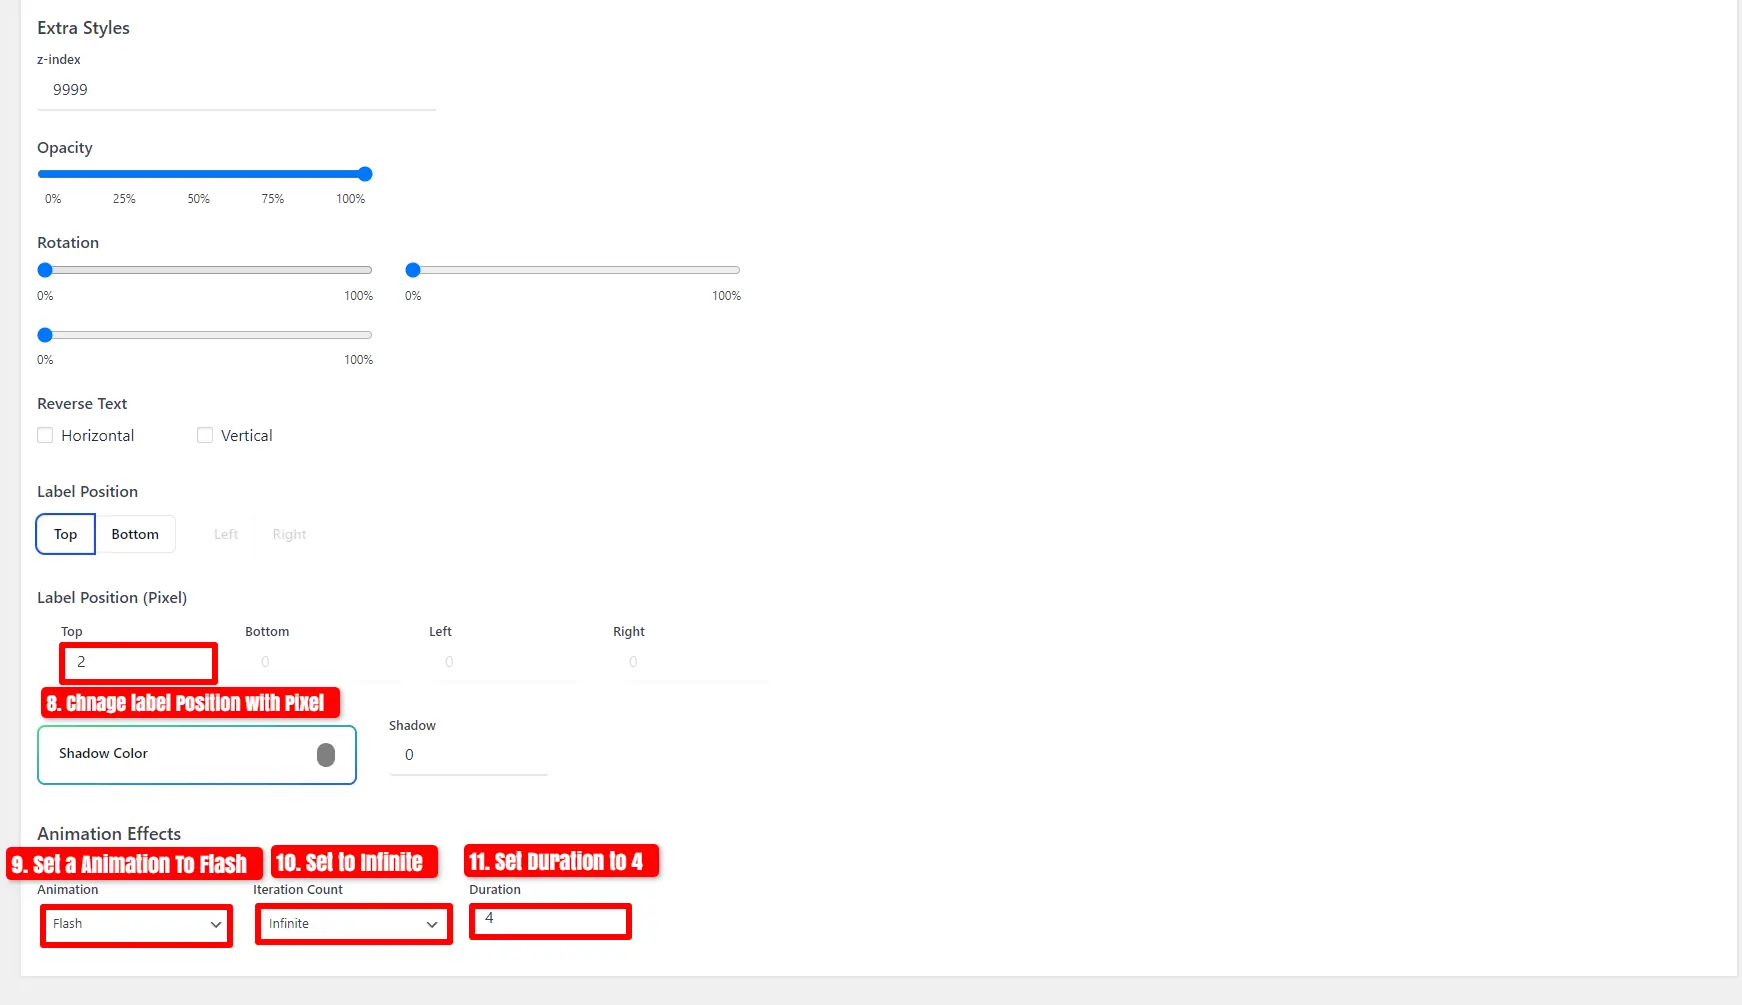
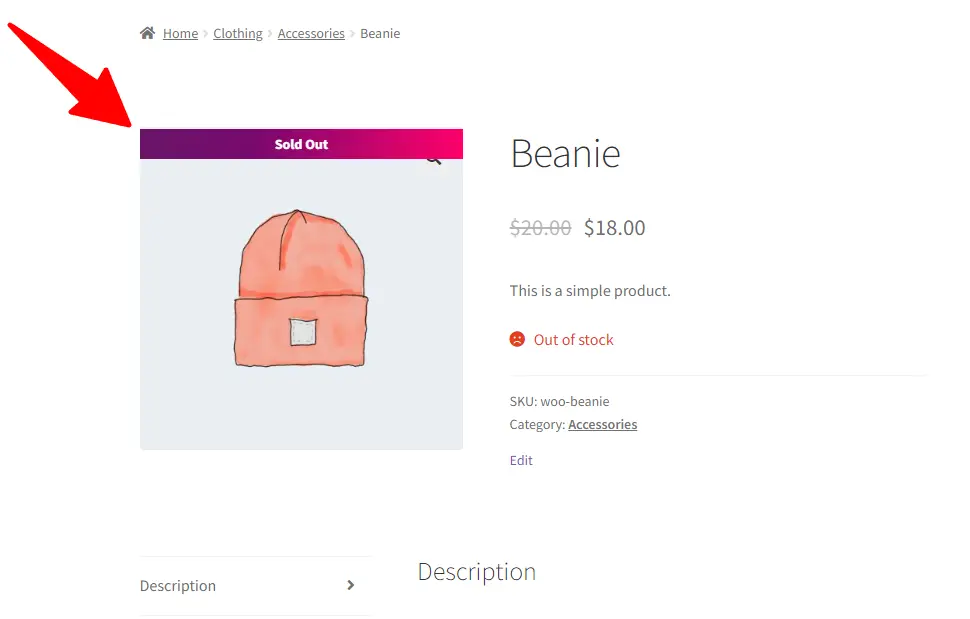
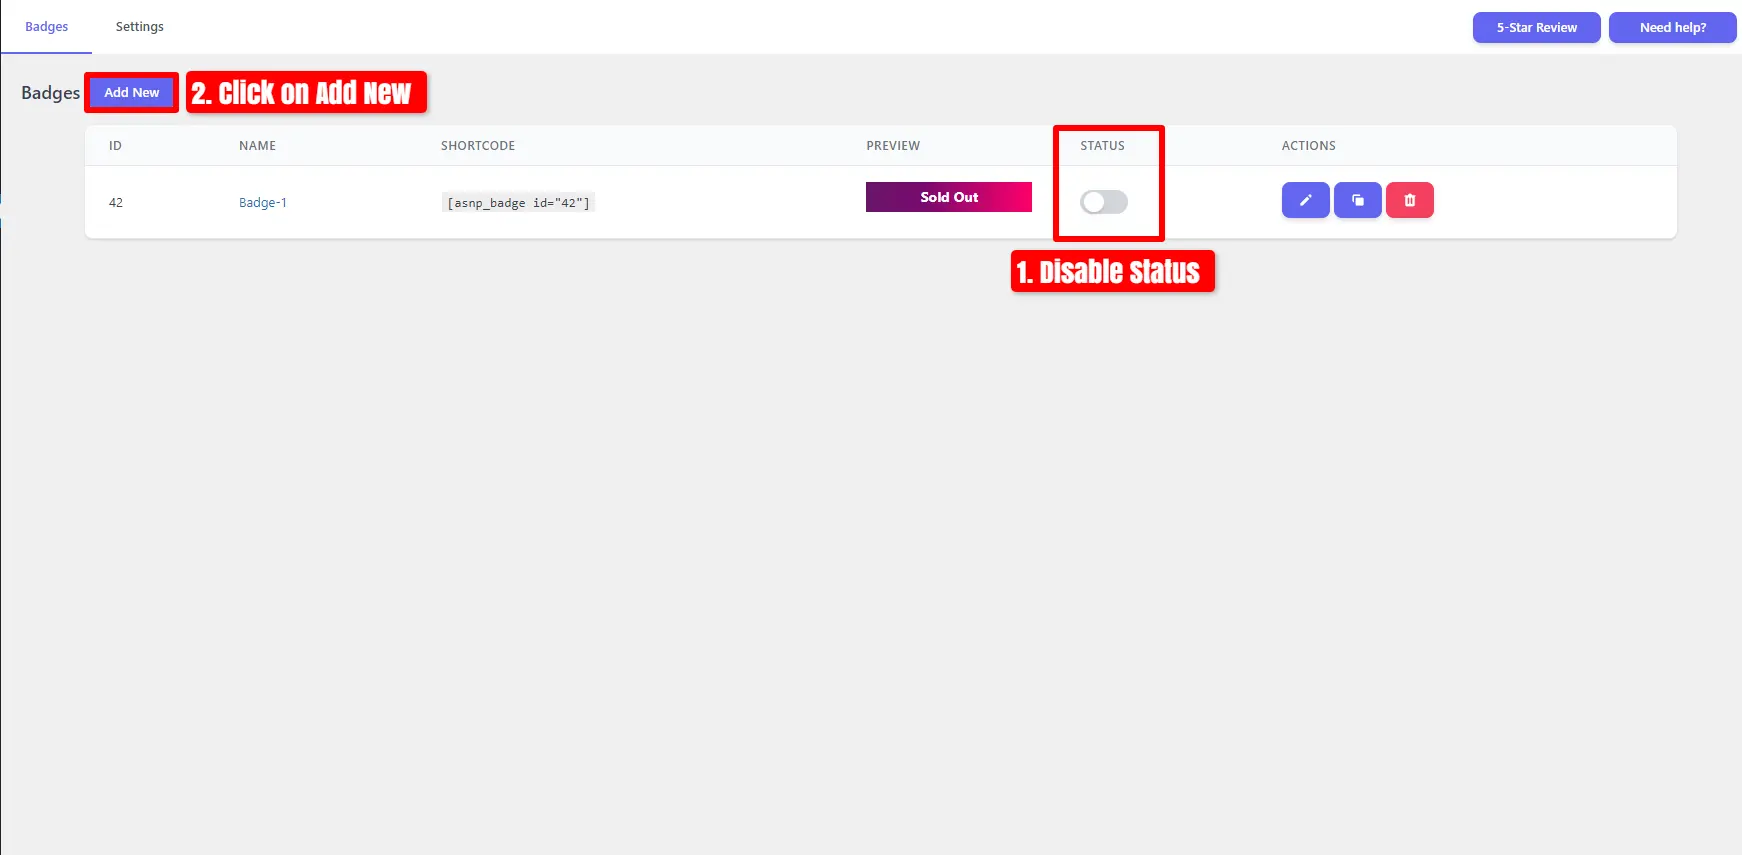
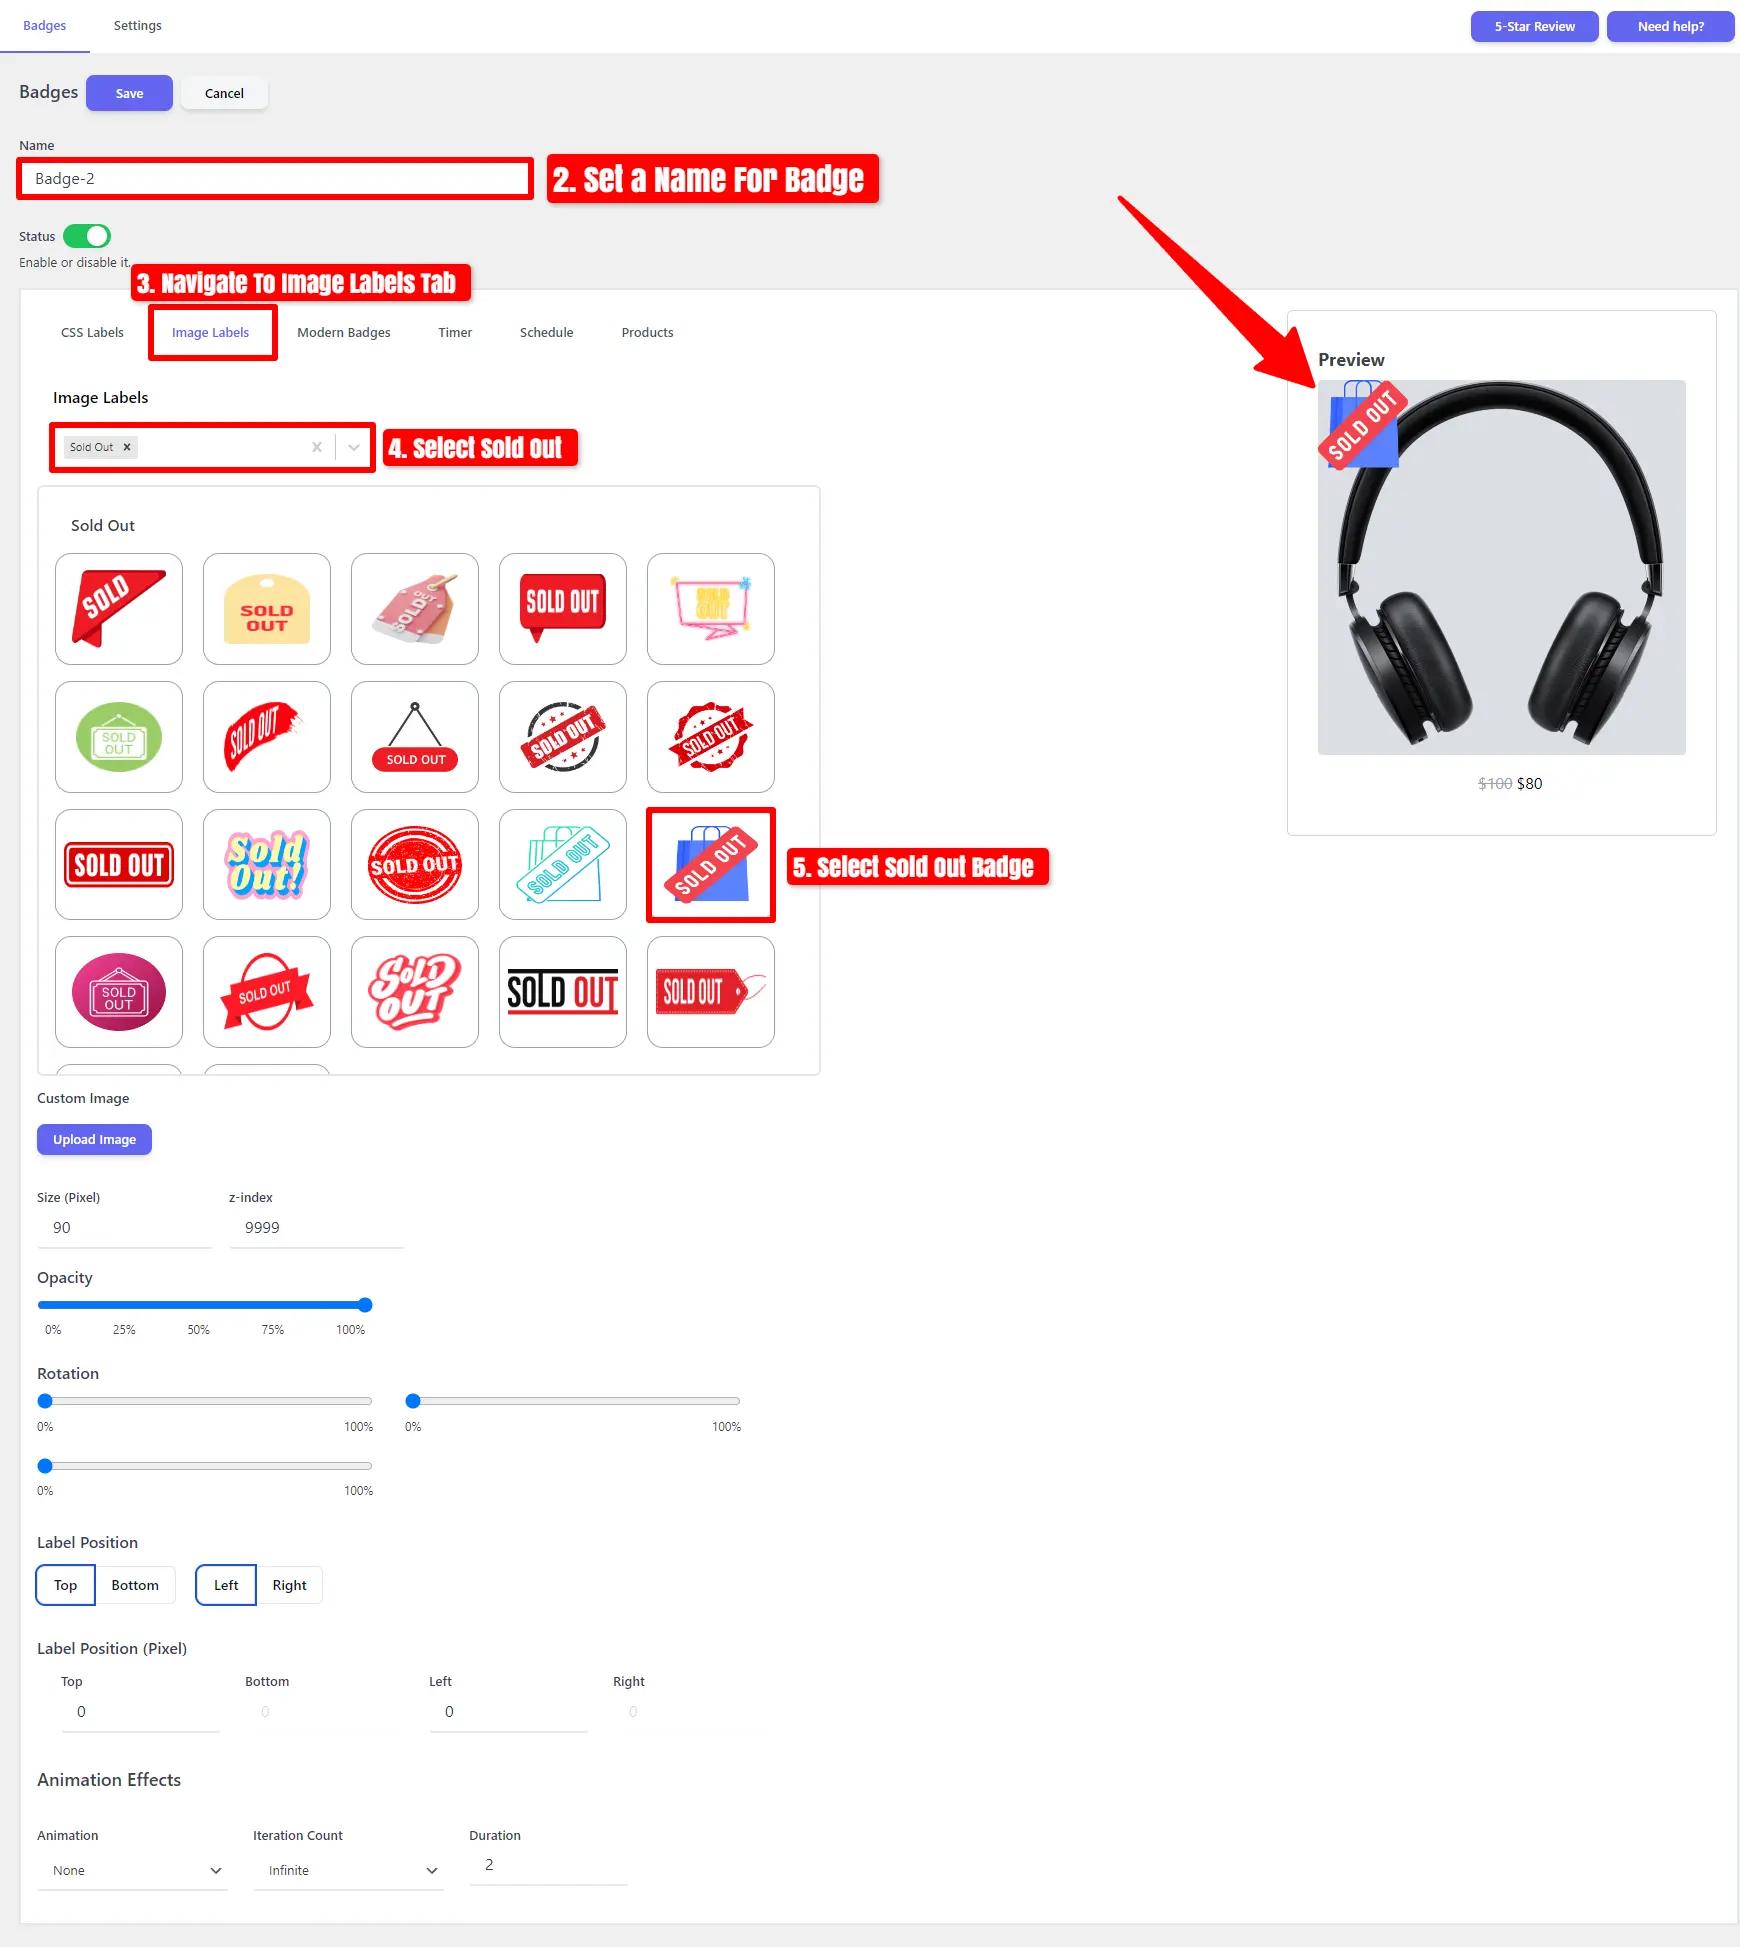
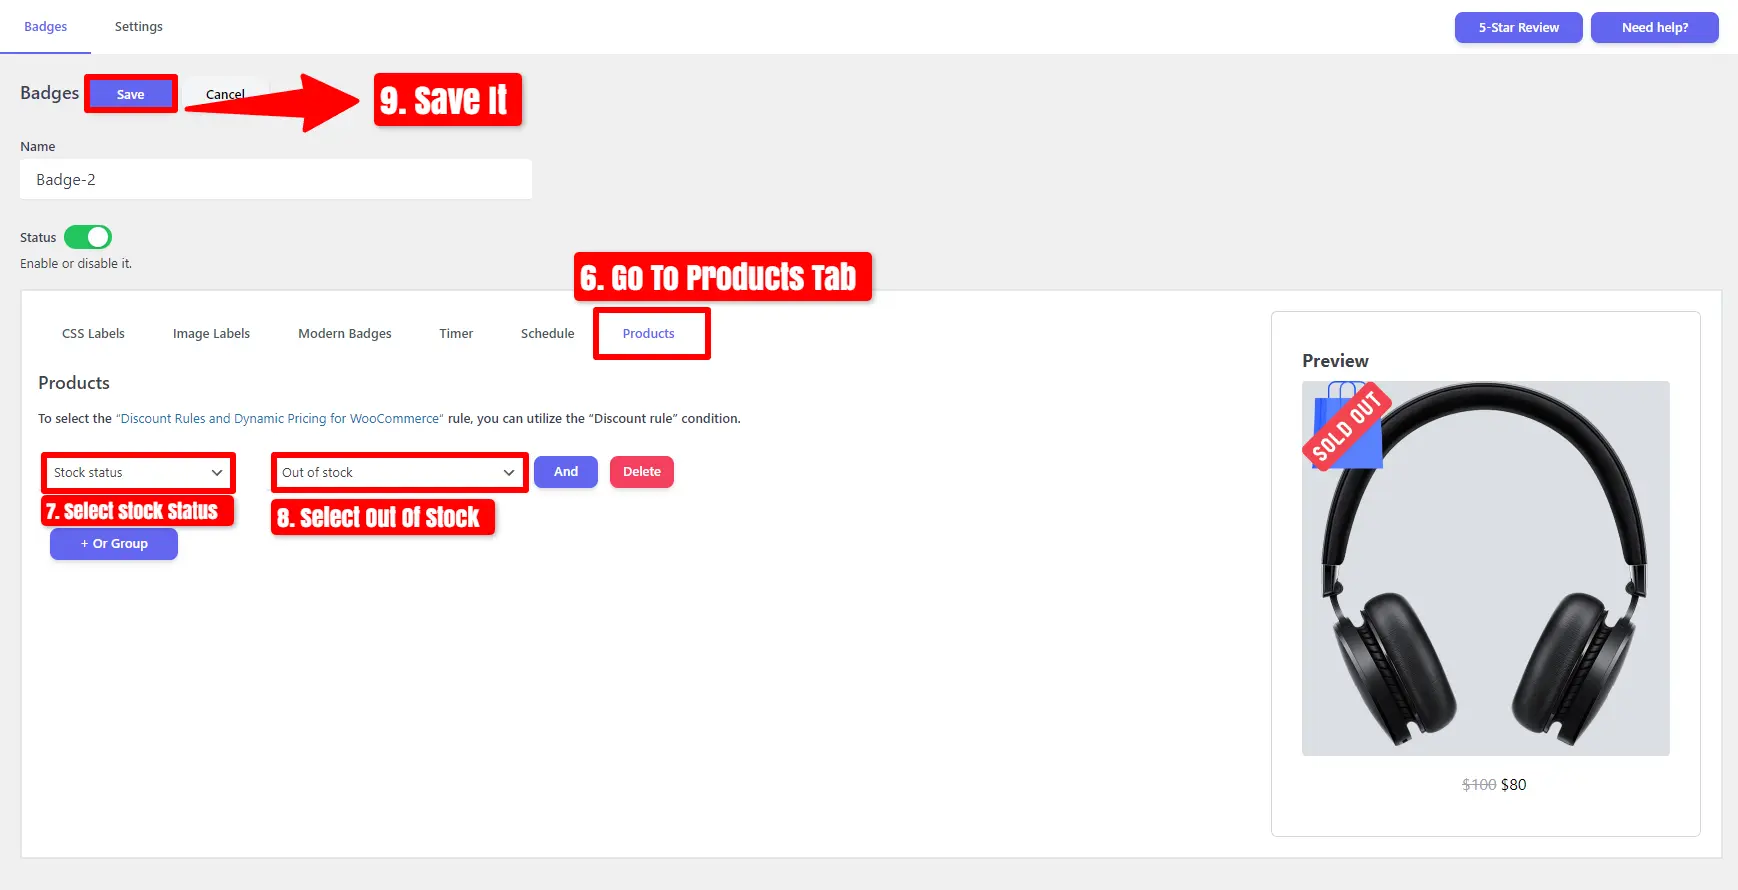
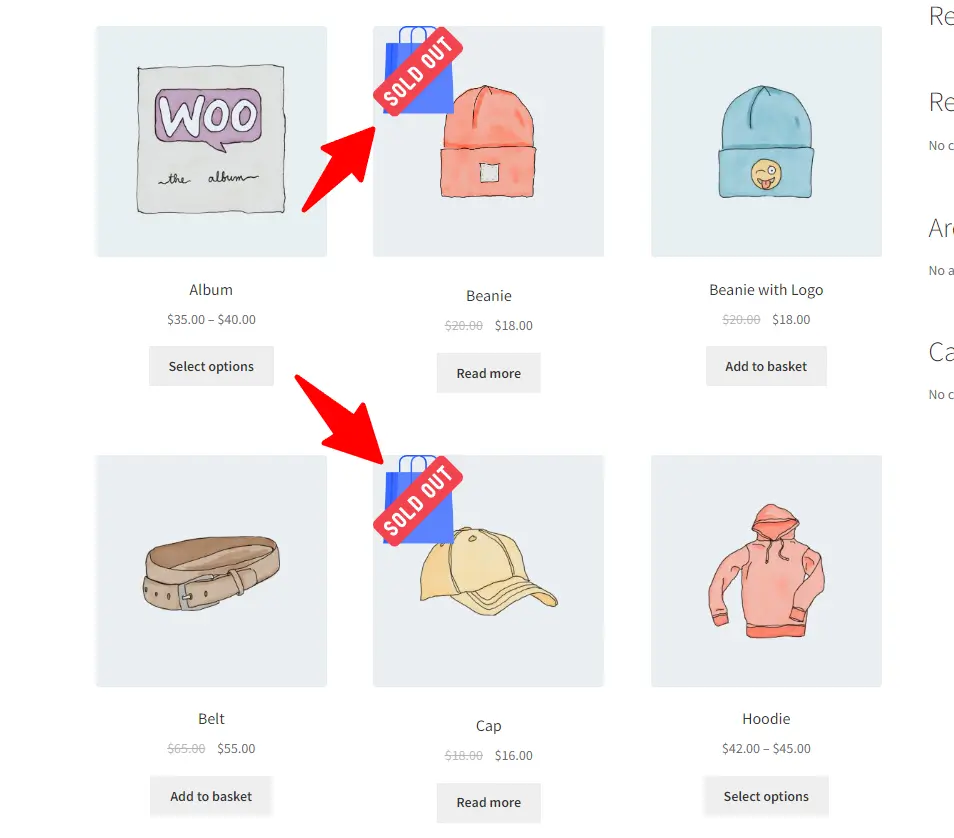
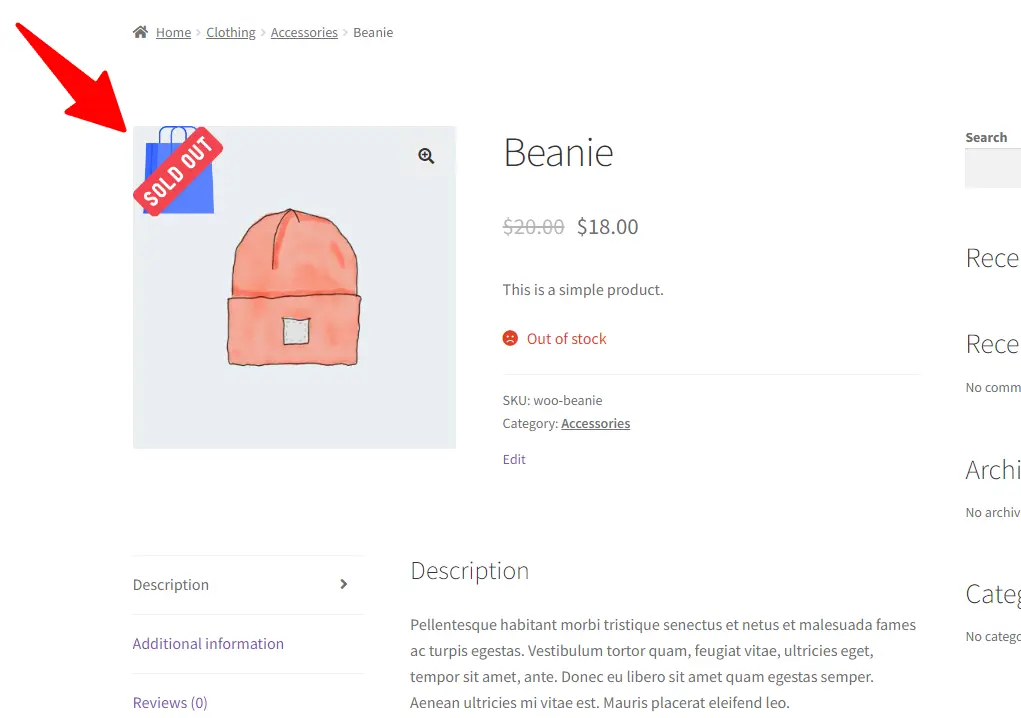
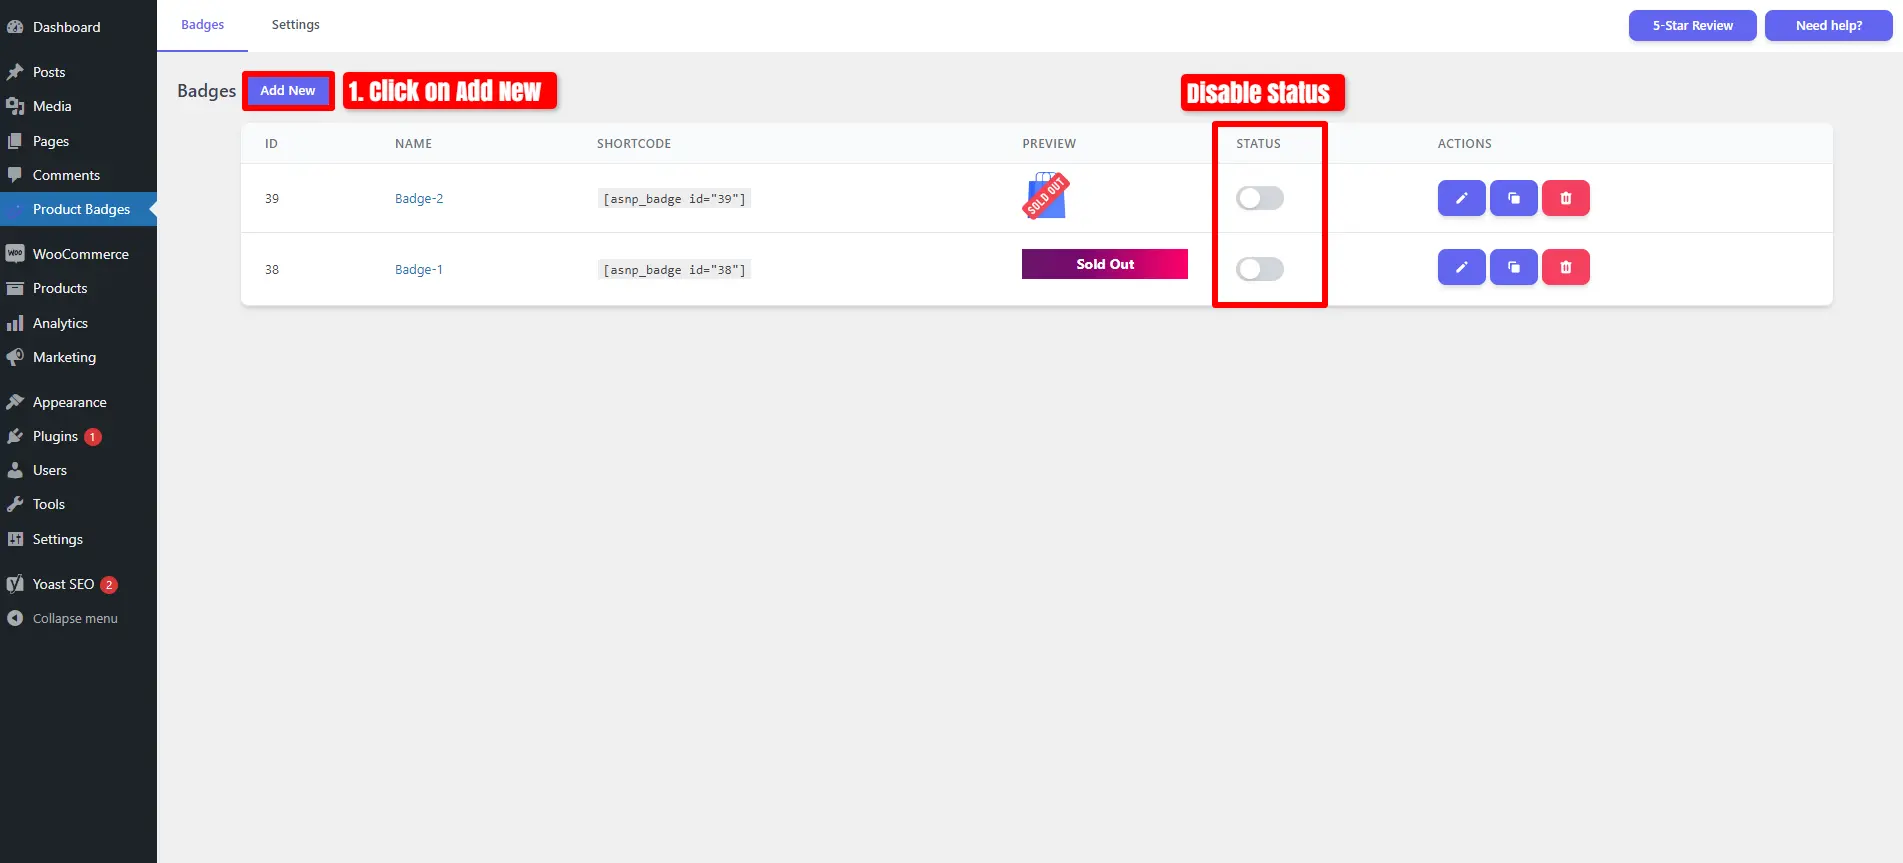
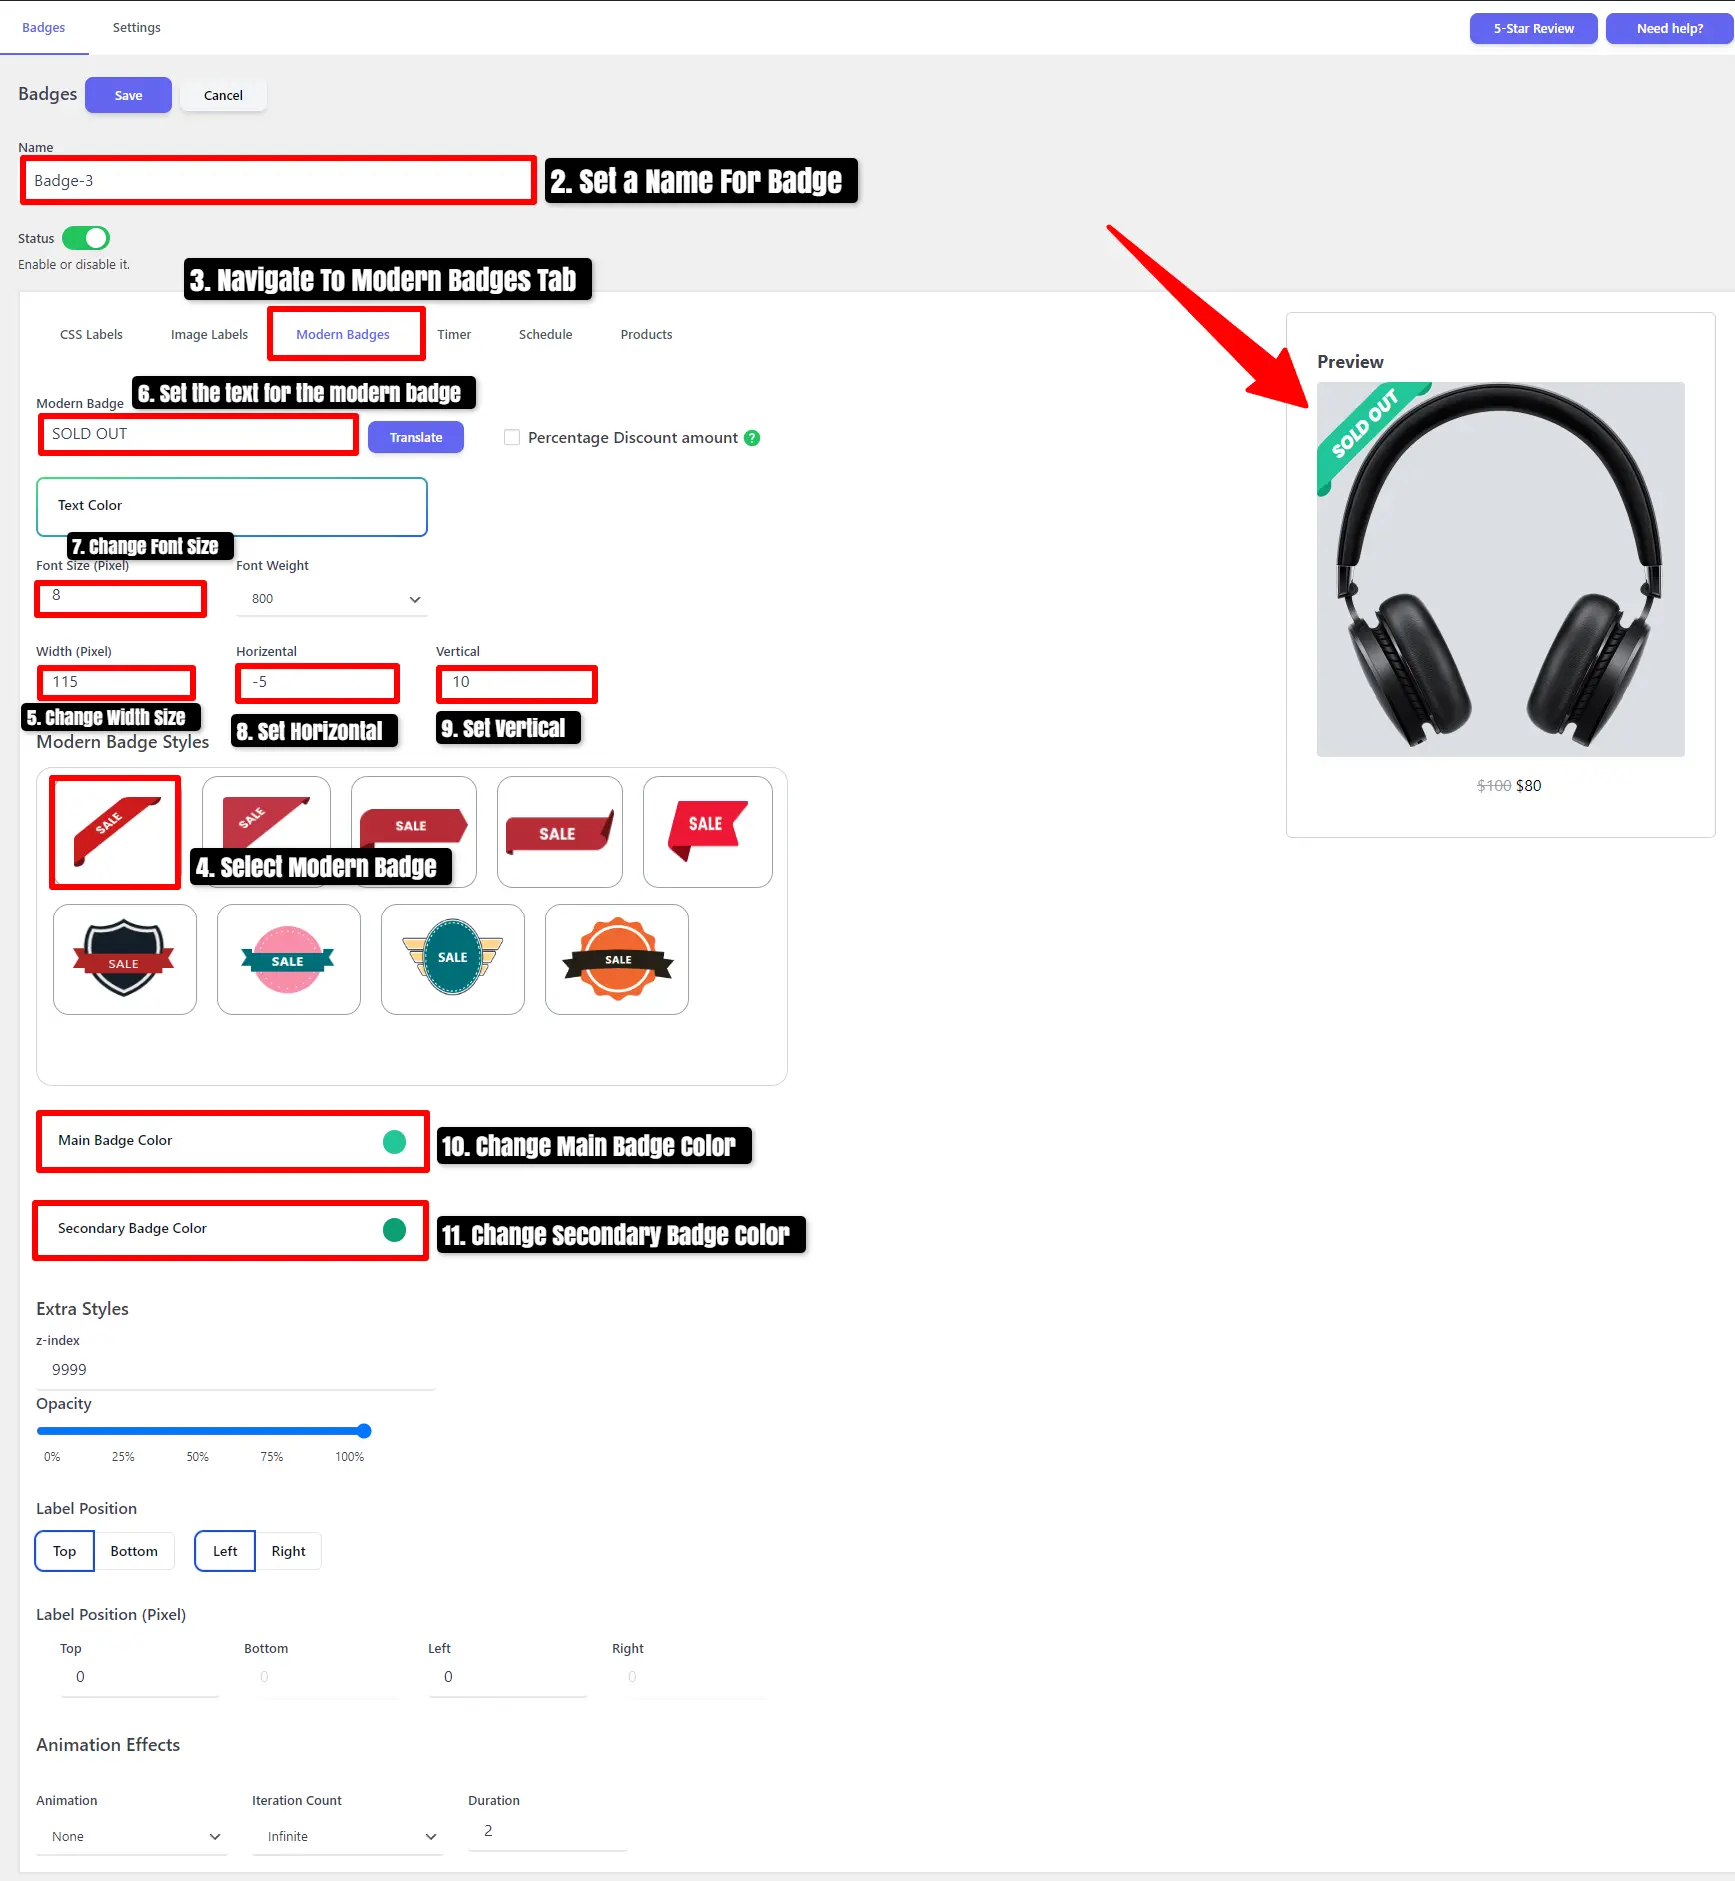
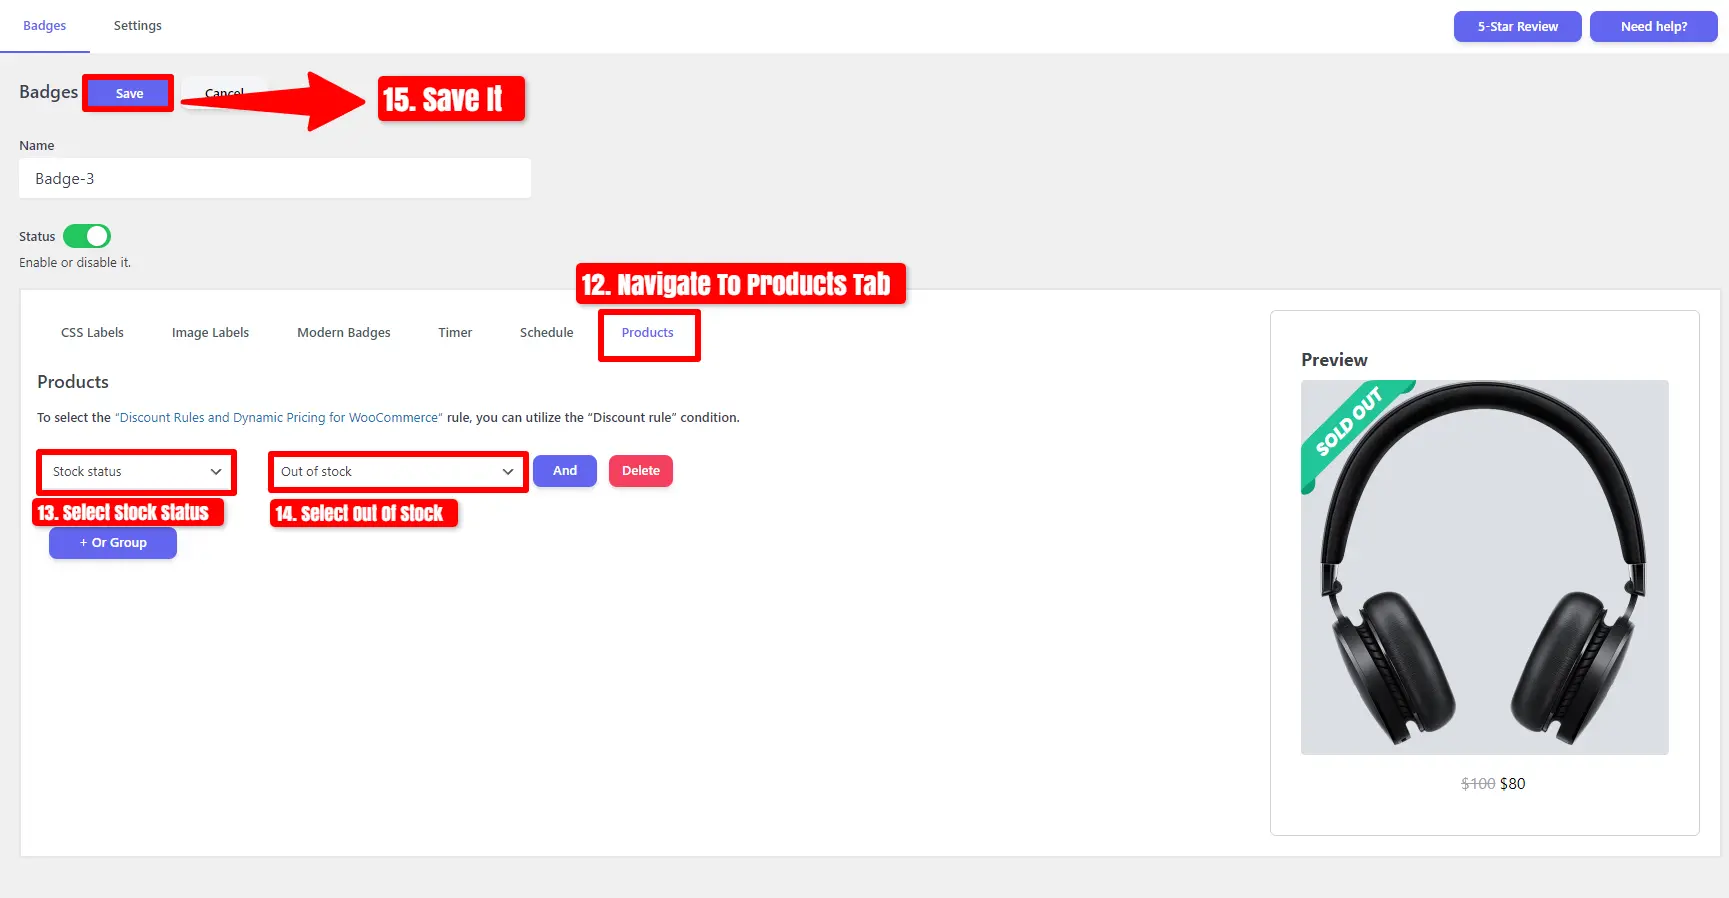
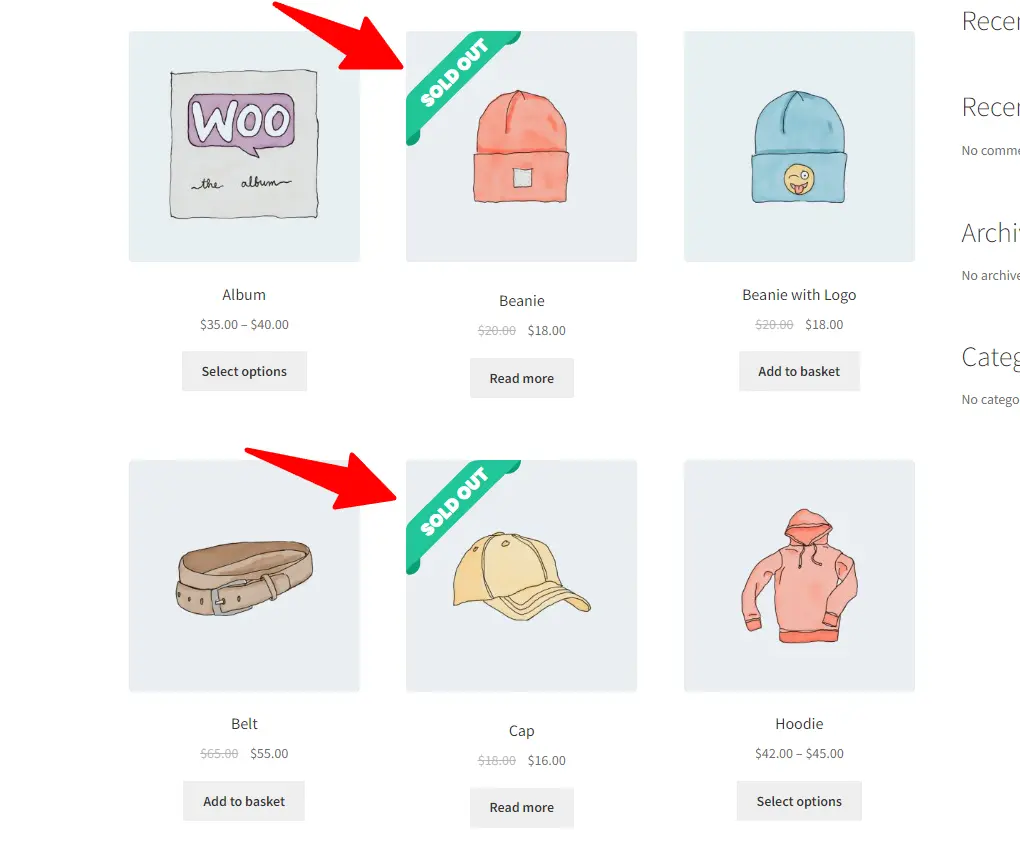
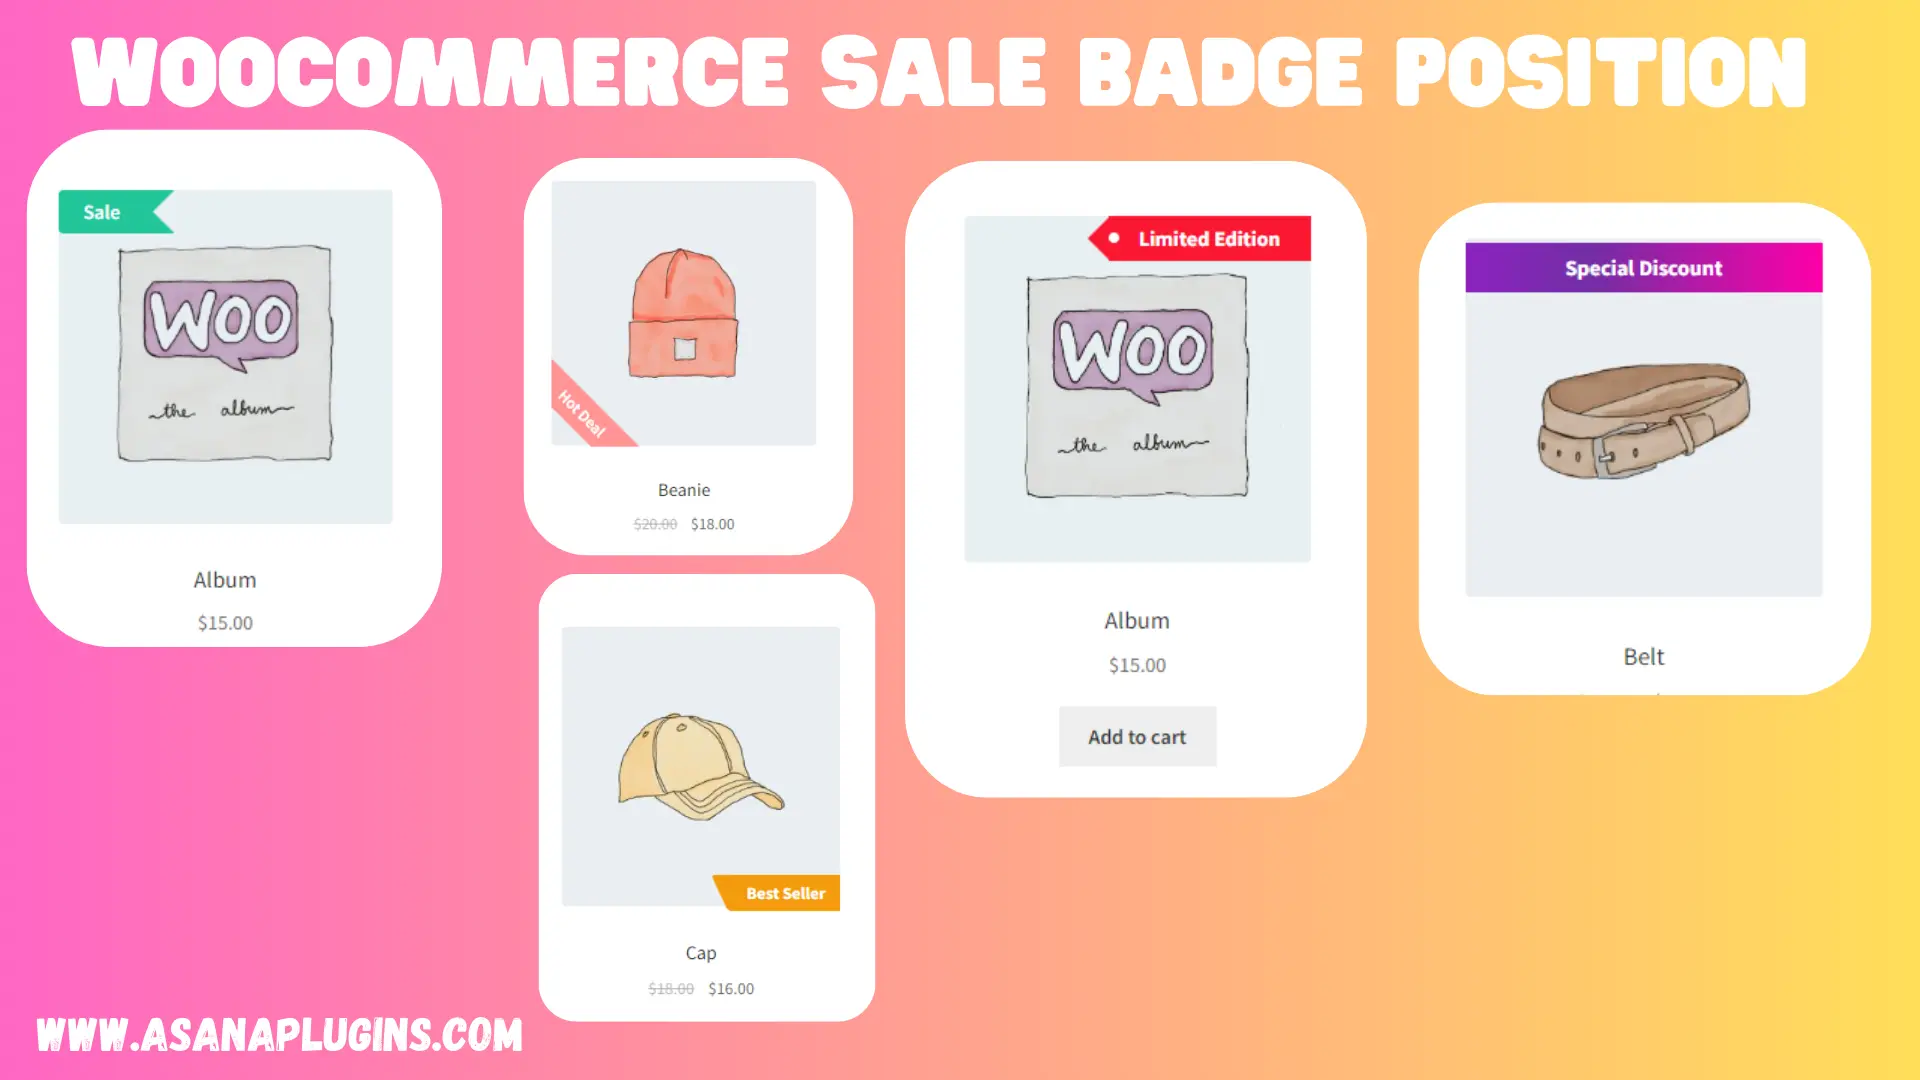
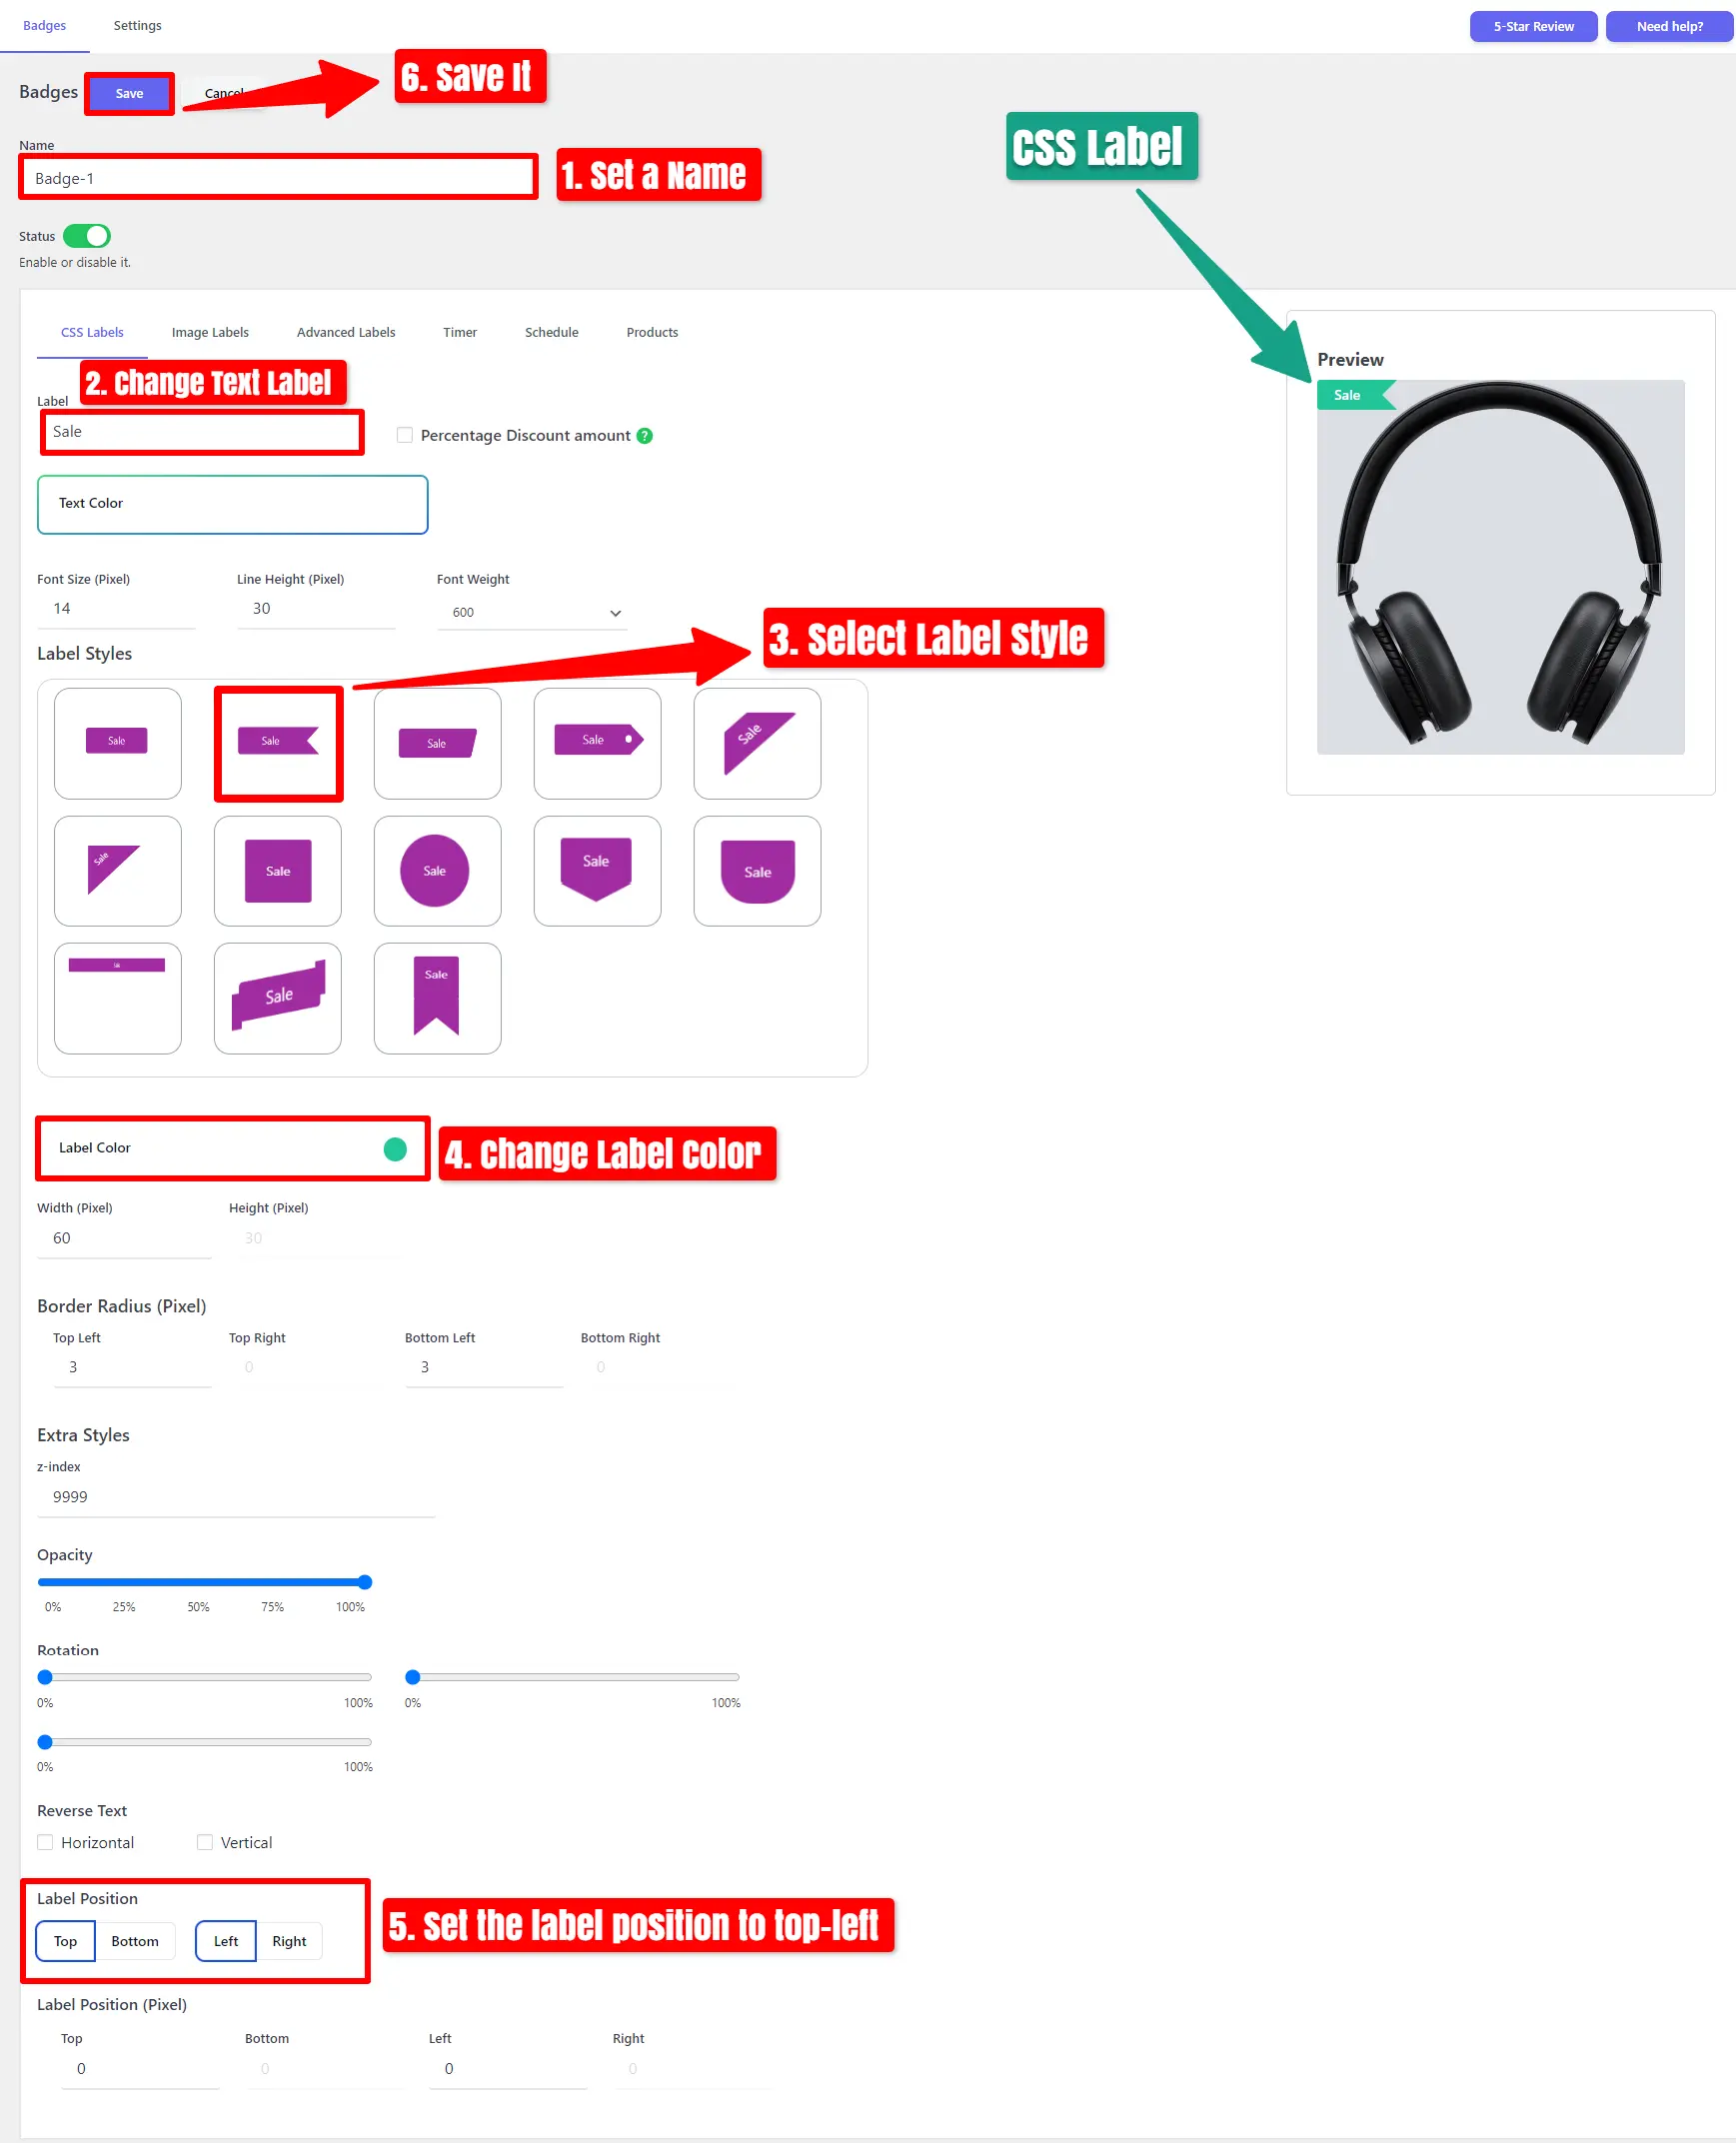
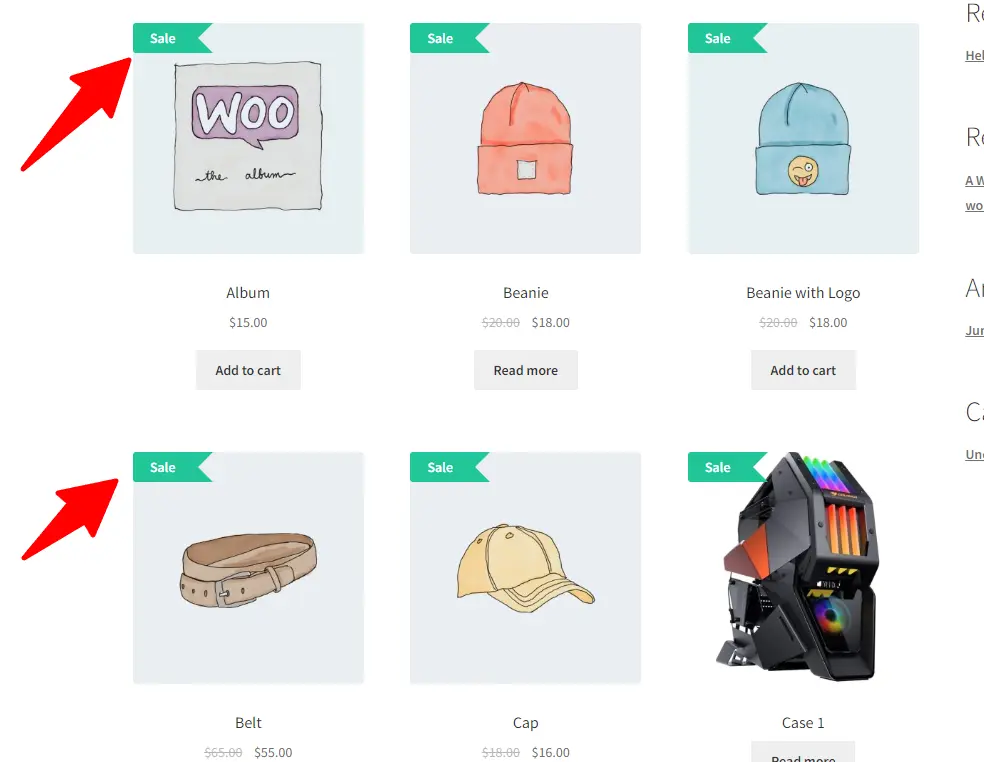
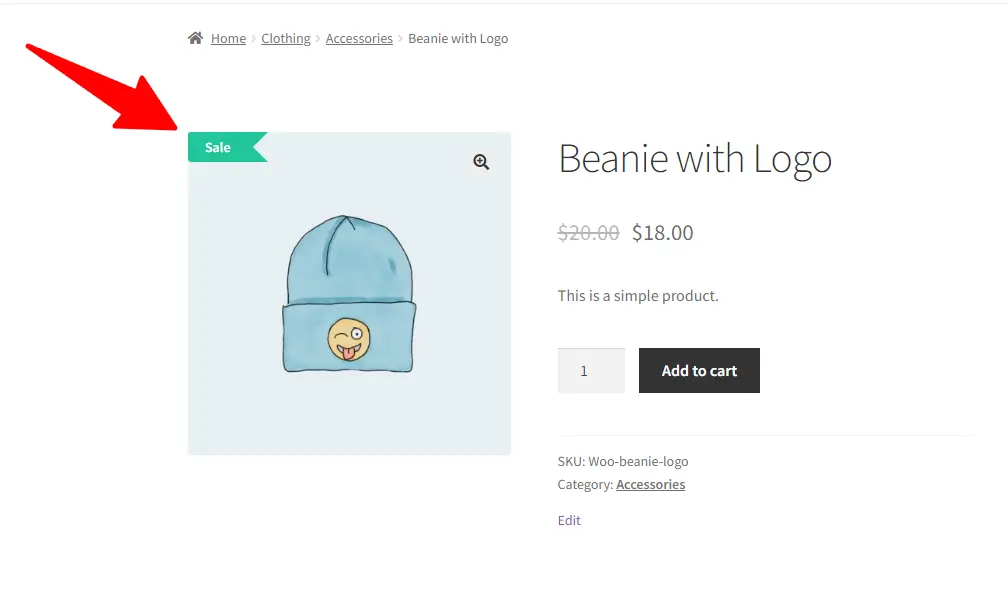
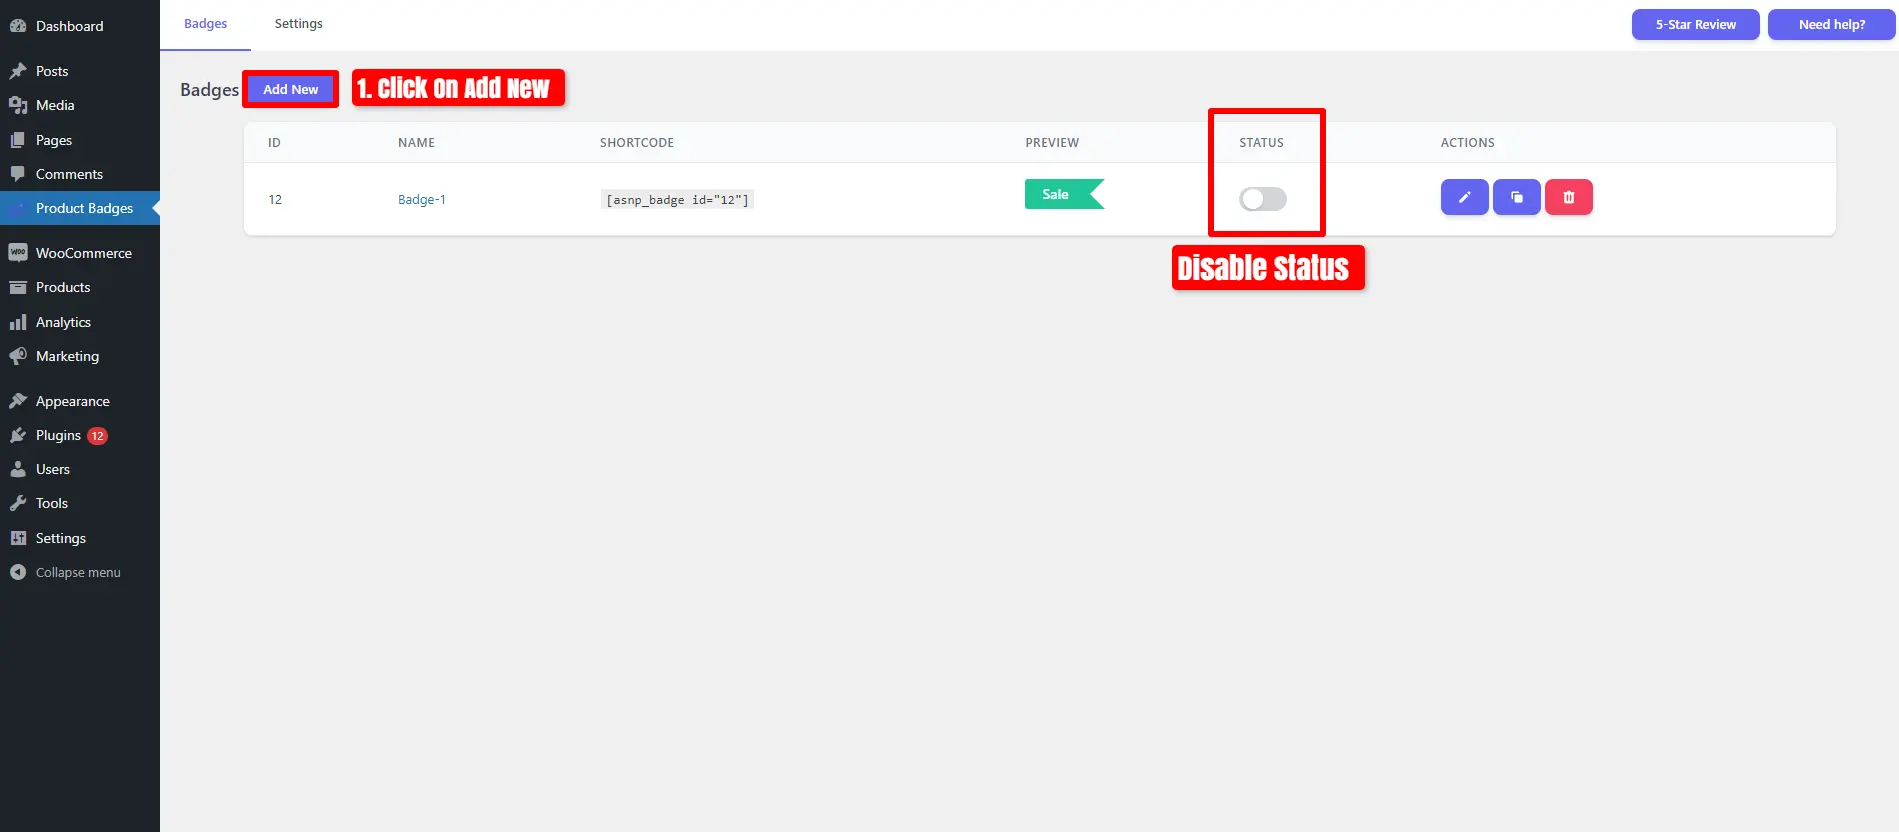
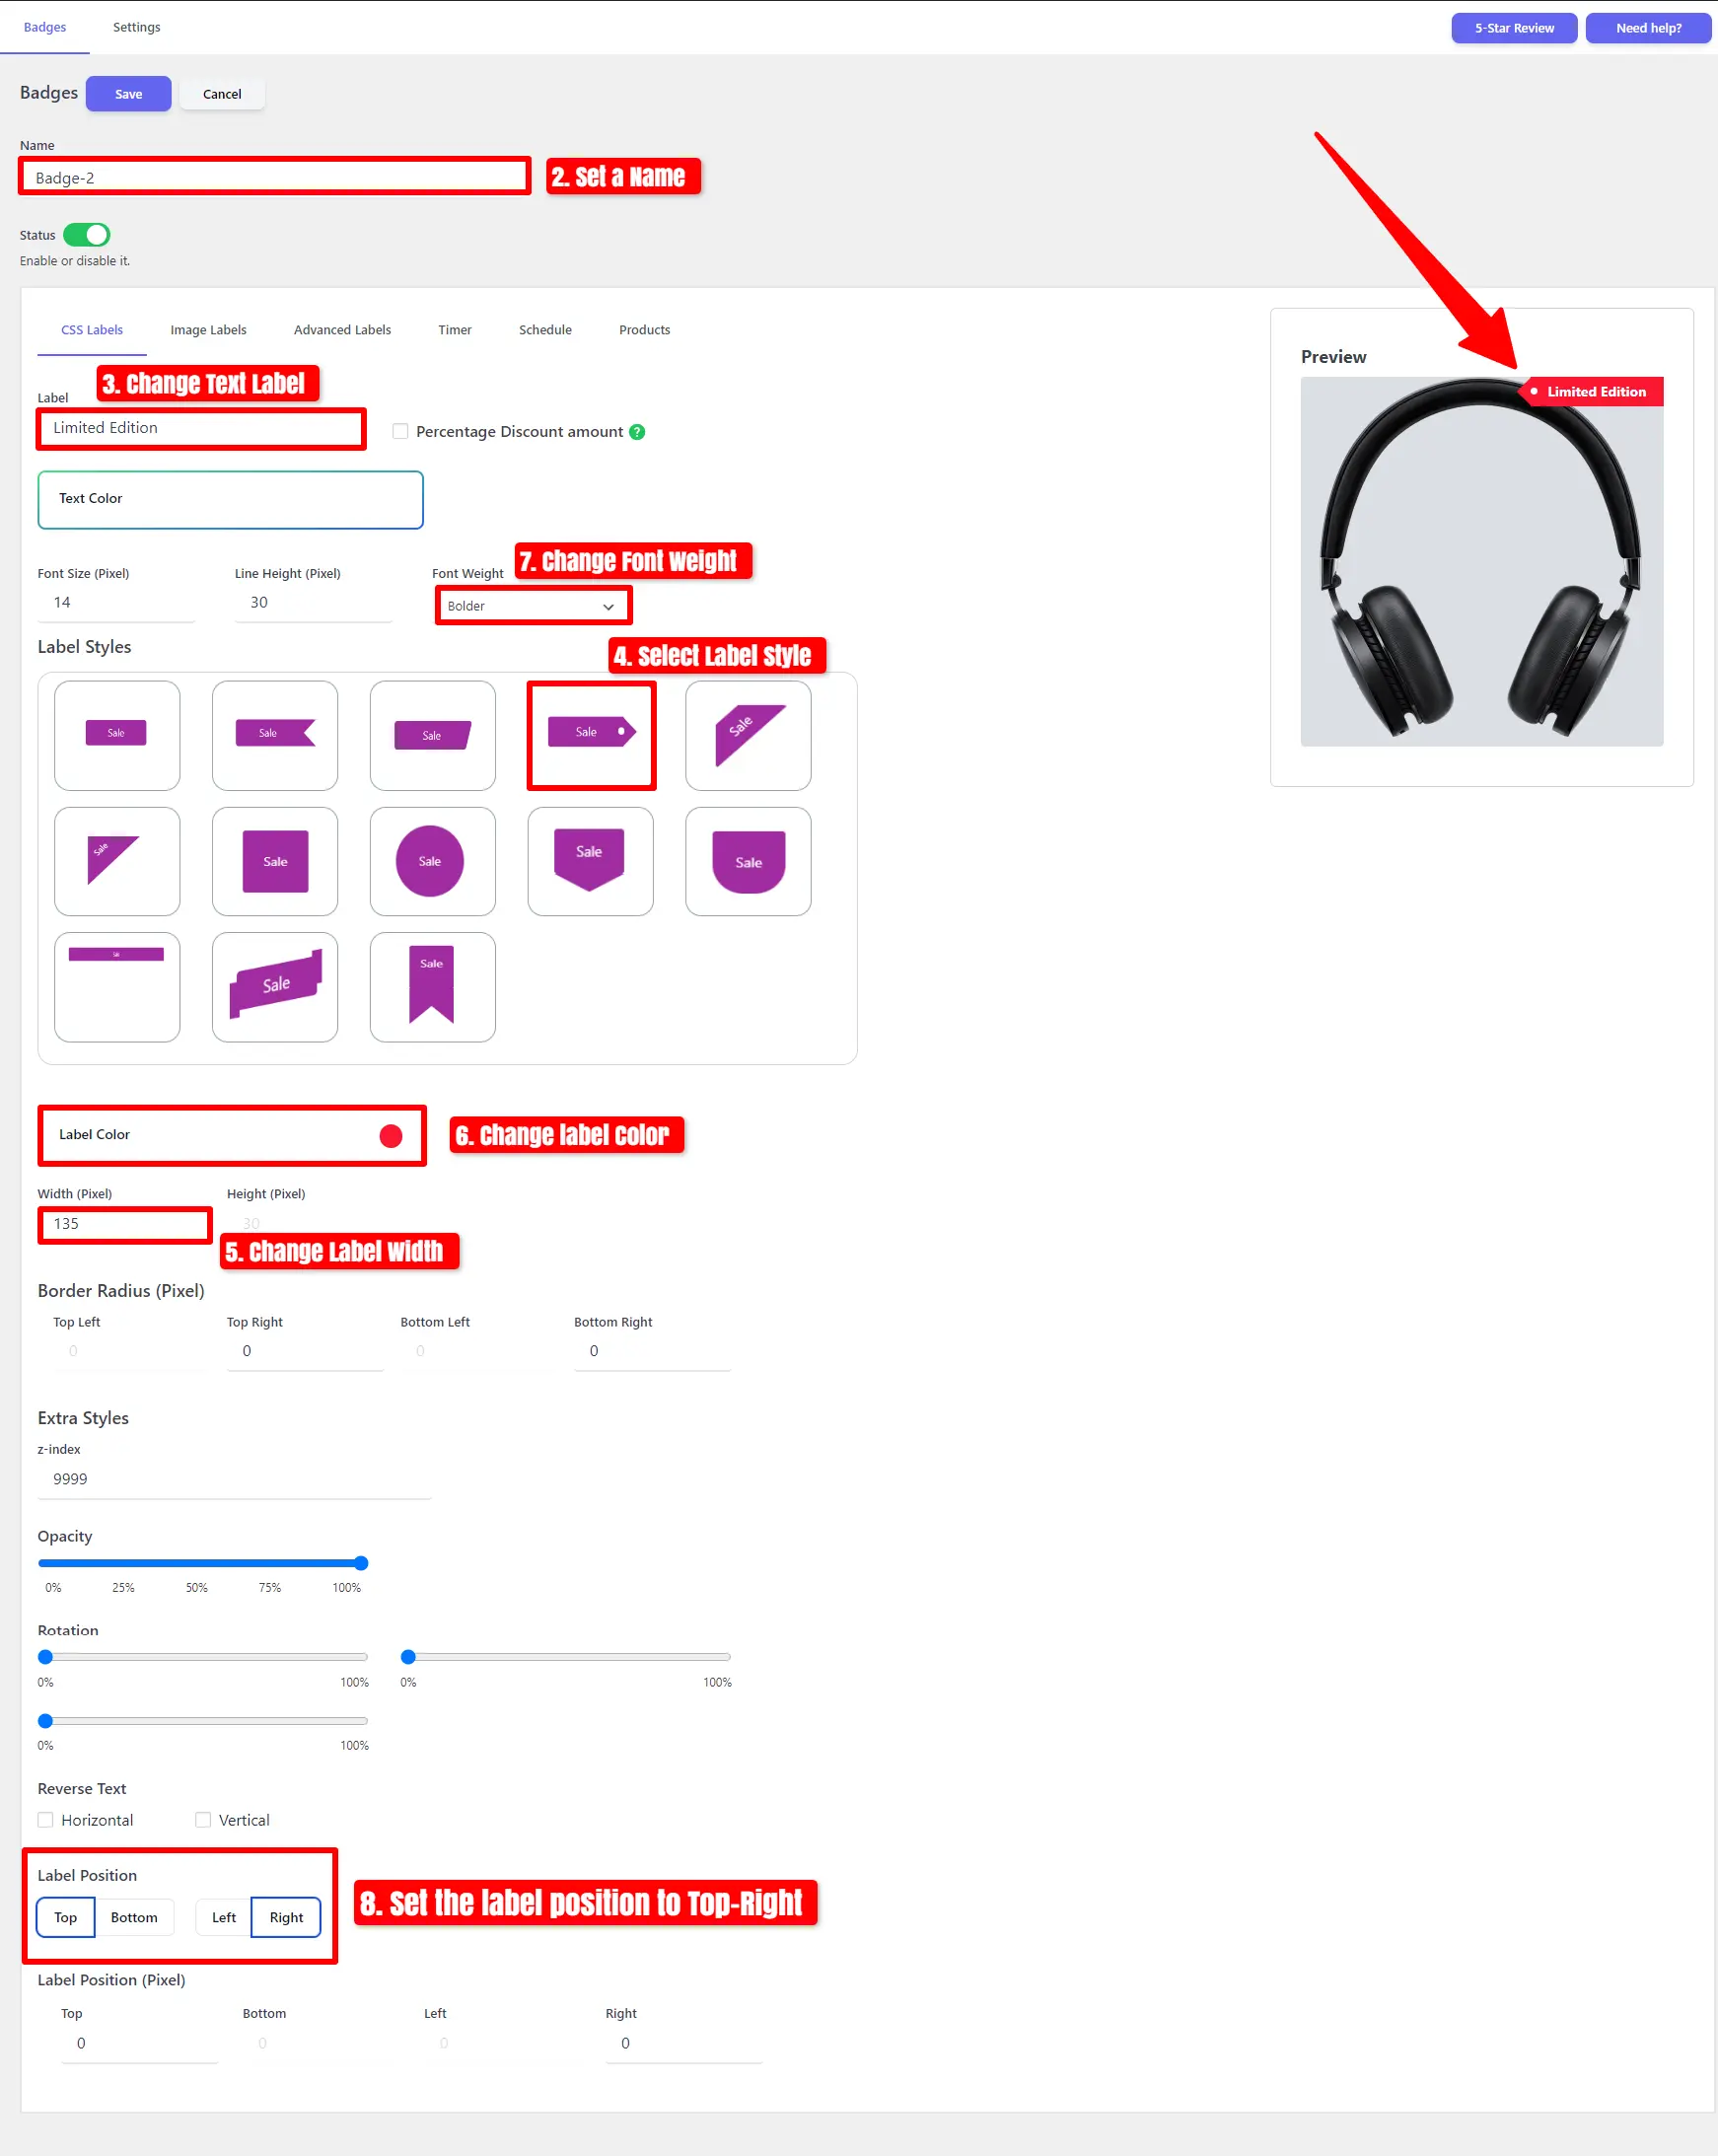
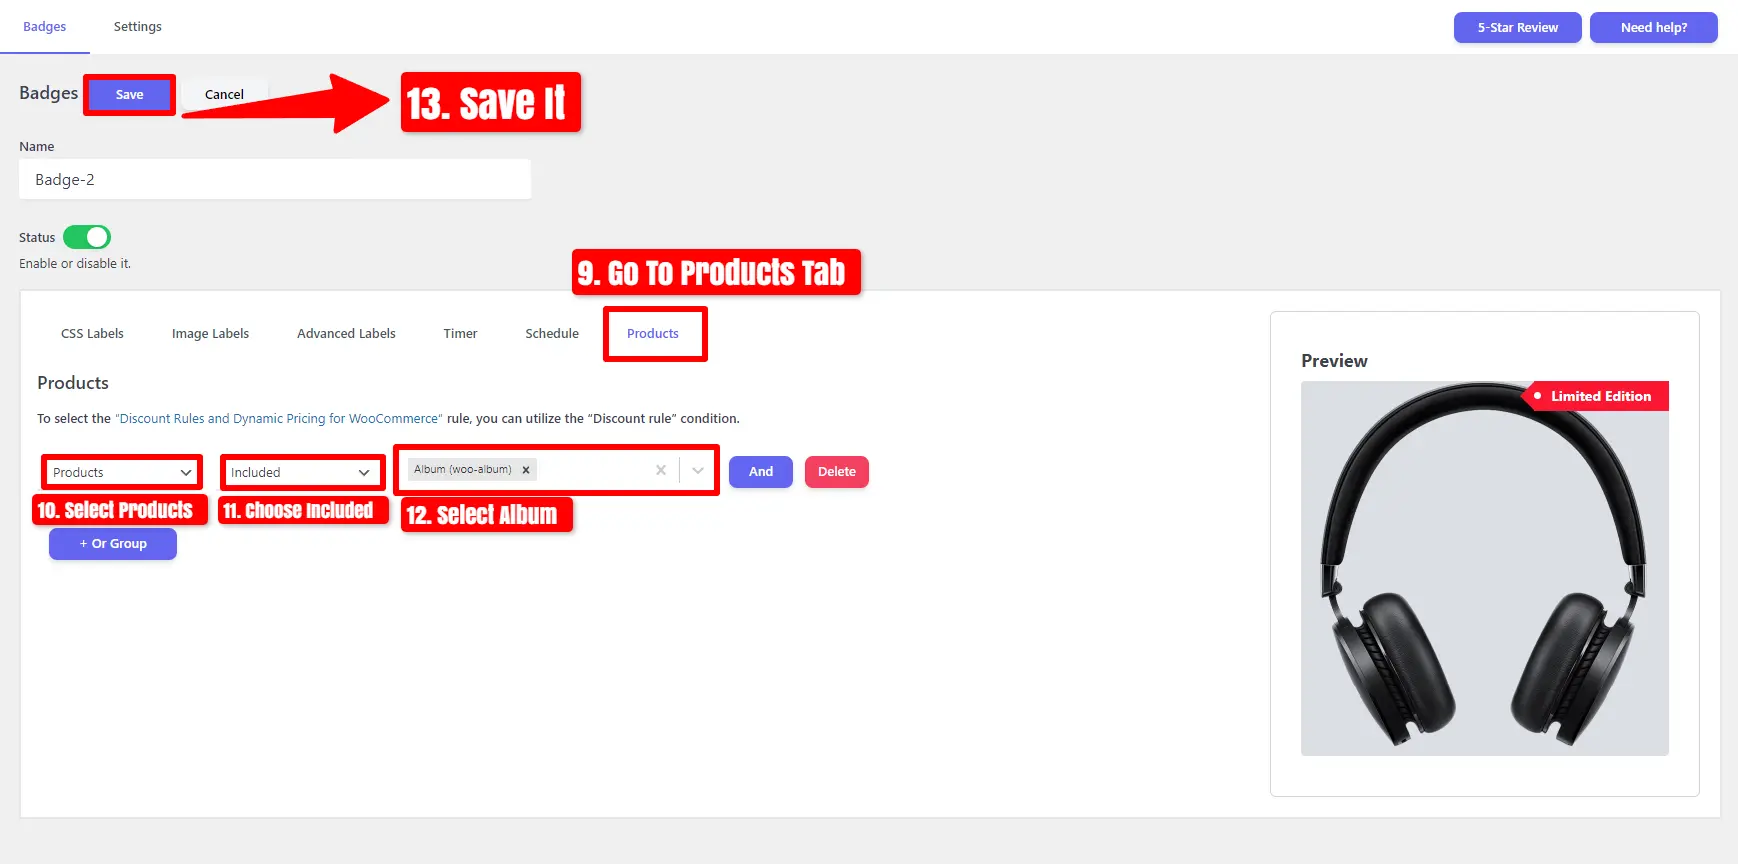
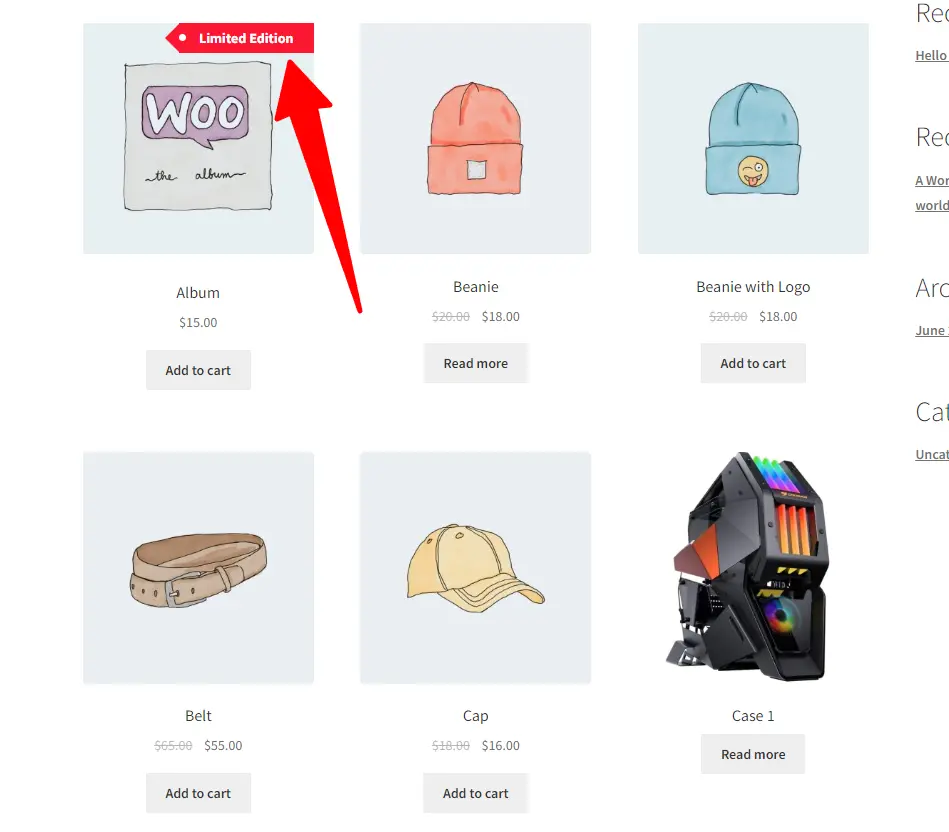
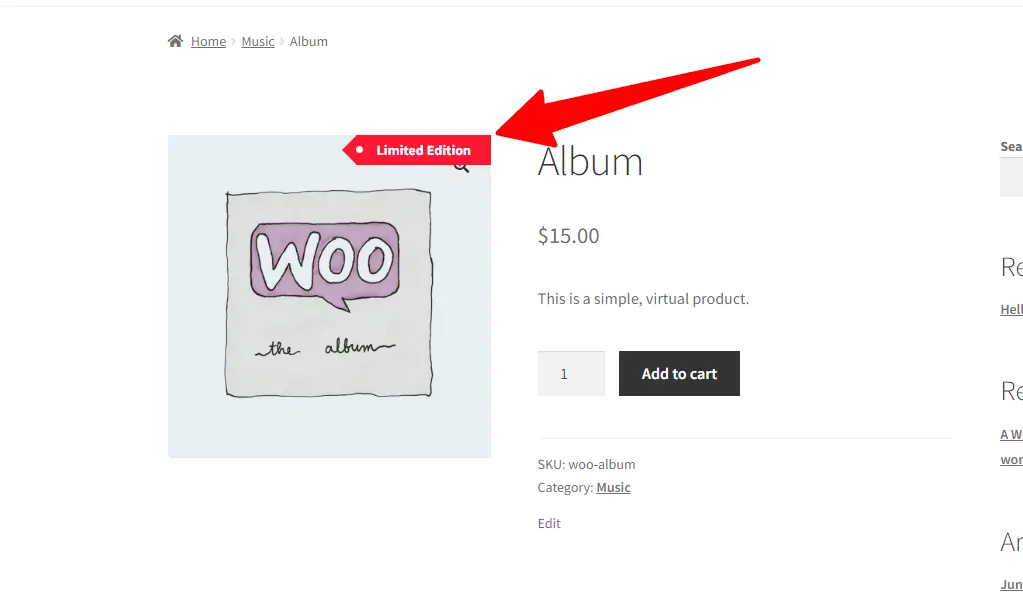
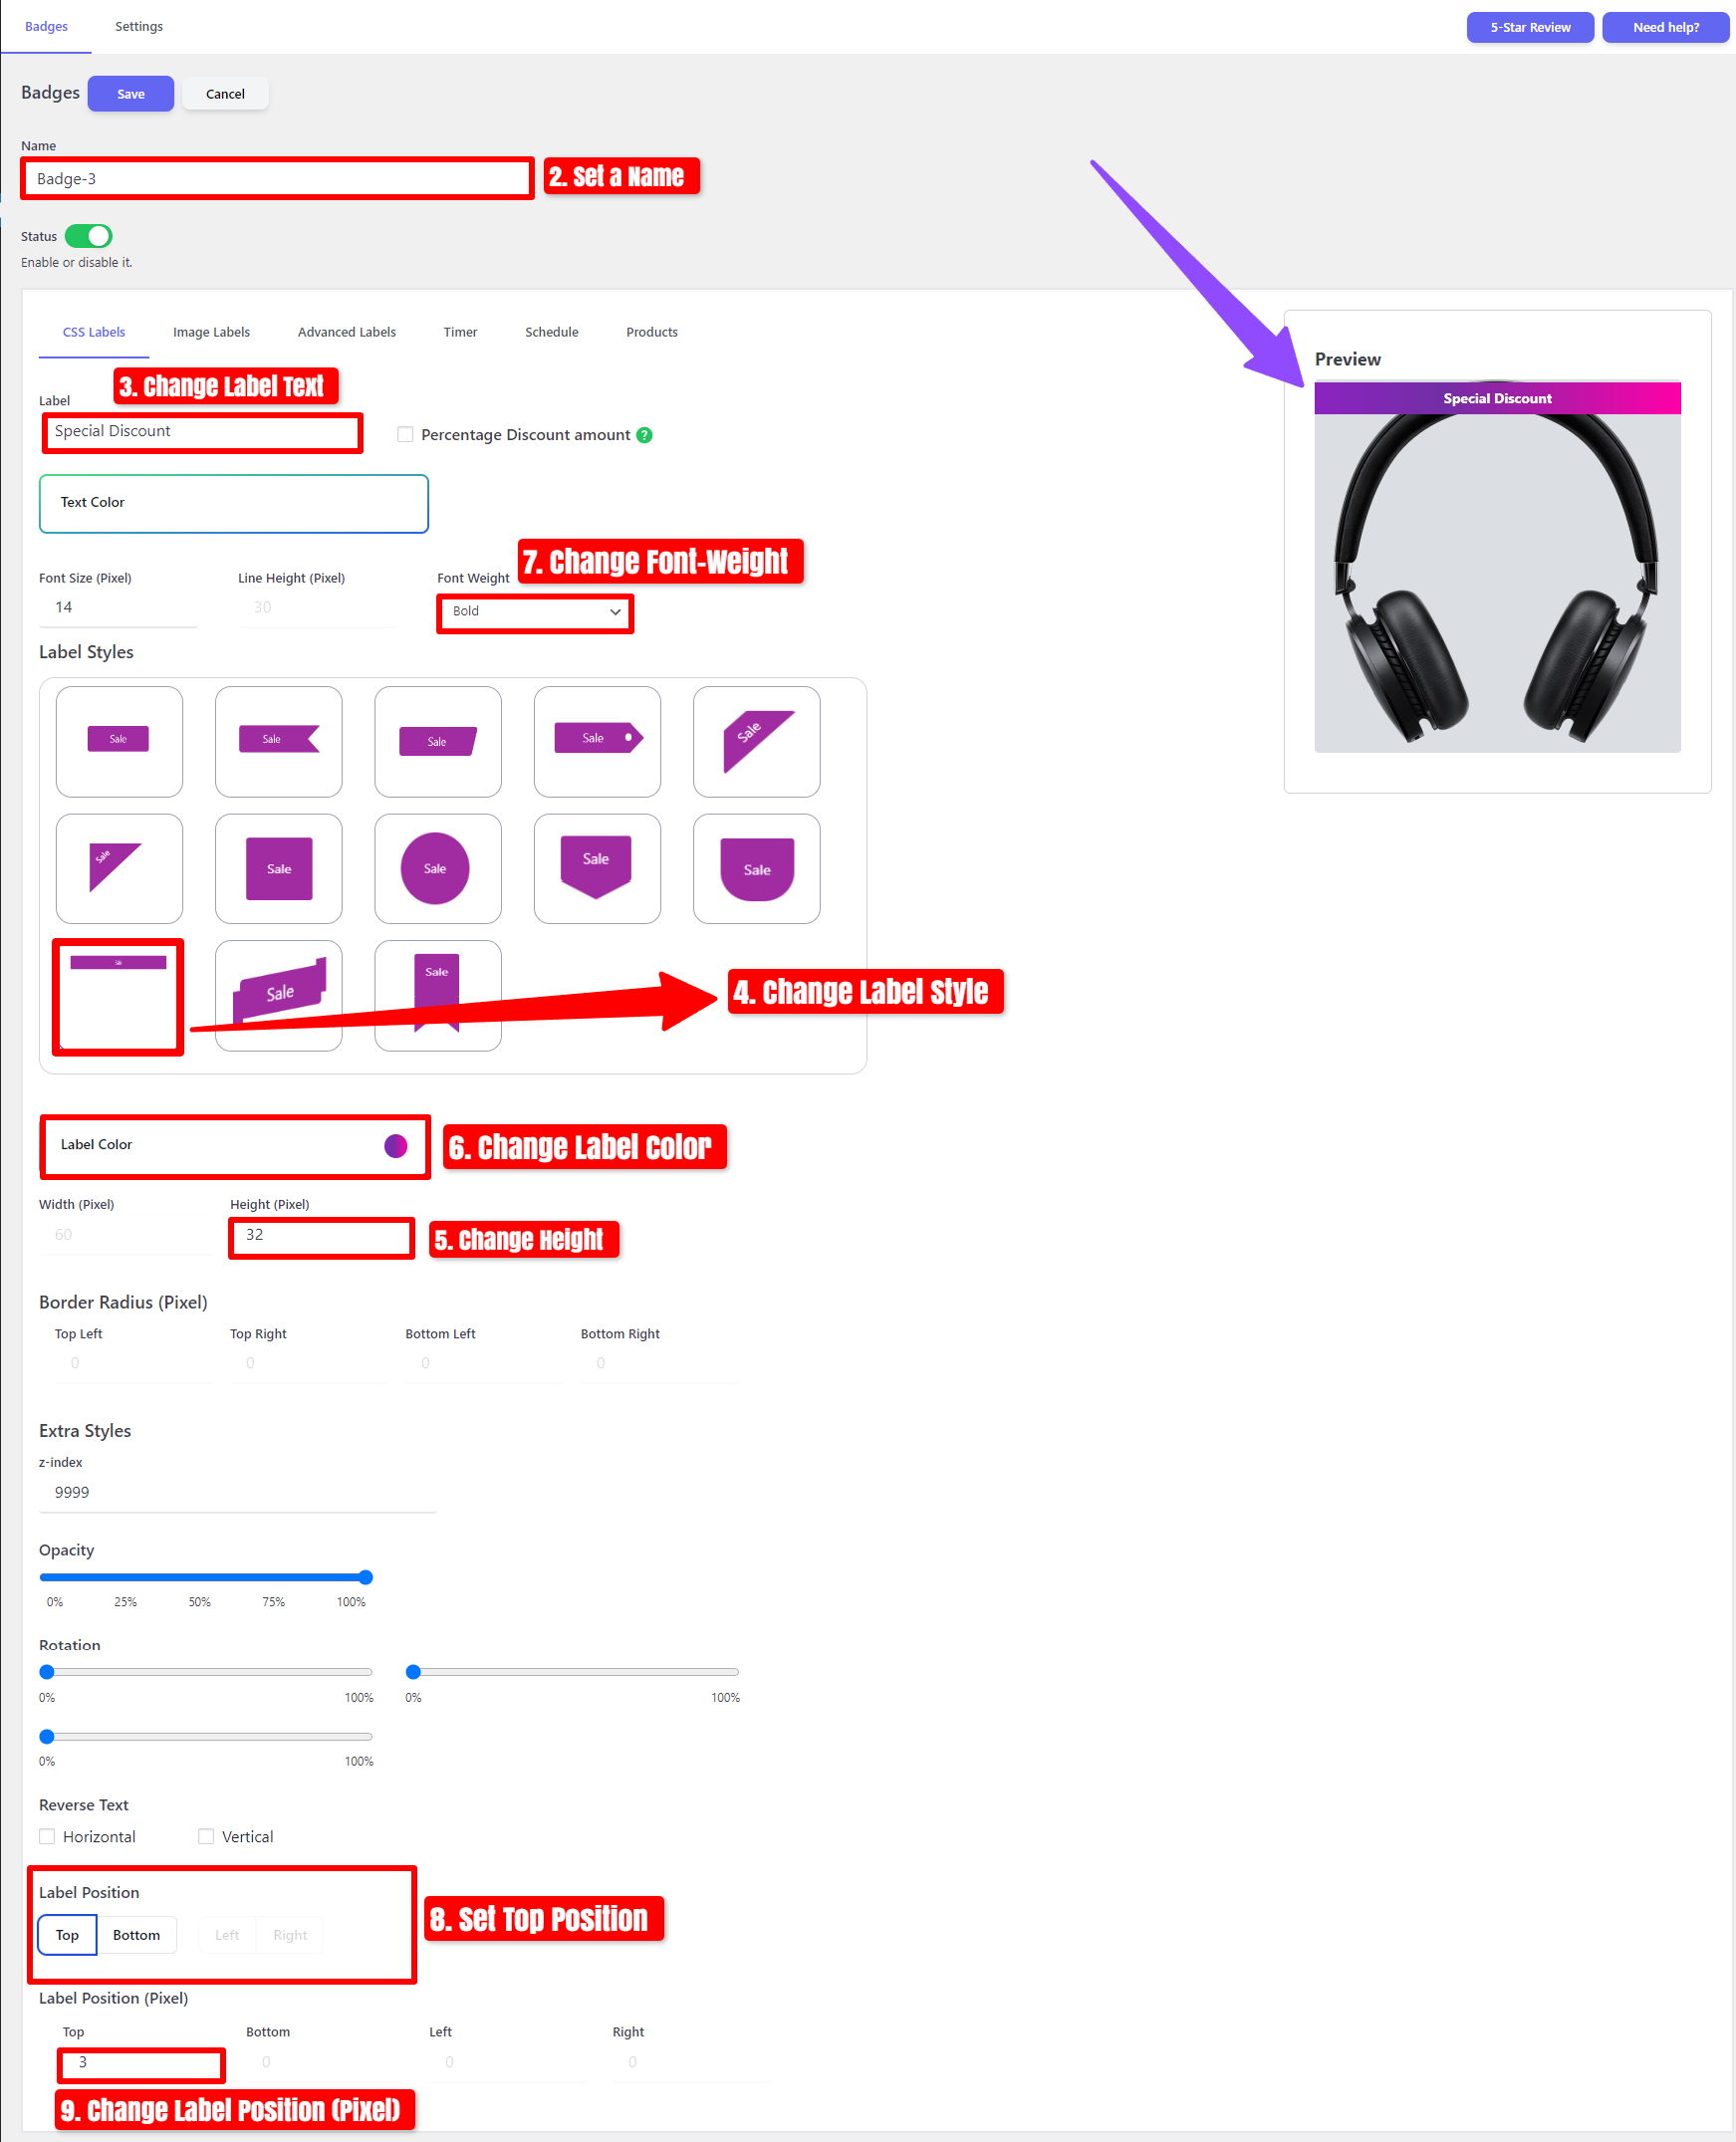
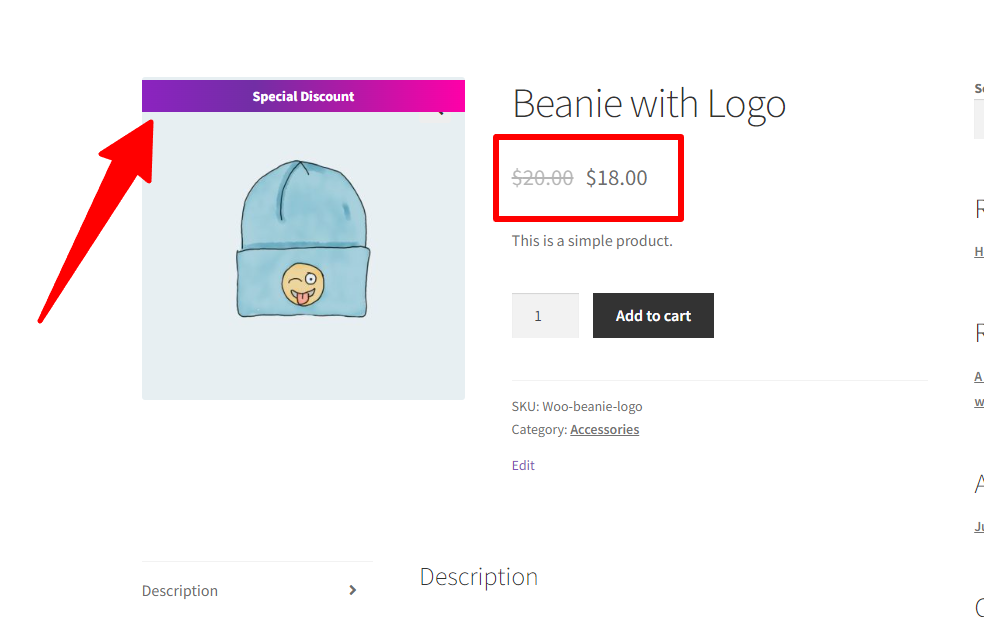
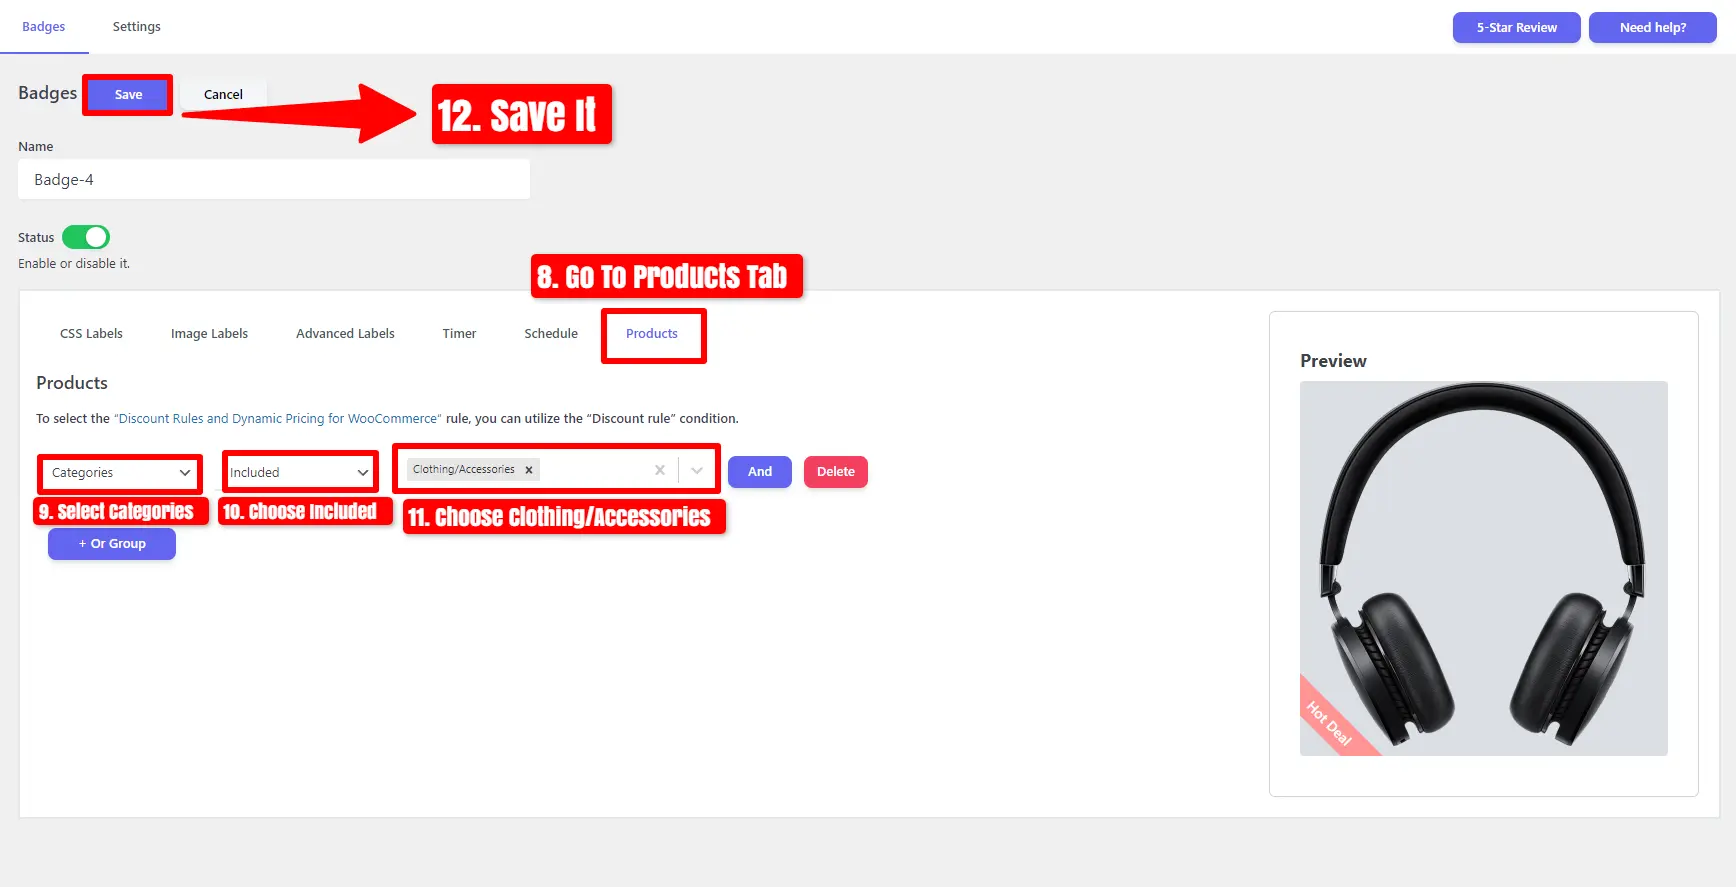
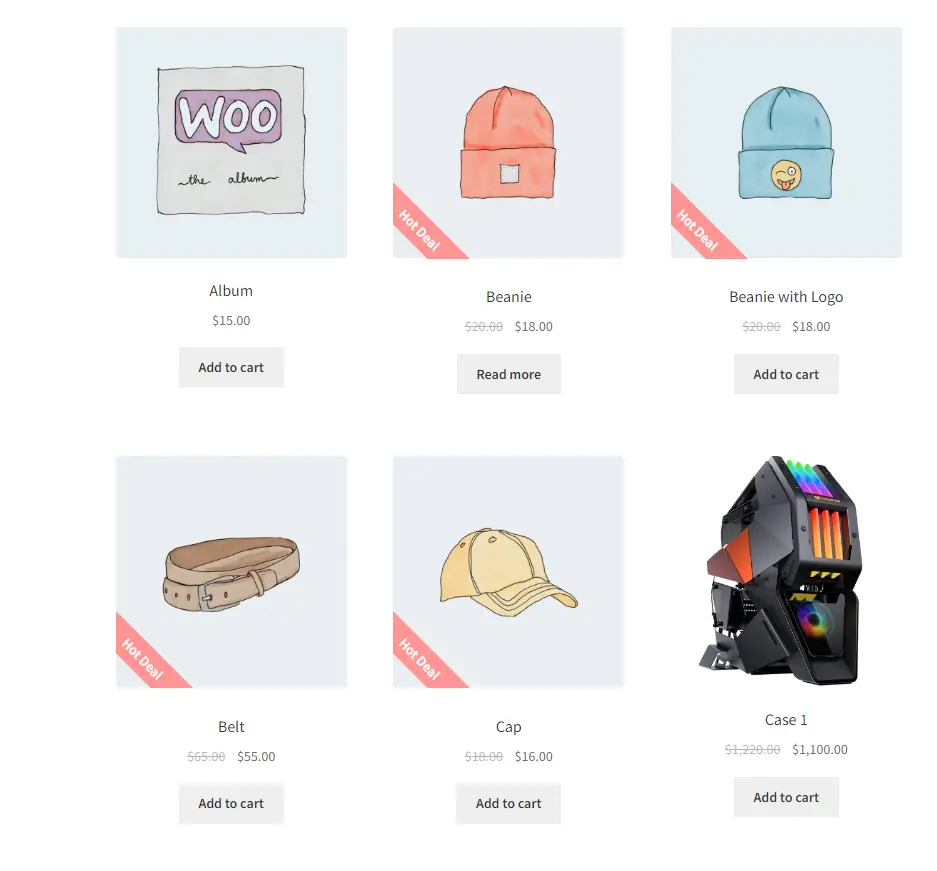
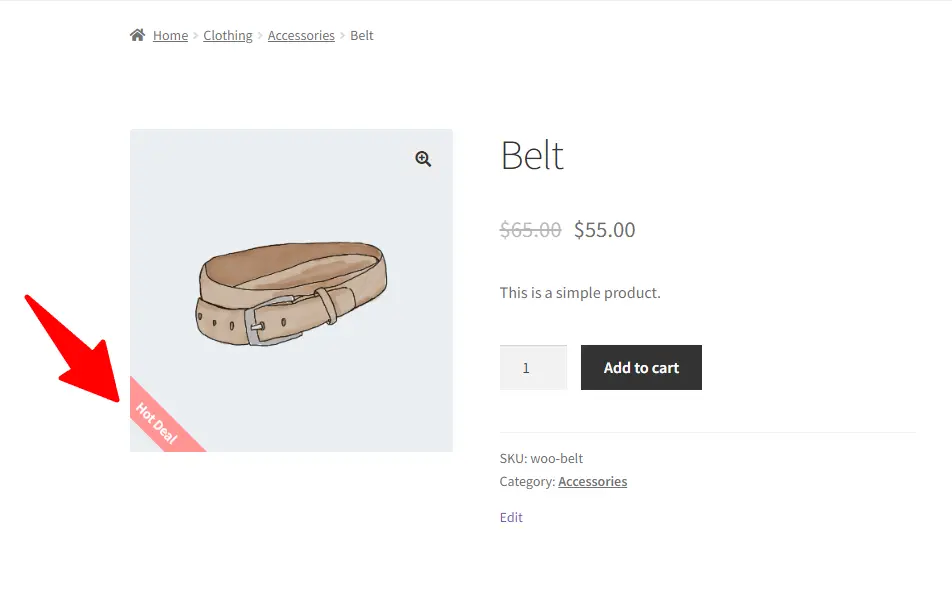
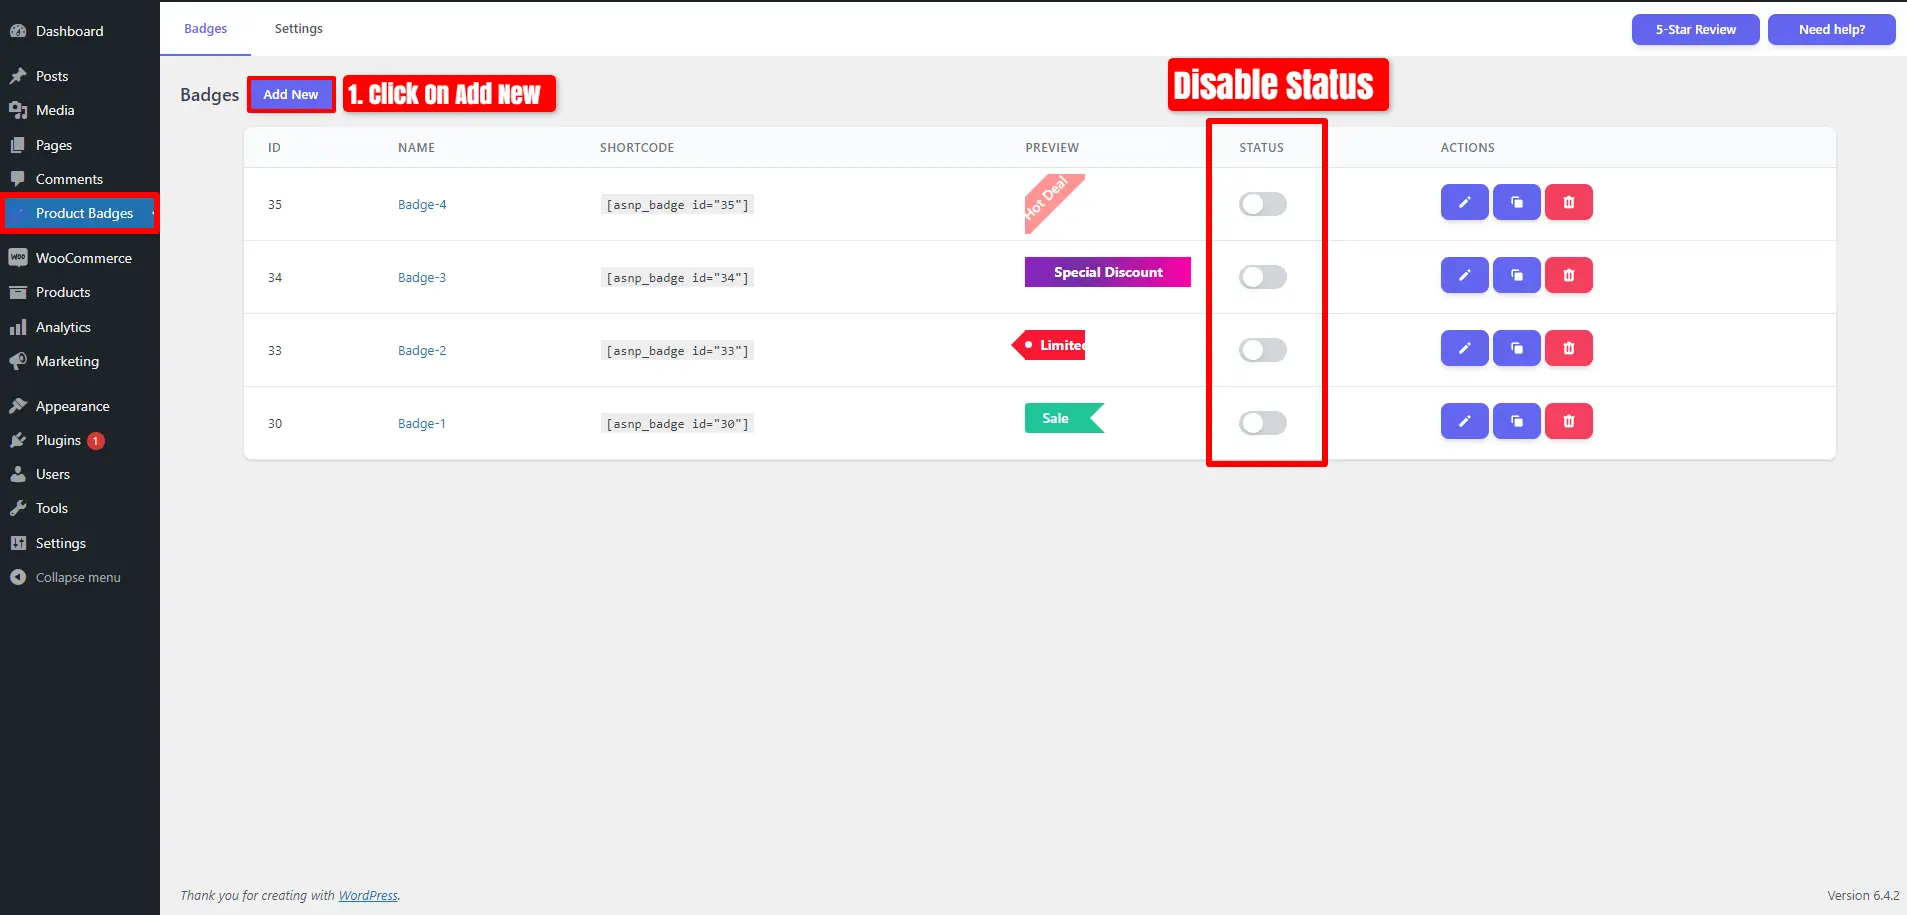
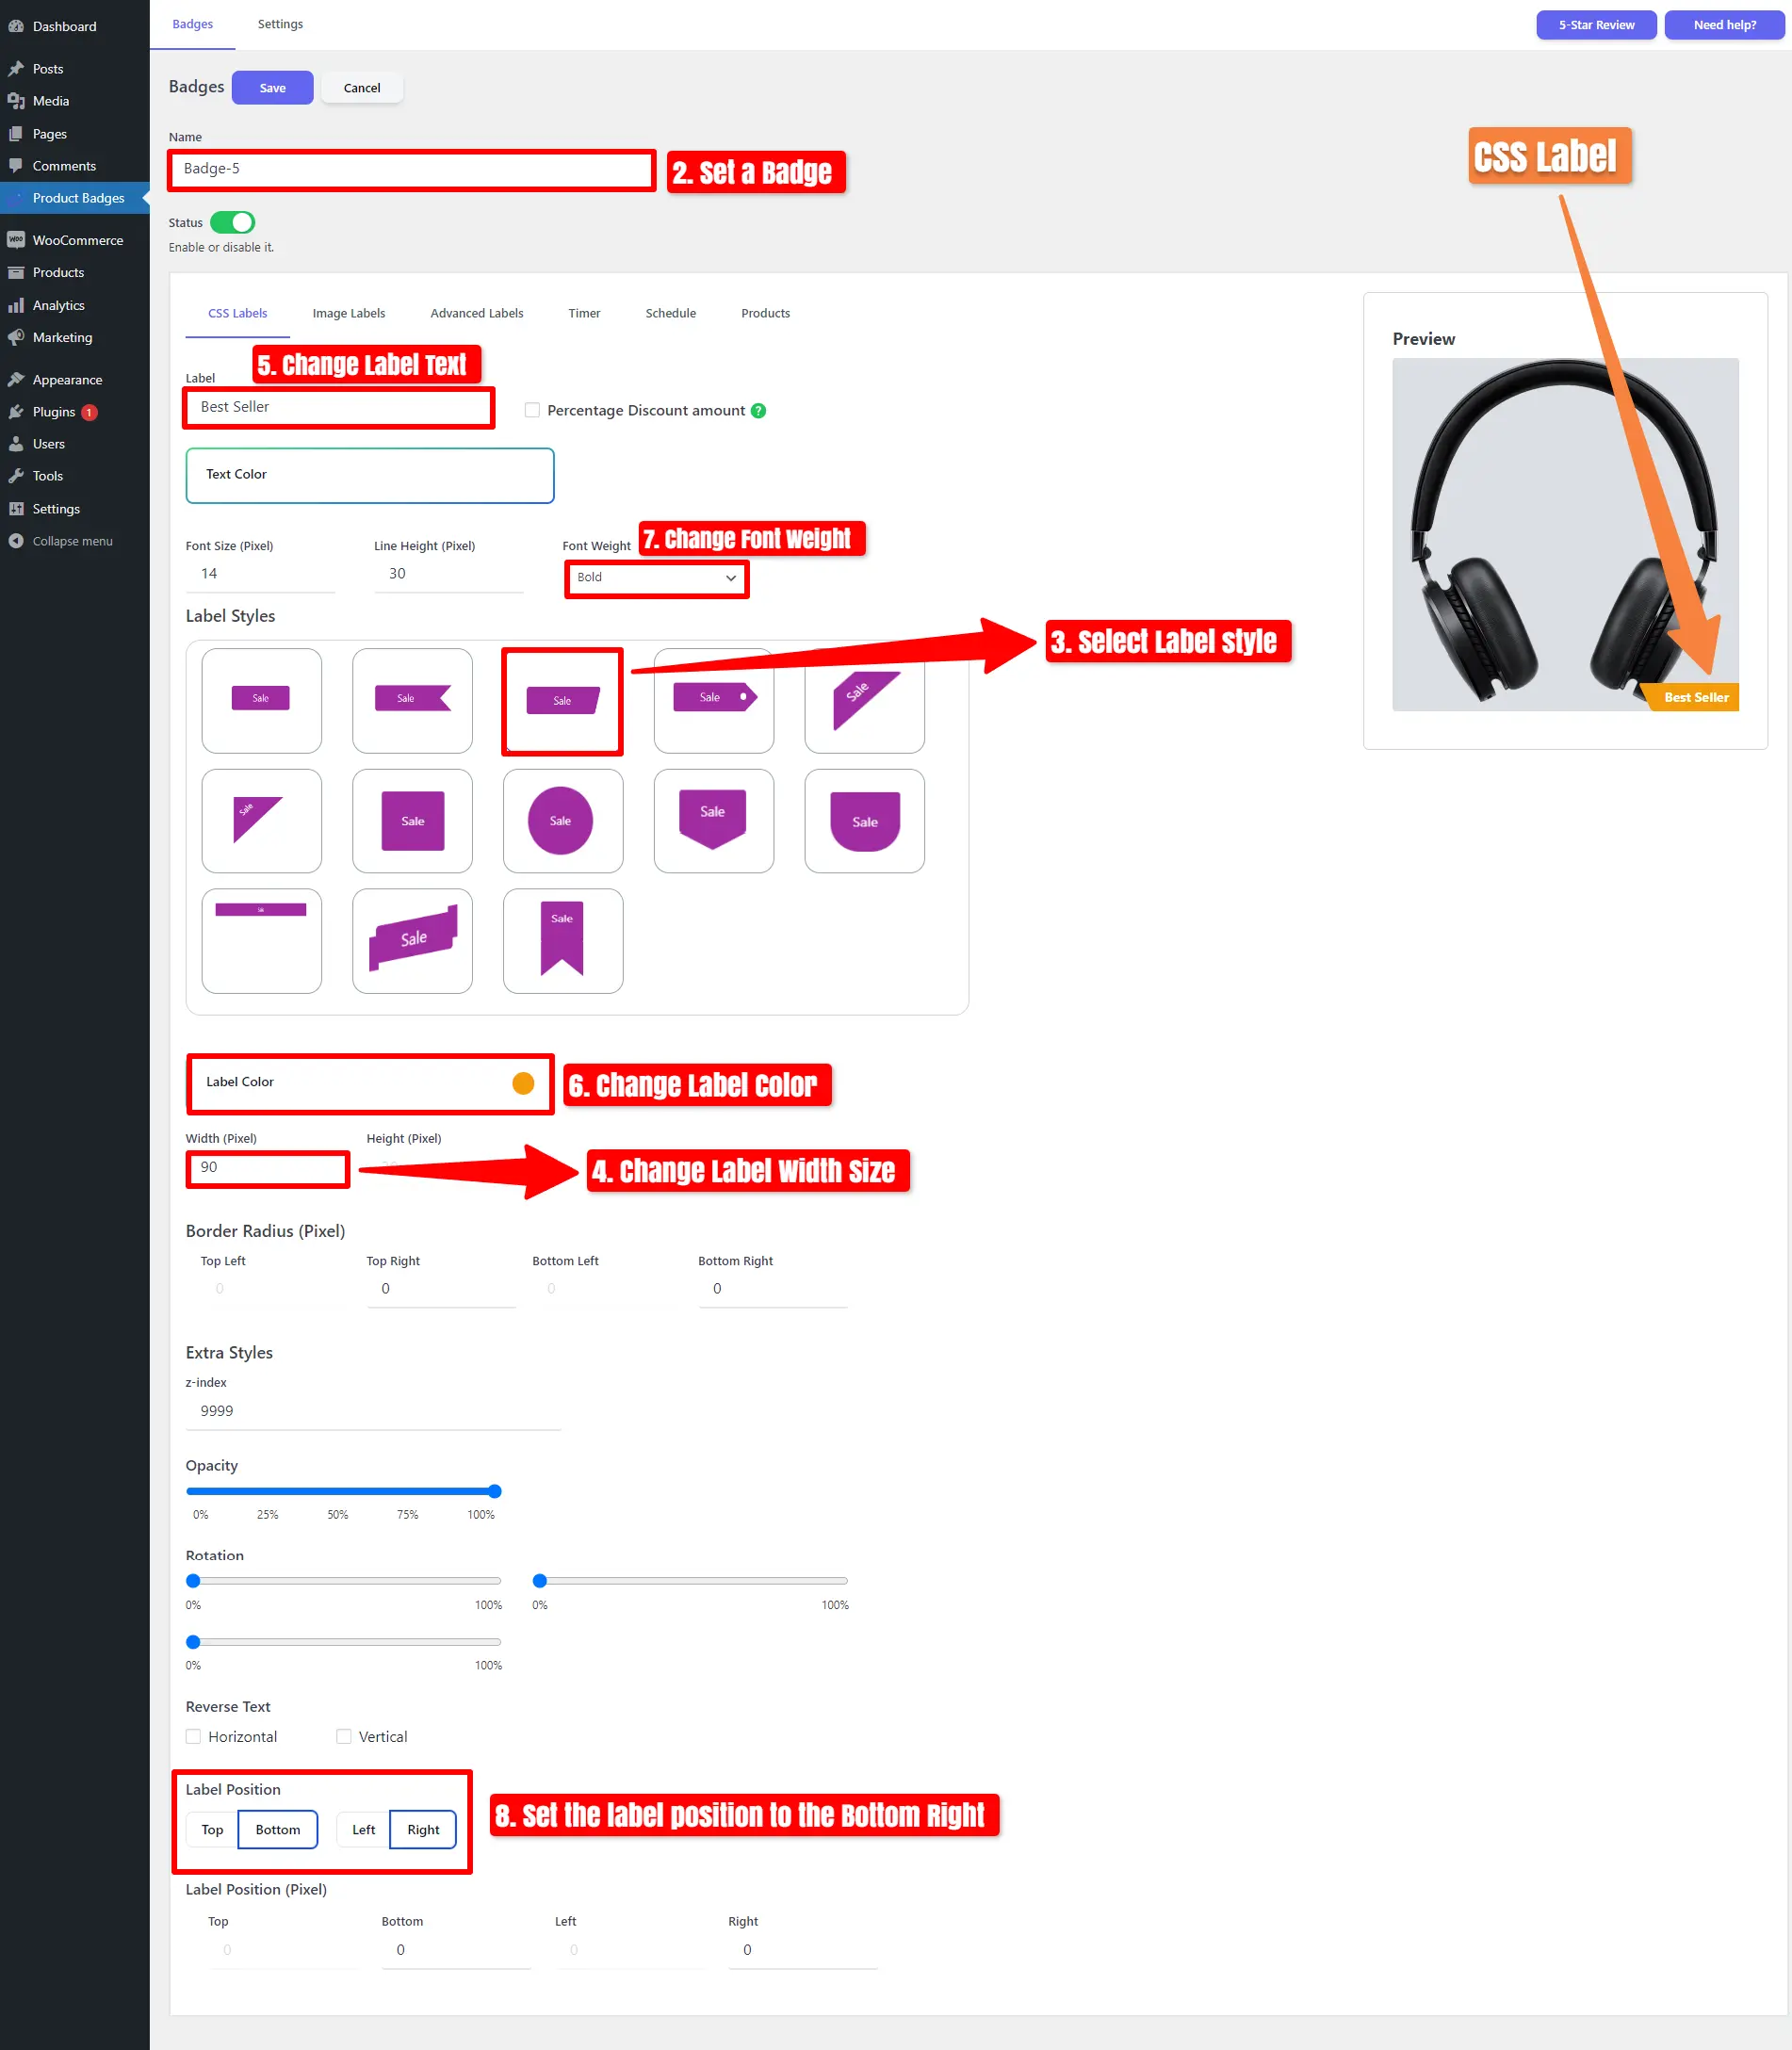
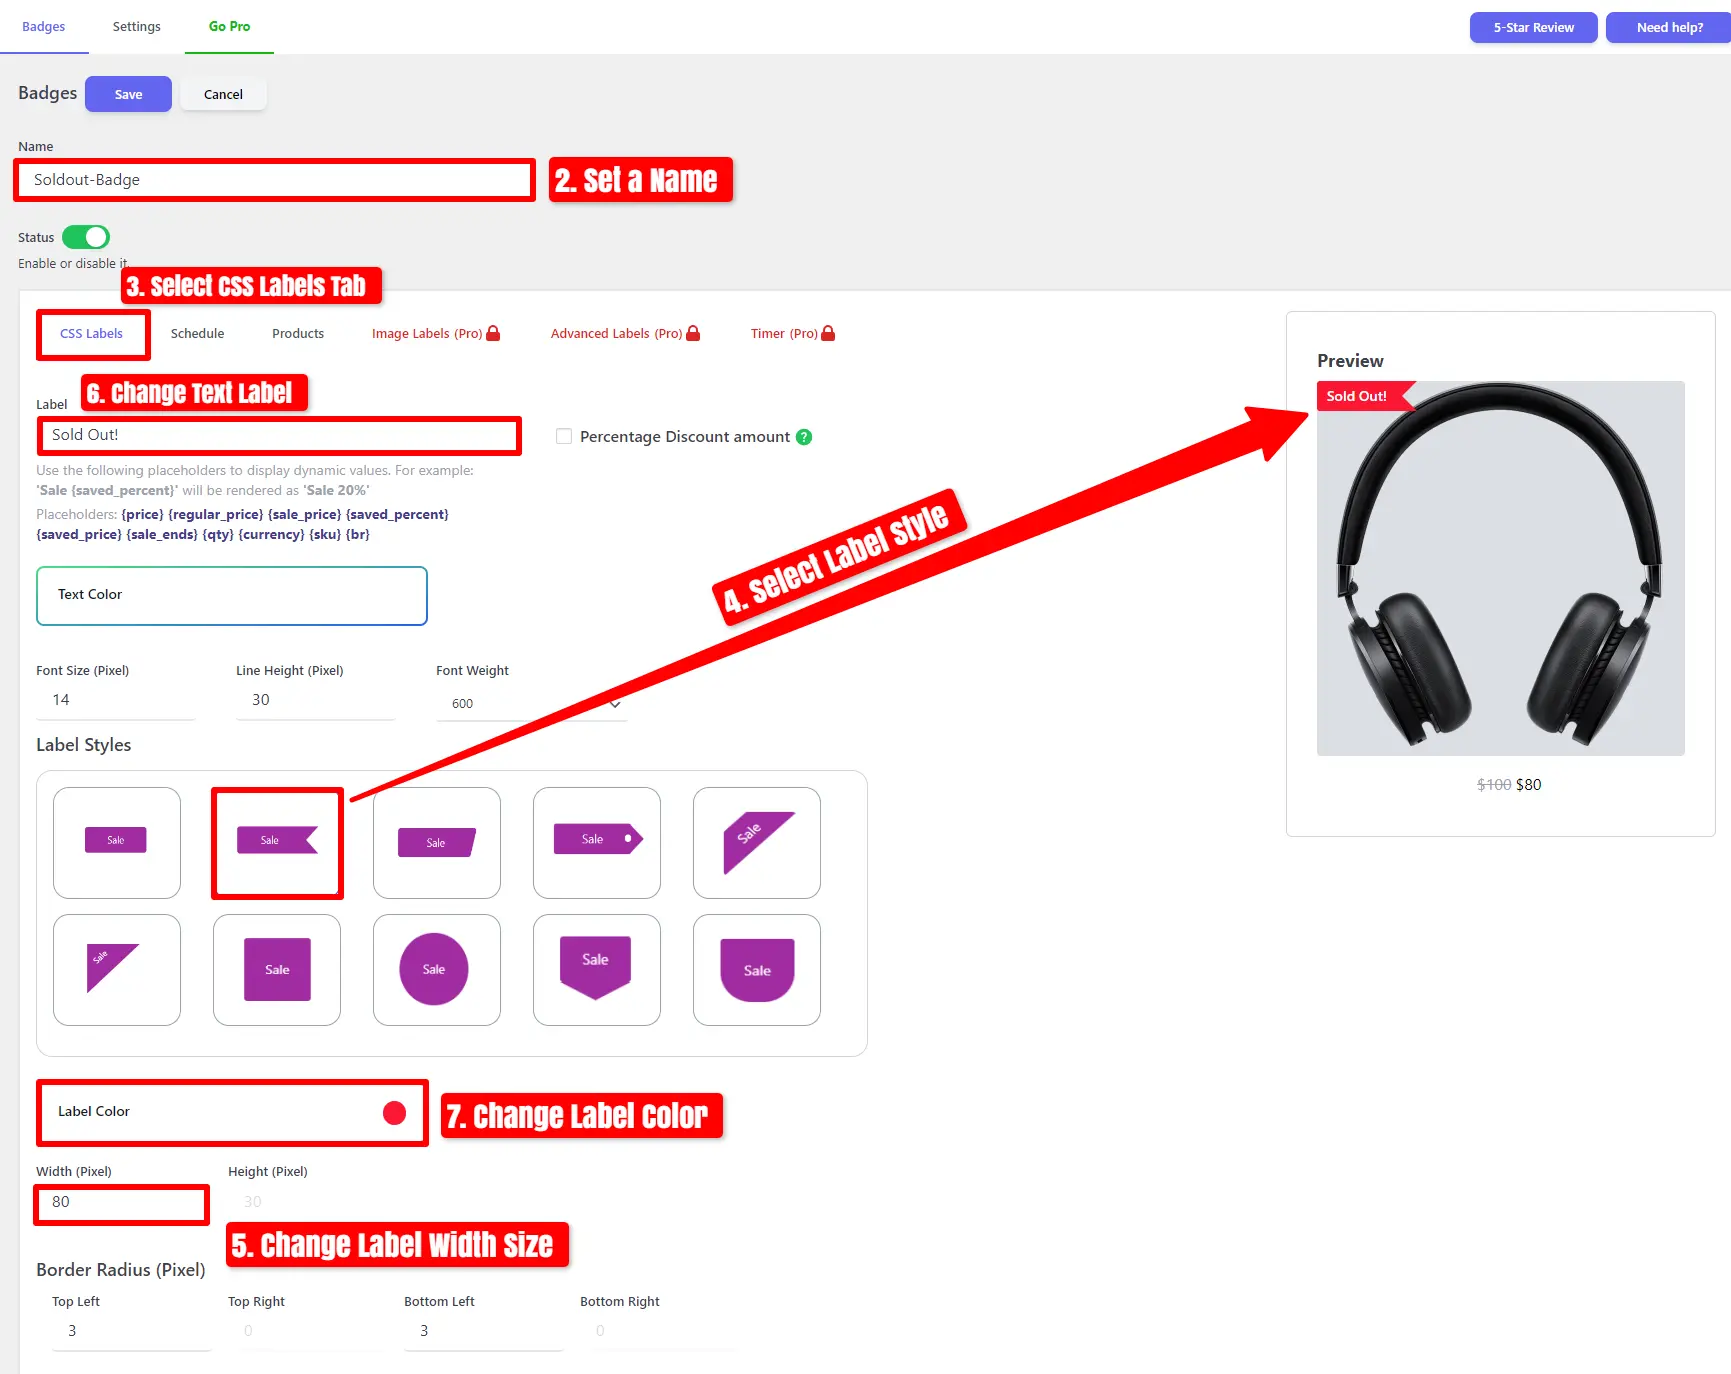
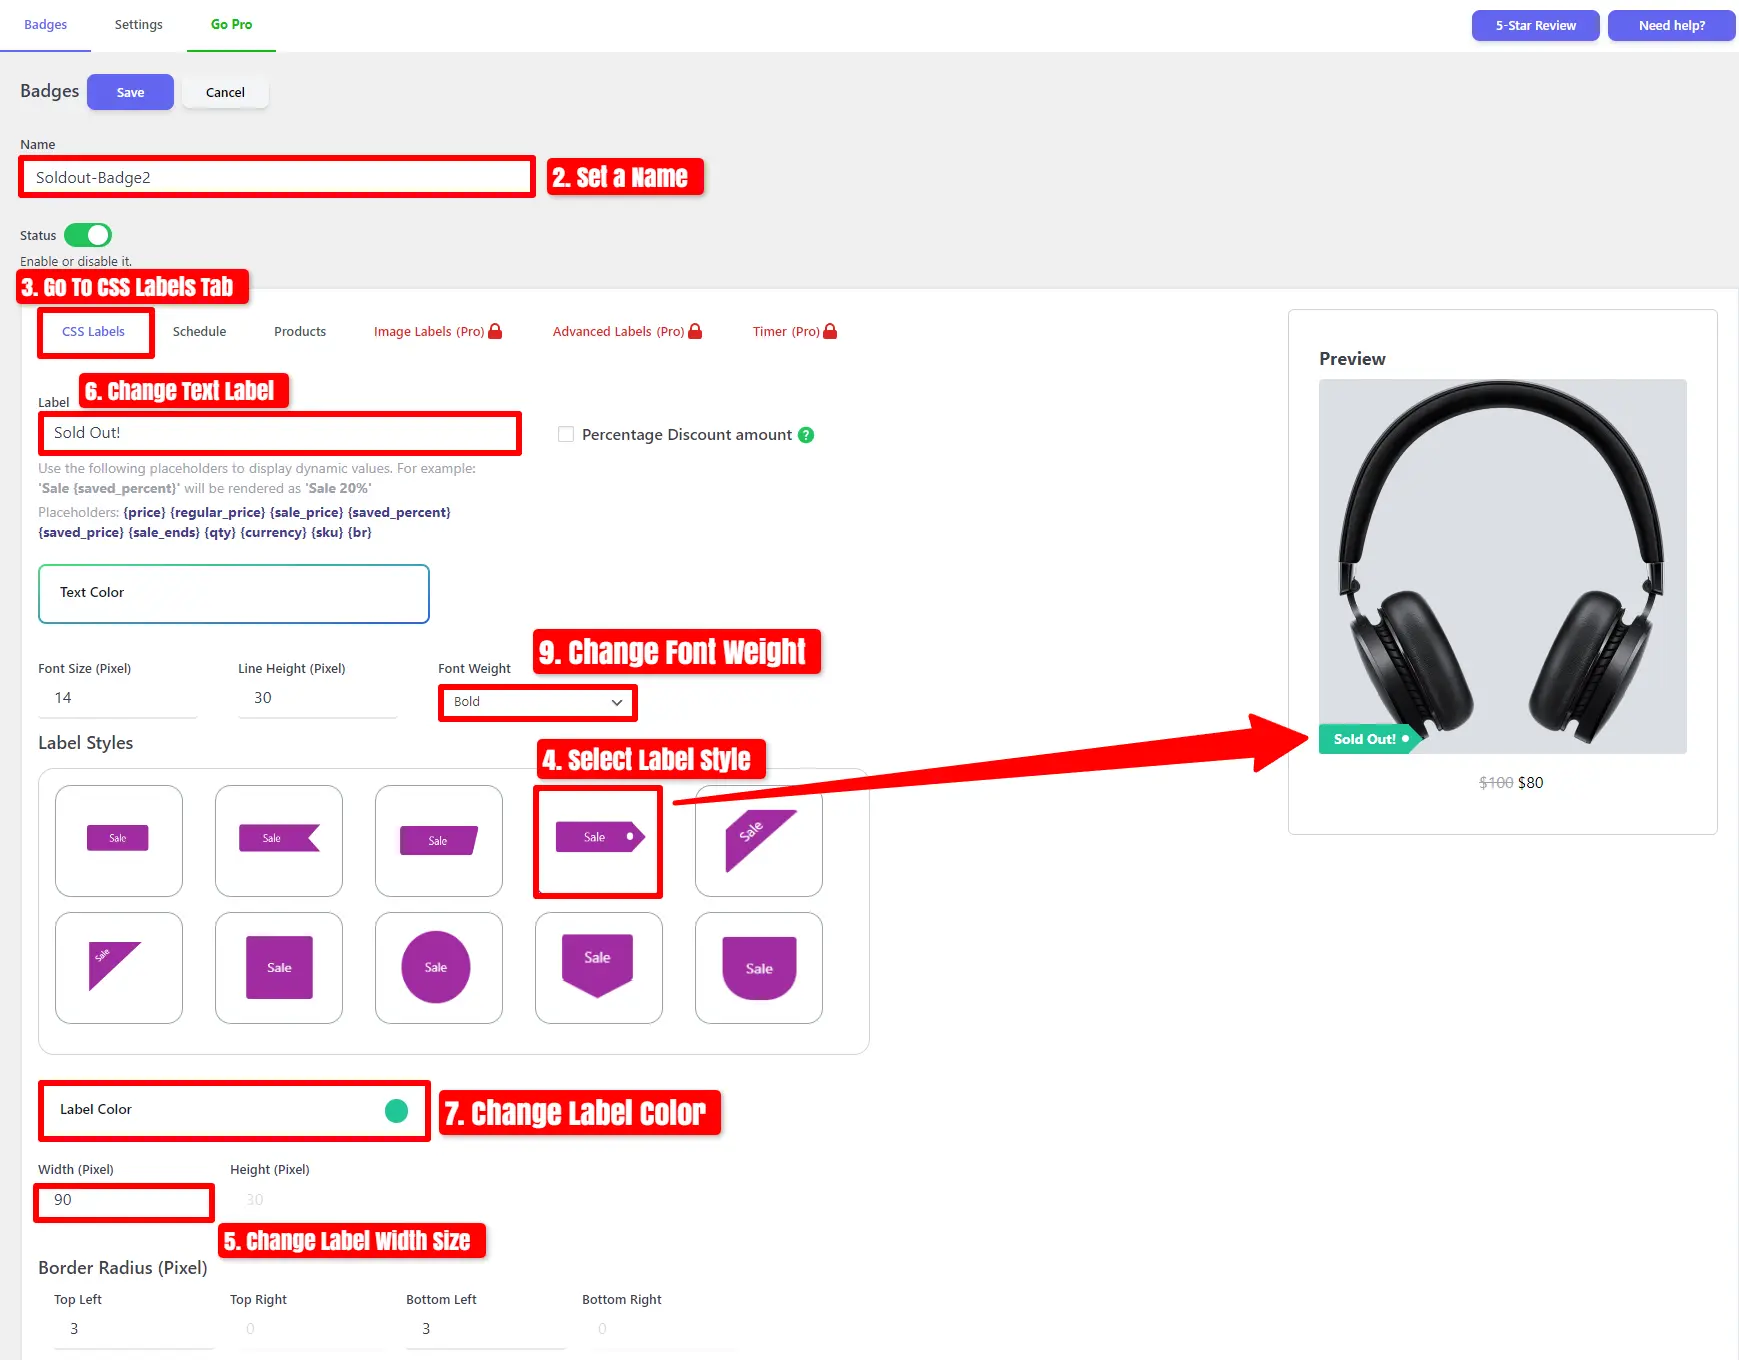
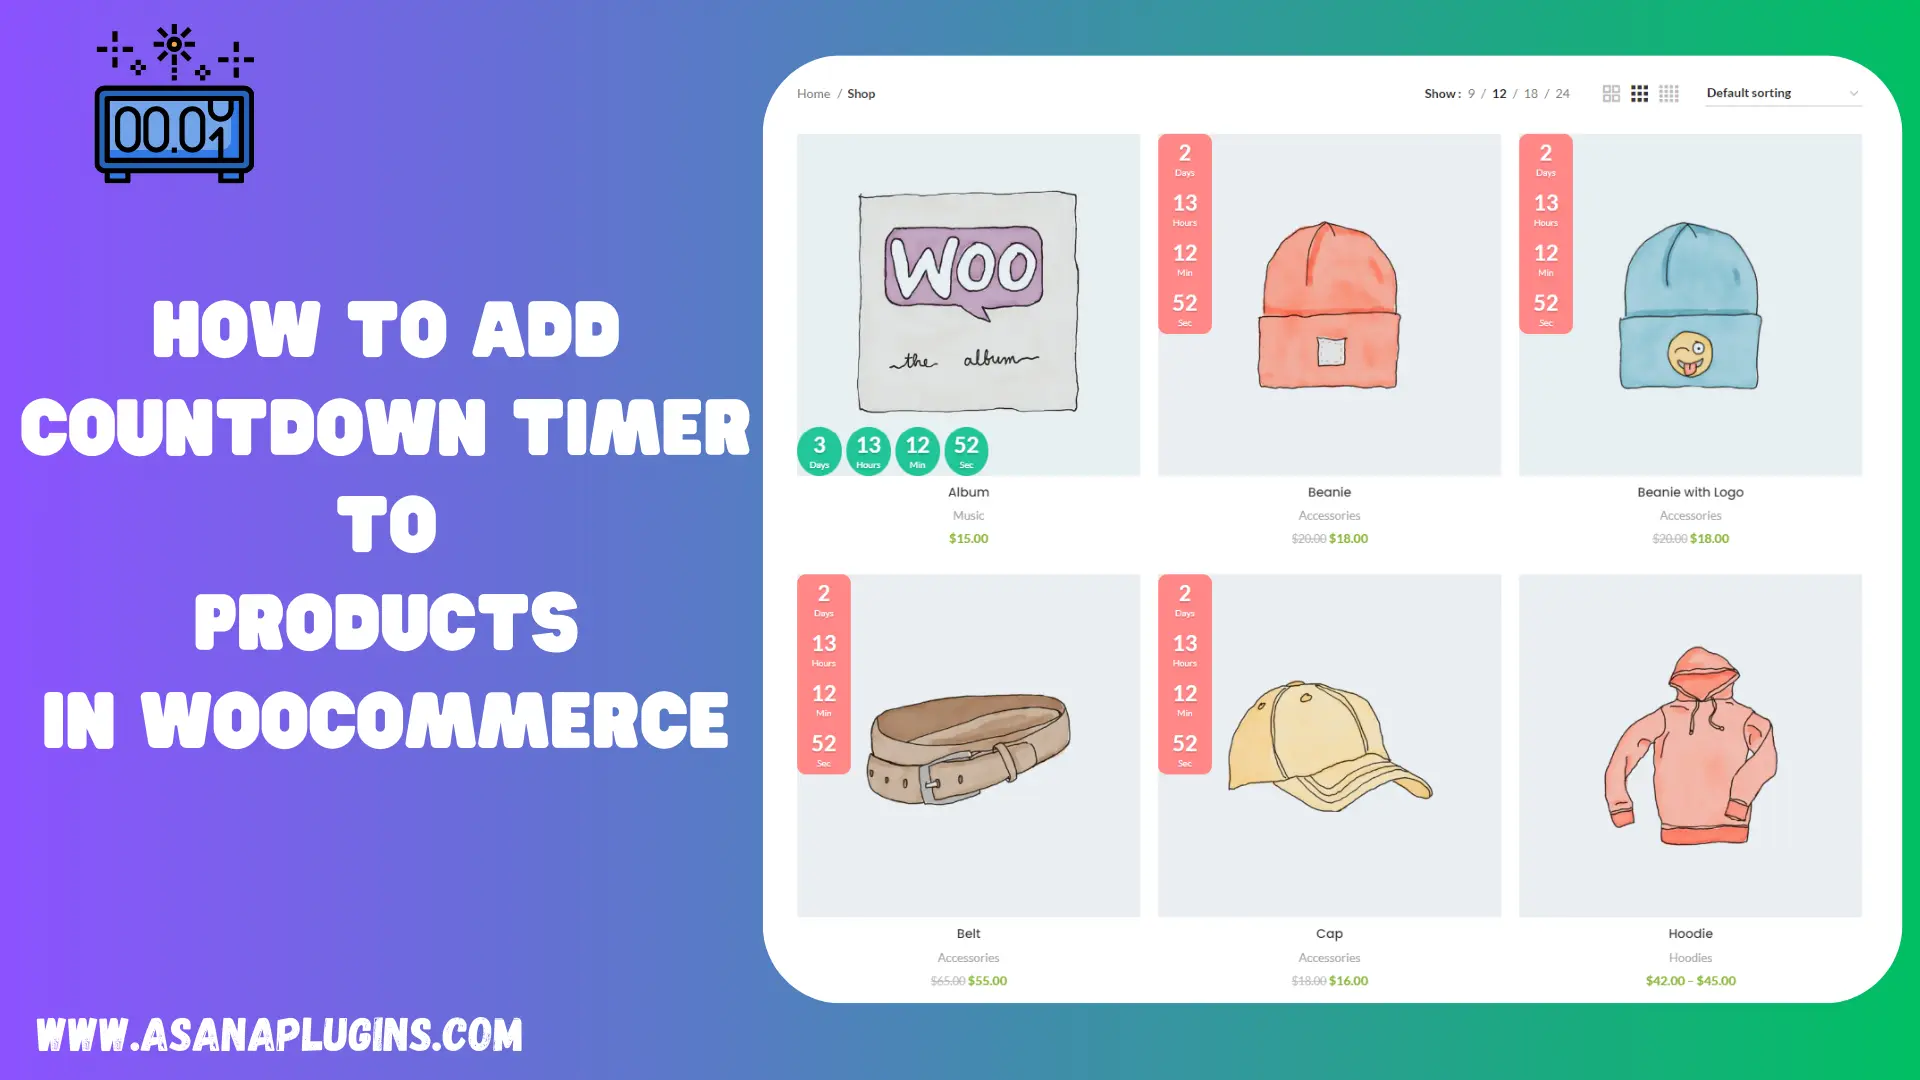
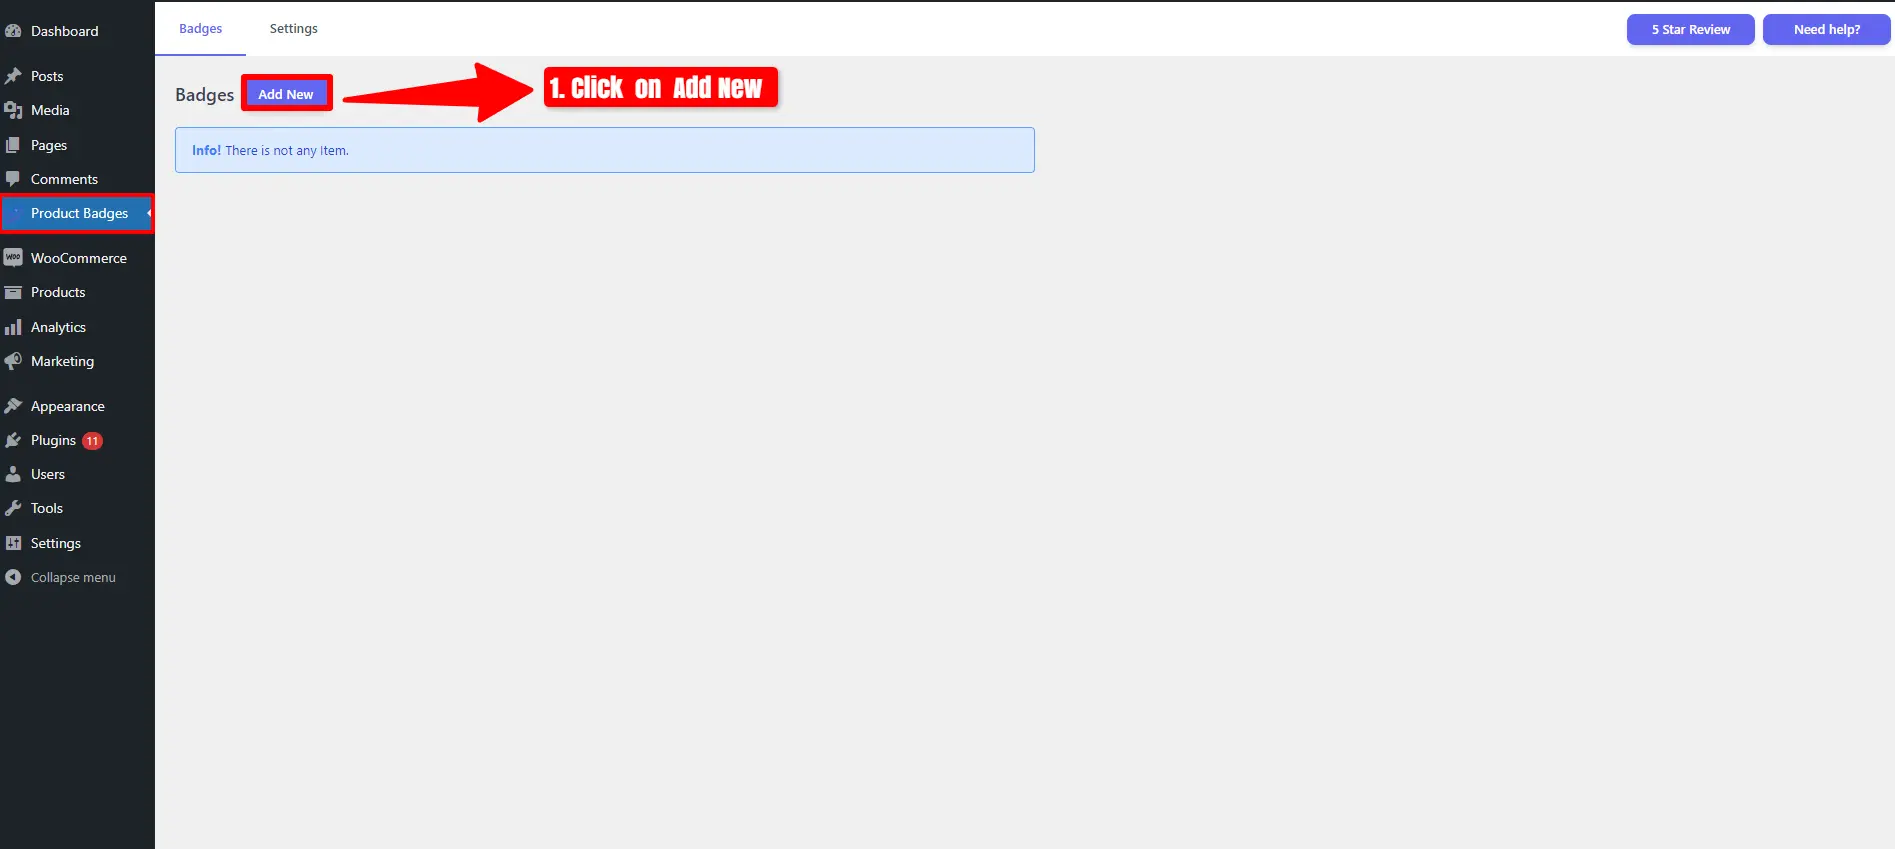
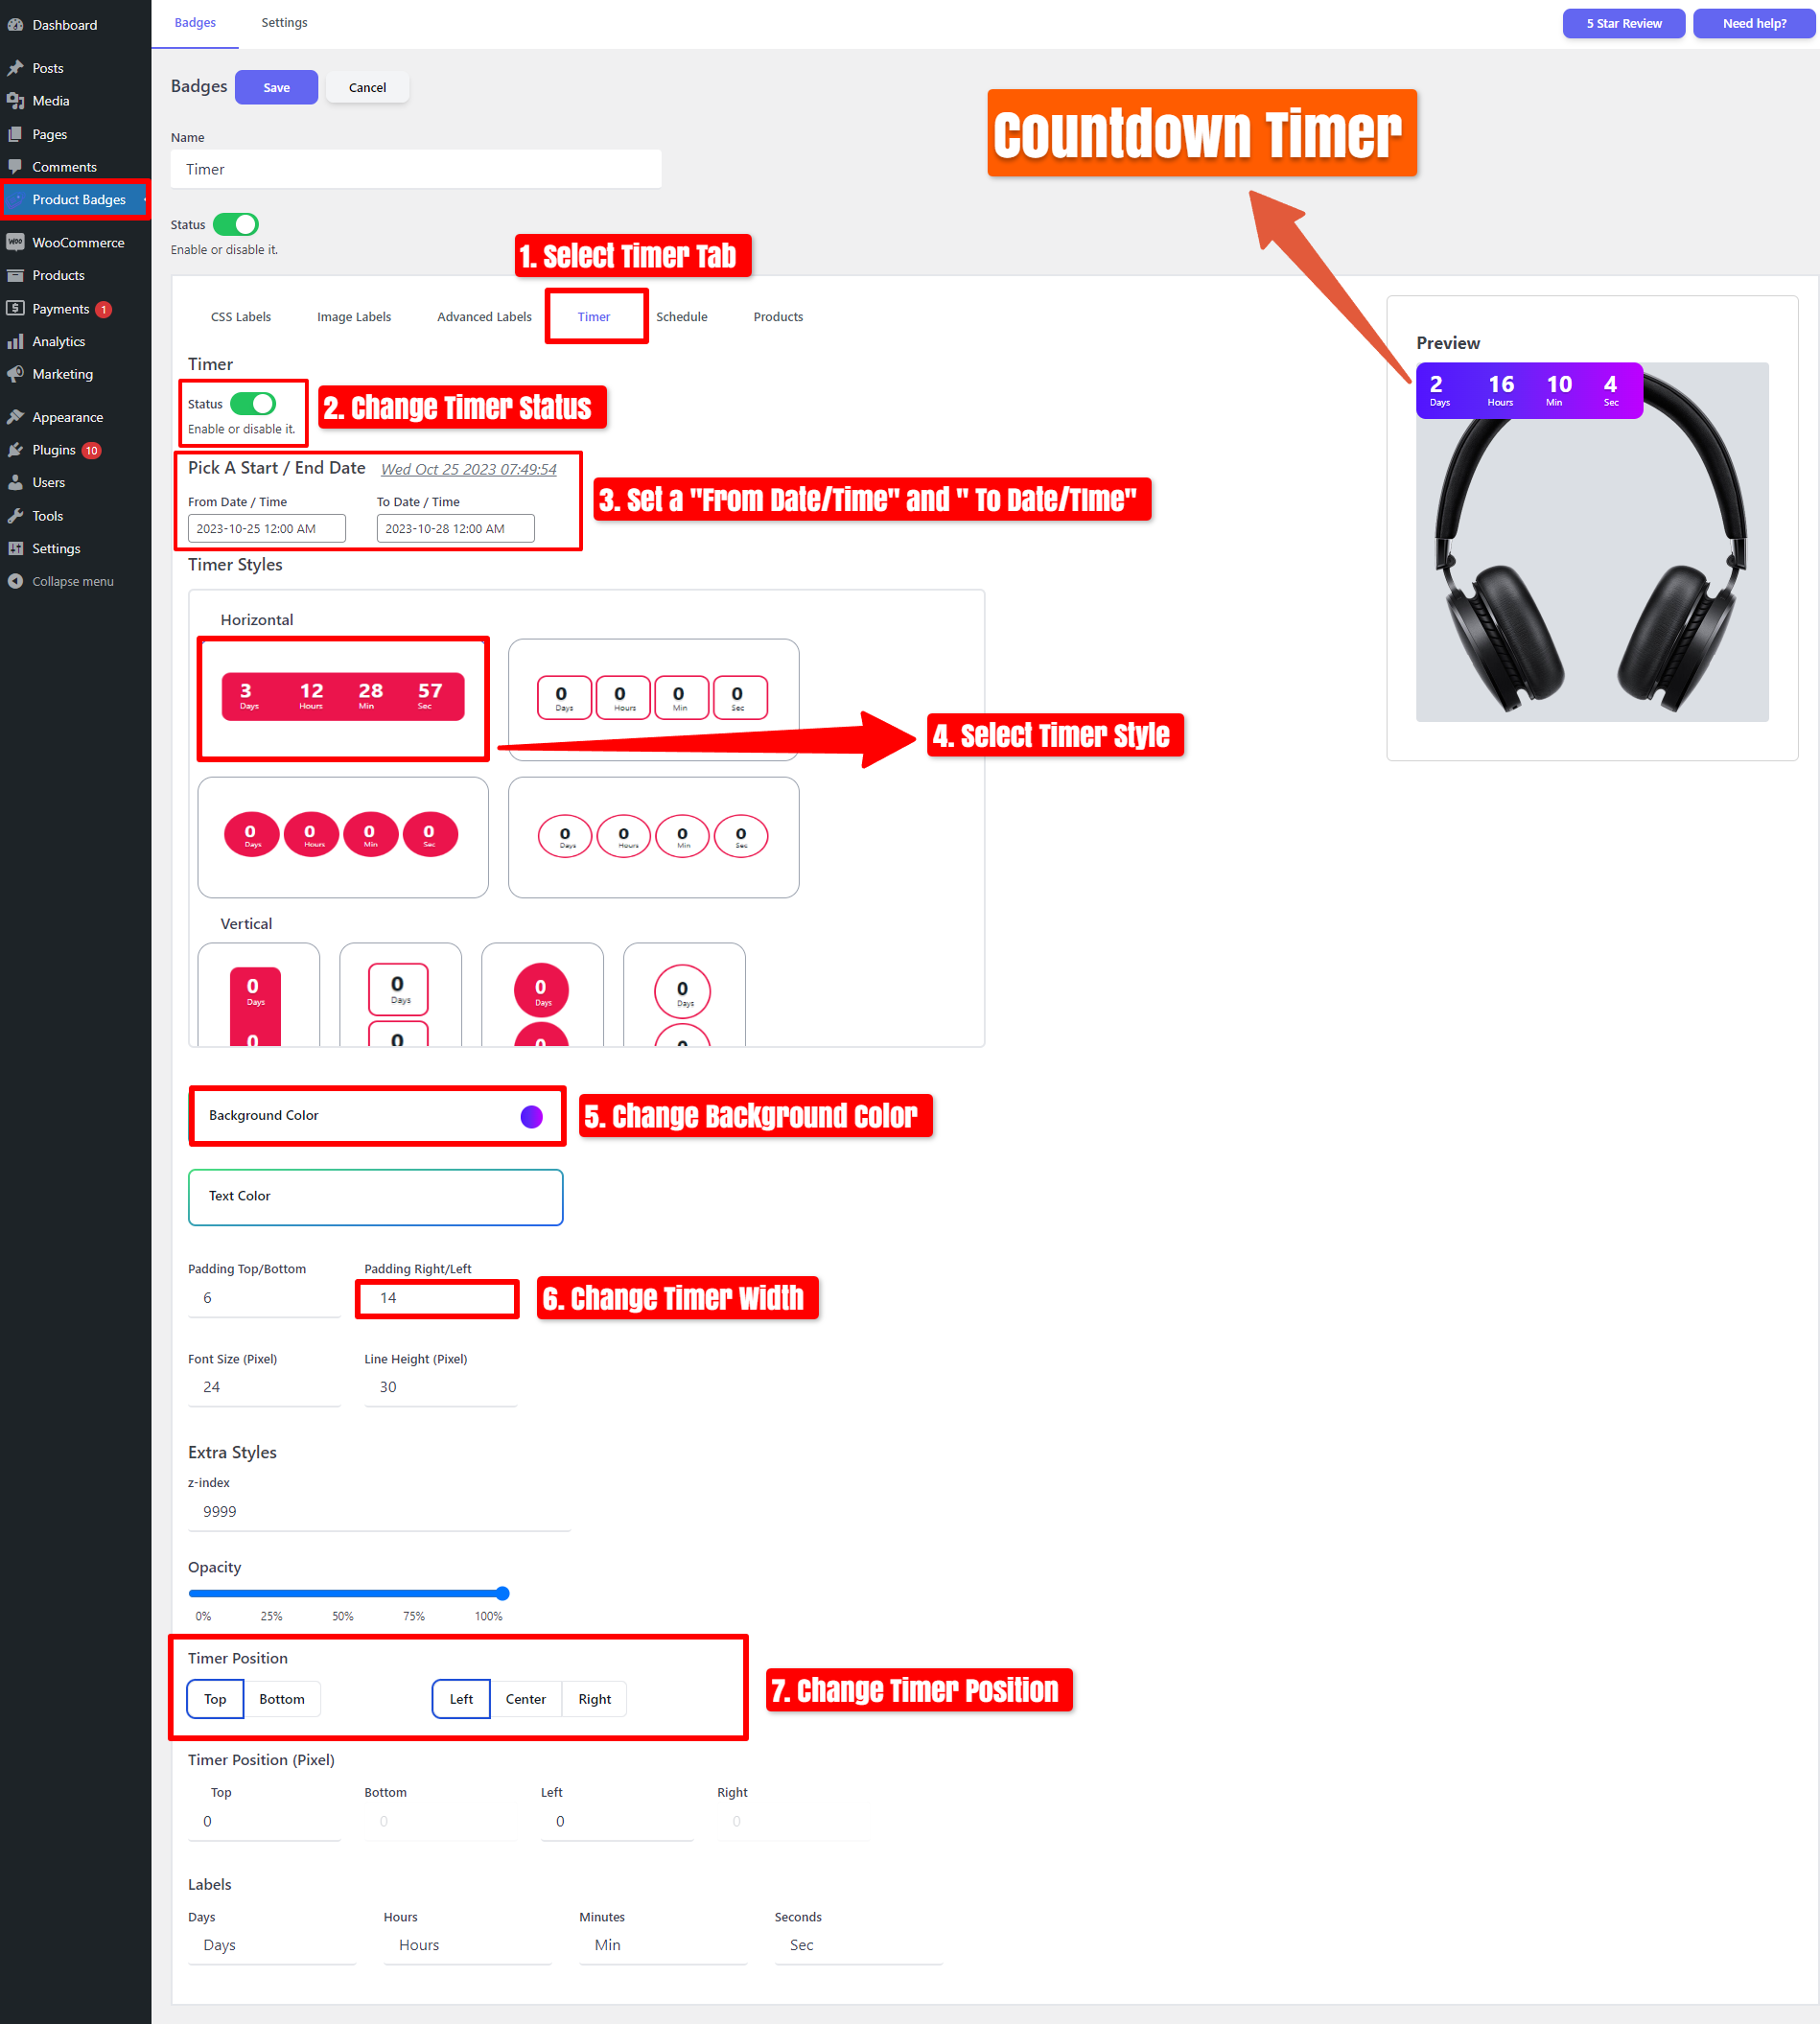
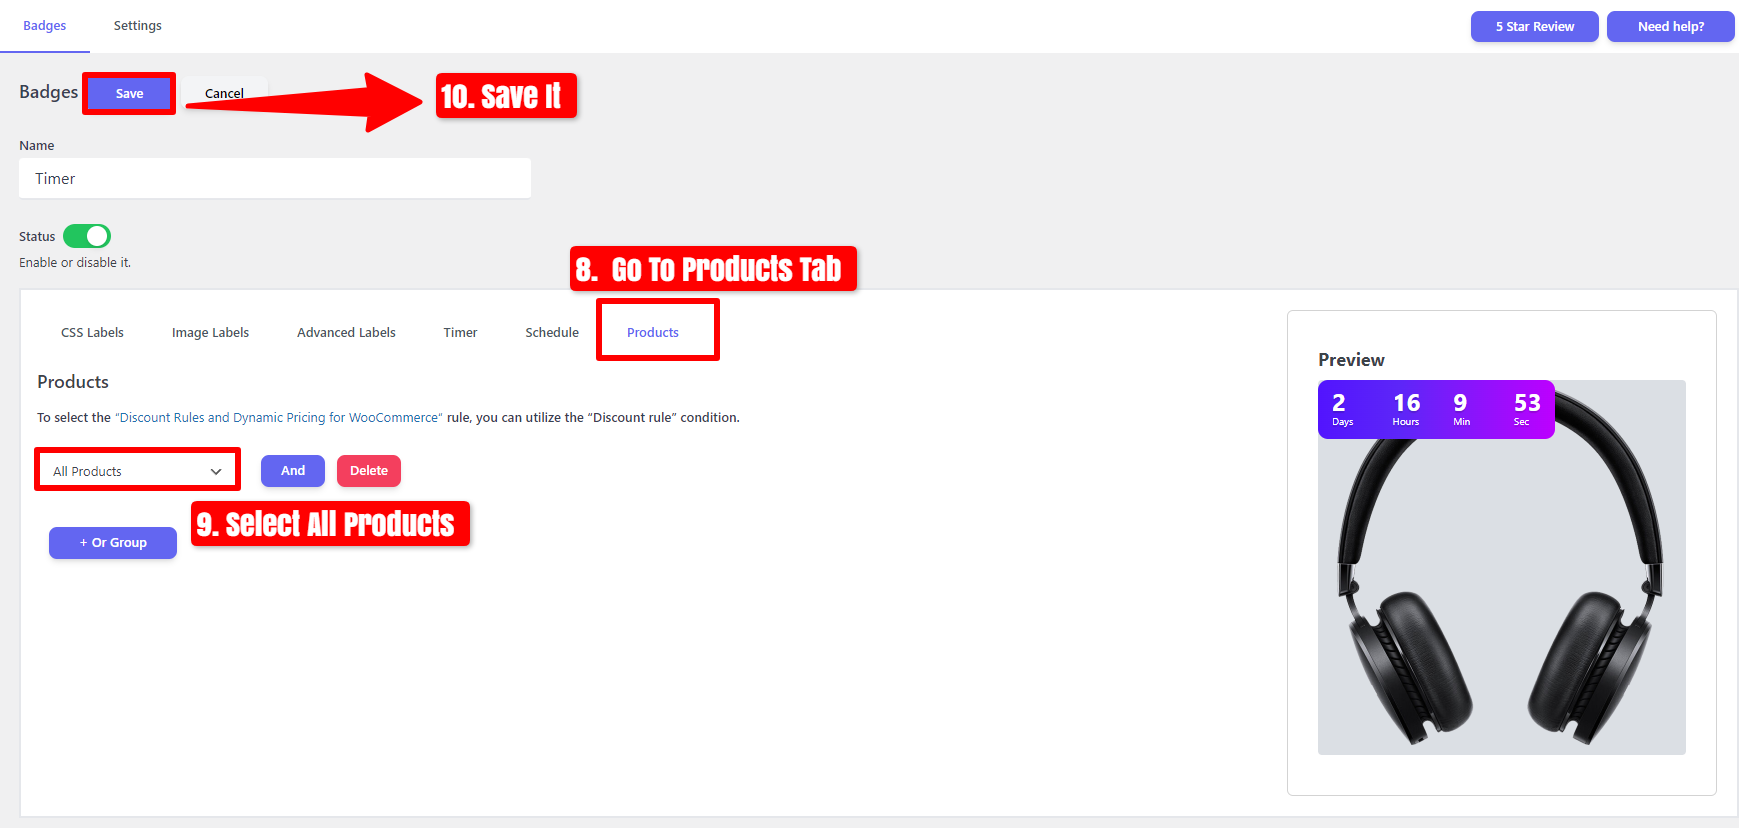
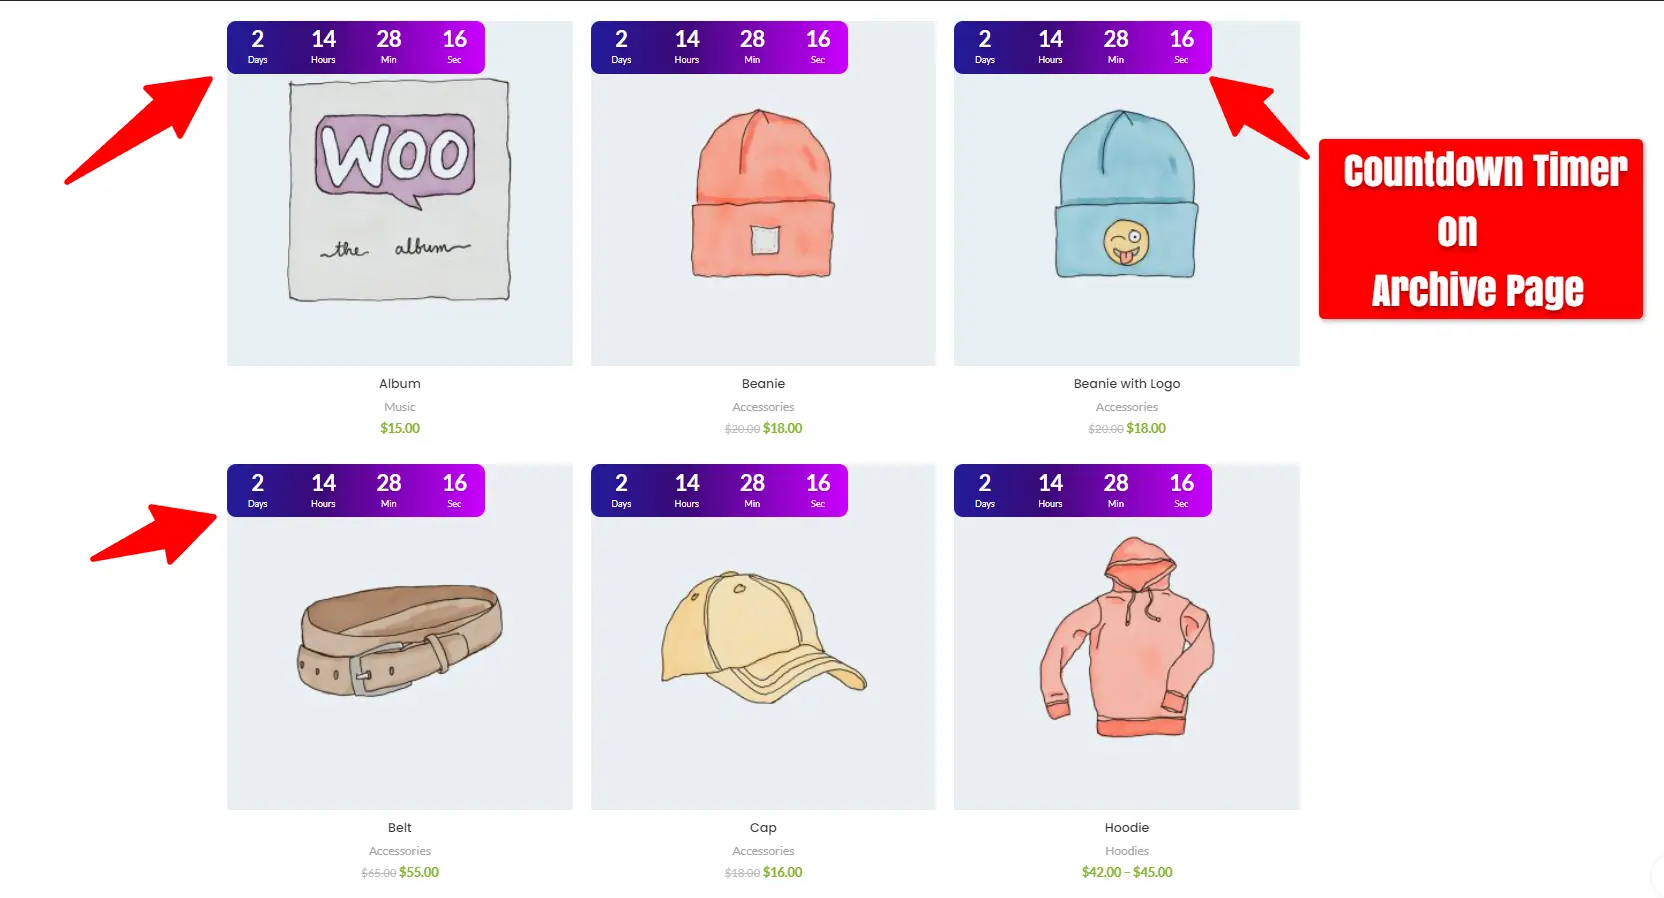
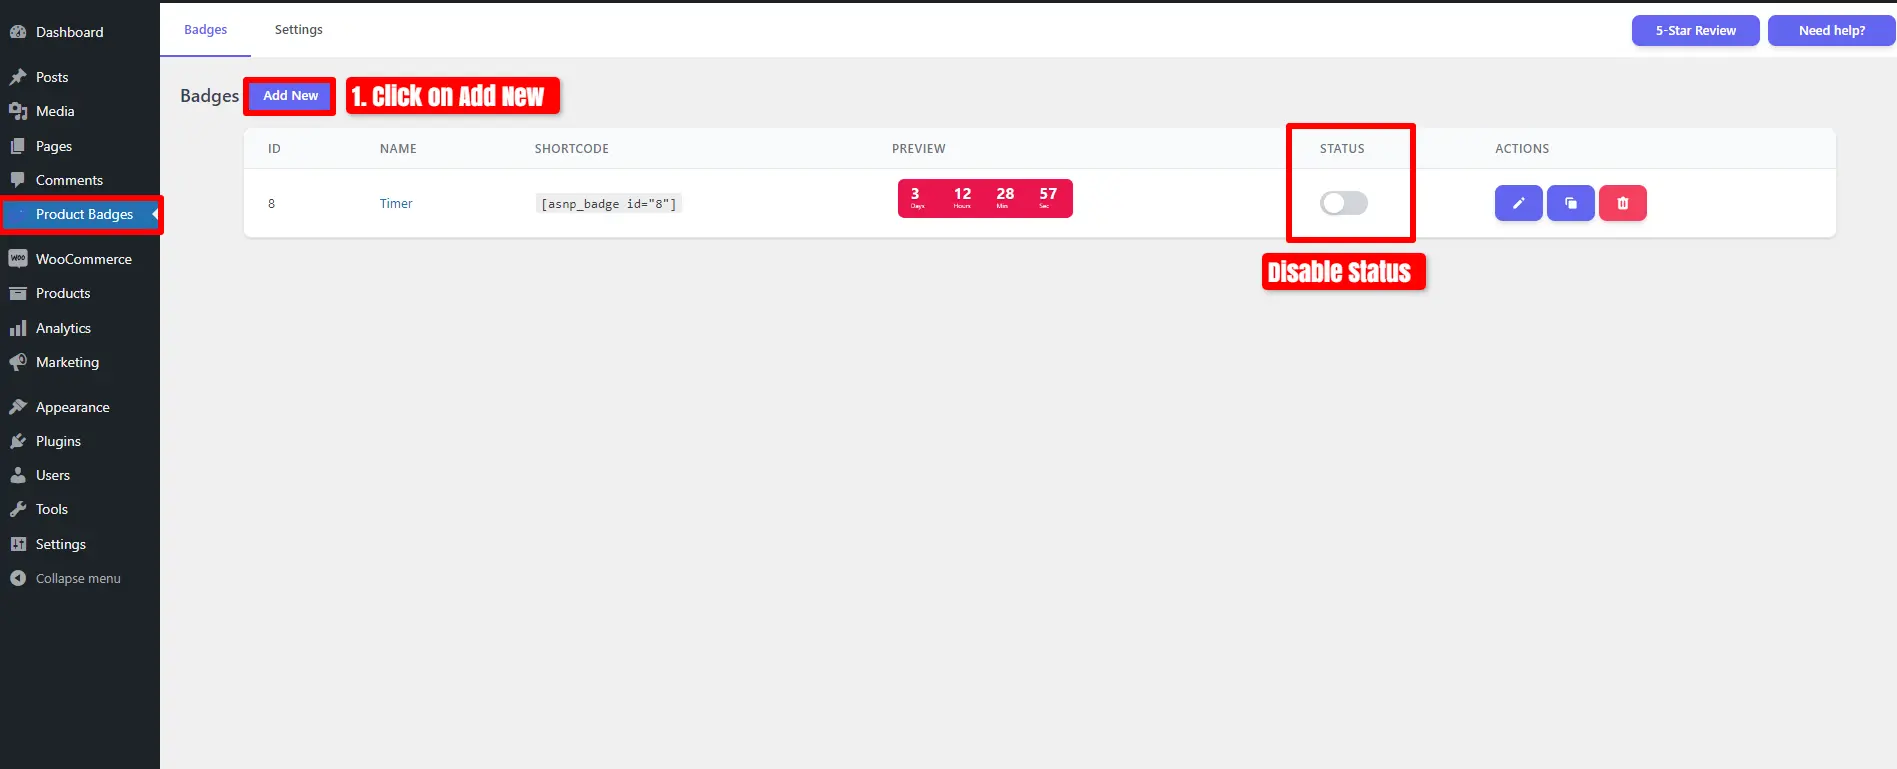
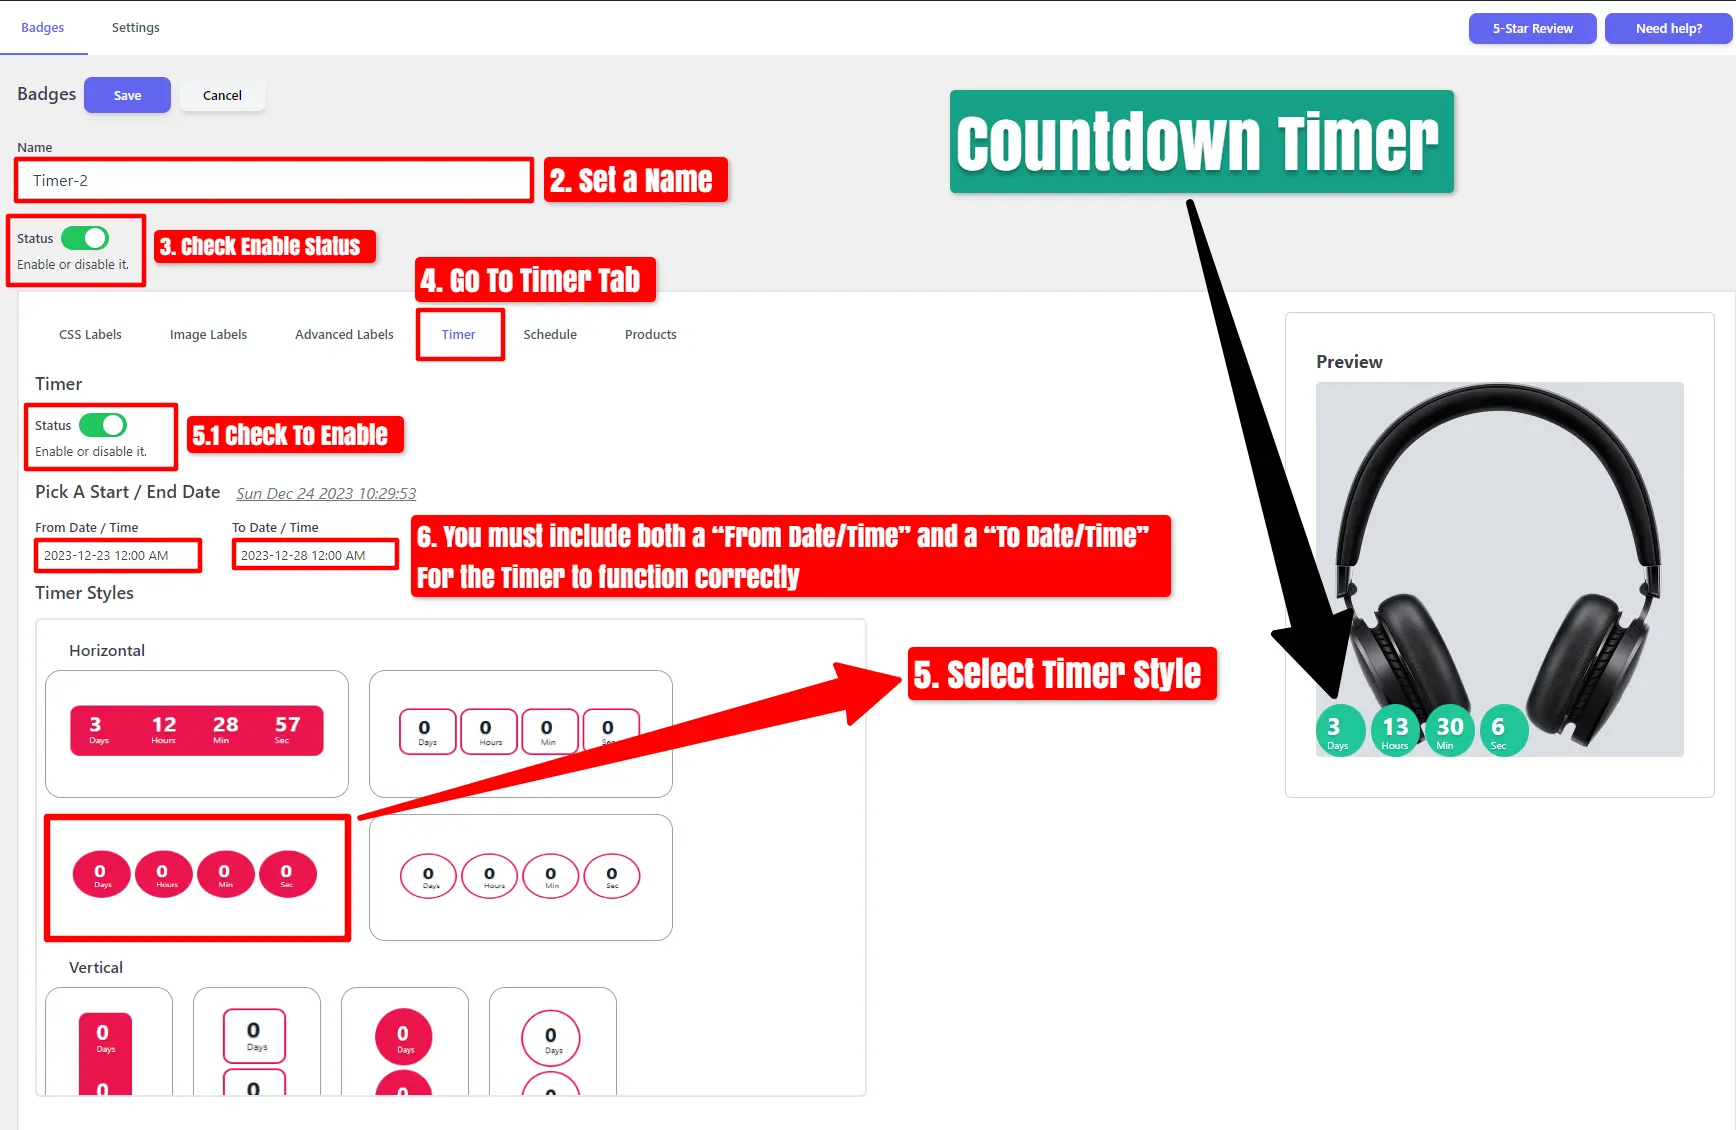
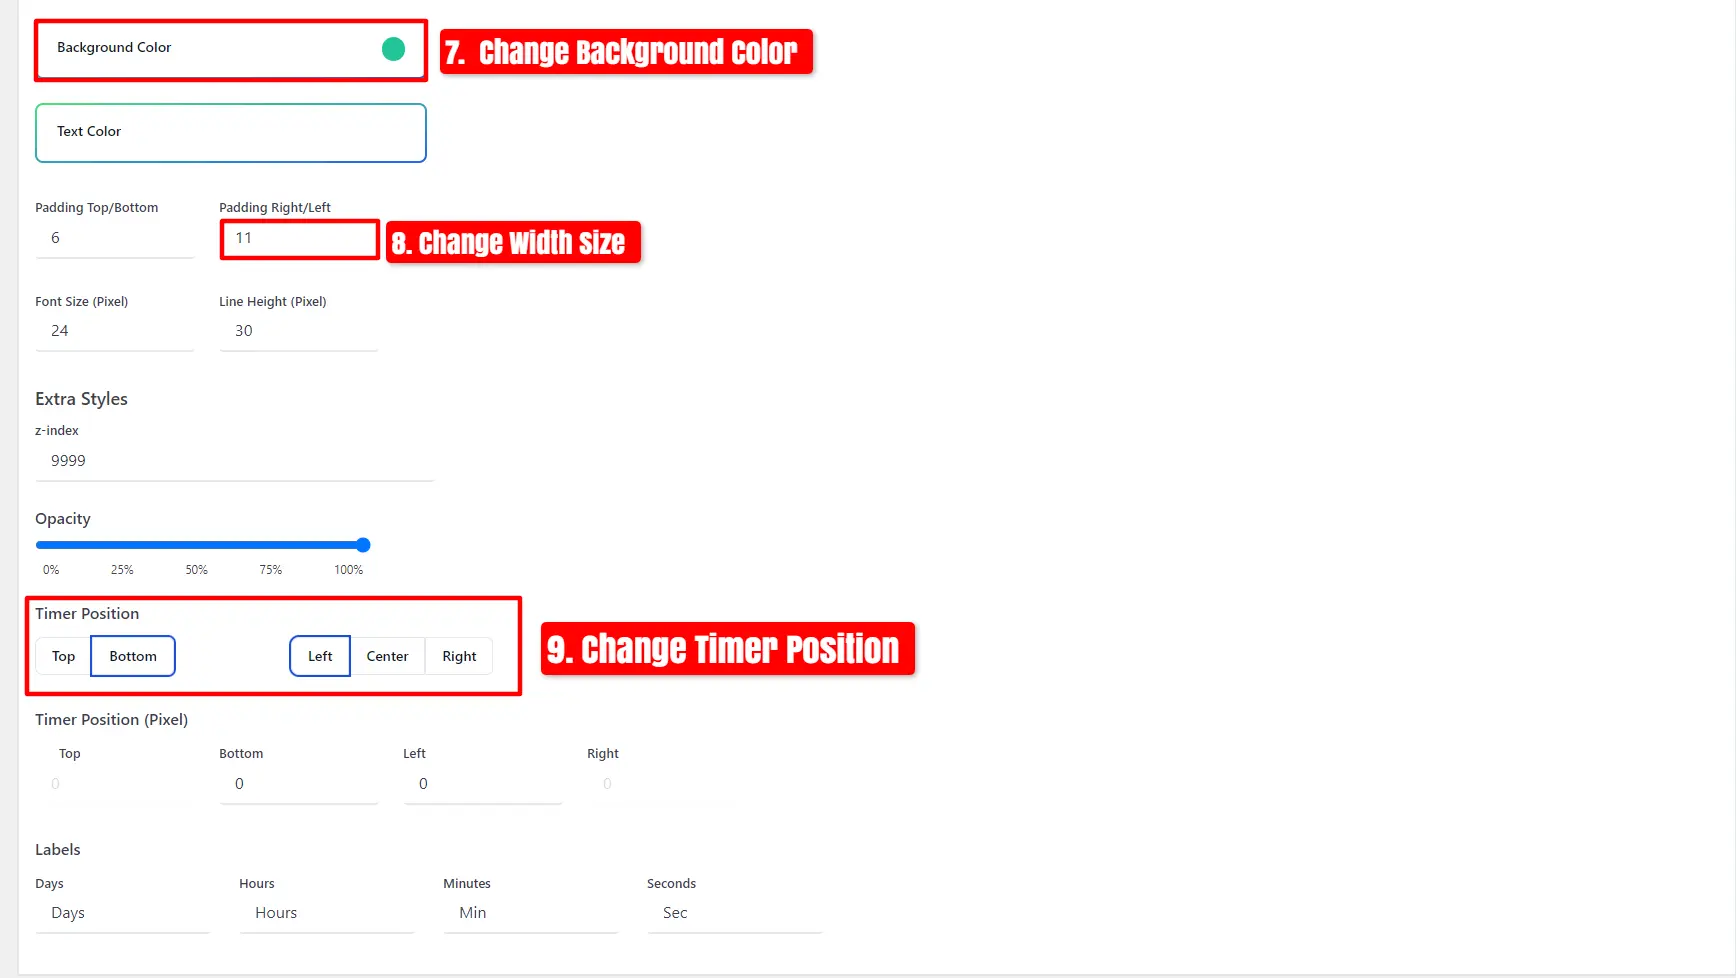
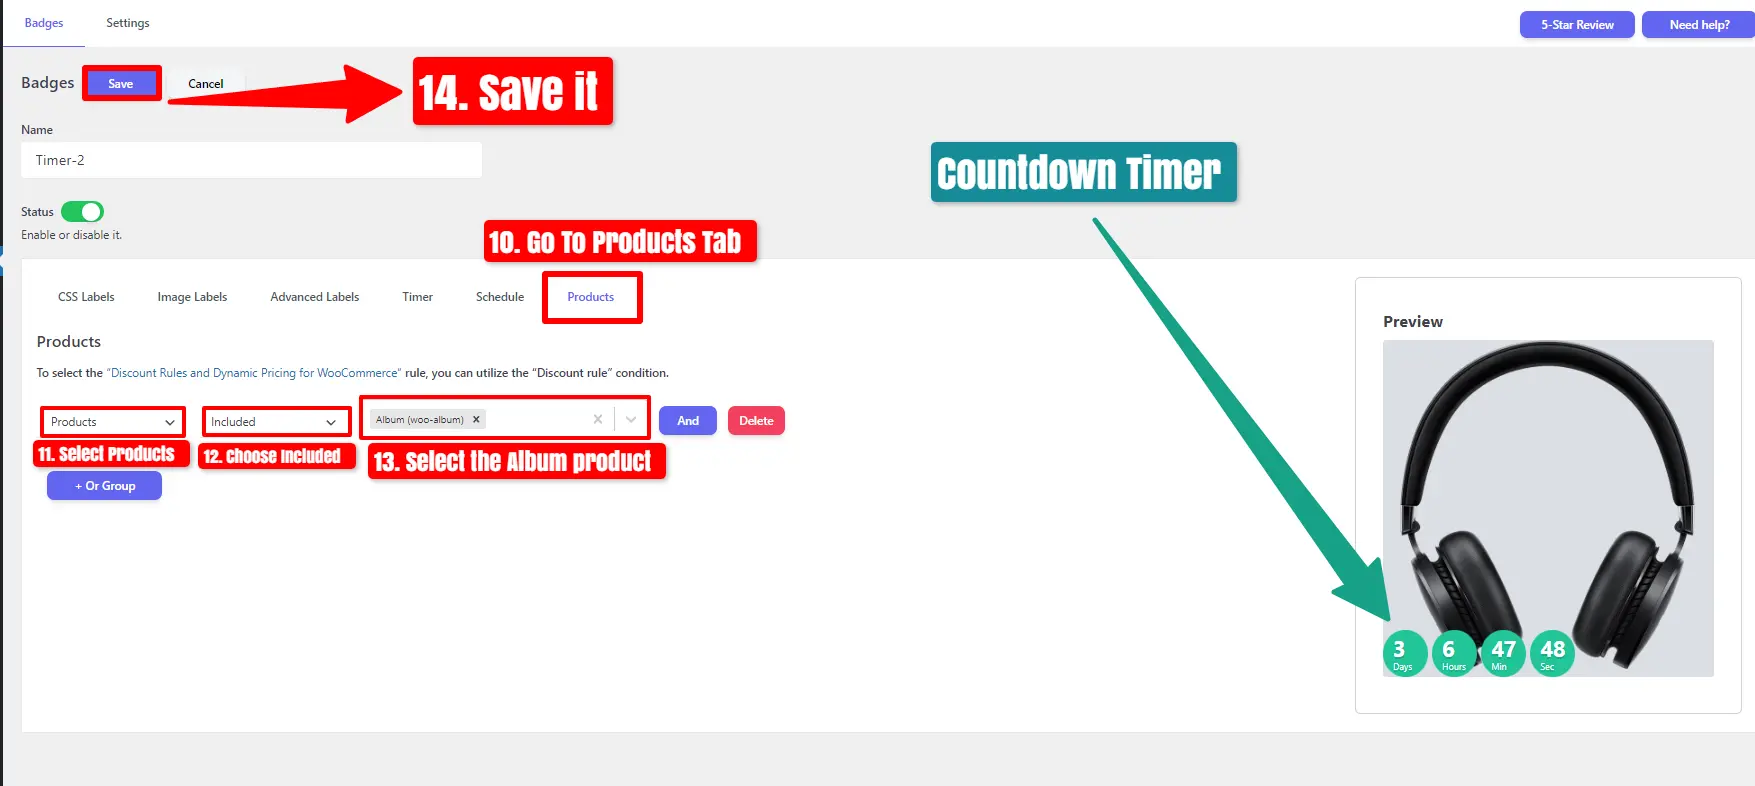
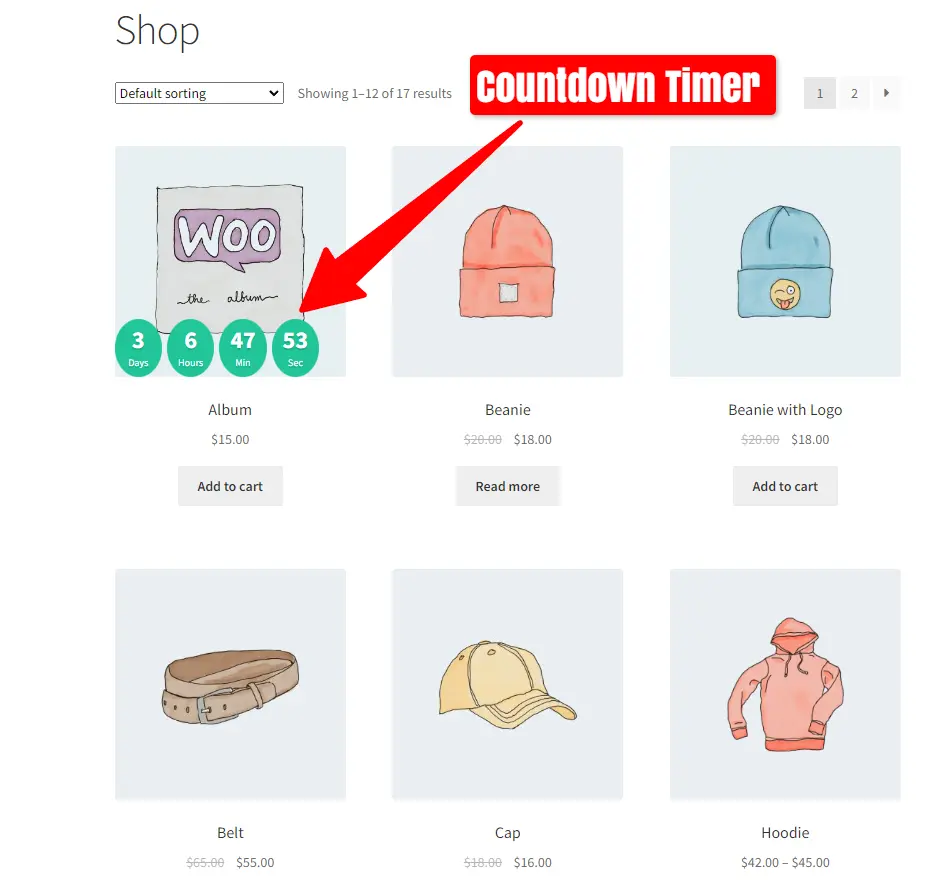
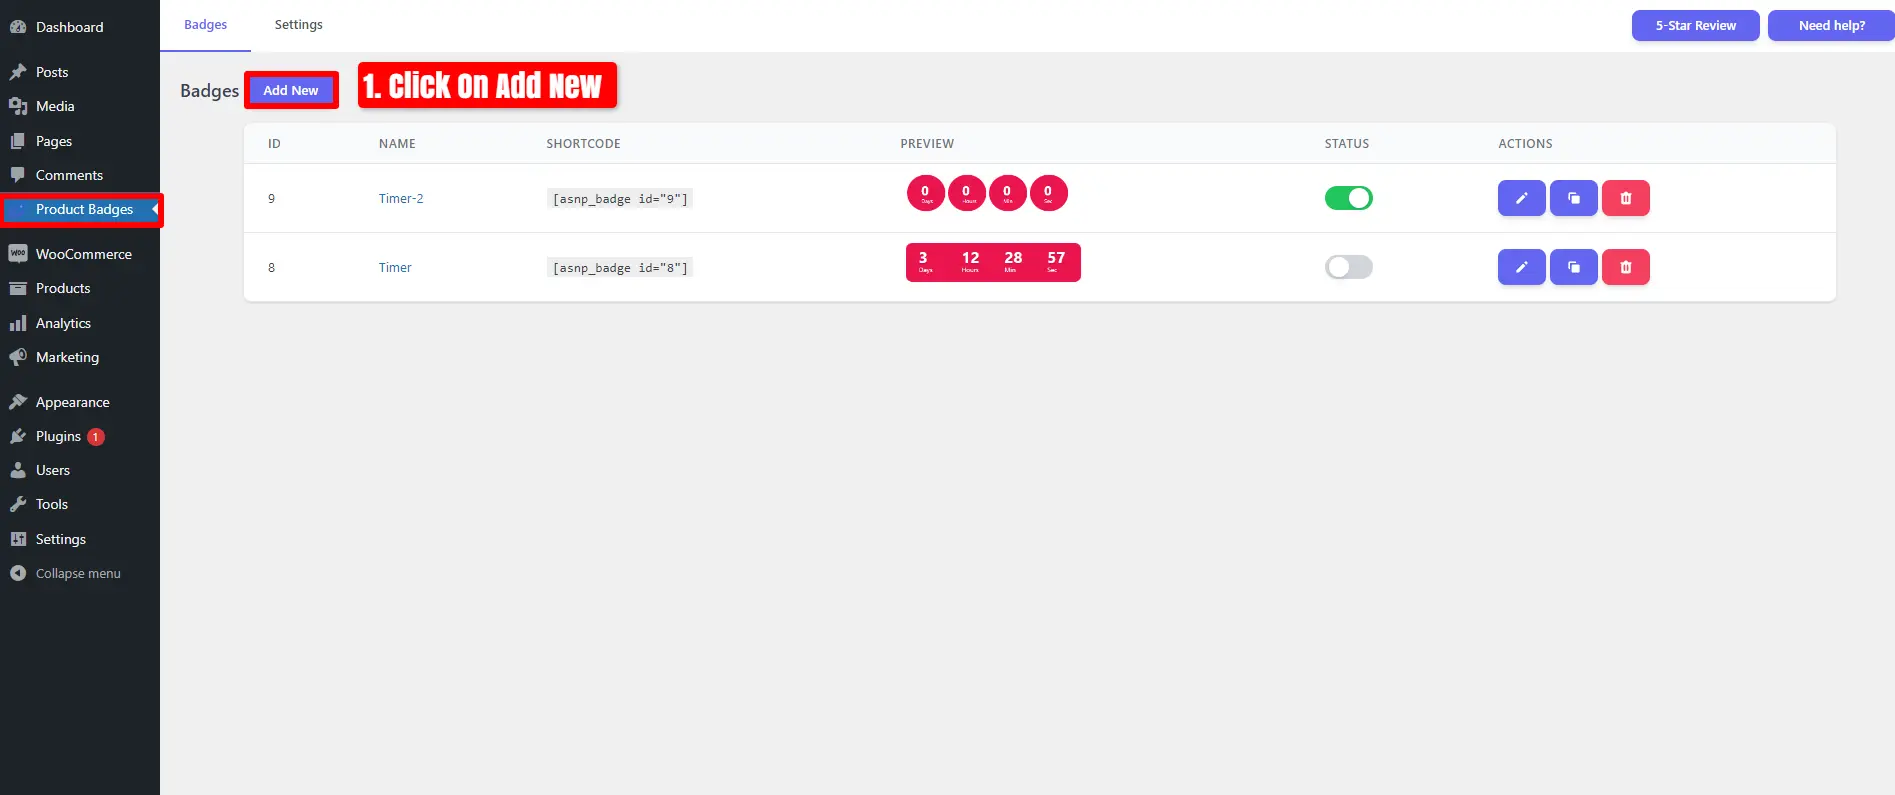
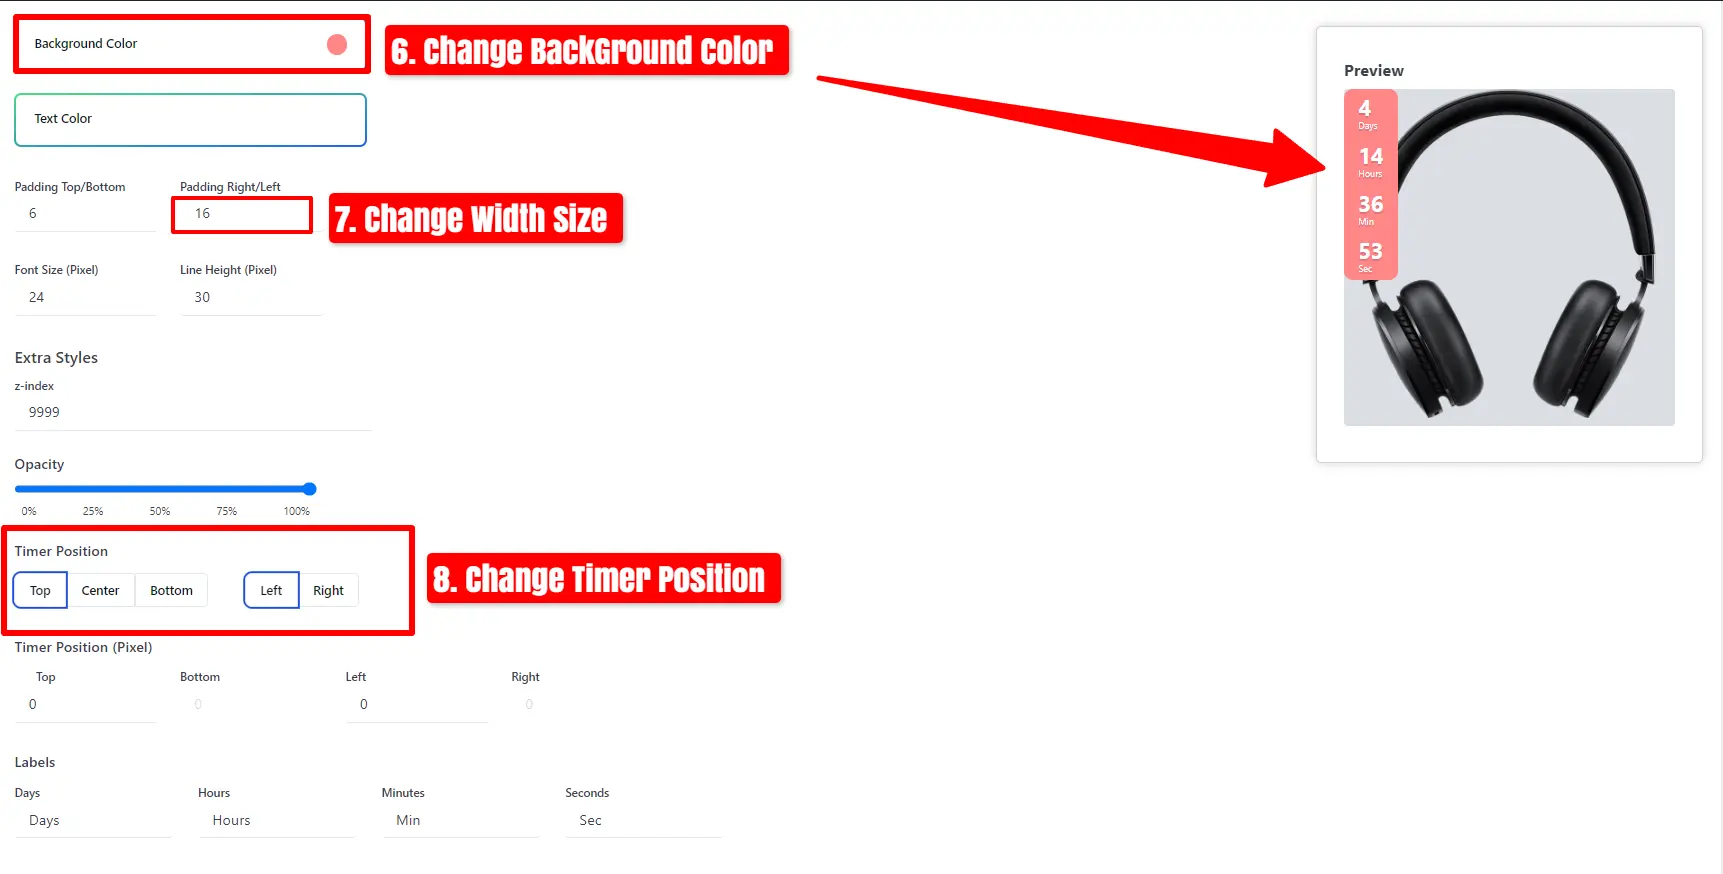
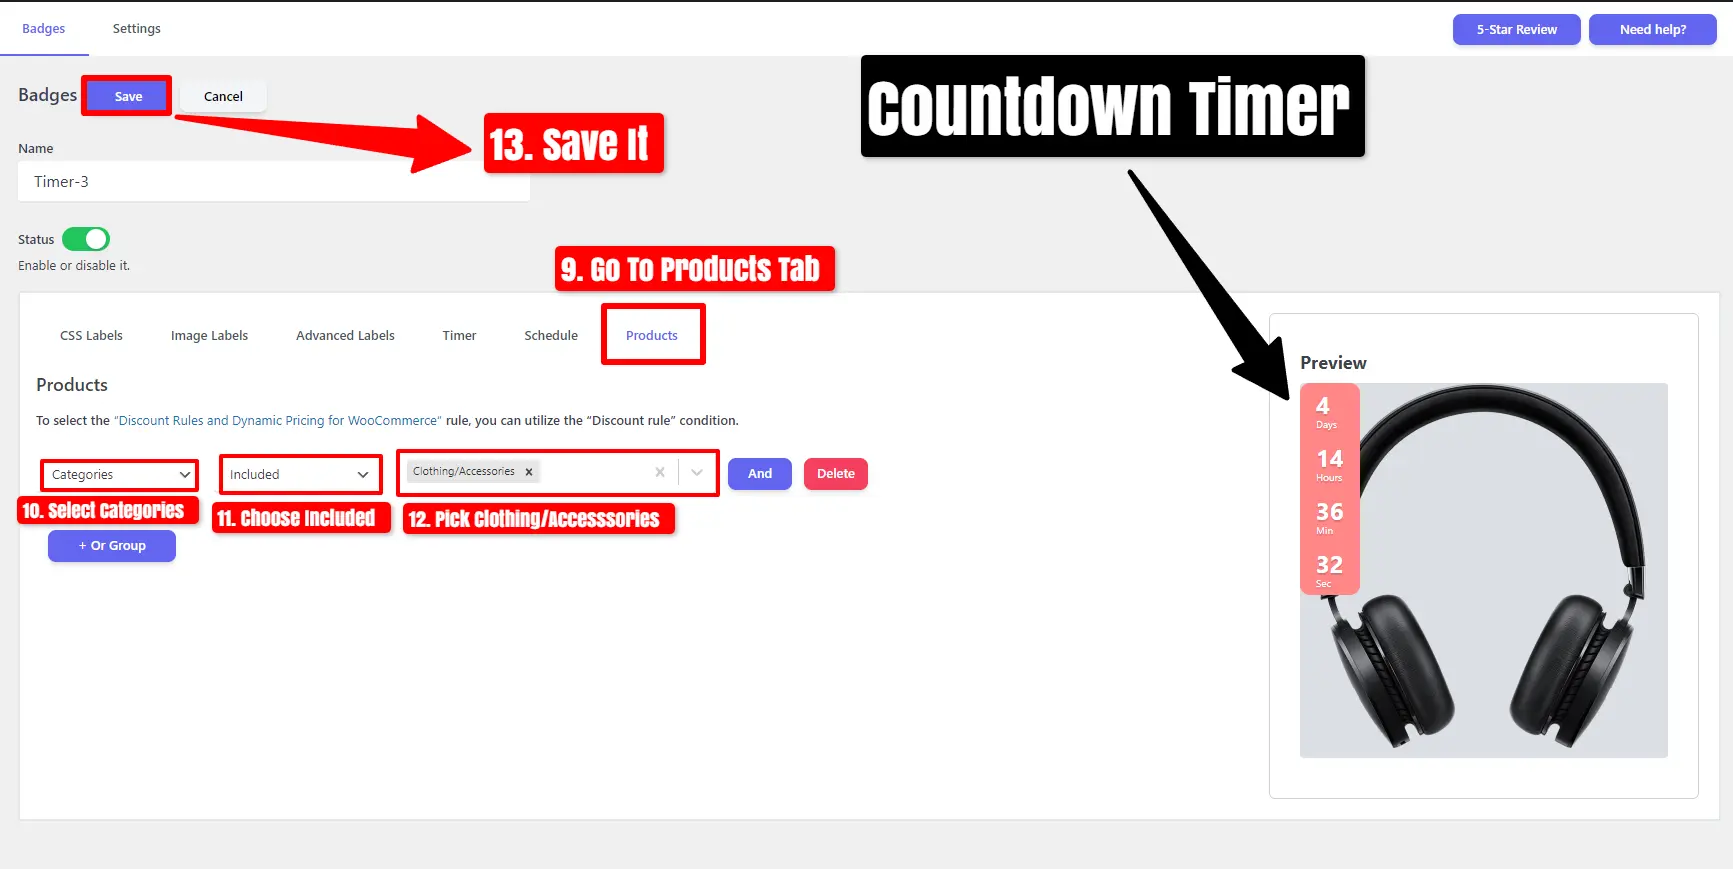
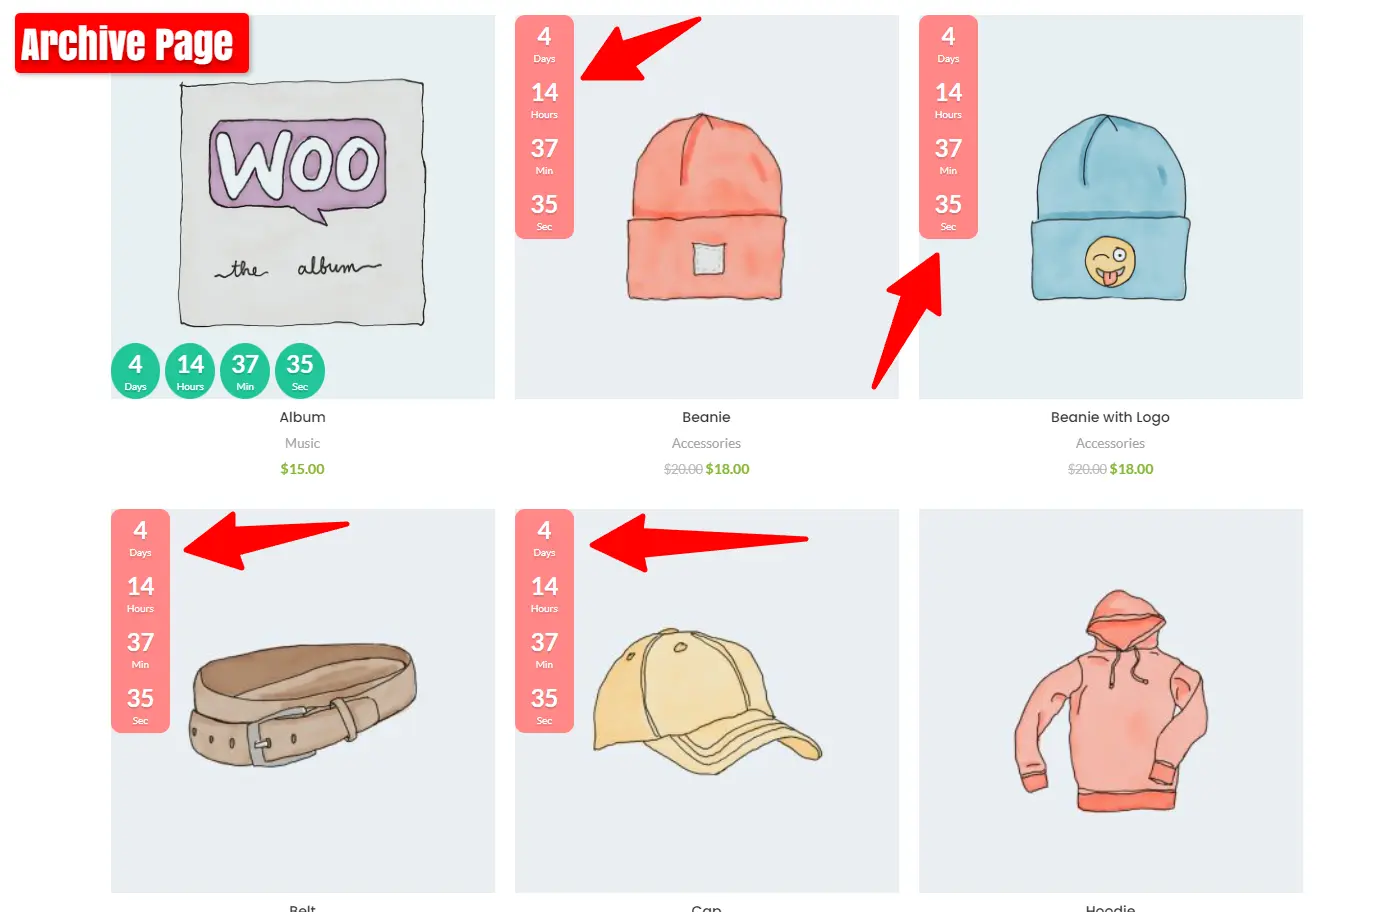
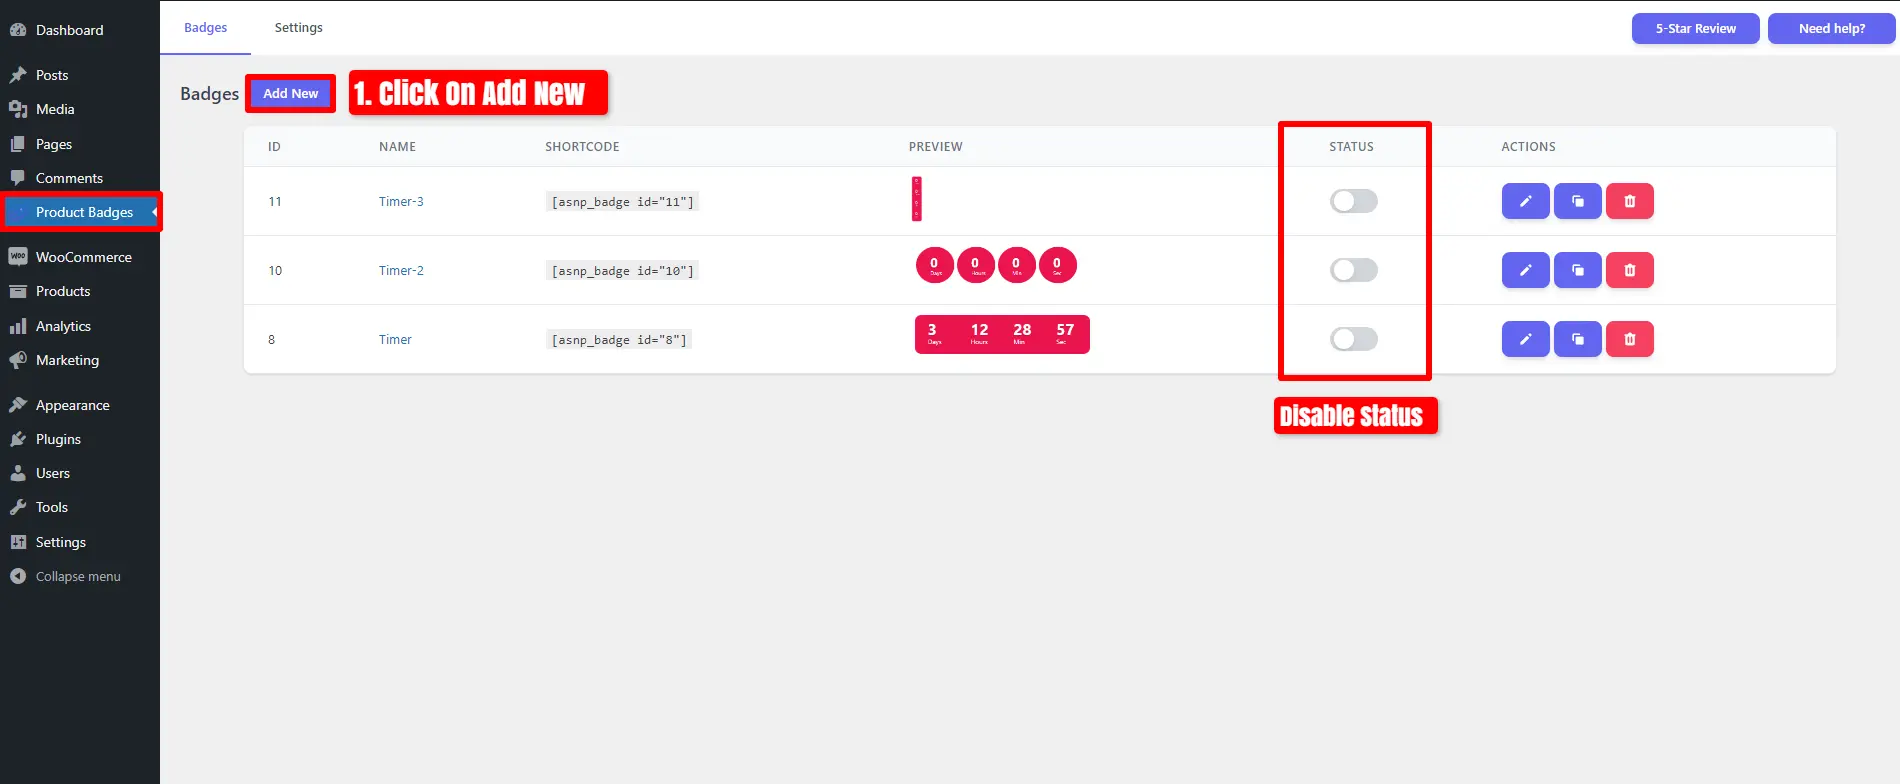
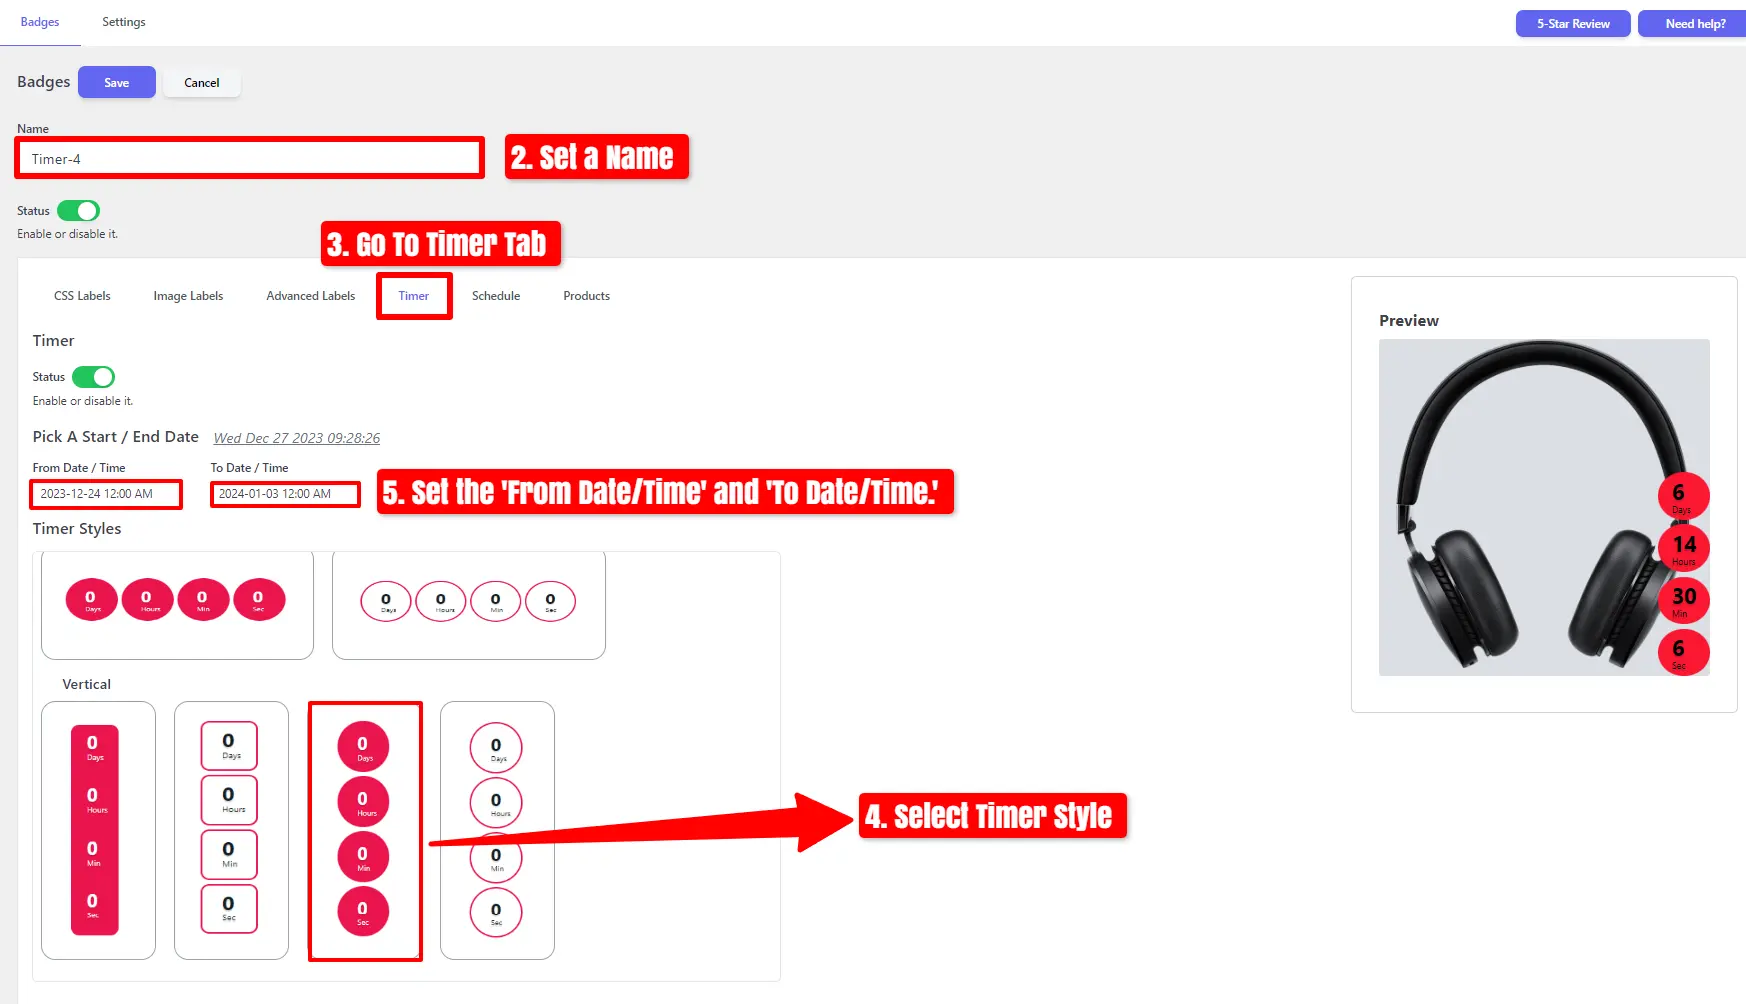
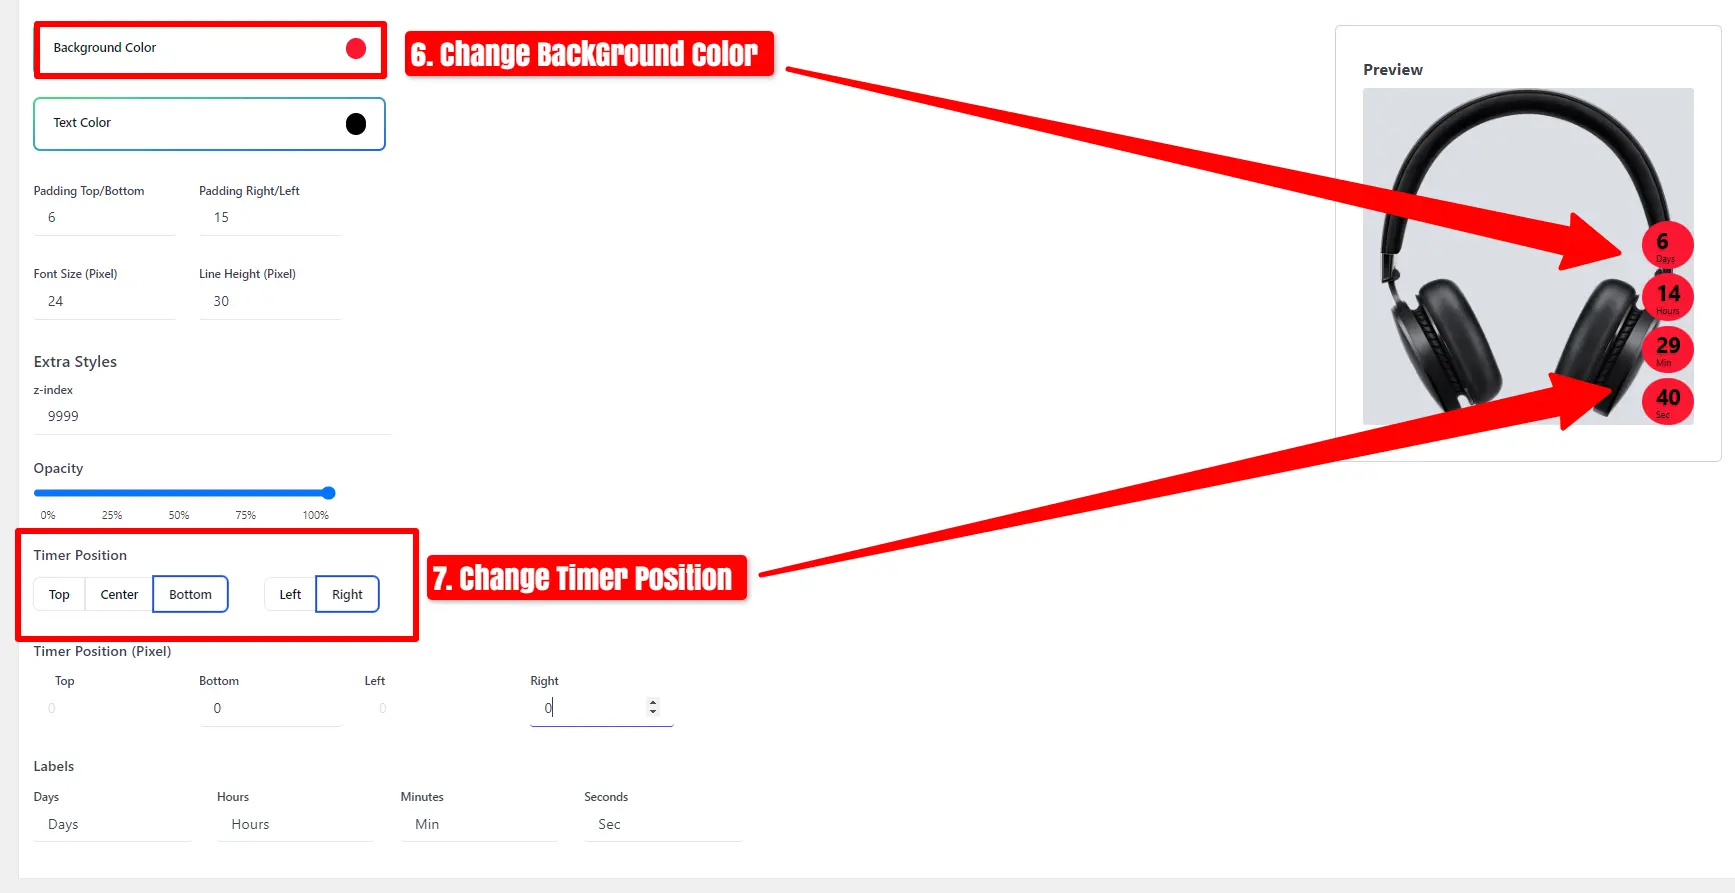
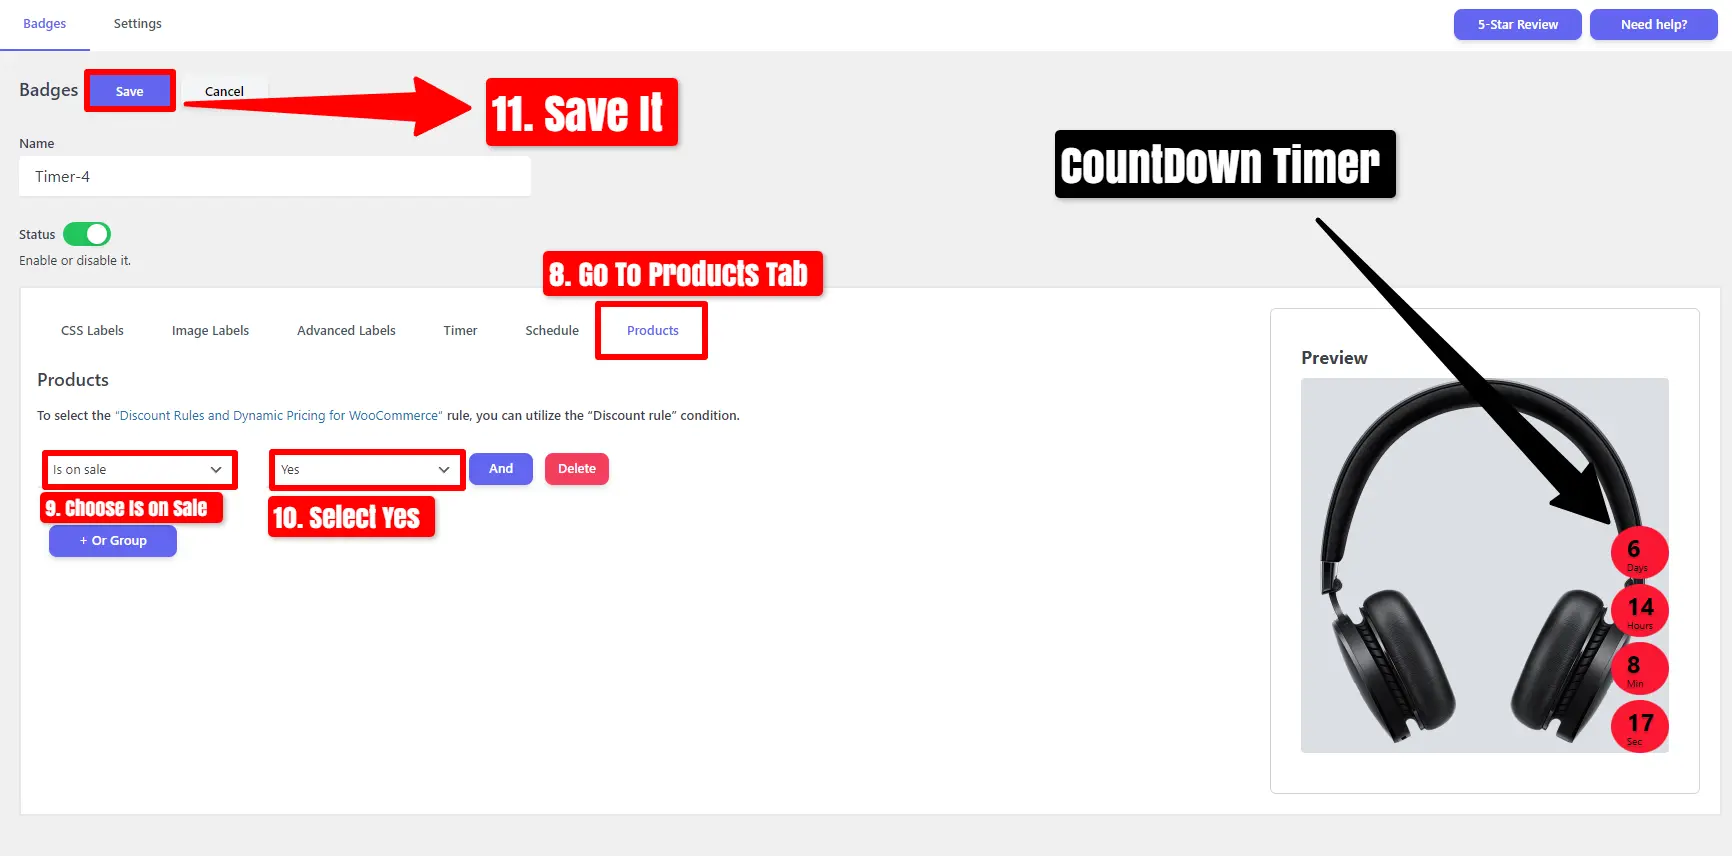
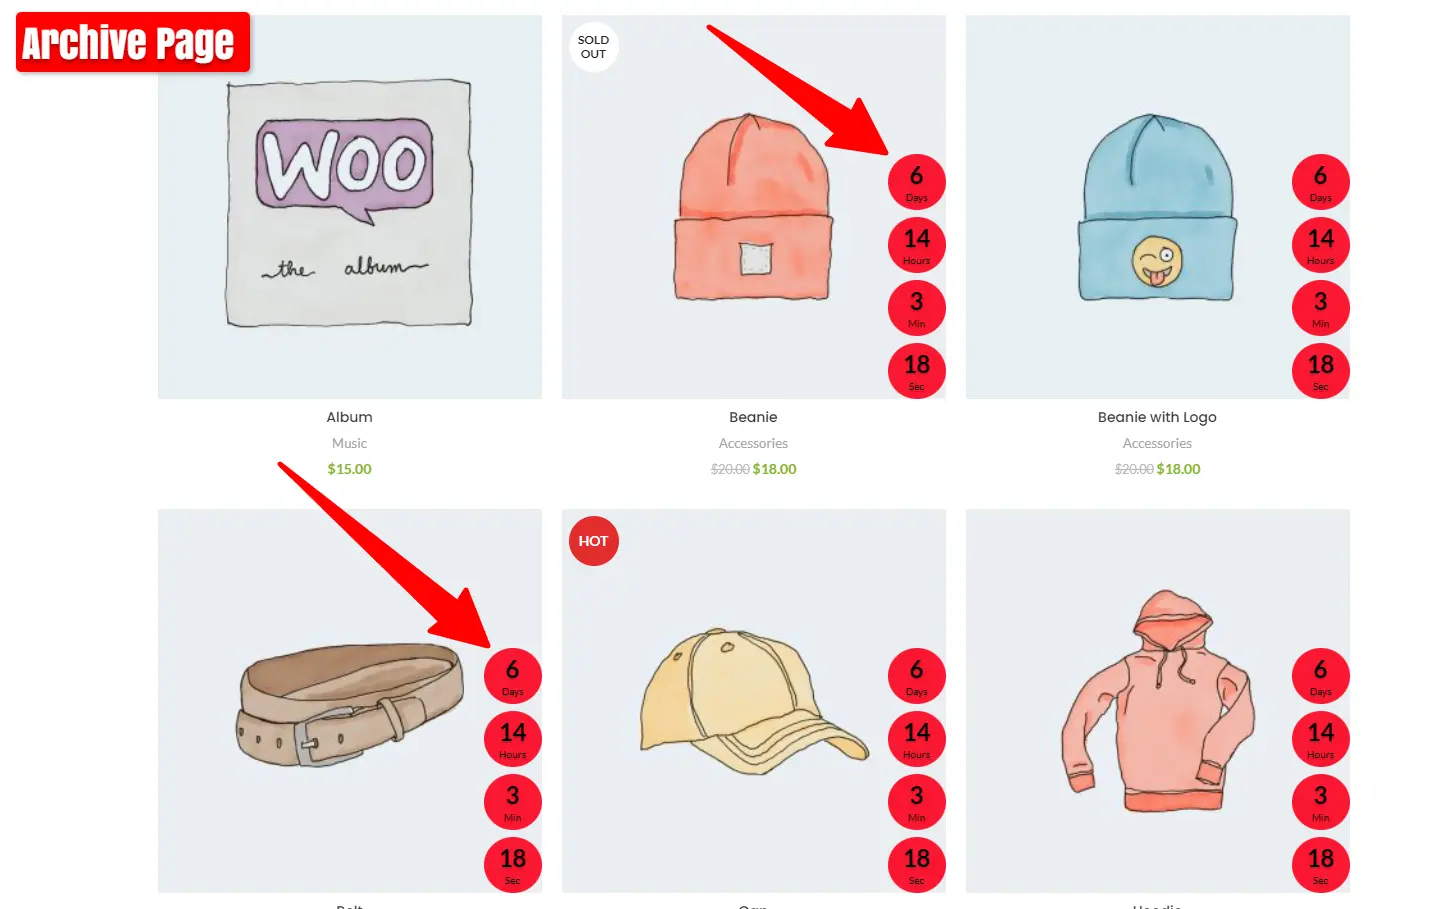
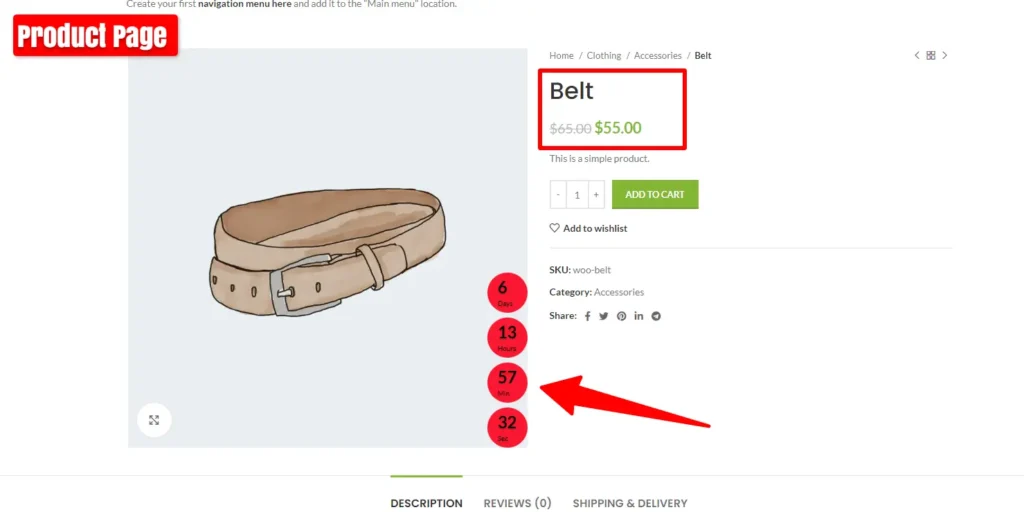
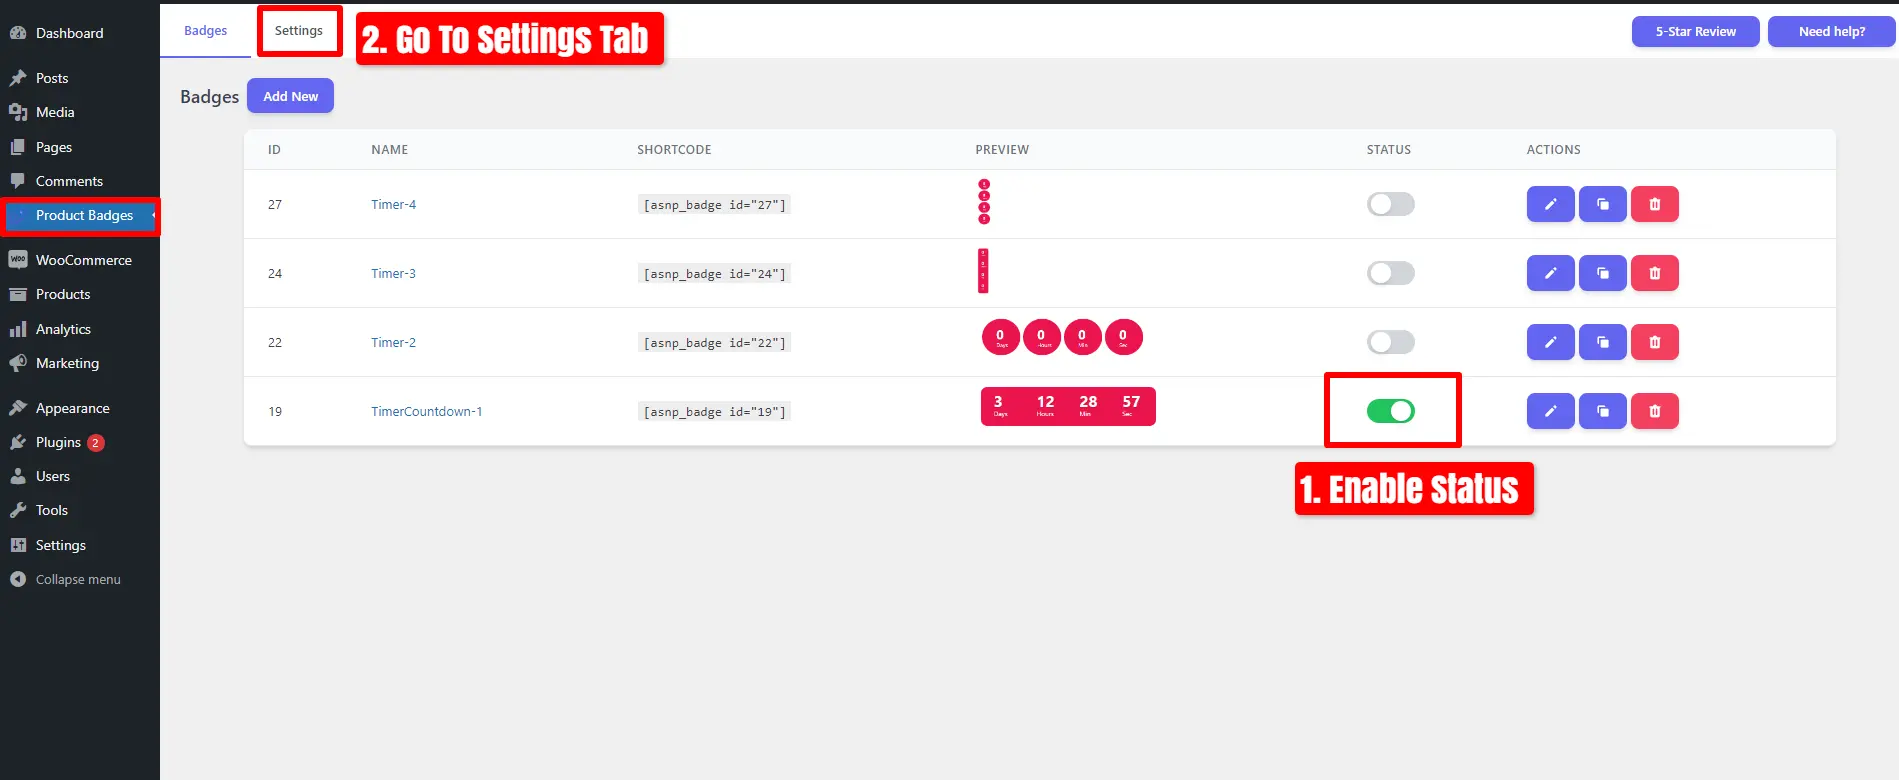
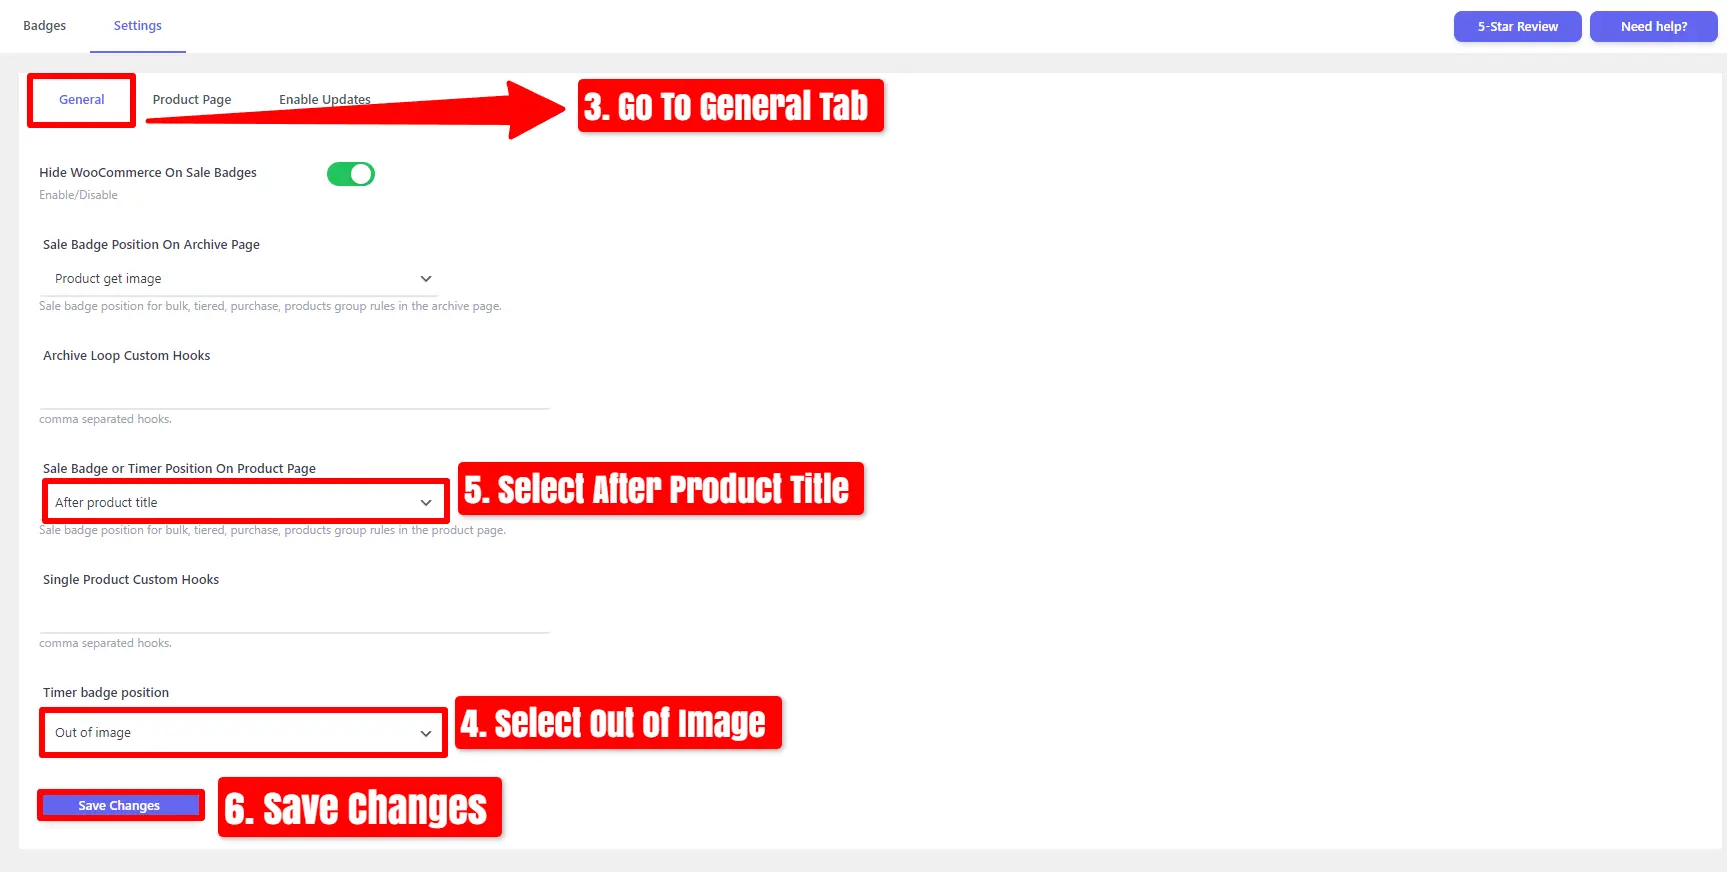
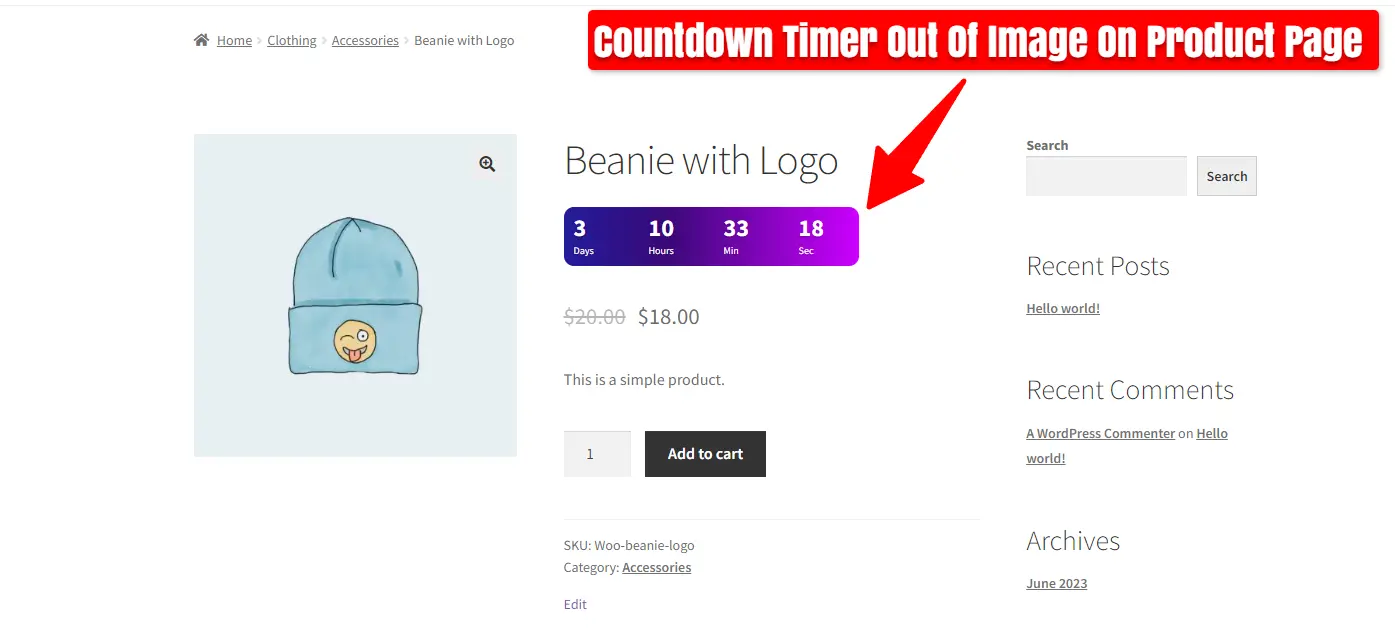
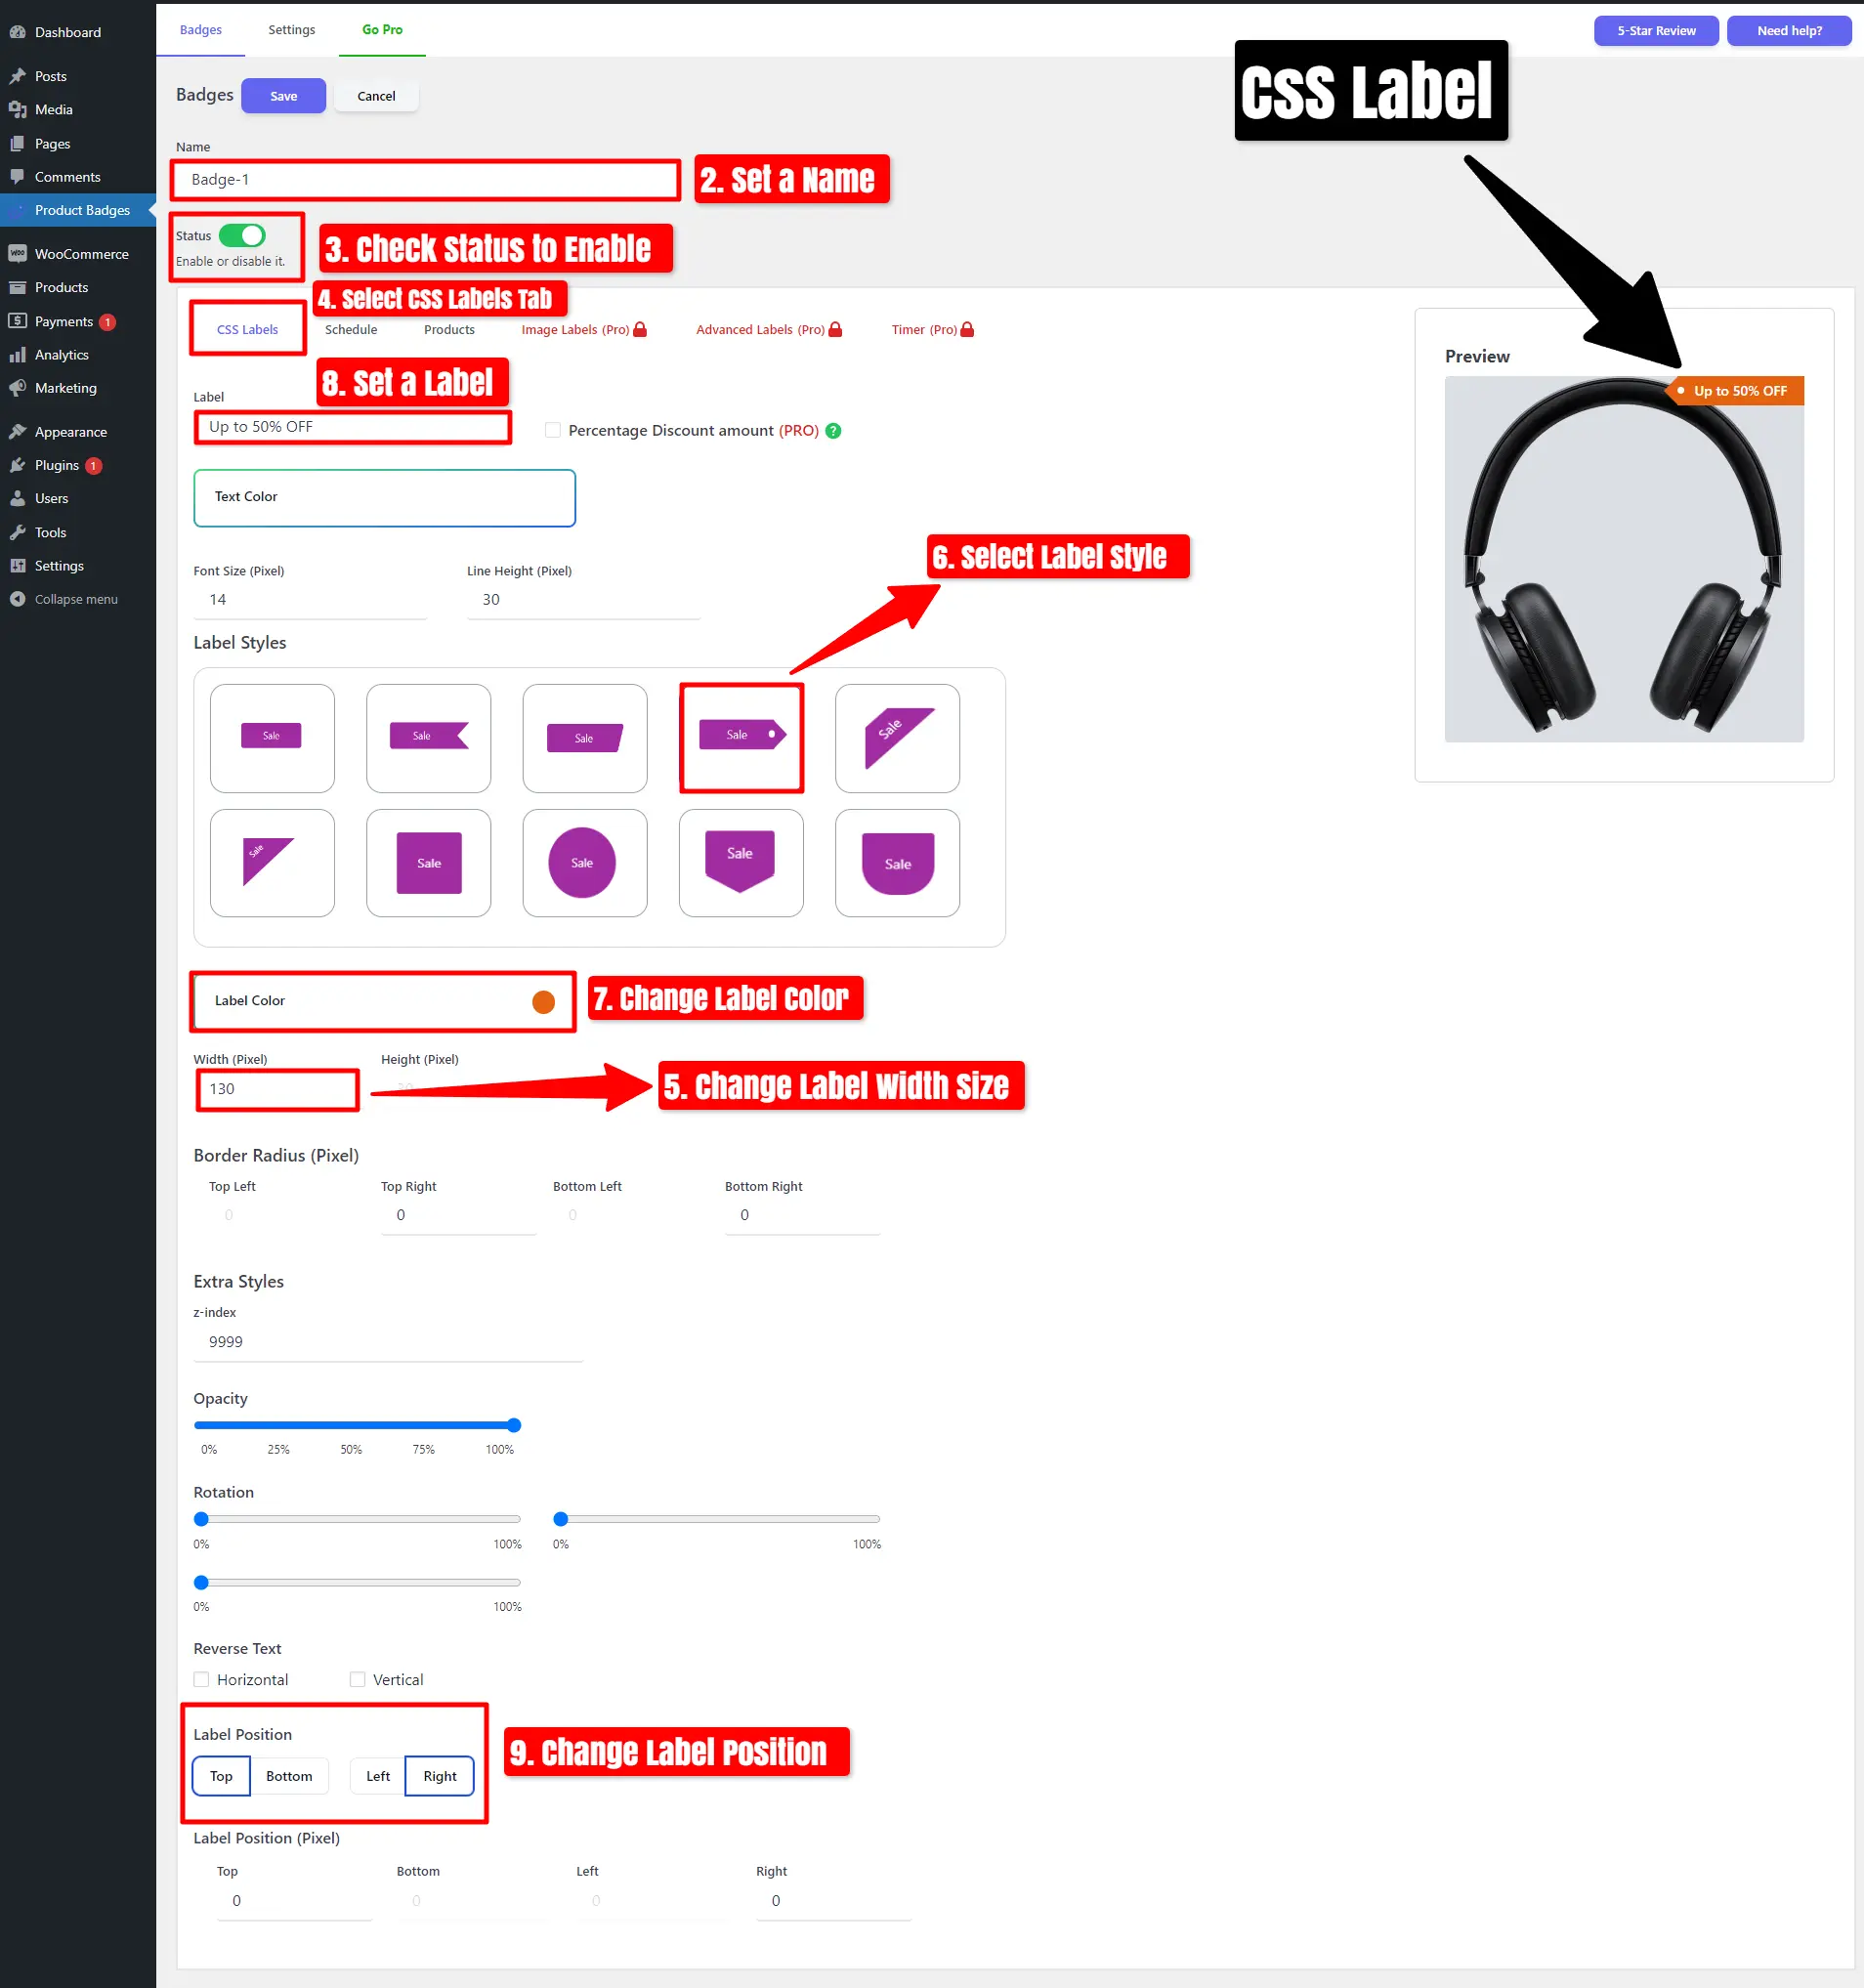
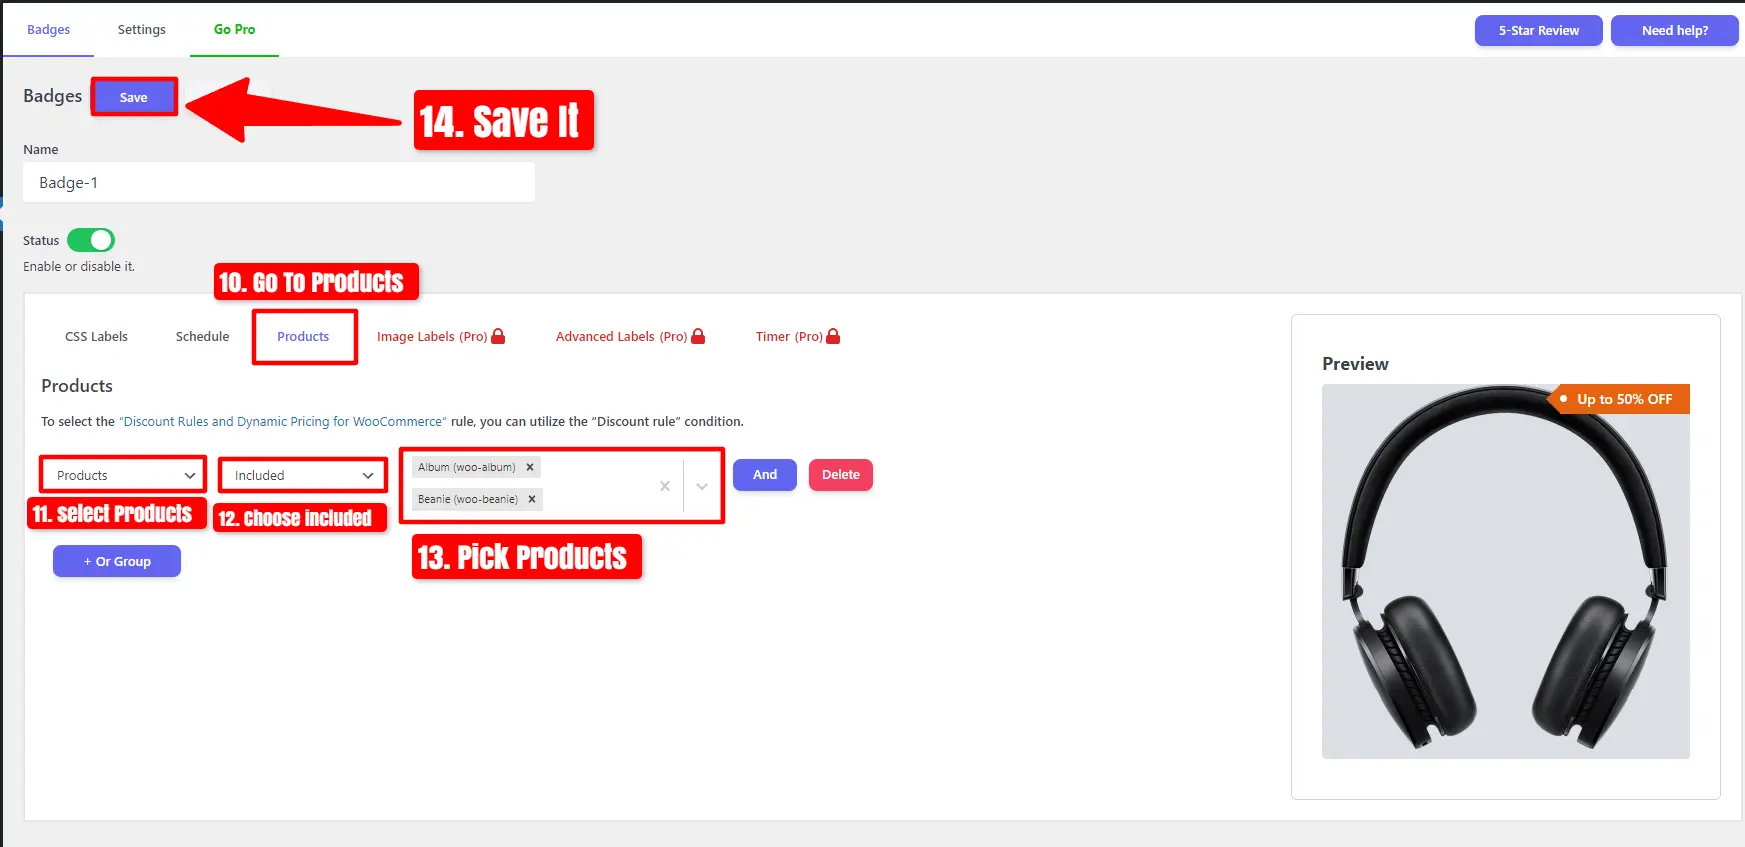
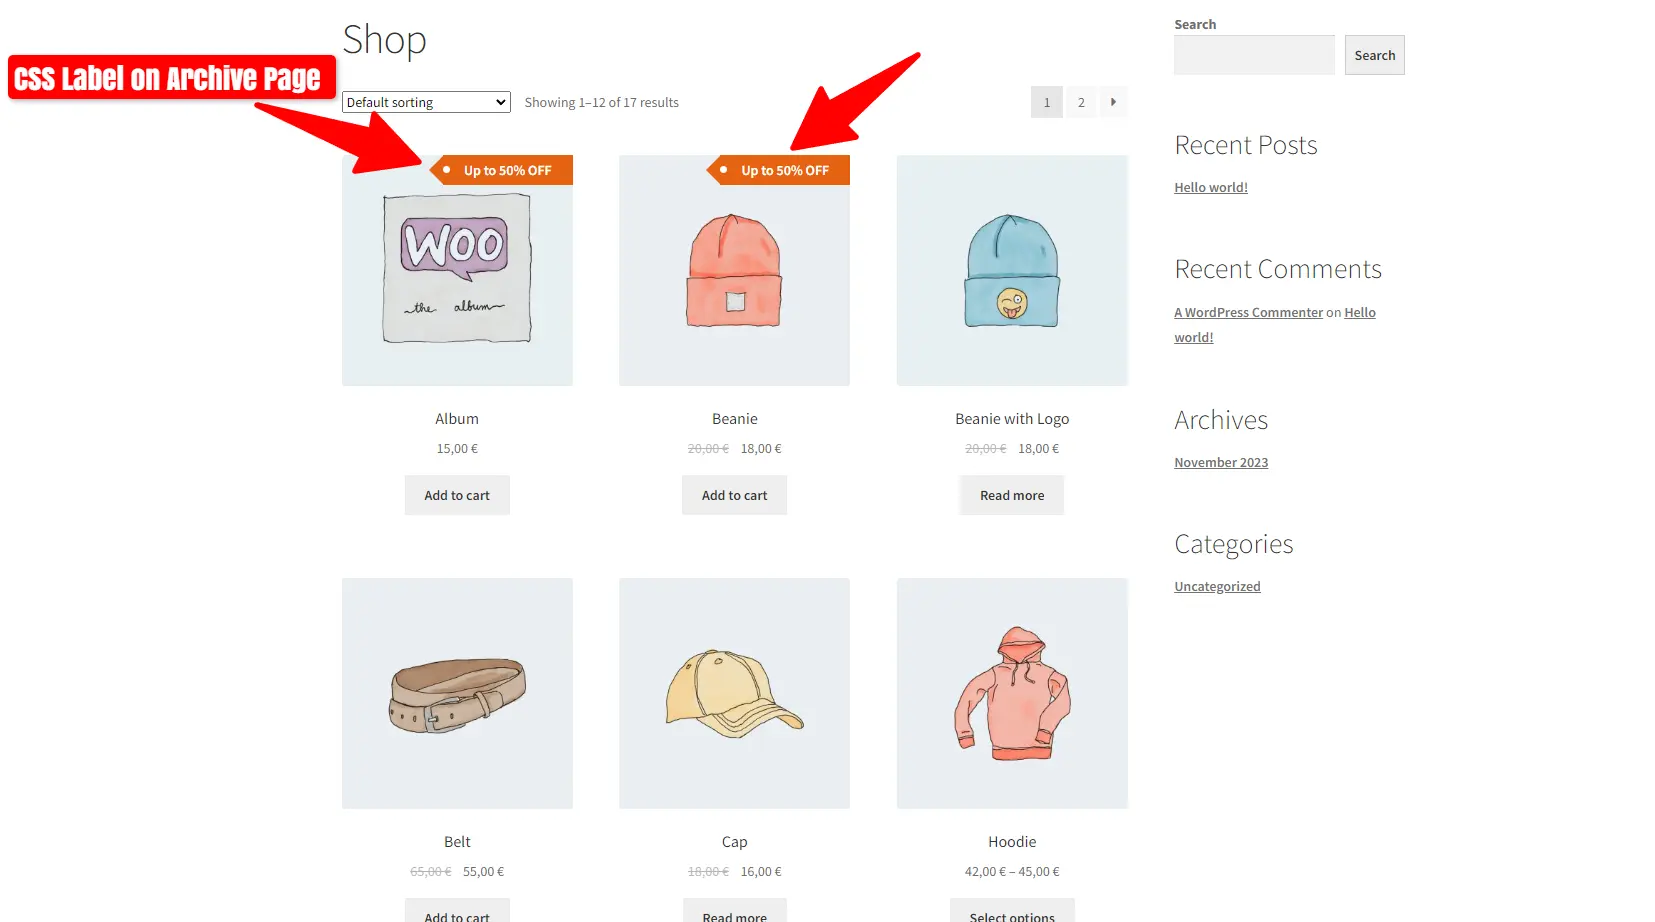
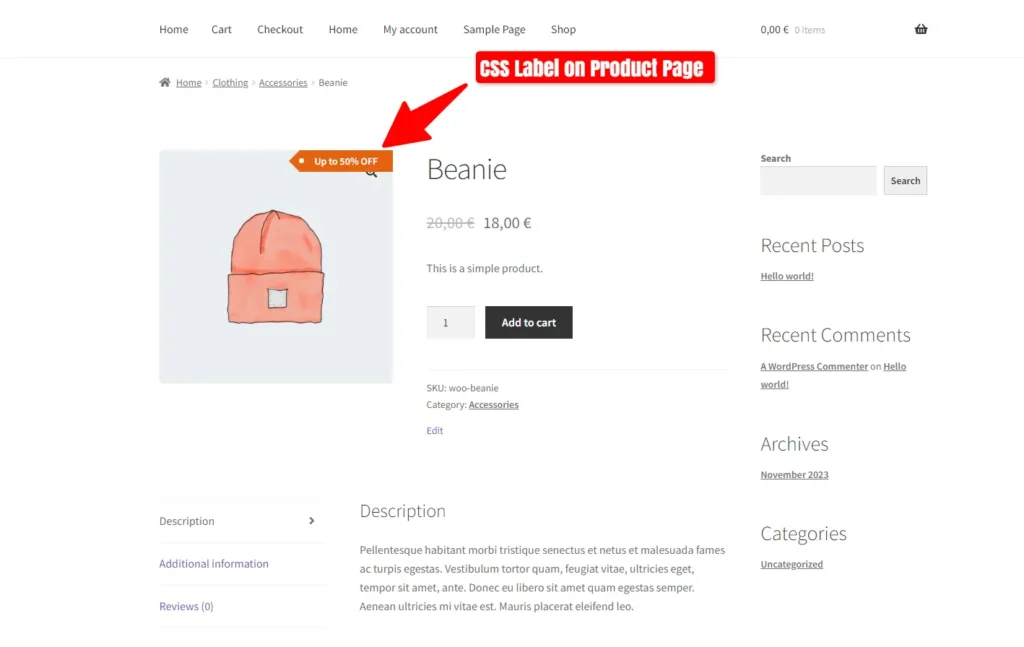
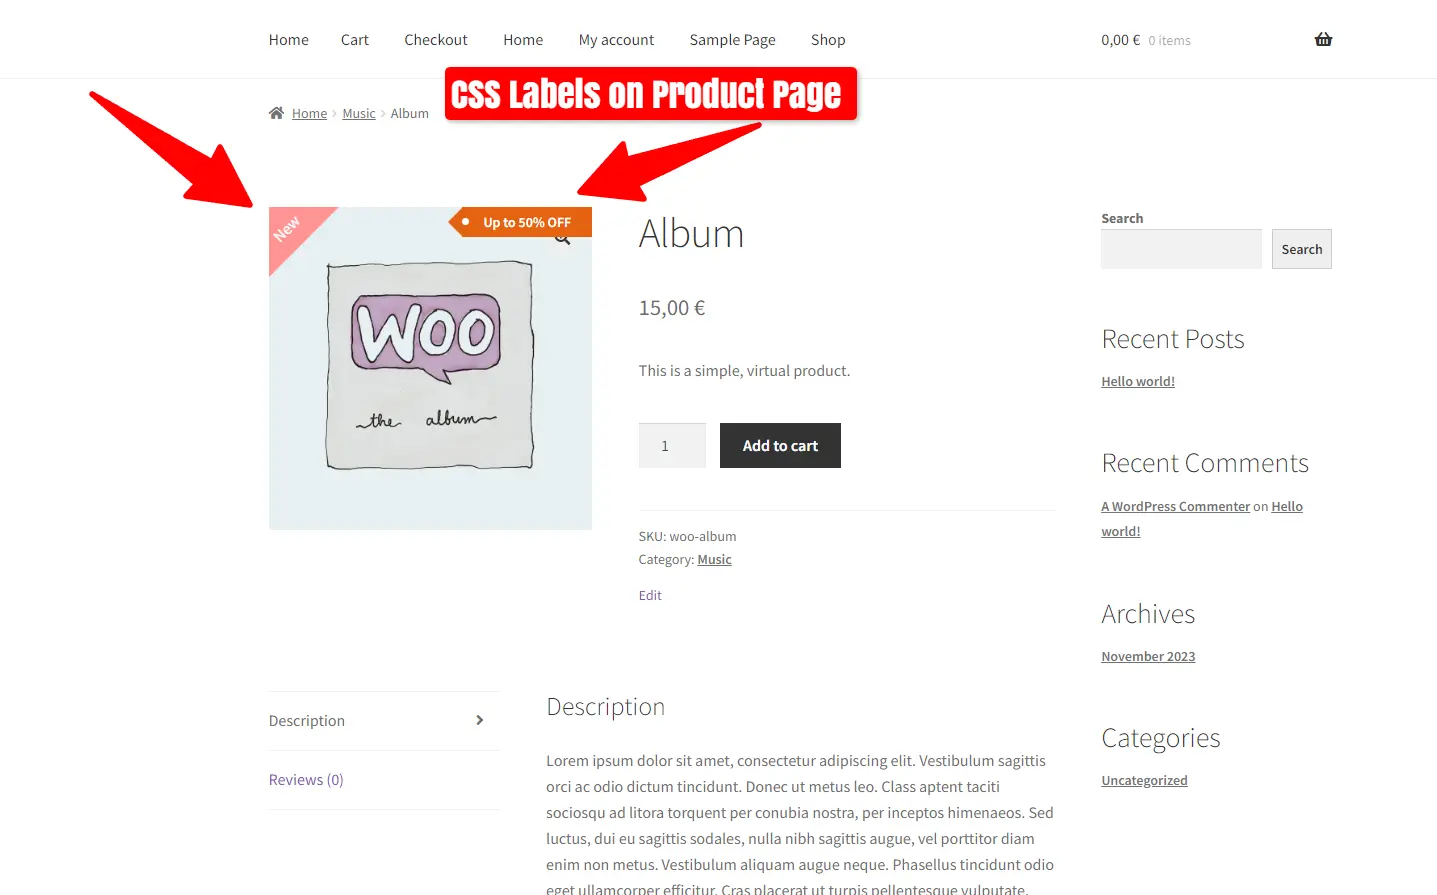
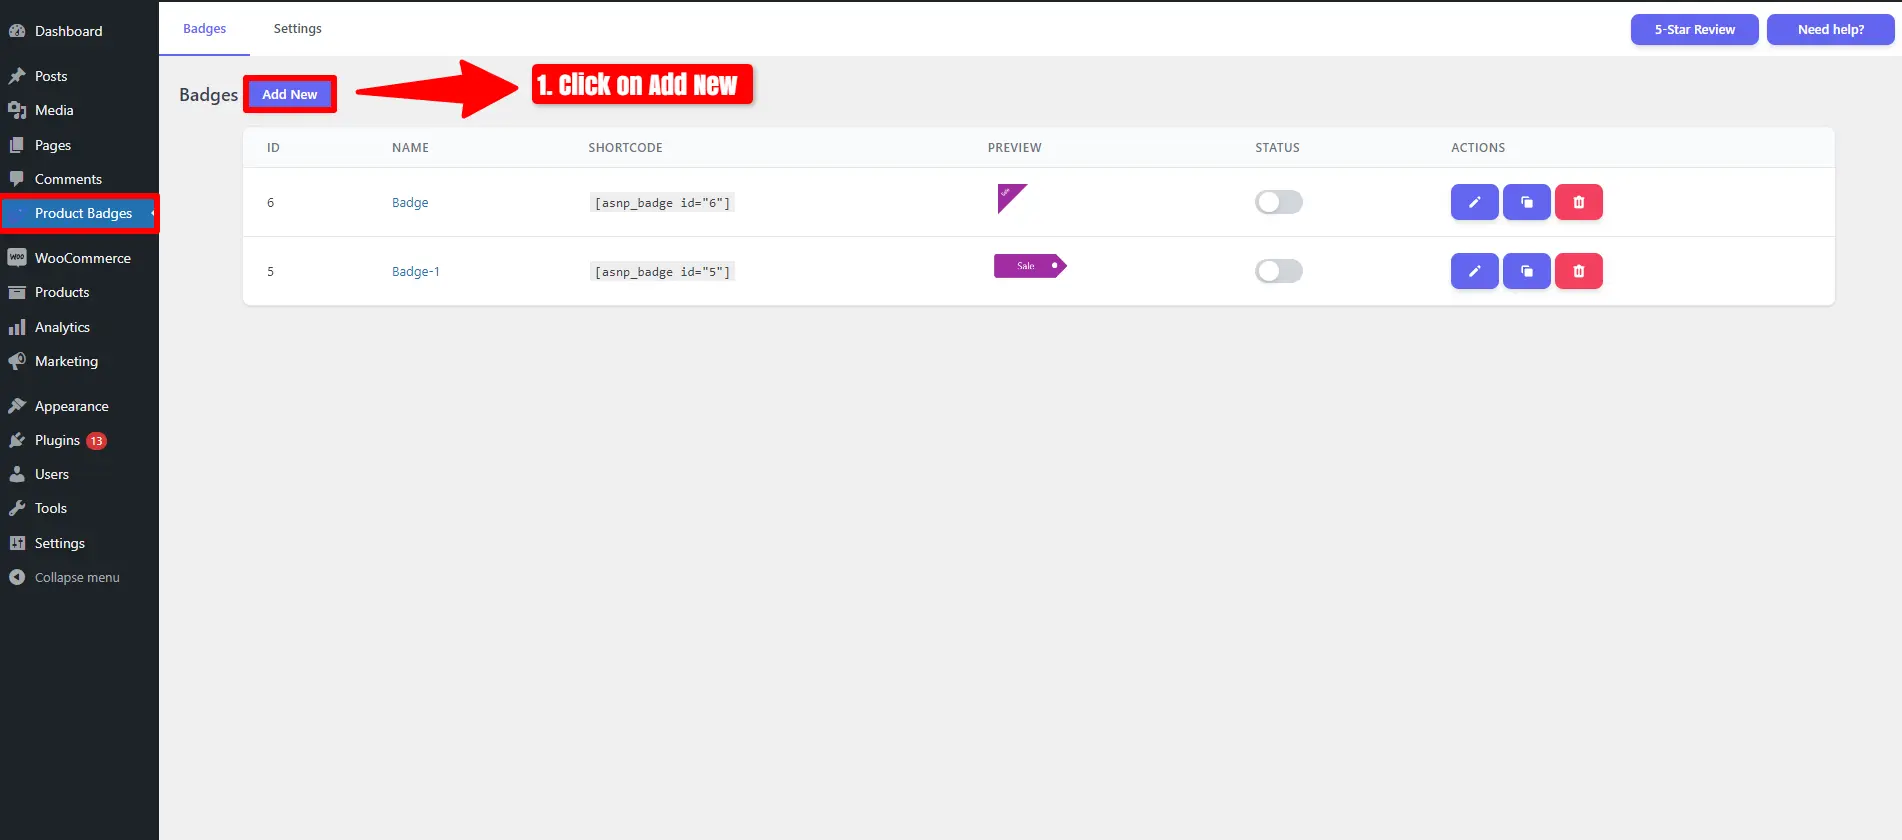
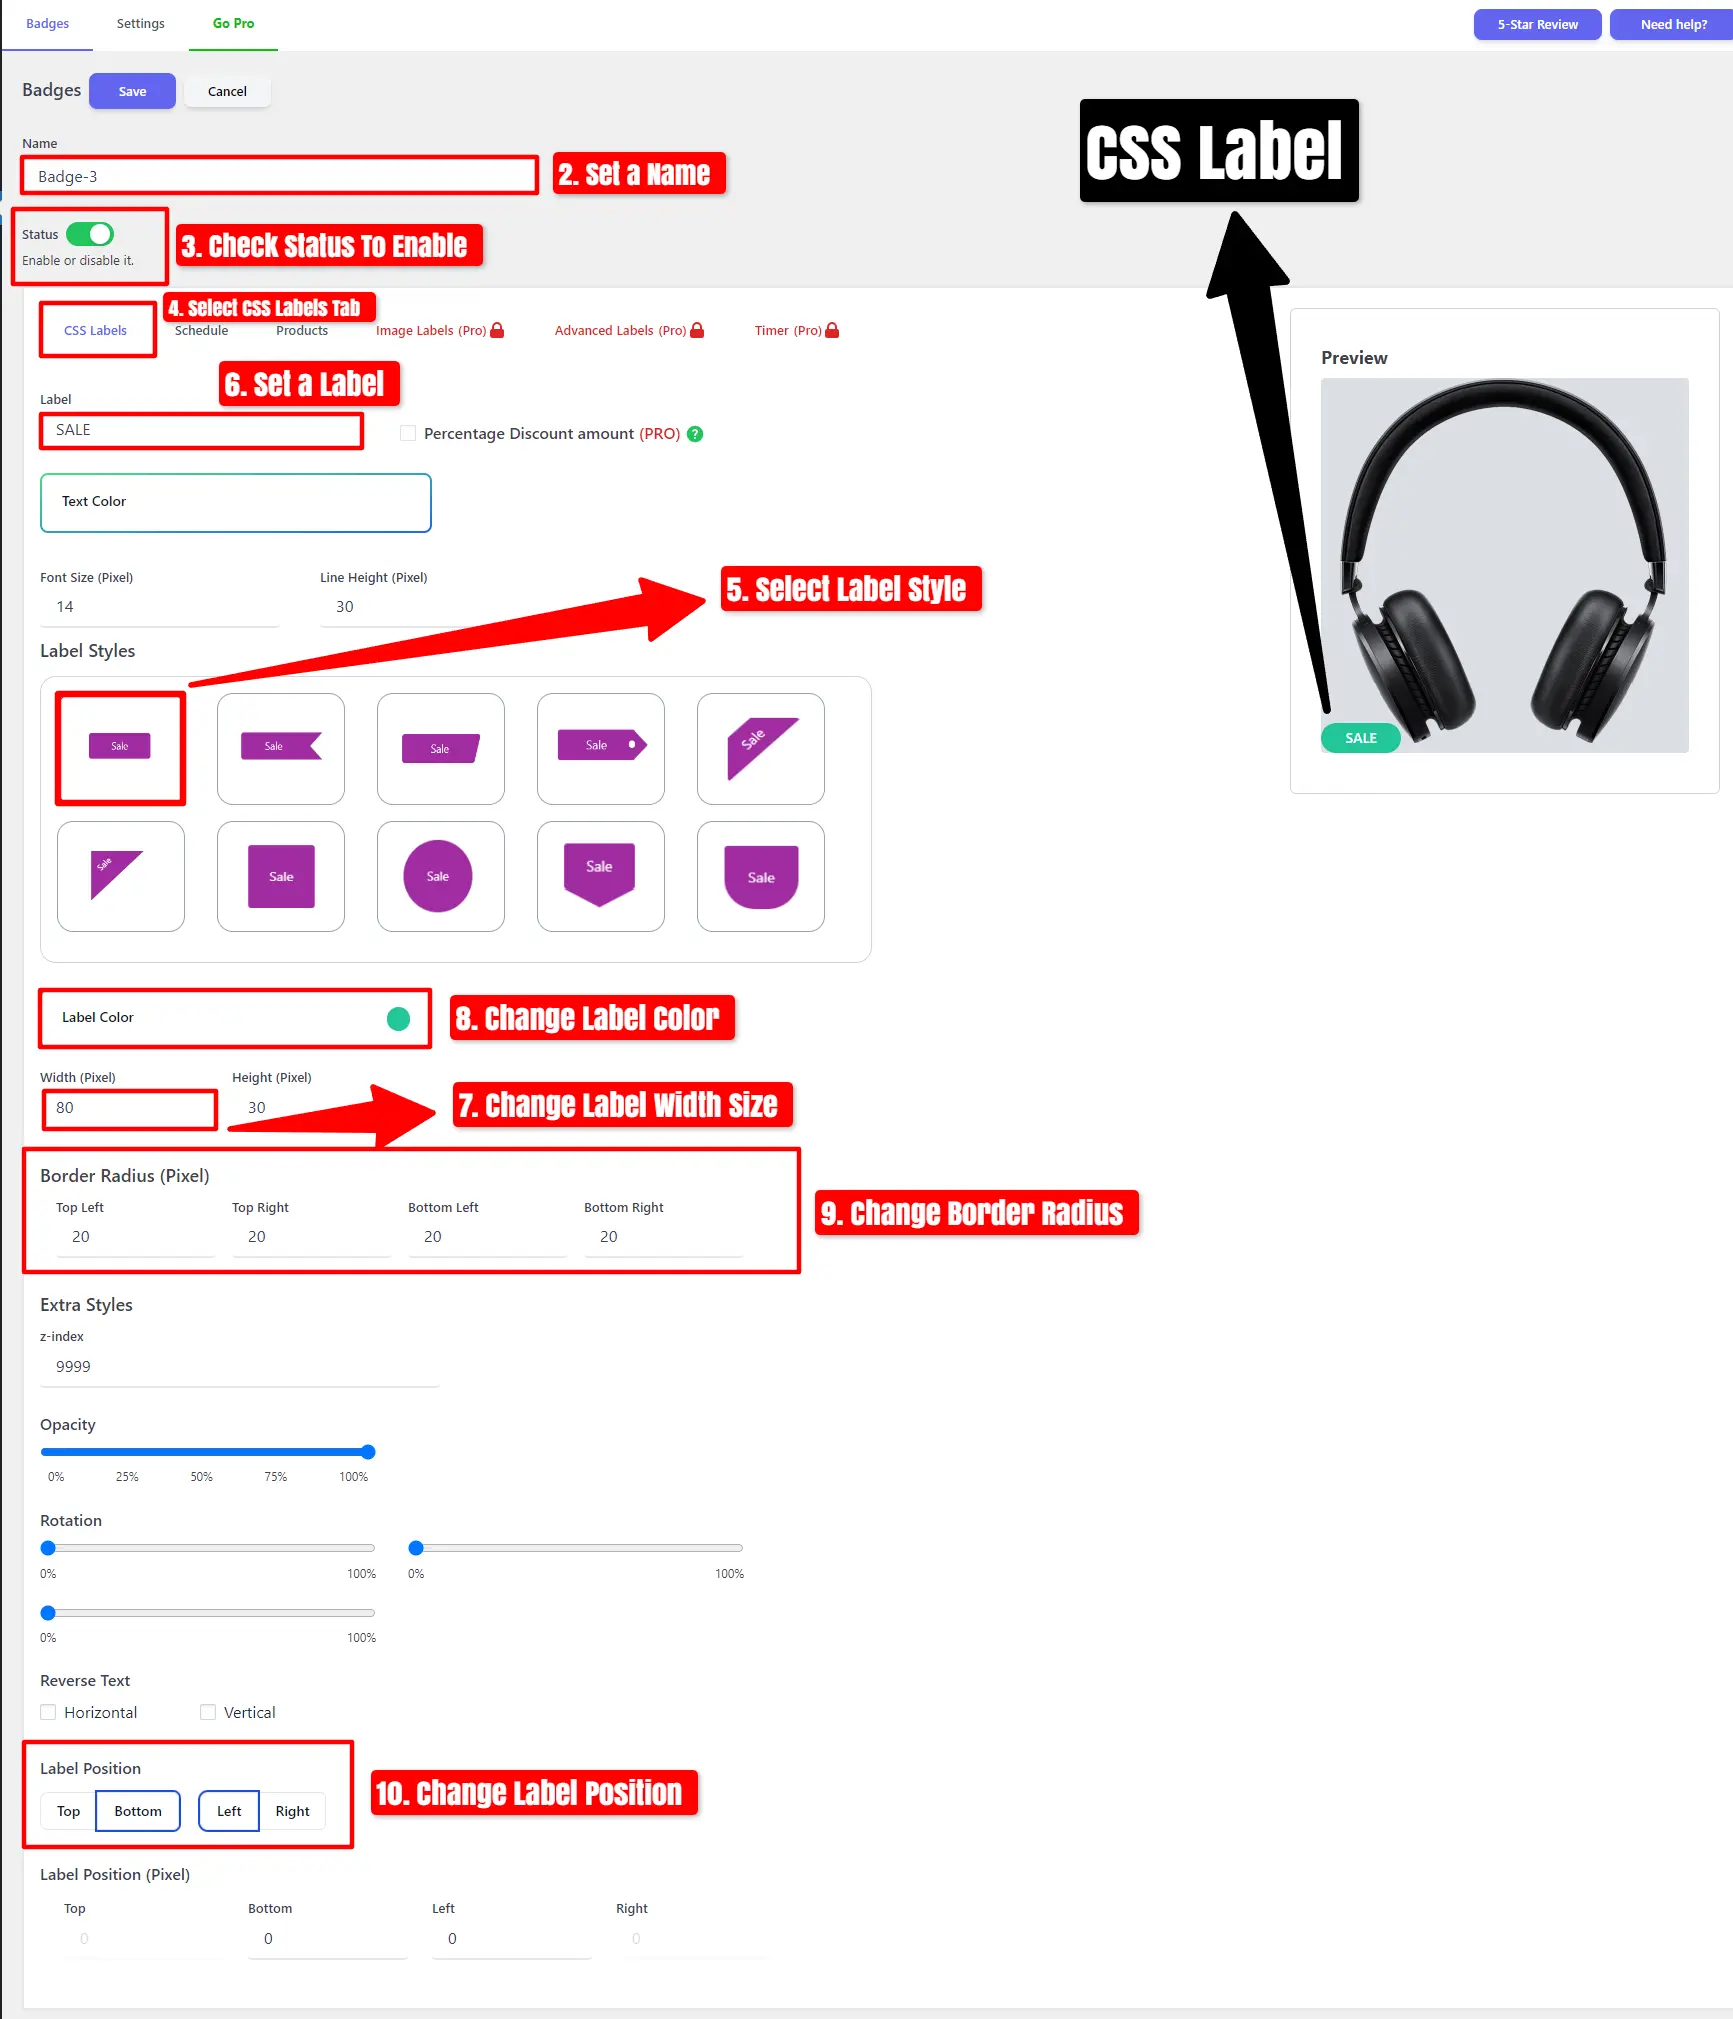
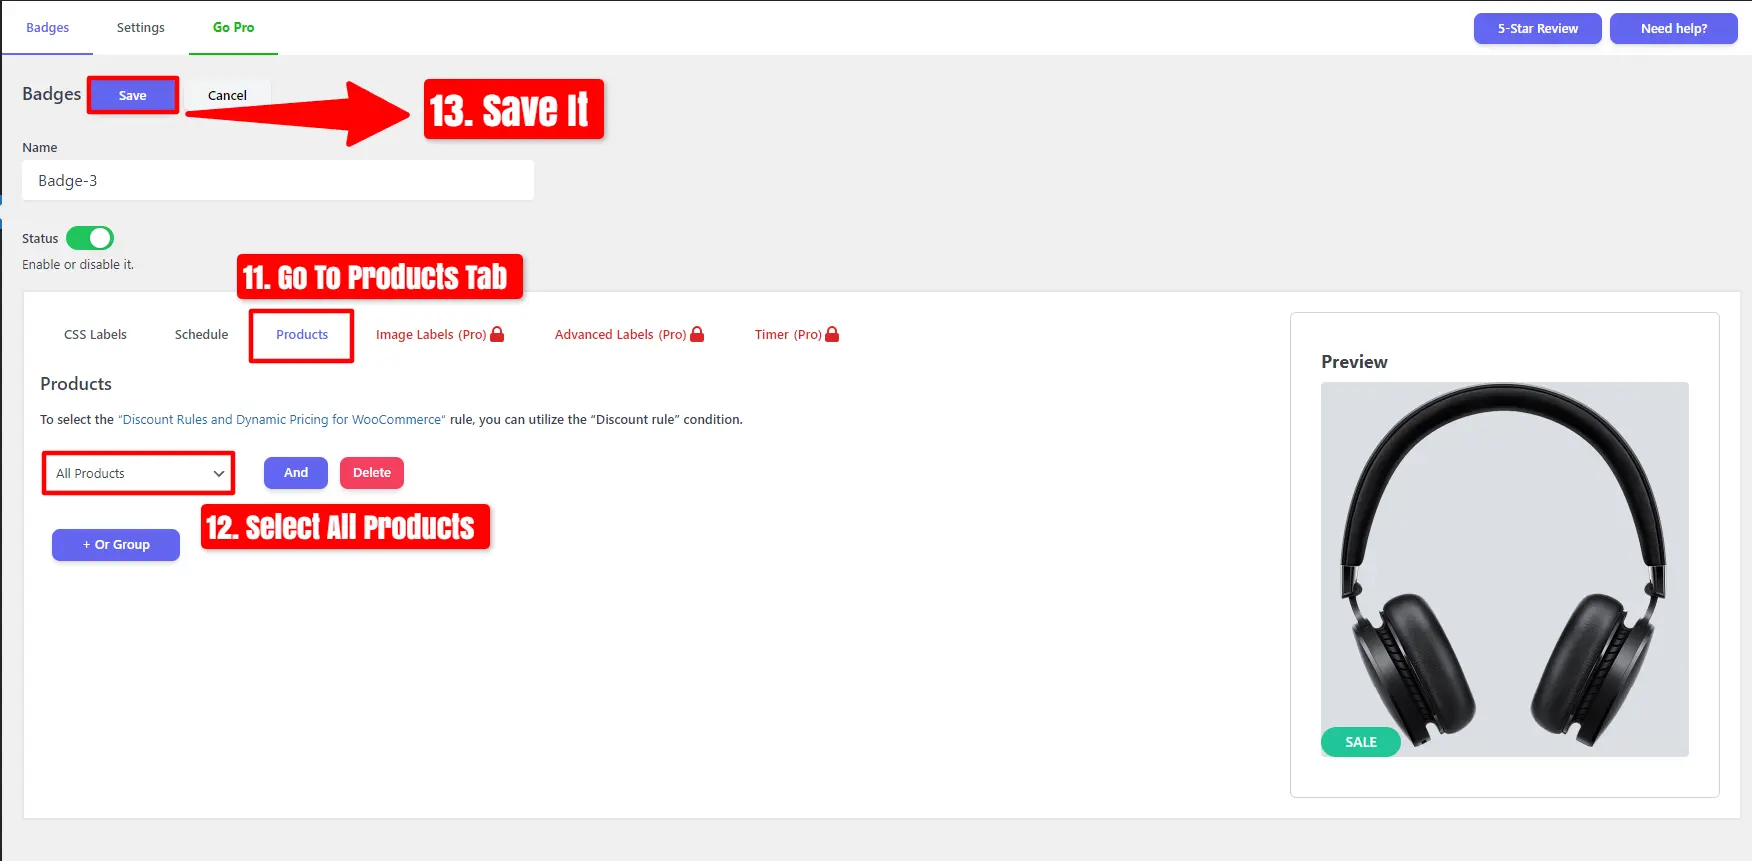
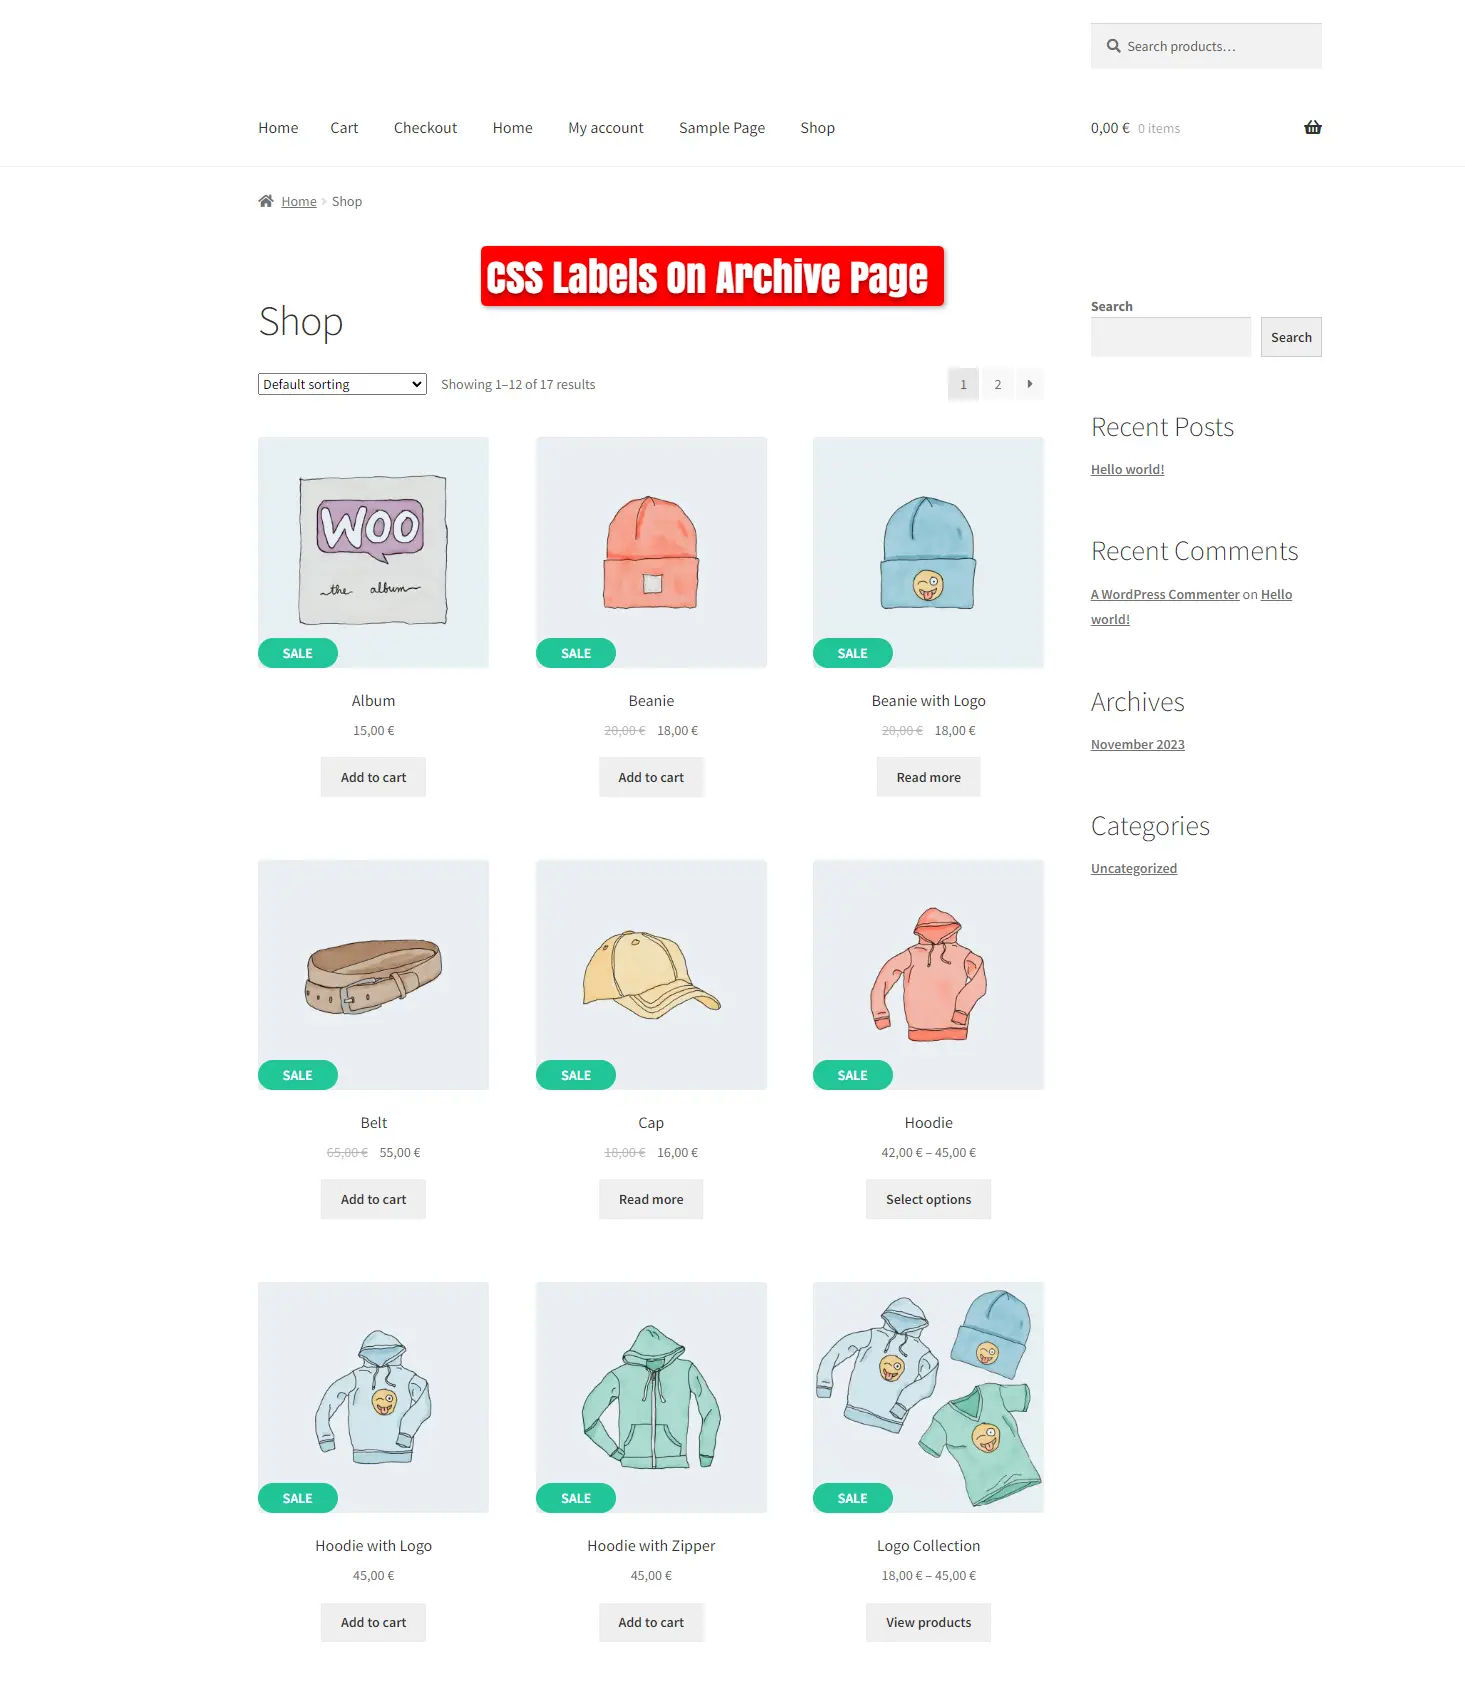
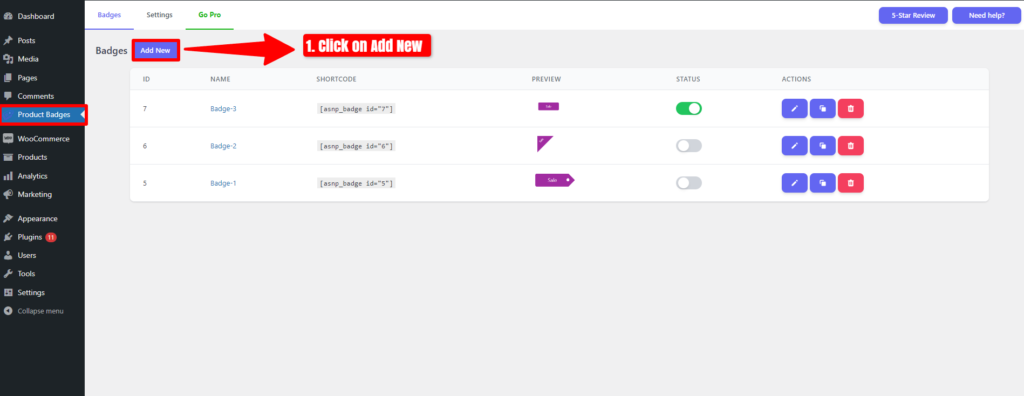
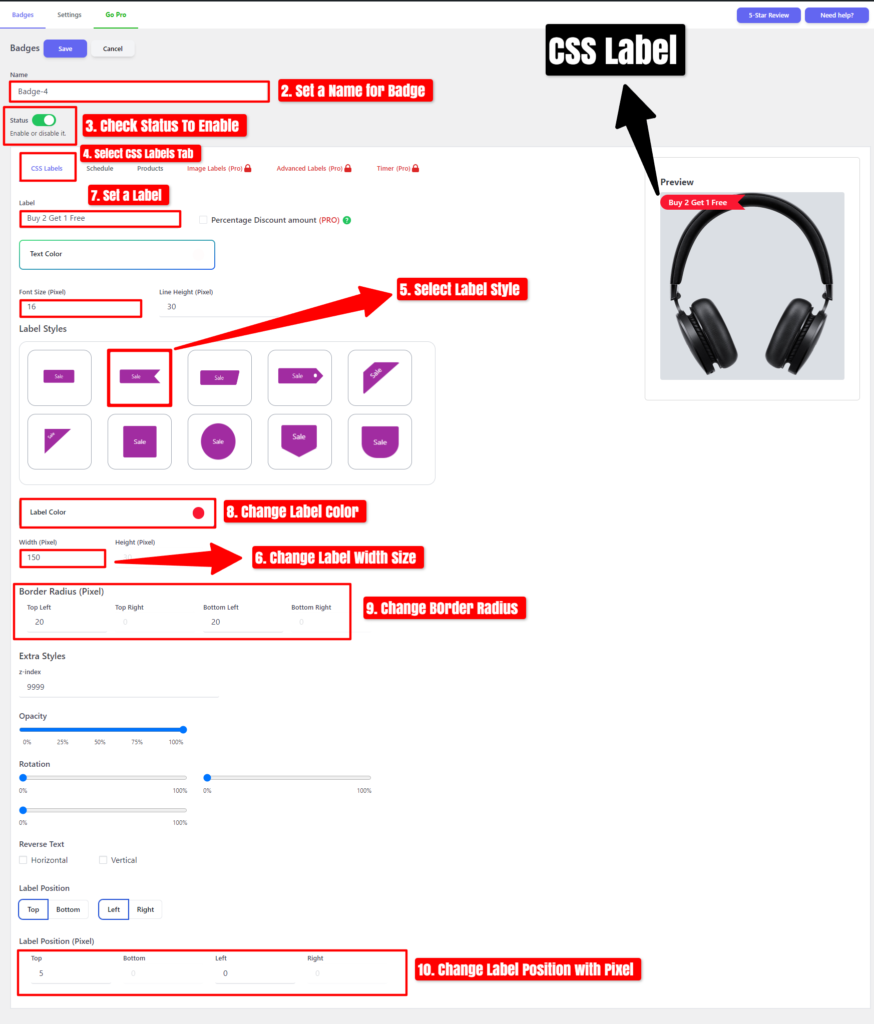
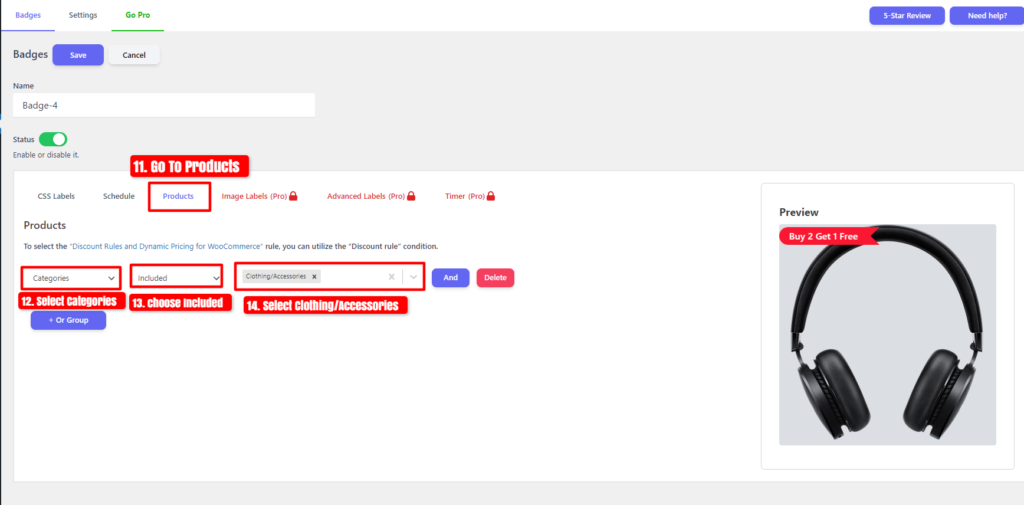
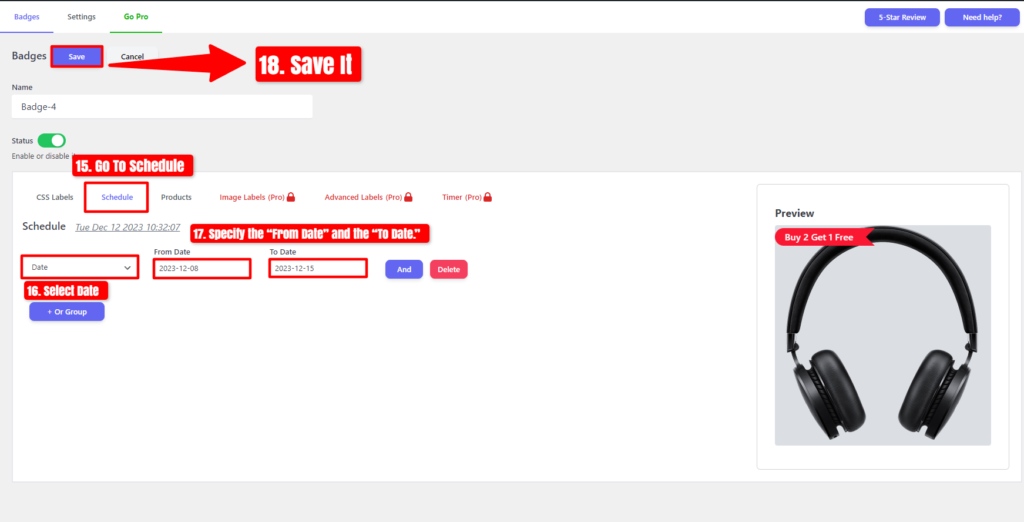
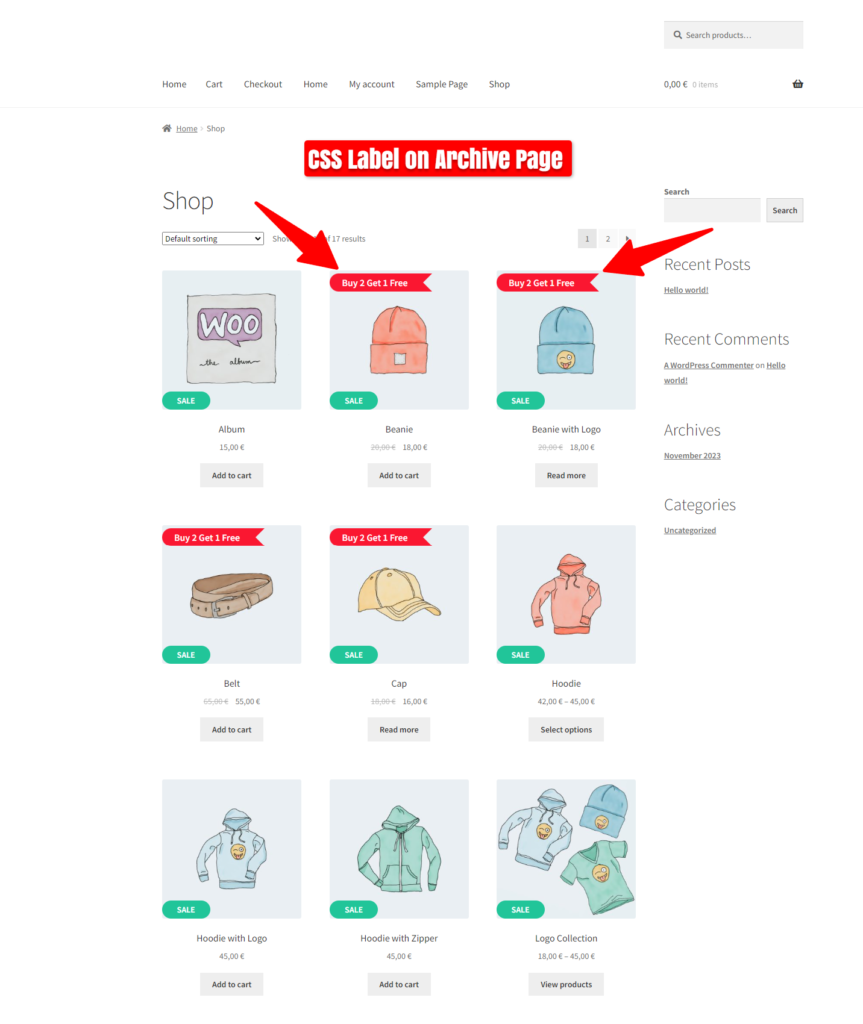
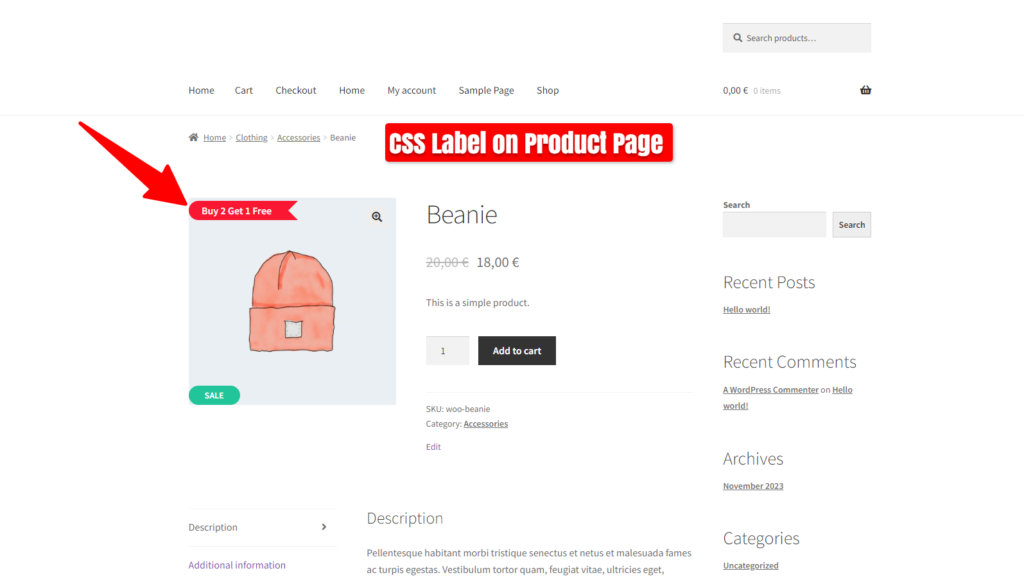
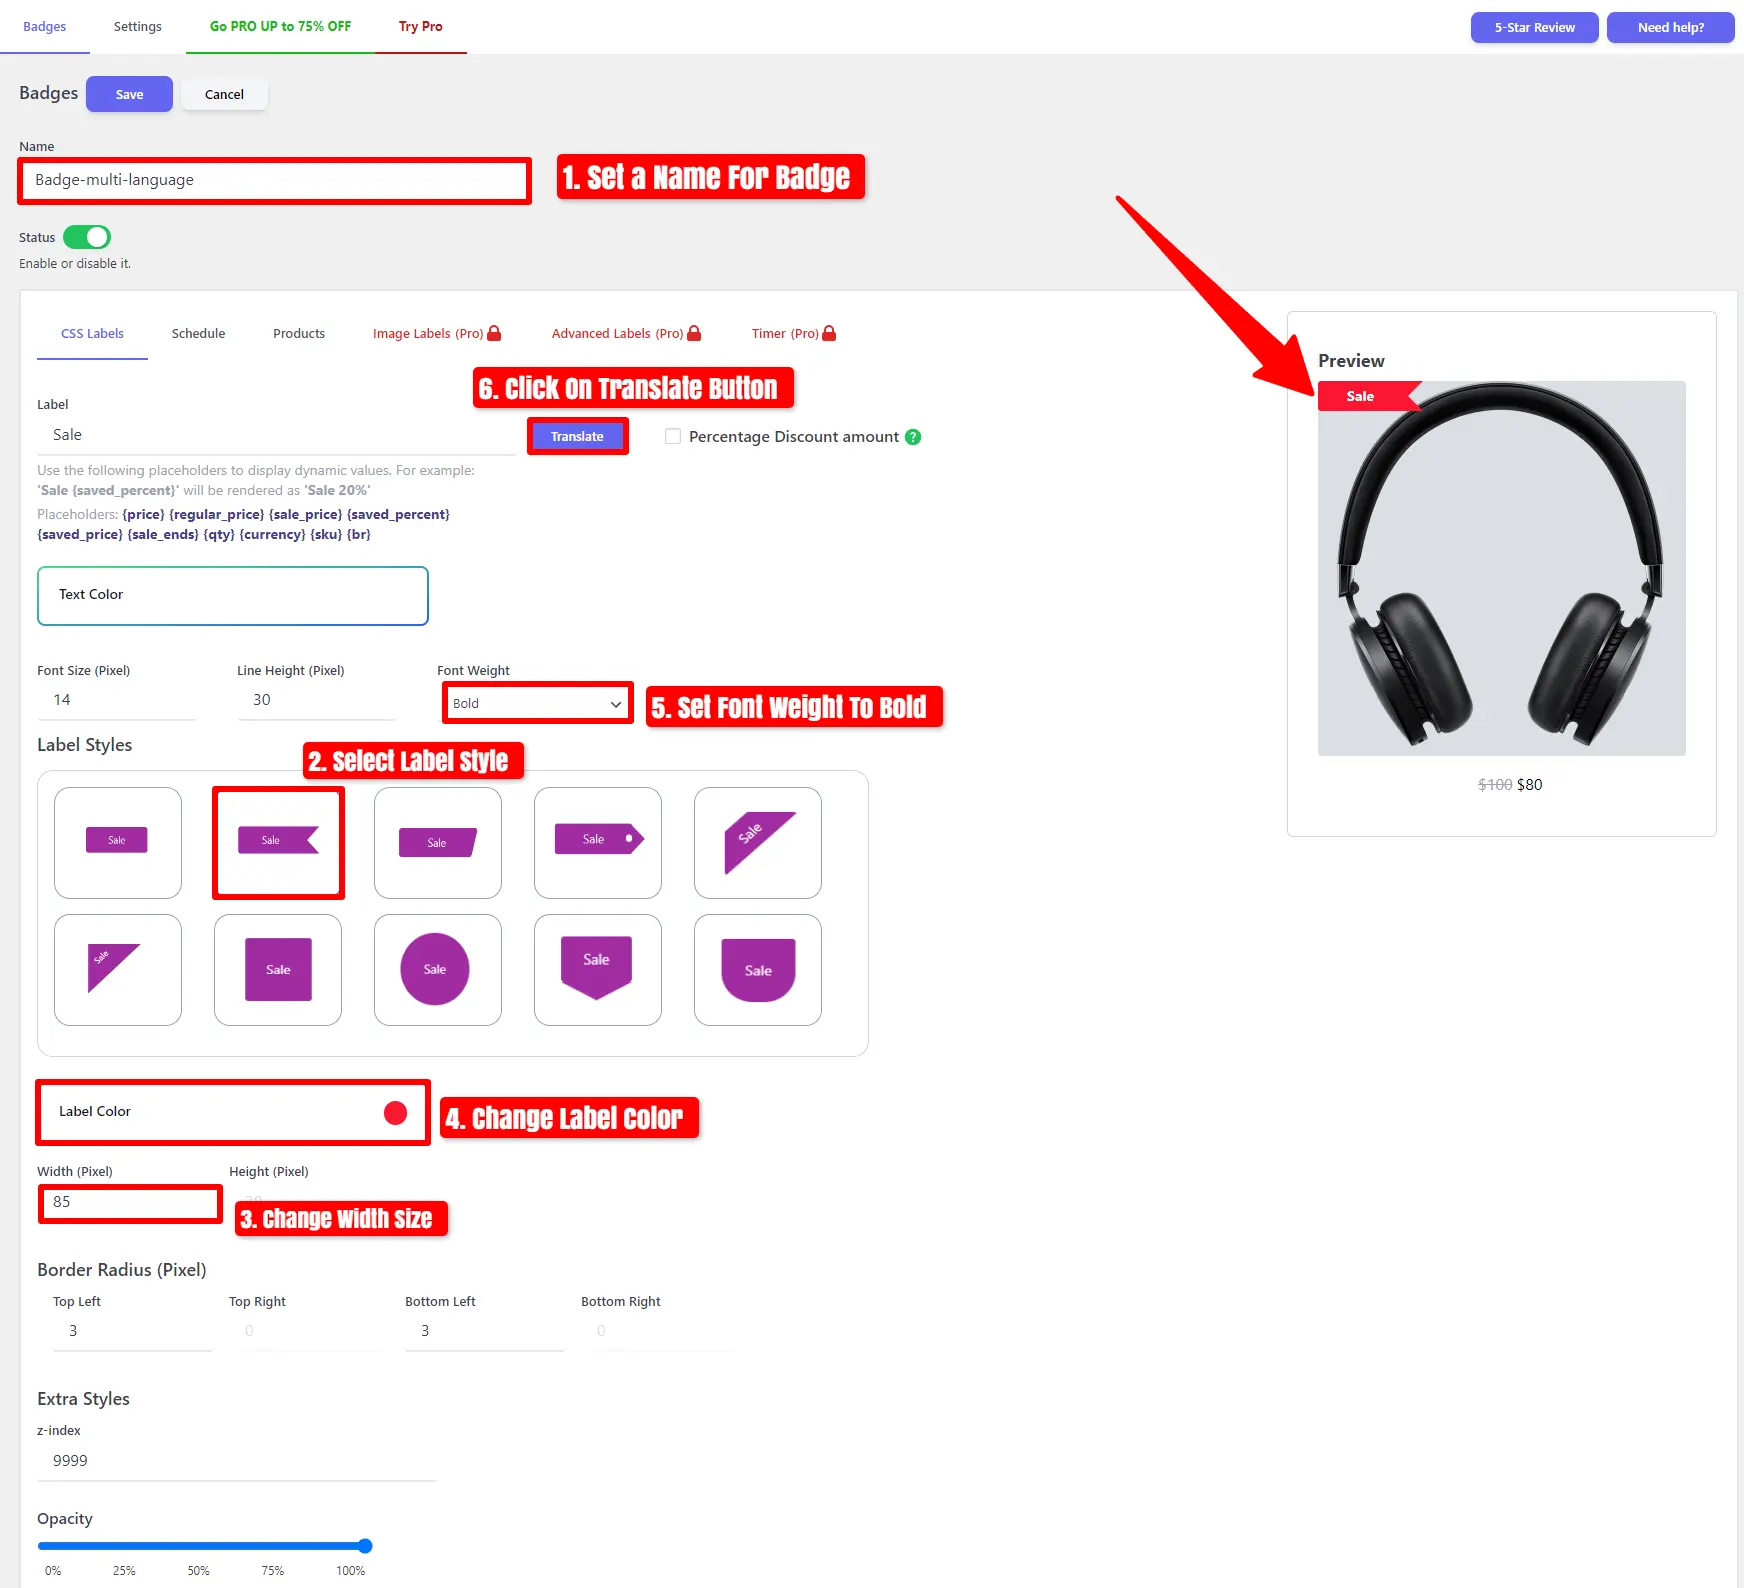
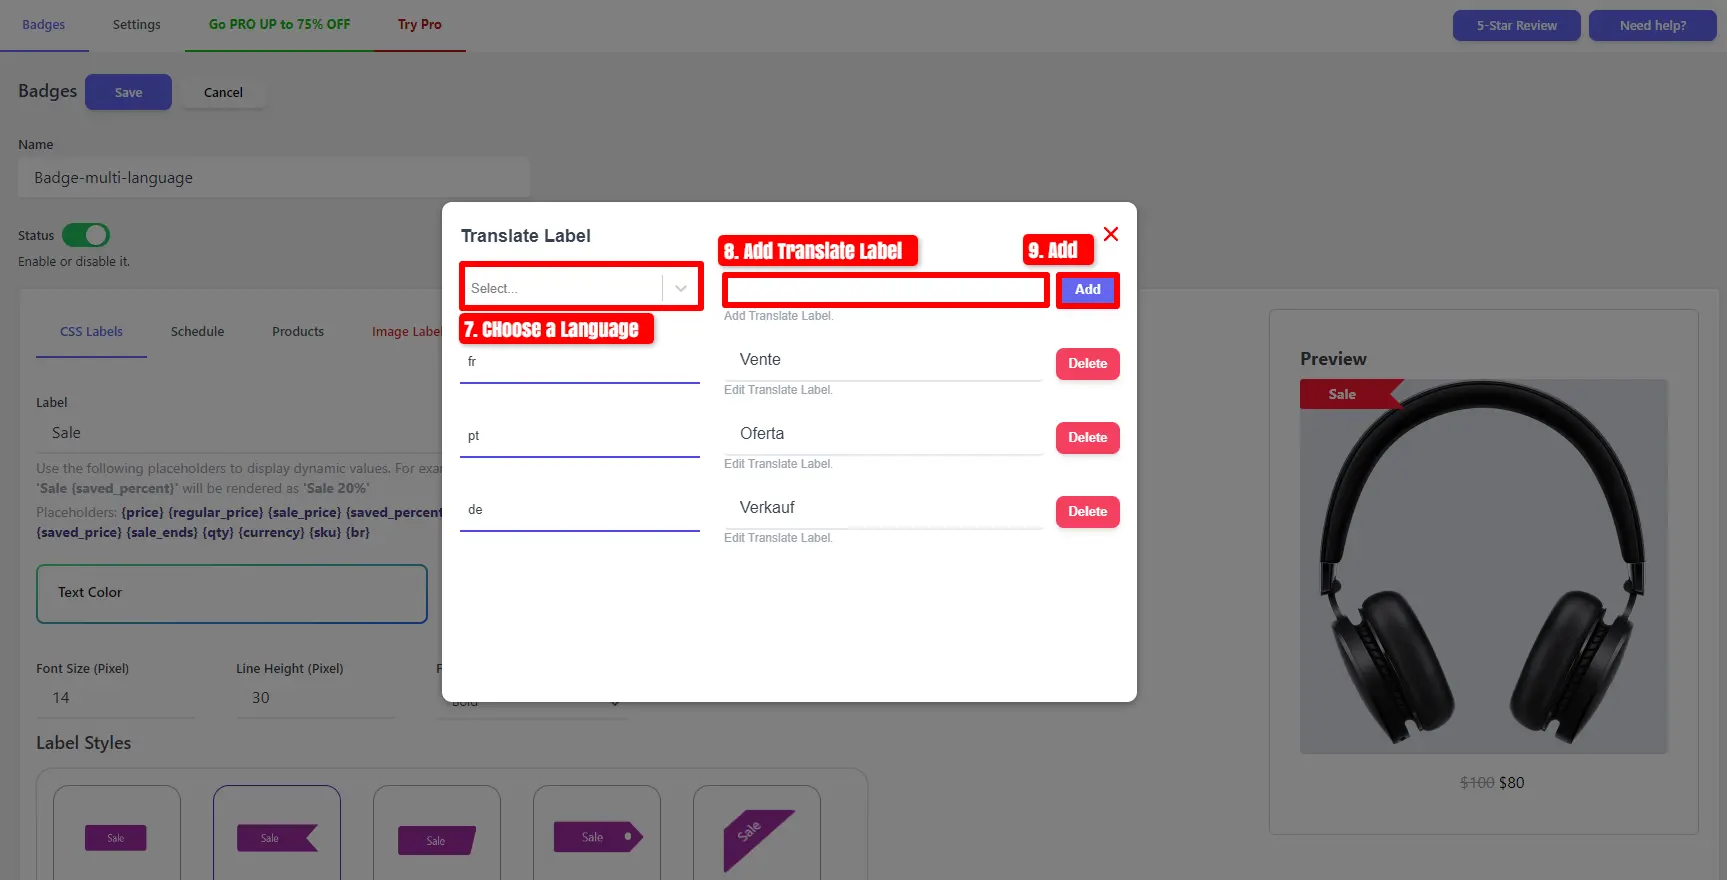
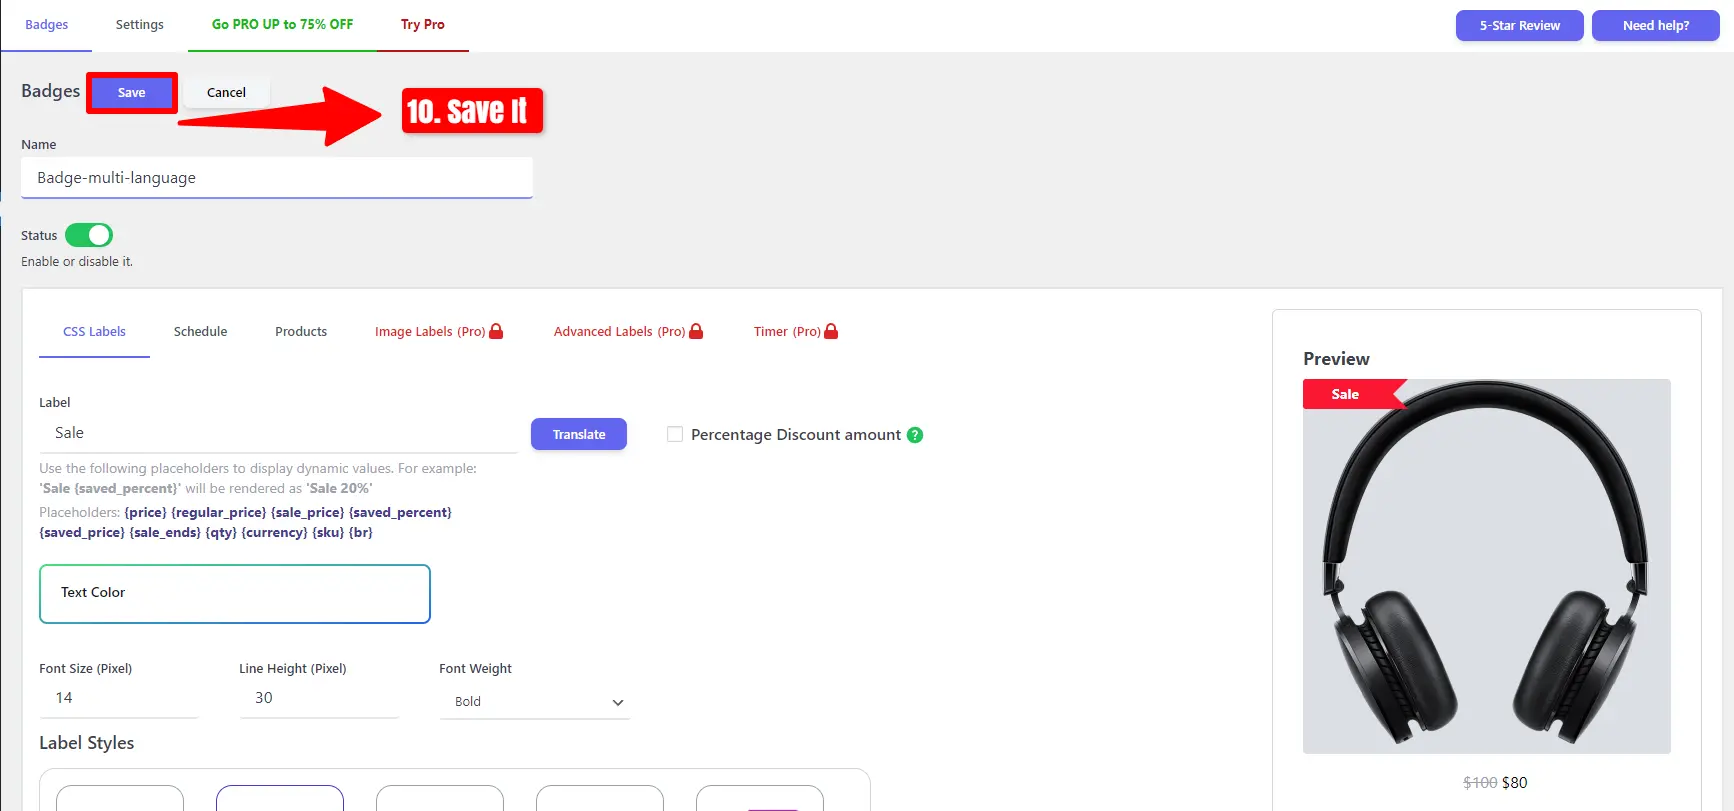
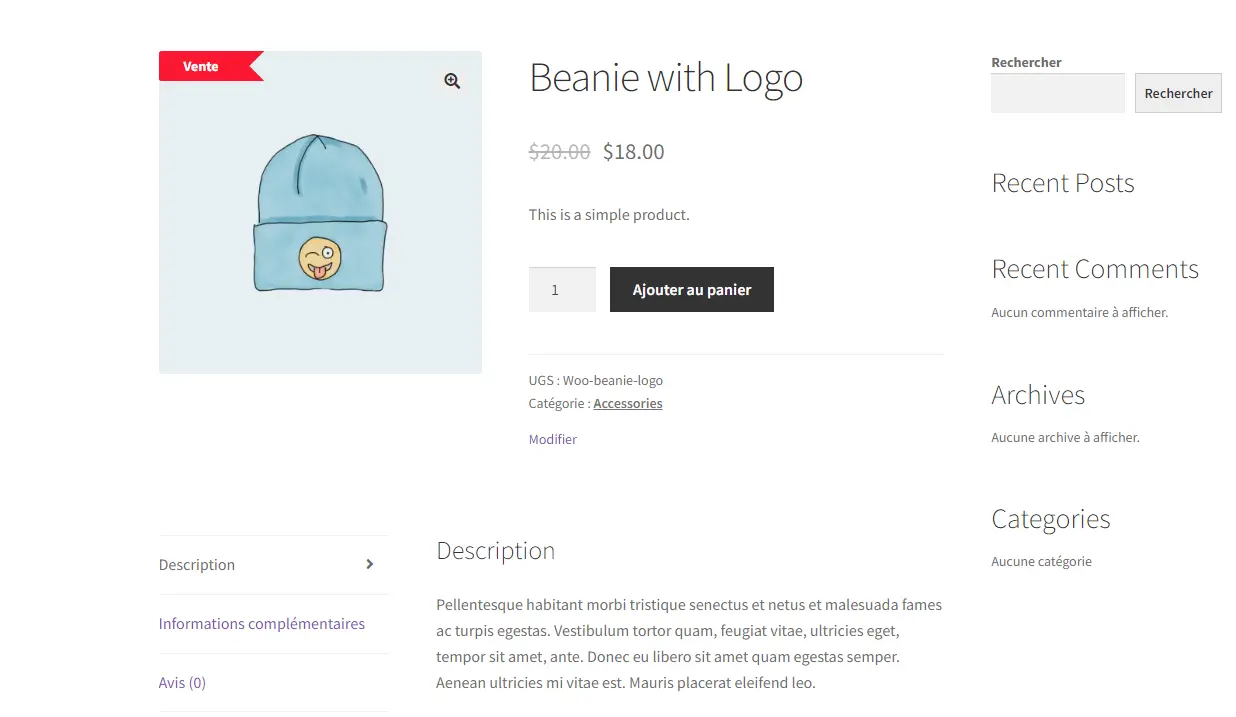
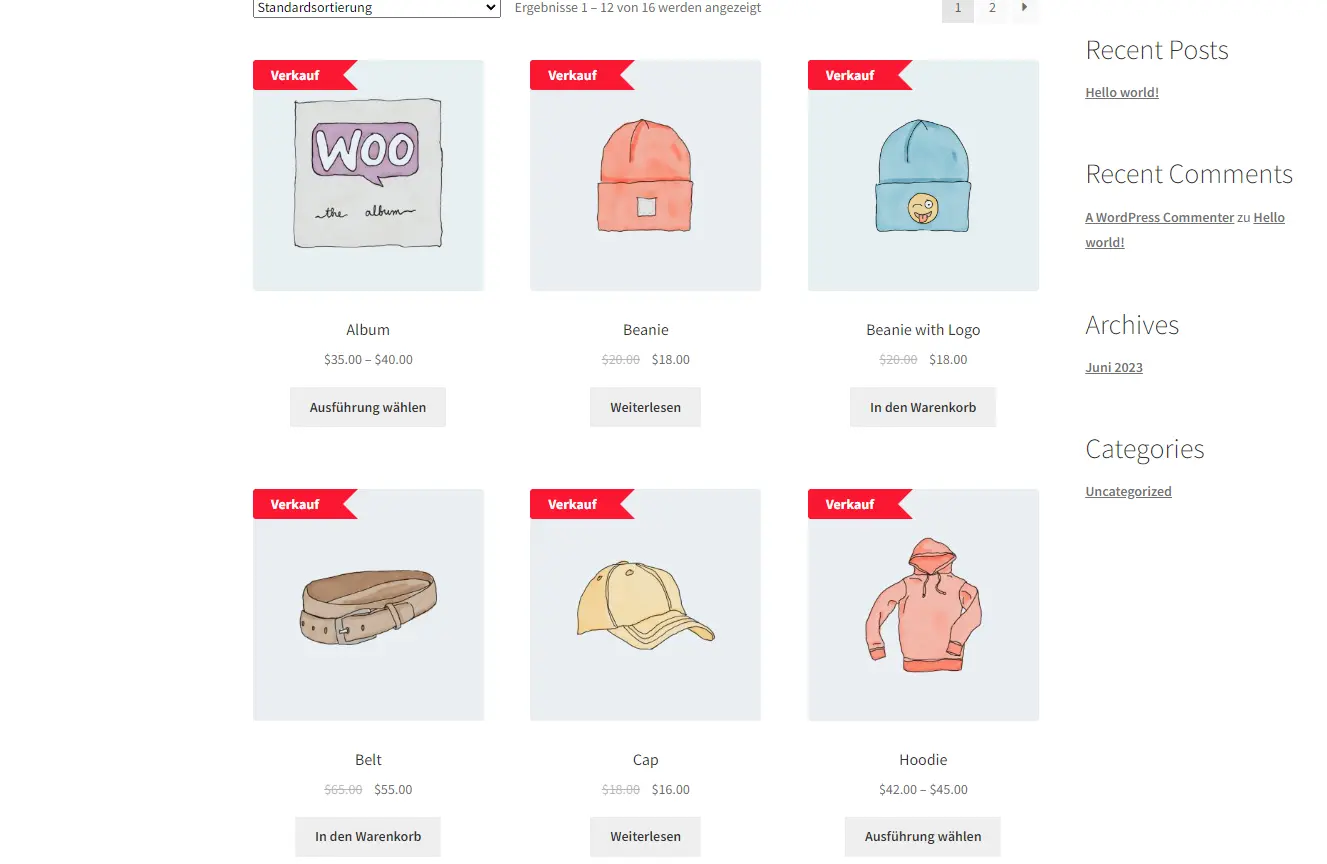
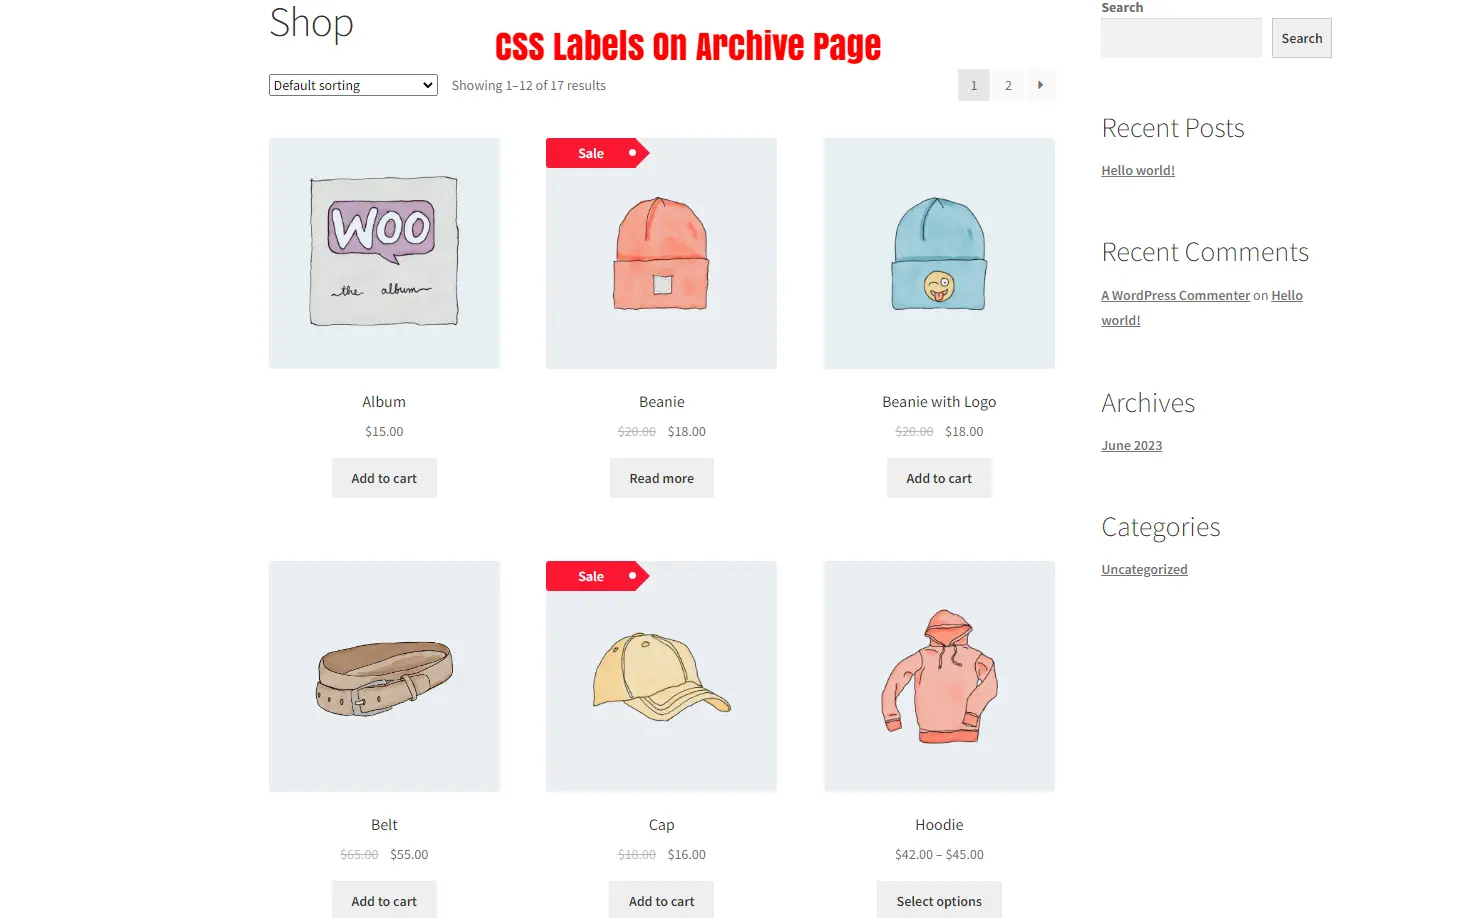
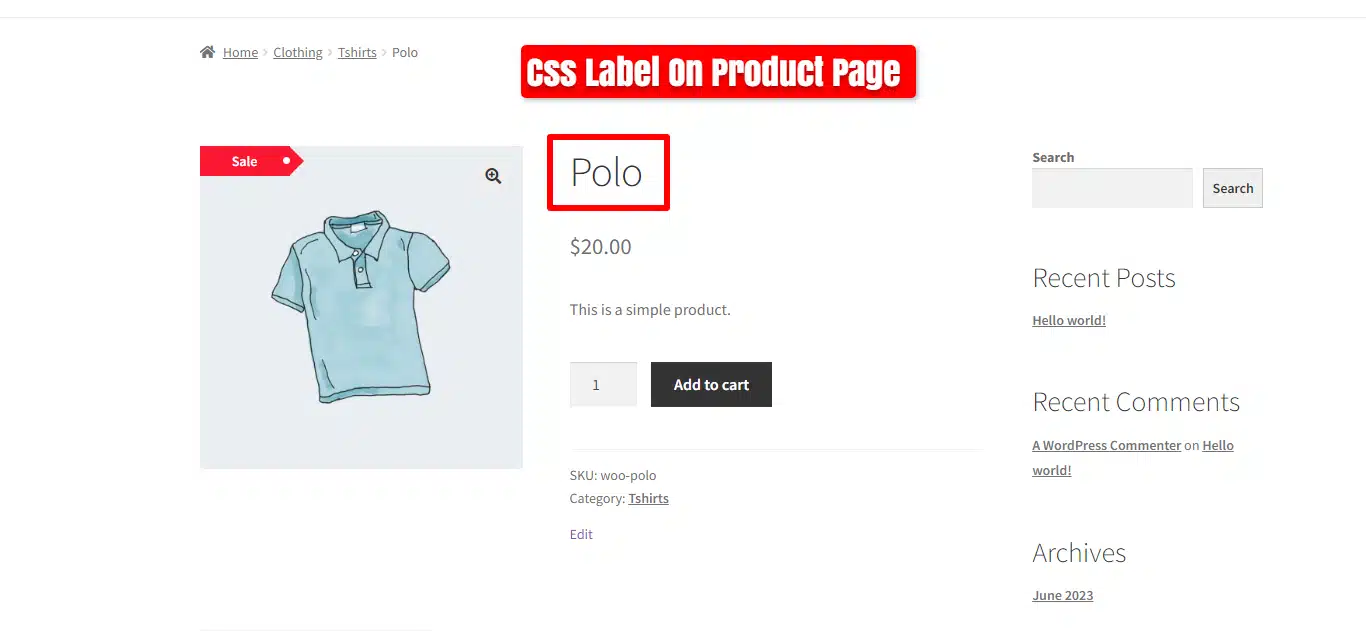
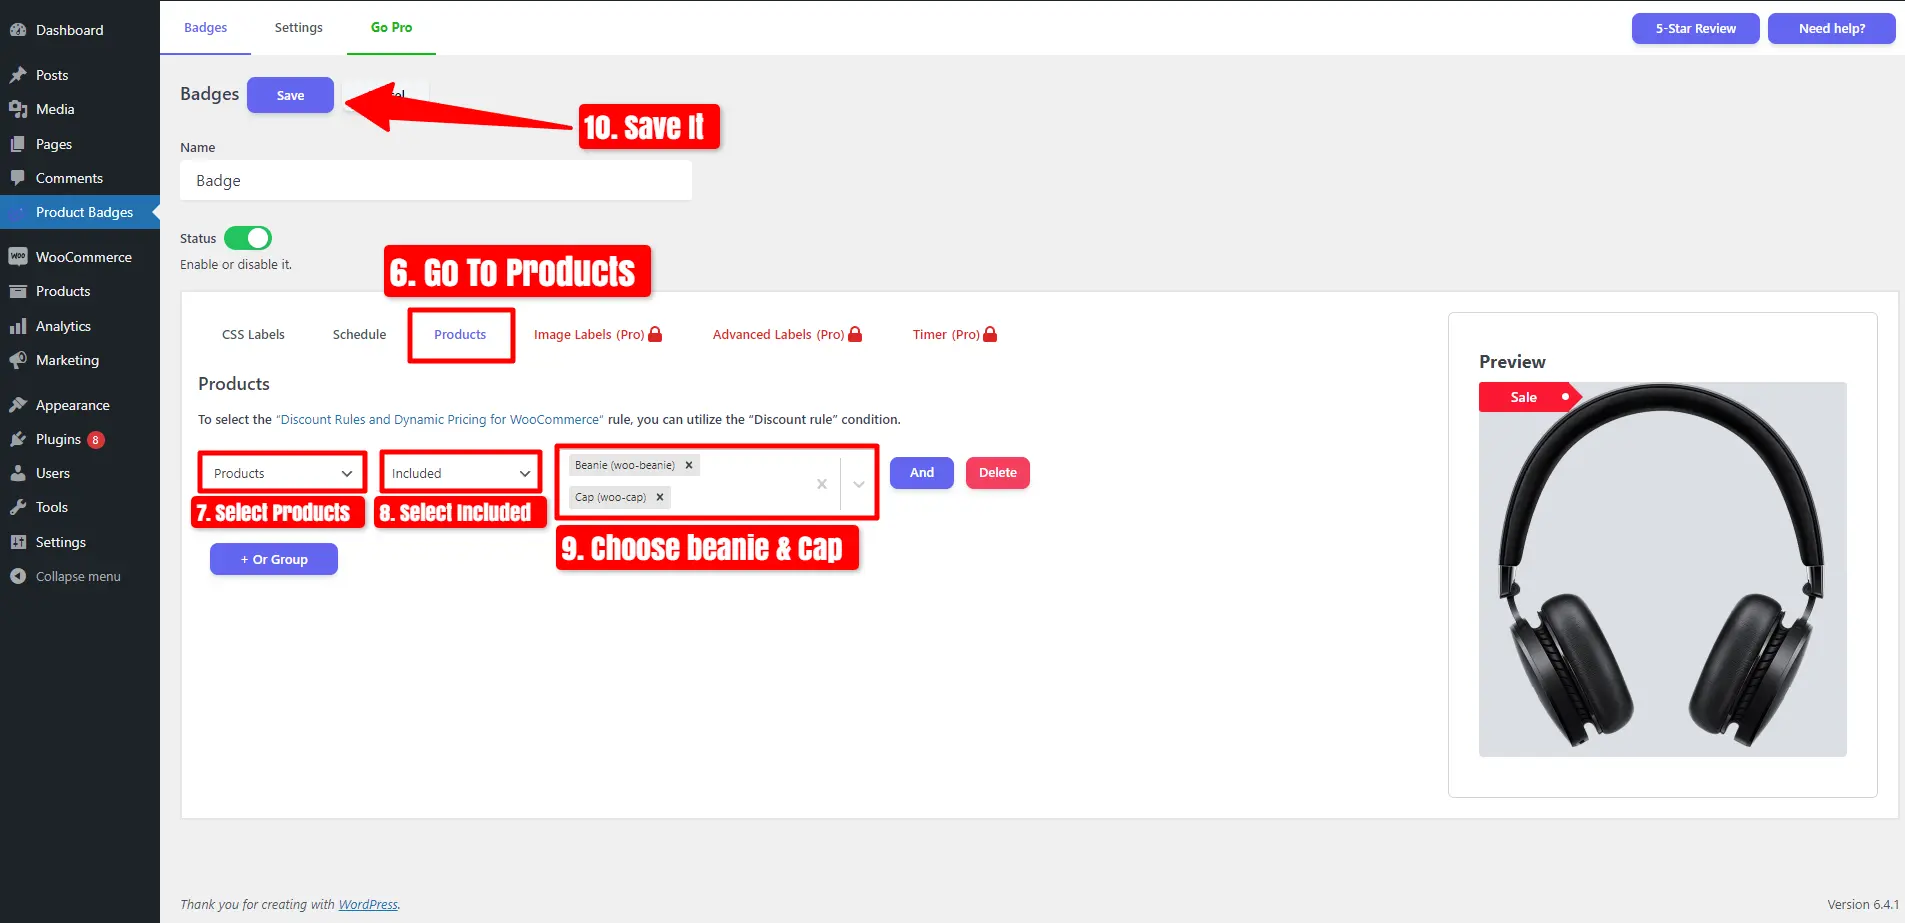
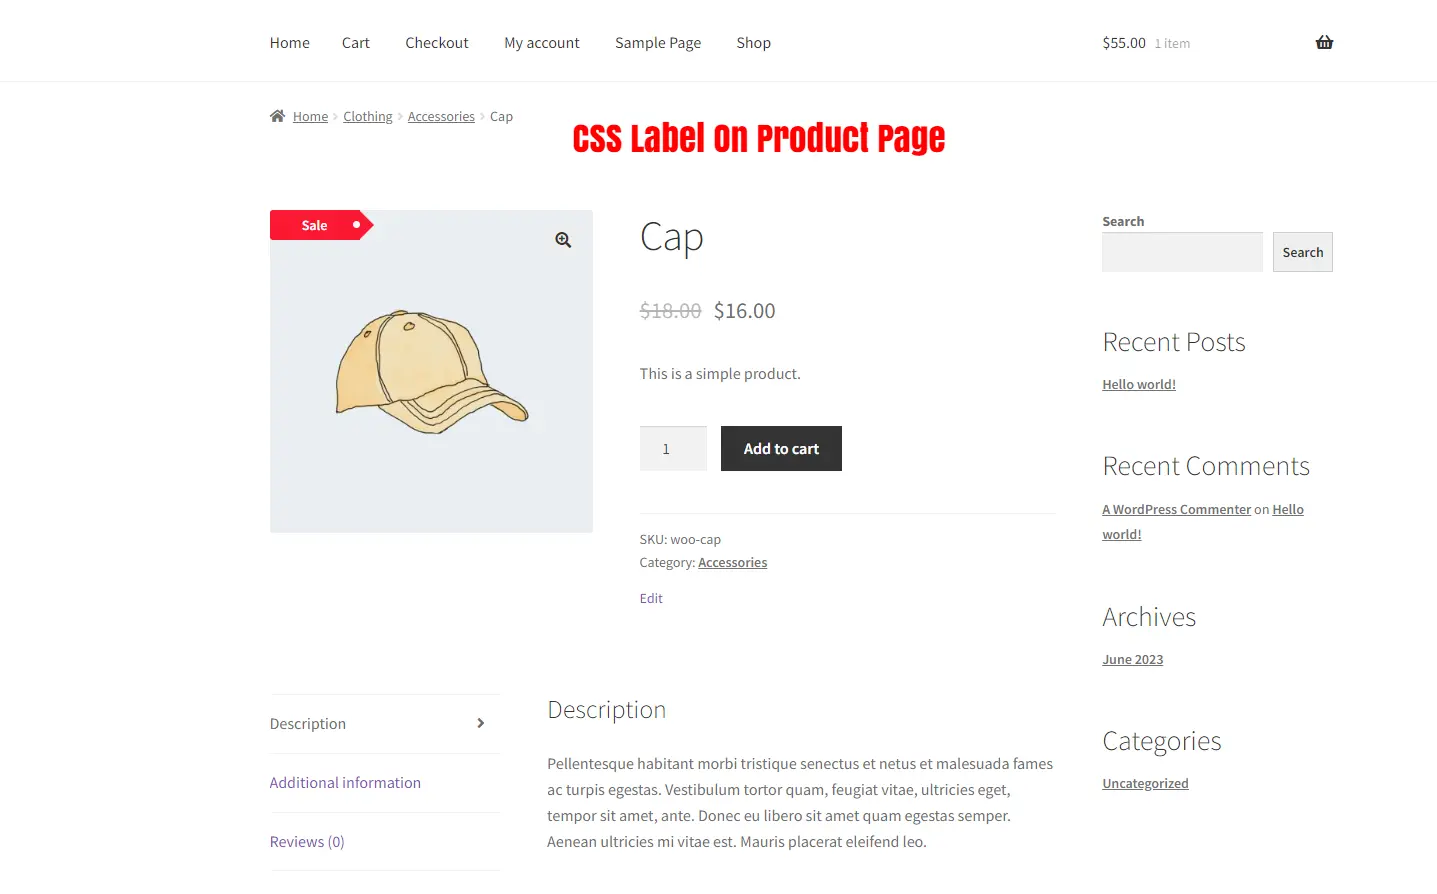
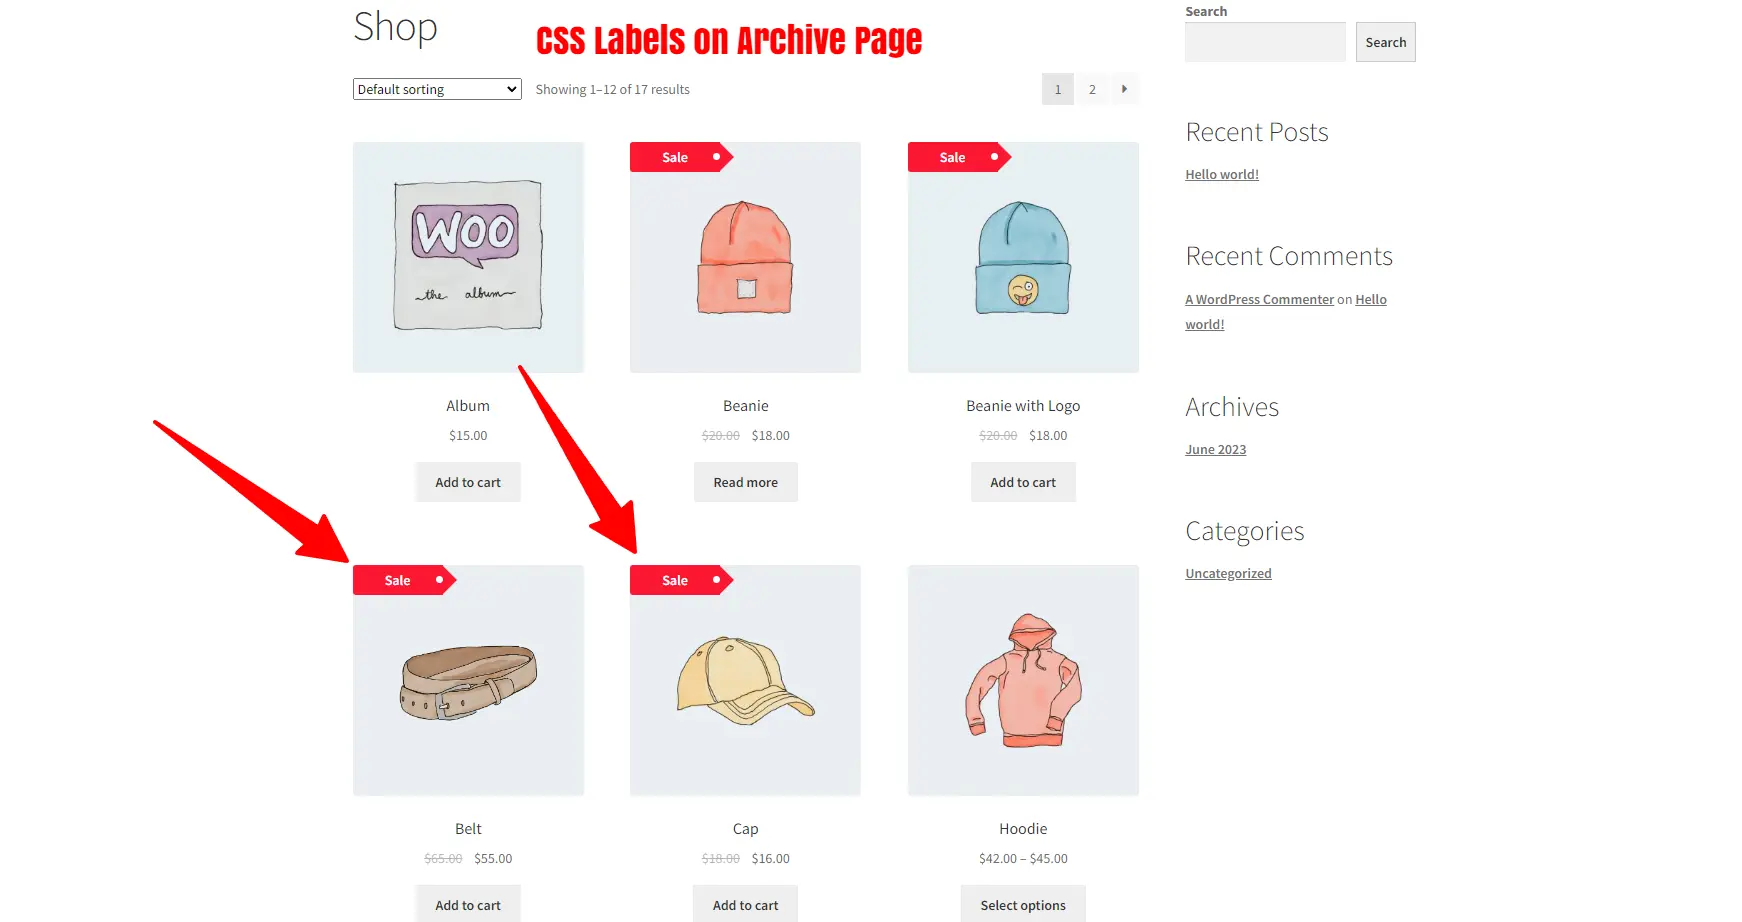
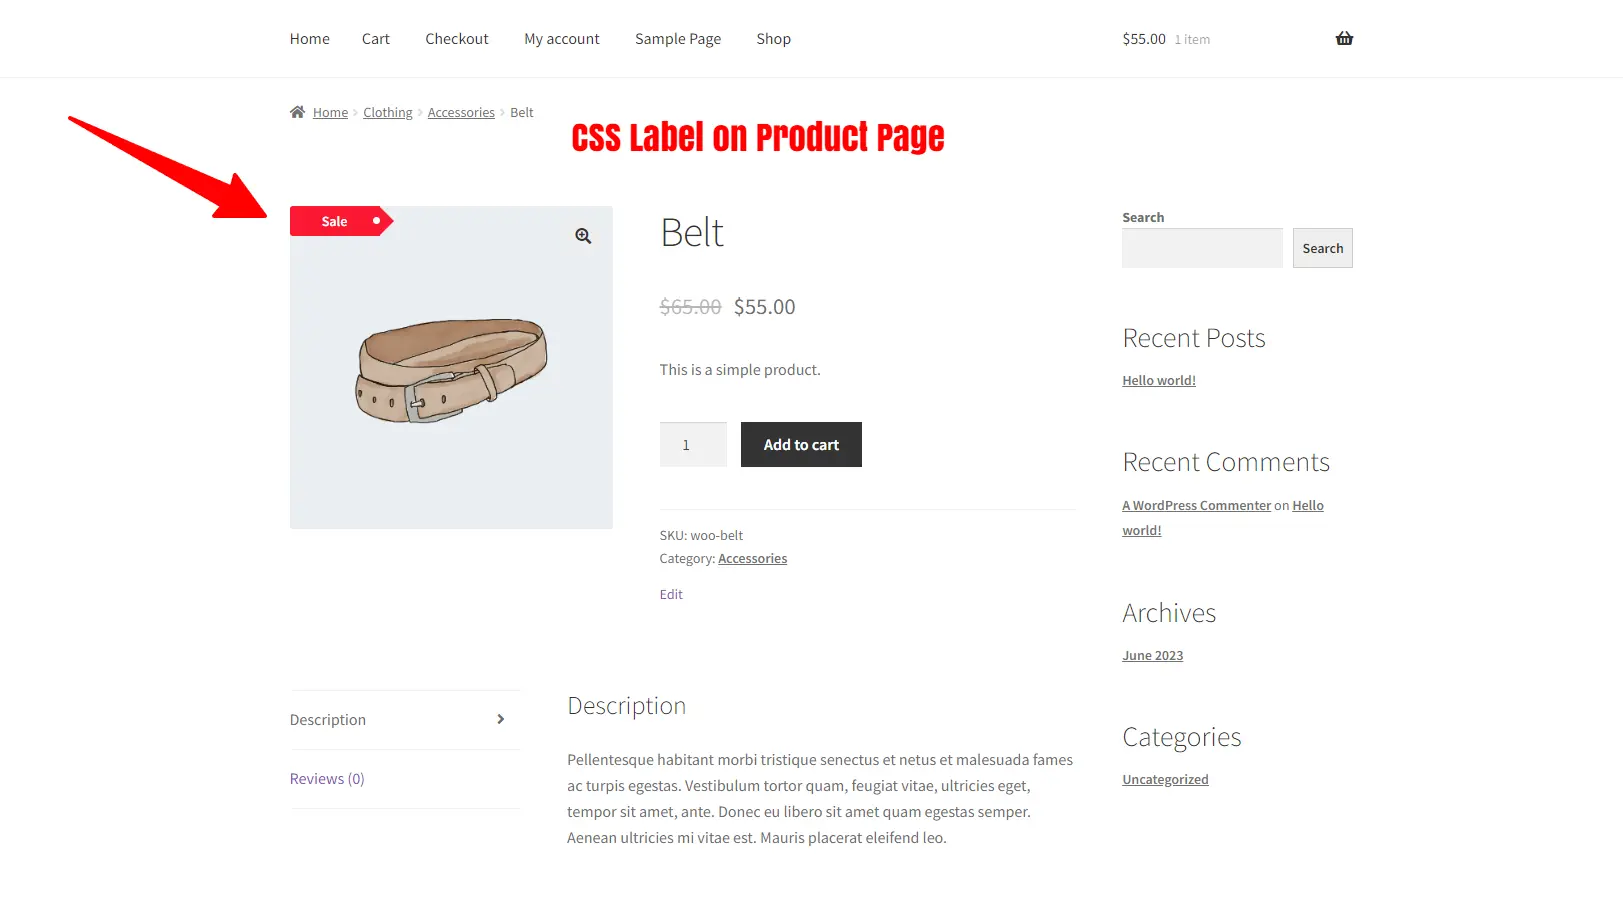
WooCommerce Badge and Product Label elevate your store’s appeal with customized badges and countdown timers (PRO Version). Enhance your WooCommerce store with sale badges, product labels, and countdown timers to drive sales. This all-in-one plugin empowers you to create eye-catching labels and scheduled badges for products, categories, and tags. Highlighting discount values, product quantities, ratings, shipping classes, stock status, and sale status, these labels provide valuable information to your customers. Plus, leverage the power of countdown timers to create urgency and drive conversions. With an intuitive interface, easily customize labels and replace default on-sale badges. Take your WooCommerce store to new heights with visually appealing badges, labels, and countdown timers tailored to your unique offerings.
🚀FEATURES
Let’s take a brief look at some of the cool features of this plugin:
- Over 200 Image Labels
- Add Countdown timer for embeds
- Add Countdown stock for embeds
- Add Announcement feature for embeds
- Add Sales Pop up
- Add Notification Bar
- Add Free Shipping Bar
- Over 10 CSS Labels
- 5 Advanced Labels
- 8 Timers Template
- 10 Animation Effects
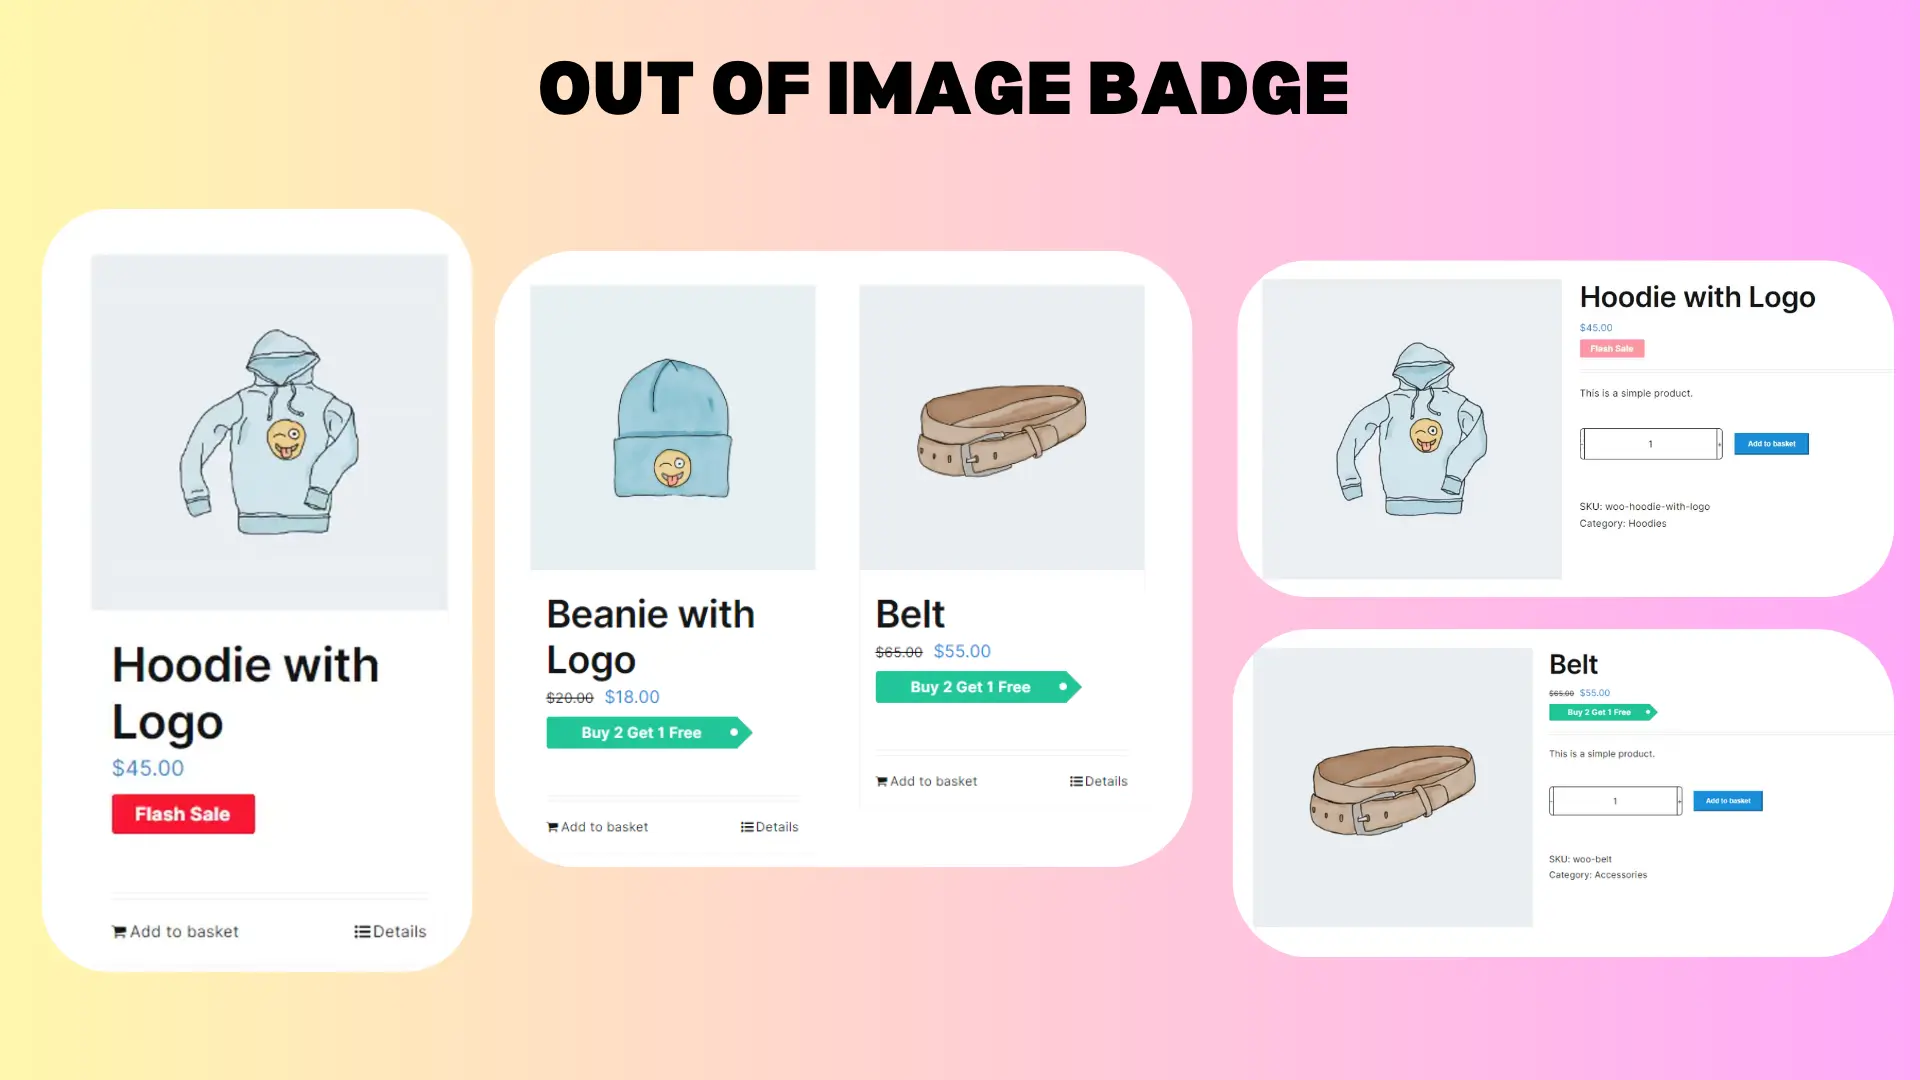
- Add Badge to Out Of Image Position
- Incorporate Gradient Colors
- Implement Discount Rules
- Add a Percentage Discount amount
- Rotate CSS Labels, Image Labels, and Advanced Labels
- Add Easy Custom labels on products
- Access CSS label templates
- Preview is available live for easy placement and customization
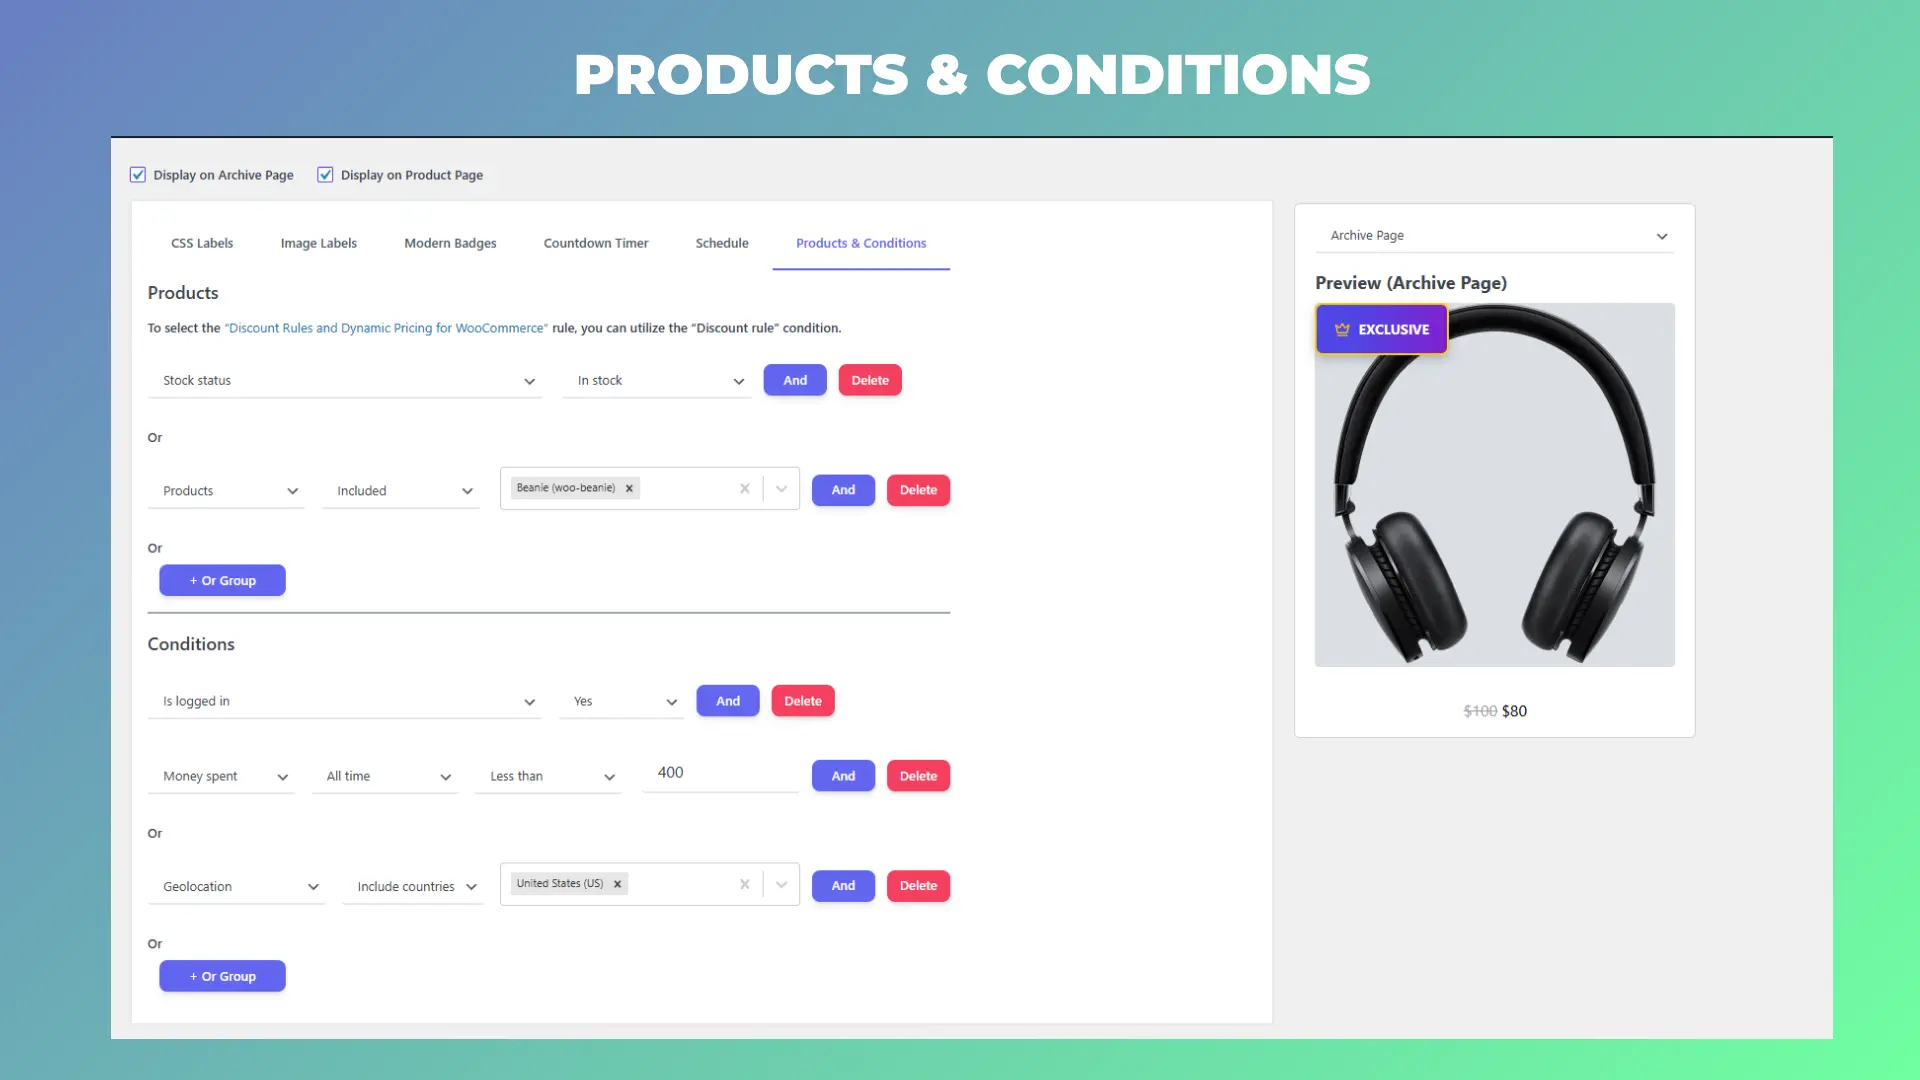
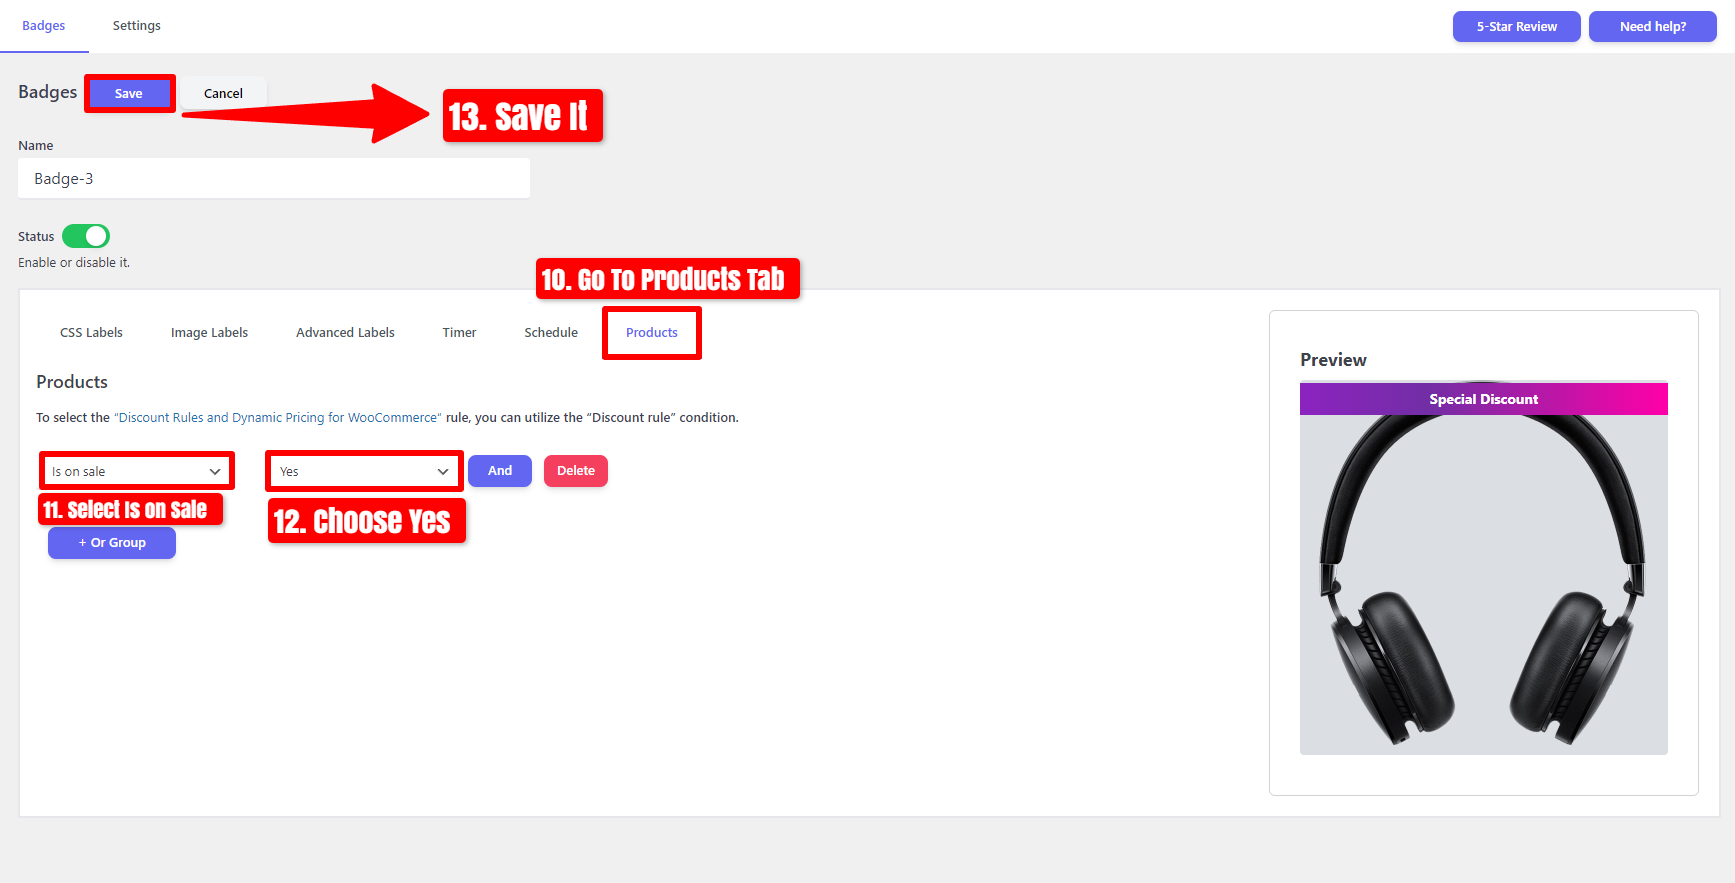
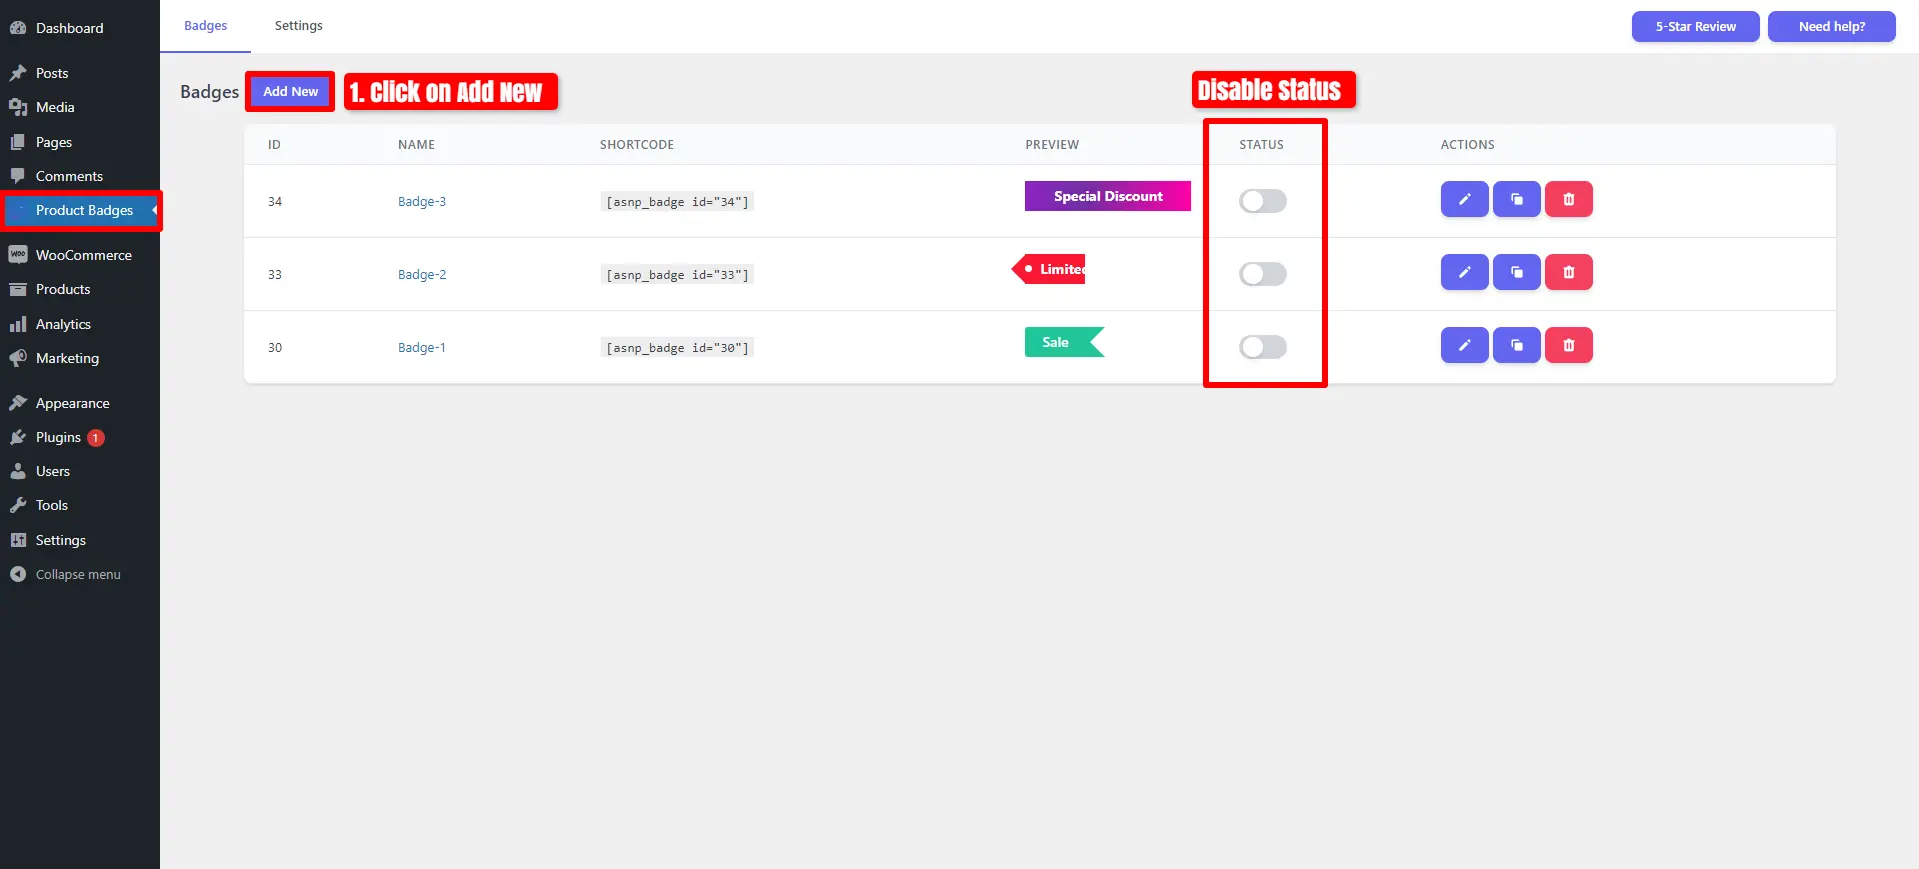
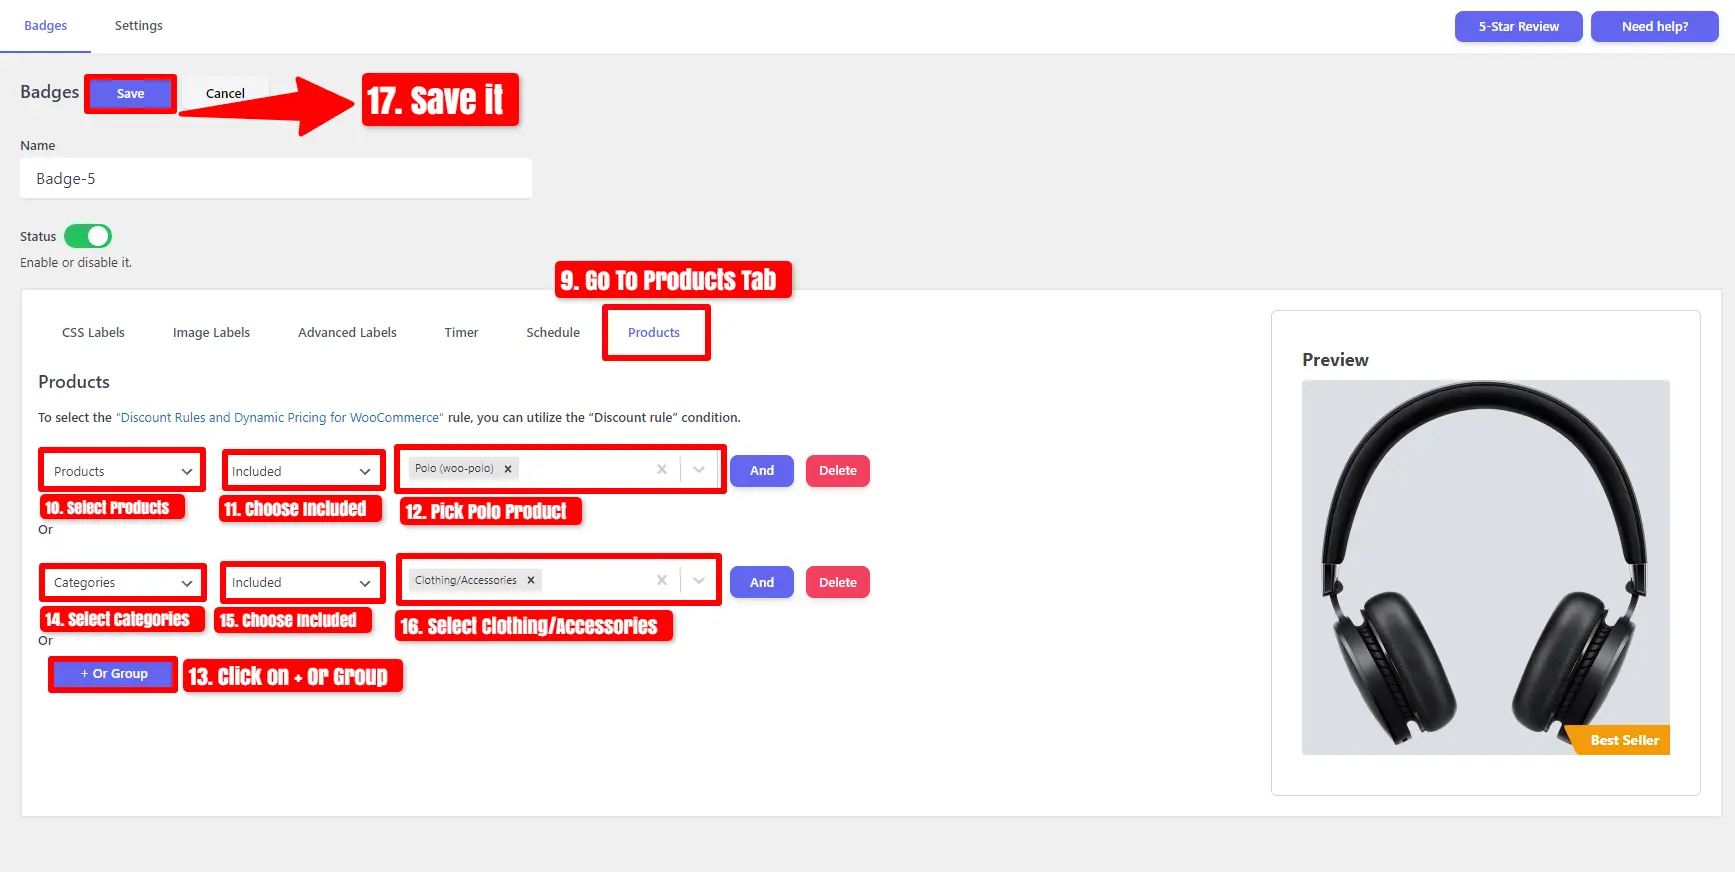
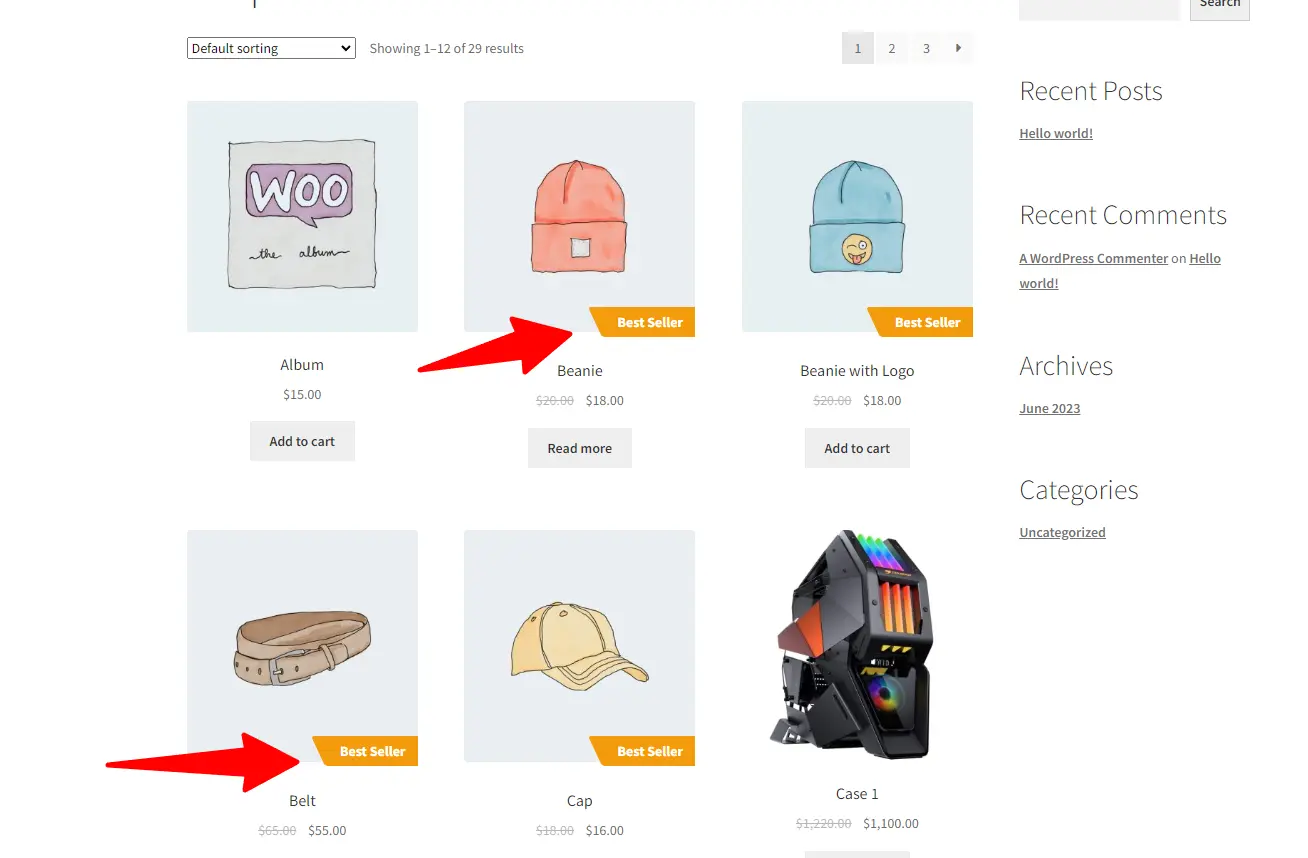
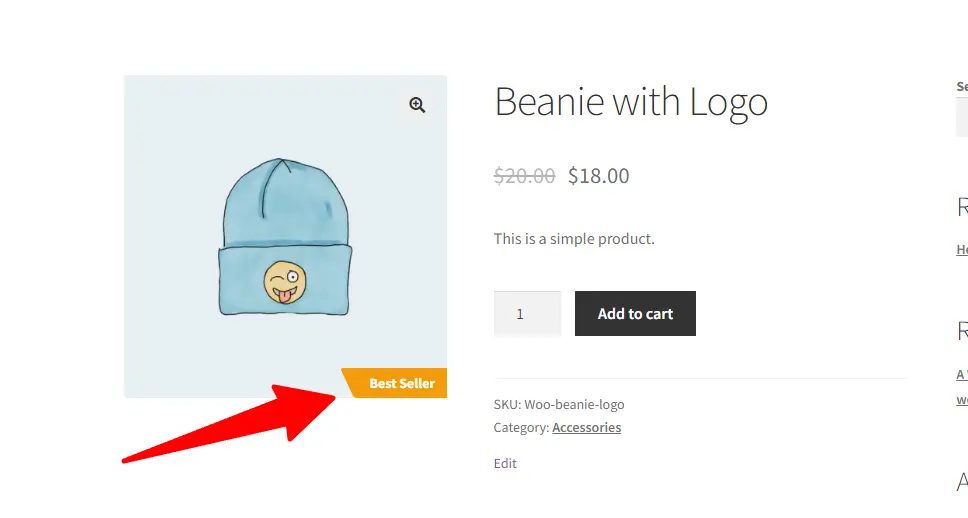
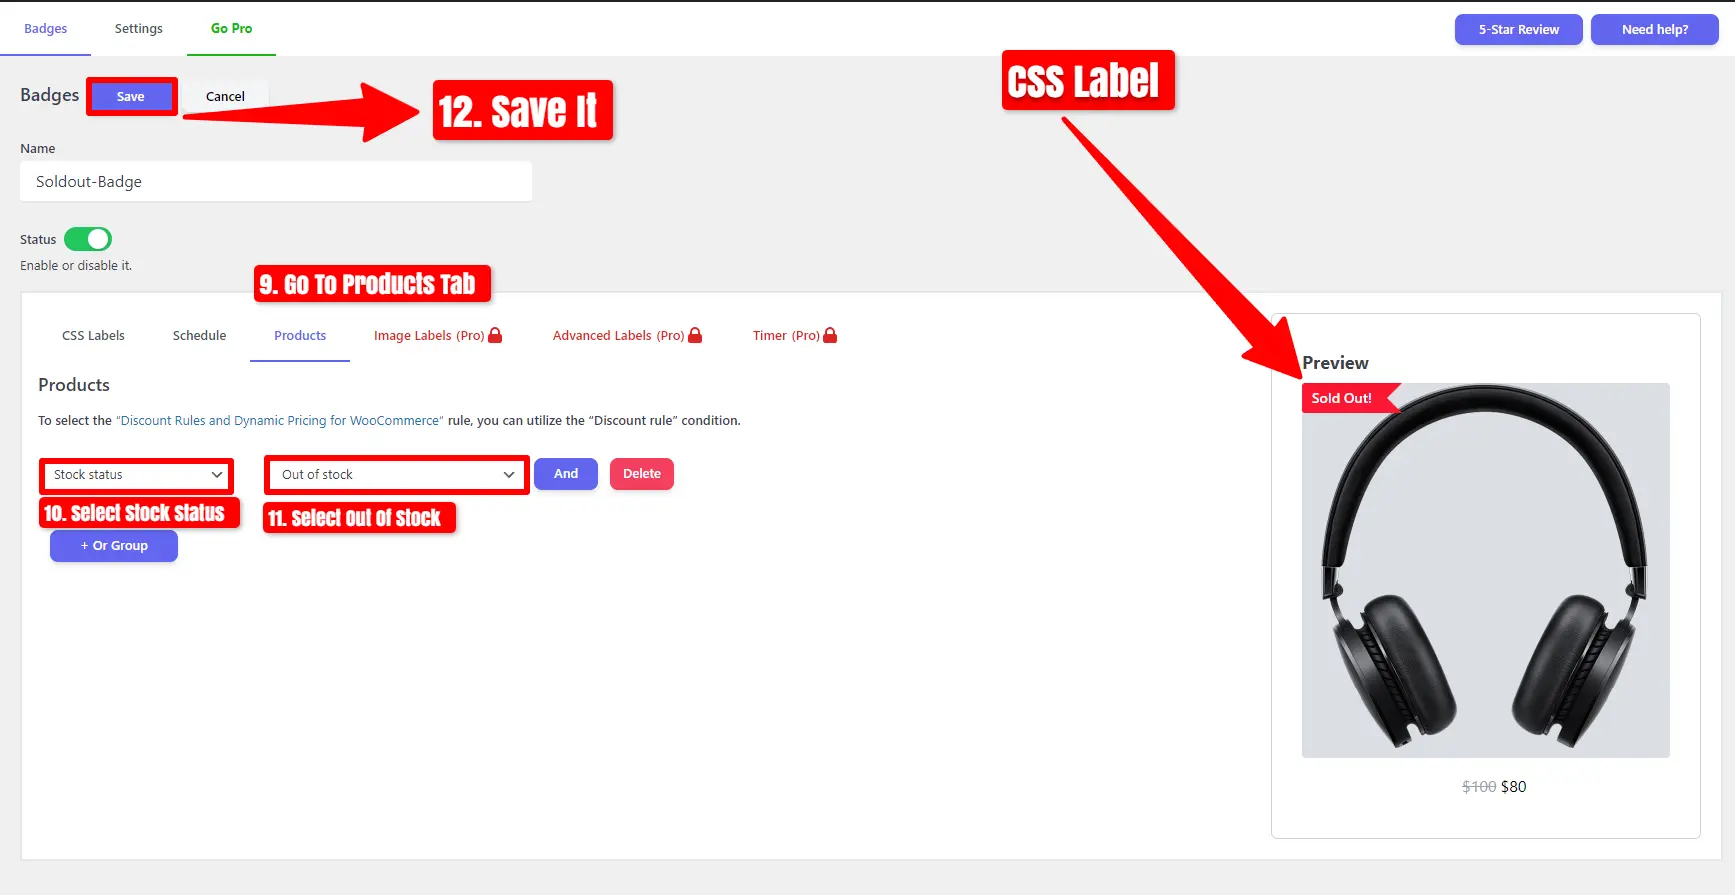
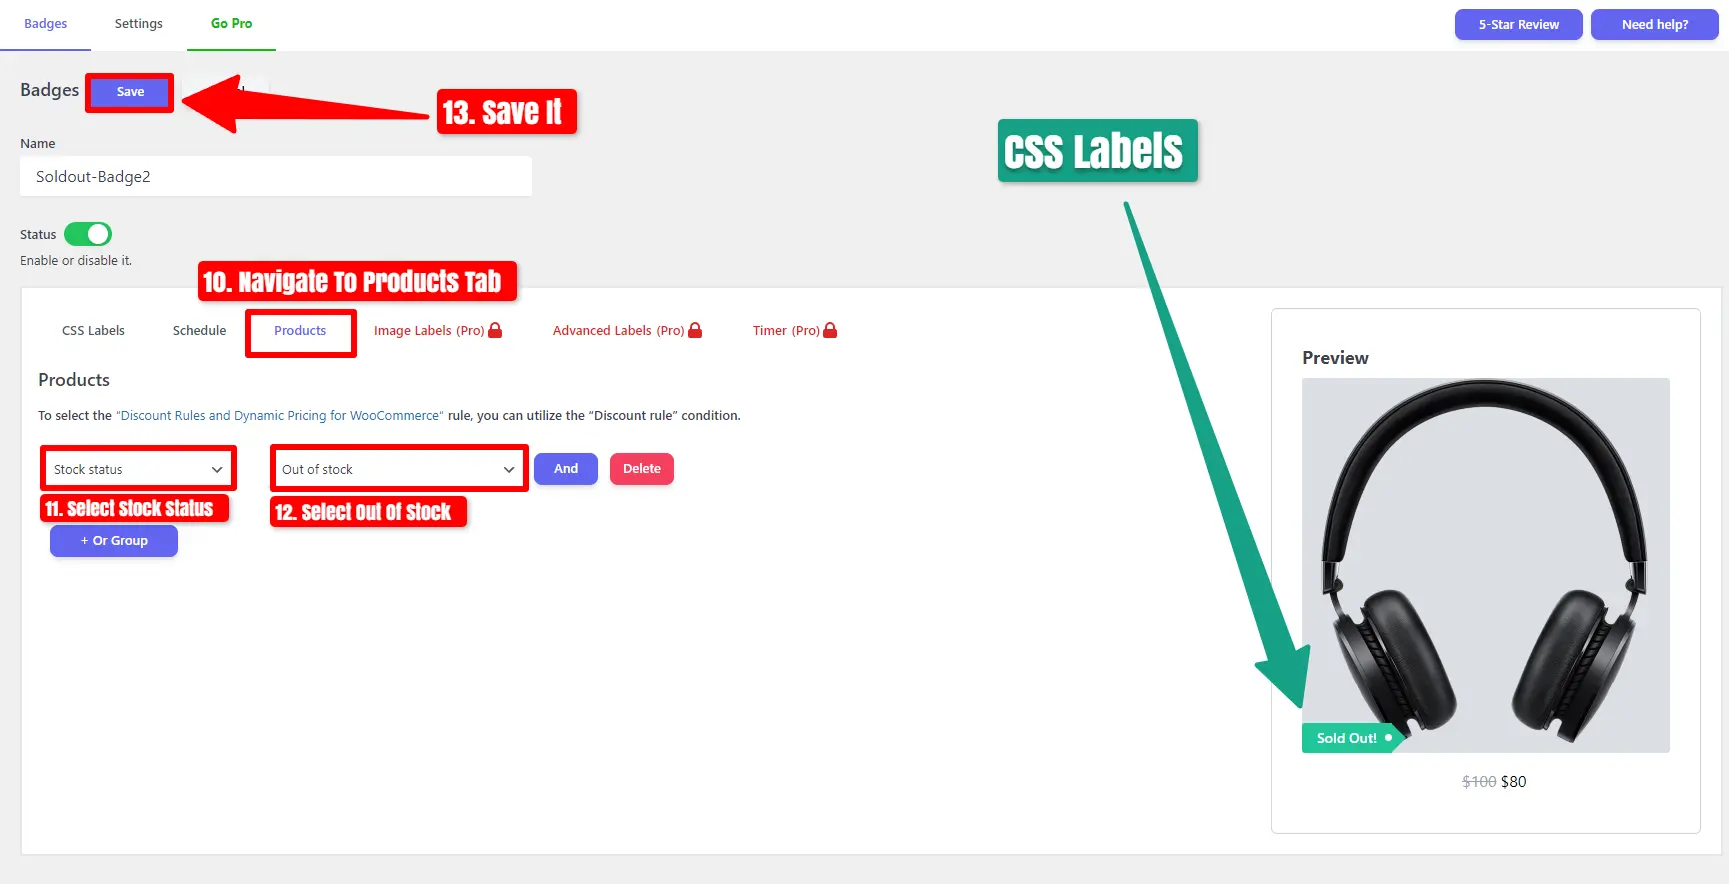
- Add Badges to specific WooCommerce products, categories, or tags
- Add Badges to “Is On Sale”
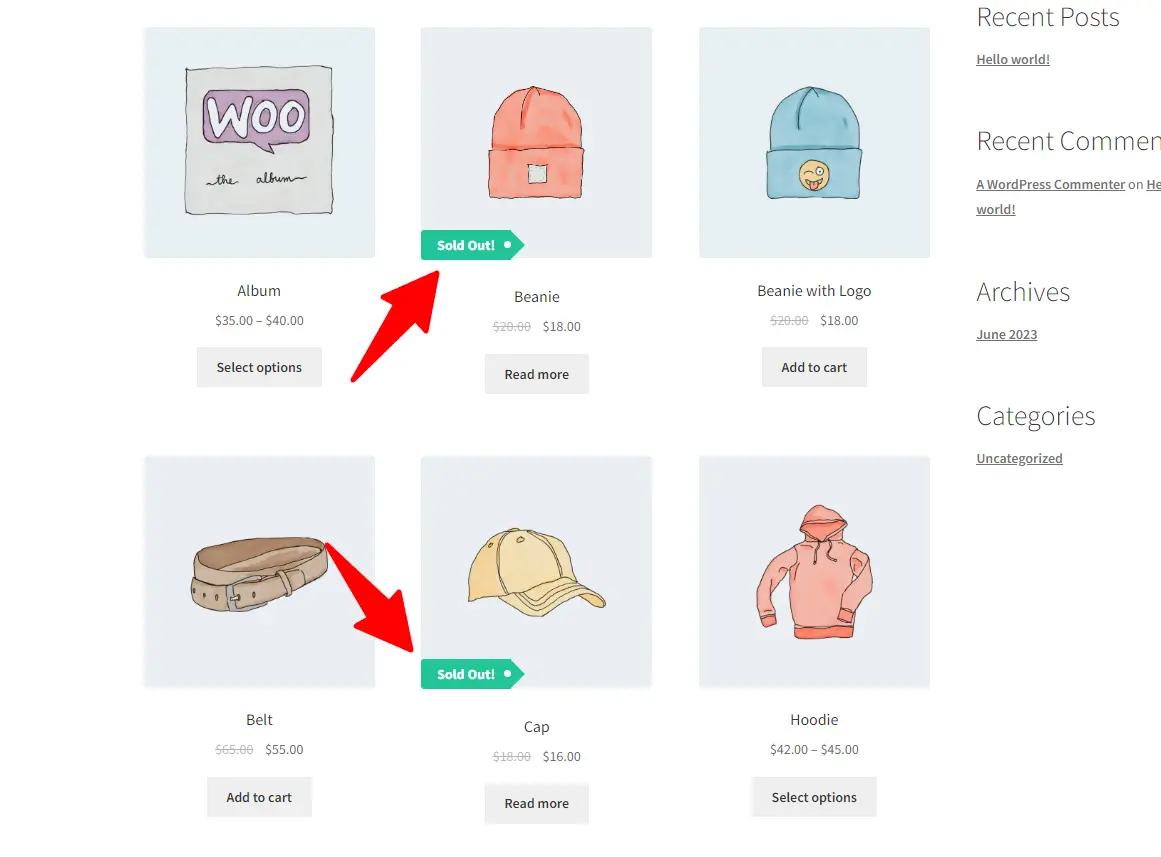
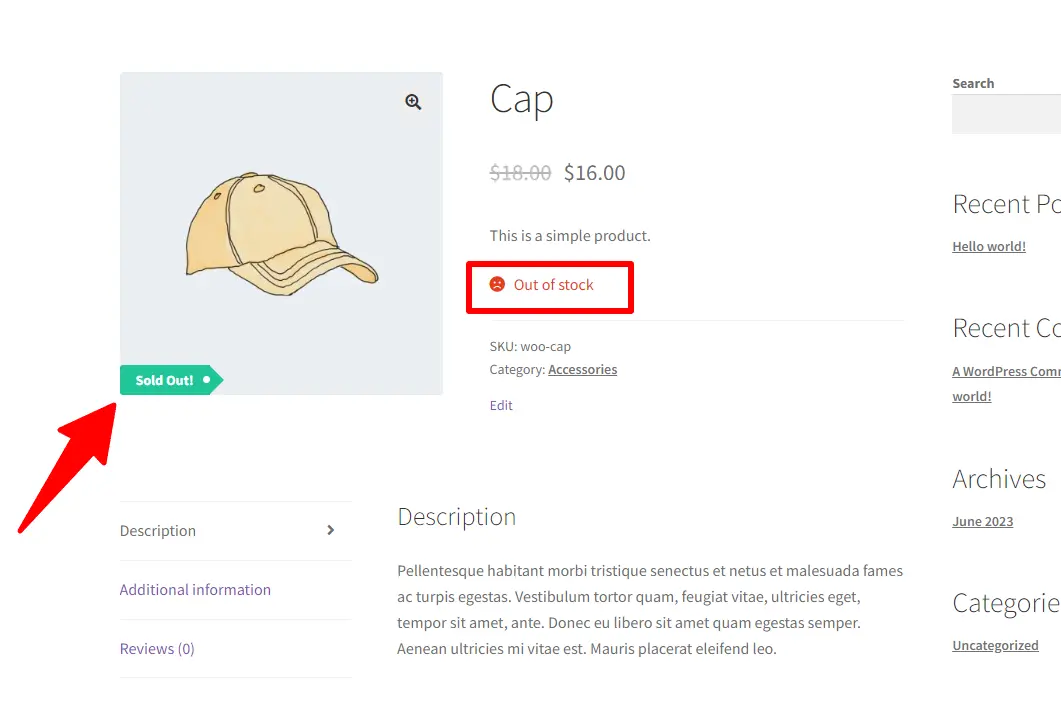
- Add Badges to “In Stock” and “Out Of Stock”
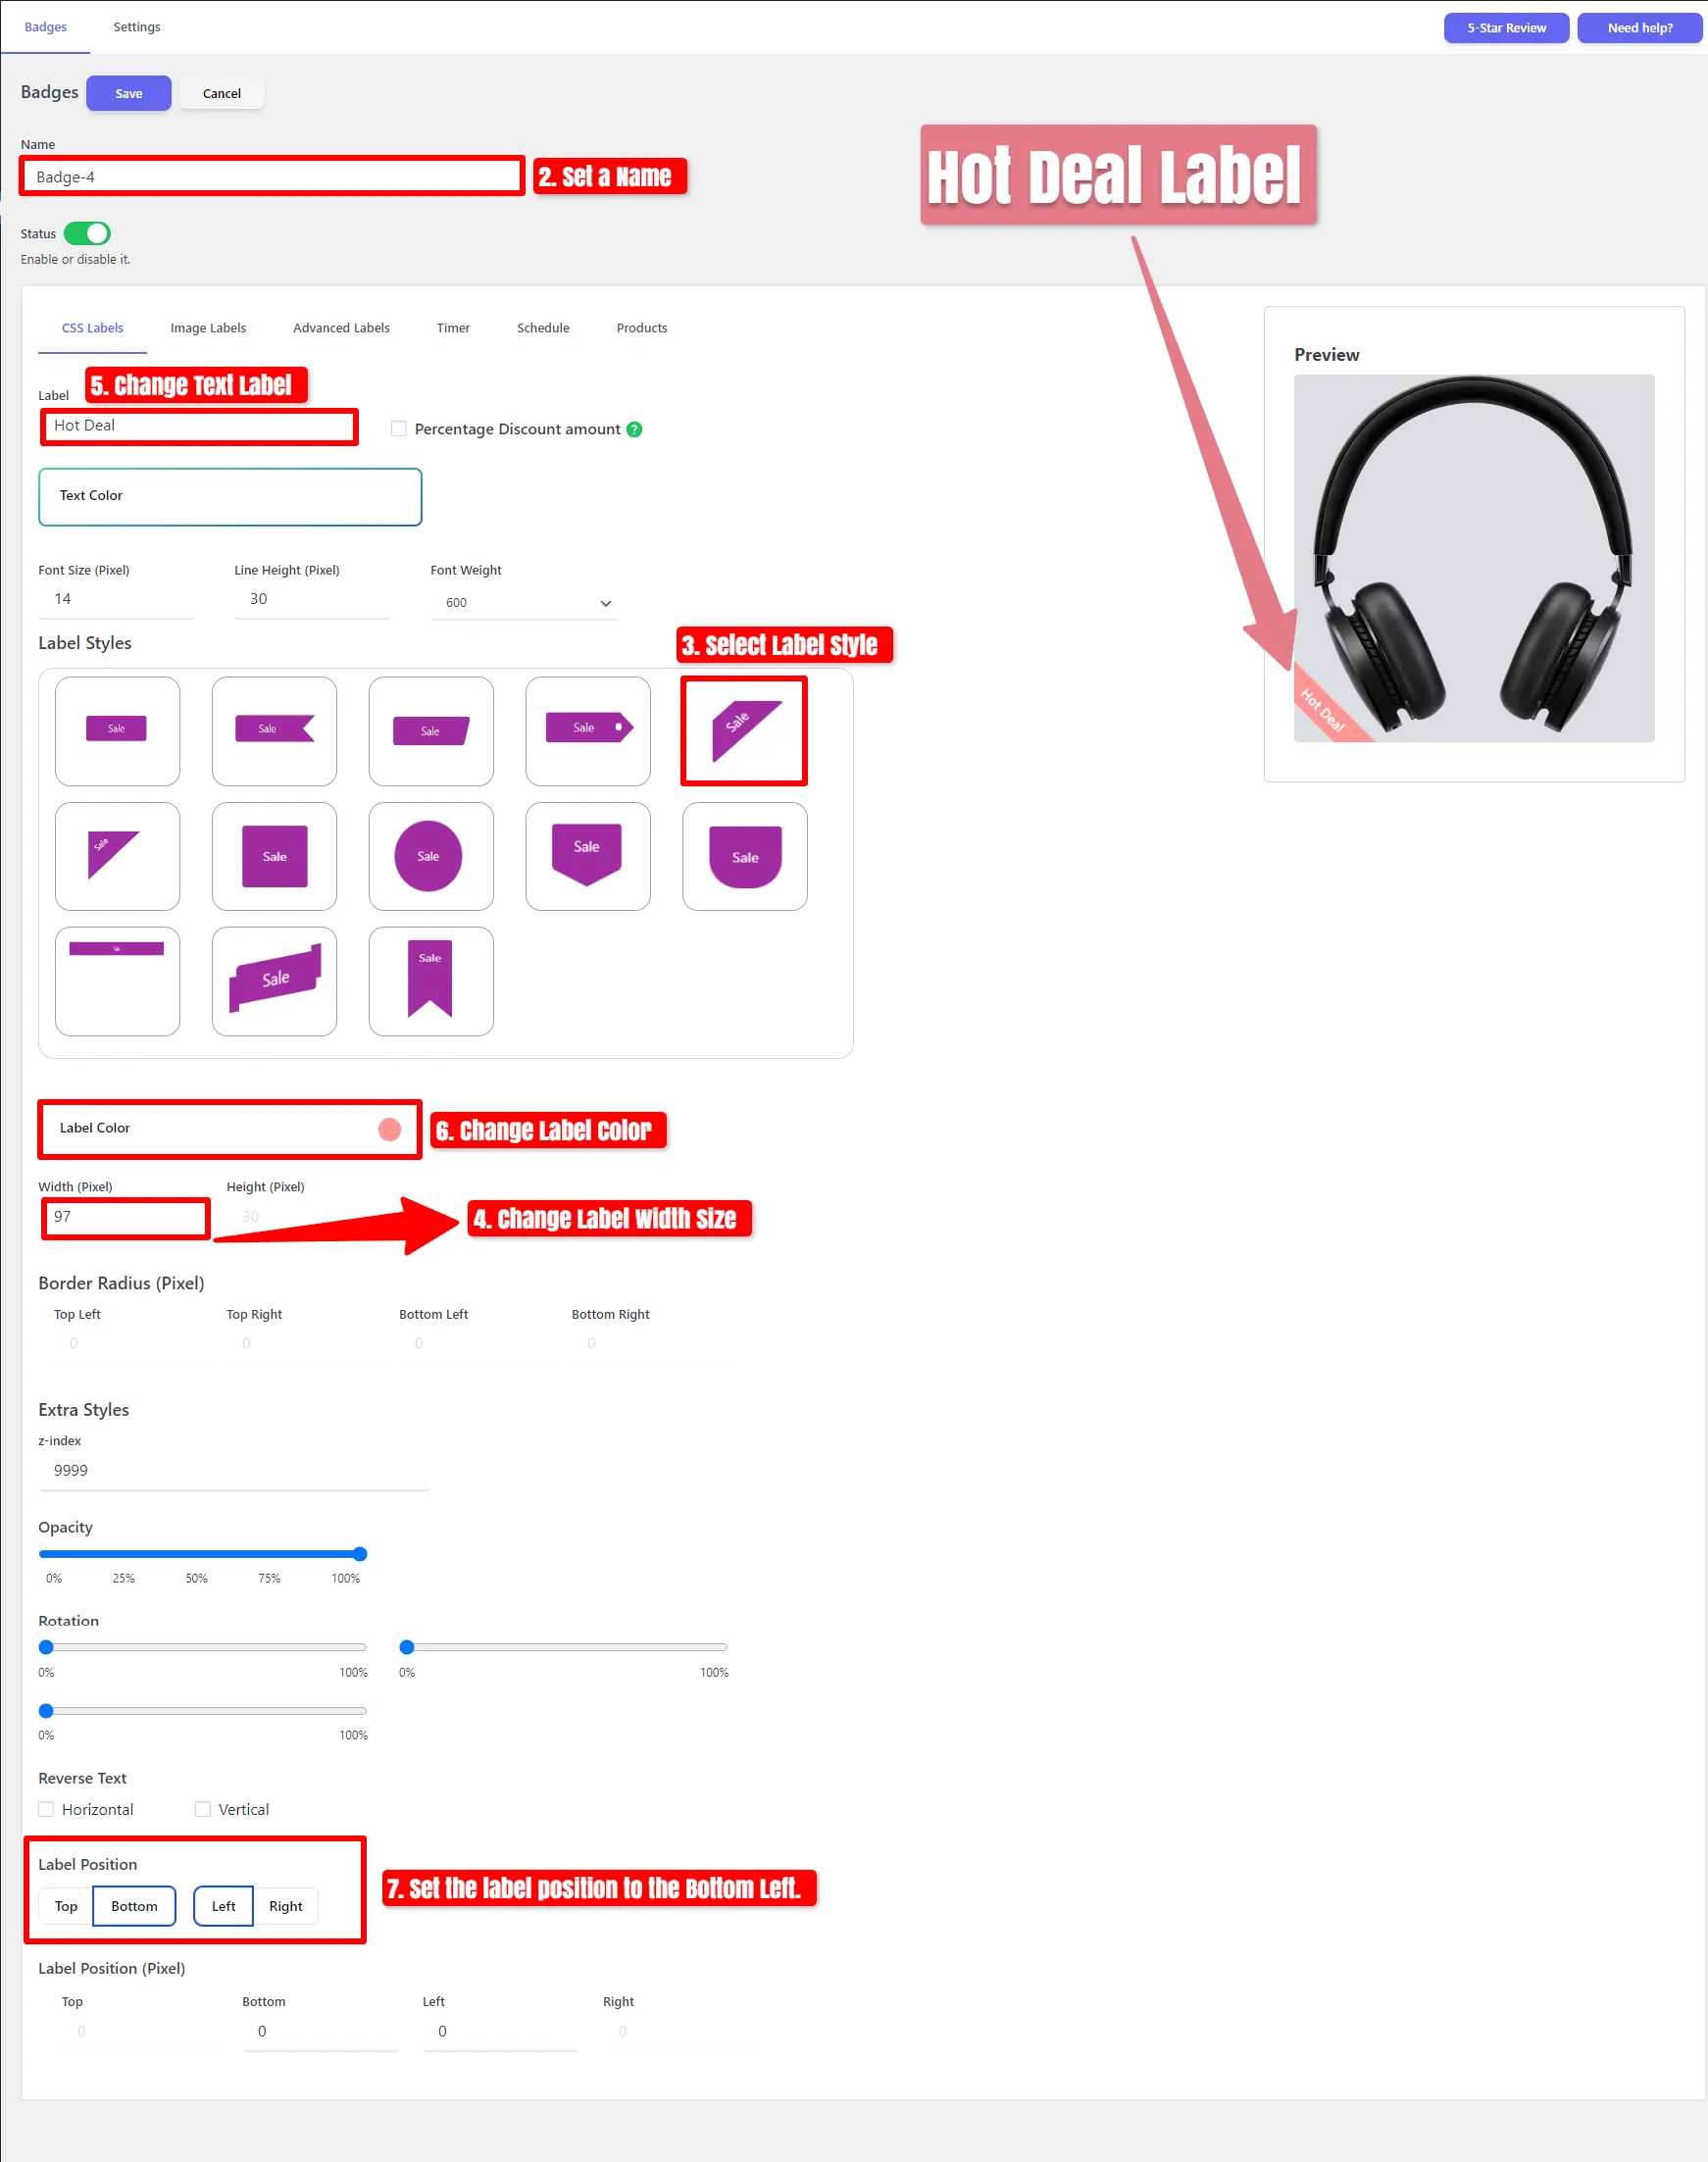
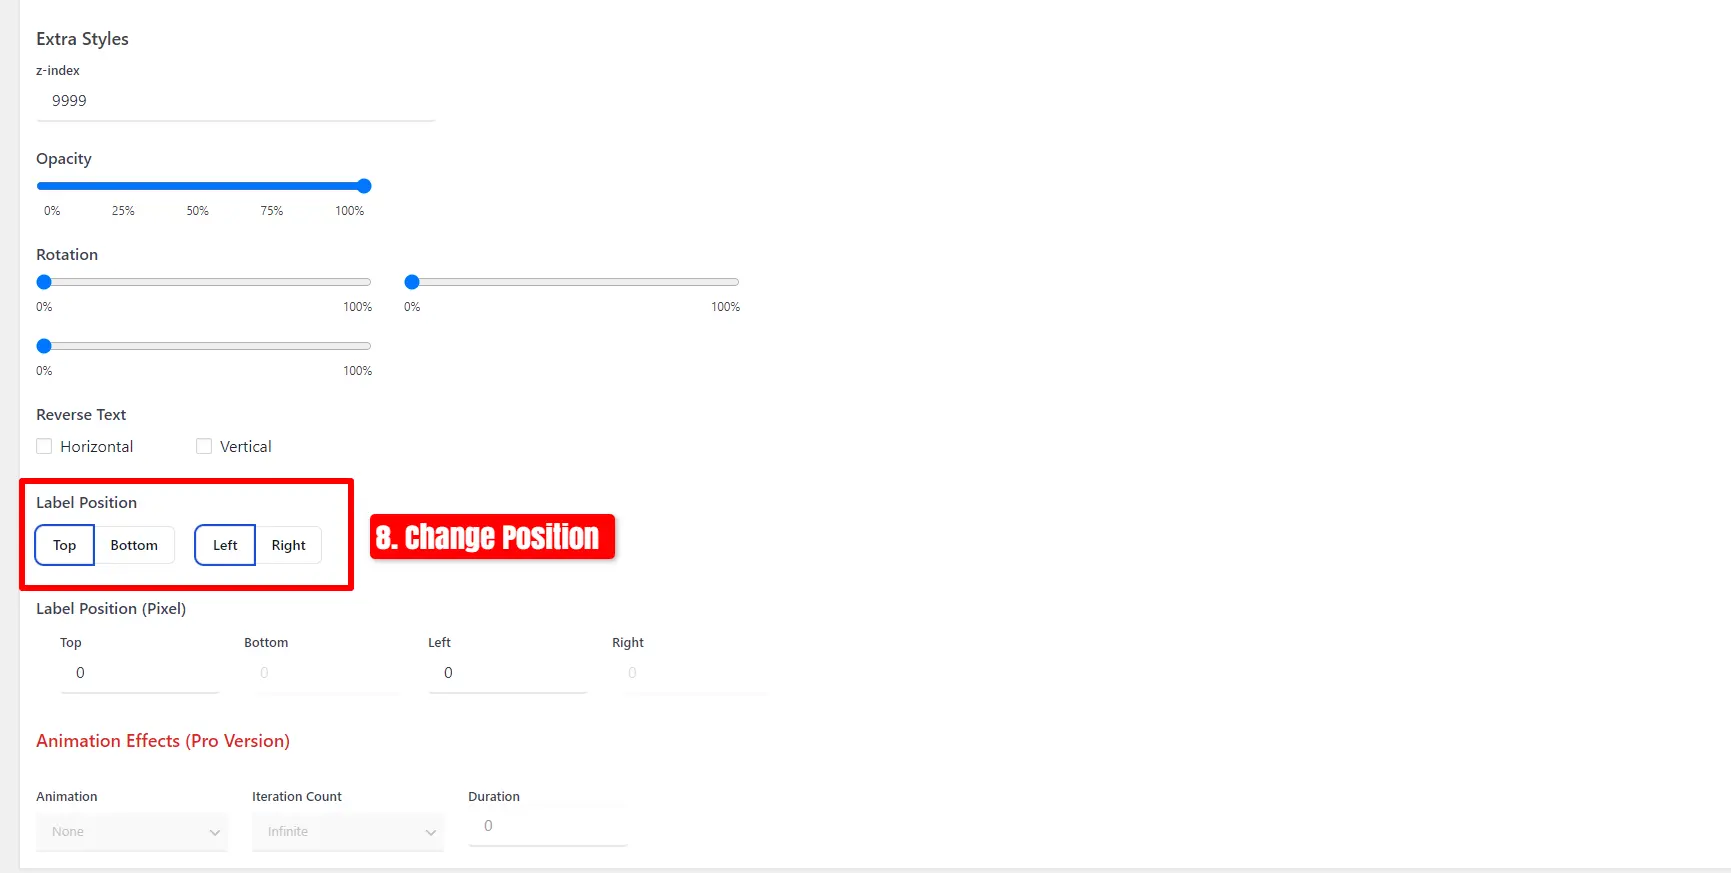
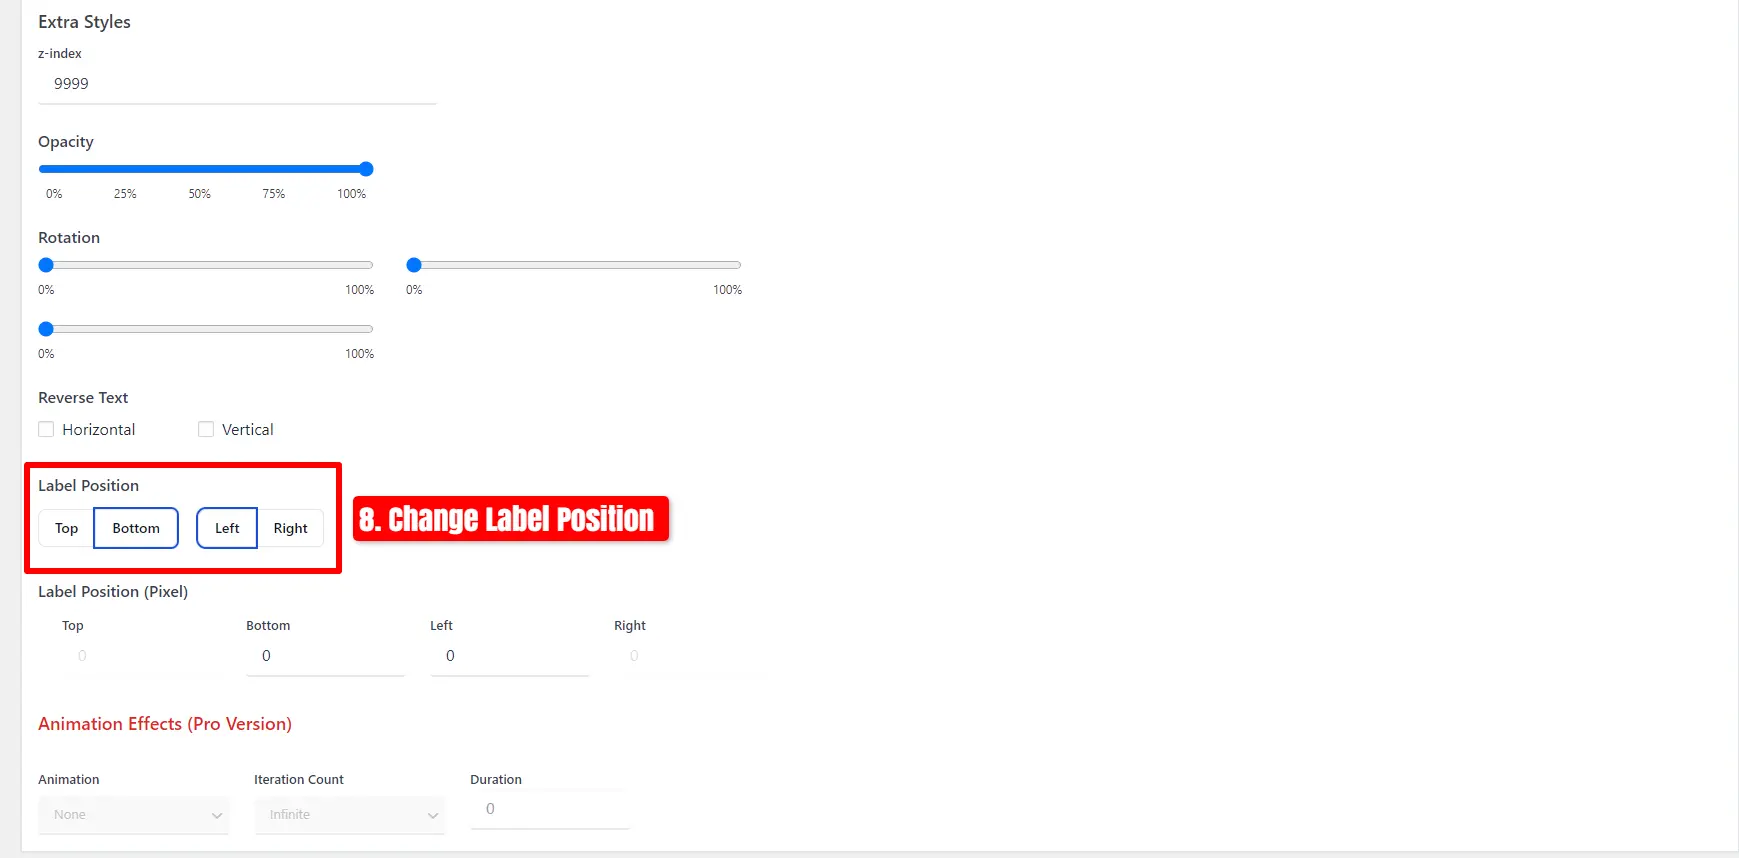
- Customize label attributes, including color, font size, line height, width, opacity, position, and much more
- Transform And Rotate Css Labels
- Set Toggle To the visibility of badges
- Include an option to set an expiration Date and Time for badges
- A unique feature for adjusting hooks that control the presentation of product labels, beneficial if your theme encounters issues displaying them or if you wish to reposition the labels
- Adjust the Position of CSS Labels, Image Labels, and Advanced Labels
- Include both Vertical and Horizontal Timers
- Personalize Sale Timers with Styling Options
- Sale Image Labels
- Percentage Off Image Labels
- Coming Soon Image Labels
- Pre-Order Image Labels
- Free Image Labels
- Black Friday Image Labels
- Valentine’s Day Image Labels
- Xmas Image Labels
Tested with more than 40+ Themes
- Flatsome
- WoodMart
- Avada
- The7
- Divi
- Betheme
- Uncode
- Enfold
- Bridge
- Salient
- JupiterX
- XStore
- Porto
- StoreFront
- Astra
- OceanWP
- and much more
📽️Demo
Visit this plugin Live Demo here to see how it works.
💵Pricing
- SINGLE SITE 👉
€60.00 €30.00
- 5 SITES 👉
€200.00 €60.00
- 25 SITES 👉
€400.00 €99.00
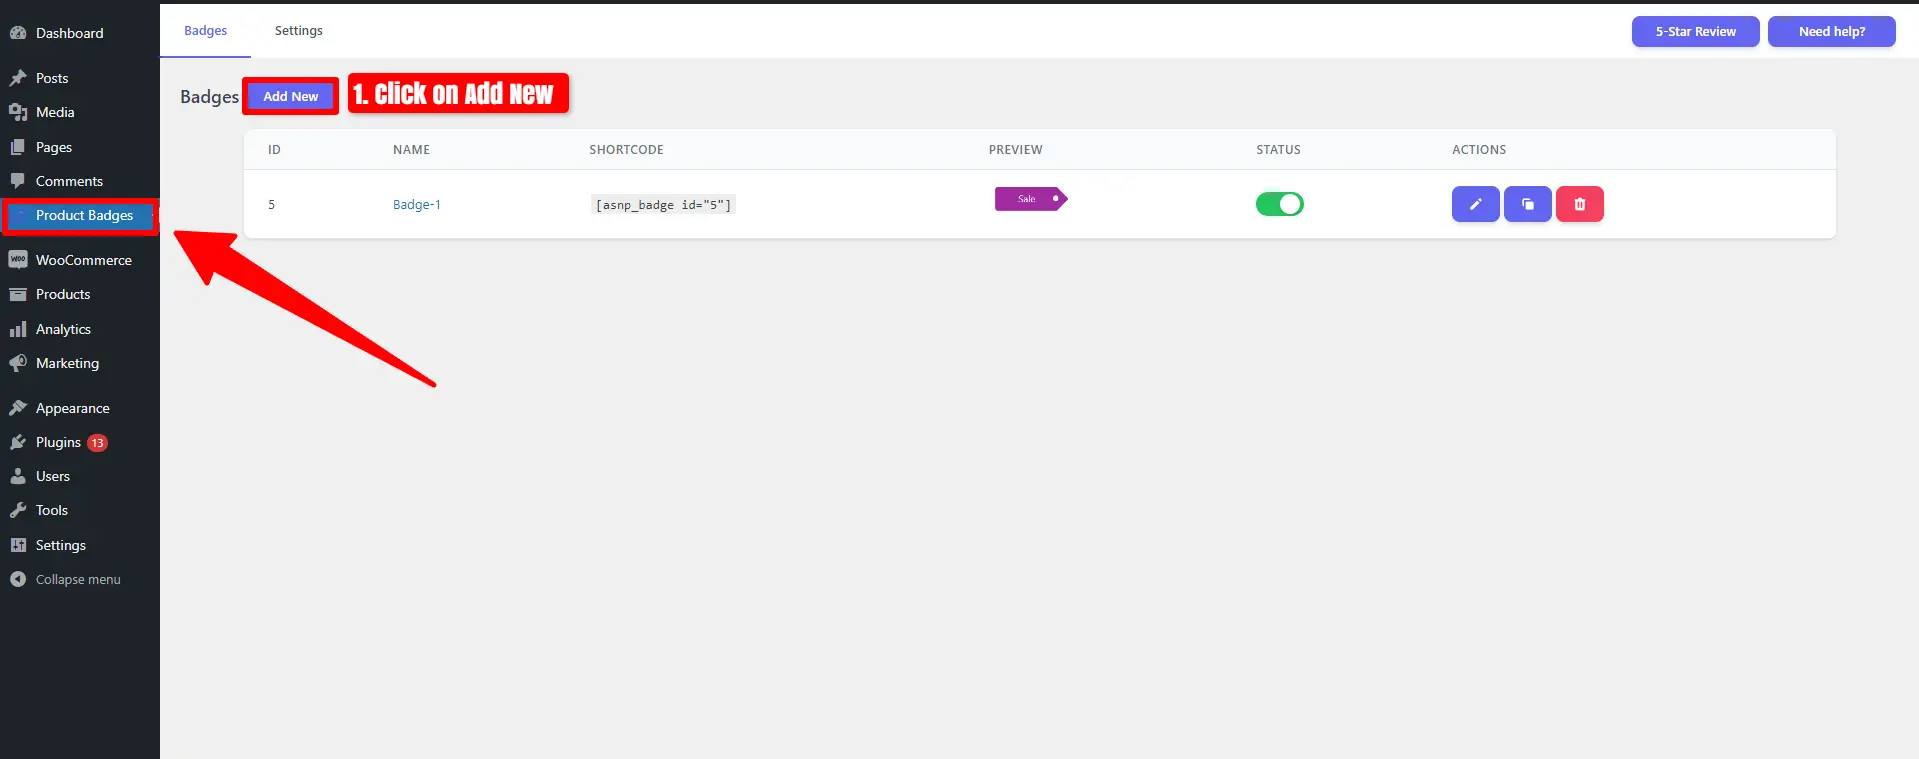
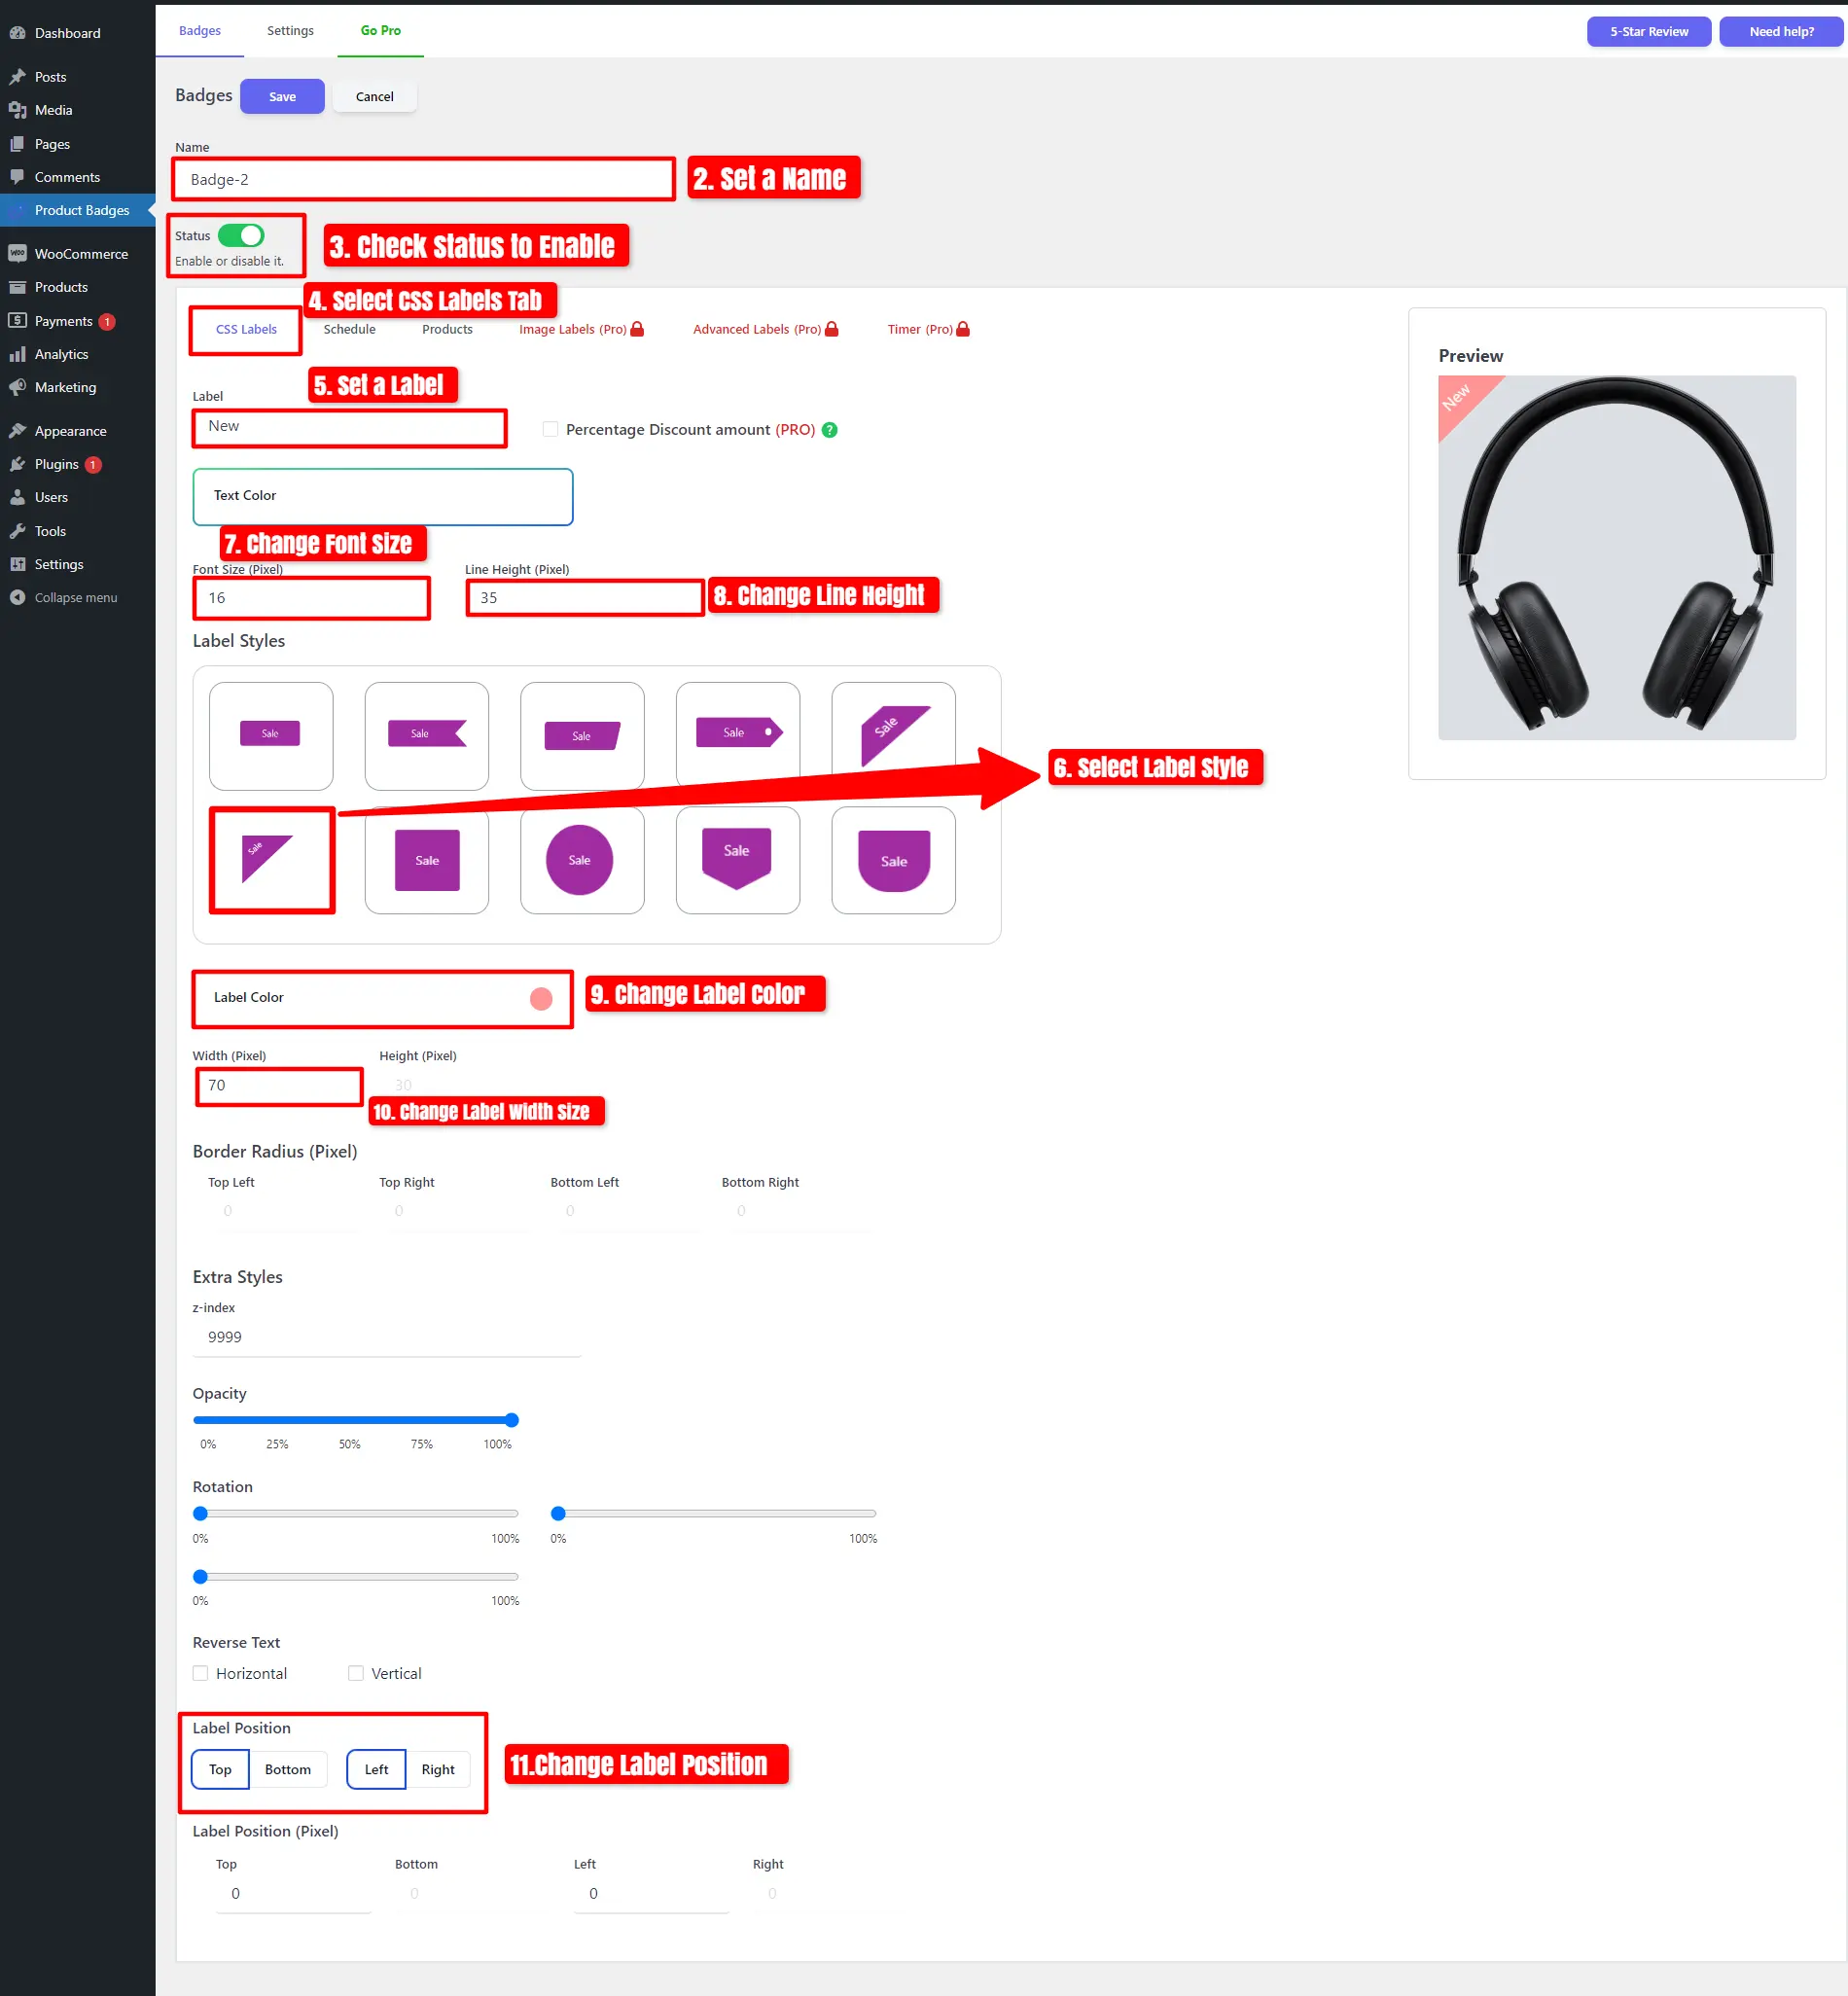
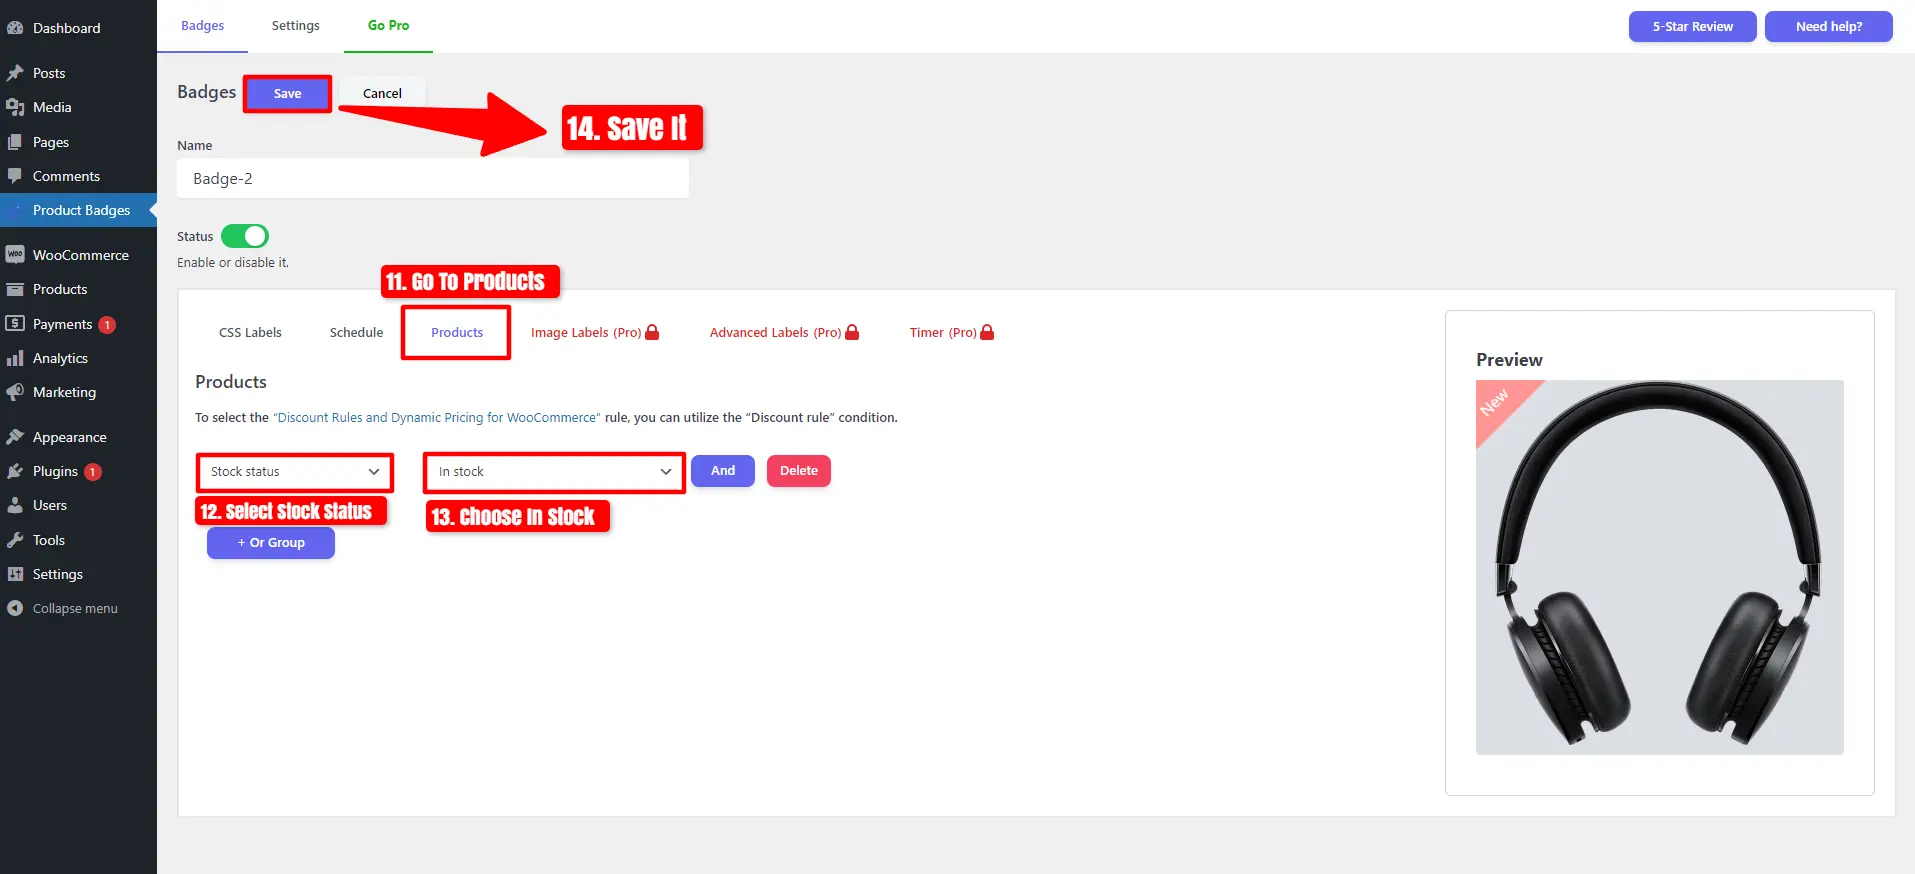
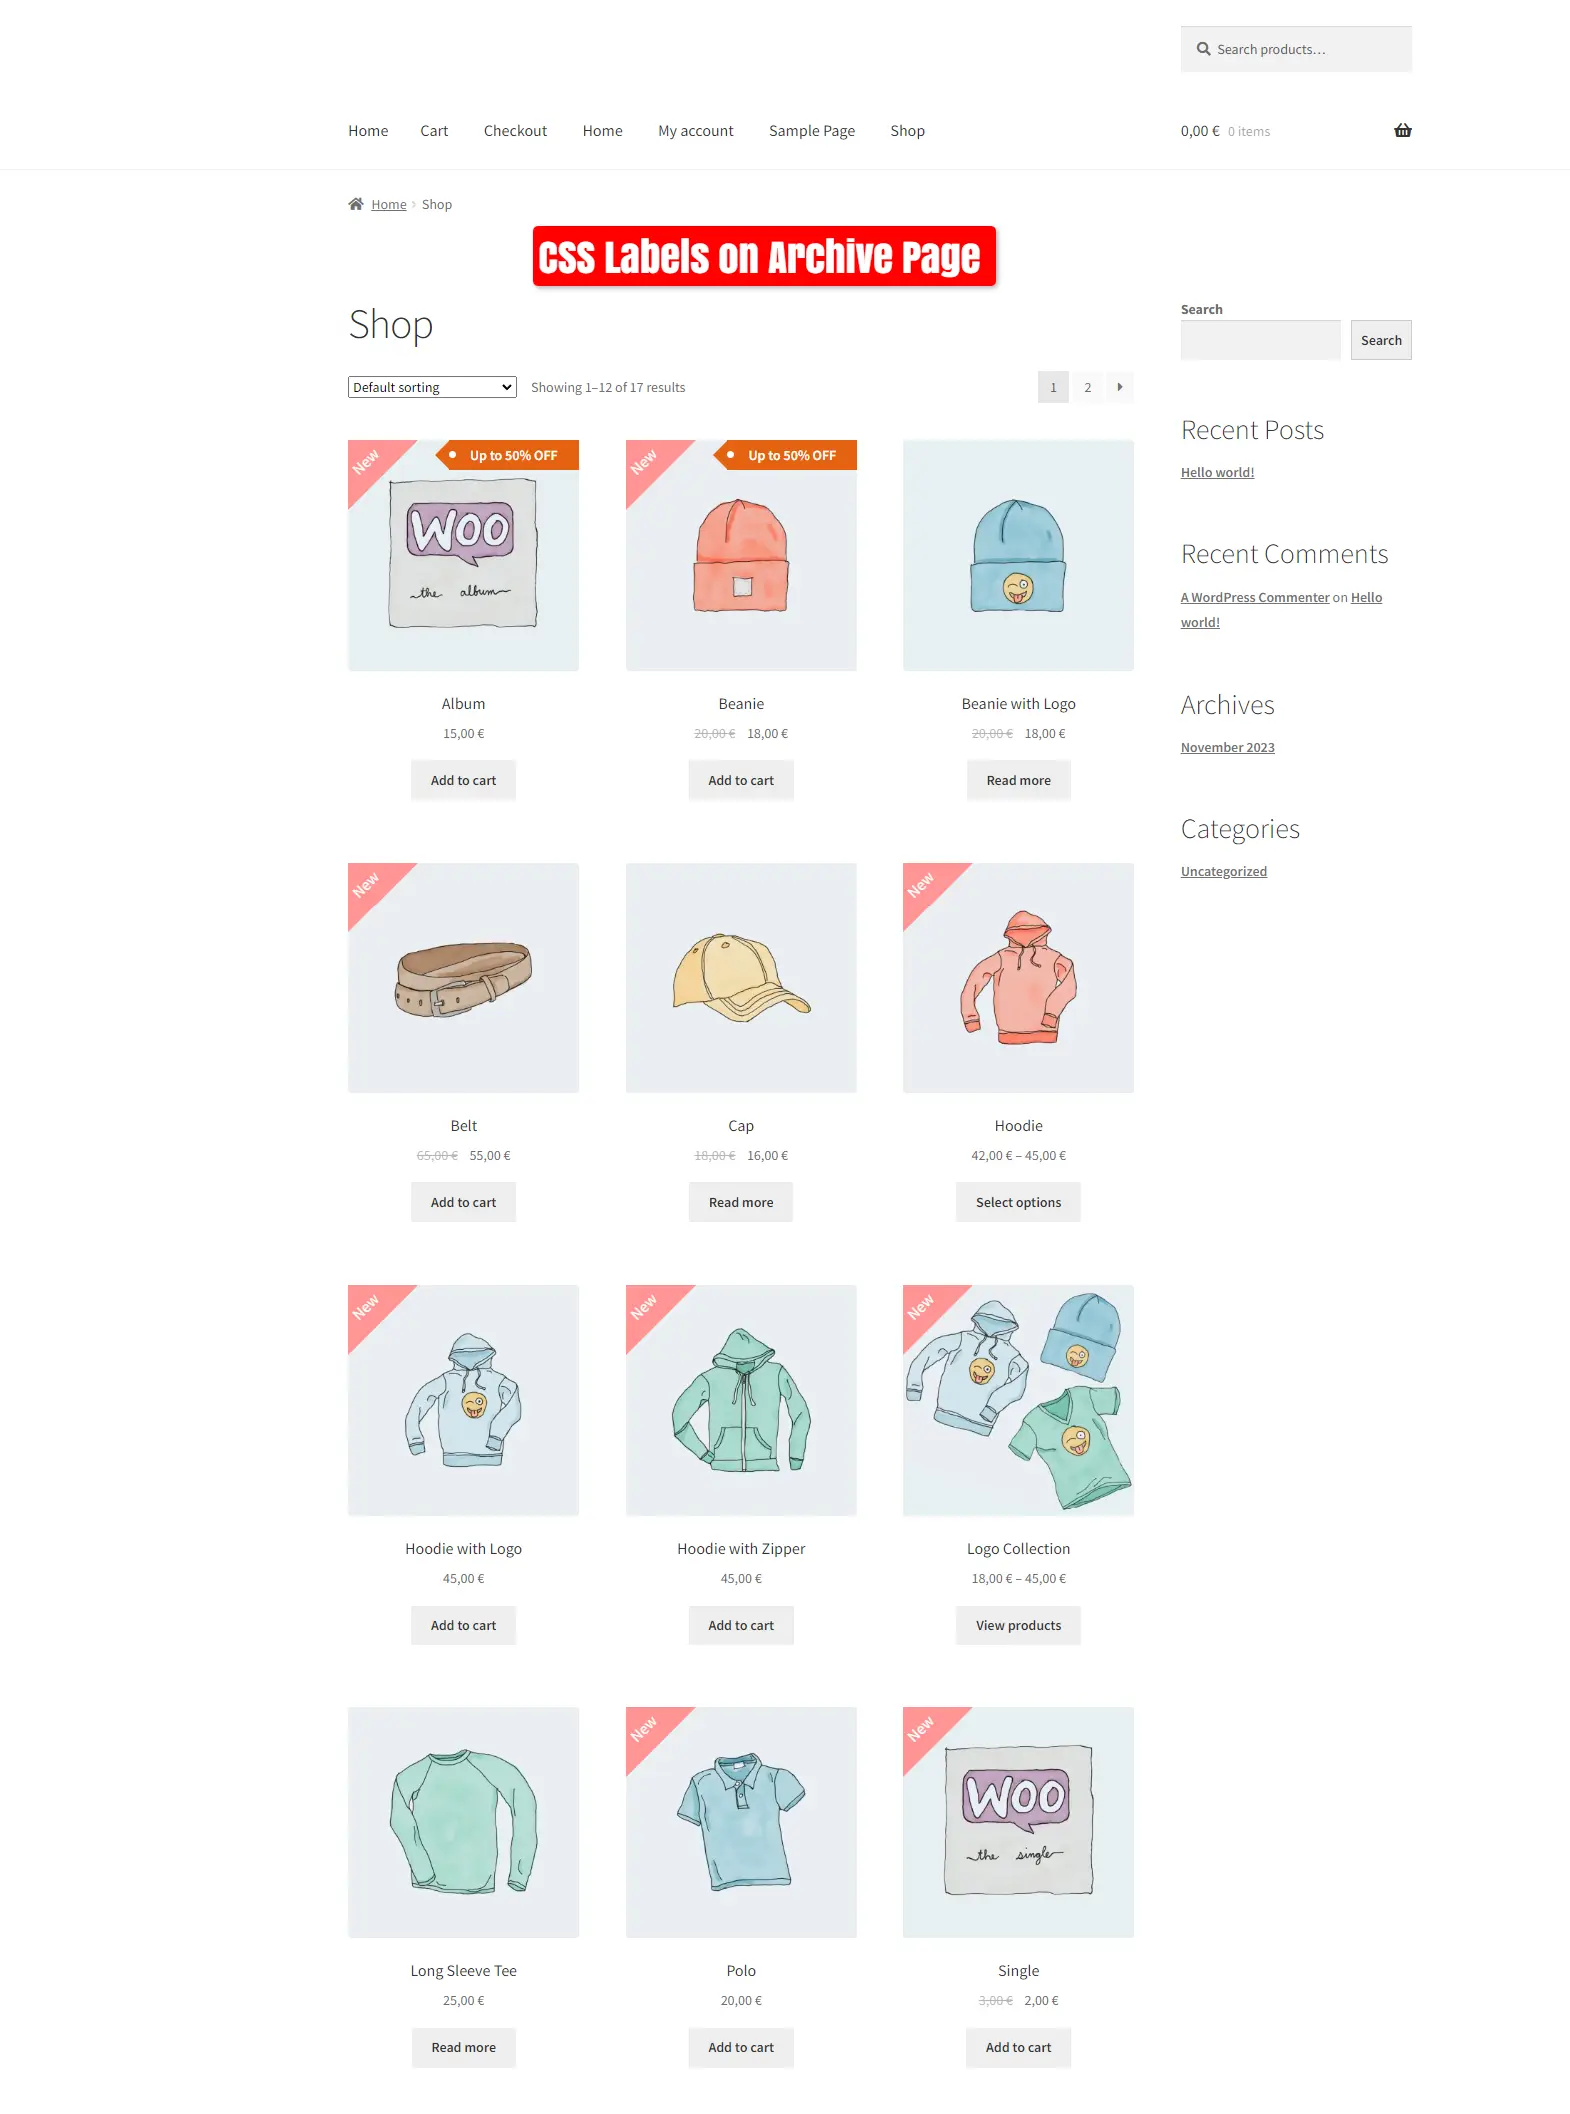
🖼️Screenshots
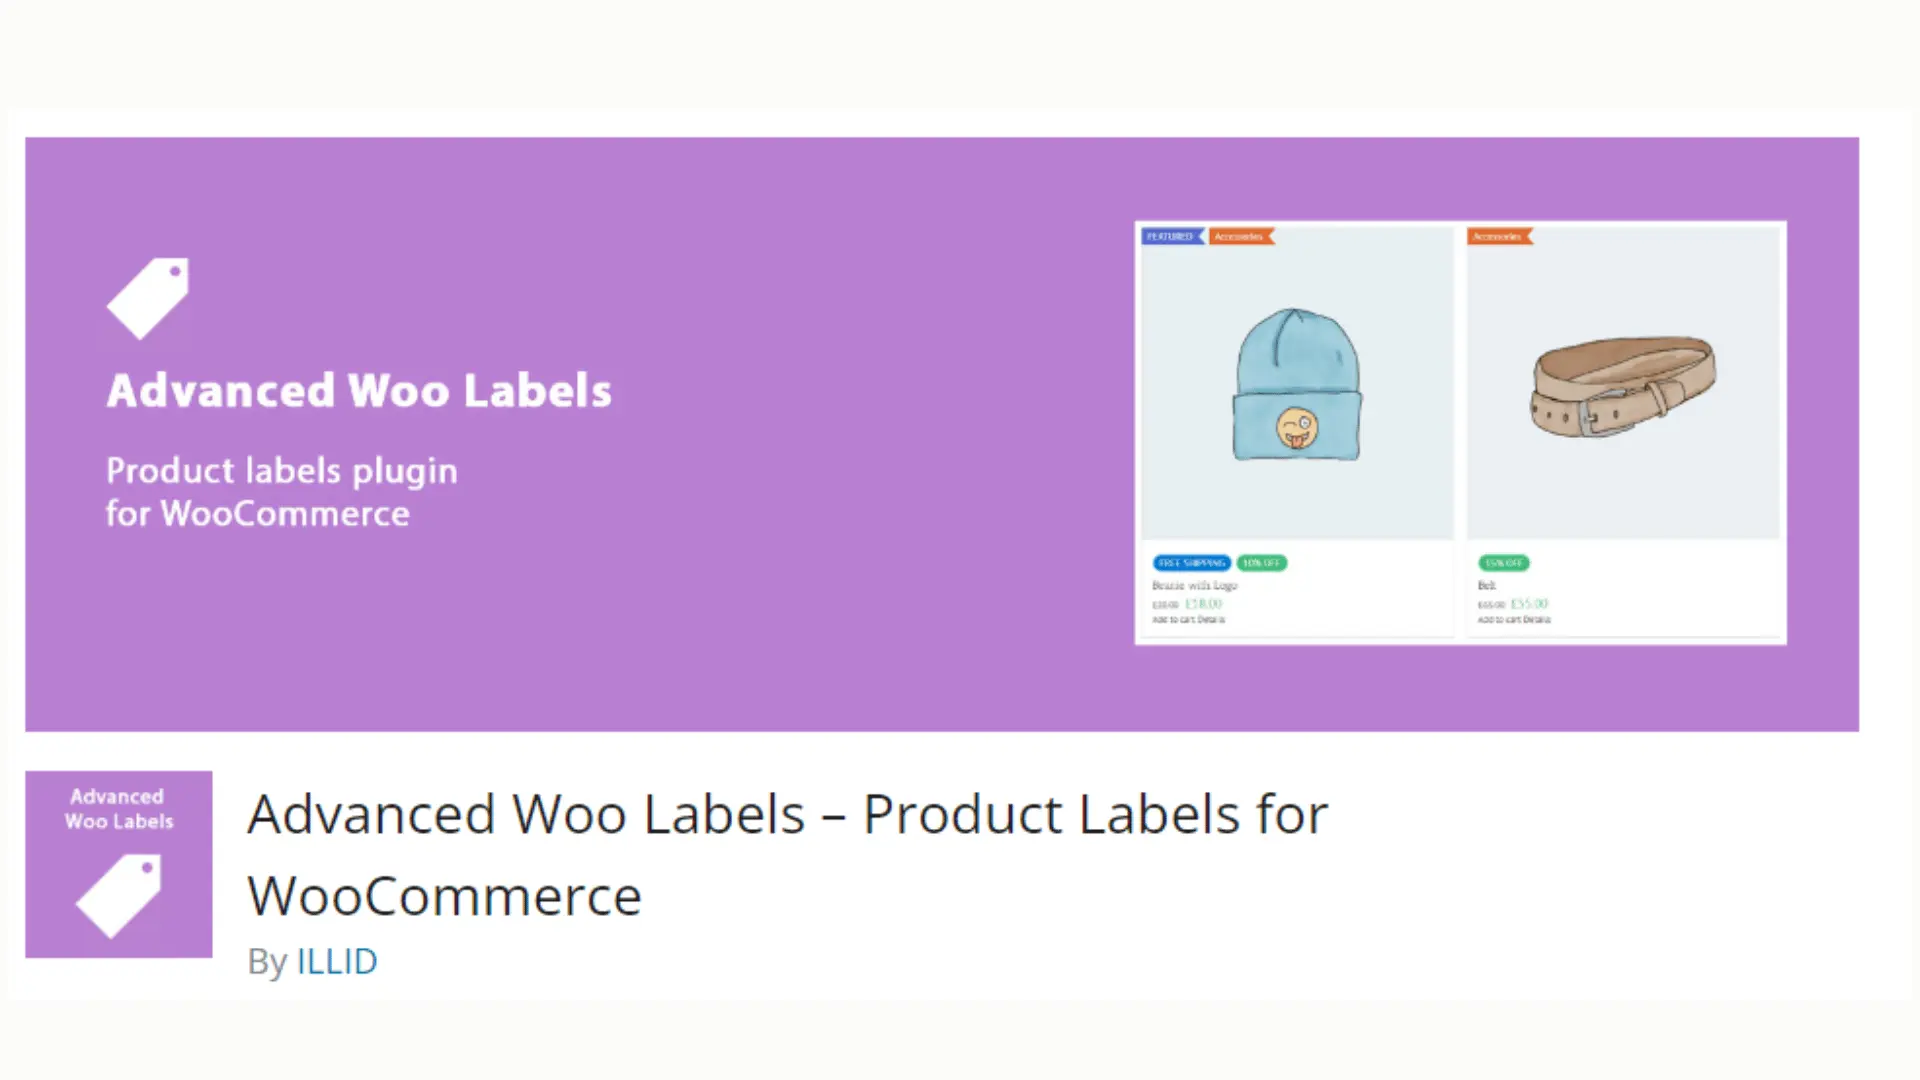
2. Advanced Woo Labels – Product Labels for WooCommerce
With the Advanced Woo Labels plugin, you can effortlessly generate labels or badges for all your WooCommerce products. Utilize label conditions to selectively display labels based on specific products, pages, or users. Customize label styles using the built-in options.
Capture users’ attention by incorporating information within labels such as discount value, product quantity, product rating, shipping class, stock status, sale status, and more.
🚀FEATURES
Let’s take a brief look at some of the cool features of this plugin:
- Create unlimited number of labels for each WooCommerce product.
- Display label in two positions: on product image or before title. Align label at any side of this position.
- Use labels with custom text. Write any text inside product labels. Also use special text variables to show important product information like Price, Sale price, Discount percentage, Discount amount, SKU, Quantity.
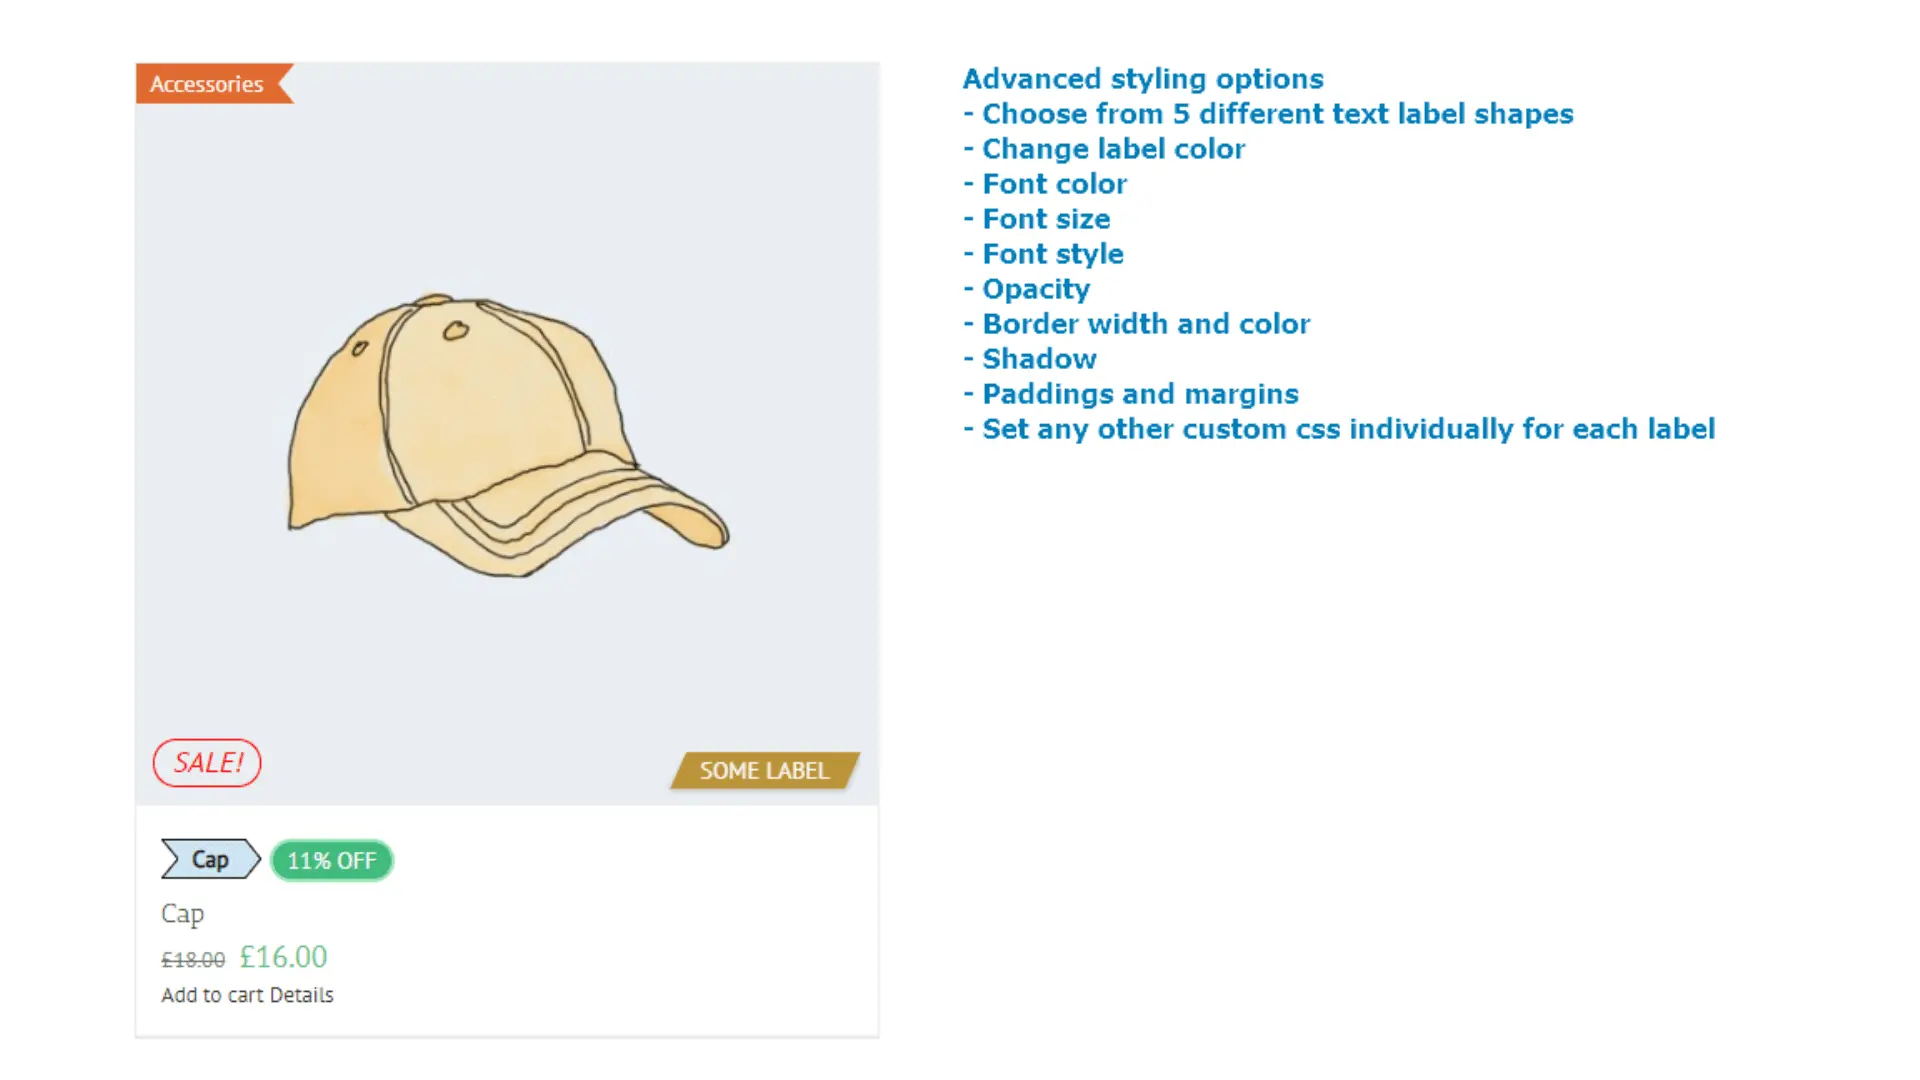
- Choose from 5 different text label shapes. Set unique styles for each of them with help of custom styling options.
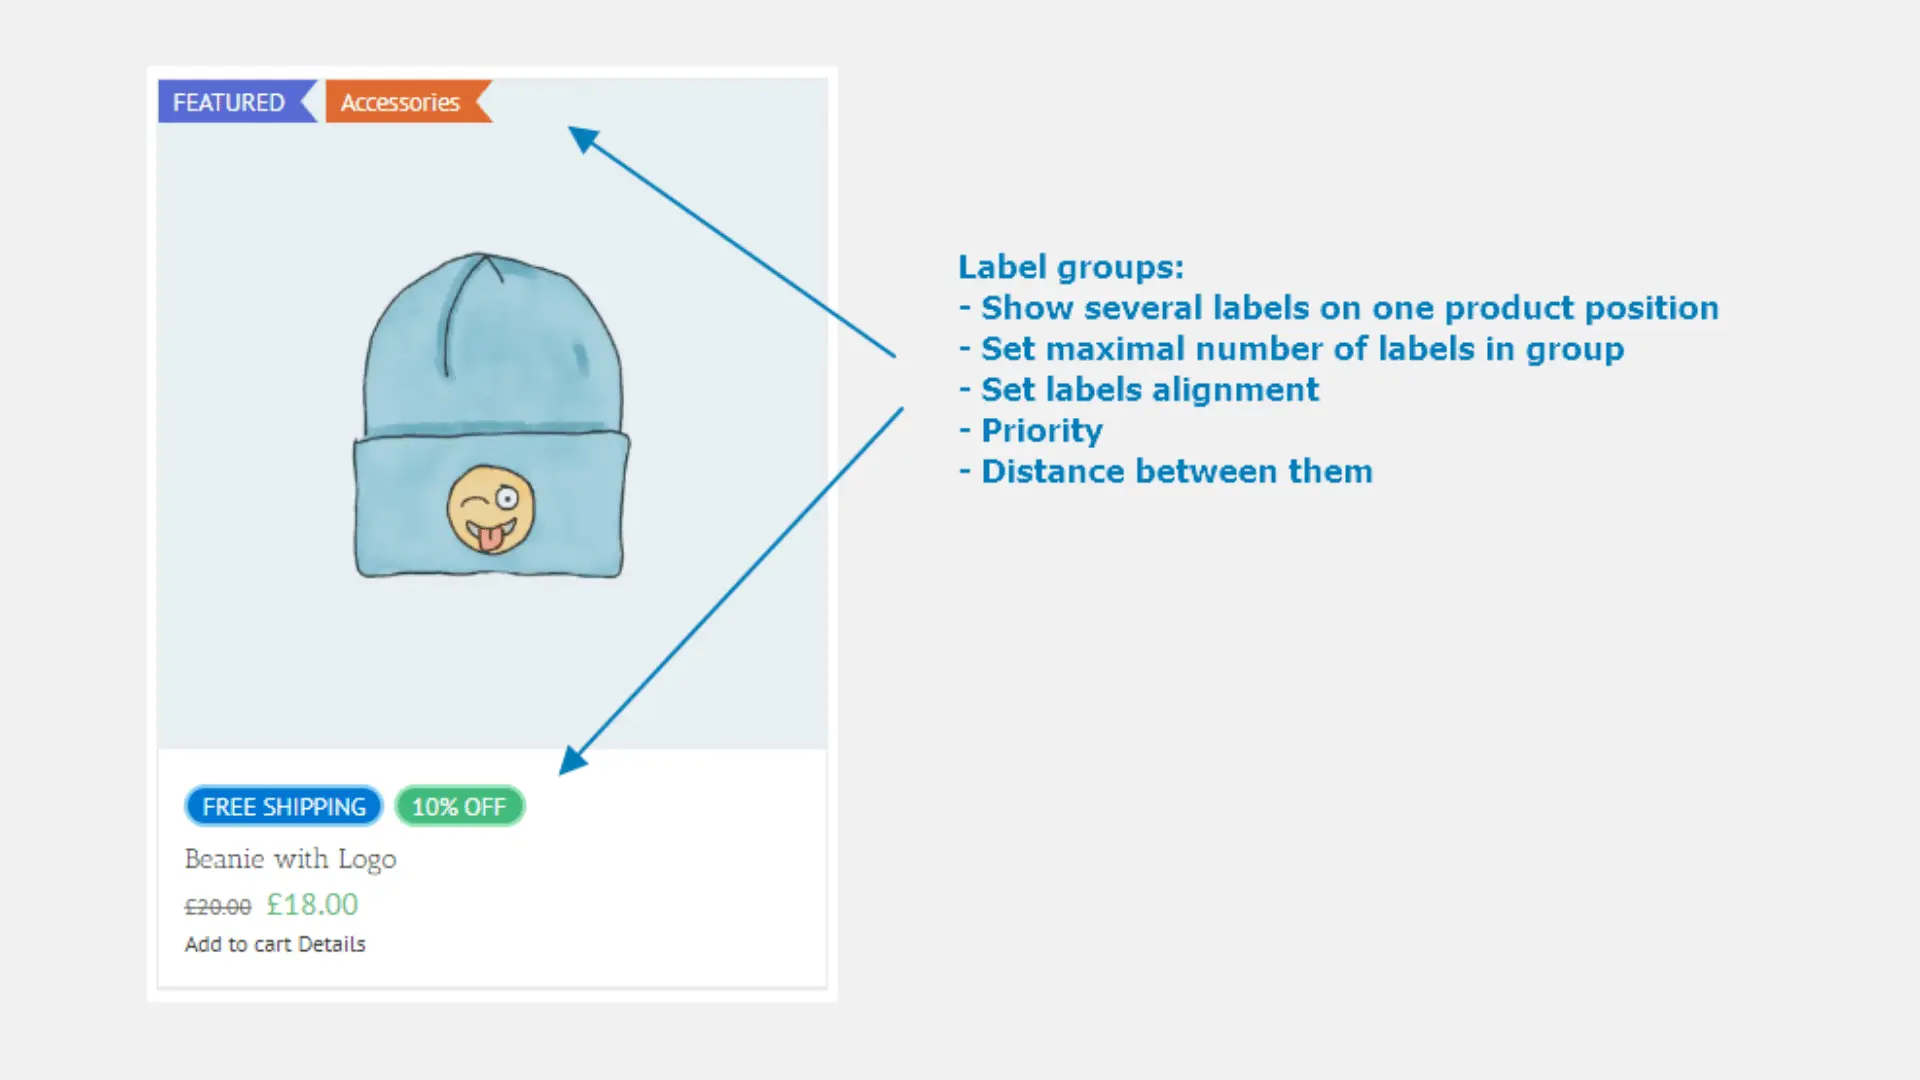
- Label groups. Show several labels for one product. Set maximal number of such labels, their alignment, priority, distance between them.
- Label conditions. Show labels based on specific product, page or user conditions. Combine conditions to ‘AND’ and ‘OR’ groups to create more complex label rules.
- Create unlimited label variations with advanced styling options: change label color, font color, font size, opacity, paddings and margins, set any other custom css individually for each label.
- Cool admin panel with labels live preview.
- Special option to change hooks that used to display product labels if your theme has some problem with showing them or if you want to change labels position.
- Page builder plugins support: Gutenberg, Elementor, Beaver Builder, WPBakery, Divi Builder, Avada Builder, etc.
📽️Demo
Visit this plugin Live Demo here to see how it works.
💵Pricing
- SINGLE SITE 👉 $59
- 5 SITES 👉 $79
- Unlimited SITES 👉 $149
🖼️Screenshots
3. Advanced Product Labels for WooCommerce
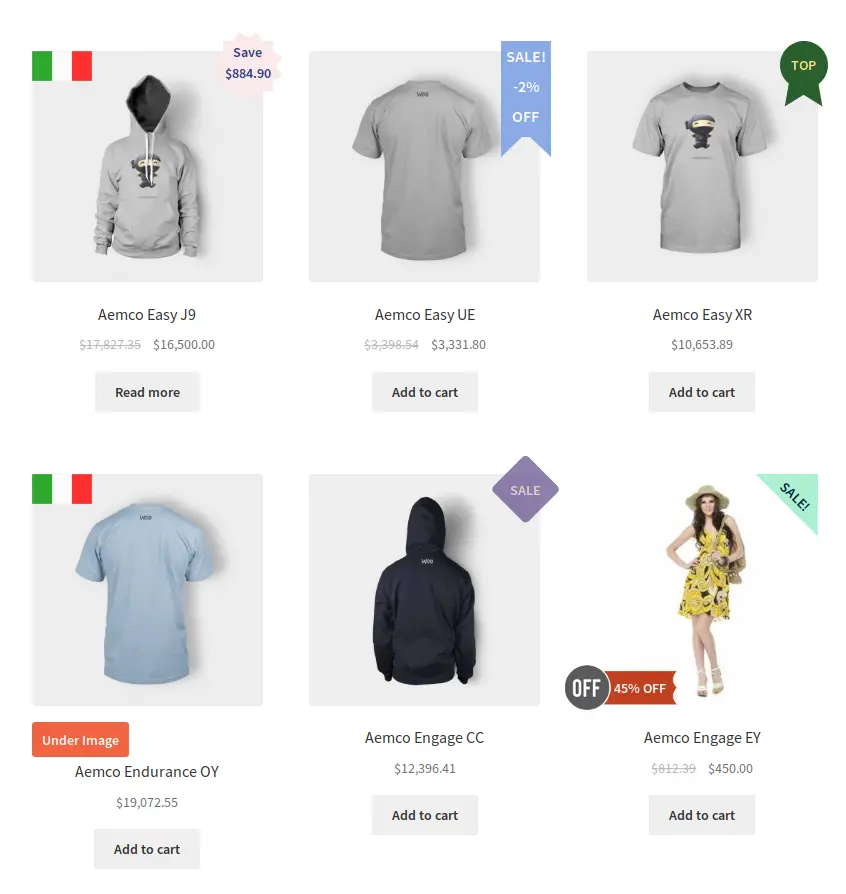
The Advanced Product Labels plugin makes creating labels a breeze, allowing you to swiftly promote your free products or showcase special attributes such as “Free Shipping.” With the flexibility of conditions, you can assign each label to specific products within your shop, ensuring targeted promotion and highlighting of key features.
🚀FEATURES
Let’s take a brief look at some of the cool features of this plugin:
- Custom labels on products
- Labels for products by specific conditions
- Labels by: product name, product category, sale status, stock status, bestsellers position, price, total sales count
- Labels custom text and discount percentage type
- Labels custom background and text colors
- Custom label position
- Multiple labels for one product
- CSS templates
- Custom image template
- Better position for labels
- Font size for labels
- Font family for labels
- Dimensions(px|em|%) for the Height, Width, Font size, Line height, Padding and Margin
- z-index for labels
📽️Demo
Visit this plugin Live Demo here to see how it works.
💵Pricing
- SINGLE SITE 👉 $34
- 3 SITES 👉 $54
- 5 SITES 👉 $84
- 10 SITES 👉 $129
🖼️Screenshots
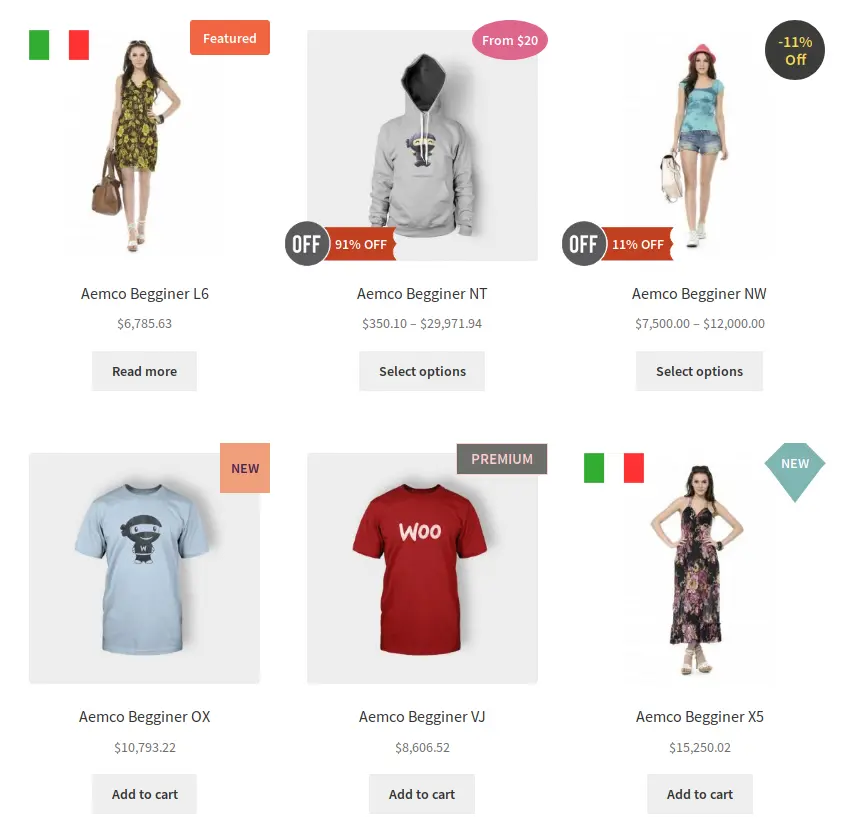
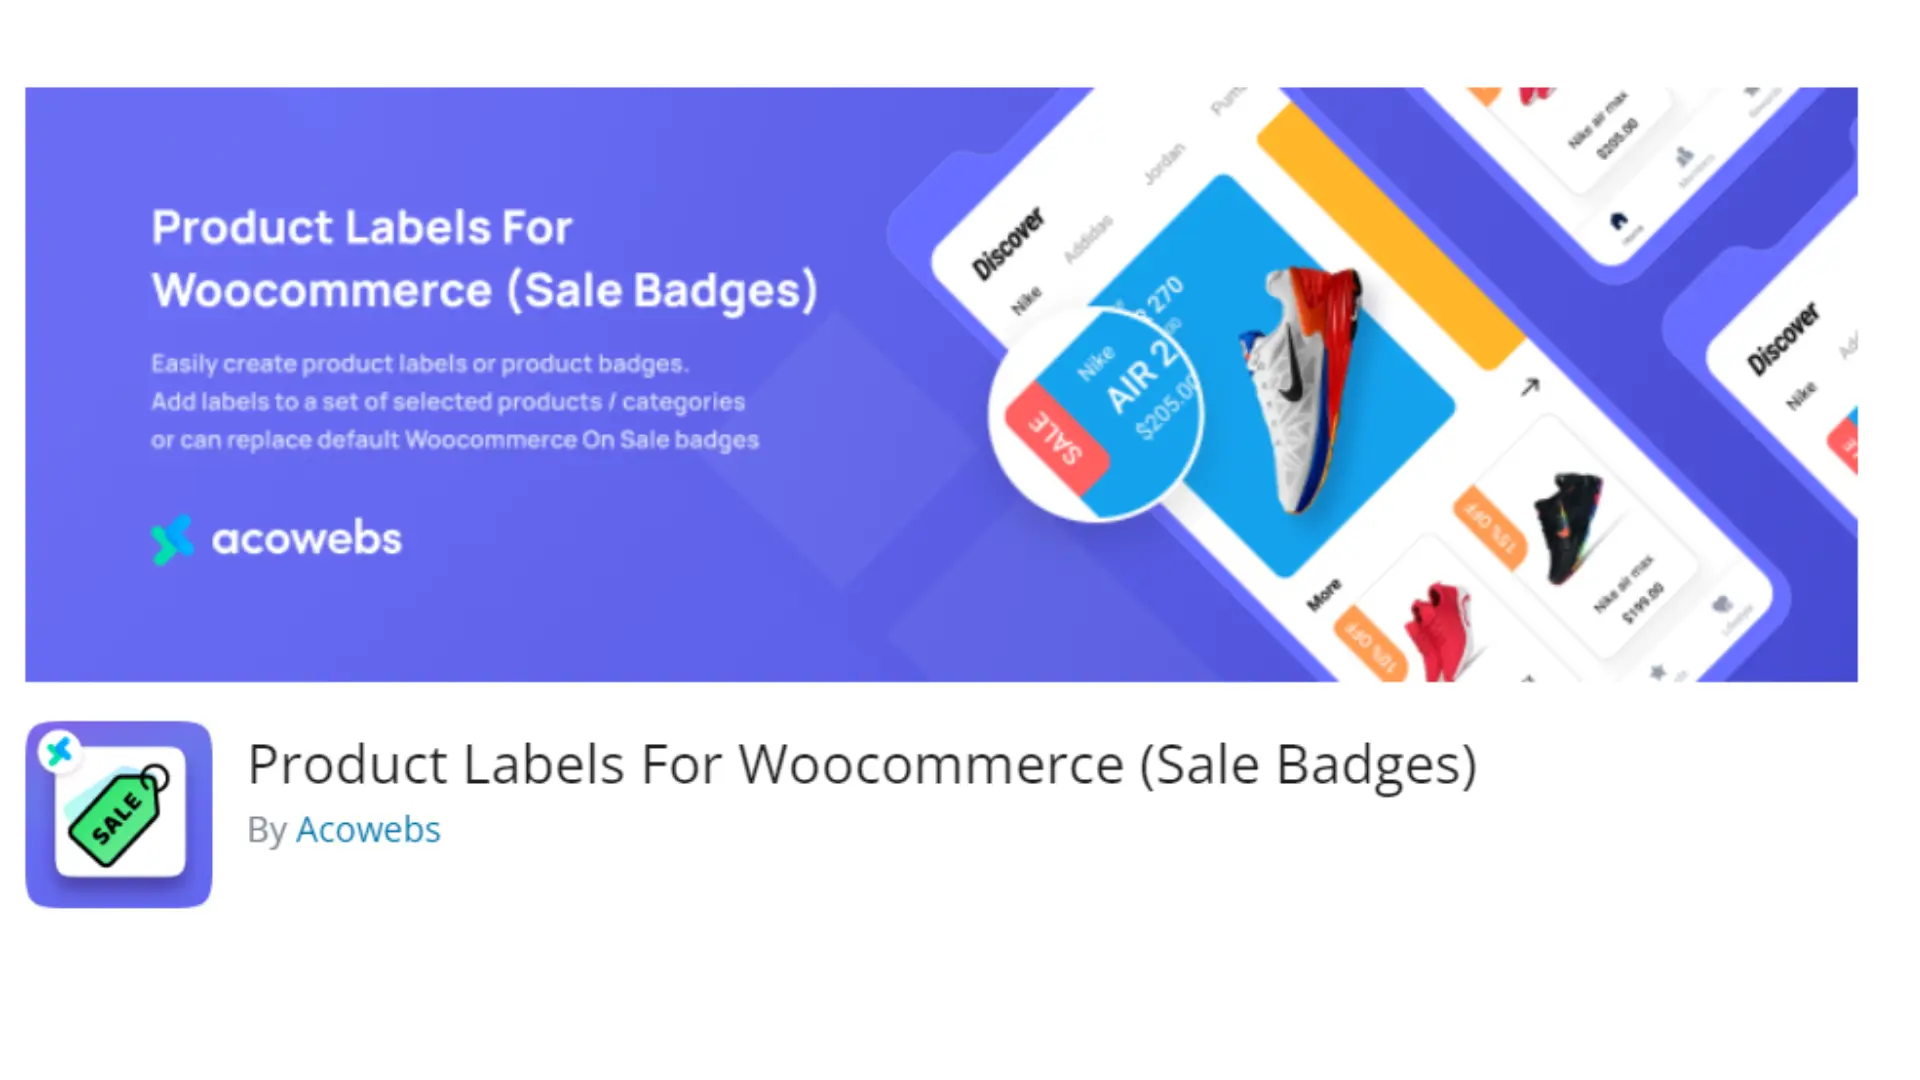
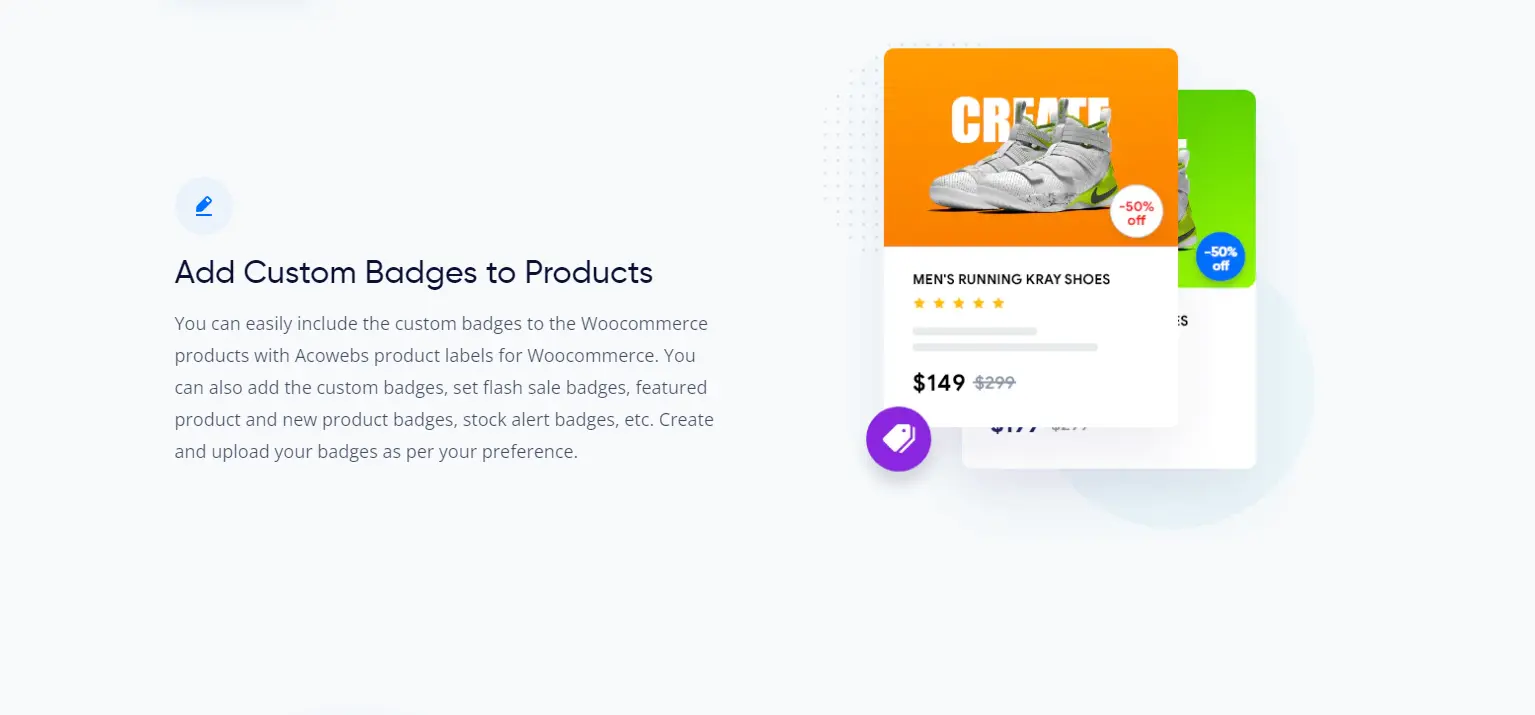
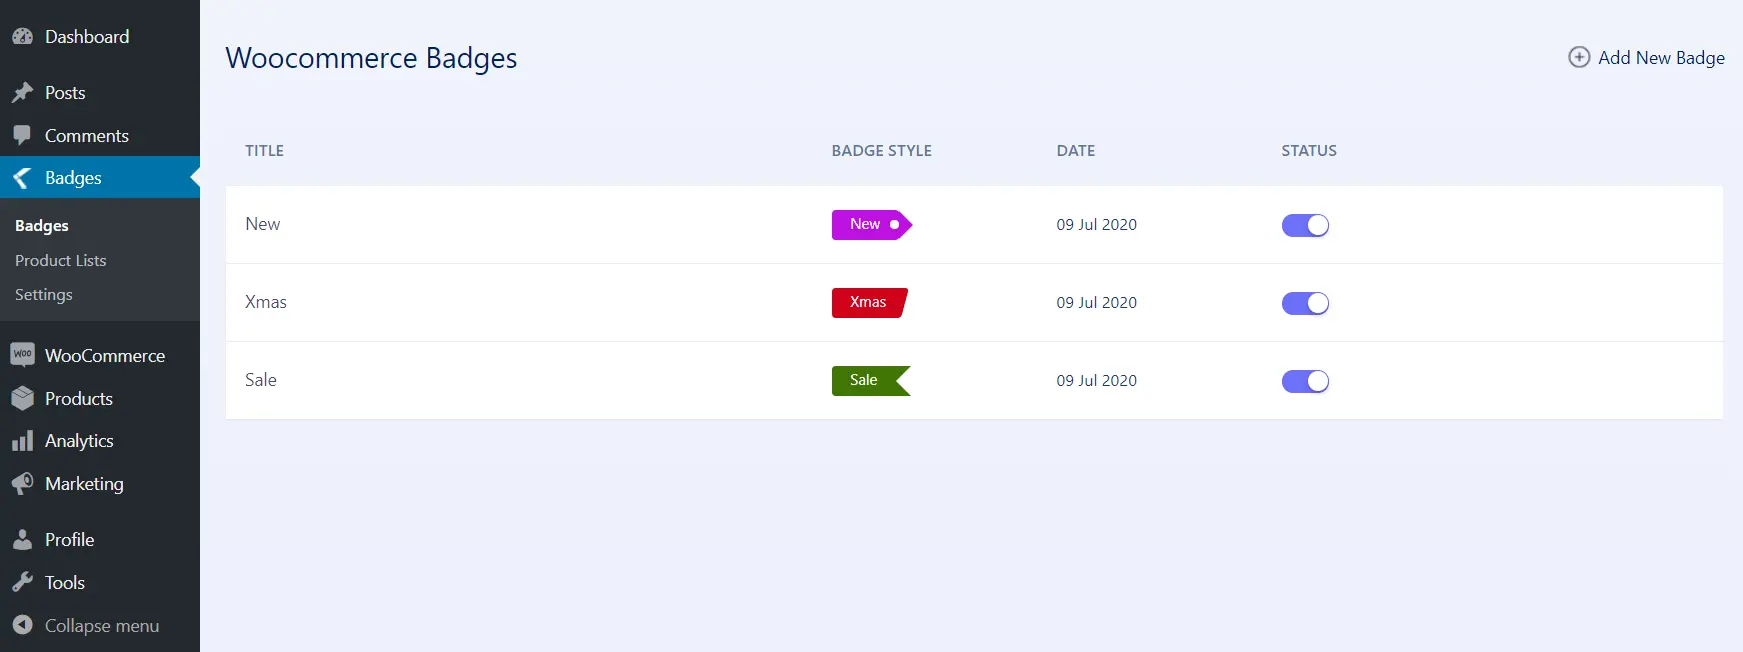
4. Product Labels For Woocommerce (Sale Badges)
The WooCommerce Product Labels plugin, also known as WooCommerce Sale Badges, simplifies the creation of product labels or badges effortlessly. With its user-friendly interface, you can easily craft custom product labels for WooCommerce products. Whether you want to add labels to specific products or categories or replace the default WooCommerce On Sale badges, this plugin offers the flexibility to do so with ease.
🚀FEATURES
Let’s take a brief look at some of the cool features of this plugin:
- Can easily create / manage badges with our easy to use UI.
- Option to customize badge color, font size, line height, width, opacity, position etc.
- Live preview for easy positioning / styling.
- Default / commonly used badge styles available to choose from.
- Option to set hide / show badges.
- Option to set badges to a set of products / category.
- Option to set badges to all products ‘On Sale’.
- Option to set badges to ‘Out Of Stock’ products.
- Option to set expiry date & time on badges.
- Option to hide the default WooCommerce ‘On Sale’ Badge.
- Option to show discount percenatge (sale / regular price difference) as Badge text.
📽️Demo
Visit this plugin Live Demo here to see how it works.
💵Pricing
- SINGLE SITE 👉 $43
- 5 SITES 👉 $99
🖼️Screenshots
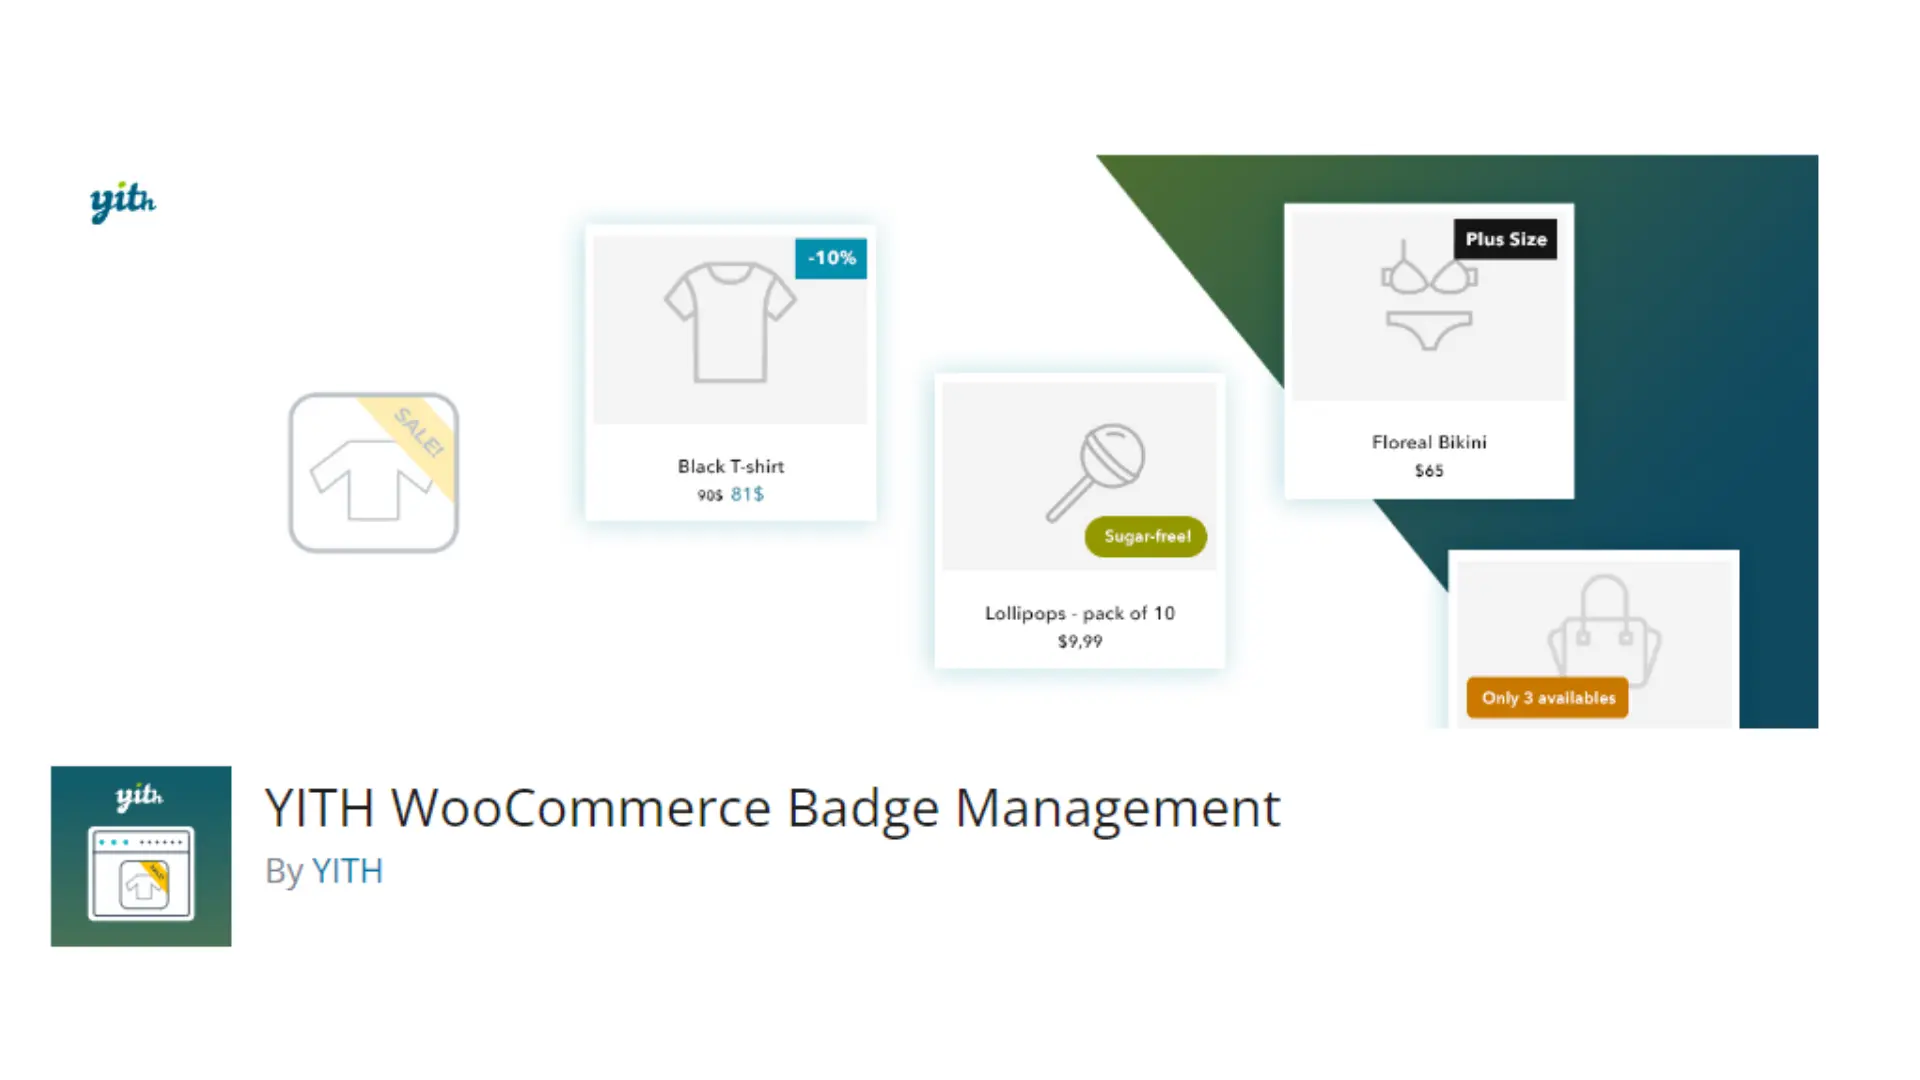
5. YITH WooCommerce Badge Management
Utilizing product badges is an effective strategy for enhancing sales within your e-commerce platform. These badges serve to spotlight key products, whether they’re new arrivals, popular items, featured selections, or others. Moreover, product badges can leverage potent psychological triggers such as scarcity, social proof, and urgency, effectively stimulating sales.
🚀FEATURES
Let’s take a brief look at some of the cool features of this plugin:
- Create unlimited badges using the advanced builder
- Create simple textual badges, with or without background
- Create image badges and choose from 9 different images
- Set the badge size
- Set the padding for the textual badges
- Set the badges border radius
- Set the badge position (top, bottom, center) and alignment (left, right, center)
- Hide or replace the default WooCommerce “on sale” badge
- Assign badges to products
📽️Demo
Visit this plugin Live Demo here to see how it works.
💵Pricing
🖼️Screenshots
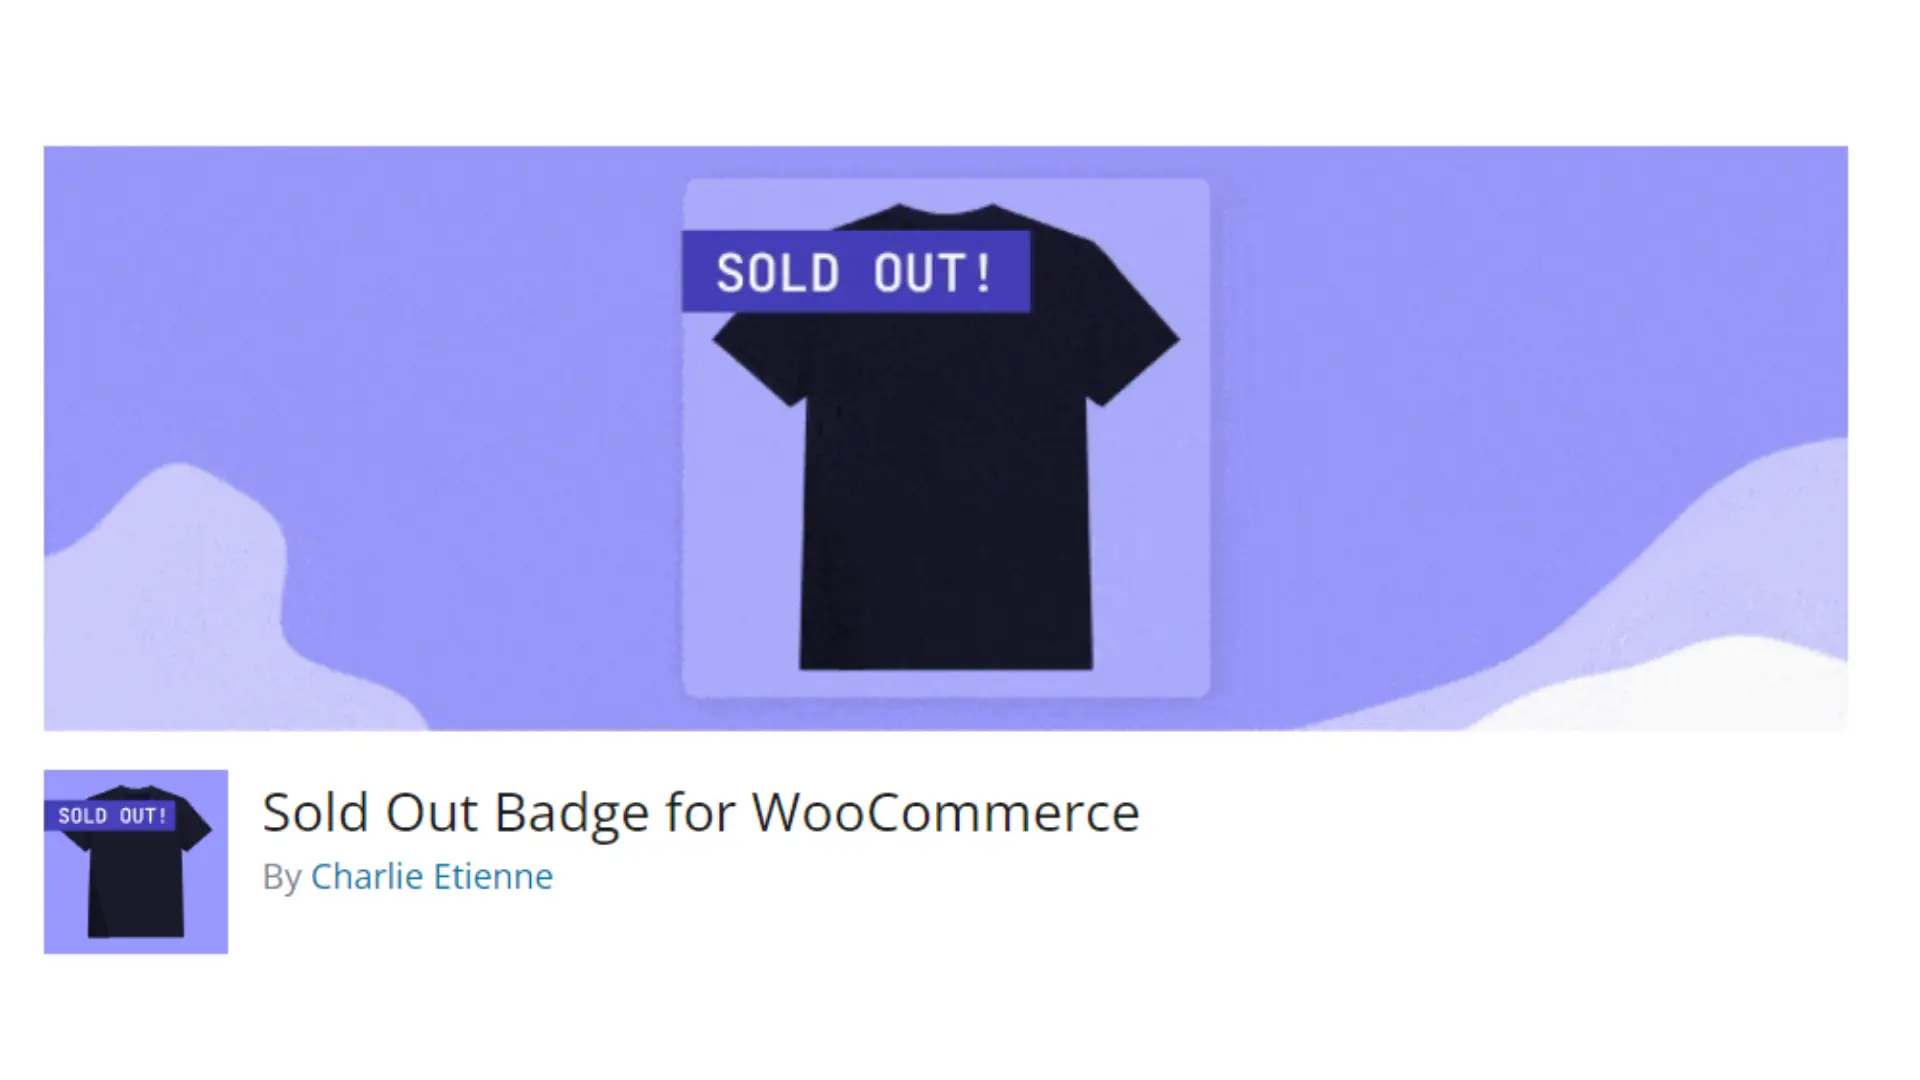
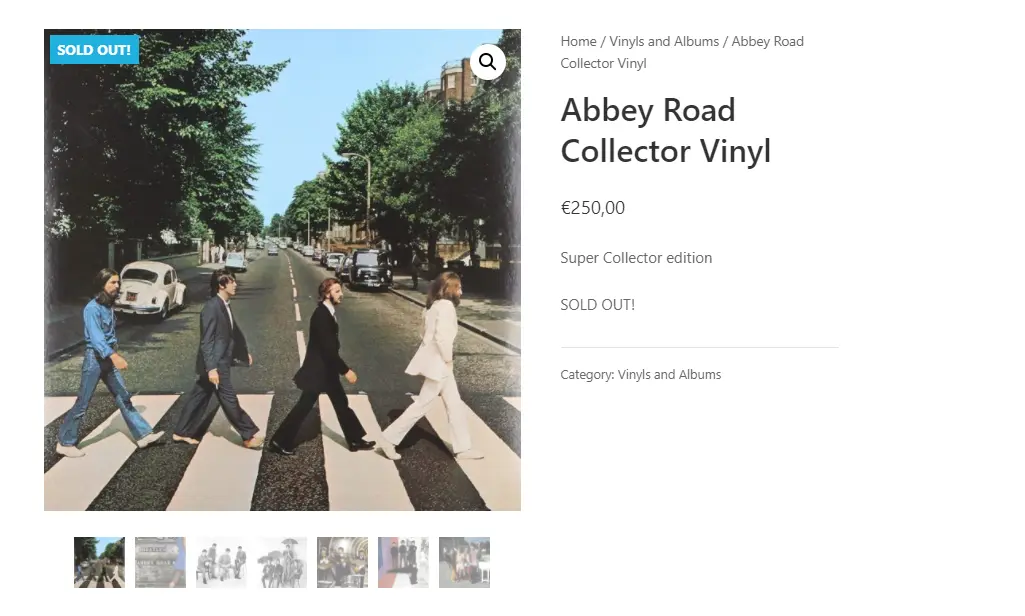
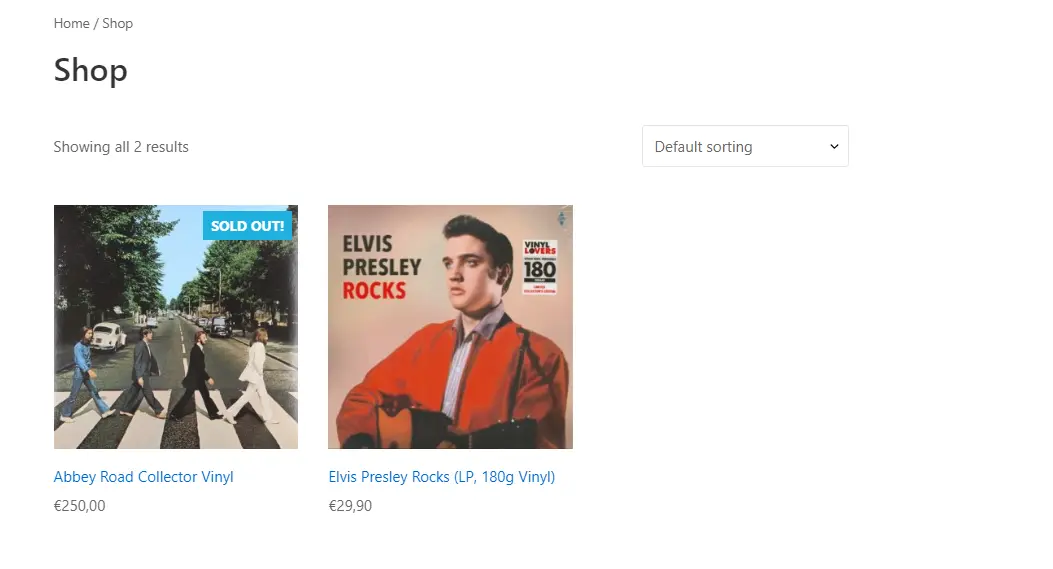
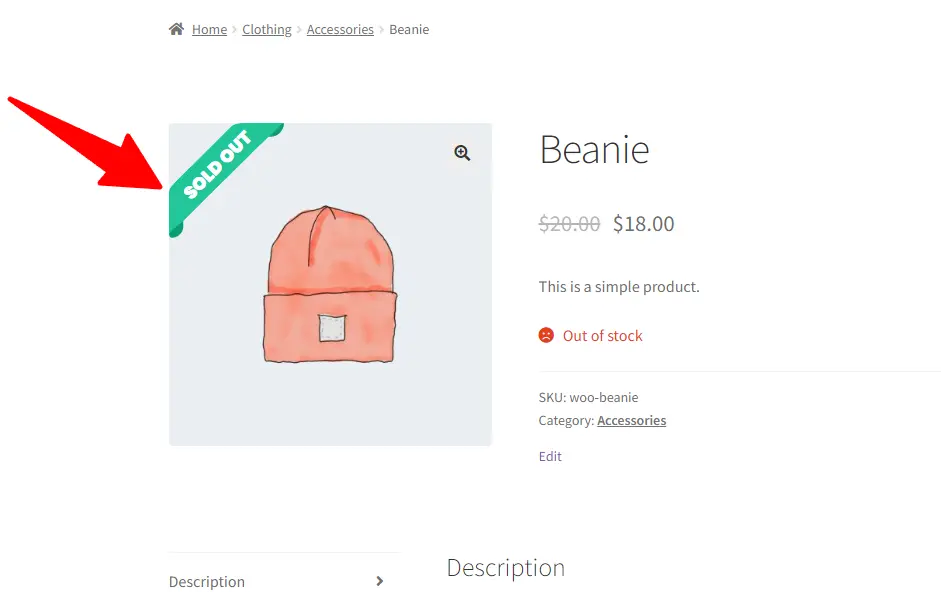
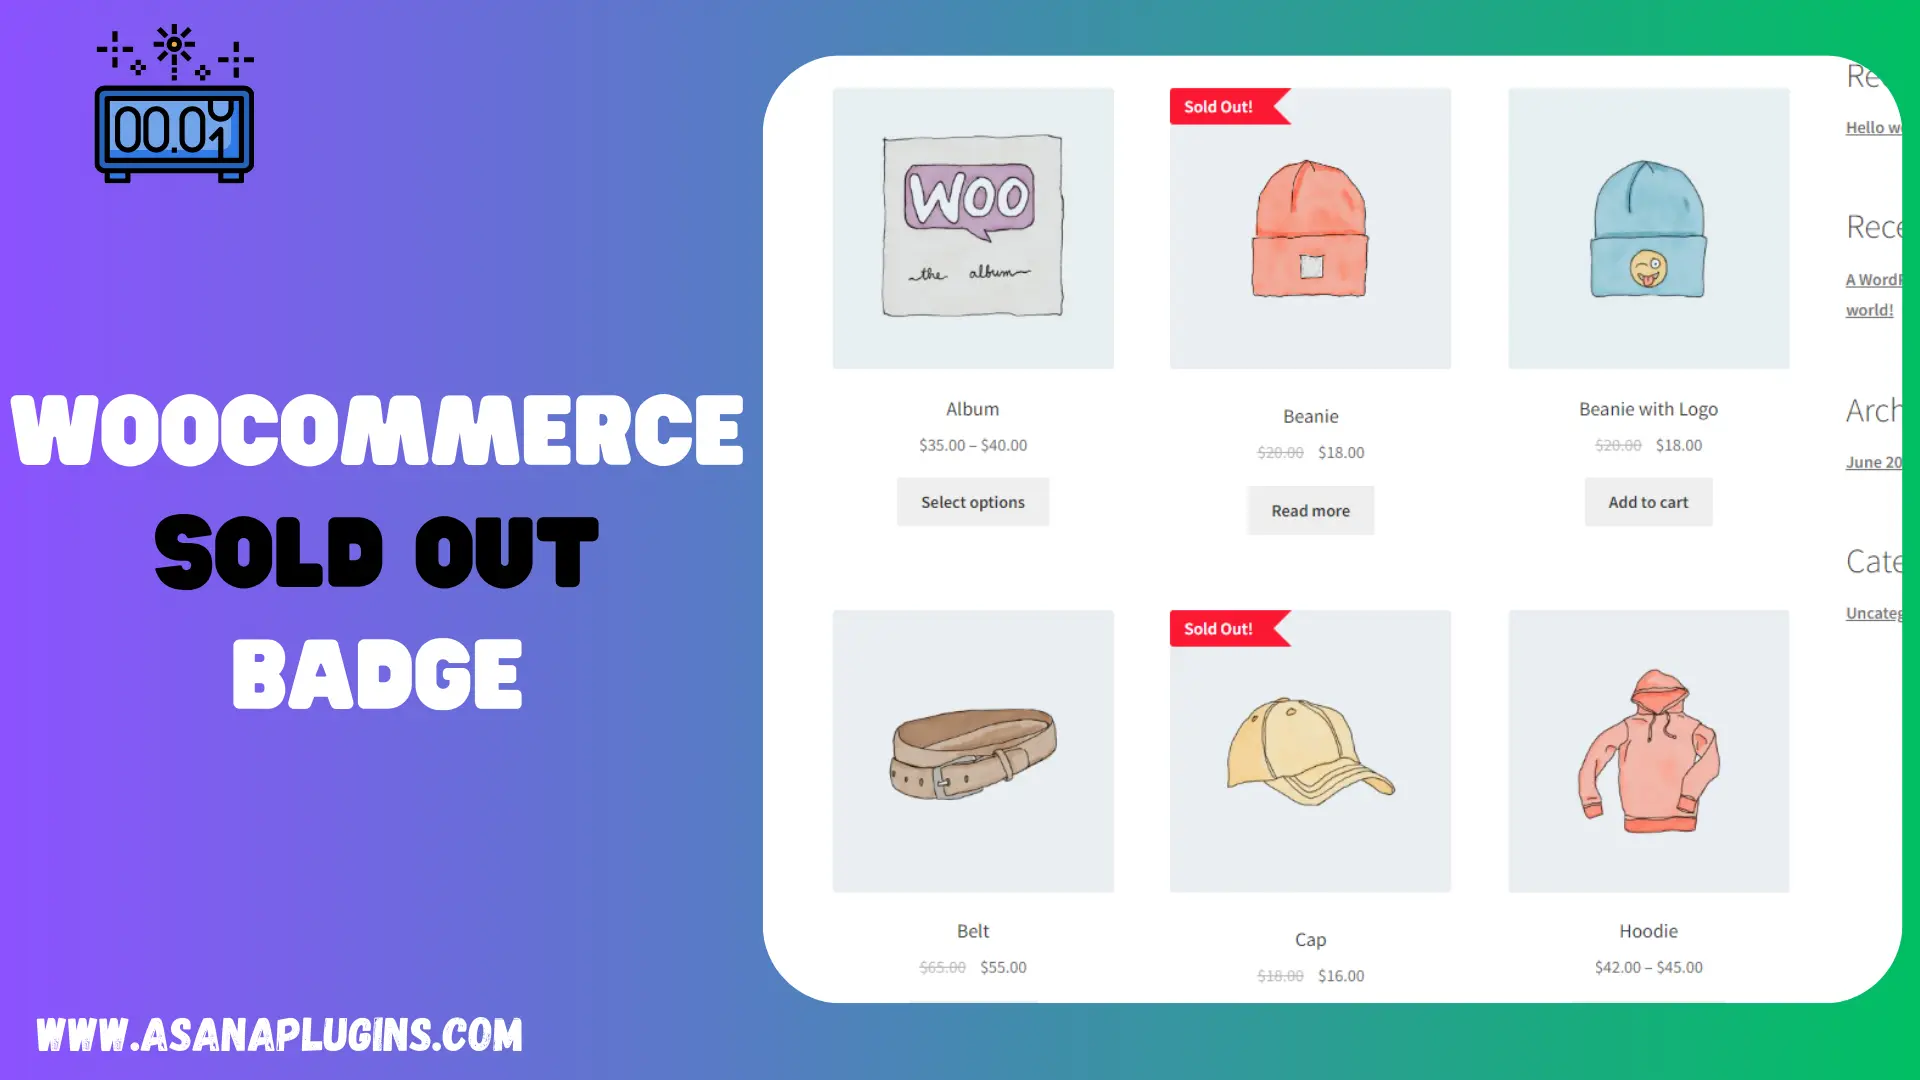
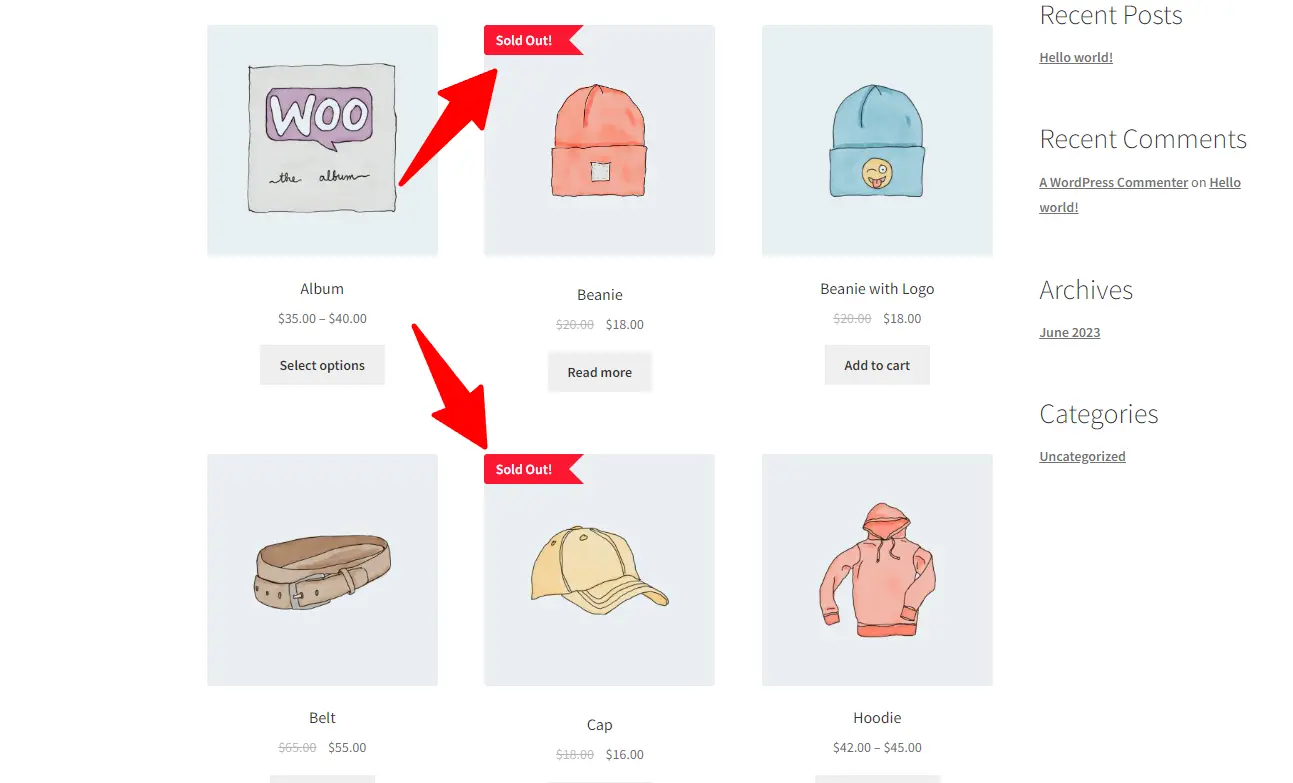
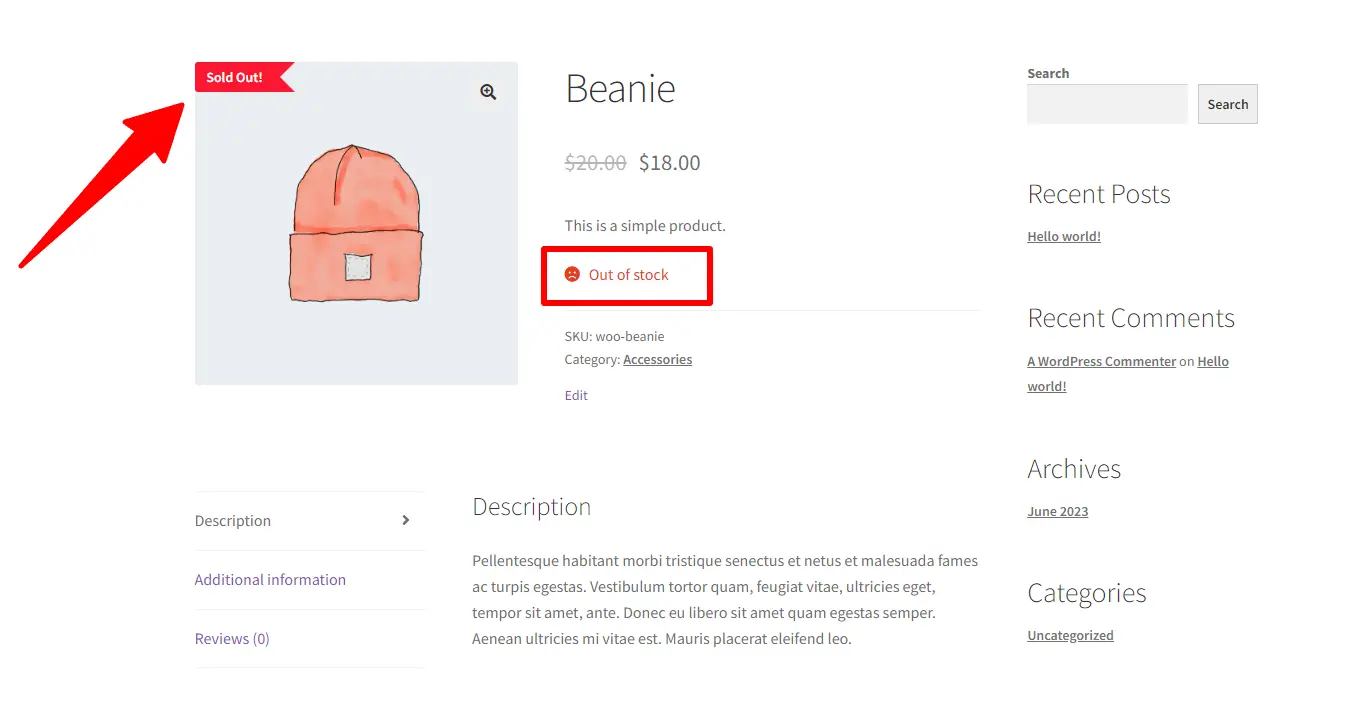
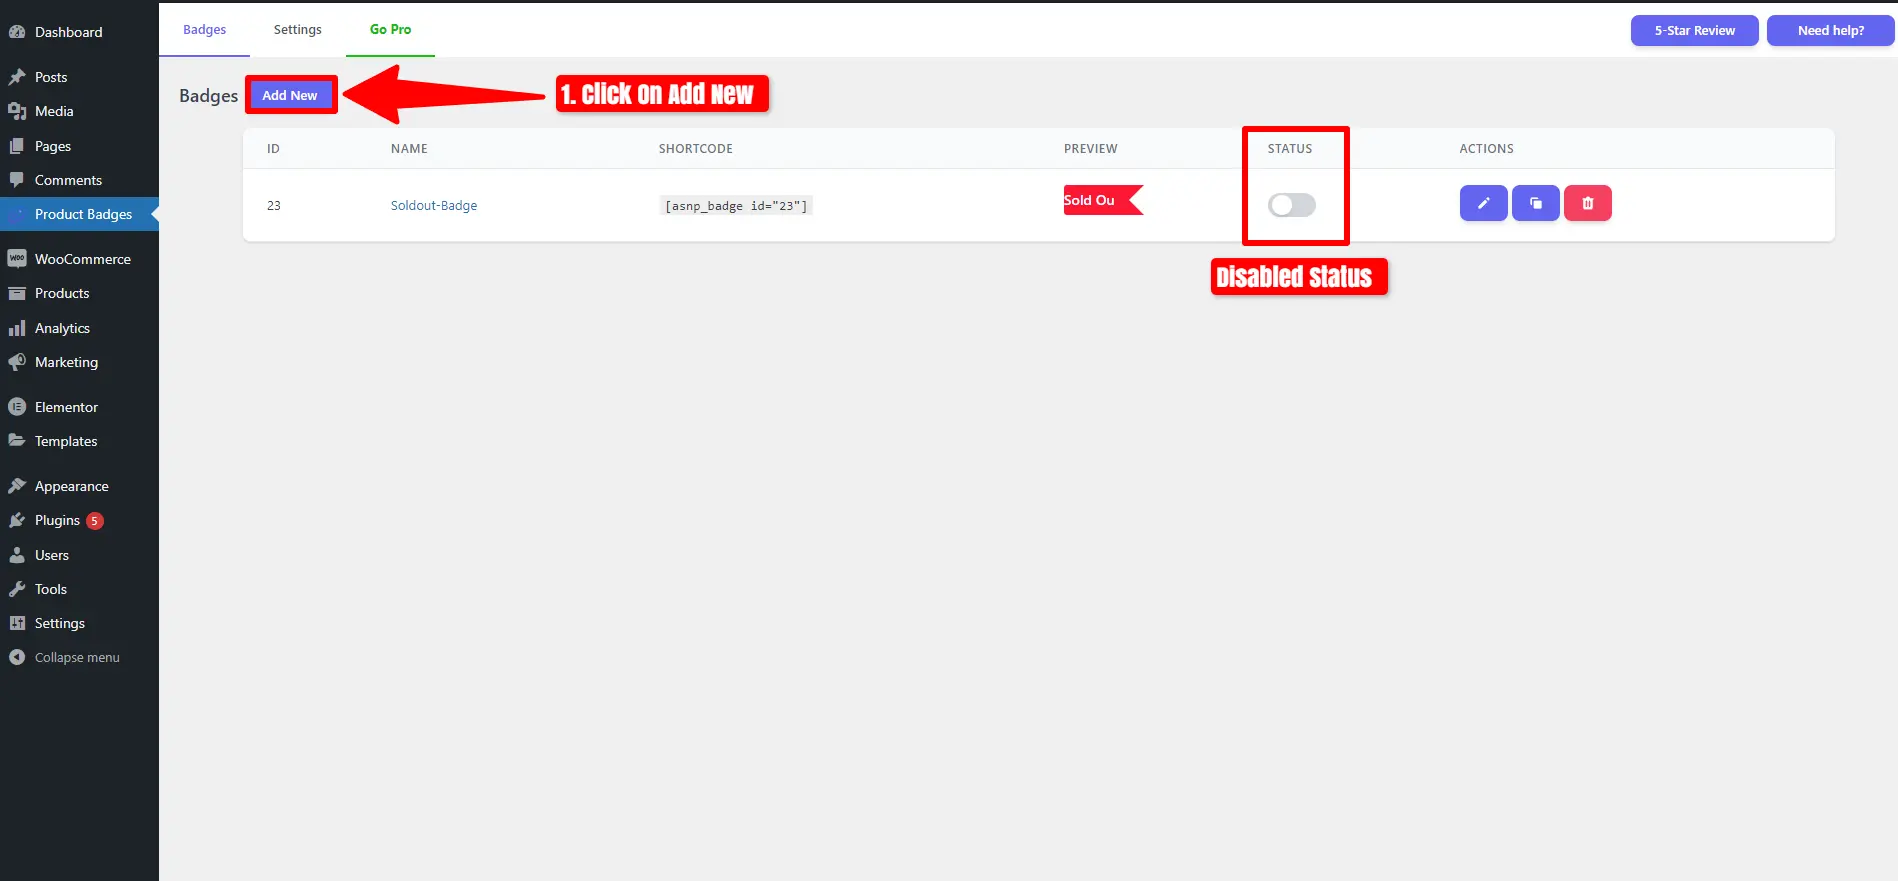
6. Sold Out Badge for WooCommerce
Show a “Sold Out!” badge on products that are out of stock. This plugin for WooCommerce will display a badge on the product thumbnail, featuring the text you’ve specified, when the product becomes out of stock.
🚀FEATURES
Let’s take a brief look at some of the cool features of this plugin:
- Badge text (you can replace “Sold Out” with any text you want, like “Out of stock” or “Coming Soon“)
- Badge background color
- Badge text color
- Badge font size
- Badge width
- Badge height
- …
- An option to hide “Sale” badge if you get an overlap (checked by default)
📽️Demo
Visit this plugin Live Demo here to see how it works.
🖼️Screenshots
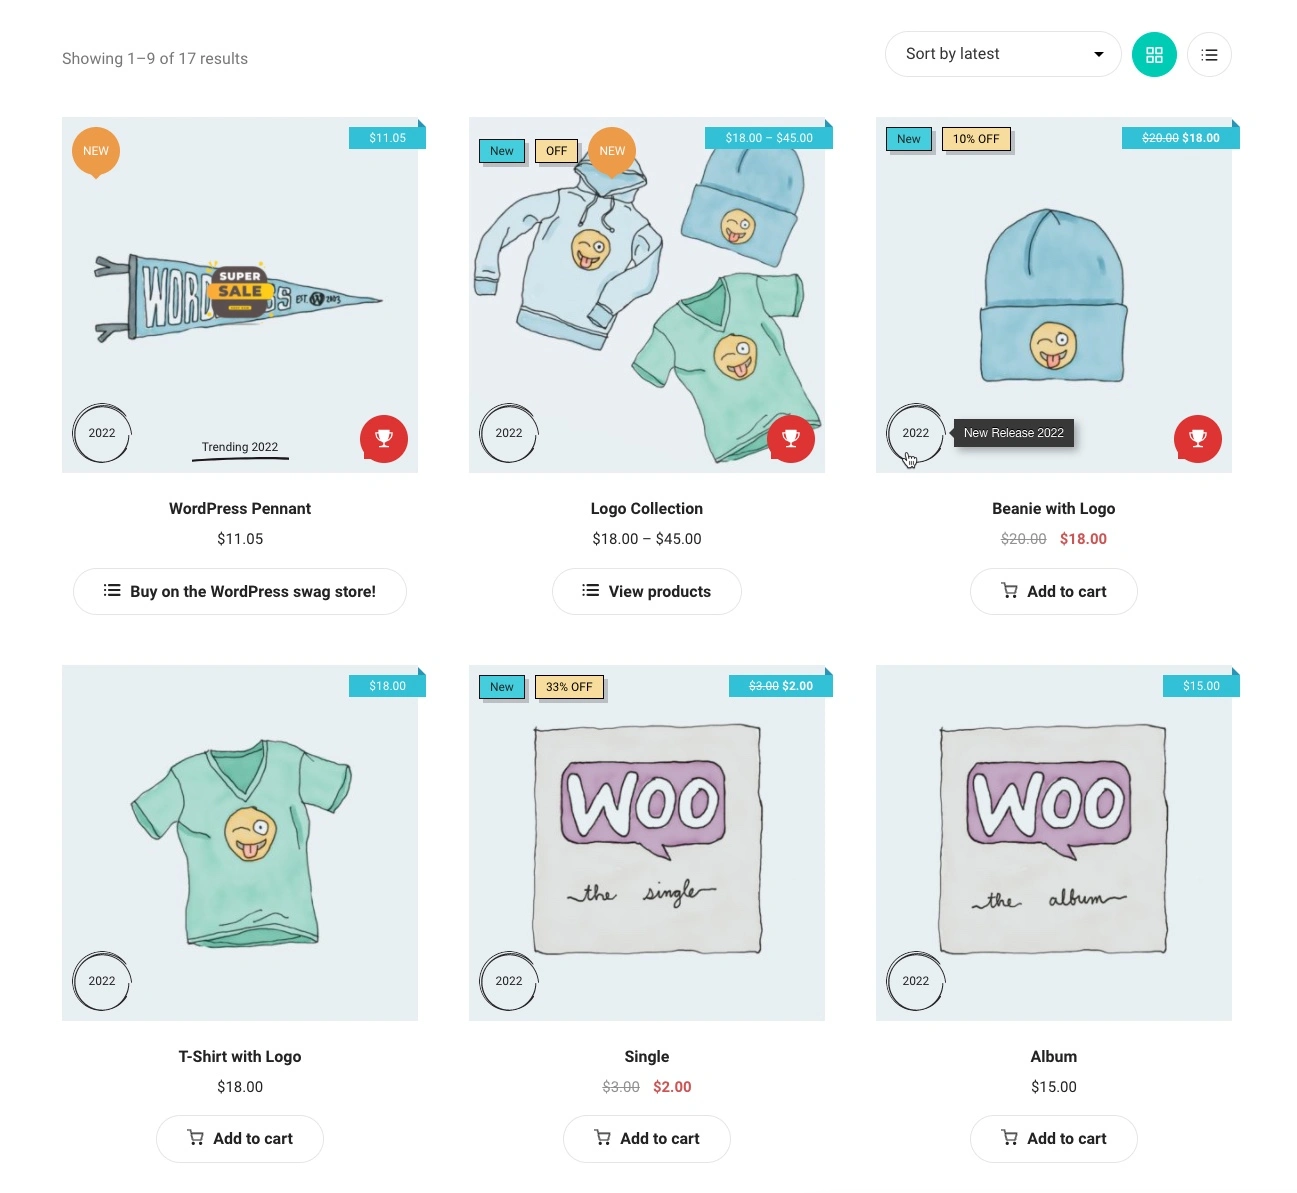
7. WPC Badge Management for WooCommerce
The WPC Badge Management plugin is incredibly versatile, multipurpose, and powerful. Specifically designed for managing badges in online shops and WooCommerce sites, it goes beyond simple product labeling. It serves as a potent tool for ecommerce business owners, aiding them in increasing conversion rates, boosting sales and revenues, ensuring speedy checkout processes, and enhancing customer retention rates.
🚀FEATURES
Let’s take a brief look at some of the cool features of this plugin:
- More than 22 styles of badges that diversify in images, colors, shapes, texts, etc.
- Highly customizable Global Badges: excerpt, applicable objects, position, text, colors, tooltip & order
- Multi-level object application: storewide (all products), on-sale, featured, out of stock, selected tags, categories, brands, product types, specific attributes
- Various positions: Show or hide badges in more than 10 positions on pages & product images
- Icons & short-code supported custom text for badges
- Icon library: support FontAwesome, Feather, Ionicons
- Orderable badges: input the order to be arranged when there are various badges inserted
- Instant preview of badges on product image
- Quickly preview all details of badges from the dashboard
- (PREMIUM) Using a combination of conditionals
- (PREMIUM) Groupable badges: manage positions of badges in groups on the single product page, archive page and product image
- (PREMIUM) Product-level badge management: customize badges for specific products
- WPC Smart Quick View integration: Customizable position on quick view popup
- WPC Countdown Timer integration: Customizable badges using custom countdown timer short-code
- Compatible with WPC plugins, most common WordPress themes and WooCommerce add-ons
📽️Demo
Visit this plugin Live Demo here to see how it works.
💵Pricing
- SINGLE SITE 👉 $29
- 5 SITES 👉 $59
- UNLIMITED 👉 $99
🖼️Screenshots
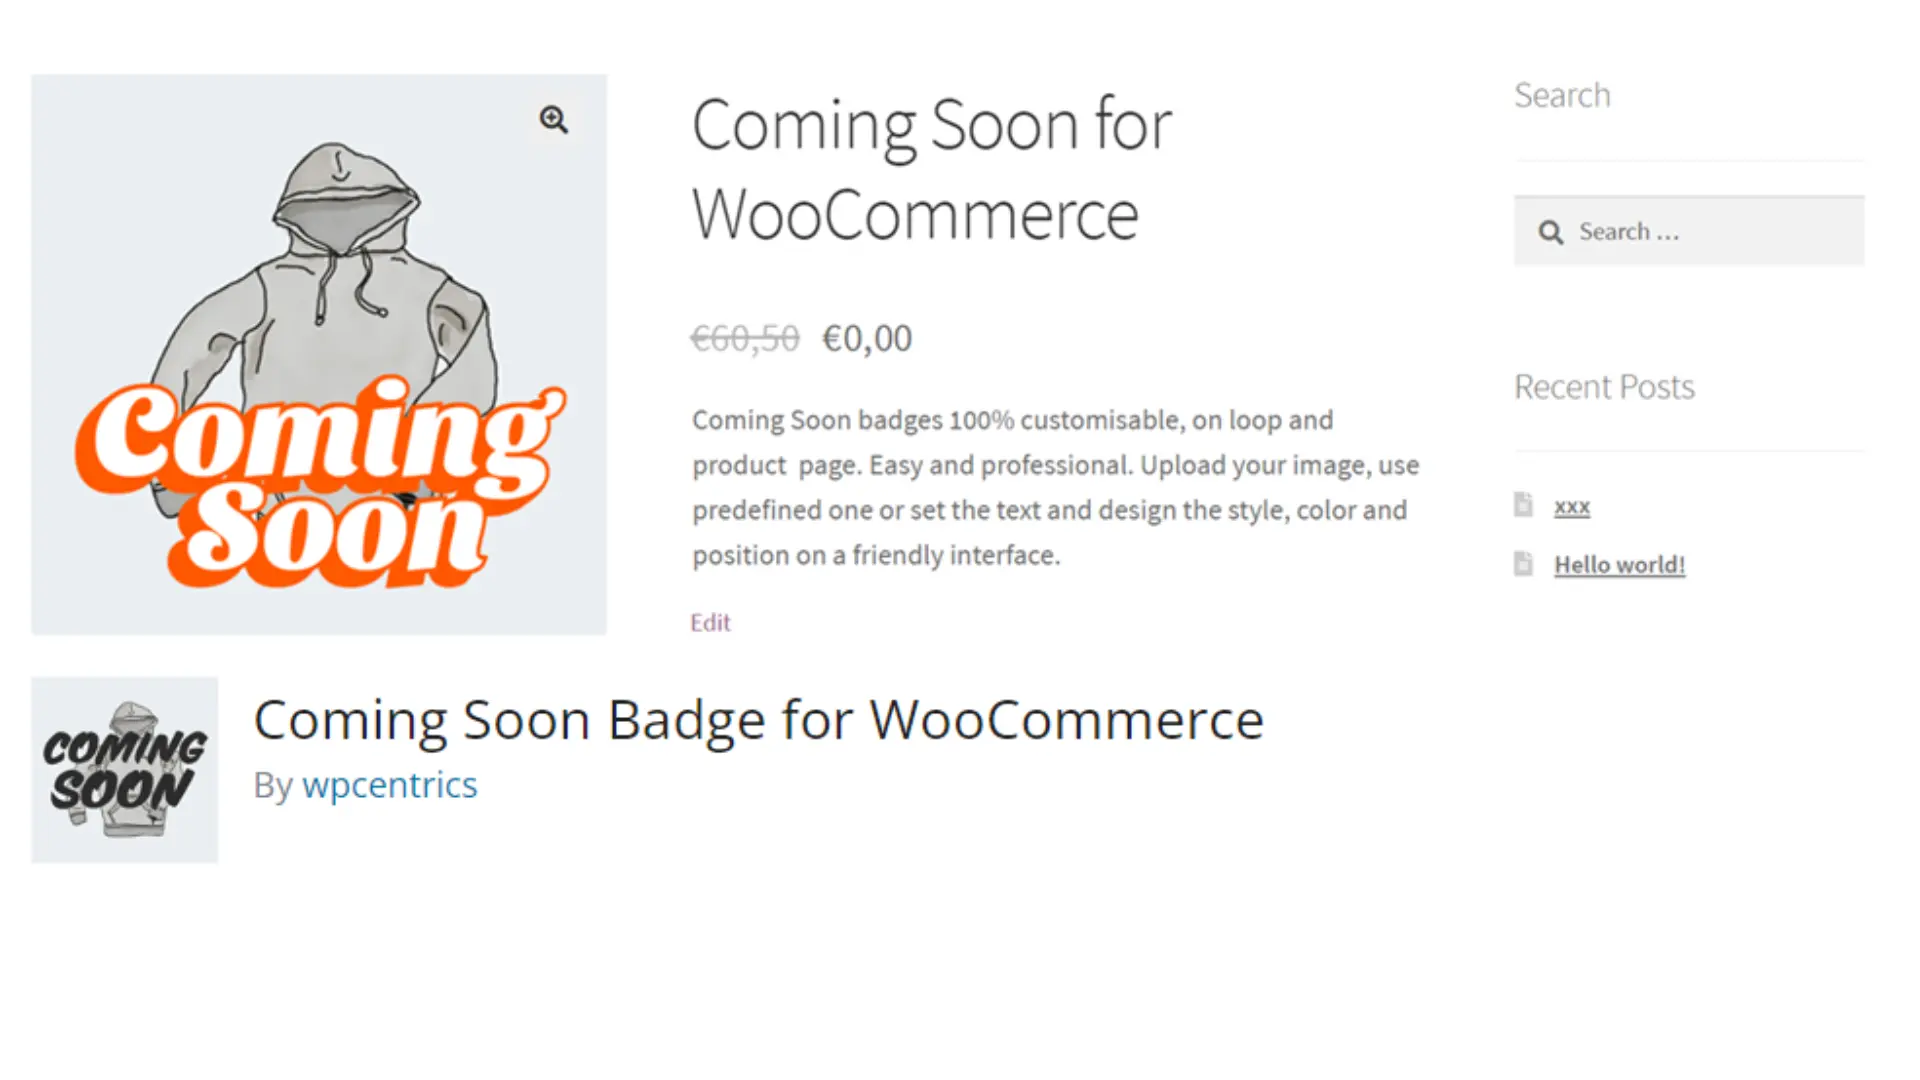
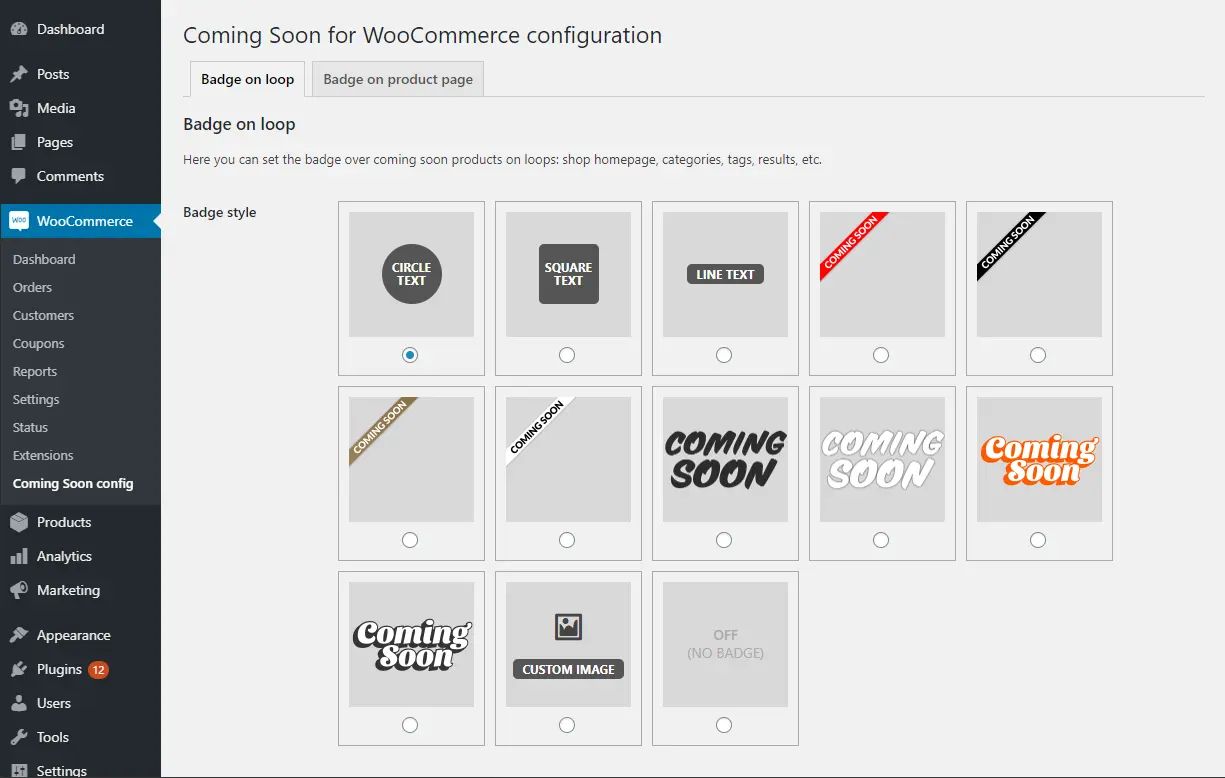
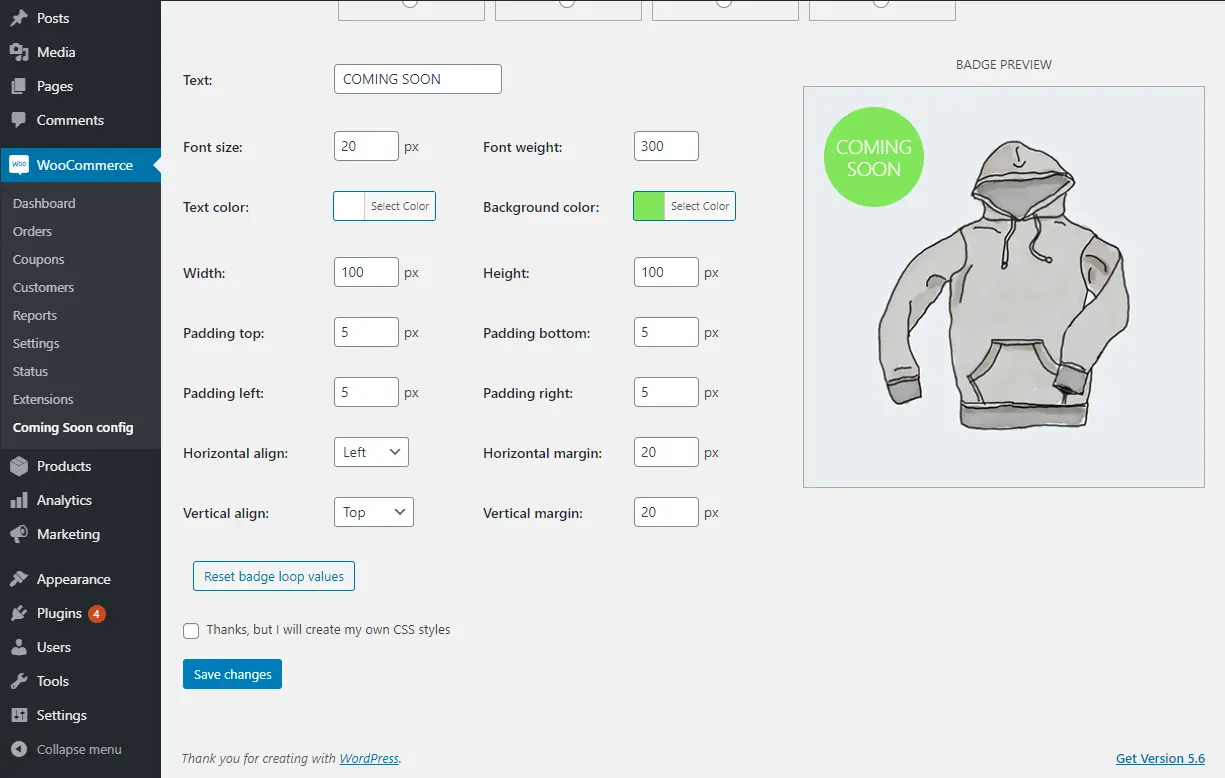
8. Coming Soon Badge for WooCommerce
Easily design your “Coming Soon” badge for WooCommerce products and select which products will display it!
🚀FEATURES
Let’s take a brief look at some of the cool features of this plugin:
- Custom badge with full control over design: position, size, colors, font-weight, margins, paddings, etc.
- Super easy and friendly designer: all without writing one line of CSS, with visual live preview
- Set the same or distinct badge for products loop / product page (or switch off the badge on one of them)
- Upload your own image if you prefer, or de-activate all plugin CSS generation and add your own
- After configuration, switch on/off product coming soon badge with a simple checkbox on product edition
- Compatible with most of WooCommerce themes
- Compatible with Elementor and Divi
📽️Demo
Visit this plugin Live Demo here to see how it works.
🖼️Screenshots
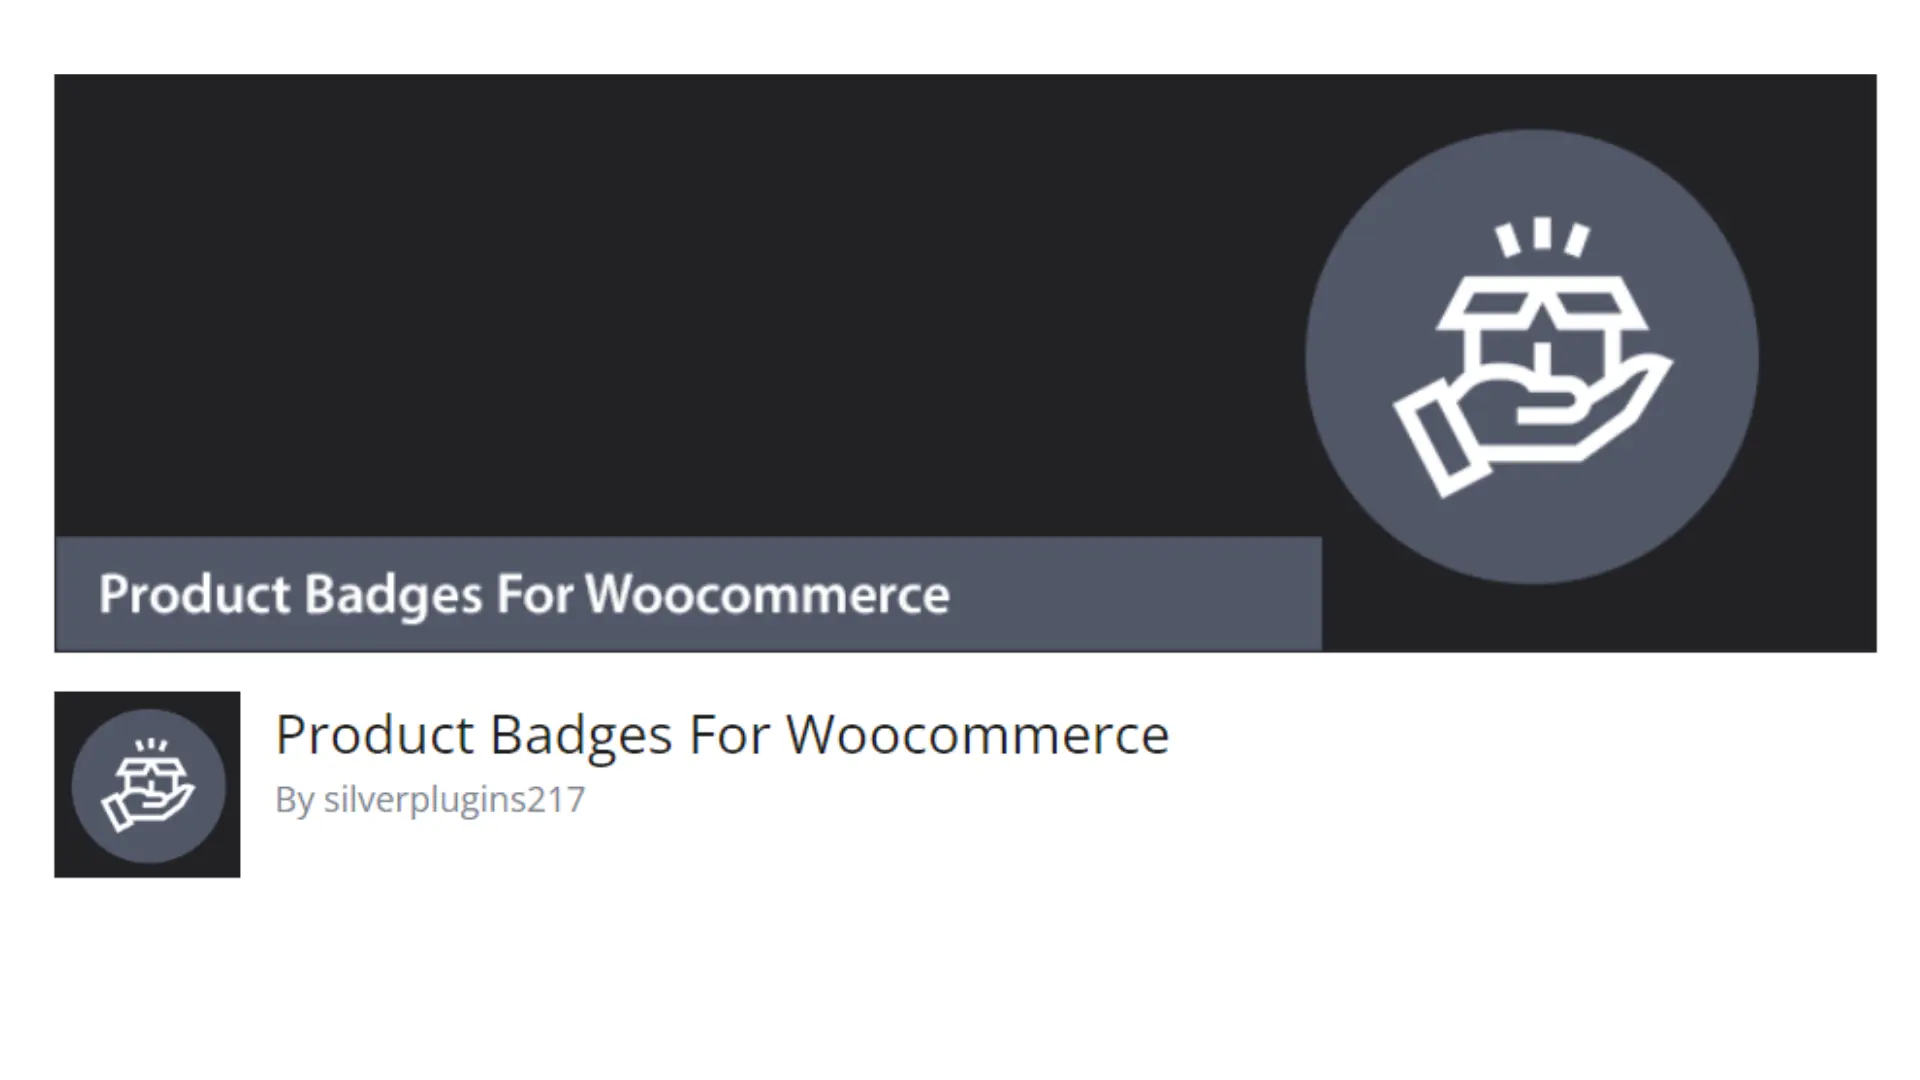
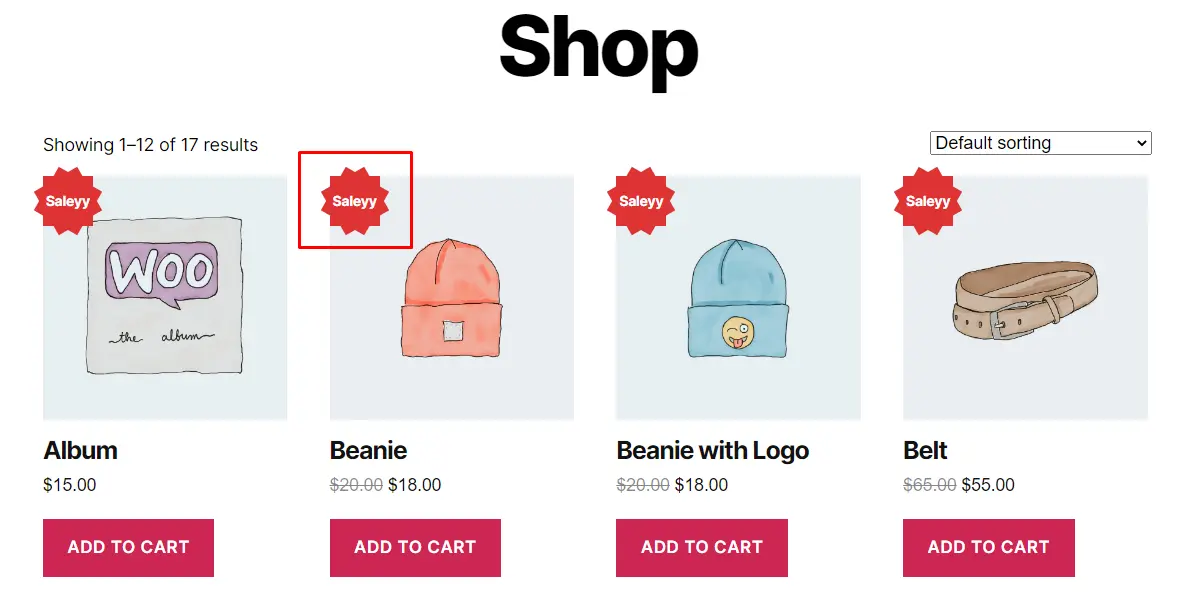
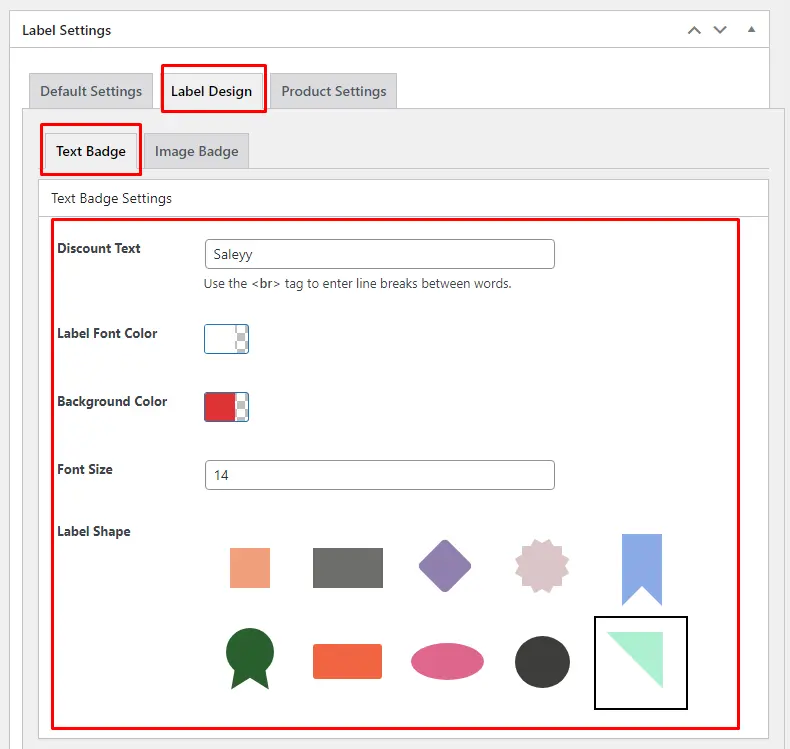
9. Product Badges For Woocommerce
The Product Badges for WooCommerce plugin provides an additional badge on the shop page, single product page, and category page.
🚀FEATURES
Let’s take a brief look at some of the cool features of this plugin:
- Easy to use
- You can add new product badges.
- You can select Show Label.
- Select Product badge position.
- Customized Label font size, color and background color.
- Add Product Discount Text.
- You can Select Label Shape or Image Badge select.
- Product Badges add conditionally with product wise and tag wise.
- WPML Support
📽️Demo
Visit this plugin Live Demo here to see how it works.
💵Pricing
🖼️Screenshots
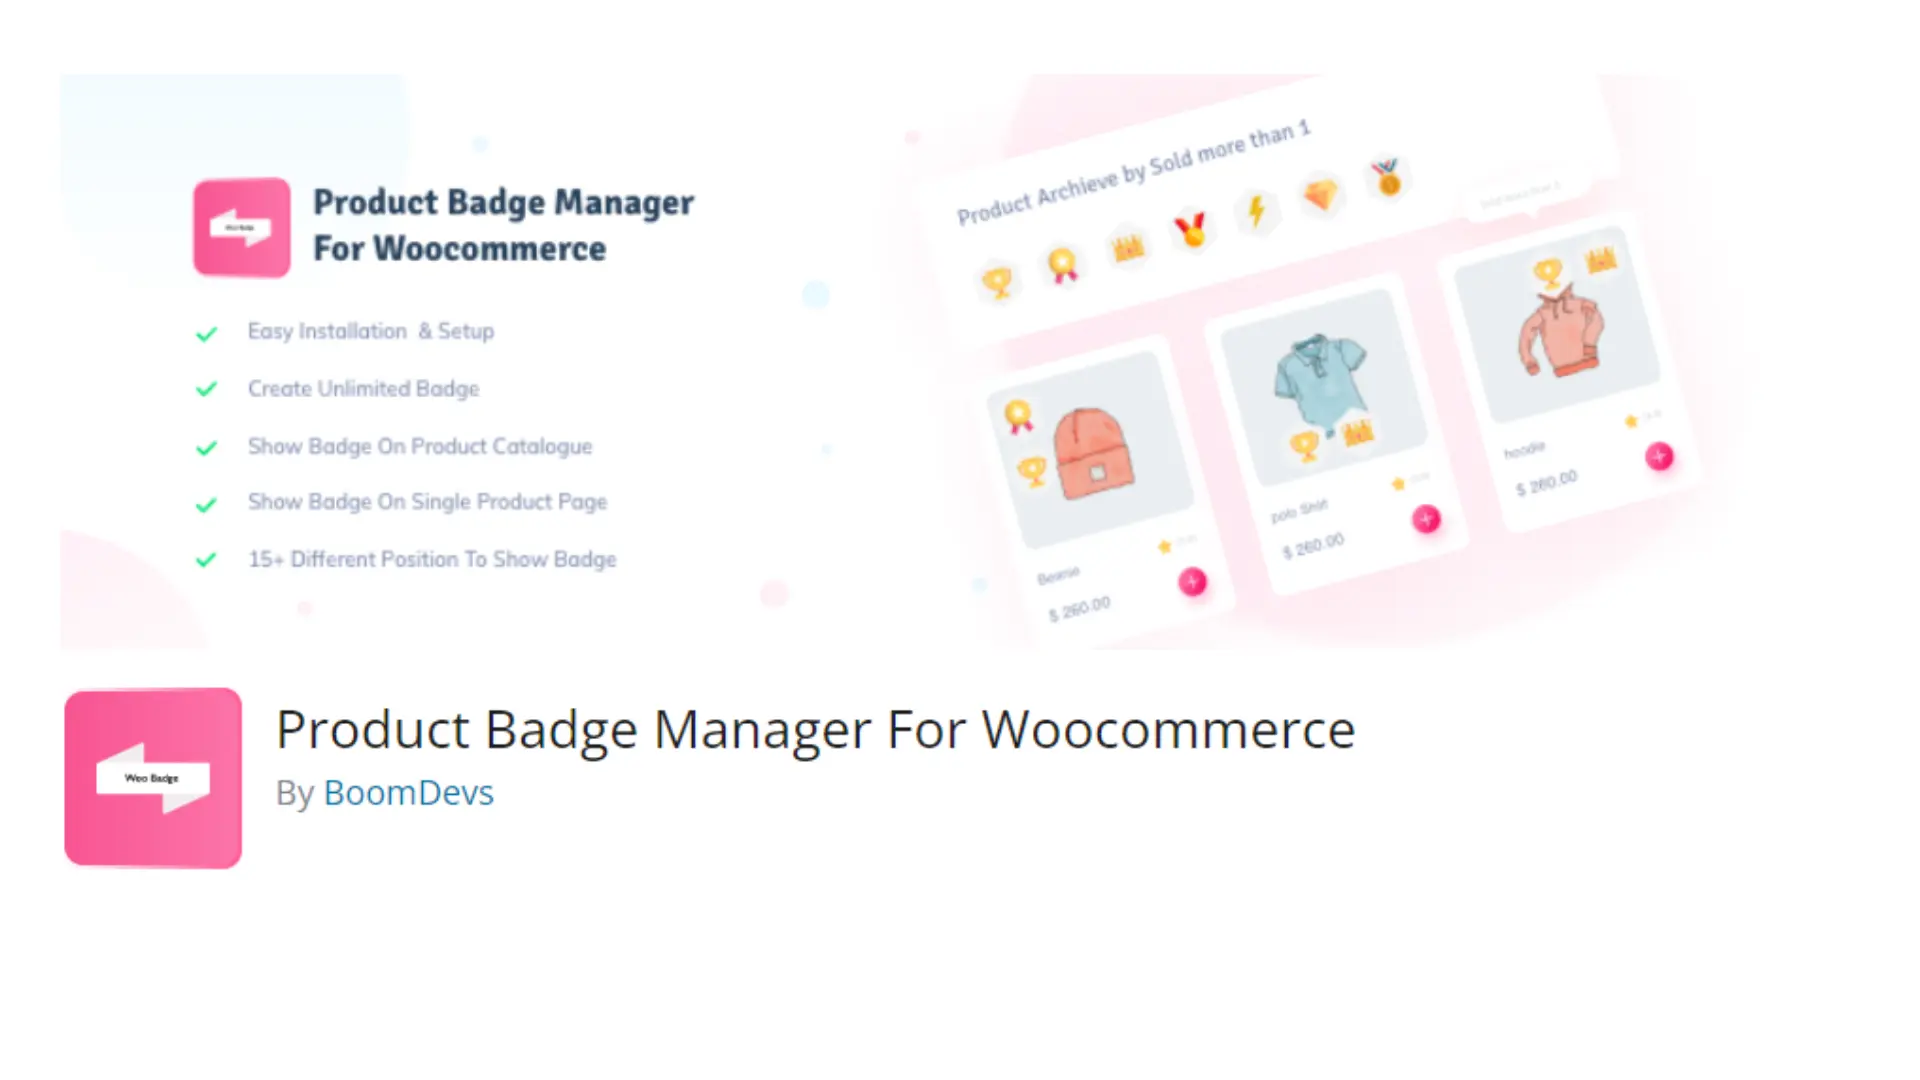
10. Product Badge Manager For Woocommerce
Product Badge Manager for WooCommerce enables you to create unlimited product badges and assign them to your WooCommerce products based on various criteria such as category, attributes, terms, popularity, sales, time, stocks, and more. You can also filter the product archive using these badges.
🚀FEATURES
Let’s take a brief look at some of the cool features of this plugin:
- Easy to use
- You can add new product badges.
- You can select Show Label.
- Select Product badge position.
- Customized Label font size, color and background color.
- Add Product Discount Text.
- You can Select Label Shape or Image Badge select.
- Product Badges add conditionally with product wise and tag wise.
- WPML Support
📽️Demo
Visit this plugin Live Demo here to see how it works.
💵Pricing
🖼️Screenshots


