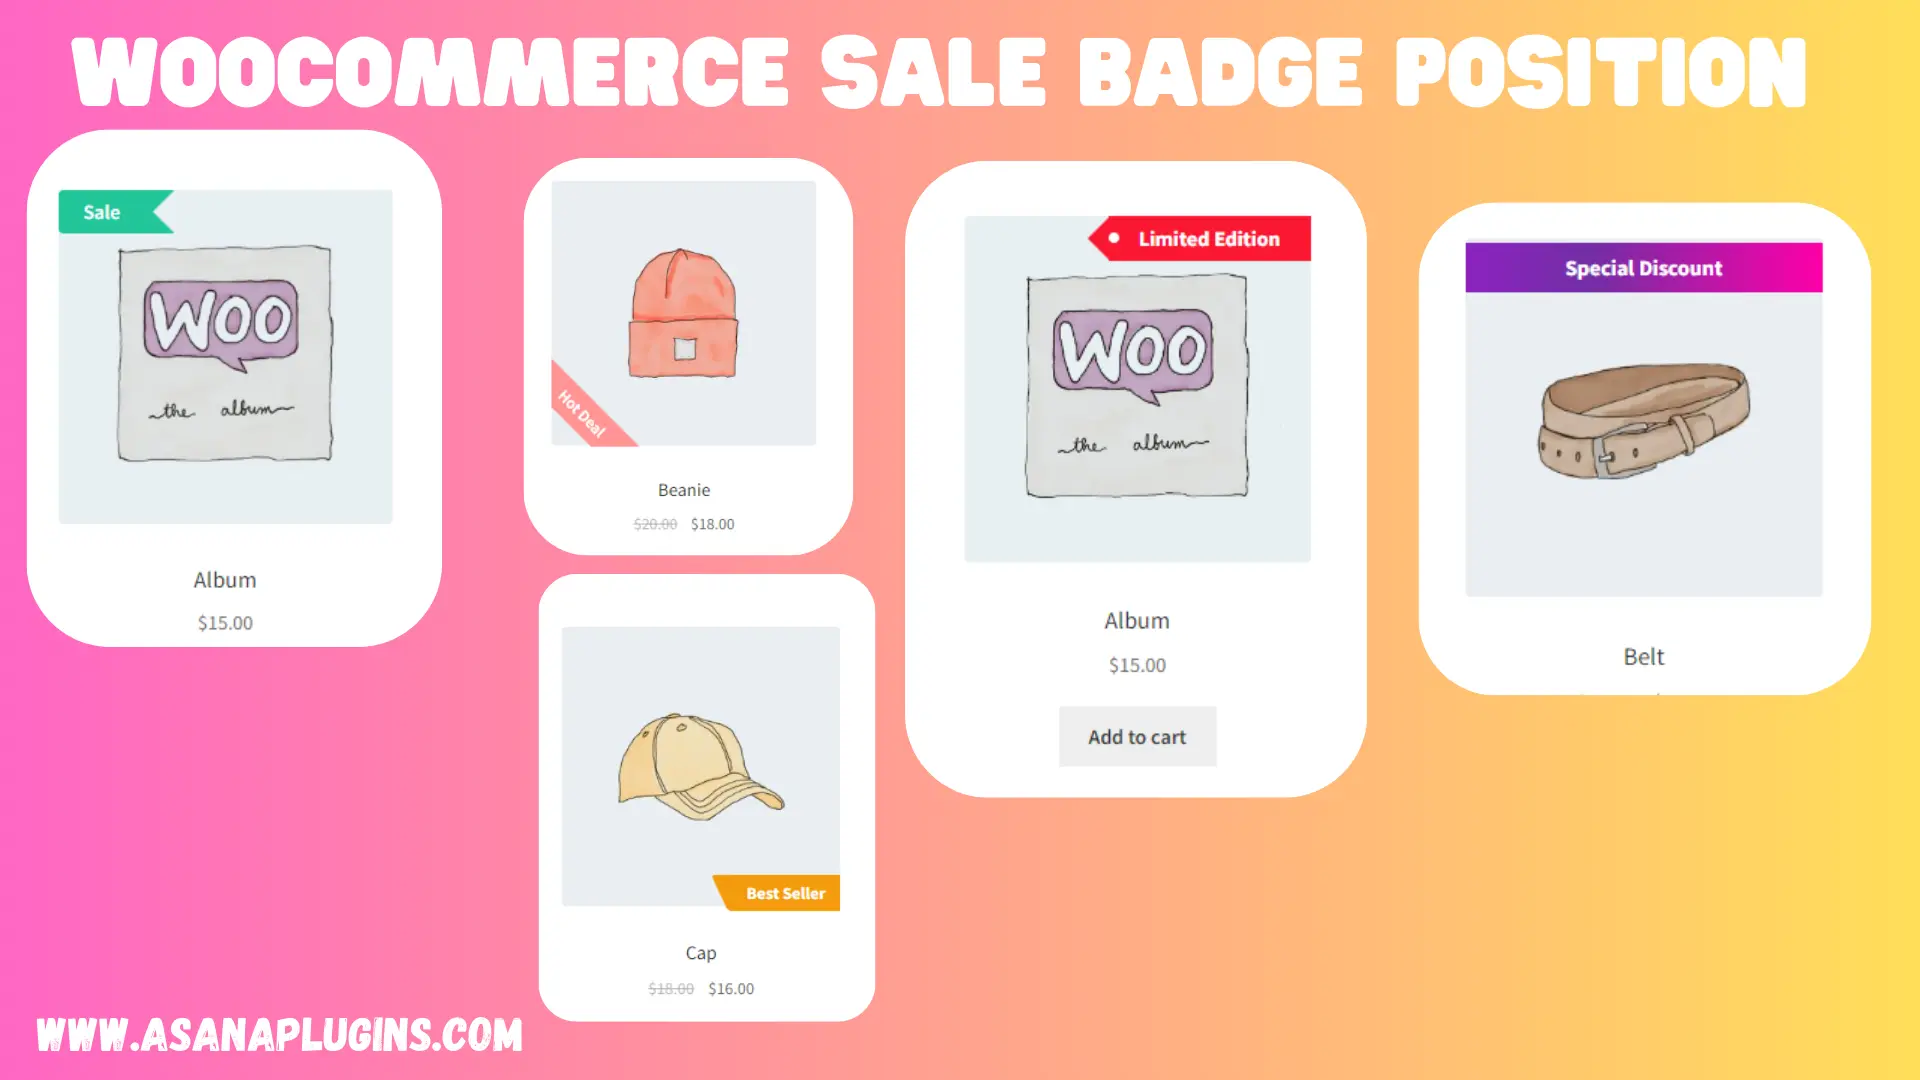
This article delves into the crucial topic of “WooCommerce Sale Badge Position,” exploring the various ways in which you can leverage this feature to maximize product visibility and entice shoppers. Whether you are a seasoned online retailer or just setting up your e-store, understanding the nuances of sale badge positioning can make a substantial difference in your overall marketing strategy.
In the dynamic world of e-commerce, capturing the attention of potential customers is essential for driving sales. One powerful tool at your disposal within the WooCommerce platform is the Sale Badge. The strategic placement of this badge can significantly impact how customers perceive and engage with your products.
Contents
- Install Badge and Product Label for WooCommerce
- How To Add Sale Badge To Top Left Position in Woocommerce
- How To Add Sale Badge To Top Right Position in Woocommerce
- How To Add Sale Badge To Top Position in Woocommerce
- How To Add Sale Badge To Bottom Left Position in Woocommerce
- How To Add Sale Badge To Bottom Right Position in Woocommerce
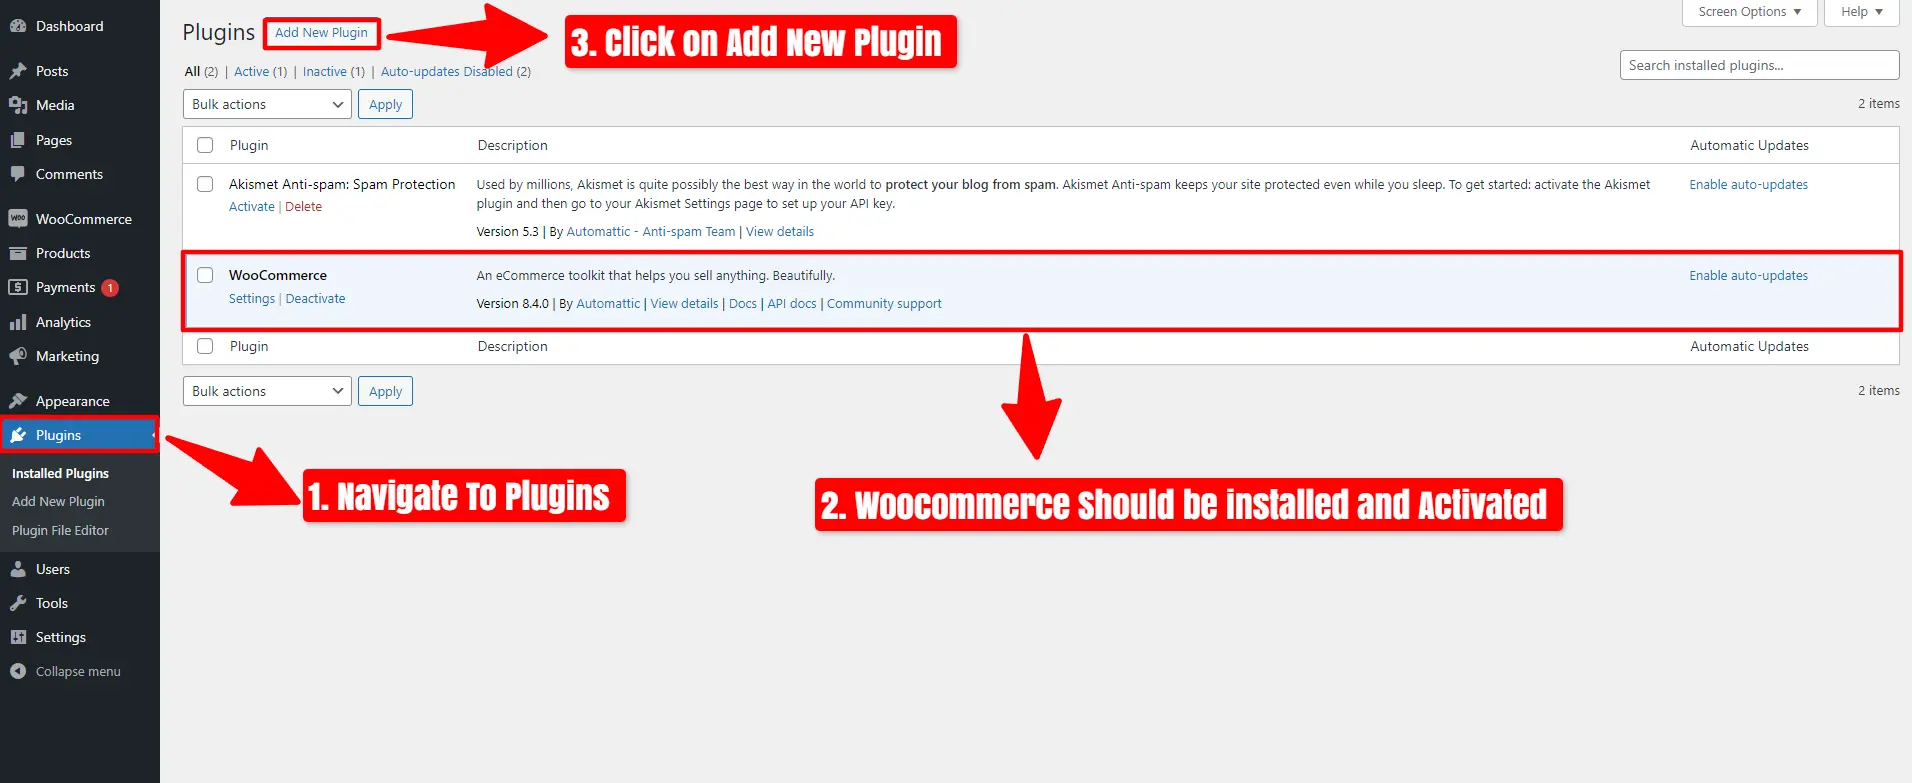
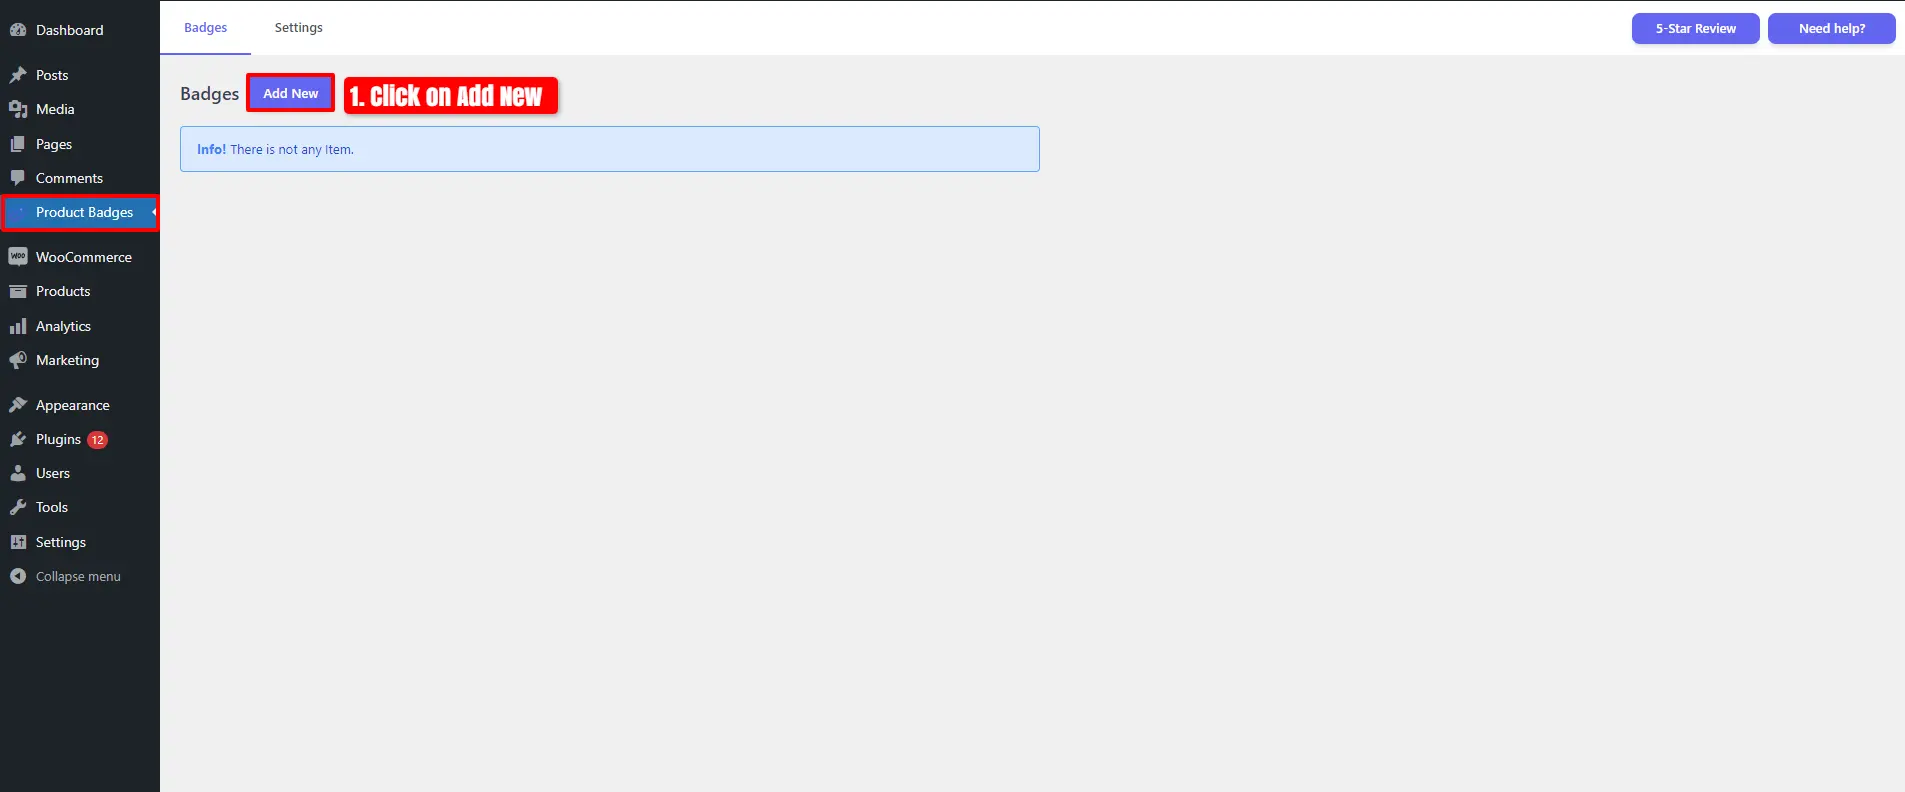
Install Badge and Product Label for WooCommerce
Follow these steps to install the Badge and Product Label for the WooCommerce plugin.
- Navigate To Plugins.
- Woocommerce Should be installed and Activated.
- Click on Add New Plugin.
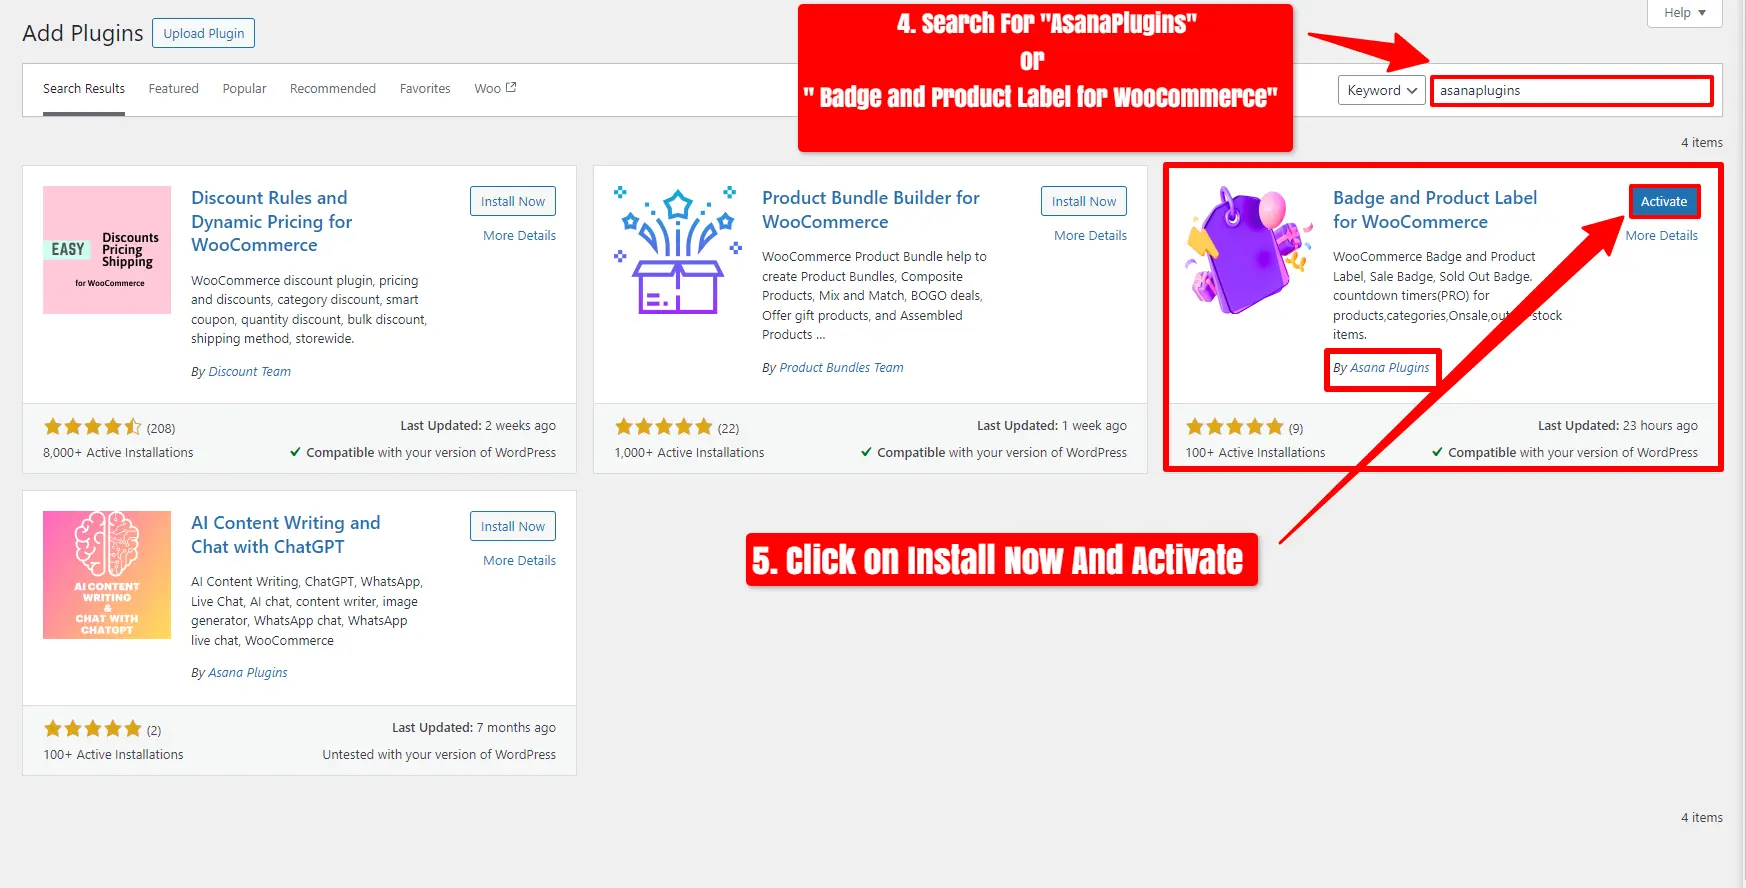
- Search For ‘Asanaplugins‘ or ‘Badge and Product Label for WooCommerce.’
- After seeing the plugin, click on “Install Now” and activate it.
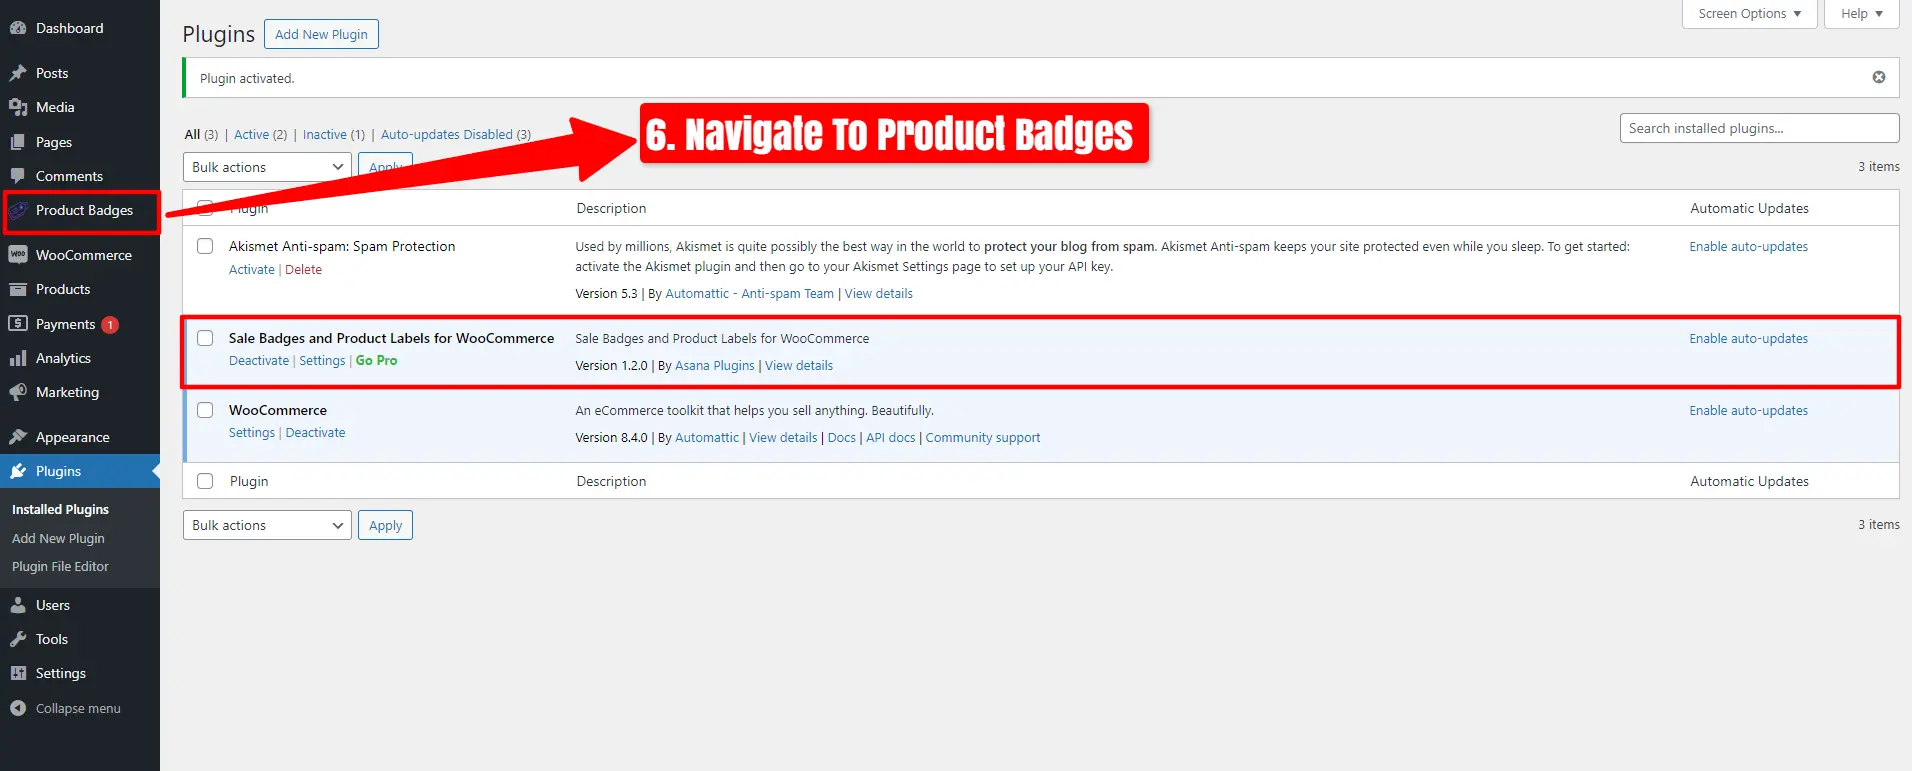
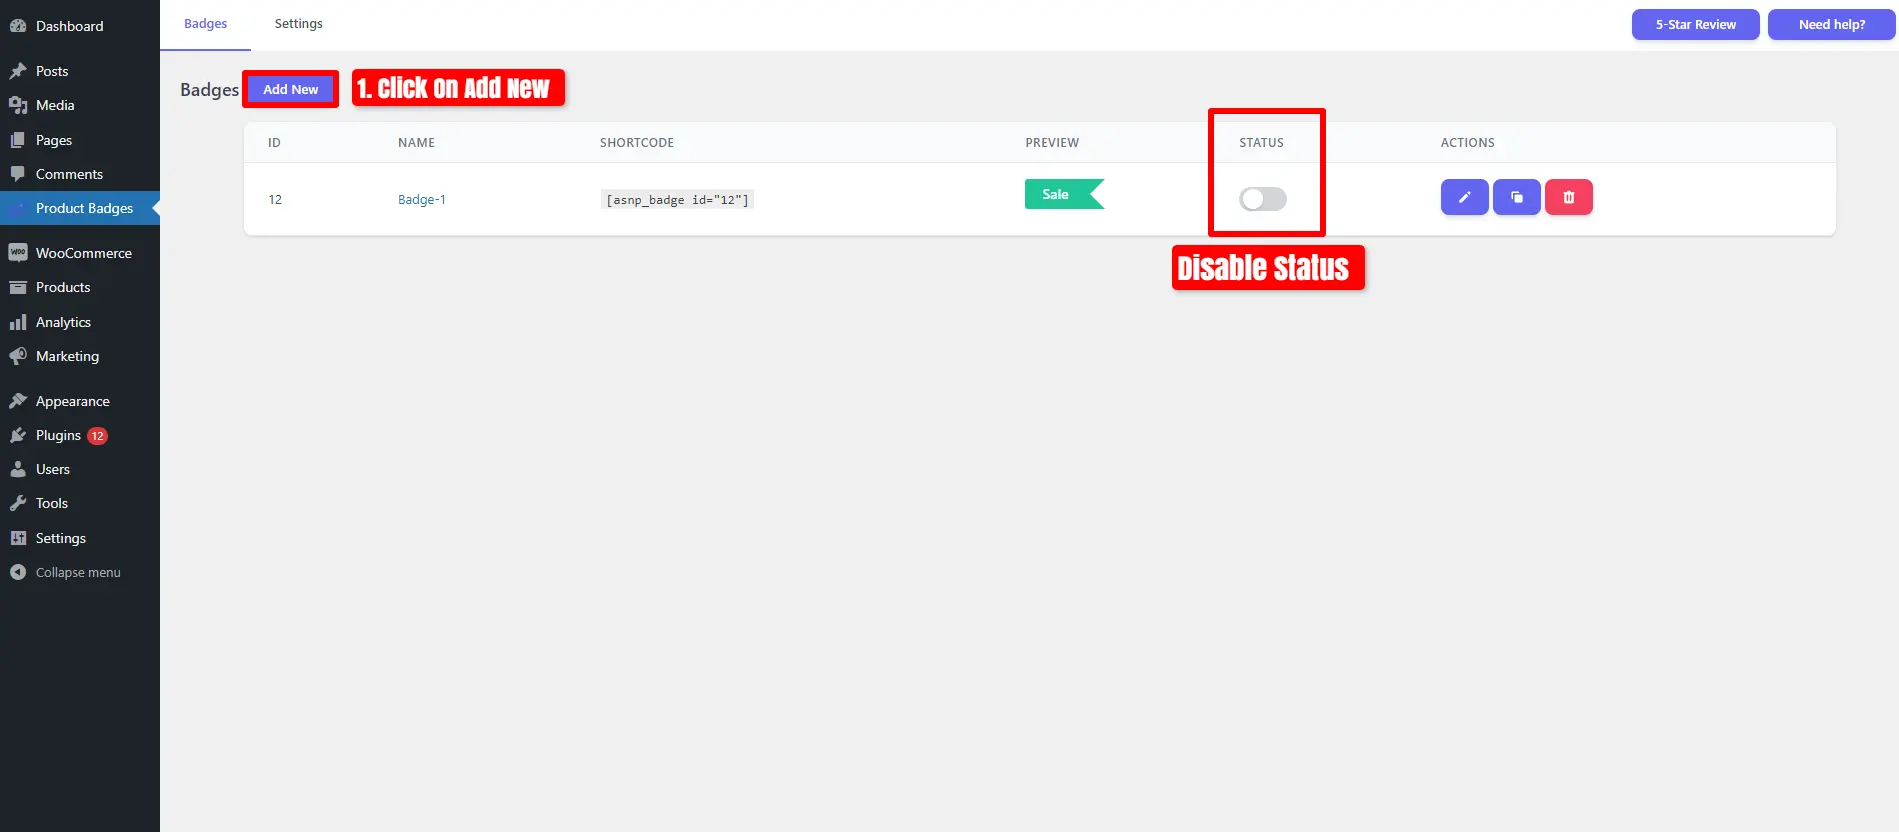
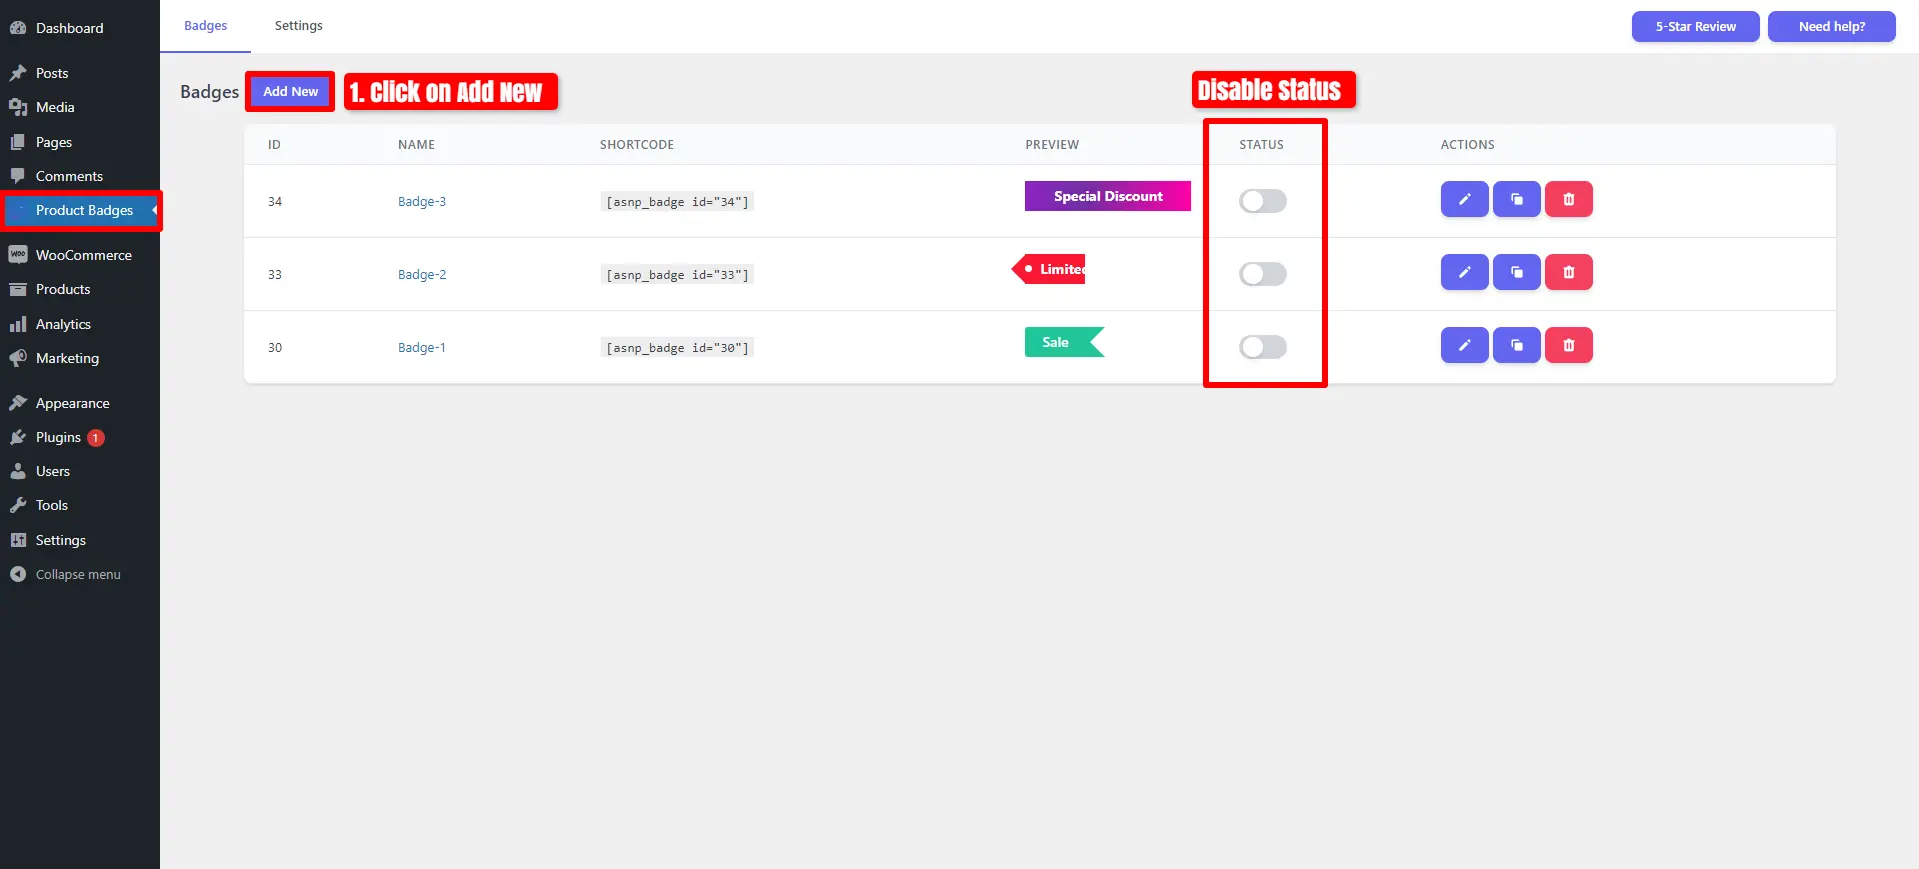
Now, Sale Badges and Product Labels for WooCommerce have been installed. Navigate to the Product Badges.
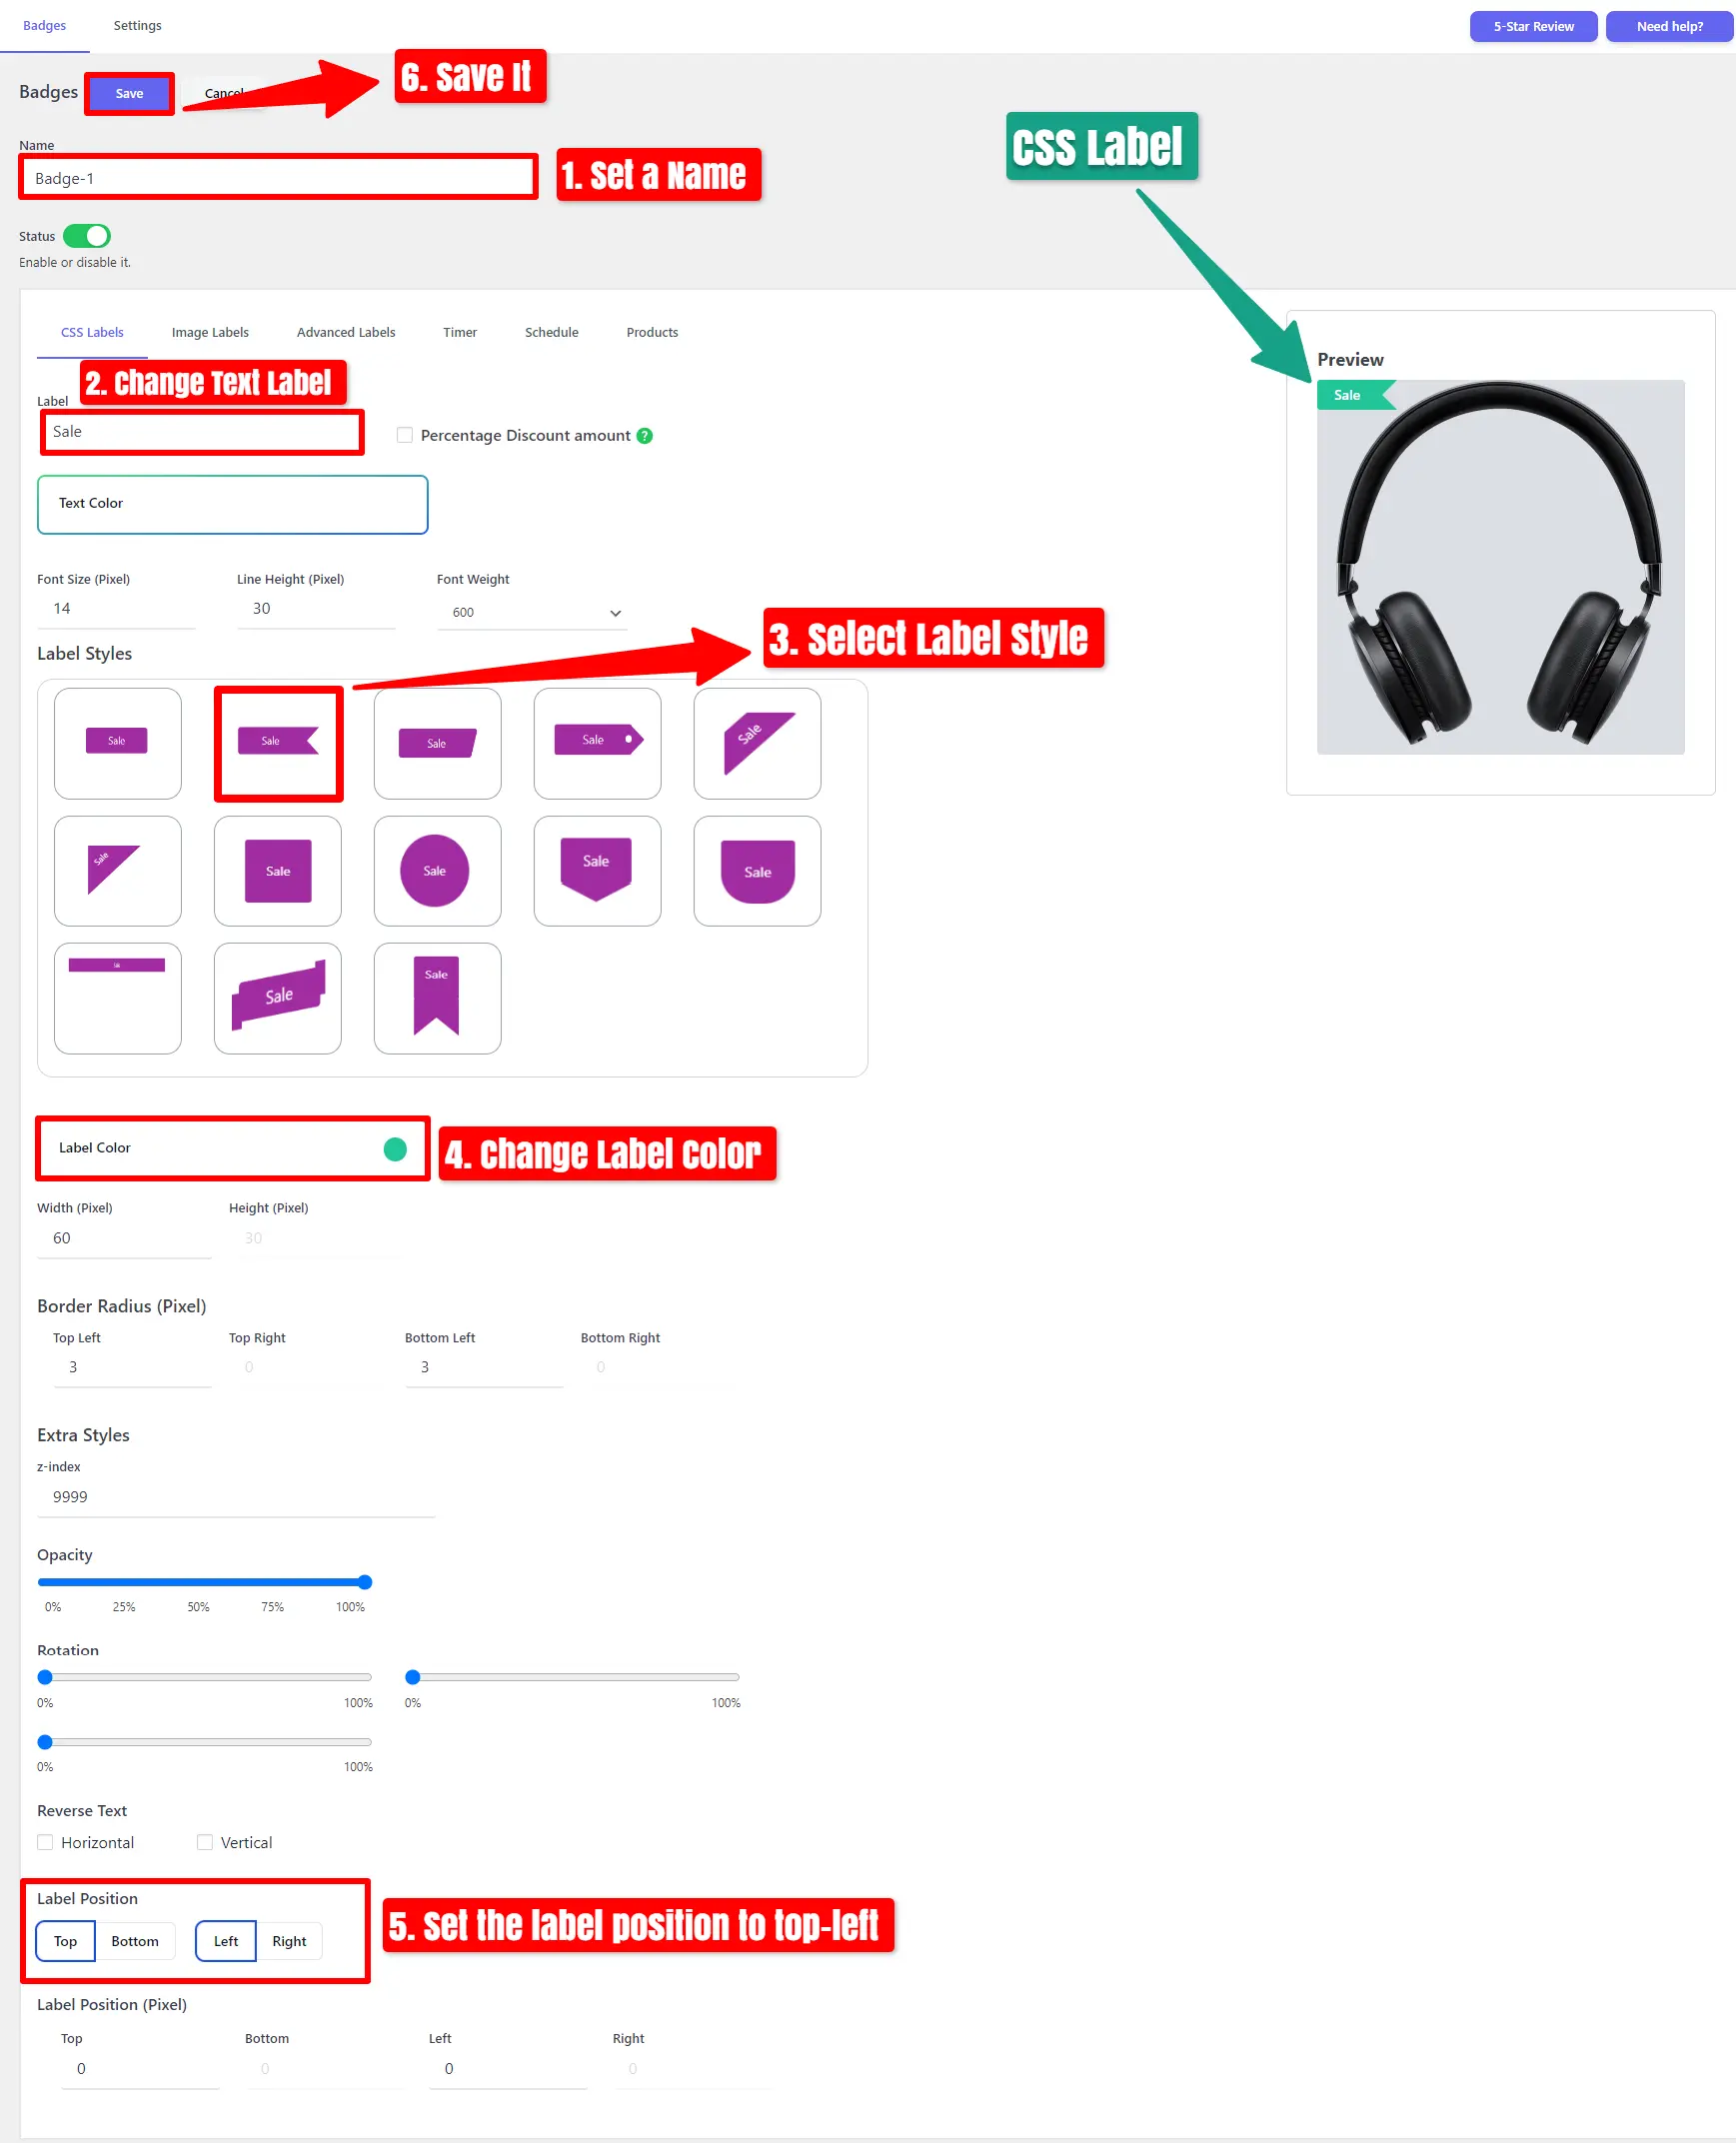
How To Add Sale Badge To Top Left Position in Woocommerce
After installing the Sale Badges and Product Labels for WooCommerce plugin to create a Sale Badge,
click on ‘Add New‘.
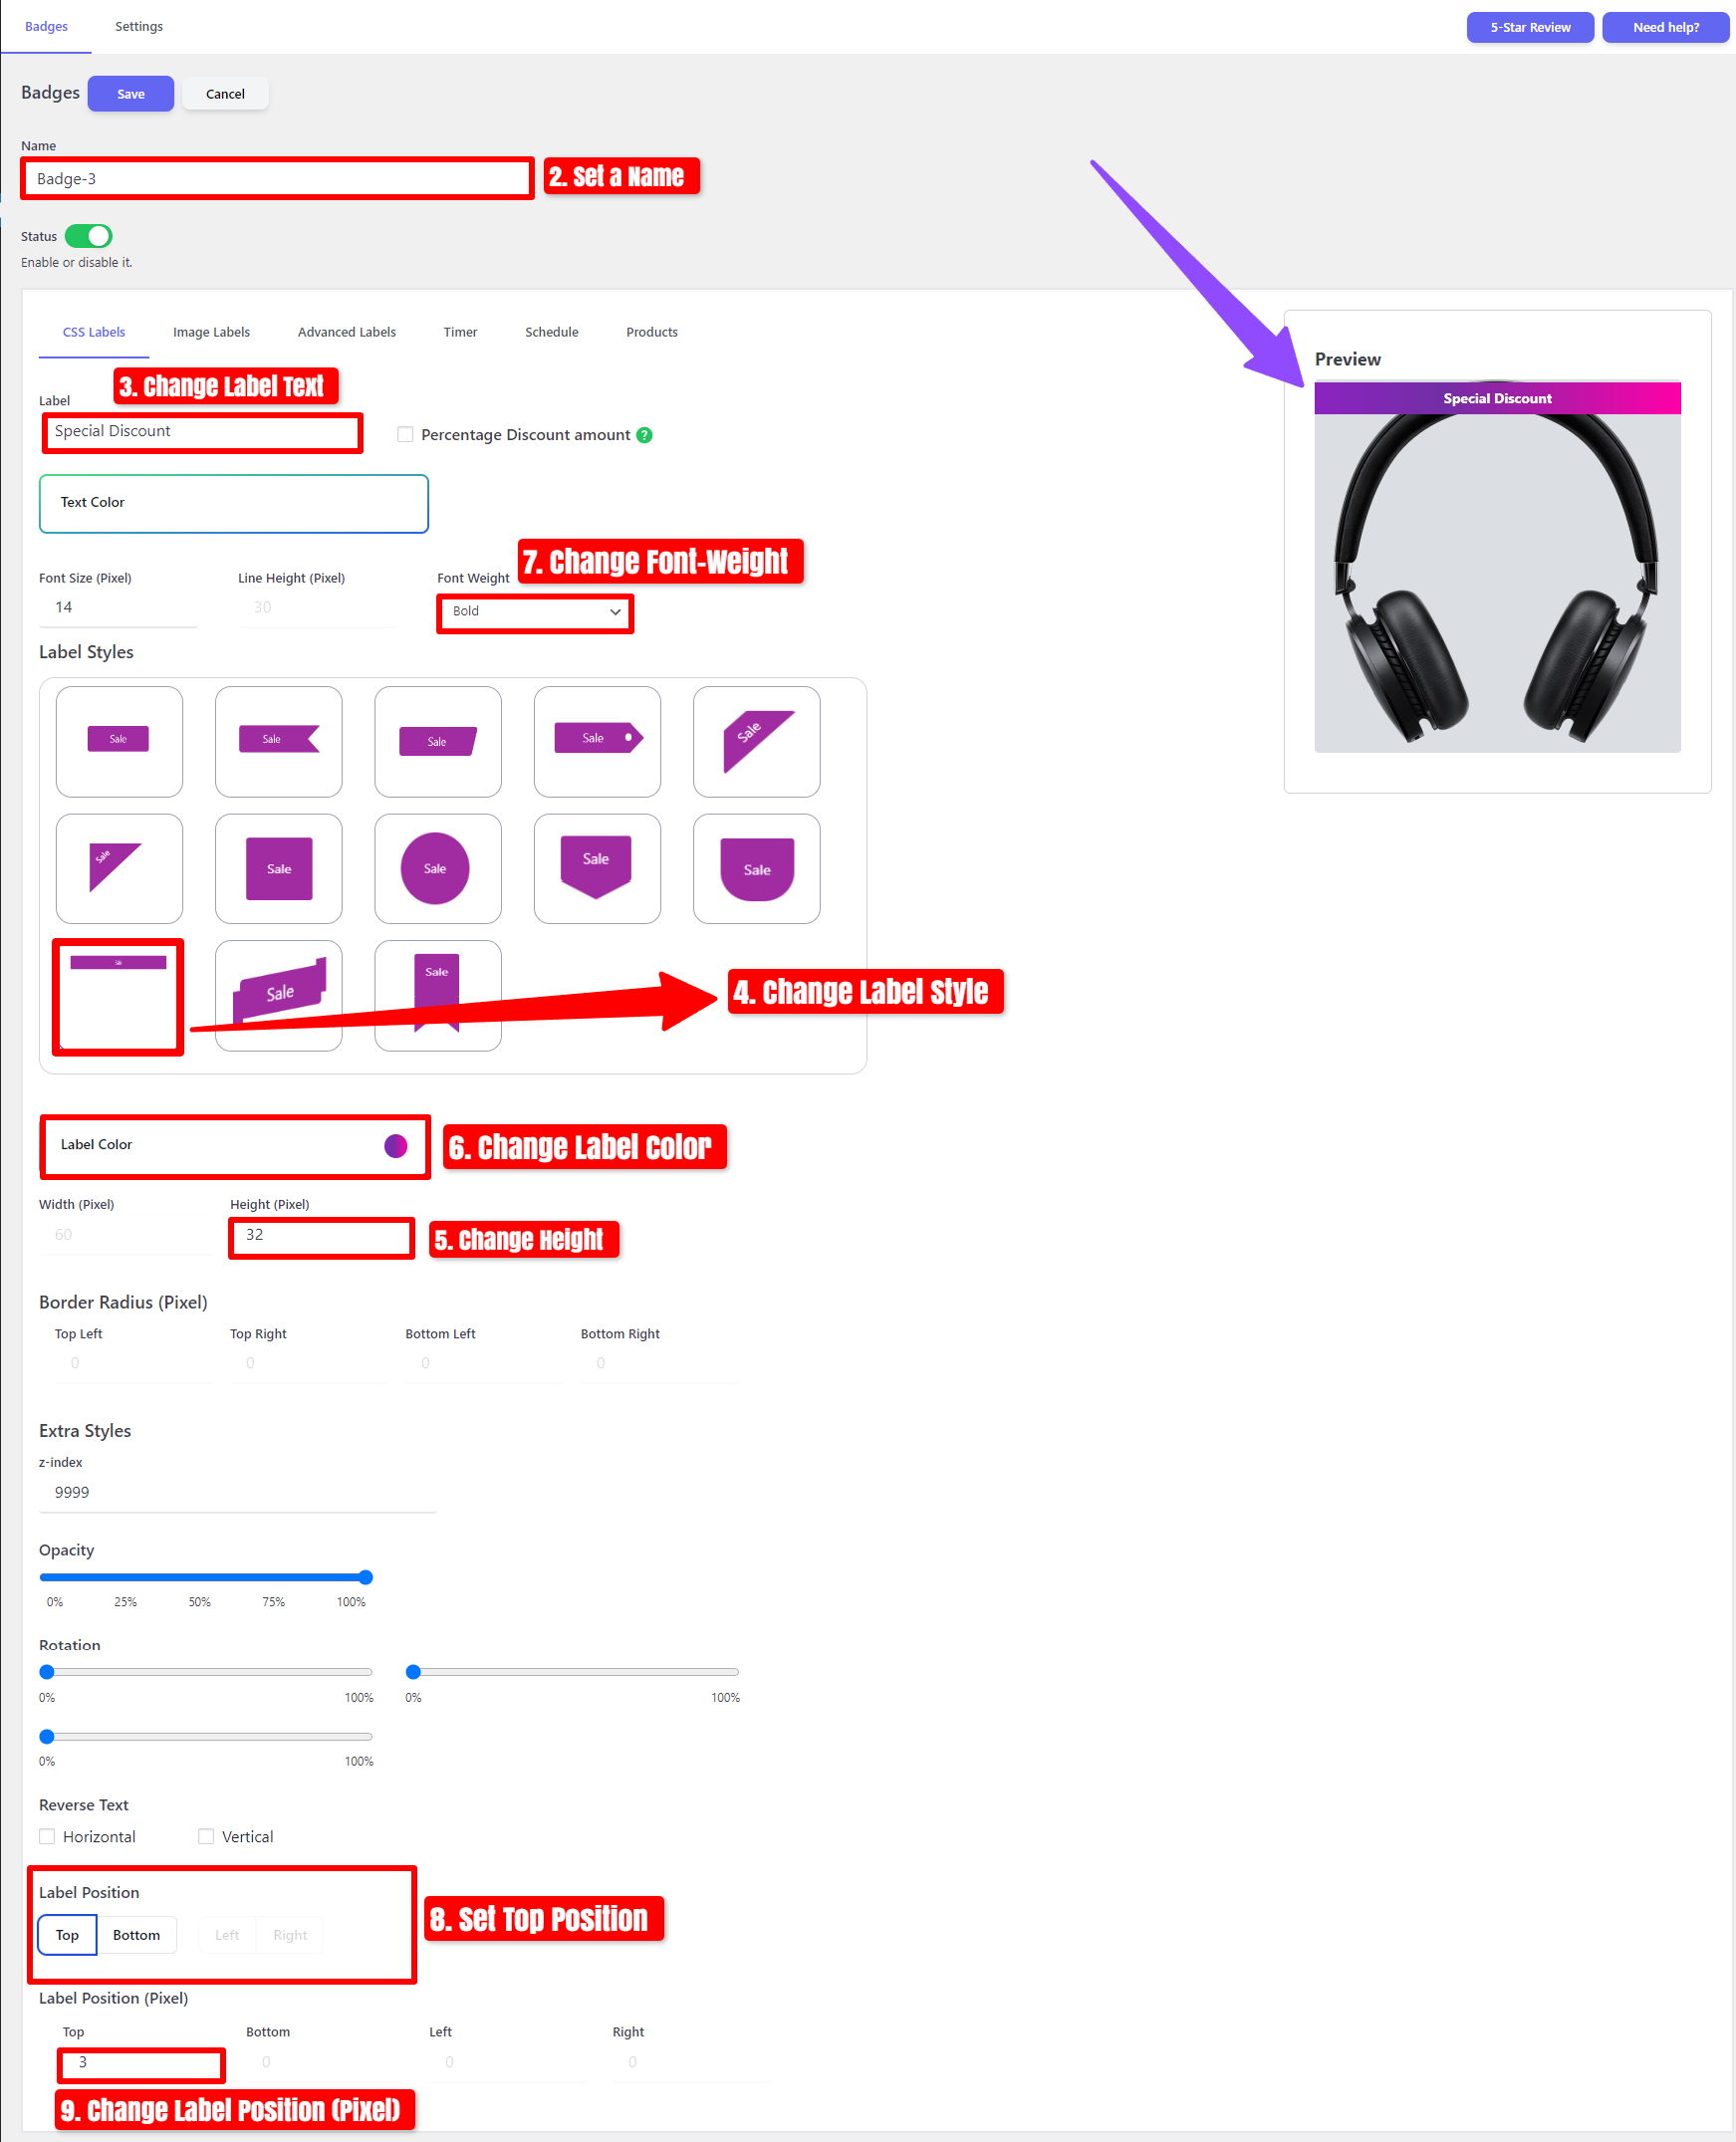
- First, set a name for your badge.
- Change Text Label.
- Choose Label Style and Adjust Label Color.
- Set the label position to the Top Left.
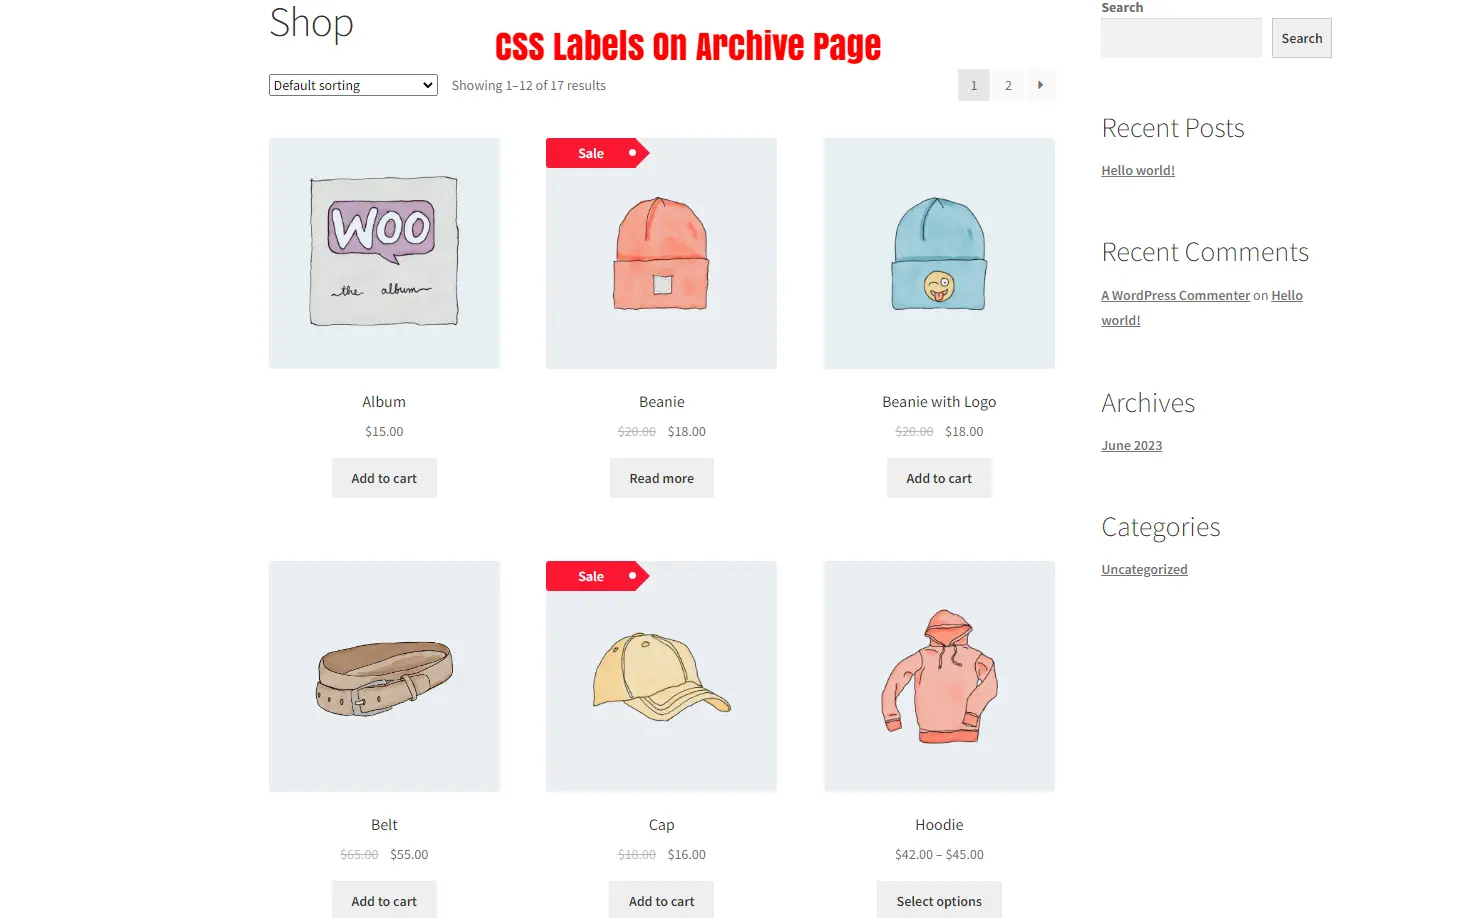
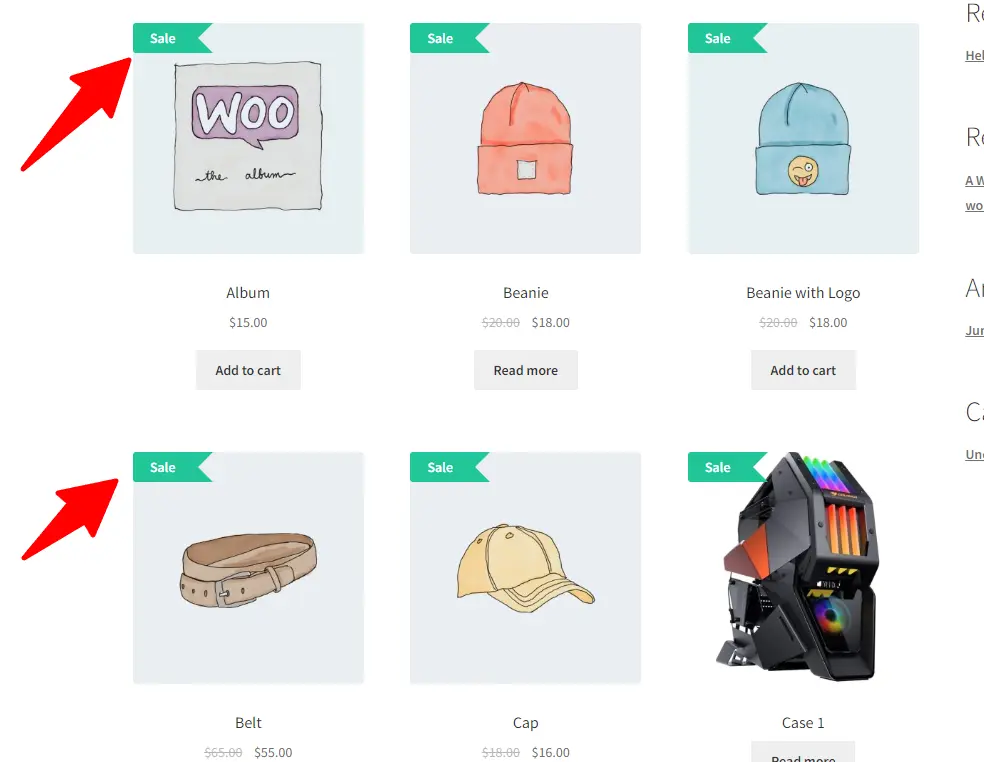
Additionally, Go to the archive page to see the CSS Labels.
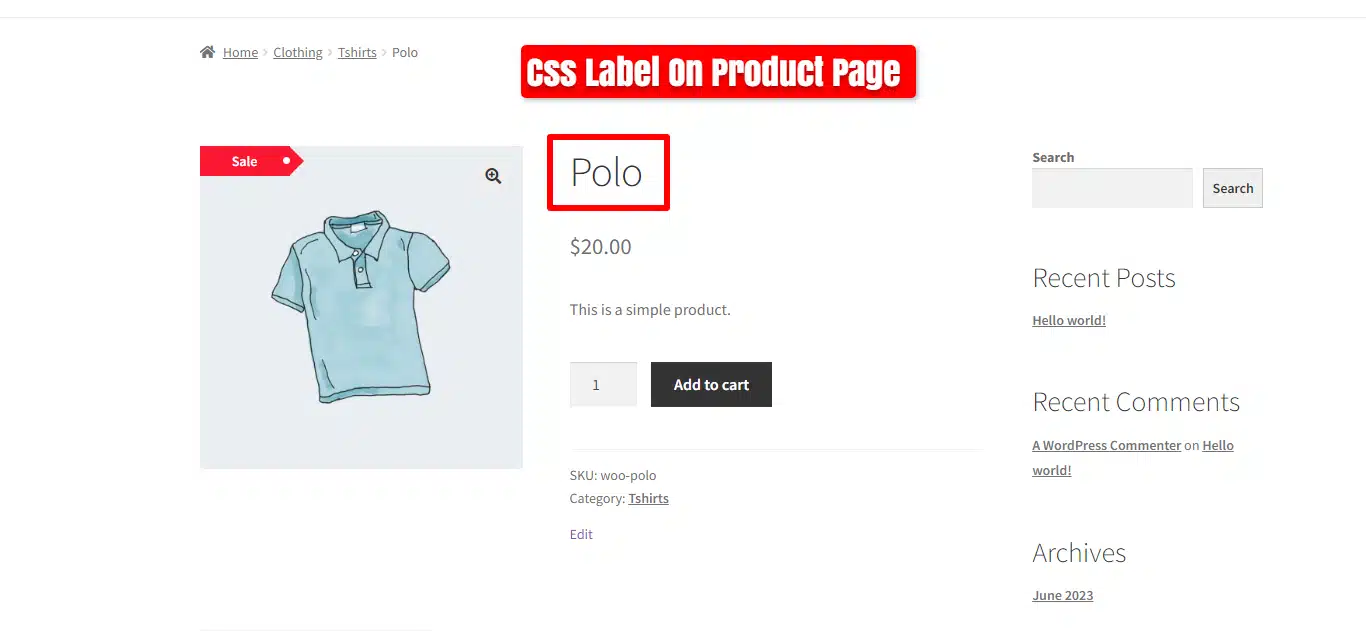
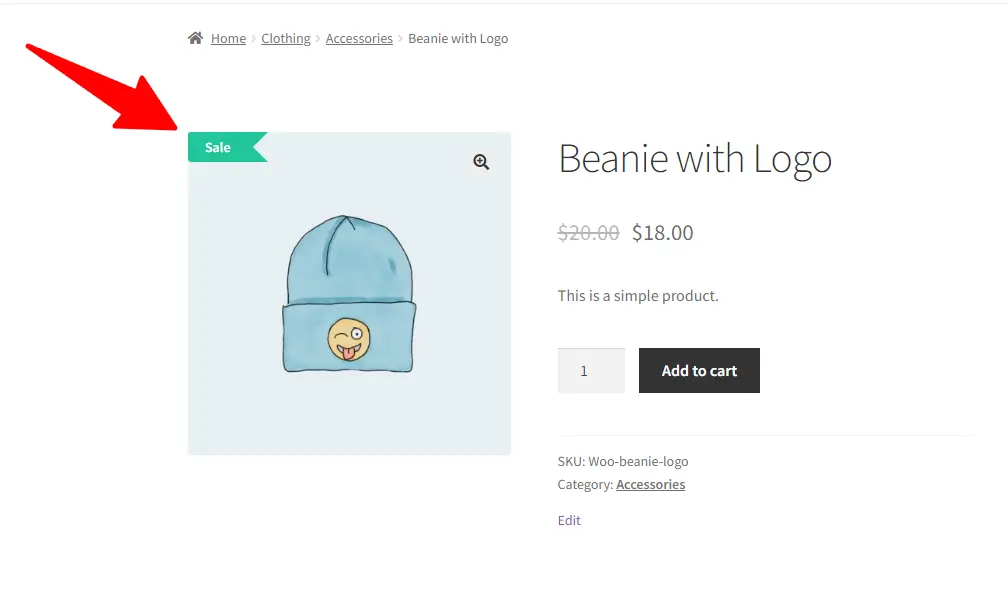
Visit the Beanie with Logo product page and check out the CSS label.
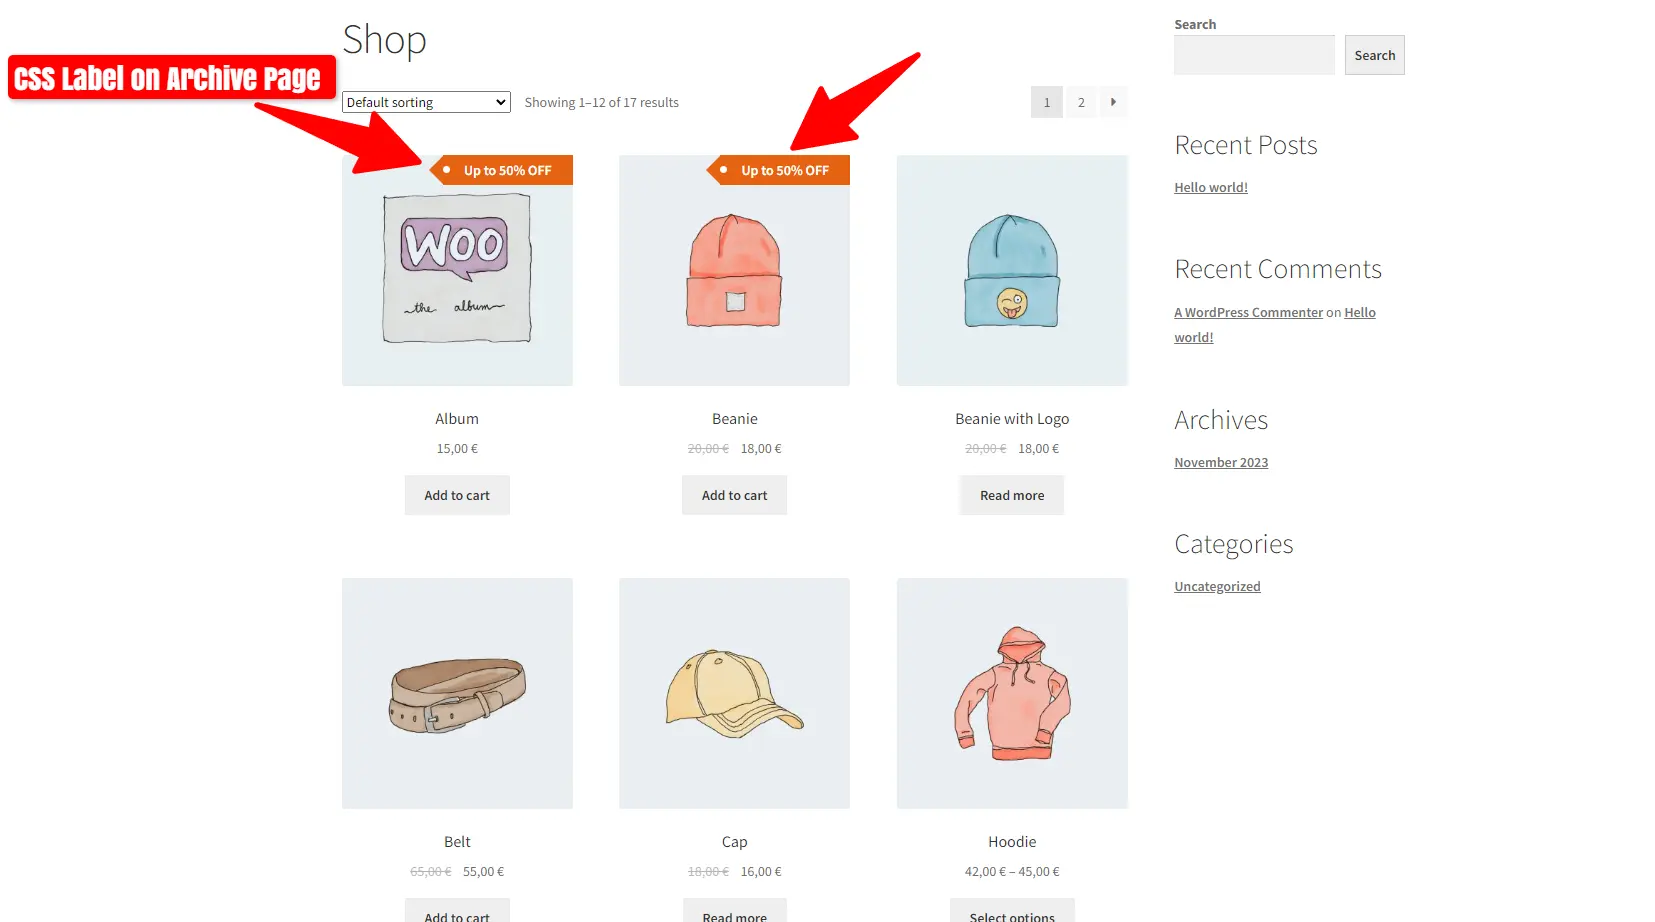
How To Add Sale Badge To Top Right Position in Woocommerce
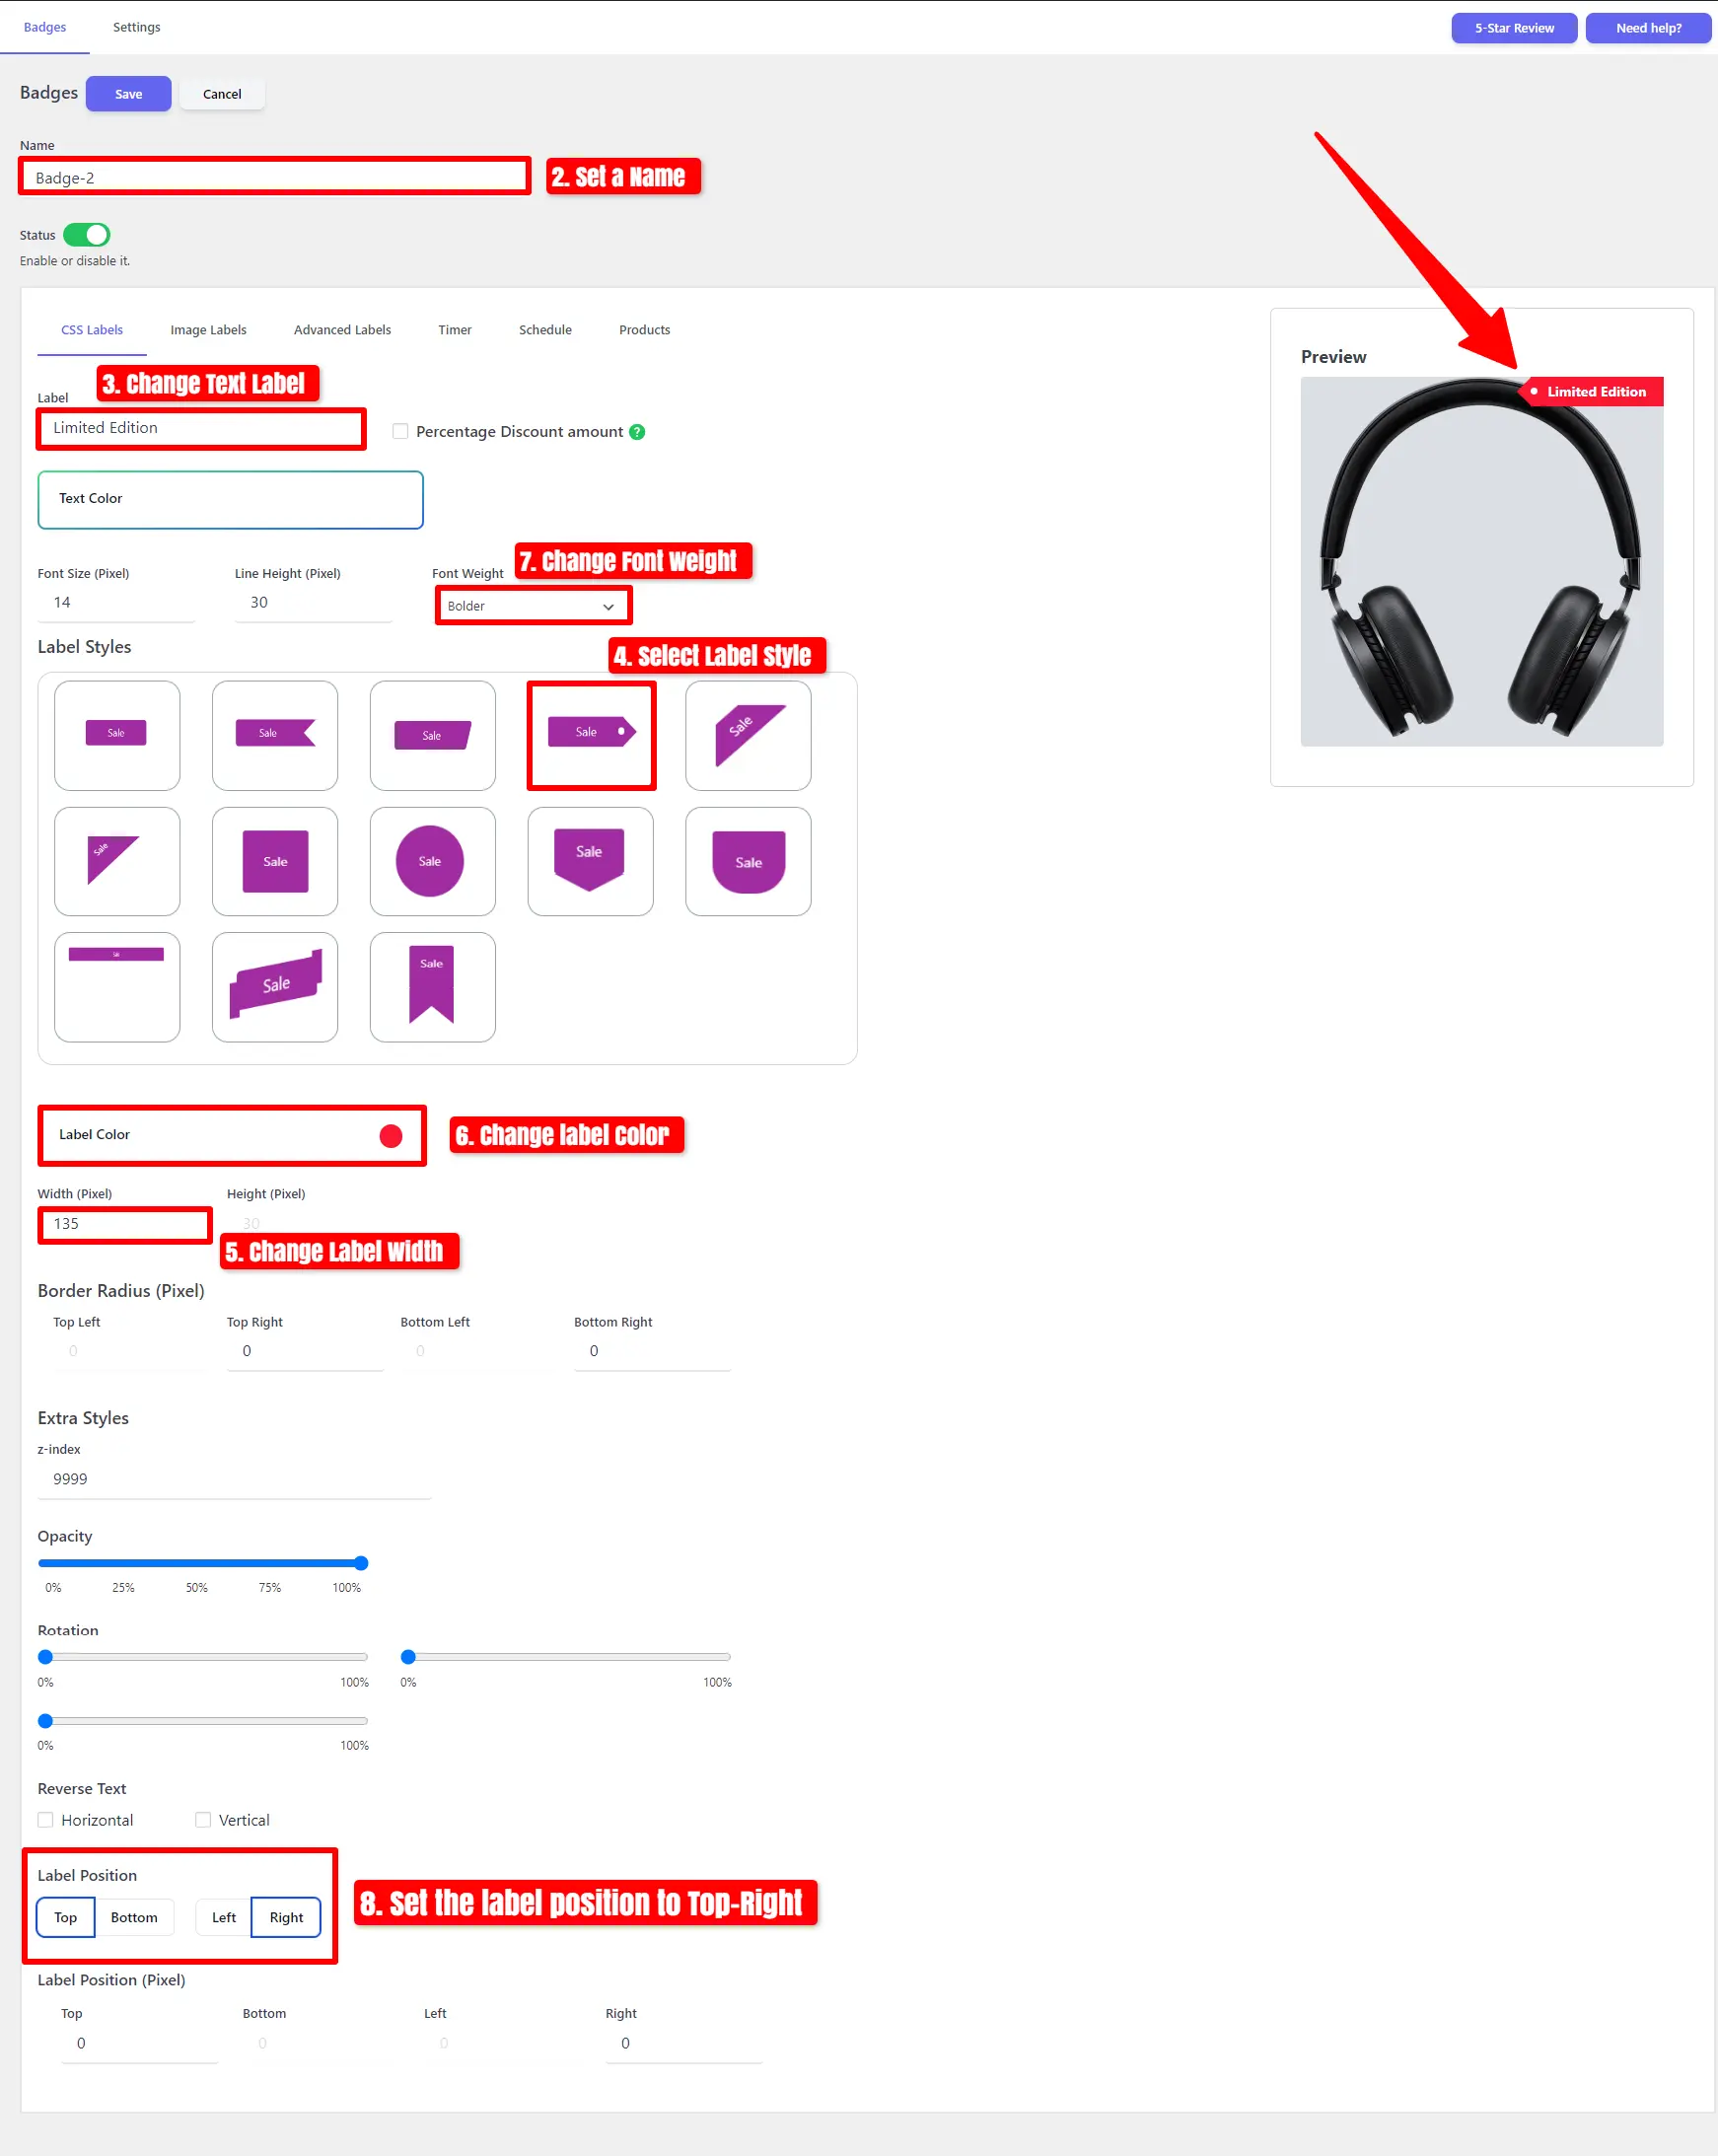
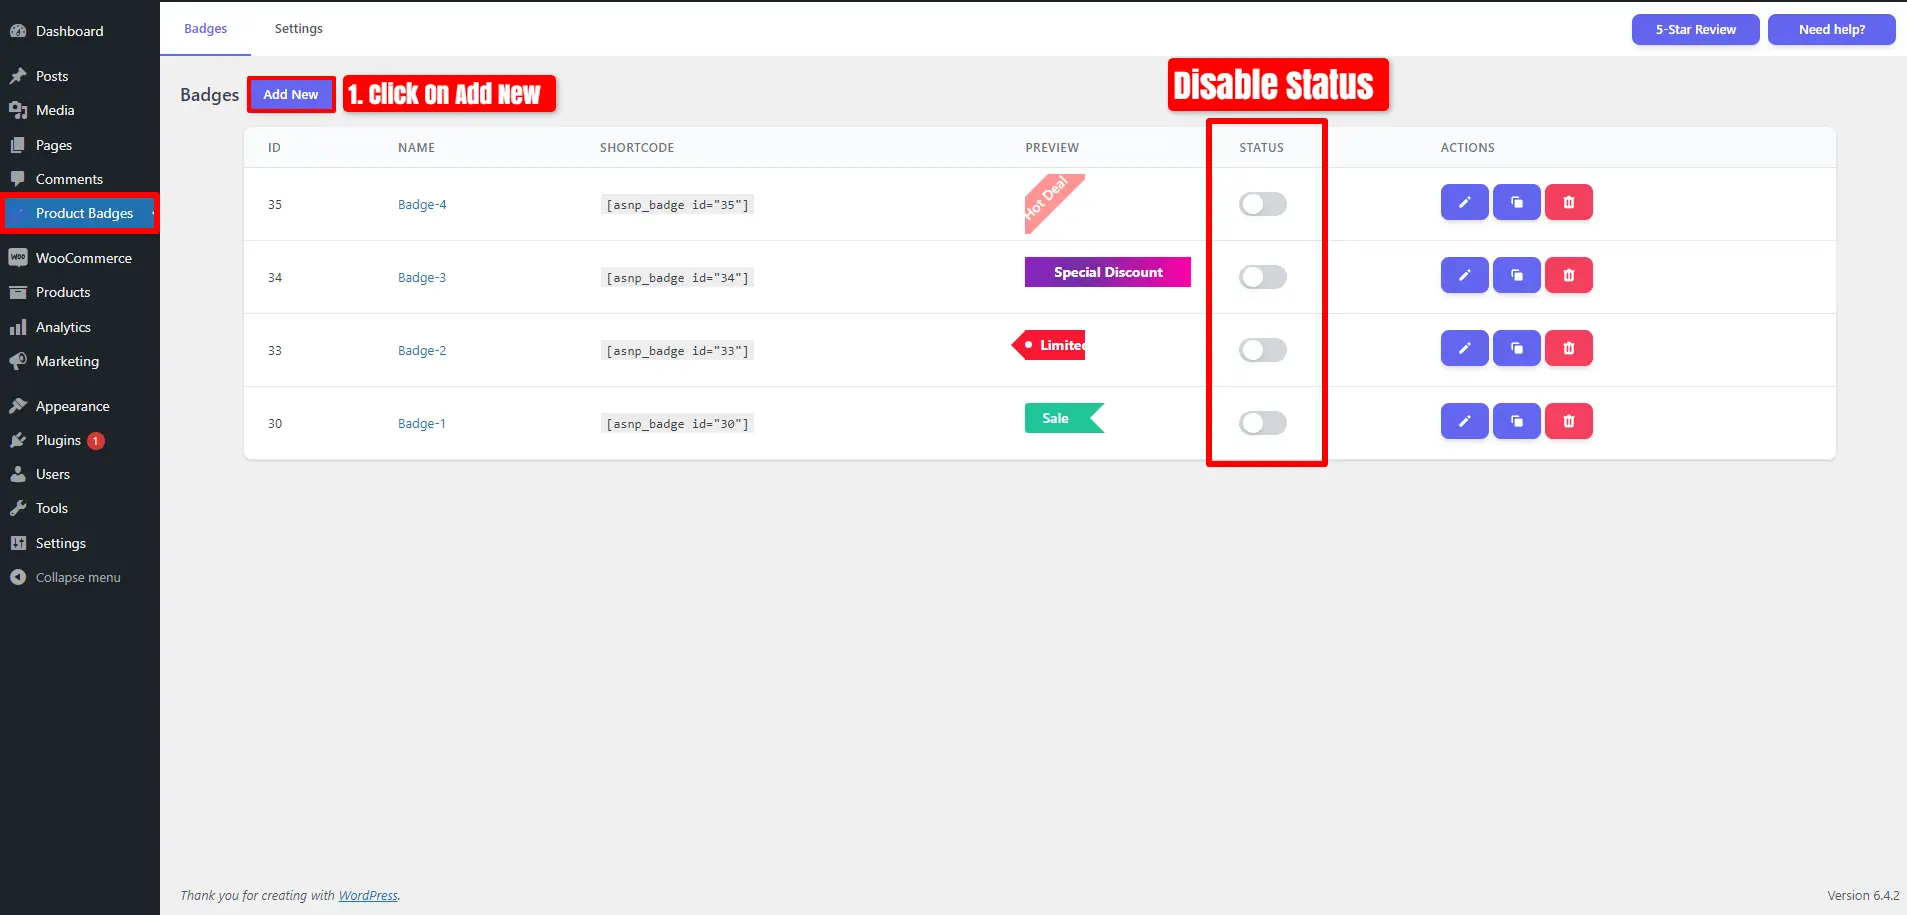
First, disable the status, and then click on “Add New“.
- First, set a name for your badge.
- Change Text Label.
- Choose Label Style and Change Label Width Size.
- Change Font Weight and Adjust Label Color.
- Set the label position to the Top Left.
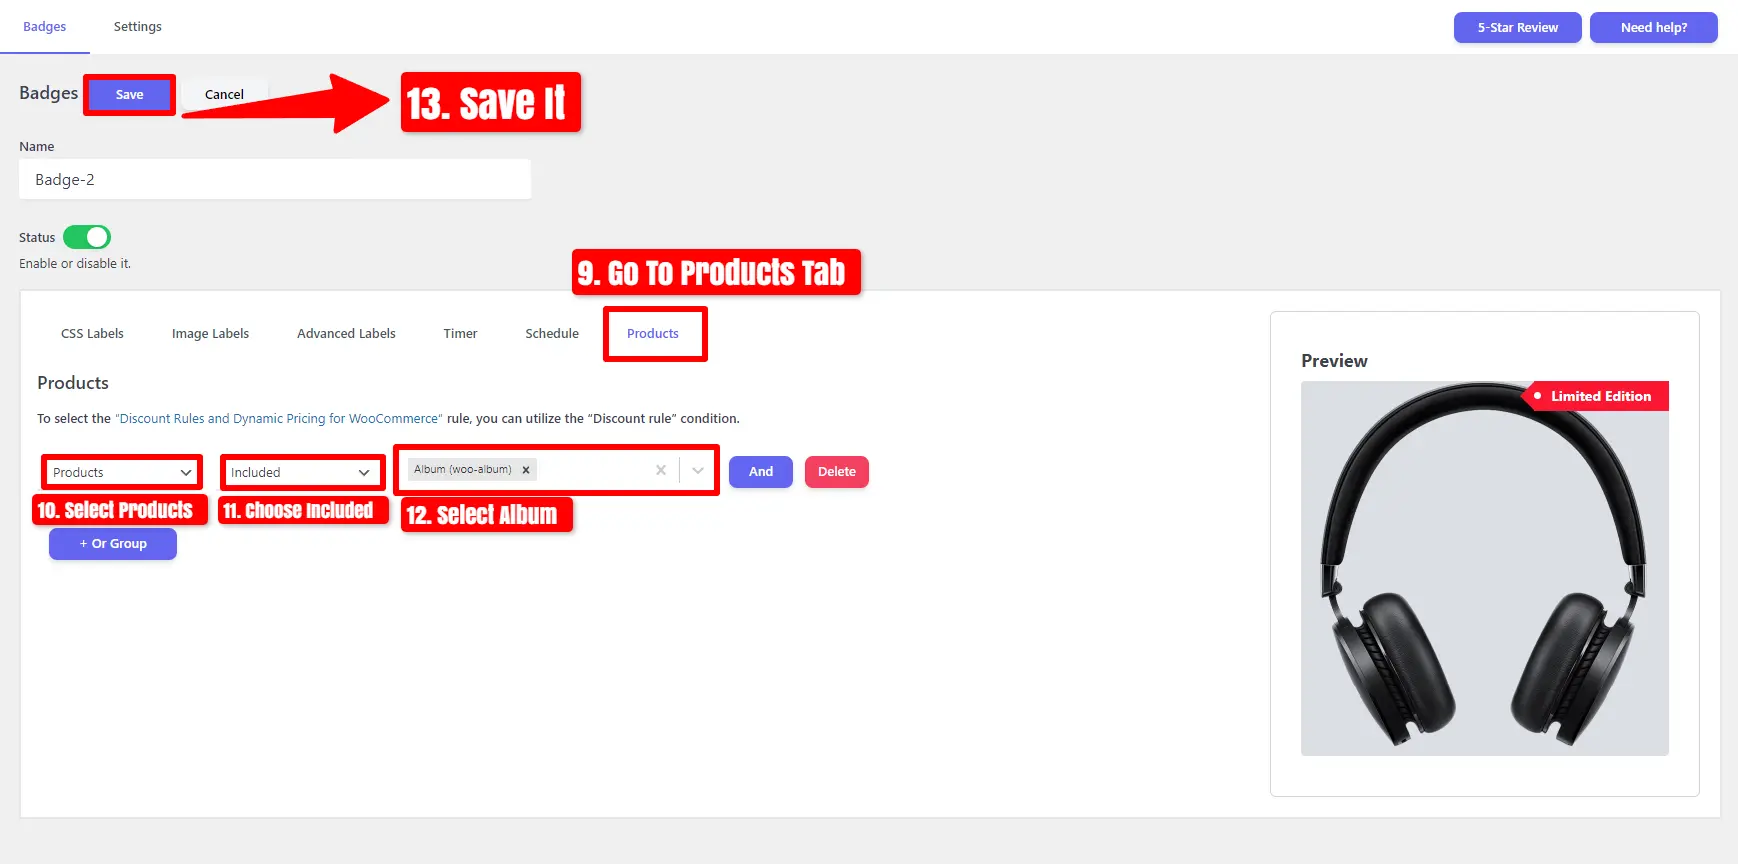
After modifying the Label, follow these steps.
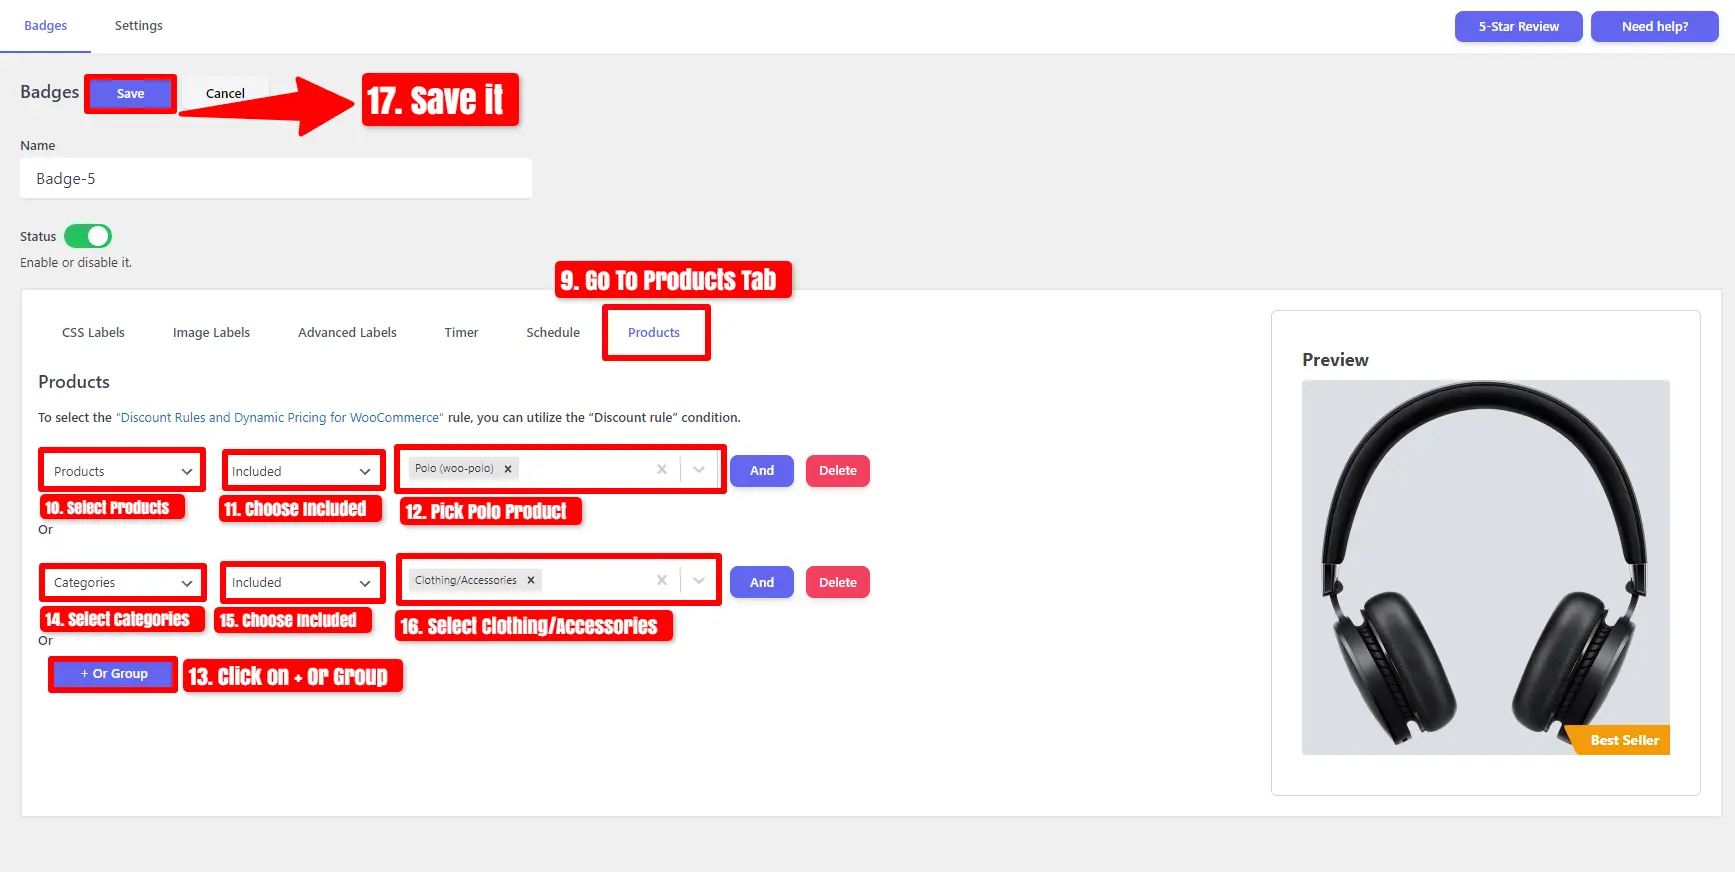
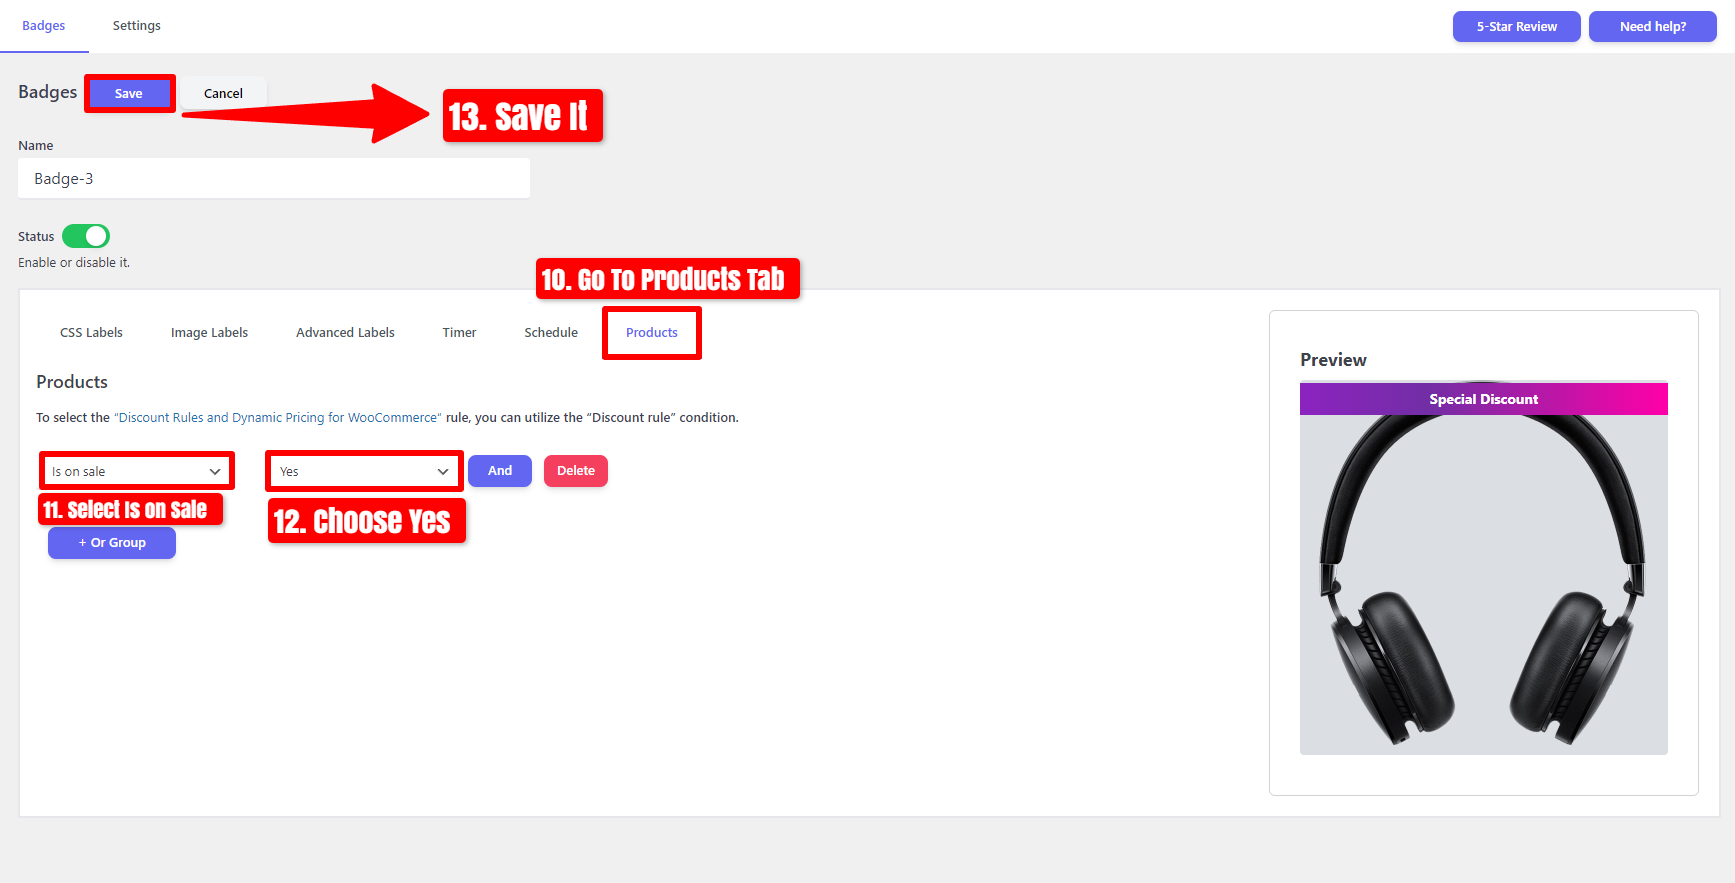
- Navigate to the ‘Products‘ tab.
- Select ‘Products‘ and Choose ‘Included’ and Pick “Album” Product.
- Save your changes.
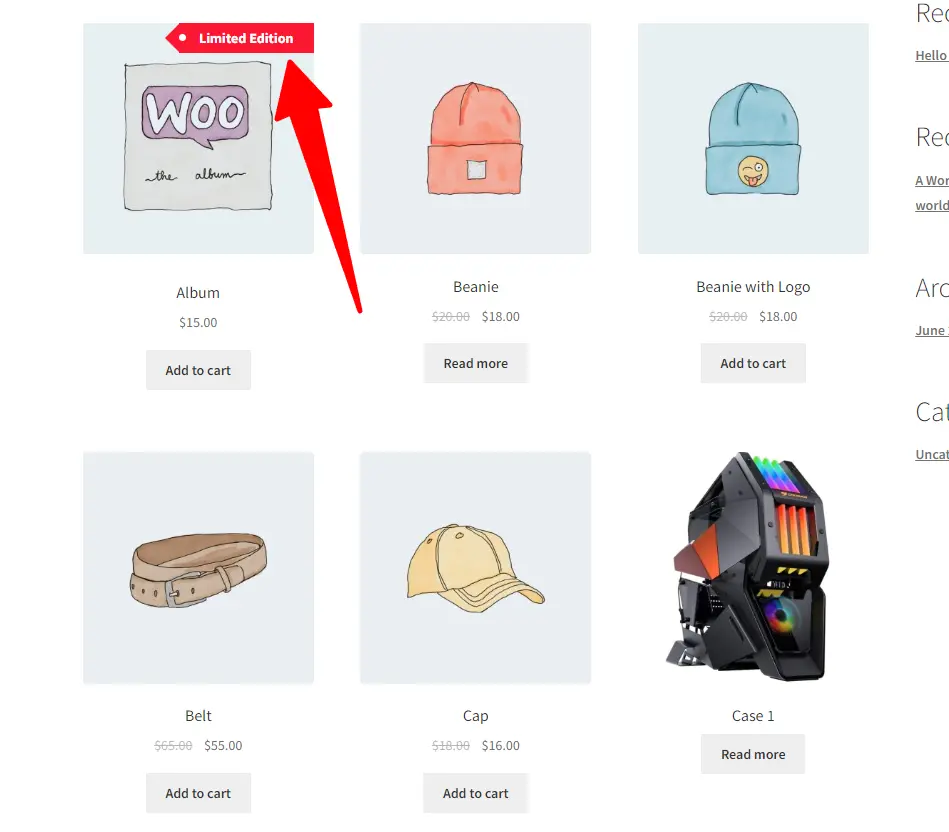
View the Limited Edition Label on the Album Product in the Archive Page.
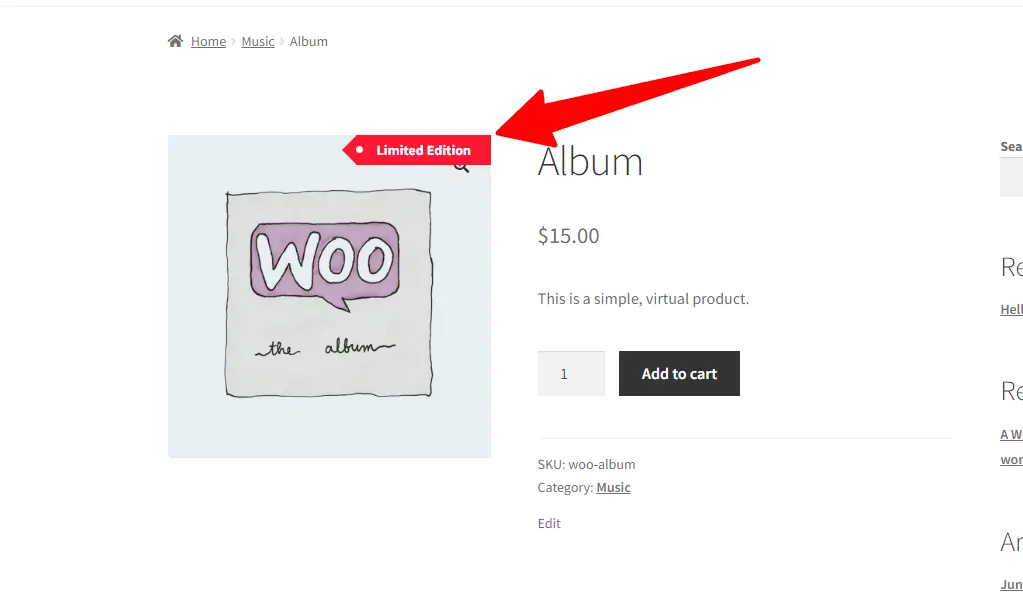
View the Limited Edition Label on the Product Page.
How To Add Sale Badge To Top Position in Woocommerce
First, disable the status, and then click on “Add New“.

- Assign a Name for your badge.
- Edit the text label.
- Select a label style and adjust the label width size.
- Modify the font weight and tweak the label color.
- Position the label at the top and adjust its position using pixels
After modifying the Label, follow these steps.
- Navigate to the ‘Products‘ tab.
- Select ‘Is on Sale‘ and Choose ‘Yes’.
- Save your changes.
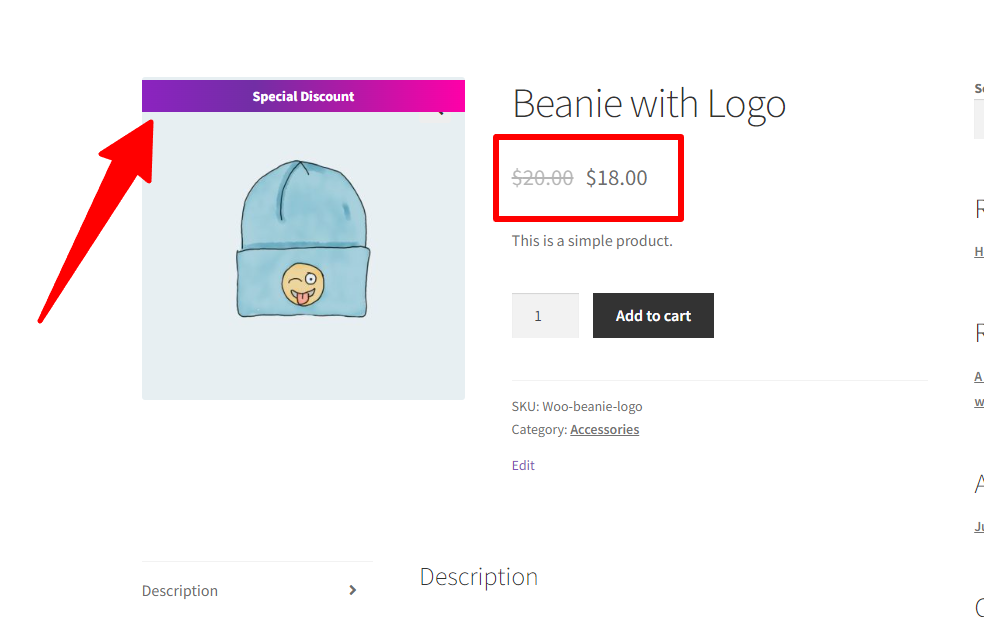
Display a Special discount label for on-sale products on the archive page.

Display a special discount label for on-sale products on the product page.
How To Add Sale Badge To Bottom Left Position in Woocommerce
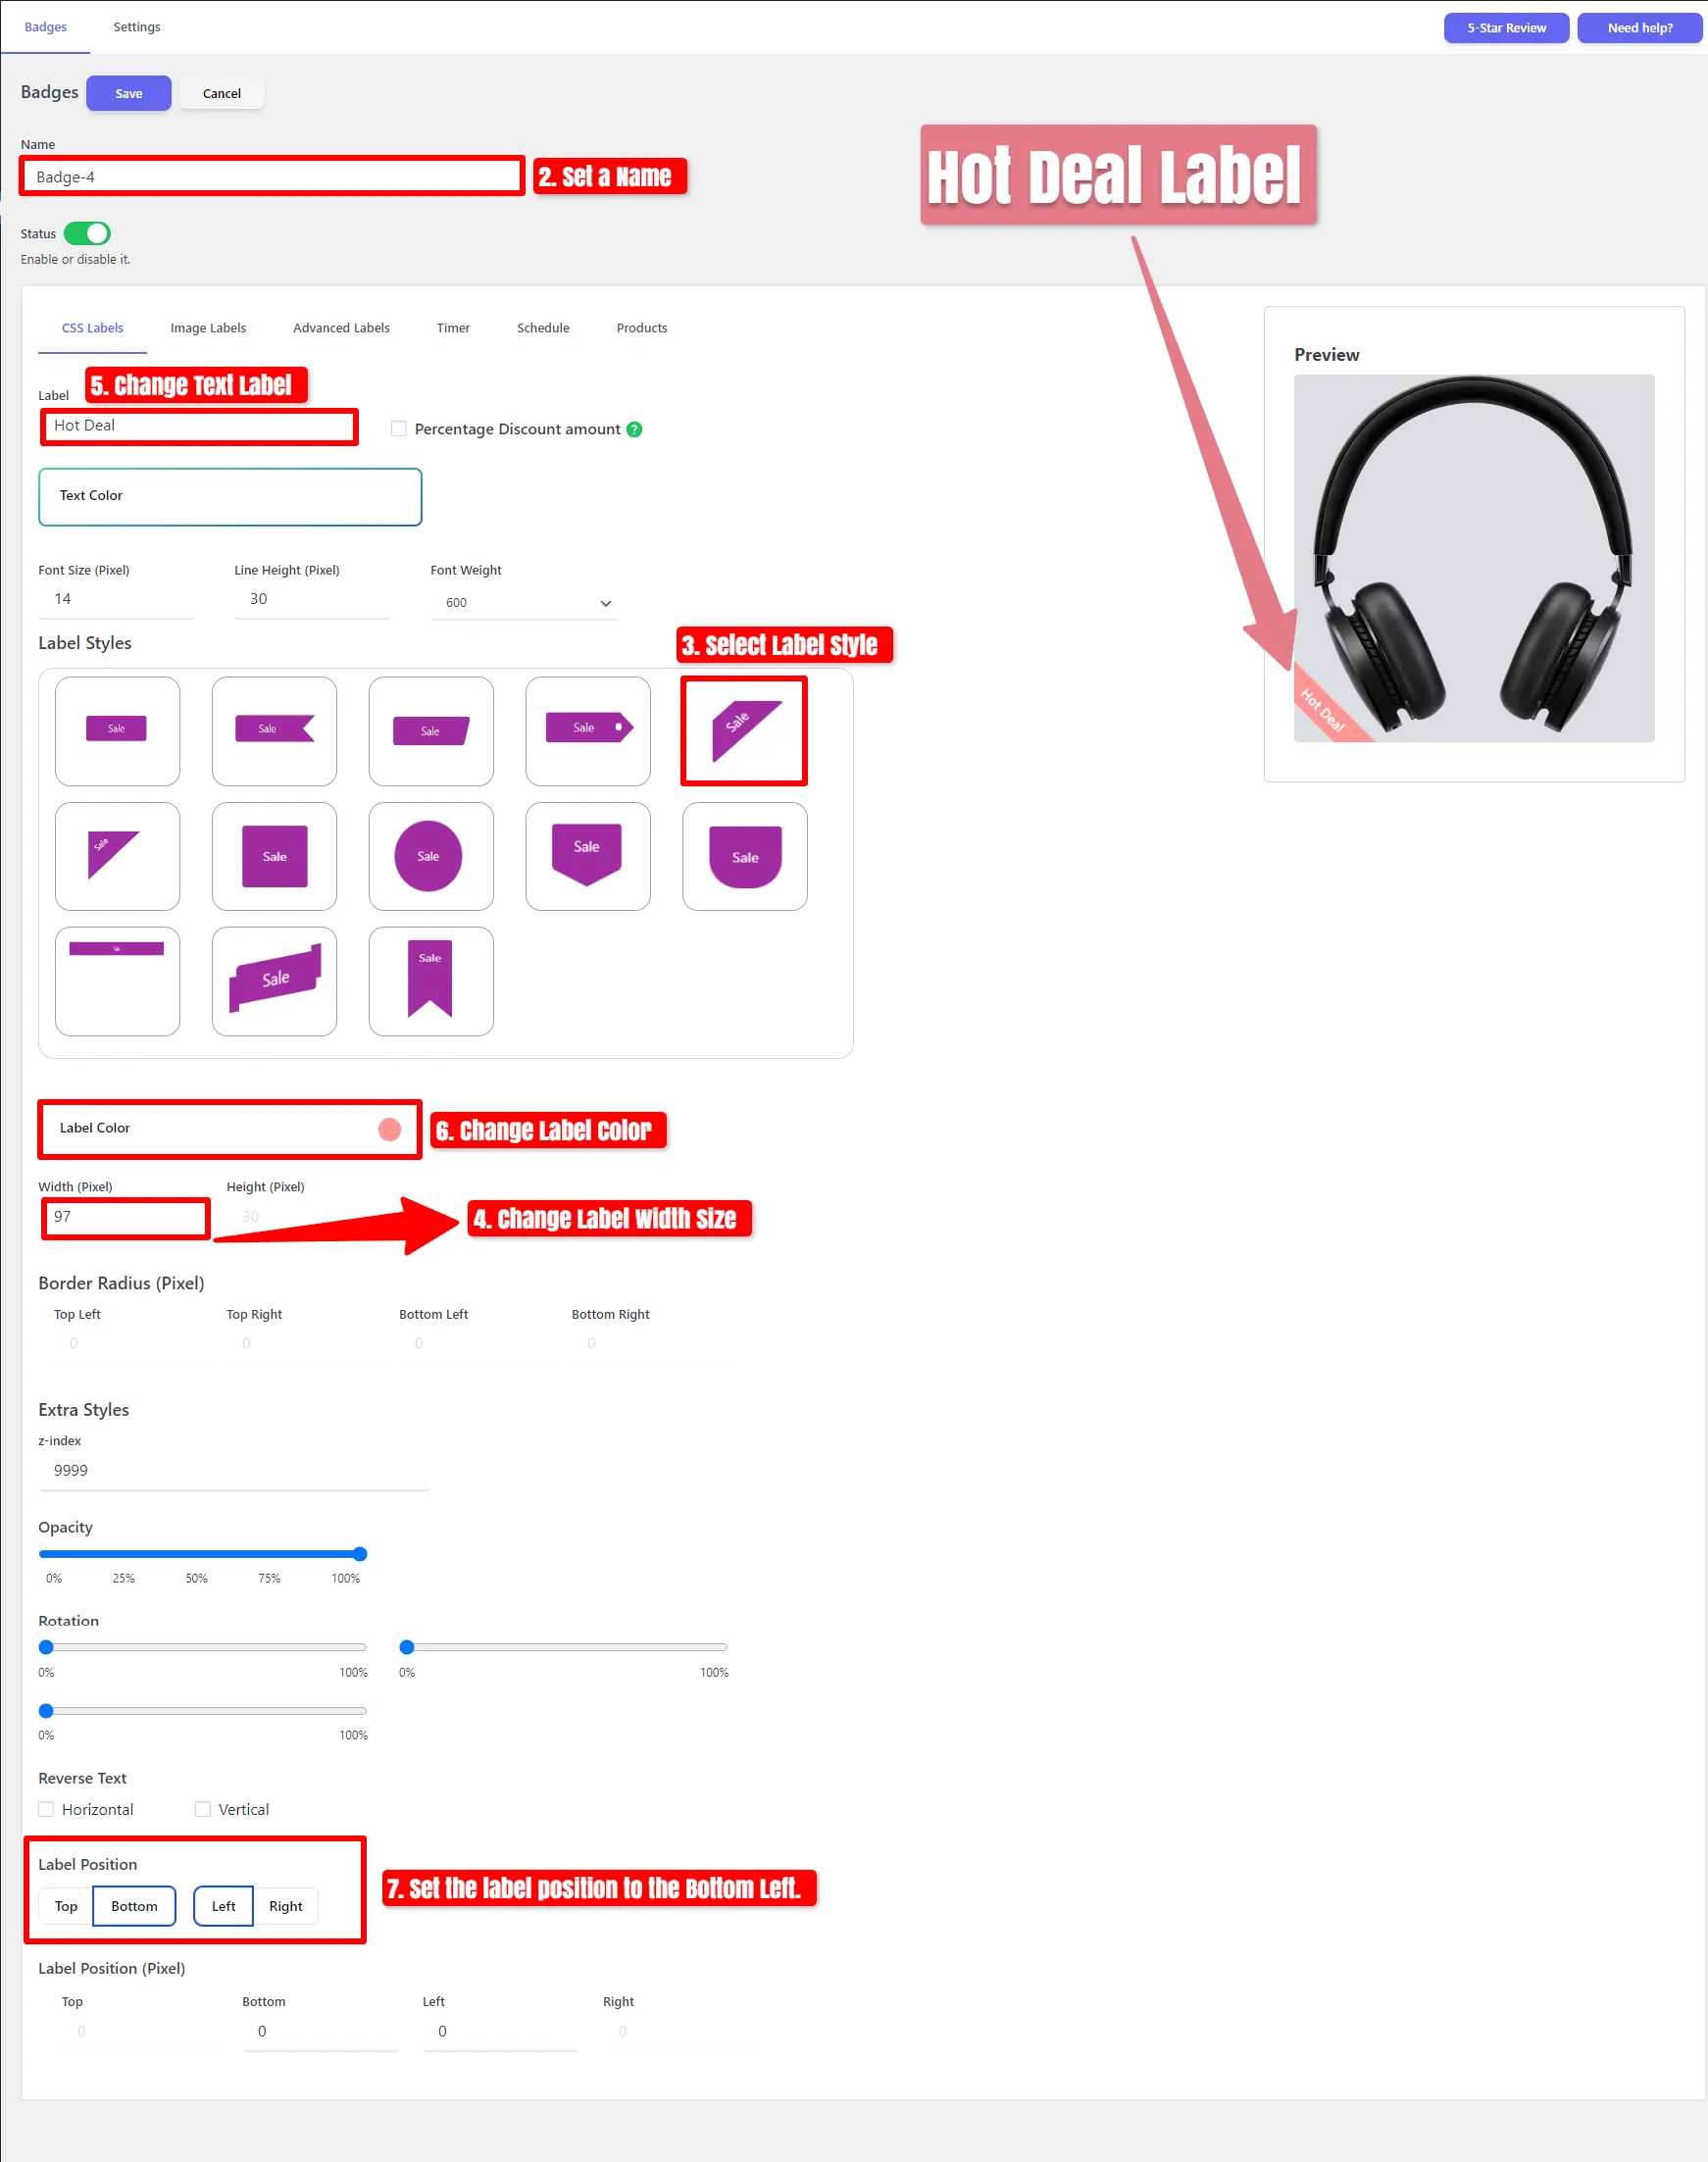
First, disable the status, then click on “Add New“.
- Assign a name for your badge.
- Choose a label style and adjust the width size of the label.
- Edit the text label to “Hot Deal“.
- Change the color of the label.
- Set the position to the bottom left.
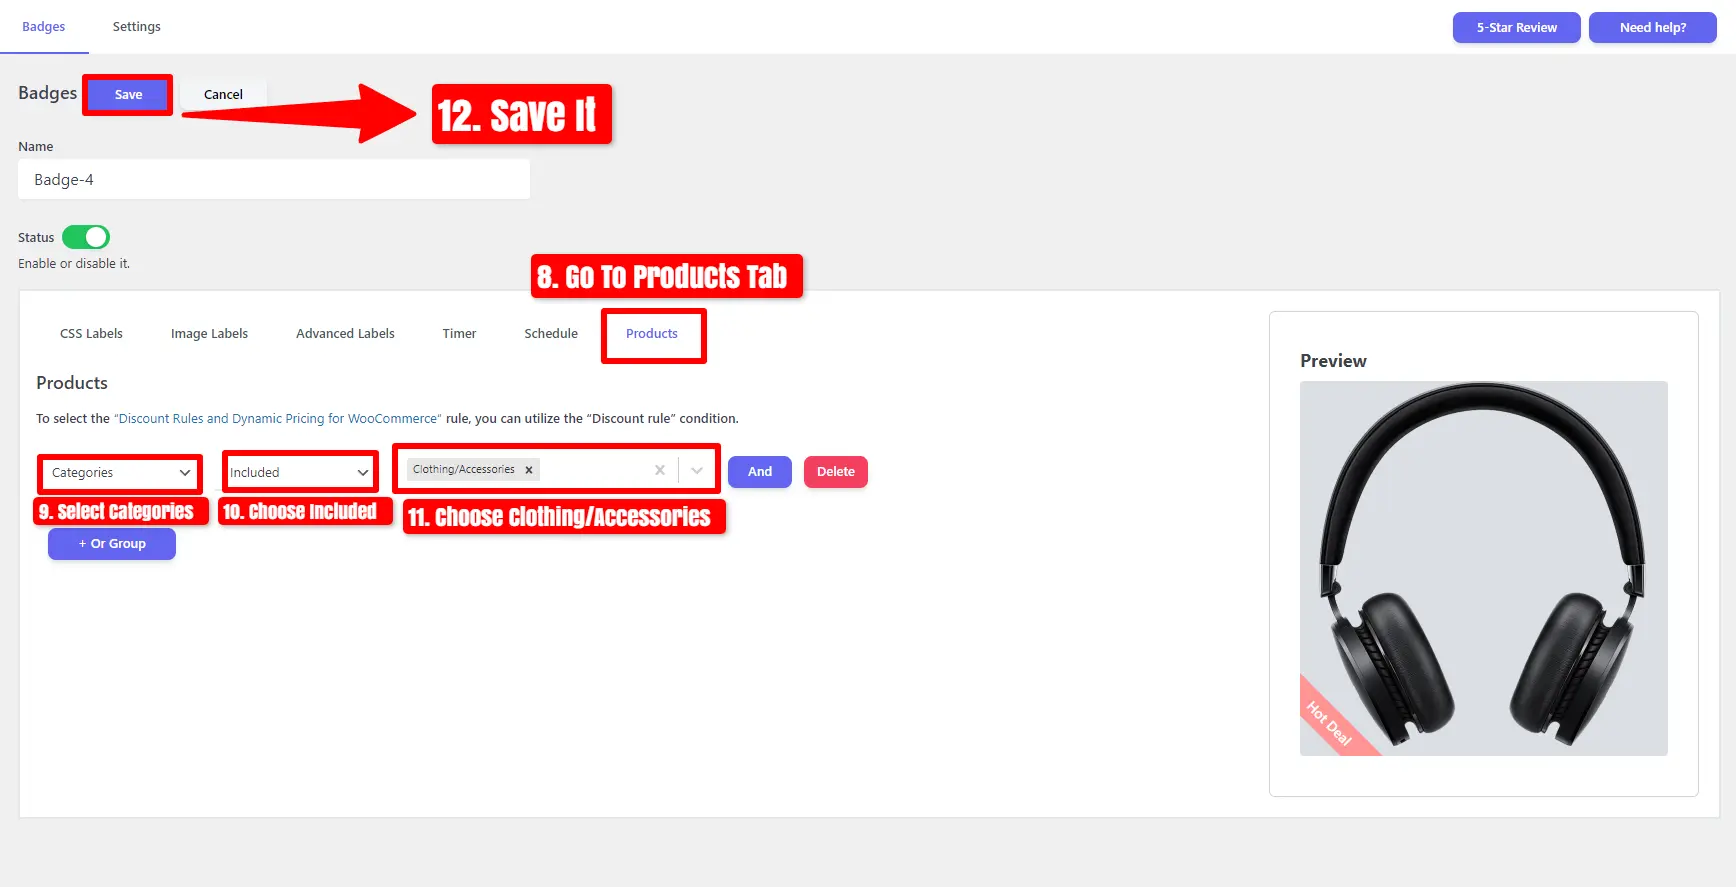
After modifying the Hot Deal Label, follow these steps.
- Navigate to the ‘Products‘ tab.
- Select ‘Categories‘ and Choose ‘Included’ and Pick “Clothing/Accessories“.
- Save your changes.
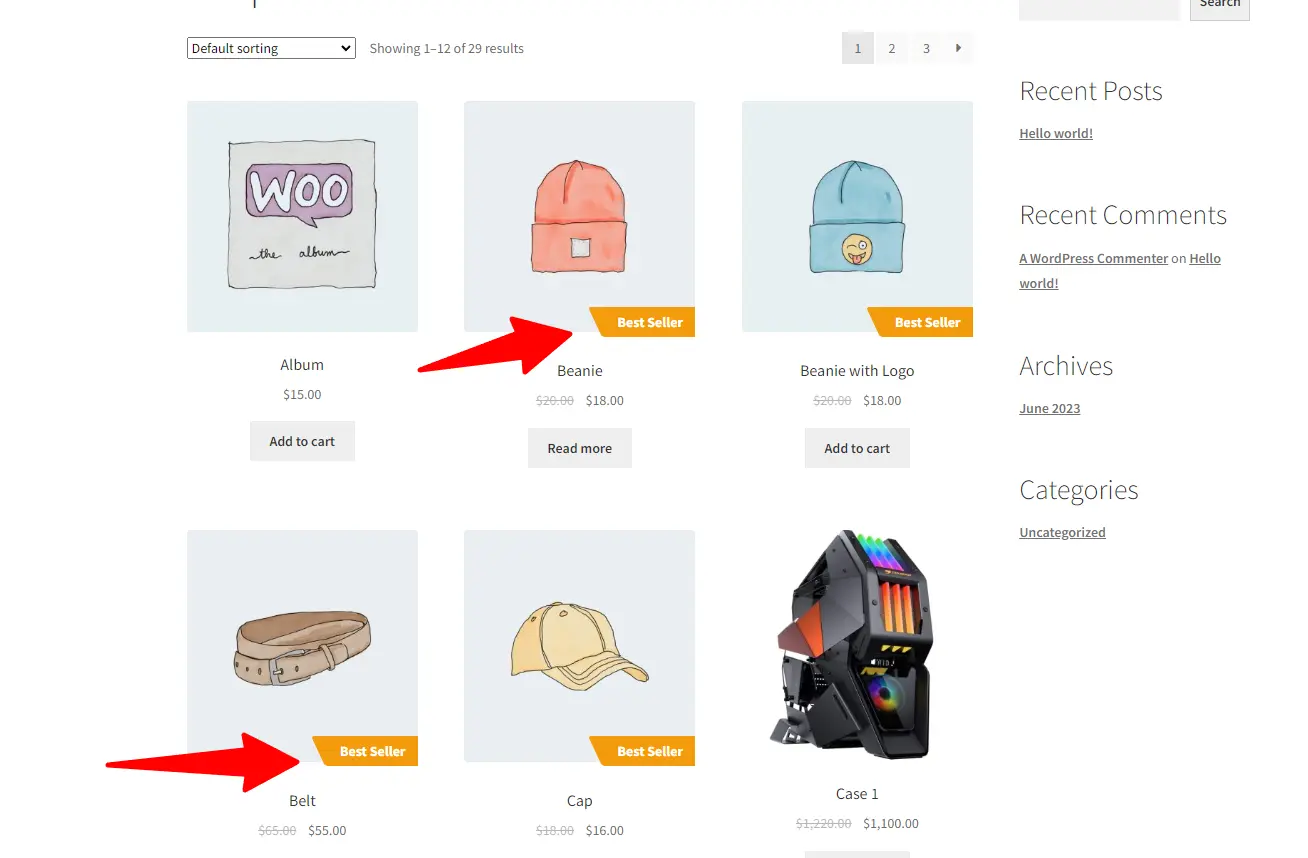
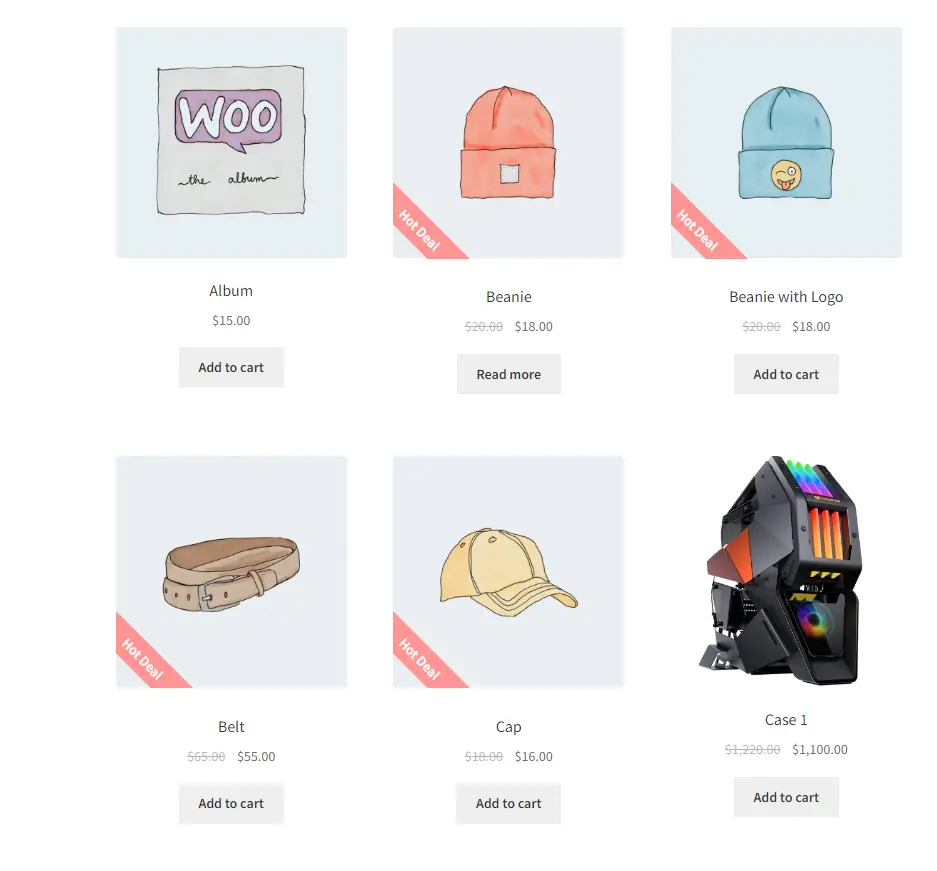
Display a Hot Deal Label for Clothing/Accessories products on the Archive page.
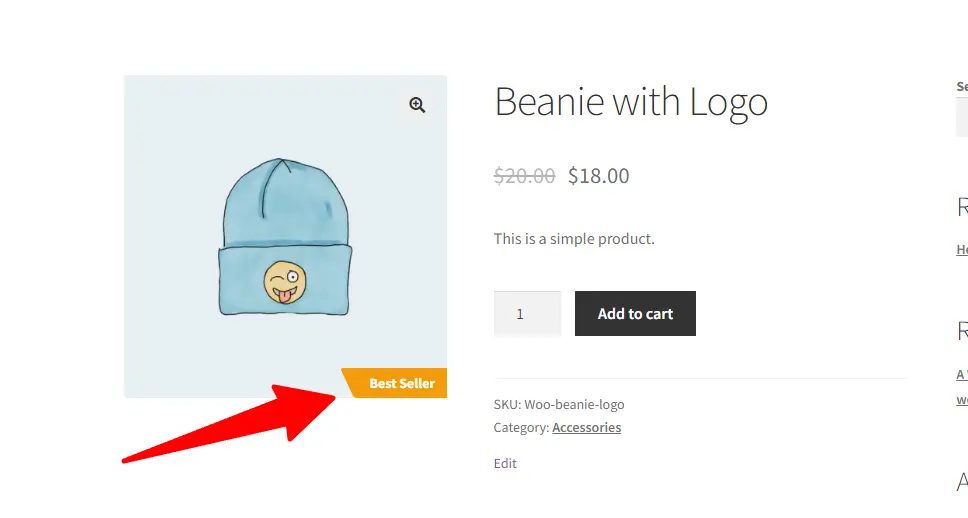
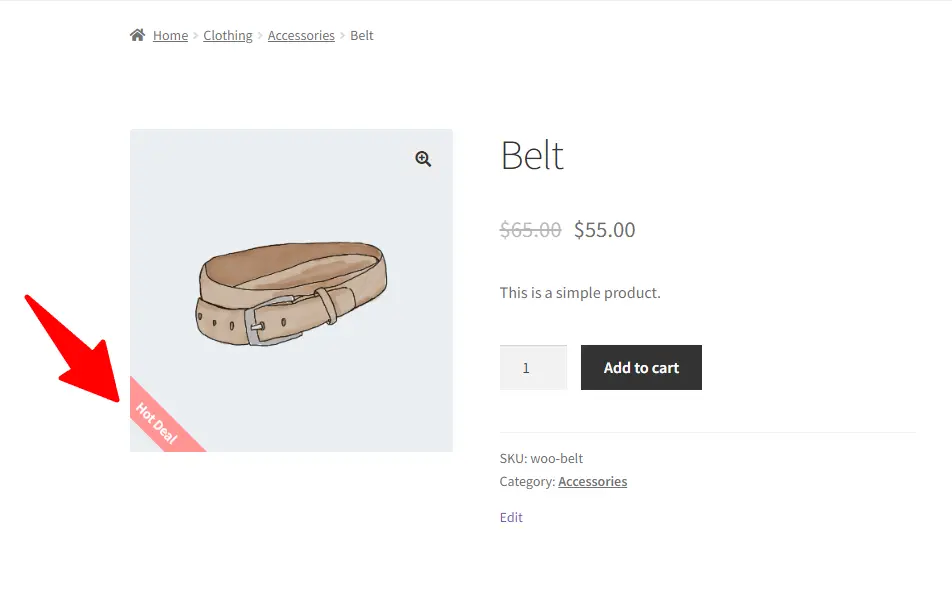
Display a Hot Deal Label for Clothing/Accessories products on the Product Page.
How To Add Sale Badge To Bottom Right Position in Woocommerce
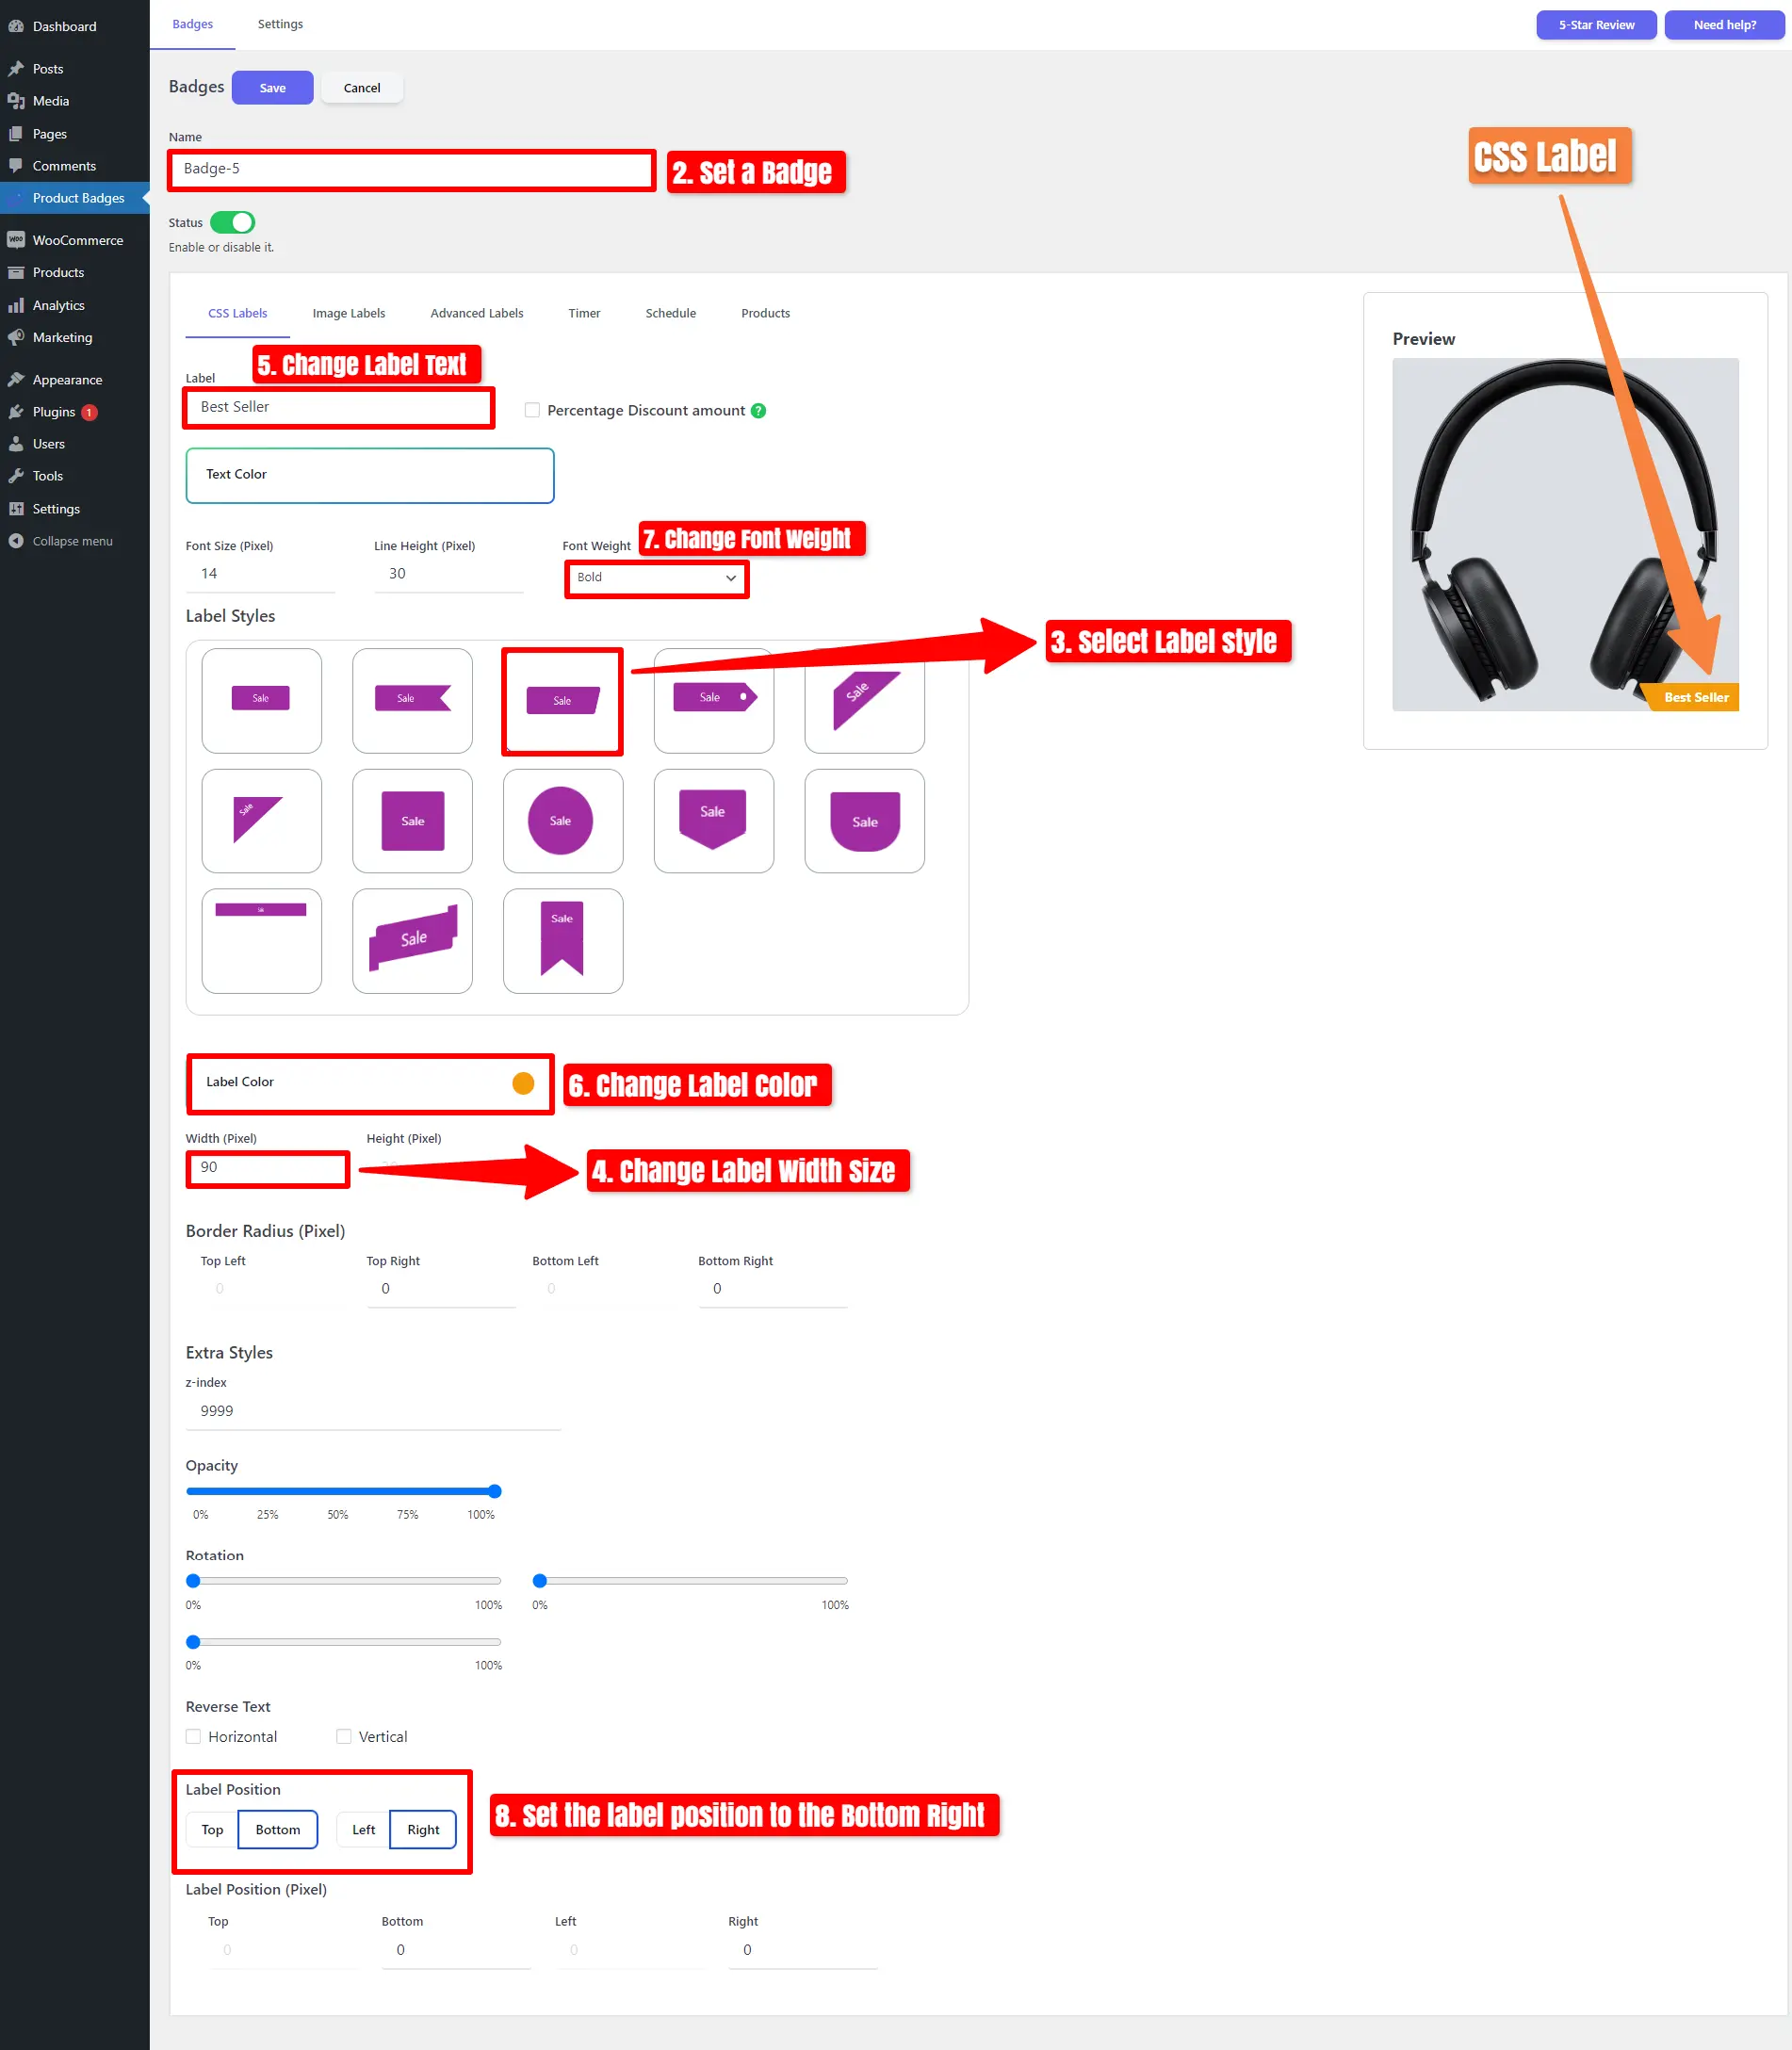
First, disable the status, then click on “Add New“.
- First, set a name for your badge.
- Change the text label to “Best Seller“.
- Choose a label style and adjust the label width size.
- Modify the font weight and adjust the label color.
- Set the label position to the Top Right.