Looking to take your content creation to the next level? Consider adding AI content writing to your website! AI content writing uses artificial intelligence technology to generate high-quality, personalized content automatically. With the right AI content writing plugin, you can create a wide range of content types, including blog posts, articles, social media posts, and more. This technology can help you streamline your content creation process, save time and resources, and improve your overall content marketing strategy. By optimizing your content for search engines, you can increase your website’s visibility and attract more visitors. If you’re looking to stay ahead of the competition and improve your online presence, adding AI content writing to your website is a smart investment. Contact us today to learn more about our AI content writing services and how we can help you achieve your content marketing goals.
In this article, you will learn how to add Content Writing to your WordPress And Create Posts, Pages, and Products in less than 2 minutes.
Why Add AI Content Writing to WordPress?
Incorporating AI-powered content writing into your WordPress site can offer many benefits. AI technology can analyze data and trends to generate personalized content for your target audience. This can improve engagement and lead to higher conversion rates and it can also help streamline the content creation process, saving time and resources while maintaining high-quality standards. Additionally, AI-generated content can be optimized for search engines, improving your website’s visibility and ranking. With its ability to produce unique, high-quality content quickly and efficiently, adding AI content writing to WordPress can be a smart investment for businesses looking to improve their online presence and stay ahead of the competition.
What is AI Content Writing?
AI content writing is the process of using artificial intelligence technology to generate written content automatically. This technology uses algorithms and natural language processing to analyze data and trends and then creates personalized and relevant content for the target audience. AI content writing can generate a wide range of content types, including blog posts, articles, social media posts, product descriptions, and more.
Producing high-quality content quickly and efficiently is one of the biggest advantages for businesses. Generating a large volume of content in a short amount of time without sacrificing quality can be especially beneficial for businesses such as news sites, e-commerce businesses, and social media accounts. Optimizing content for search engines is also important to ensure that it is more visible and ranks higher in search results. Using such strategies can help improve marketing strategies and keep businesses ahead of the competition
How to add an AI Content Writing plugin to your WordPress website?
In this article, we will provide you with a detailed guide to adding an AI content writing plugin to your website easily. To begin with, we will outline the key benefits of using AI content writing technology and explain how it works. Then, we will provide a step-by-step guide to installing and configuring the plugin on your WordPress website. Additionally, we will share some best practices for optimizing your AI-generated content and improving user engagement. By the end of this article, you will have all the information you need to add an AI content writing plugin to your WordPress website and start enjoying its many benefits.
Are you ready? Let’s dive in.
Installing AI Content Writing Plugin in WordPress
AI Content Writing with AI technology is an easy-to-use AI content writing plugin for WordPress. The plugin can generate text in a variety of formats, including blog posts, product descriptions, and social media updates. It enables you to your website in under 2 minutes.
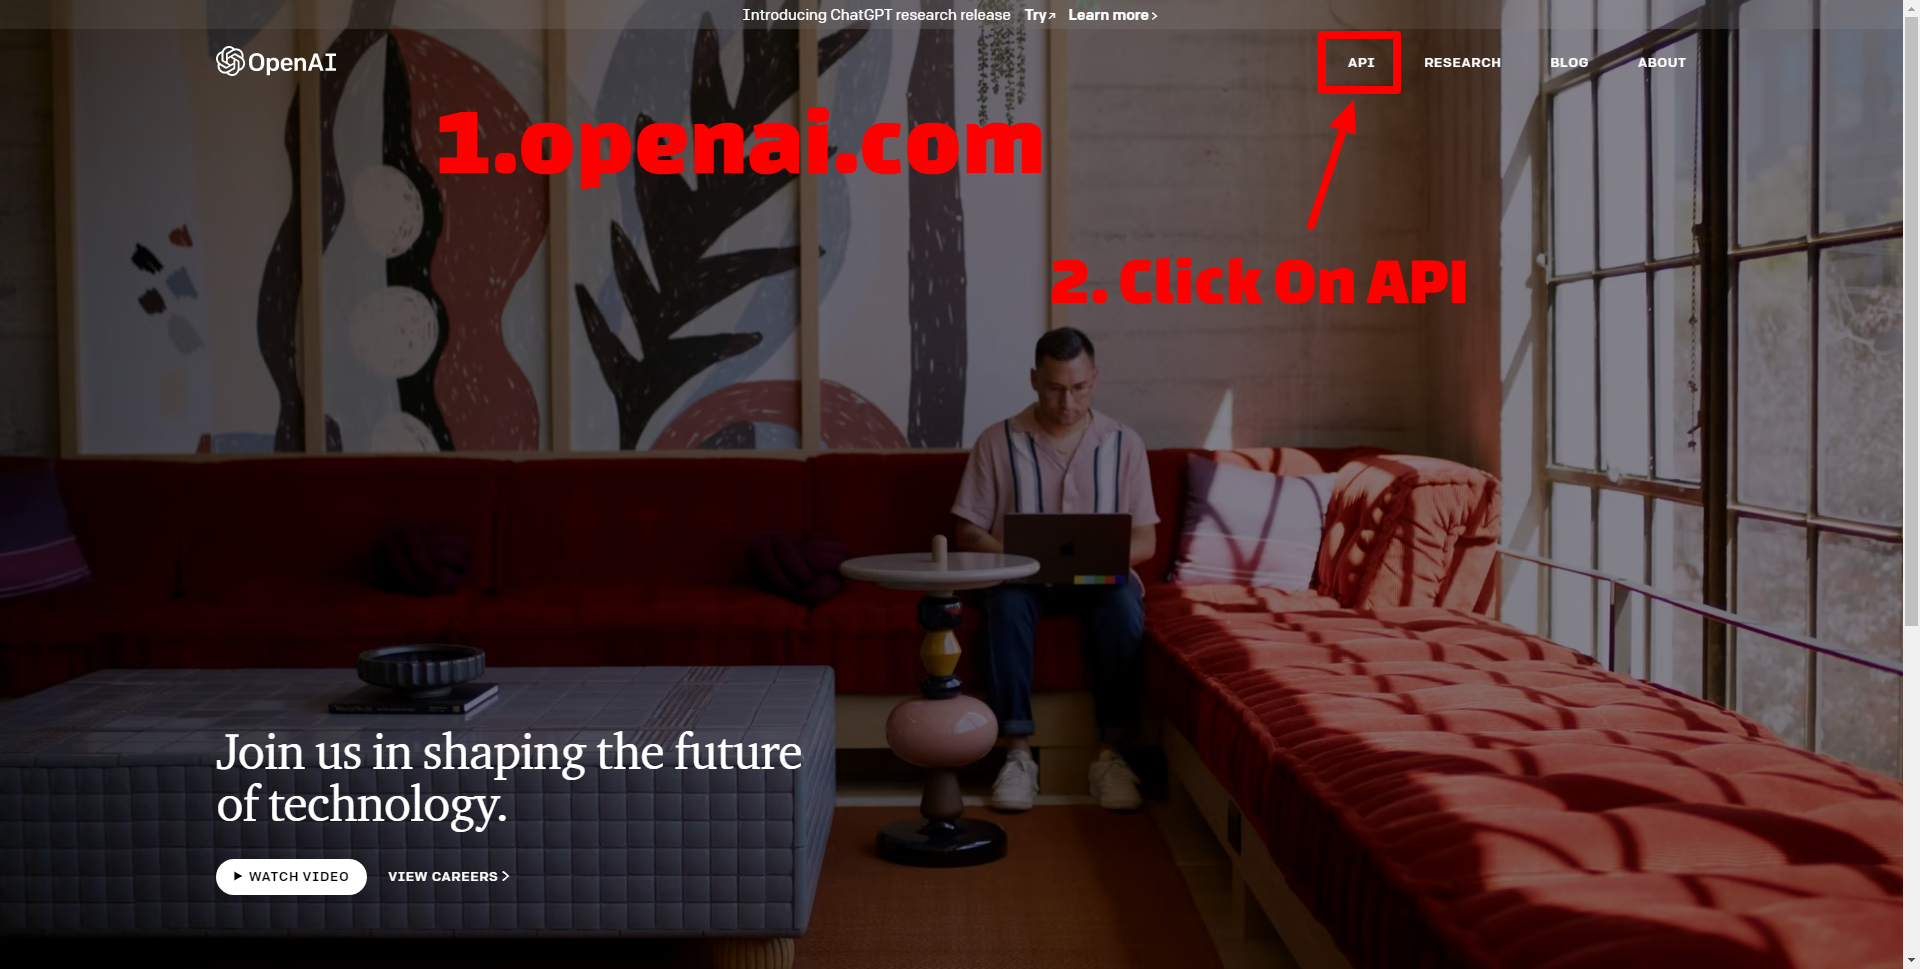
Create an Account in OpenAi
Firstly, you must create an Account in OpenAi. Once you have created an account, you can proceed to the next step, which is setting up the ChatGpt API. This involves generating an API key allowing your chatbot to access the ChatGpt language model. After you have obtained the API key, you can then integrate the ChatGpt API with your chatbot platform of choice.
navigate to the API tab, and create an account like the below image.
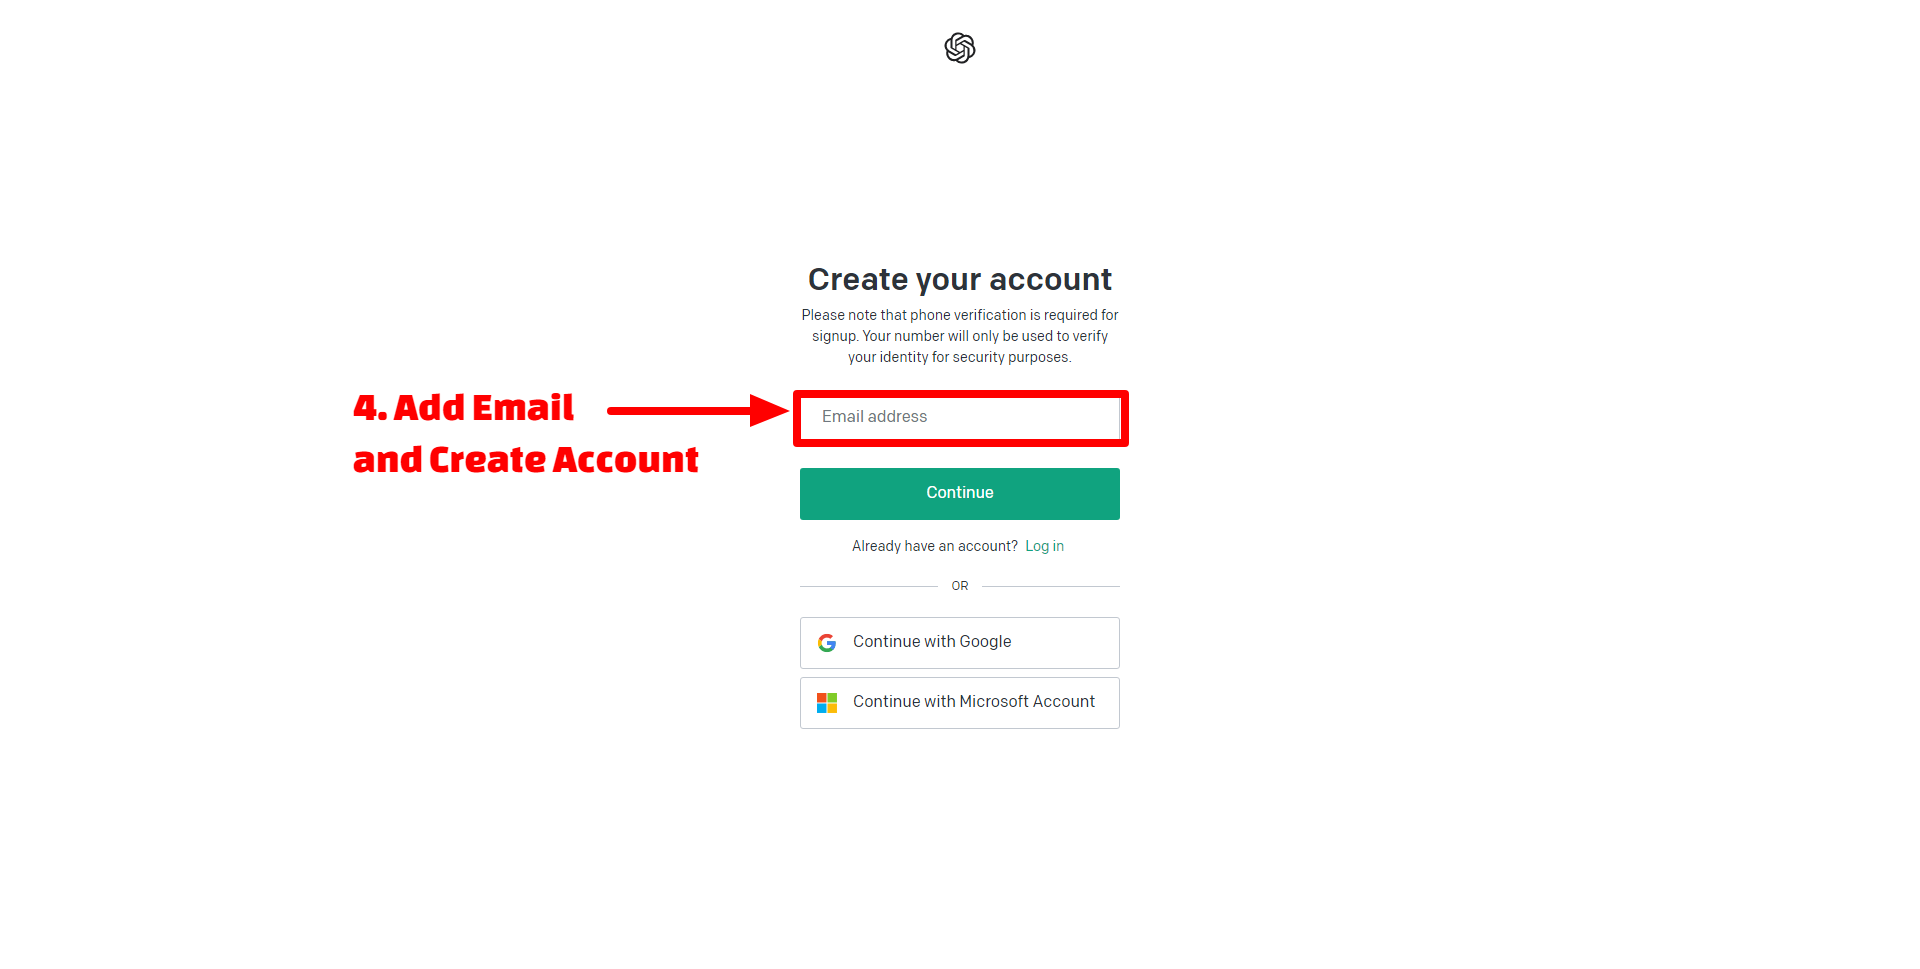
To create an account, Click On Sign Up like the below image.

one of the first steps is to add your email.
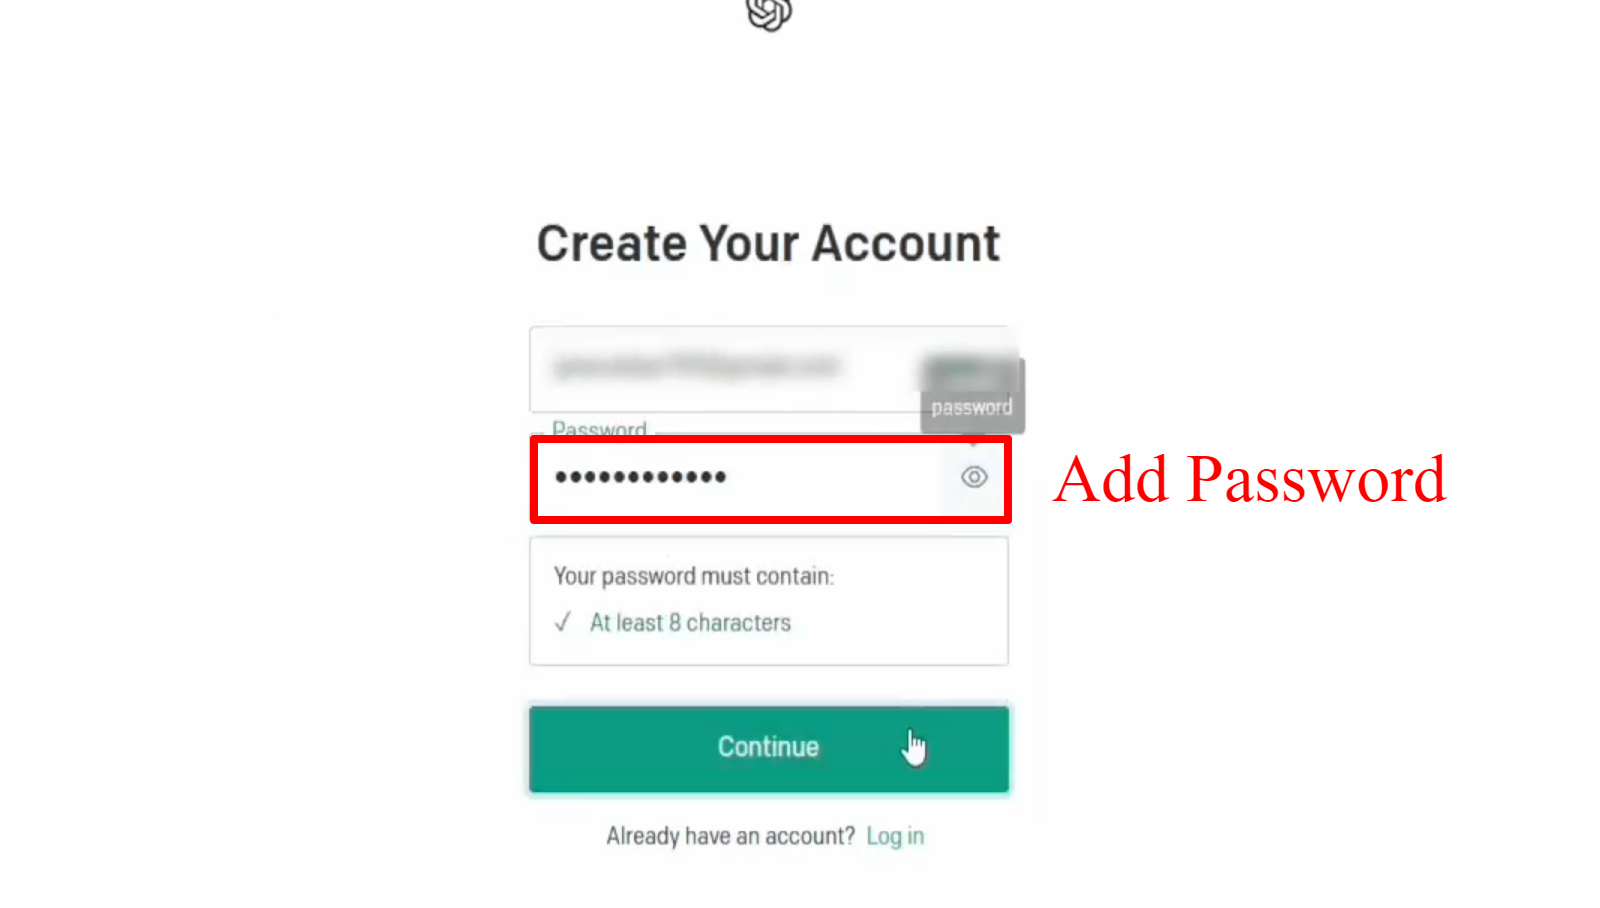
Next, you’ll need to add a password for your OpenAI account. This is an important step to ensure the security of your account and protect your sensitive information.
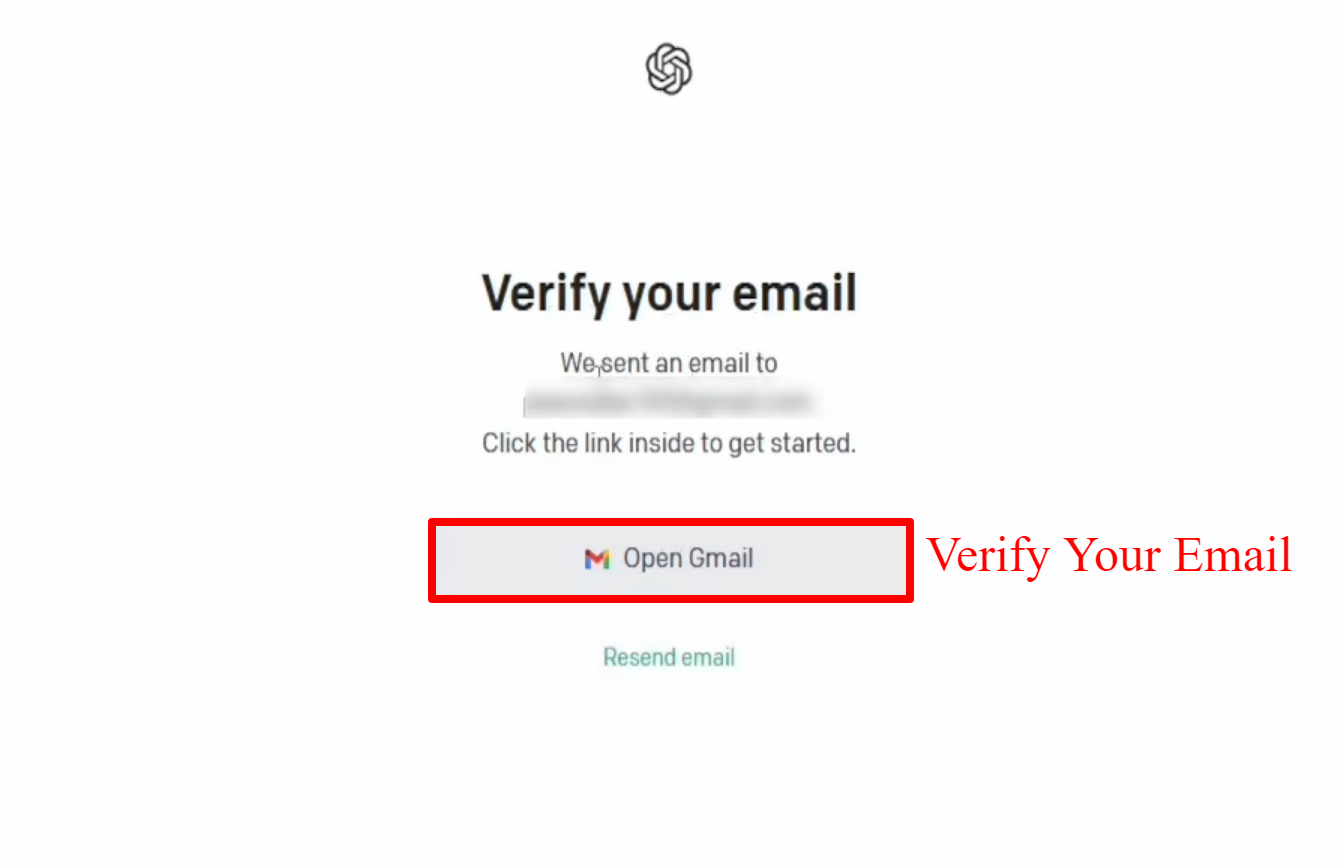
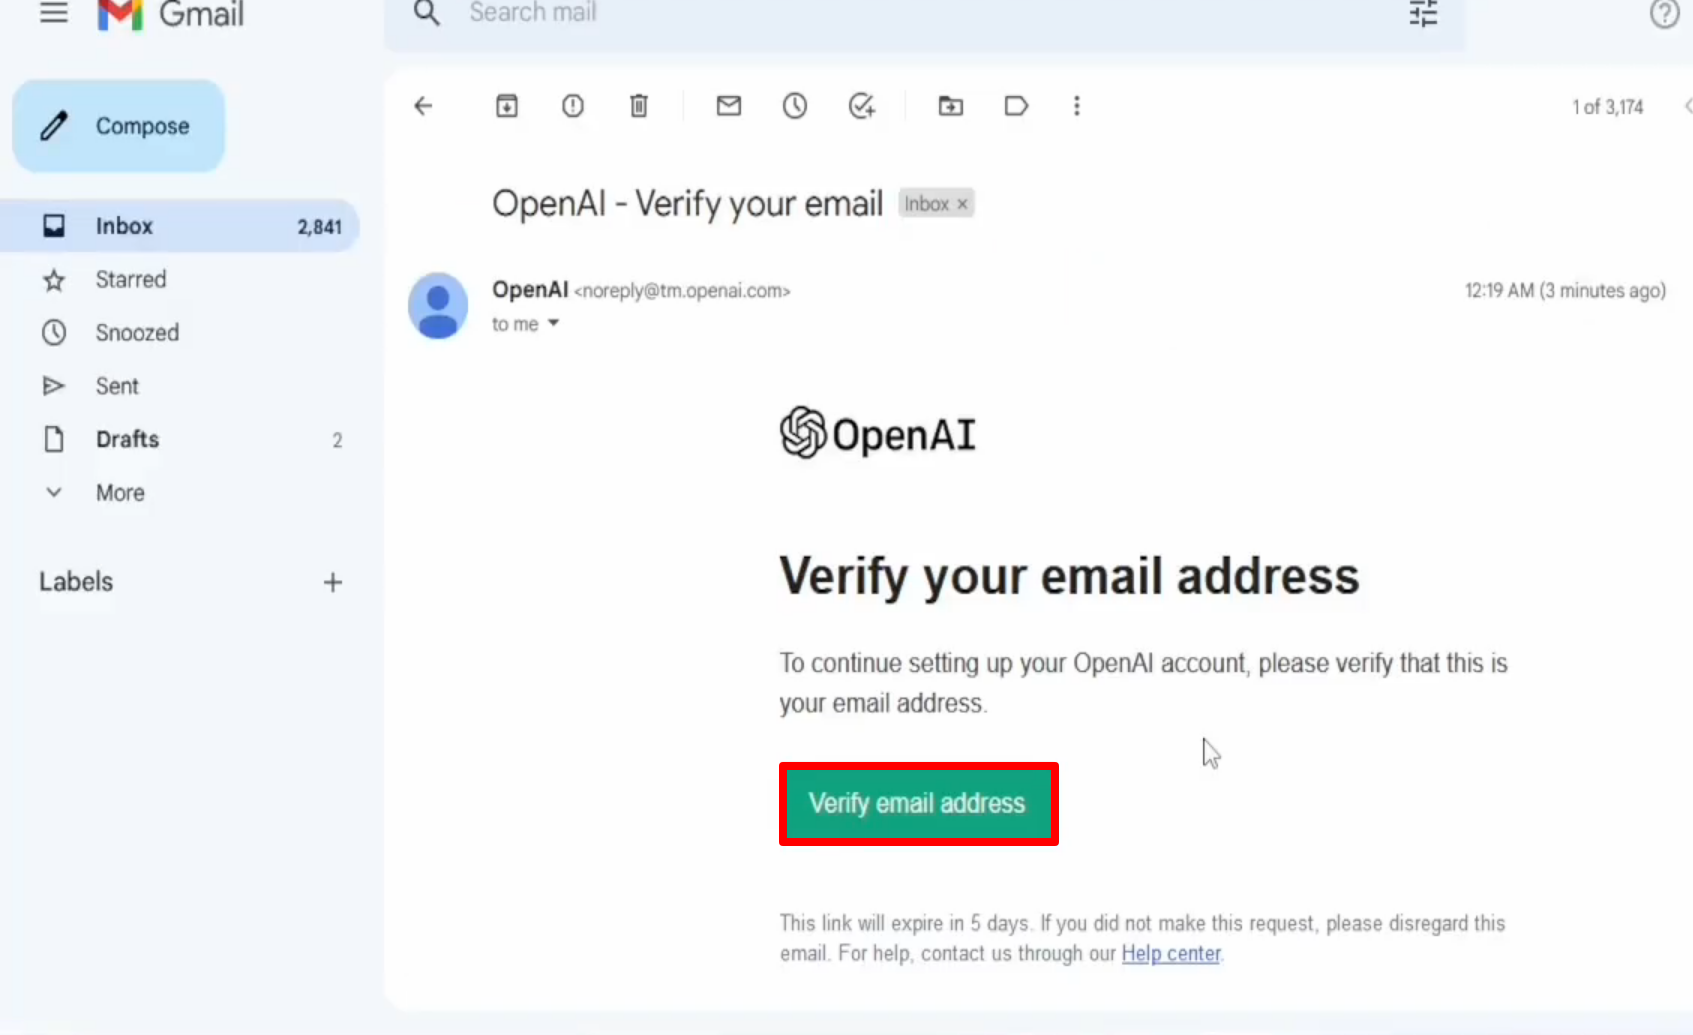
After adding your email, the next step is to verify it.
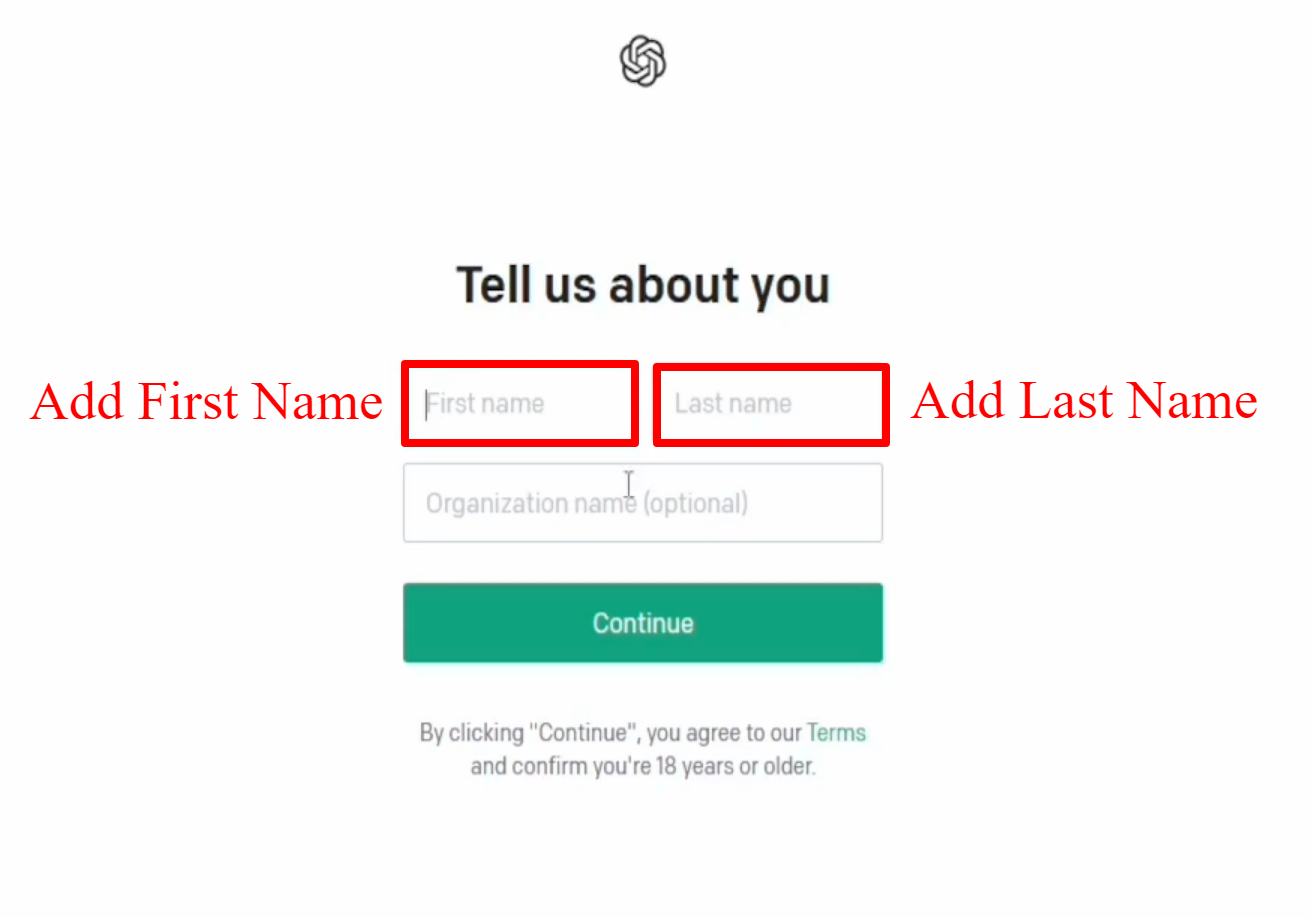
Another important step in setting up your OpenAI account is to add your first name and last name.
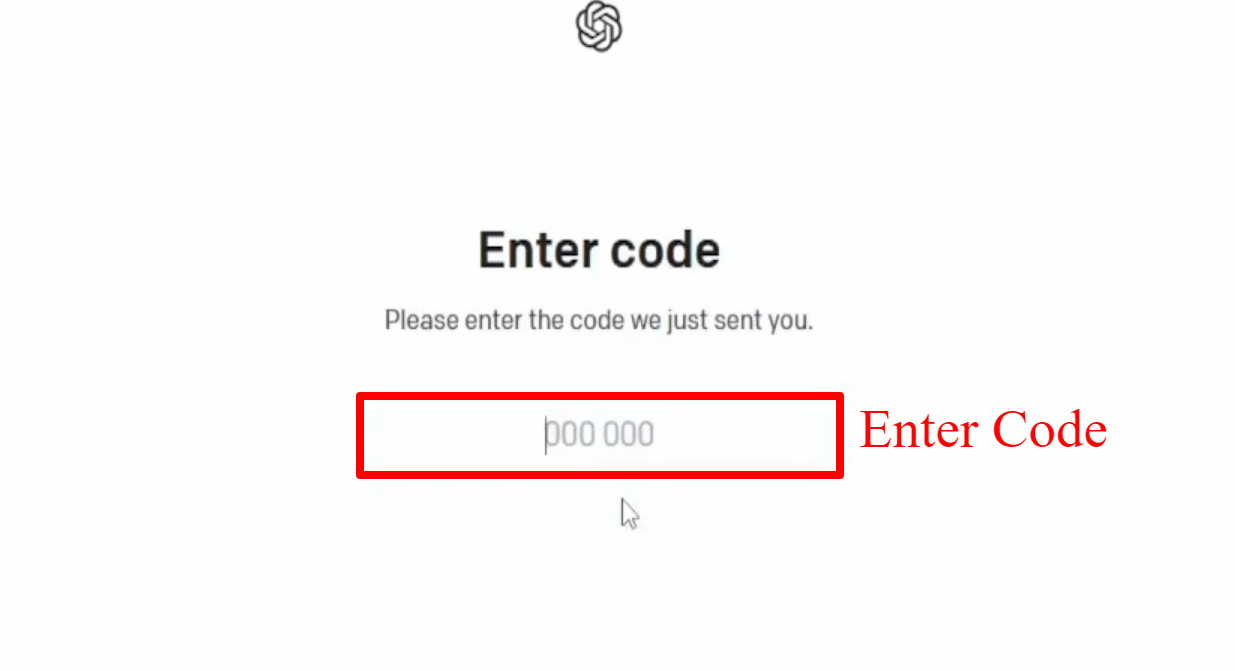
Firstly, you will need to enter your phone number in the designated field and select your country code. Secondly, OpenAI will send a verification code to your phone via SMS,

which you will need to enter into the verification field. Once you have entered the code, your phone number will be verified
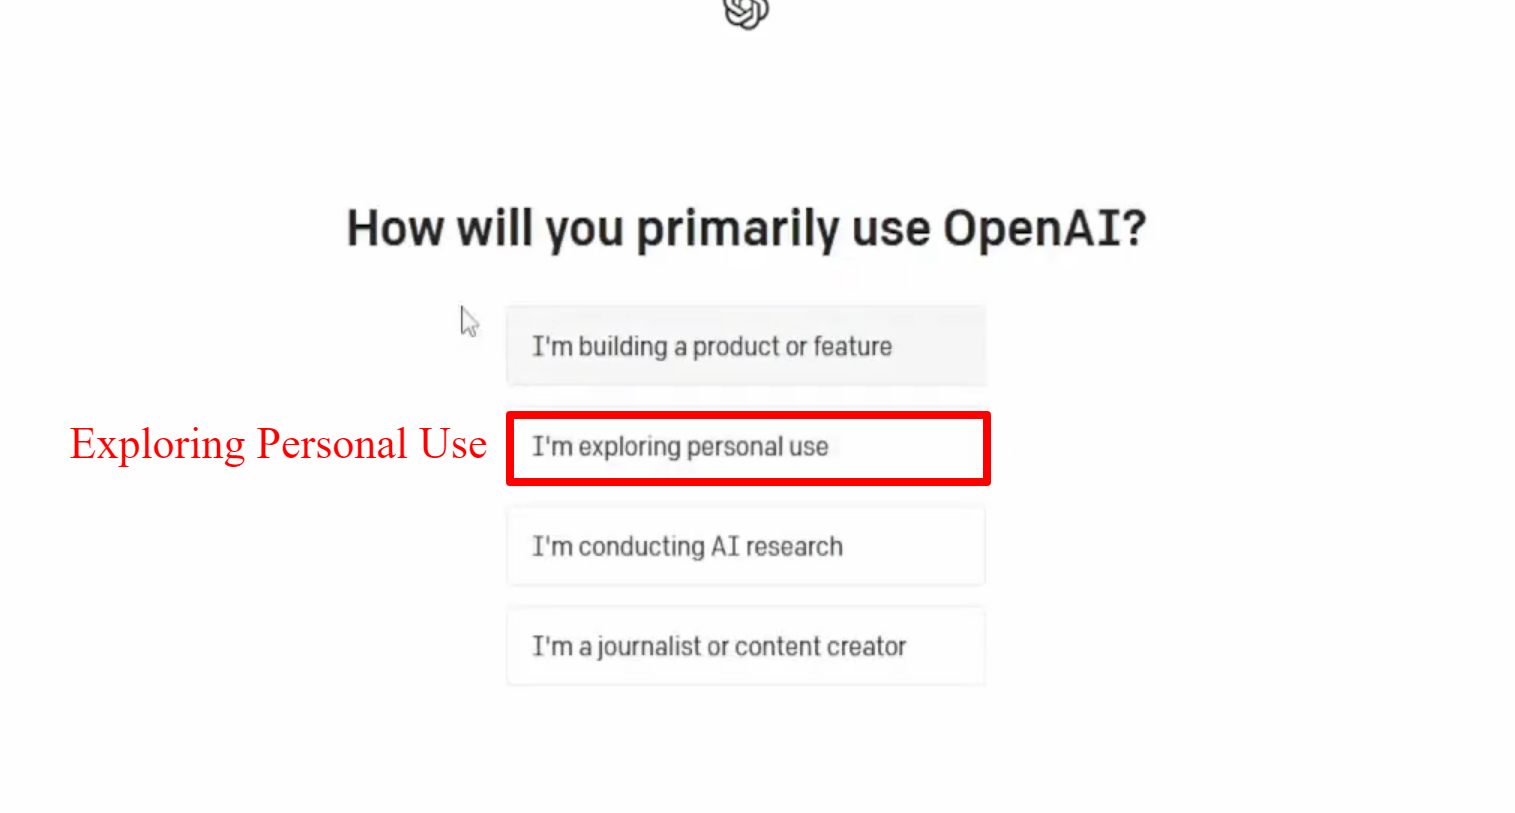
Selecting the ‘Exploring Personal Use’ option is an important step in setting up your OpenAI account,
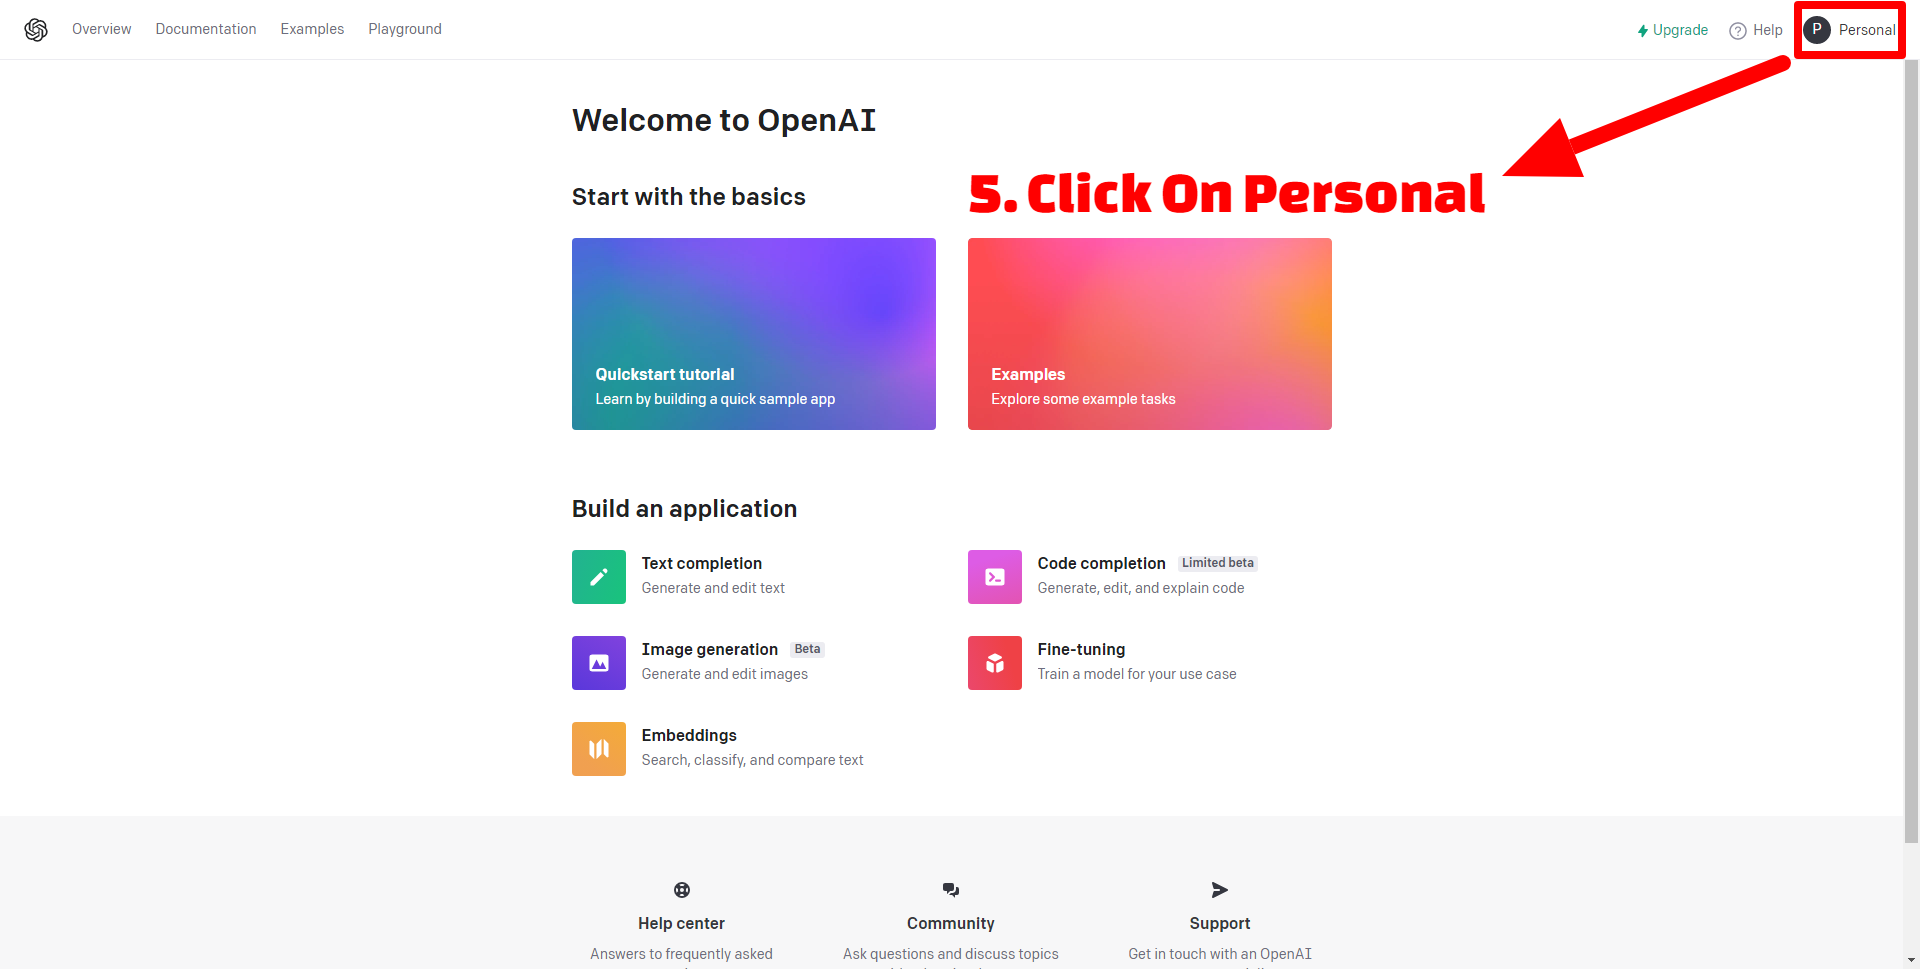
After creating an account in the previous step, navigate to the Personal tab.
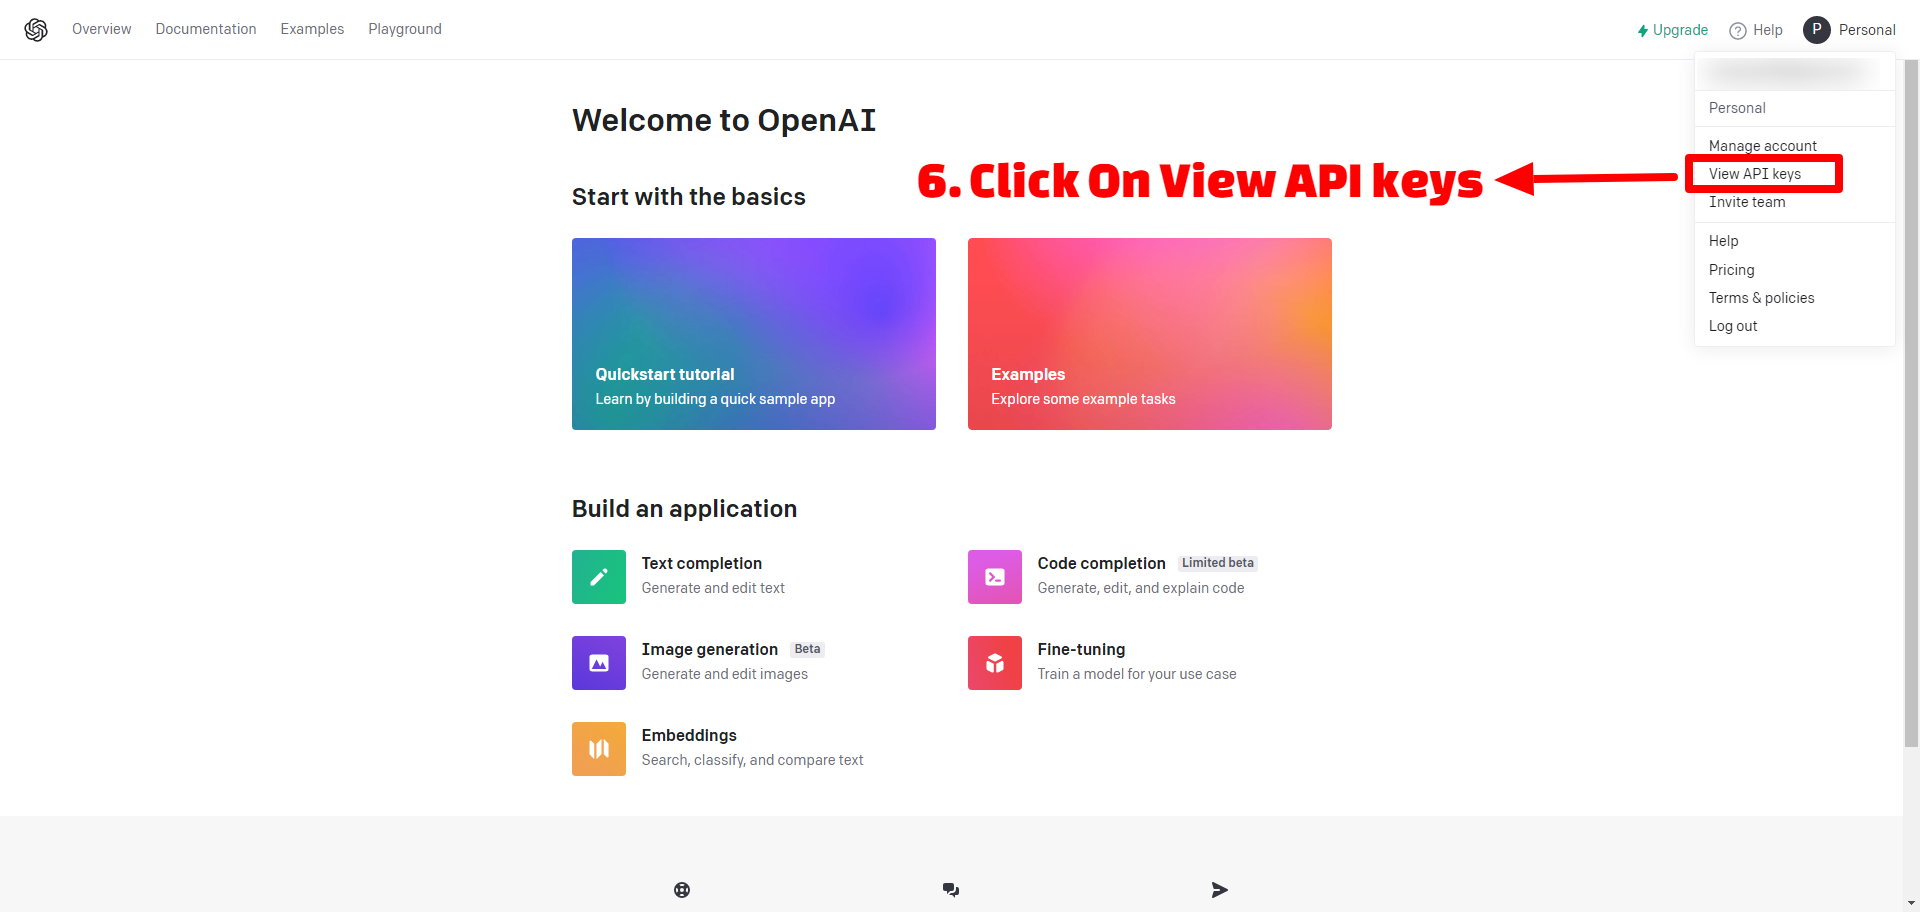
After navigating to the Personal tab, click on the View Api Keys button.
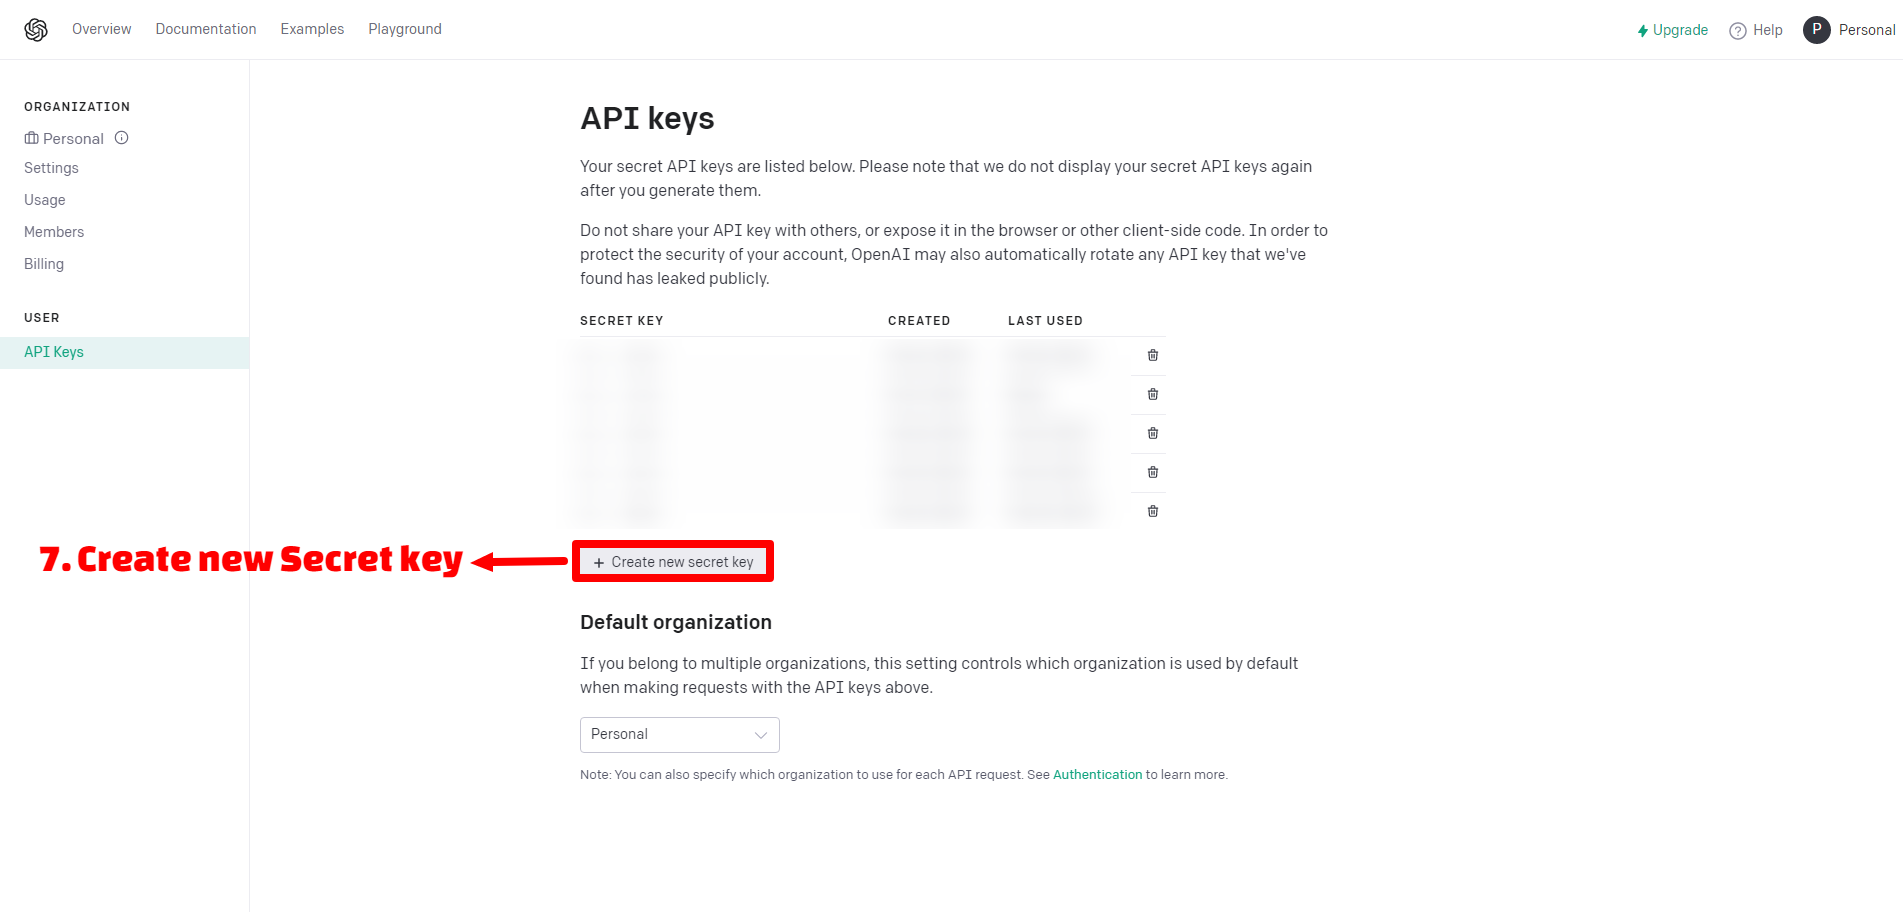
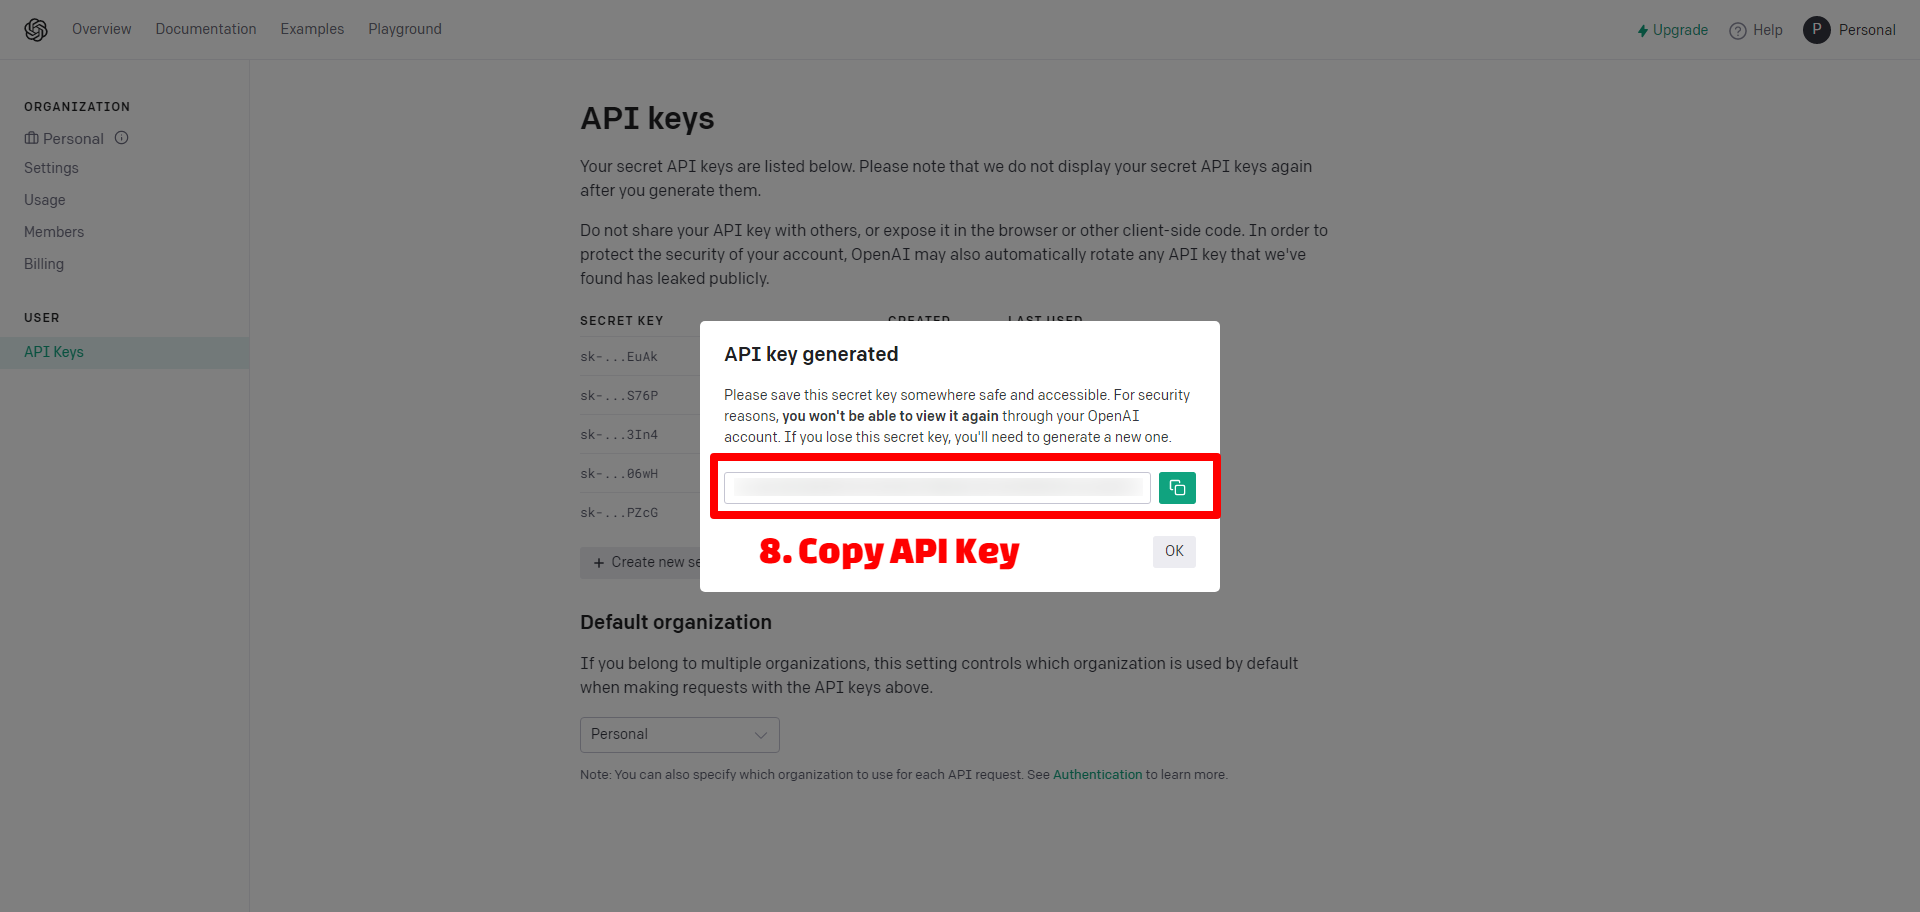
Now you can create a new Secret Key like the below image.
You should copy API Key like the below image.
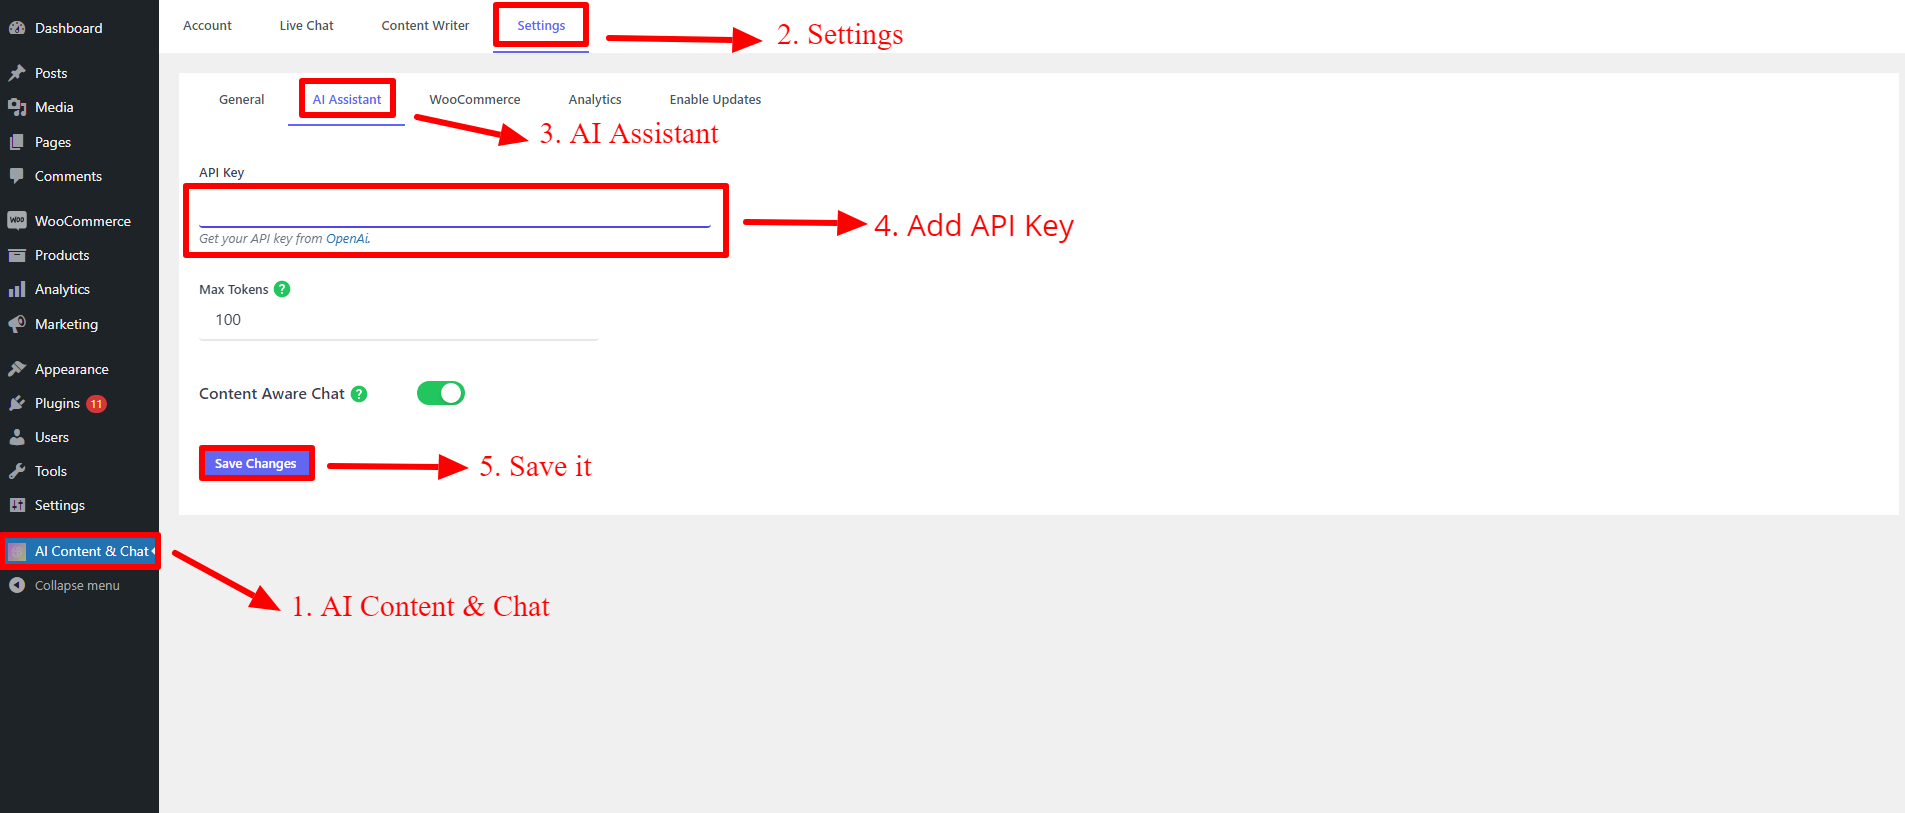
Add API Key in Settings
To Add the API Key, navigate to the AI Content & Chat>> Settings >> AI Assistant tab and Add the API Key you created in the previous step, like the image below.
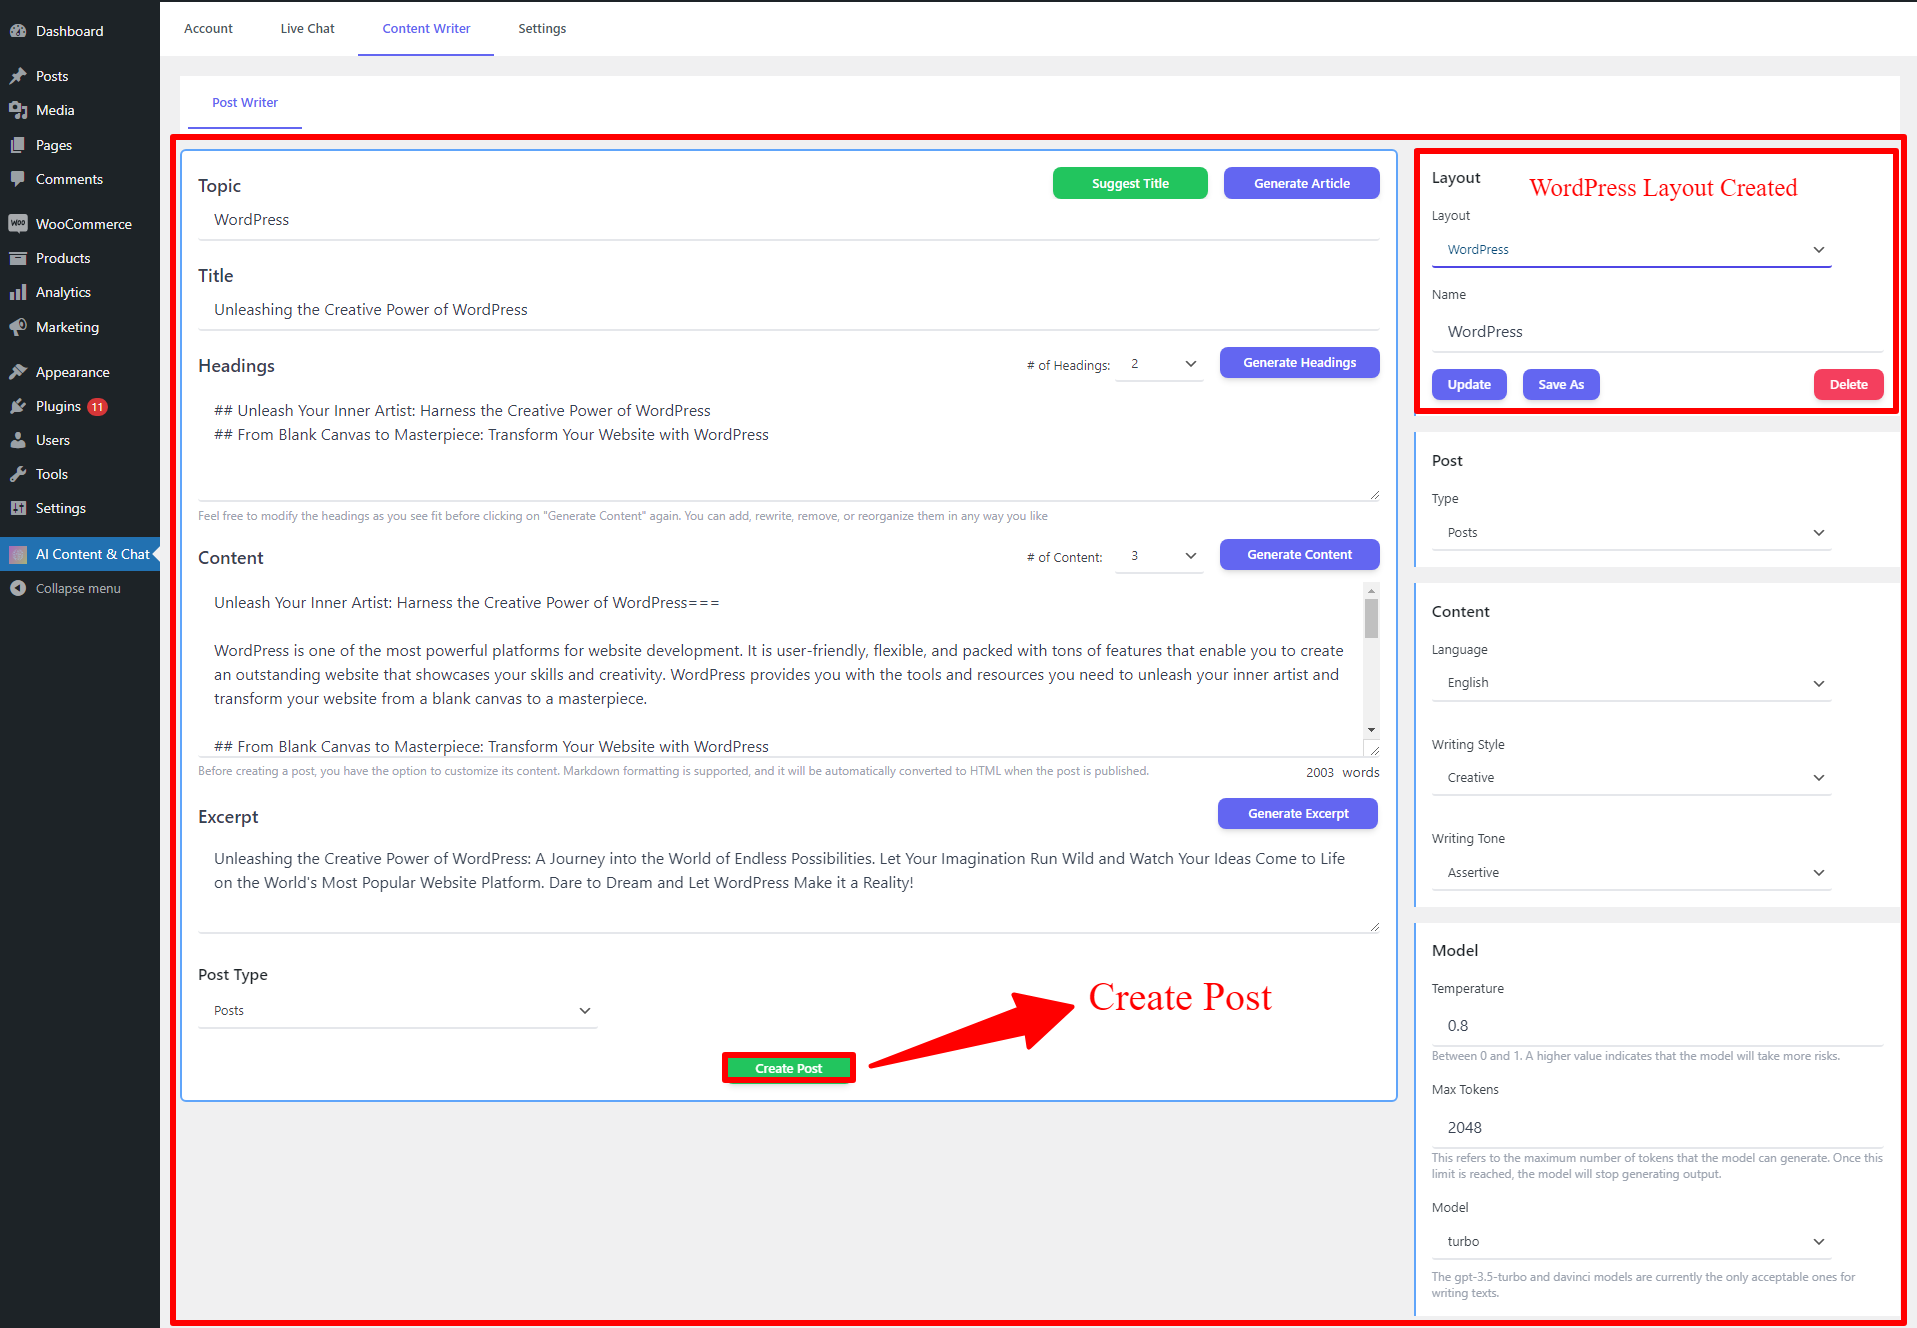
Create Post With AI Content Writing in WordPress
After Adding the API Key in the previous step, navigate to the Content Writer tab and Start to create a Post.
- Set a Topic for the Post and Click on Suggest Title or Generate Article.
- Select the Number of Headings and Click On Generate Headings button.
- Select the Number of Paragraphs of Content and Click On Generate Content button.
- Click On Generate an Excerpt button and Select the Post Type You Want.
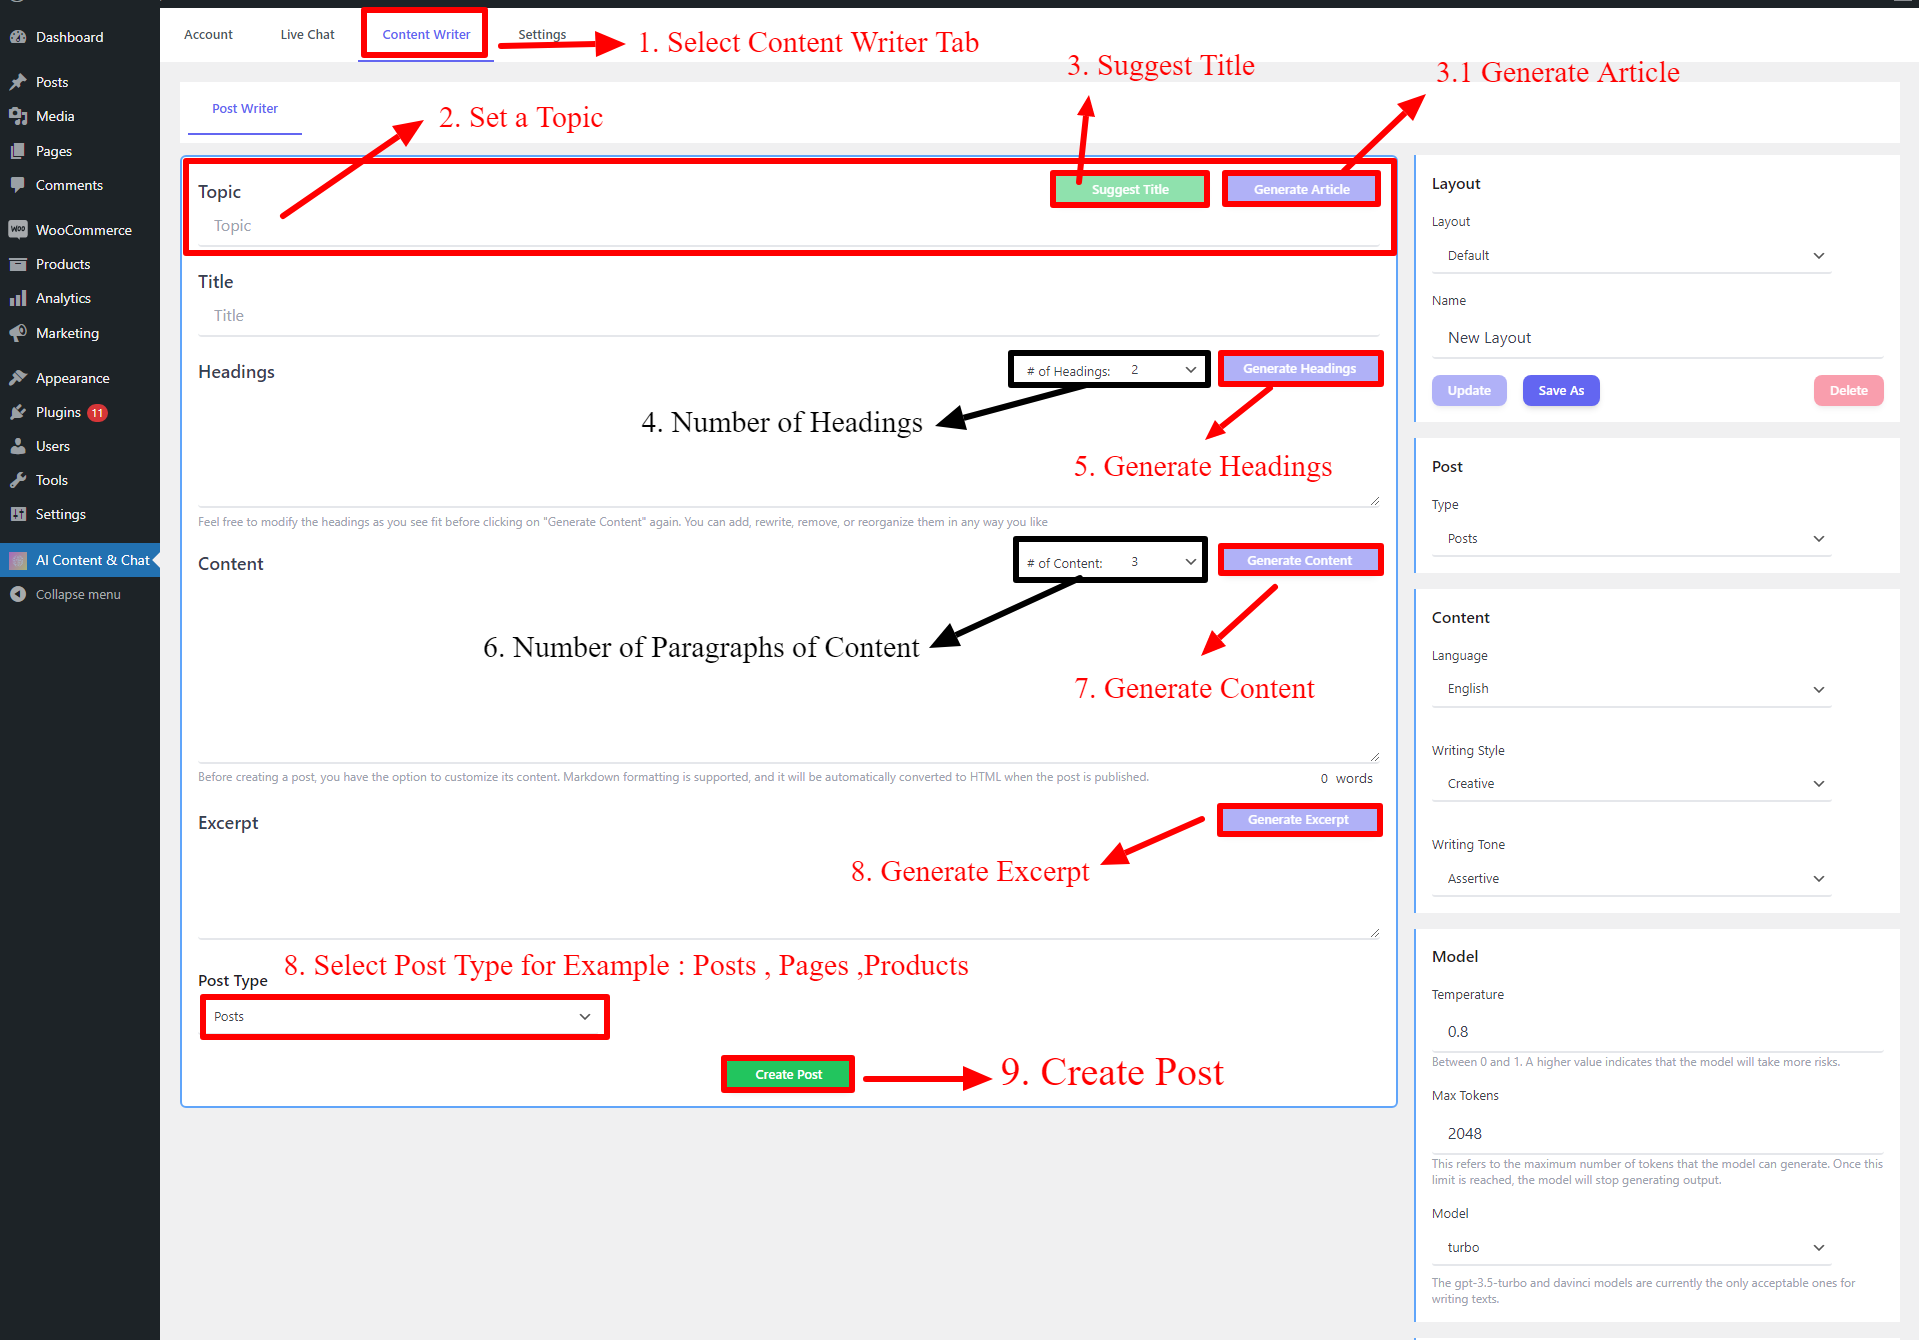
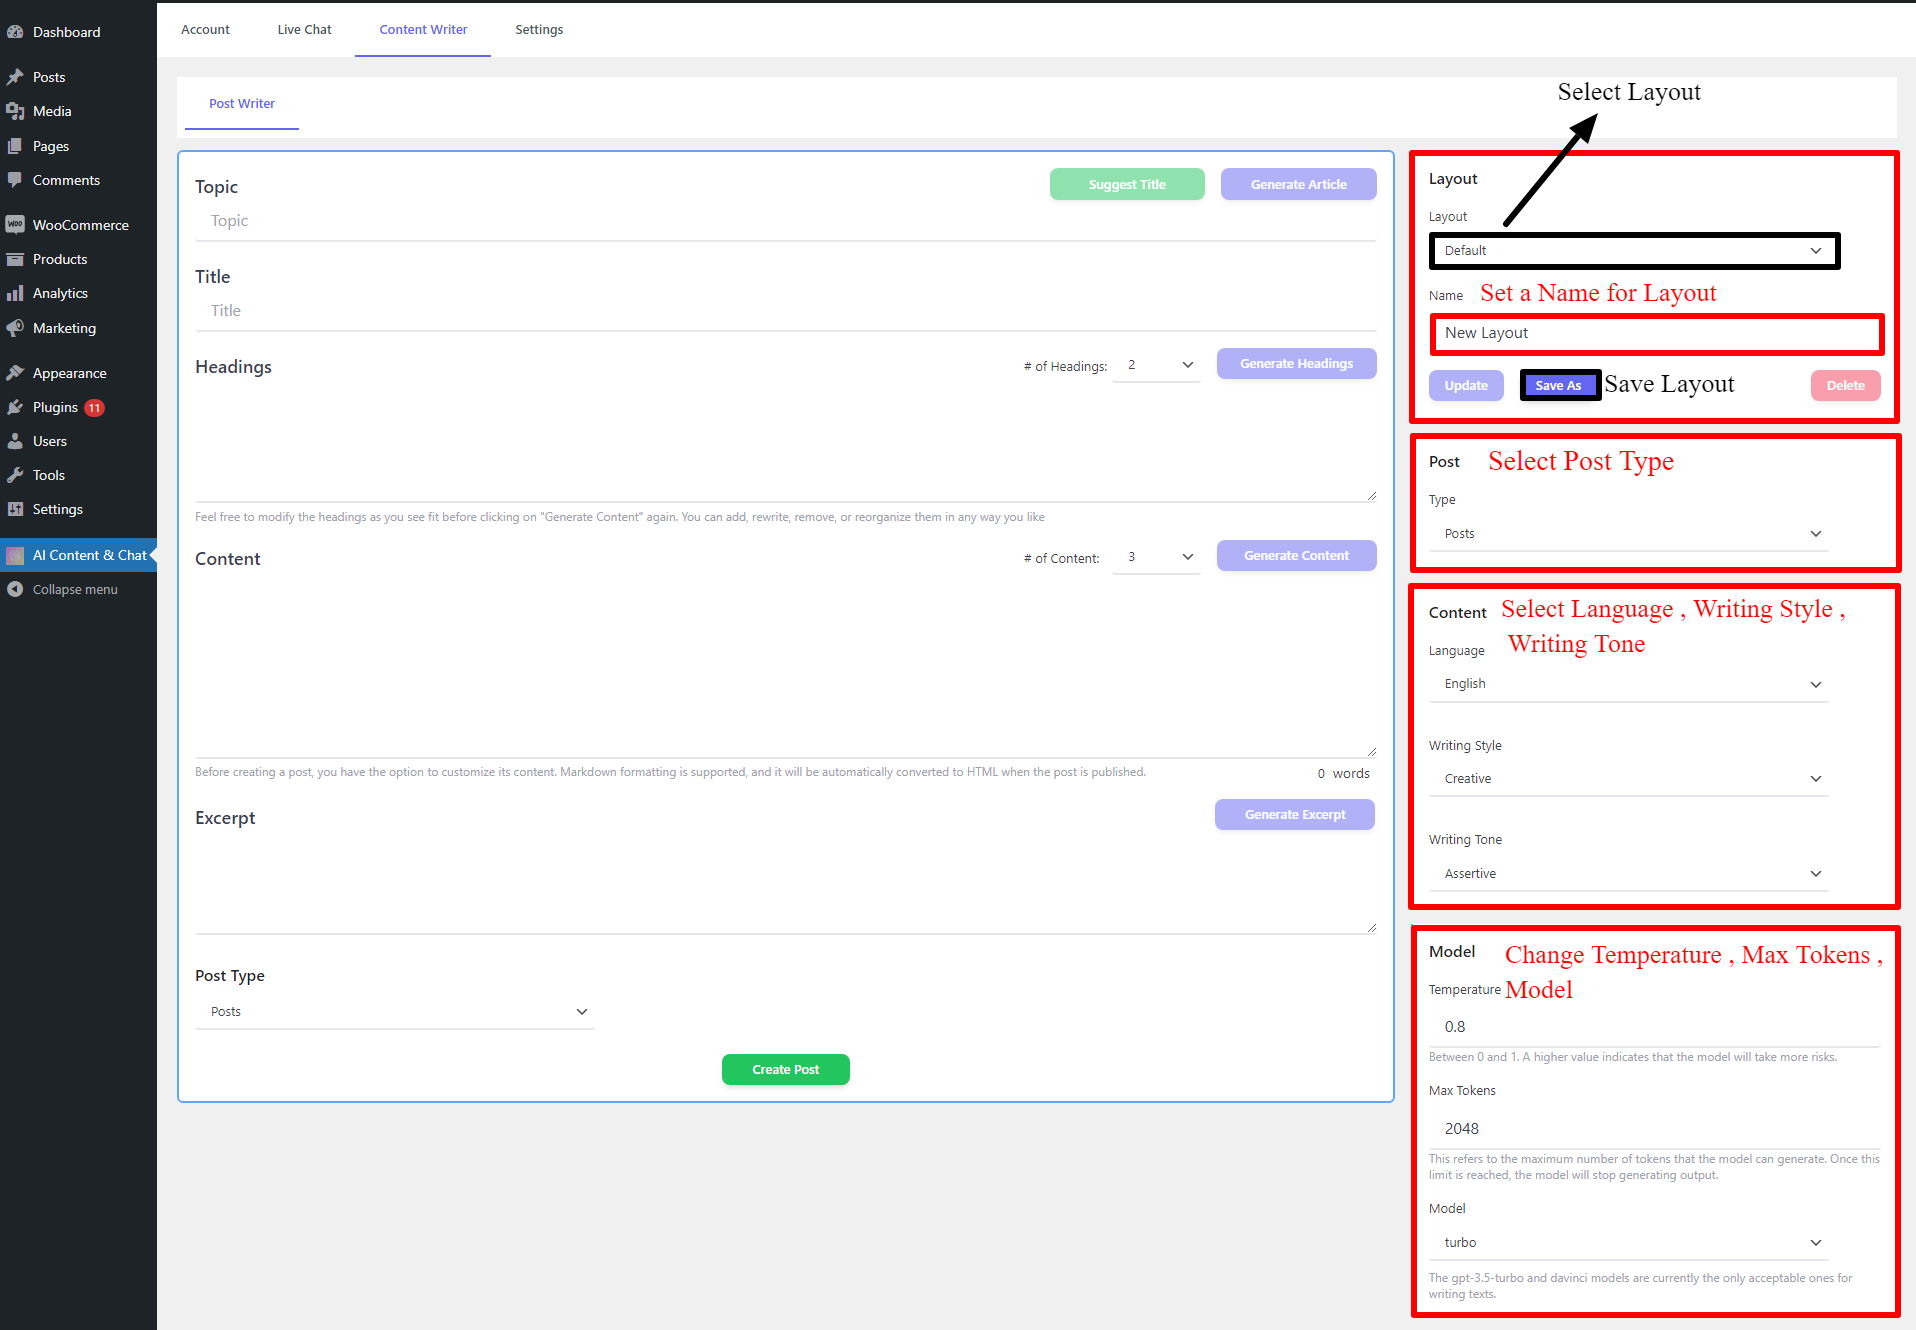
before Generate you Can Change Options Like Language, Writing Style, Writing Tone, Temperature, Max-Tokens, Model, Prompt For Tilte, Prompt For Headings, Prompt For Content, Prompt For Excerpt and After Generate you Can Save Layout
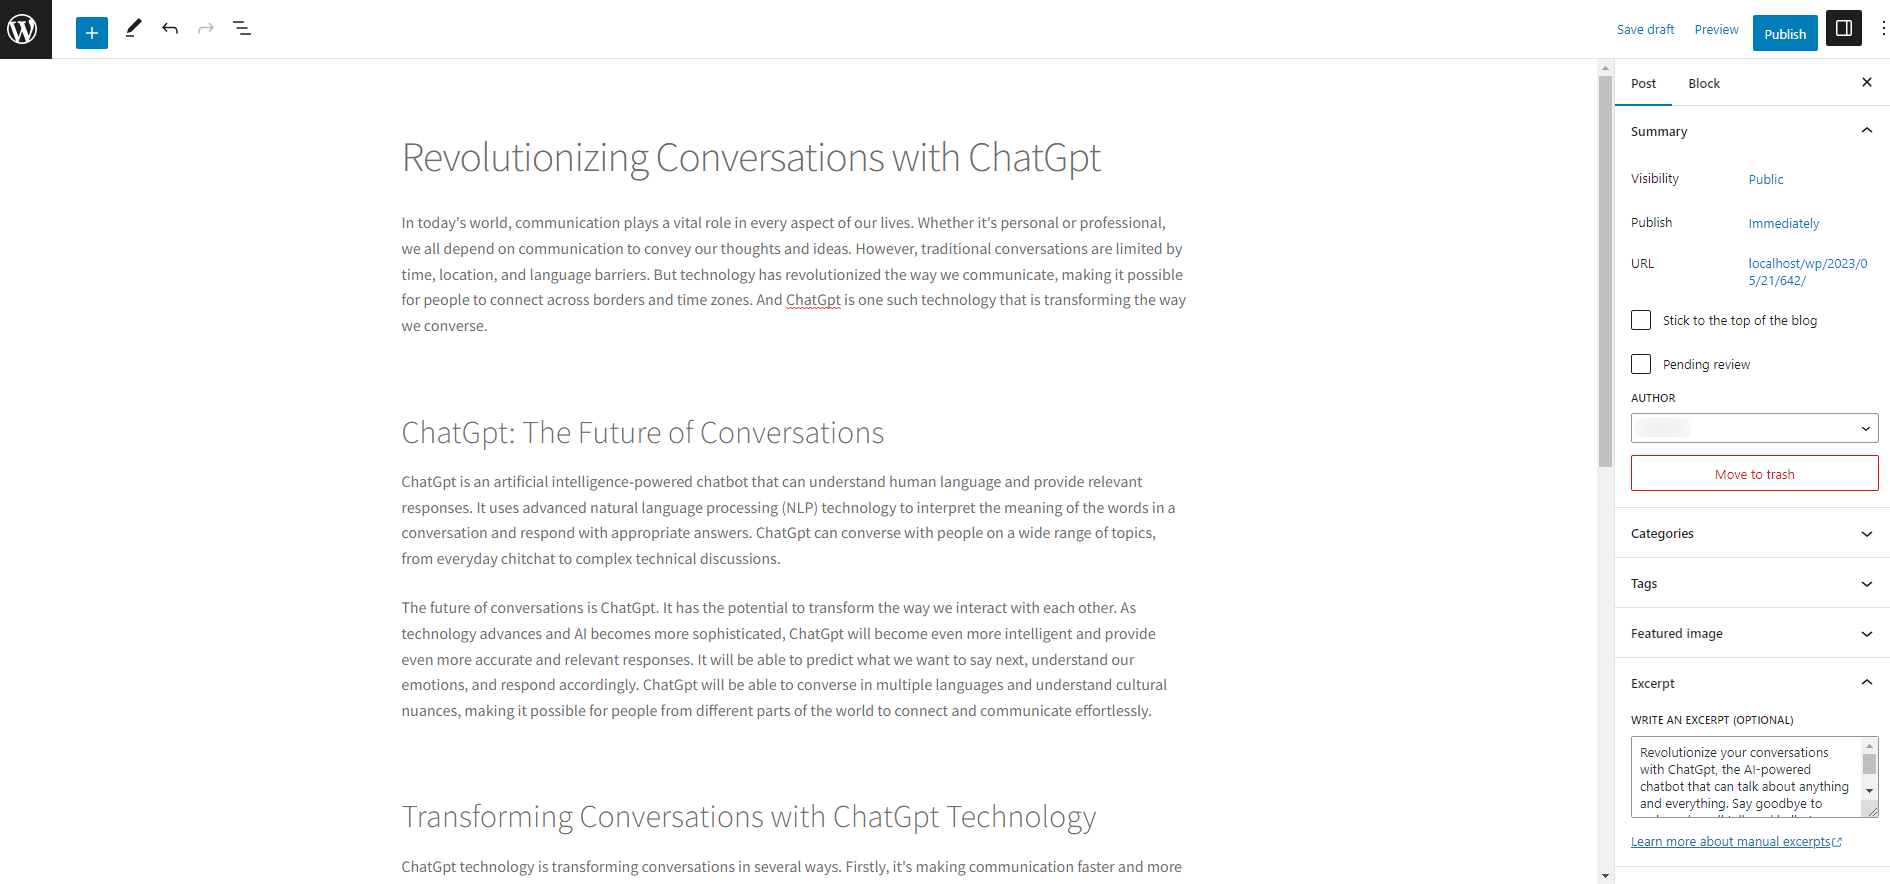
After Generate, Click on the Create Post button to See Your Post in WordPress posts.
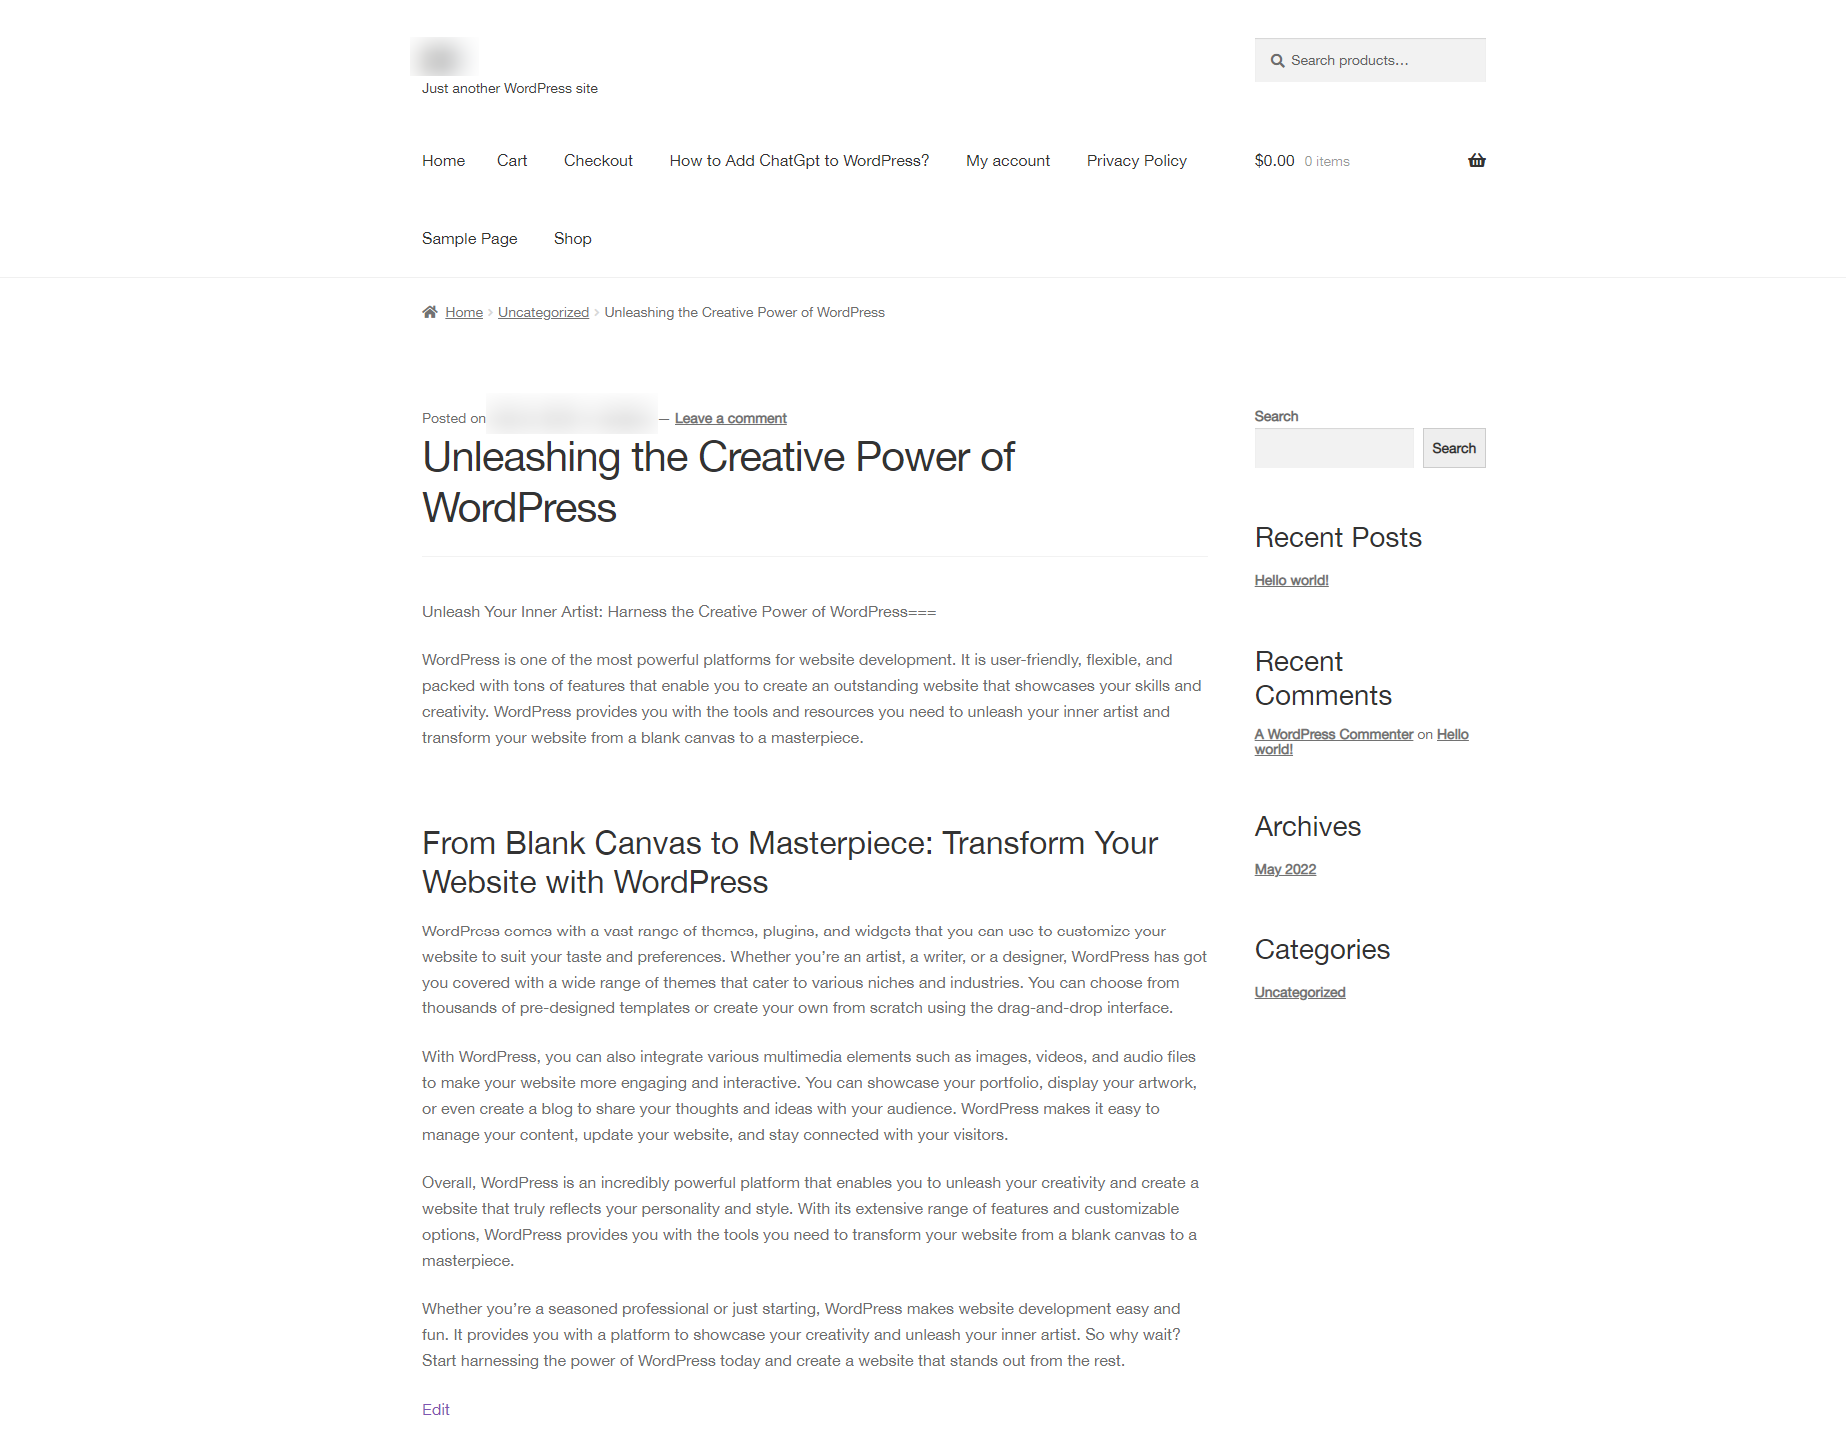
Furthermore, as shown in the image below, you can now view the post on your WordPress.
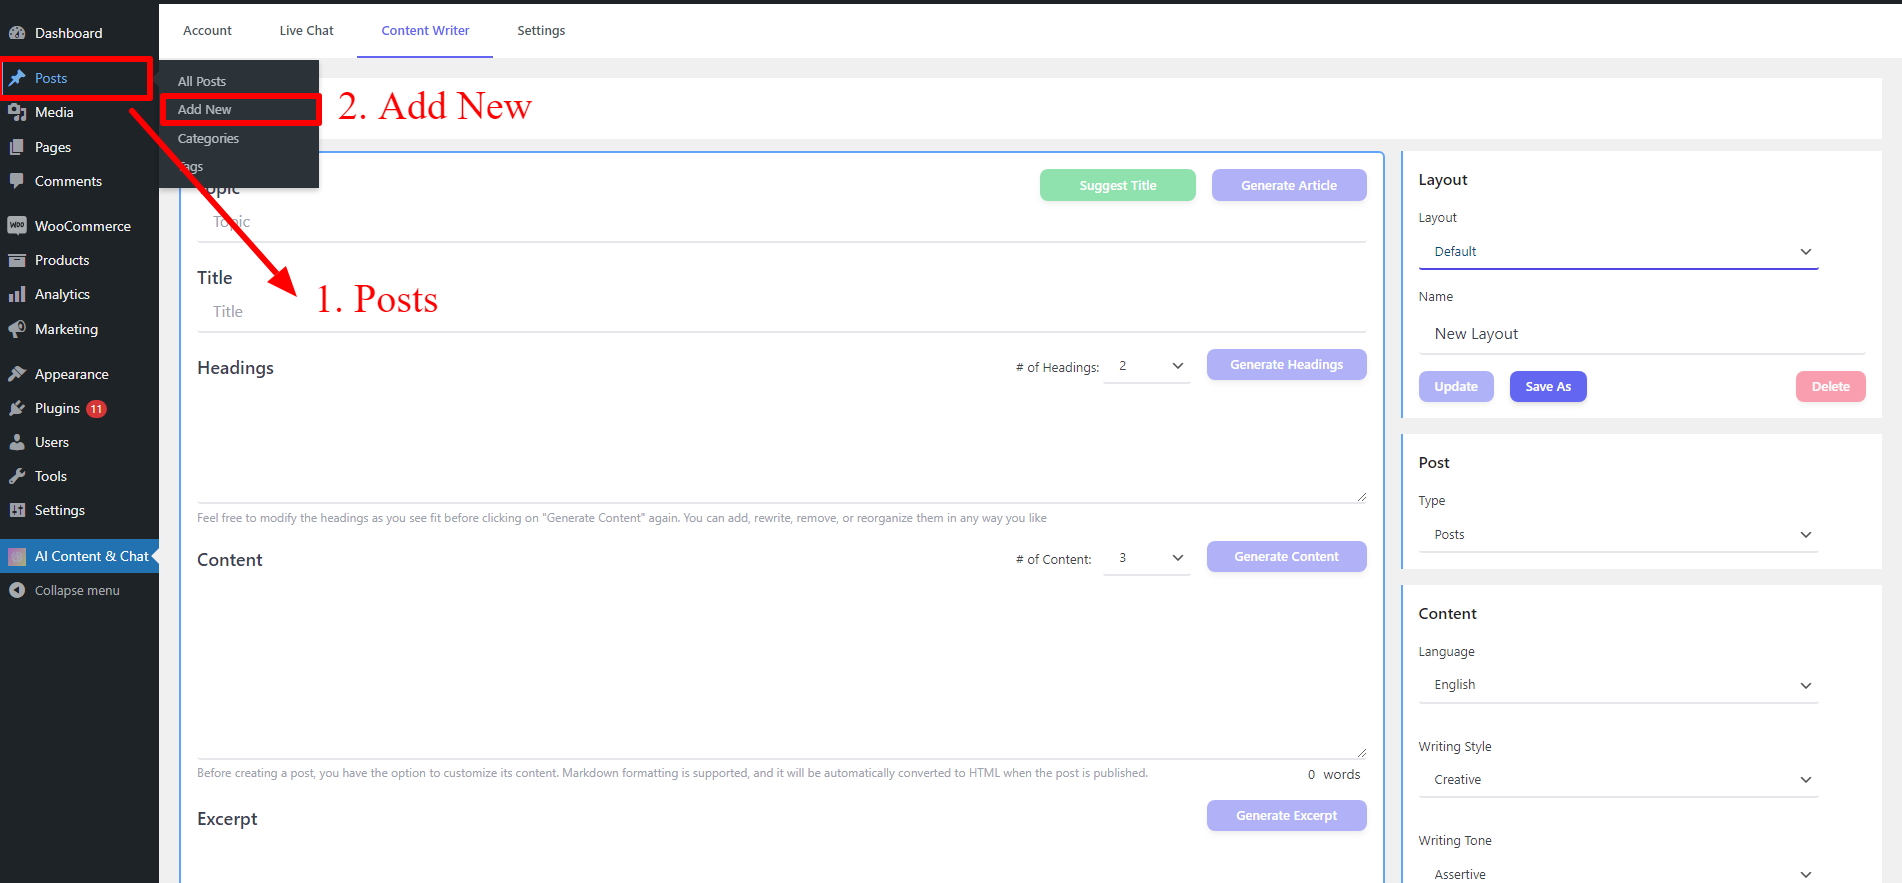
Create Post Block for WordPress
To create a Post Block, you can follow the instructions provided below.
- Navigate to the Posts tab.
- Click on the Add New button to add a new Post.
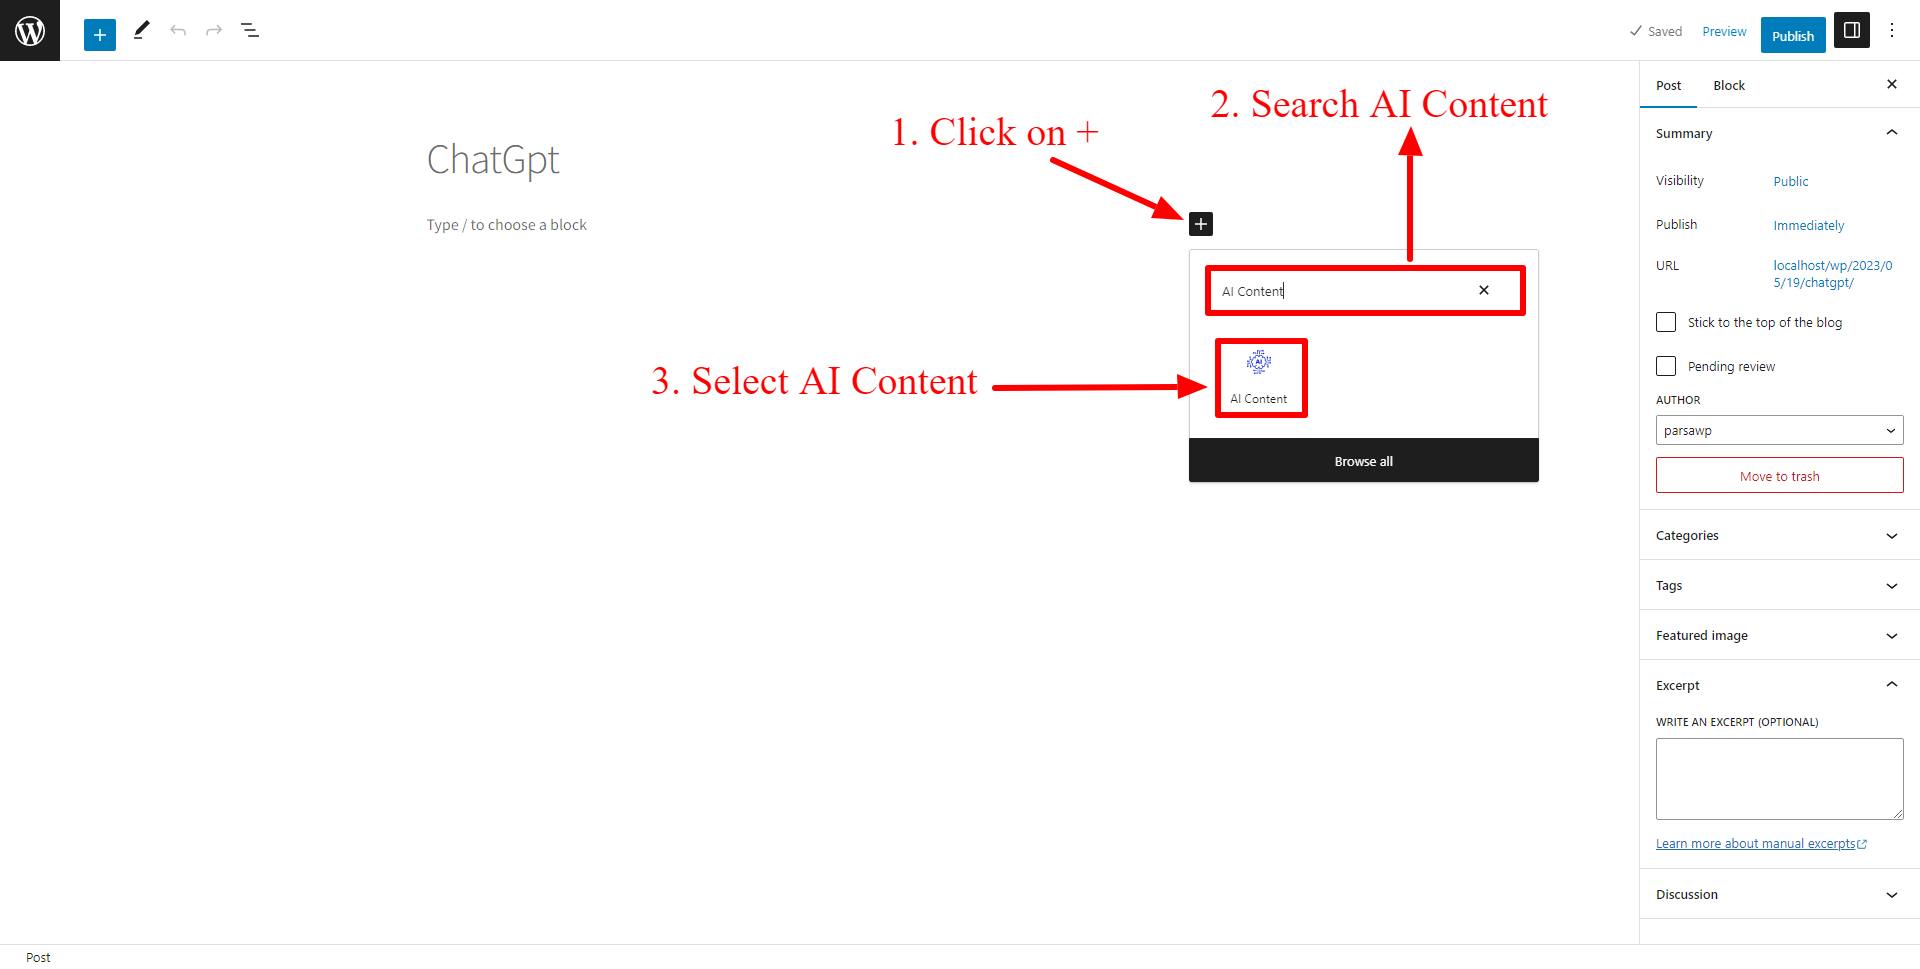
- Click On +.
- Search AI Content From Block, and select AI Content like the below image.
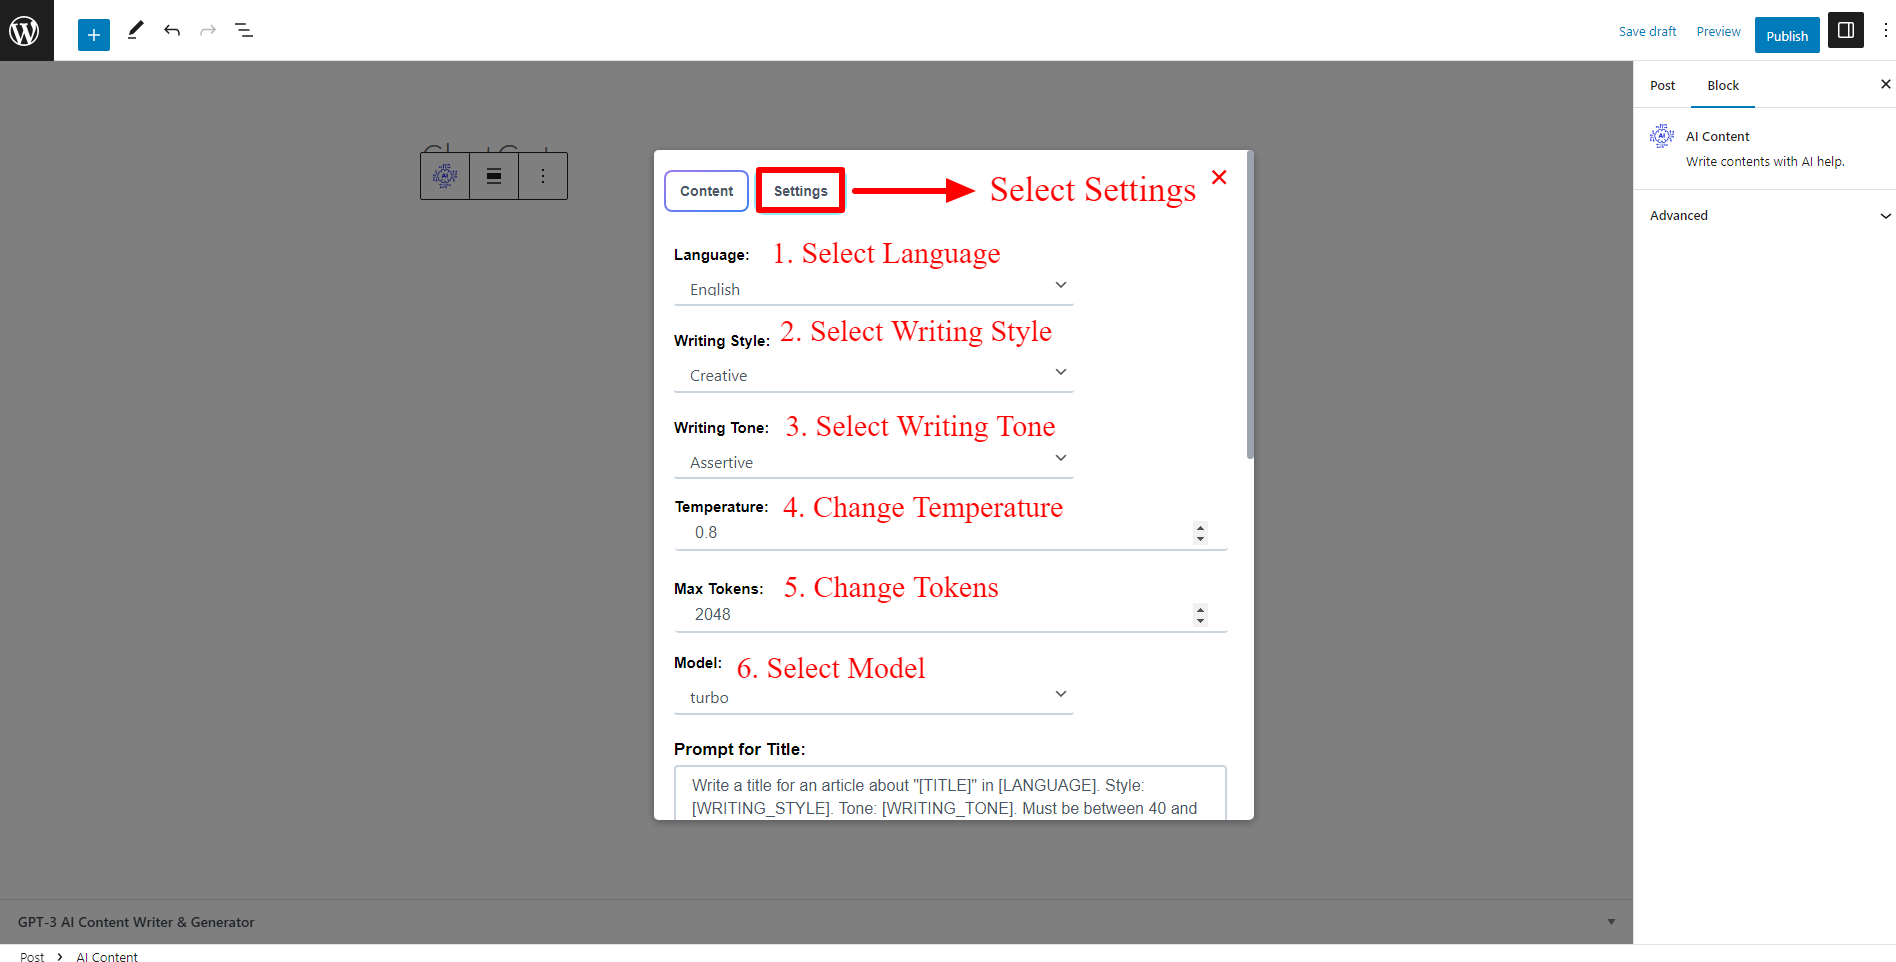
After selecting Ai Content, You Can Select Settings Tab For Change Language, Writing Style, Writing Tone, Temperature, Max-Tokens, Model, Prompt For Tilte, Prompt For Headings, Prompt For Content, Prompt For Excerpt
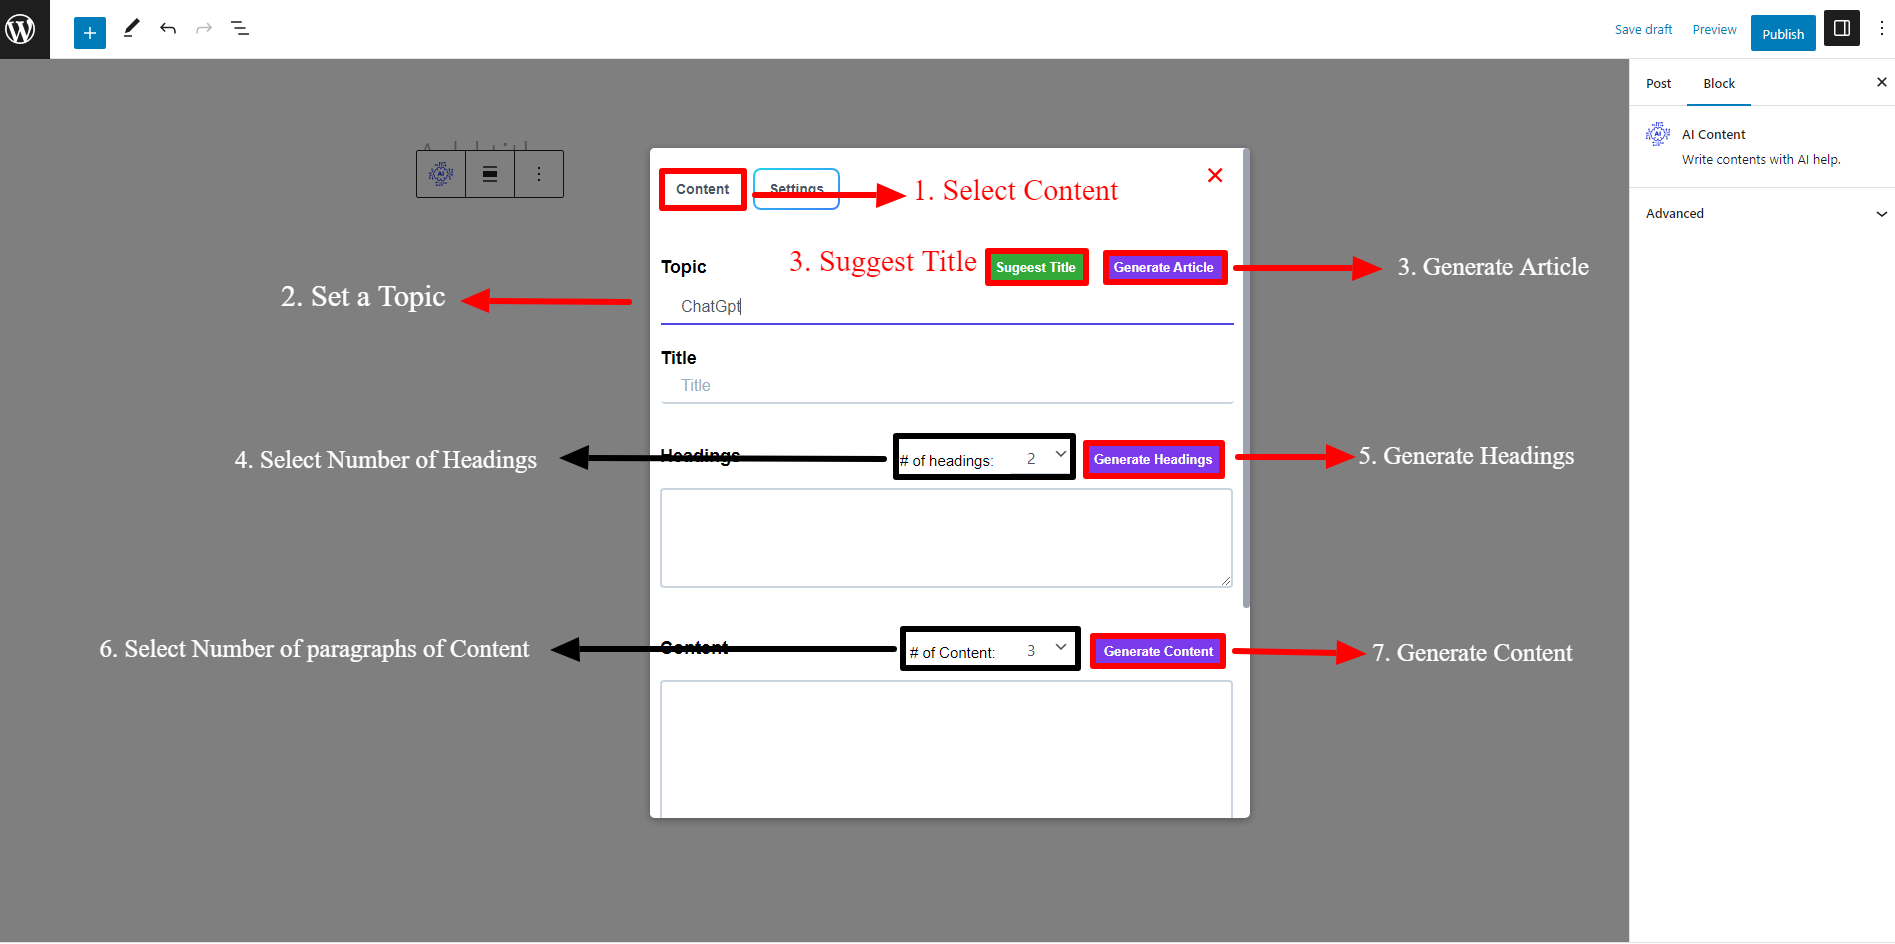
- Set a Topic for the Post and Click on Suggest Title or Generate Article.
- Select the Number of Headings and Click On Generate Headings button.
- Select the Number of Paragraphs of Content and Click On Generate Content button.
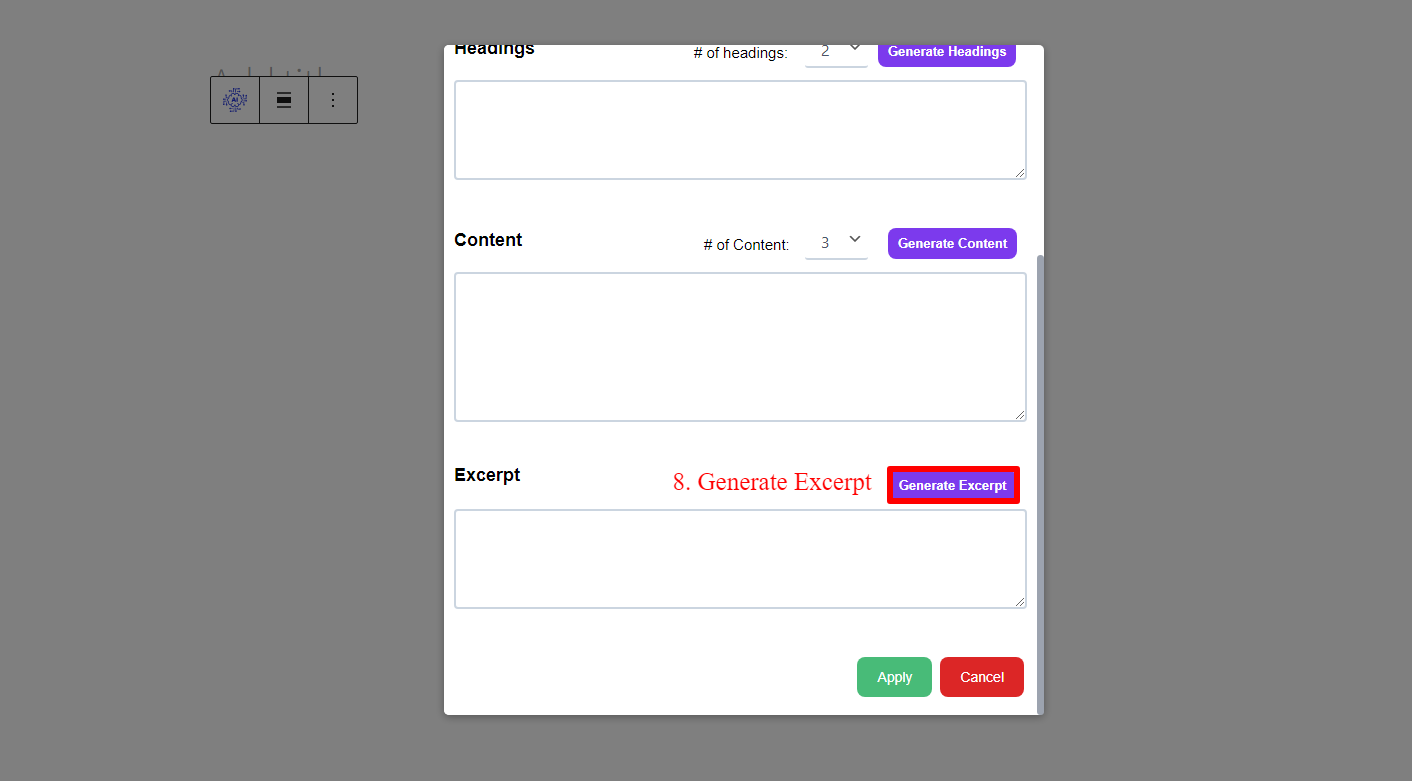
- Click On Generate an Excerpt button.
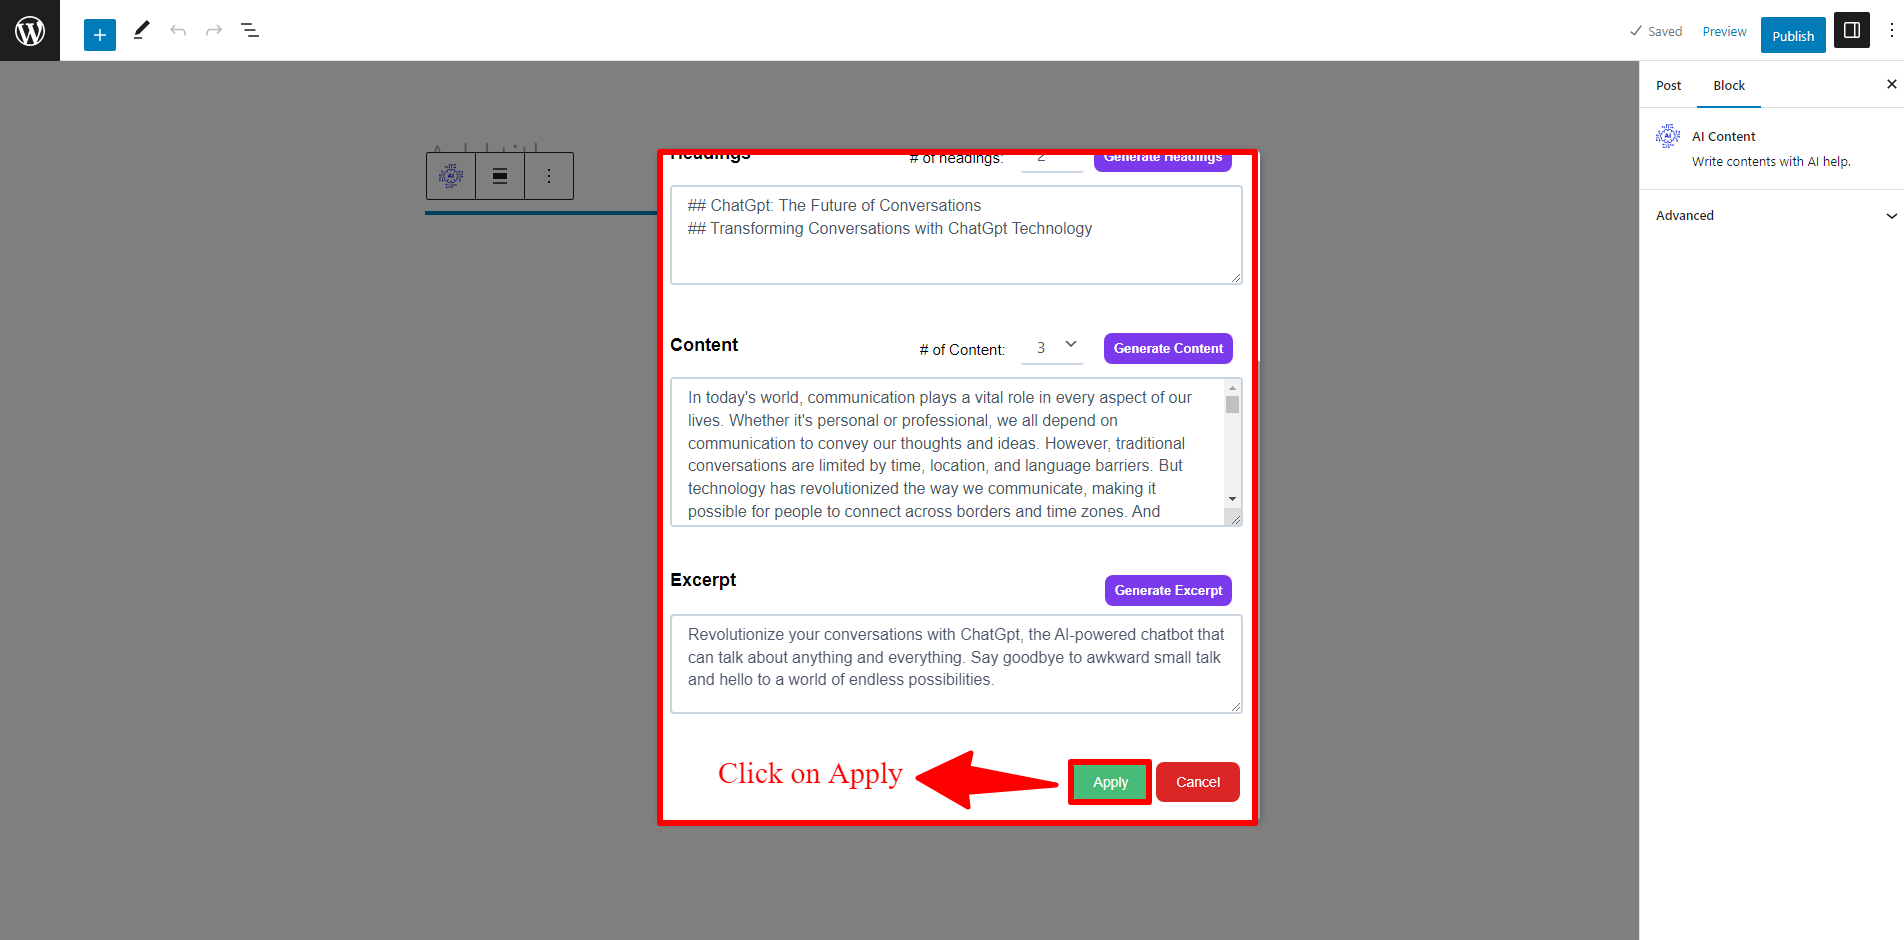
after Generate, Click on Apply Button
Now You Can See the Post On Your WordPress the image below