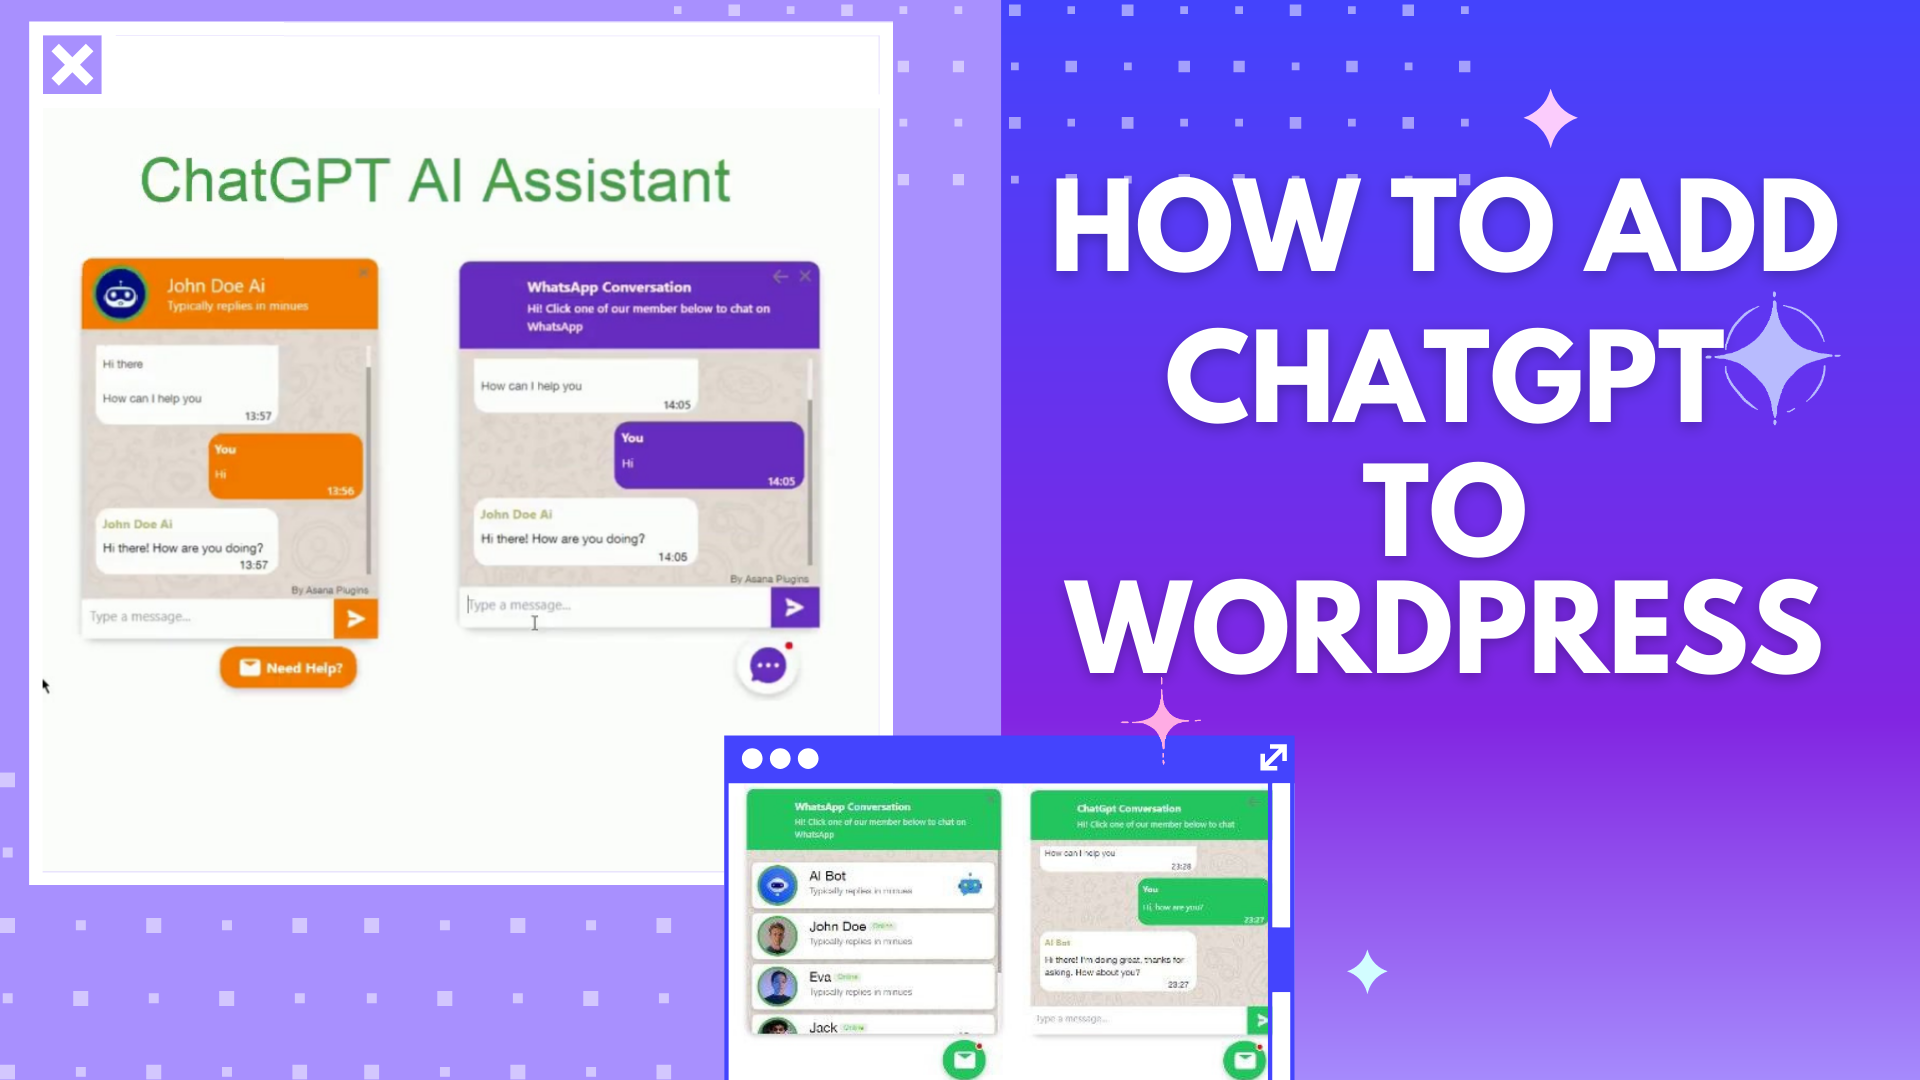
Do you want to add ChatGpt to WordPress? ChatGPT is an advanced language model developed by OpenAI. It is designed to simulate conversation with humans in a natural language, providing accurate and informative responses to questions and prompts. Utilizing cutting-edge machine learning algorithms, ChatGPT has been trained on vast amounts of diverse text data, making it capable of handling a wide range of topics and generating human-like answers. Whether you’re looking to get information about a specific subject, have a conversation, or want to pass the time, ChatGPT is the perfect tool for you. With its ability to understand the context and generate relevant responses, ChatGPT is revolutionizing the way people interact with AI technology.
In this article, you will learn how to add a ChatGpt to your website in less than 2 minutes.
Why Add ChatGPT to WordPress?
- Improved user experience: ChatGpt can enhance user experience by providing personalized responses and addressing inquiries in real time.
- Automated customer support: ChatGpt can handle customer inquiries and support requests without the need for human intervention, freeing up resources and streamlining operations.
- Increased engagement: With ChatGpt, you can engage with users conversationally and intuitively, leading to increased engagement and longer visit times.
- Higher conversions: ChatGpt can help to drive conversions by providing targeted and relevant information to users, leading to a higher likelihood of conversion.
- 24/7 availability: ChatGpt can provide round-the-clock customer support and assistance, even outside of regular business hours.
Overall, adding ChatGpt to your website can improve user satisfaction, drive conversions, and enhance the overall efficiency of your operations.
What is ChatGPT?
ChatGPT is a state-of-the-art language model developed by OpenAI. It uses AI to analyze text input and generate natural-sounding responses. The model has been trained on a massive amount of data, including books, articles, and online conversations, which allows it to generate responses that are similar to human-written content.
What is AI chatbot and OpenAI?
AI chatbots are becoming increasingly popular across different industries as they offer an efficient and cost-effective way of providing customer support and handling various business operations. One of the primary advantages of chatbots is their ability to handle large volumes of inquiries and interactions simultaneously without the need for human intervention. With their natural language processing and machine learning capabilities, chatbots can quickly analyze and interpret user requests, providing accurate and relevant responses in real time.
In addition to their efficiency, AI chatbots also offer a more personalized and engaging experience for users, as they can be programmed to learn from previous interactions and adapt to users’ preferences and behaviors. This not only helps to improve the quality of interactions but also enhances customer satisfaction and loyalty. As AI technology continues to evolve, it is expected that chatbots will become even more sophisticated, capable of performing complex tasks and handling more nuanced interactions with human users.
OpenAI is also known for its commitment to openness and transparency in AI research. The organization believes that open collaboration and sharing of knowledge are essential for advancing the field of AI and ensuring that AI technologies are developed in a safe and responsible manner. To this end, OpenAI has made several of its AI tools and models available to the public, including GPT-3, which is one of the most advanced language models in the world. Through its research and initiatives, OpenAI is playing a vital role in shaping the future of AI and promoting the development of safe and beneficial AI systems.
How to add a ChatGpt plugin to your WordPress website?
In this article, we will provide you with a detailed guide to adding ChatGpt Plugin to your website easily. To begin with, we will outline the key benefits of using ChatGpt Plugin and explain how it works. Then, we will provide a step-by-step guide to installing and configuring the plugin on your website. Additionally, we will share some best practices for optimizing your chatbot’s performance and improving user engagement. By the end of this article, you will have all the information you need to add ChatGpt Plugin to your website and start enjoying its many benefits.
Are you ready? Let’s dive in.
Installing ChatGpt Plugin in WordPress
Live Chat with ChatGPT is an easy-to-use ChatGPT plugin for WordPress and WooCommerce. It will help you to add a single account or multi-account floating ChatGPT to the website in less than 2 minutes. It provides built-in templates for a chat that speed up the workflow of adding support buttons to the website.
Create an Account in OpenAi
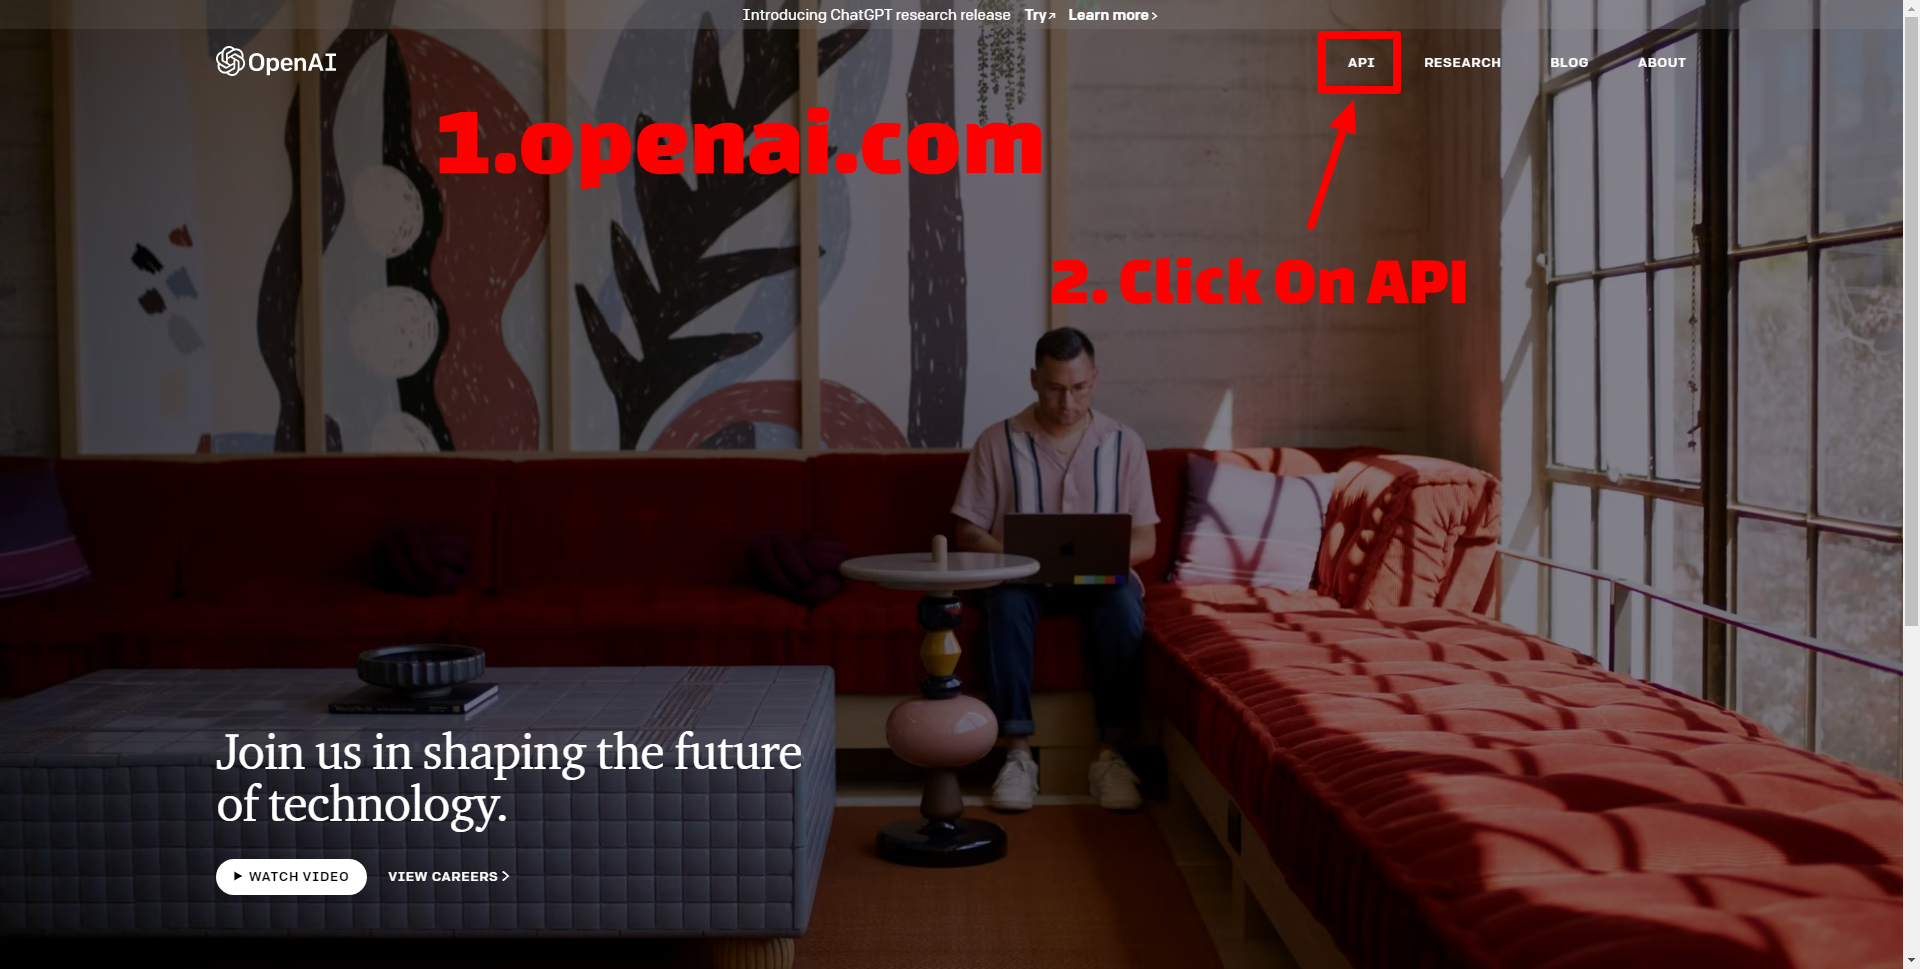
Firstly, you must create an Account in OpenAi. Once you have created an account, you can proceed to the next step, which is setting up the ChatGpt API. This involves generating an API key allowing your chatbot to access the ChatGpt language model. After you have obtained the API key, you can then integrate the ChatGpt API with your chatbot platform of choice.
navigate to the API tab, and create an account like the below image.
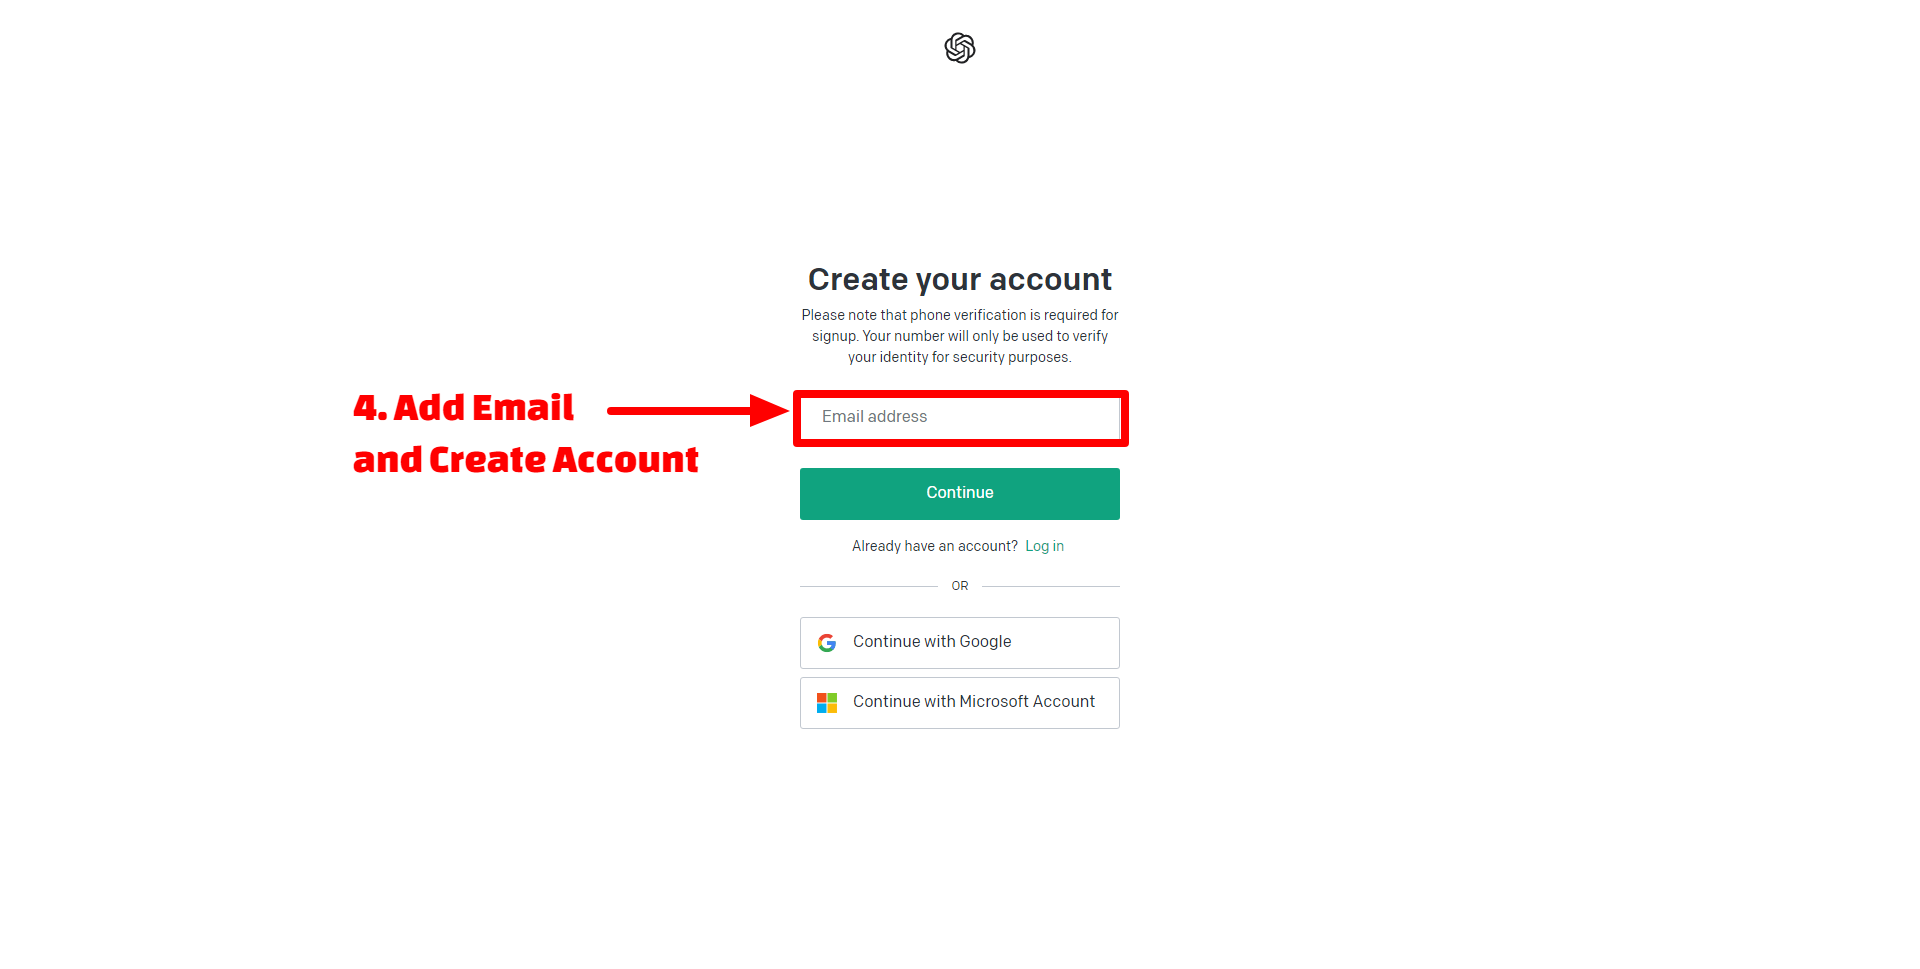
To create an account, Click On Sign Up like the below image.

one of the first steps is to add your email.
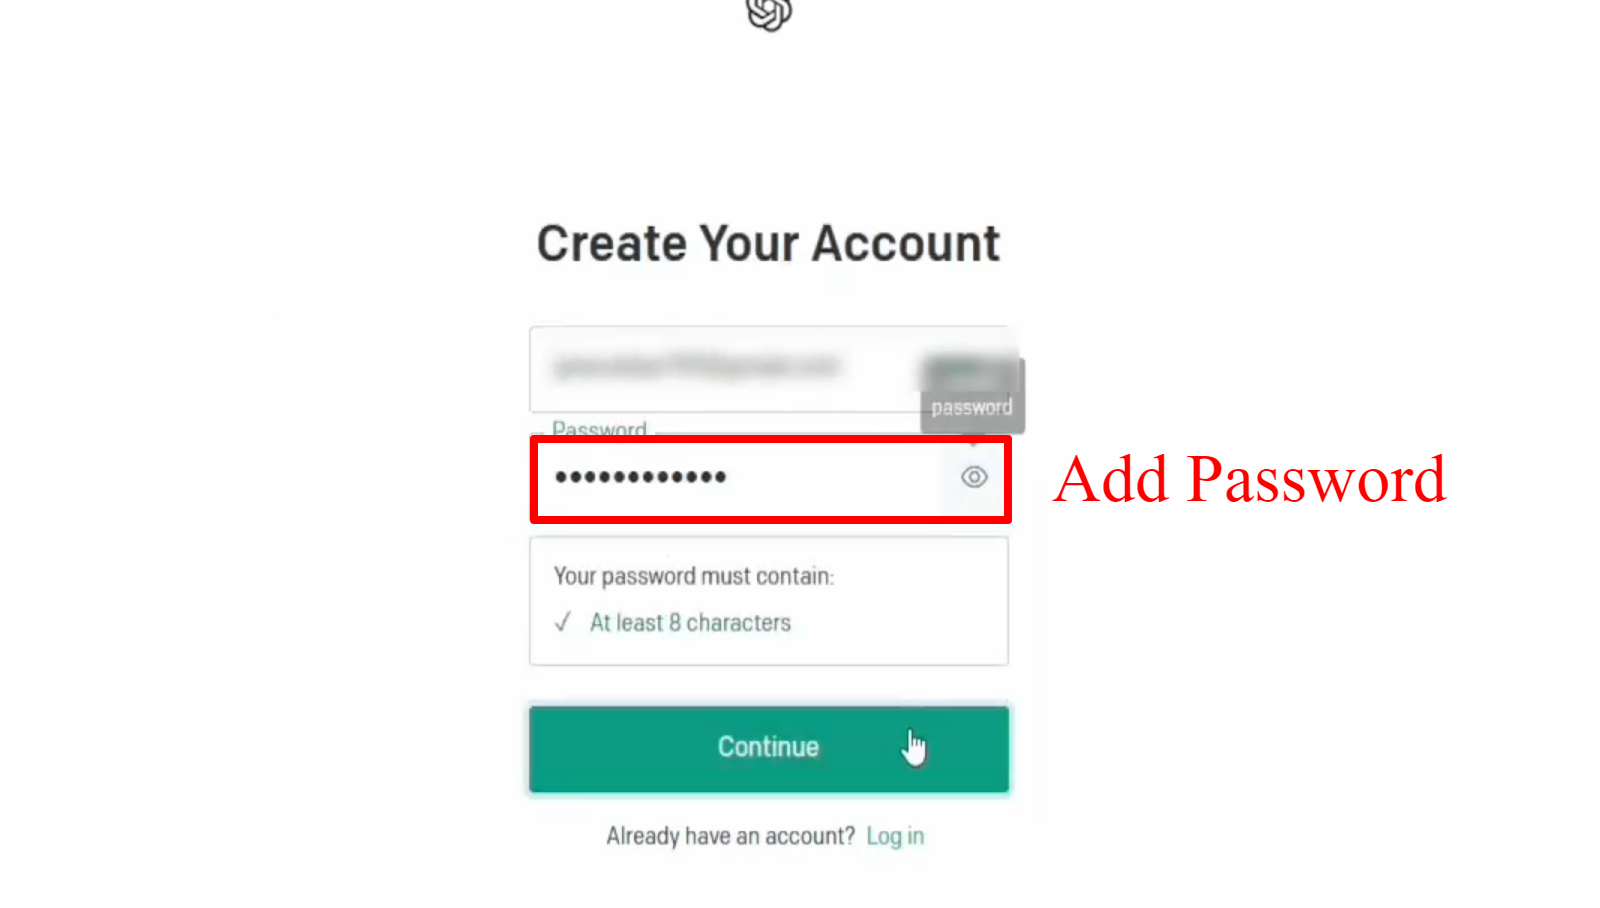
Next, you’ll need to add a password for your OpenAI account. This is an important step to ensure the security of your account and protect your sensitive information.
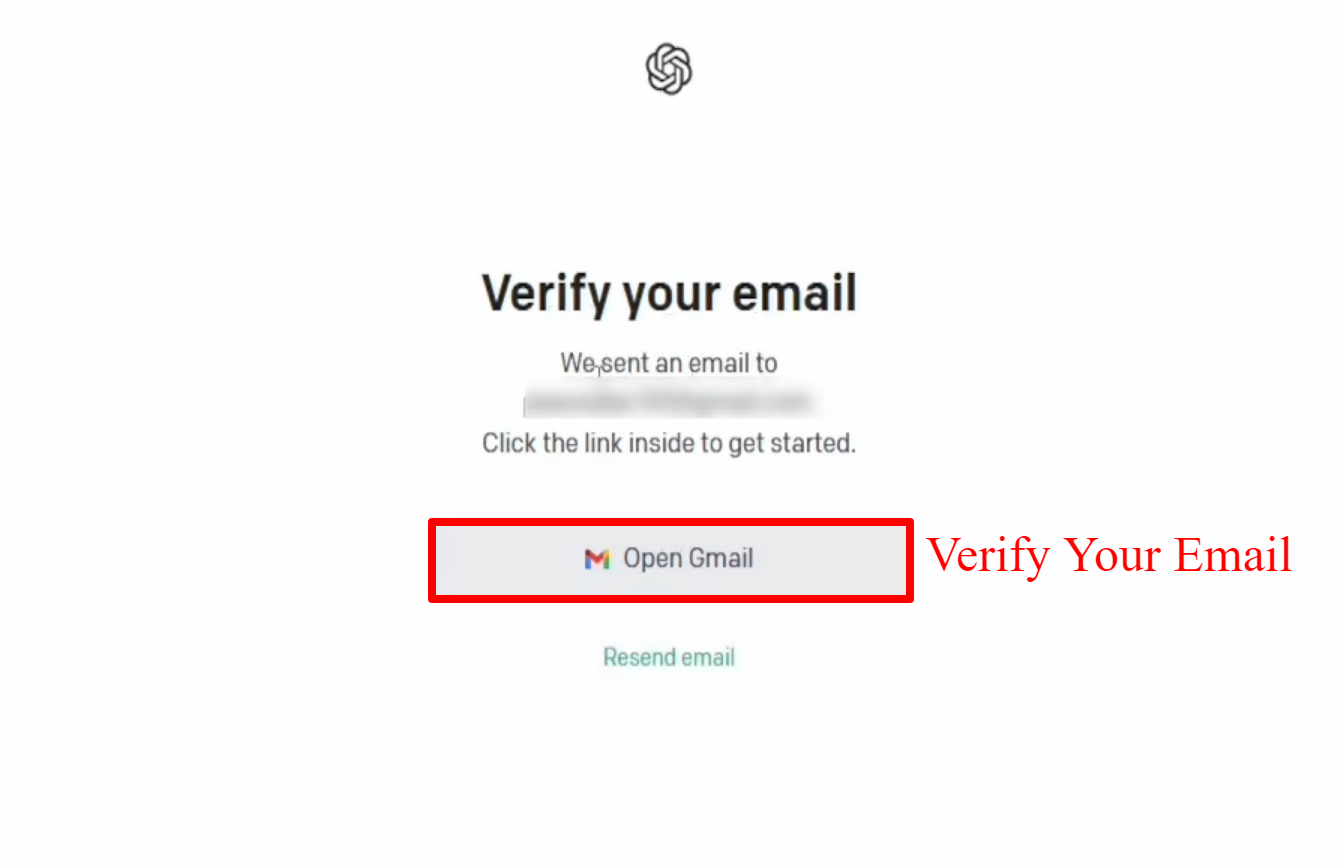
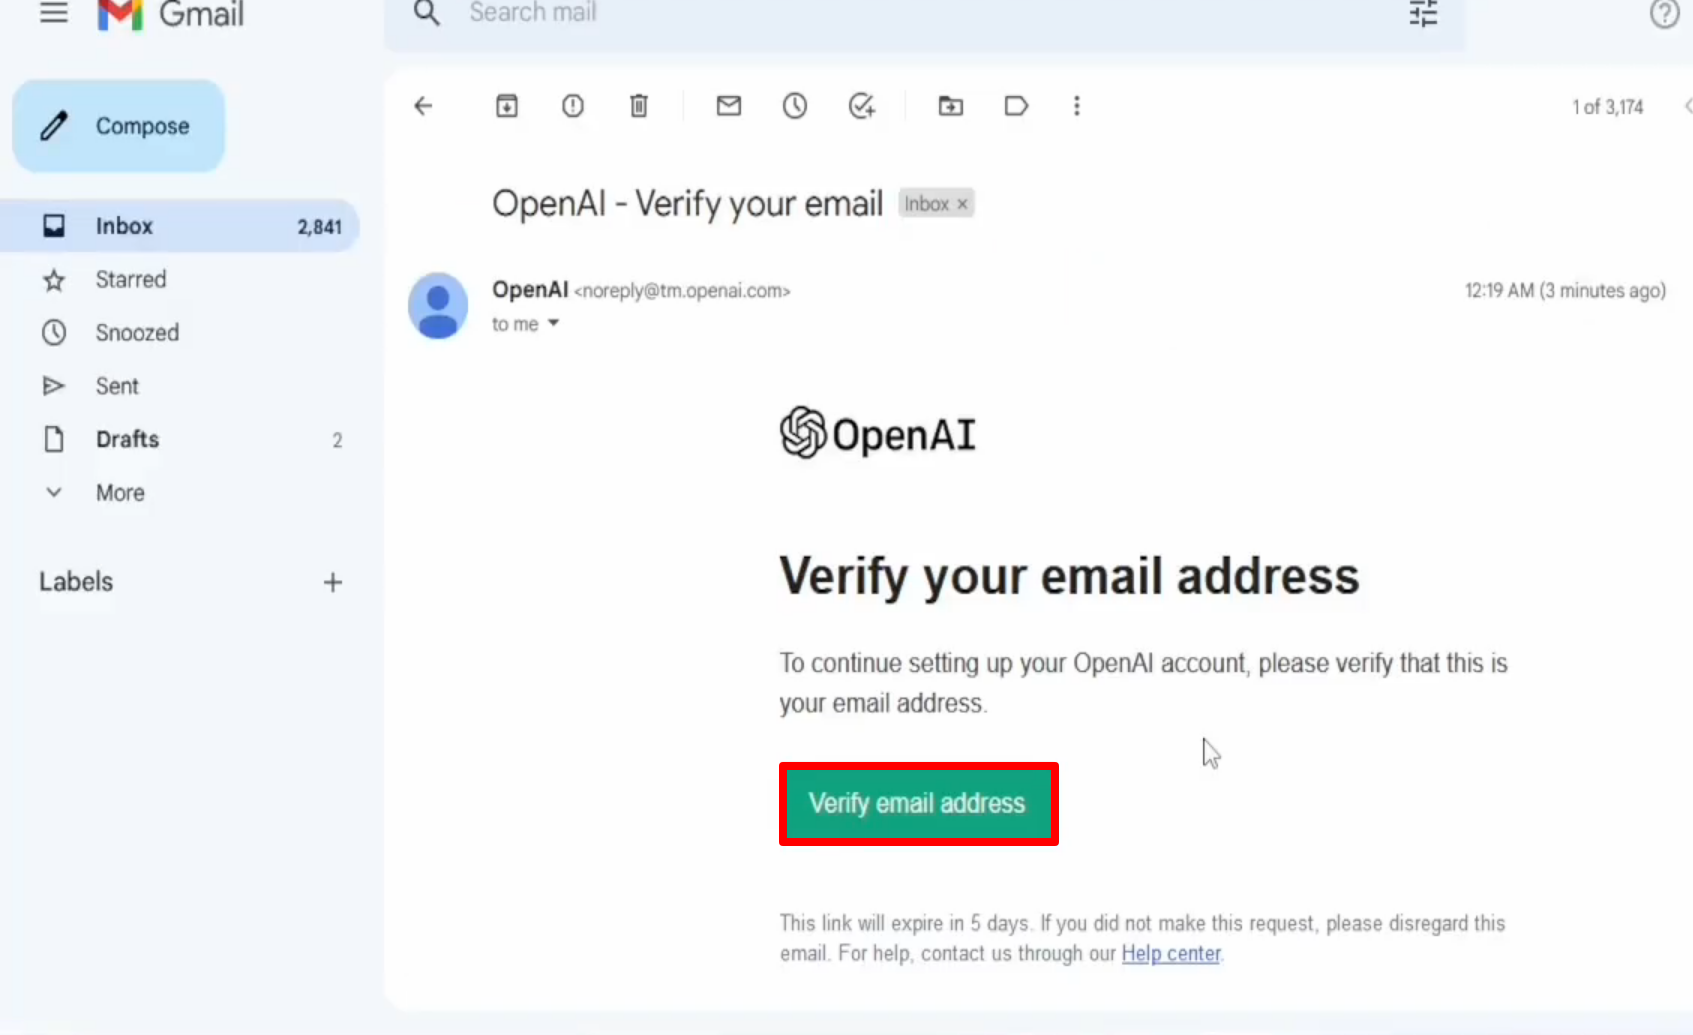
After adding your email, the next step is to verify it.
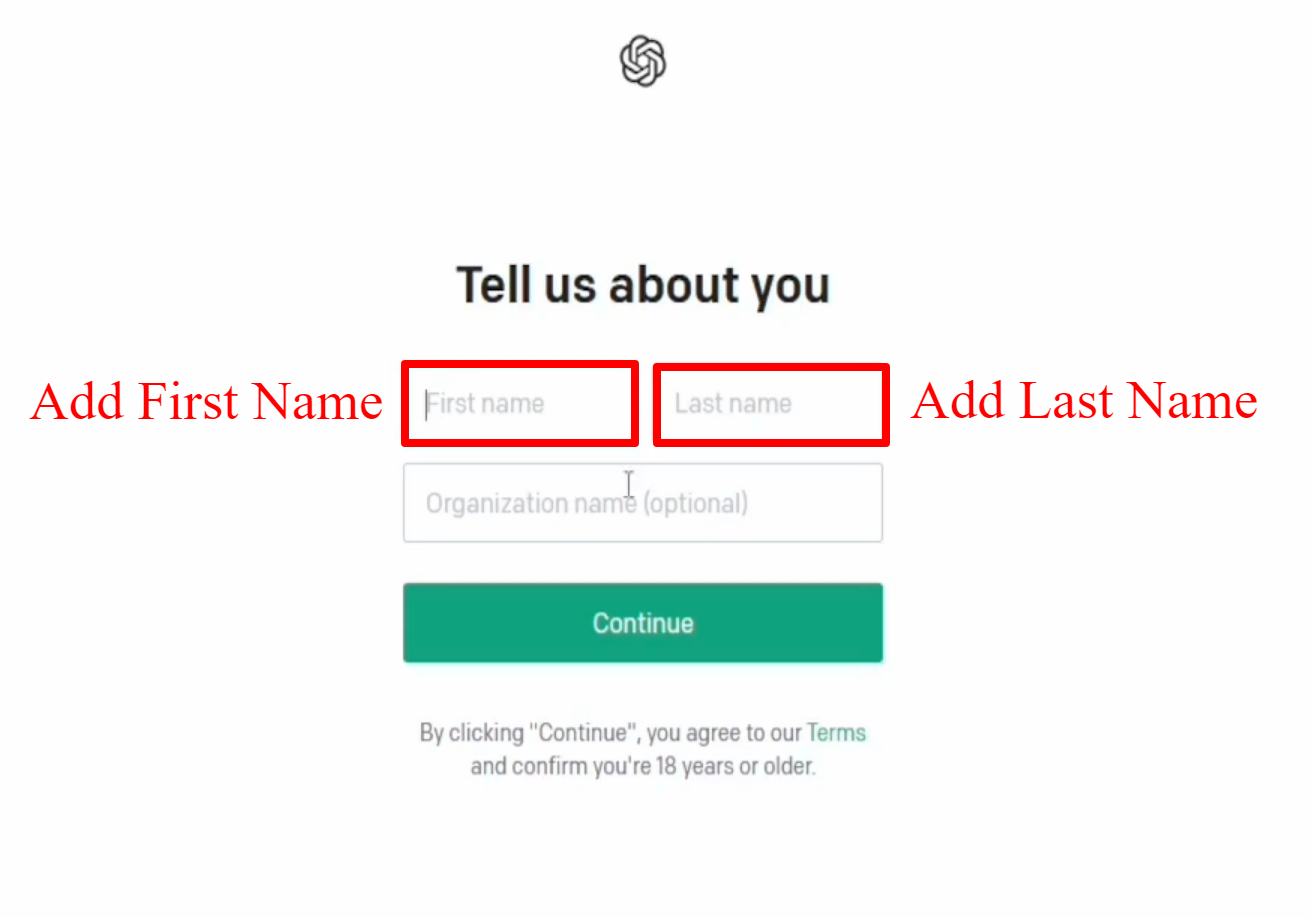
Another important step in setting up your OpenAI account is to add your first name and last name.
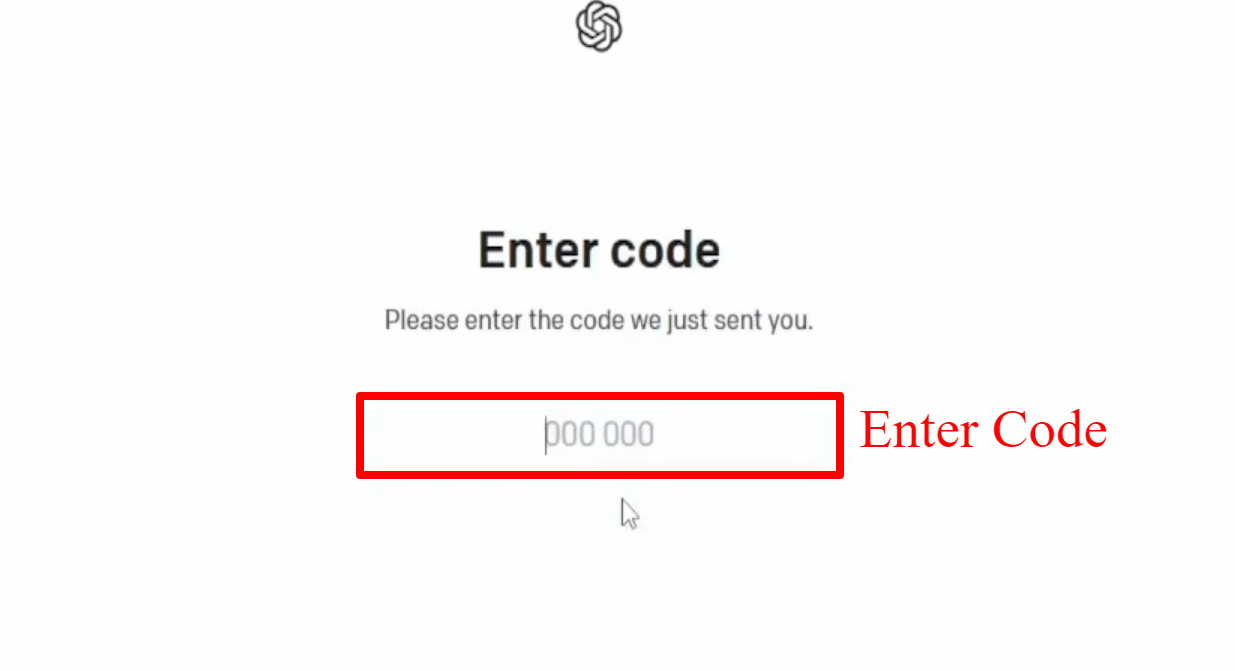
Firstly, you will need to enter your phone number in the designated field and select your country code. Secondly, OpenAI will send a verification code to your phone via SMS,

which you will need to enter into the verification field. Once you have entered the code, your phone number will be verified
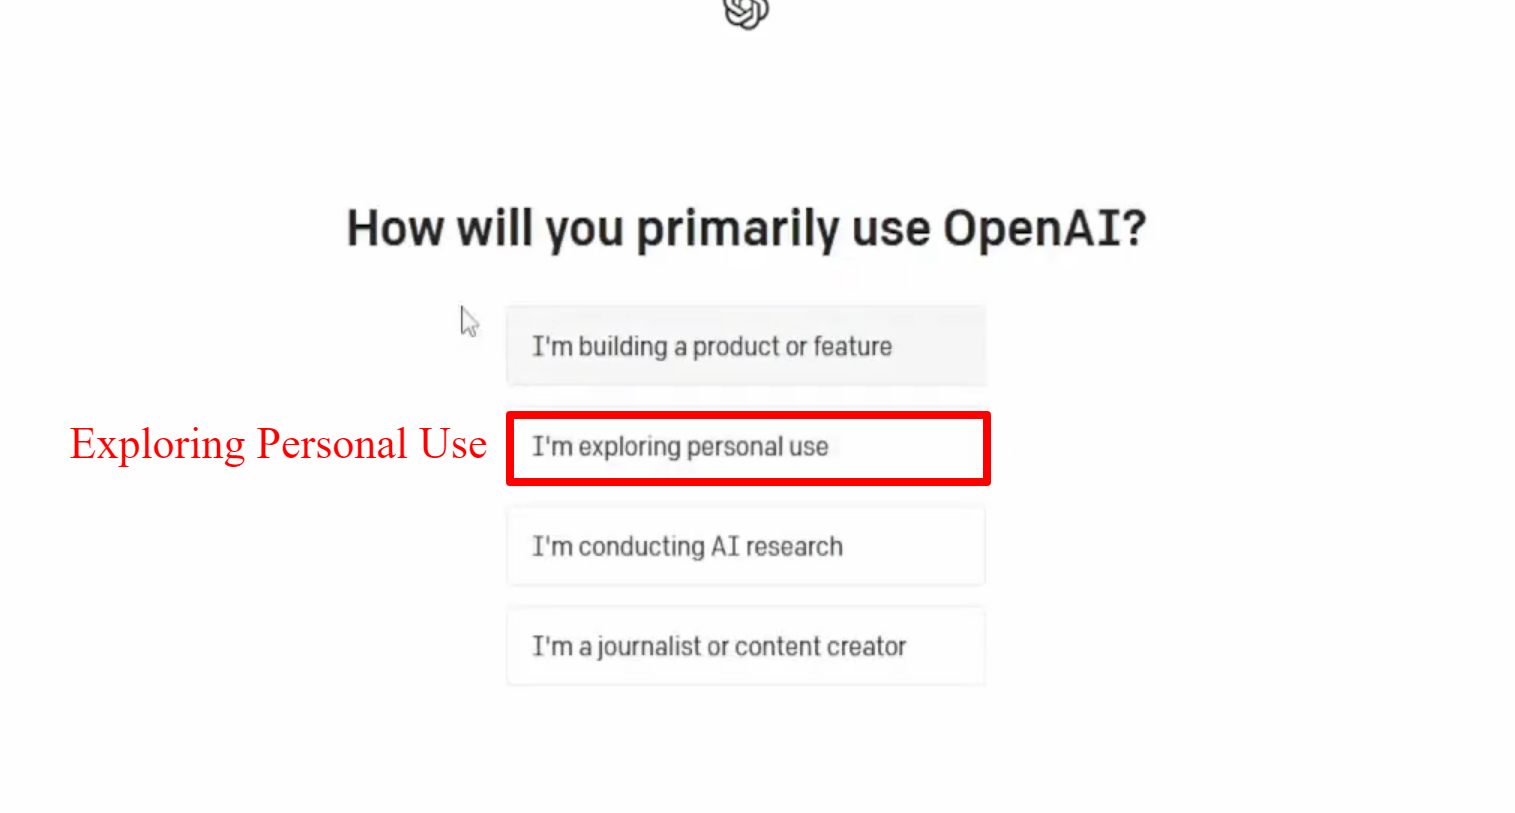
Selecting the ‘Exploring Personal Use’ option is an important step in setting up your OpenAI account,
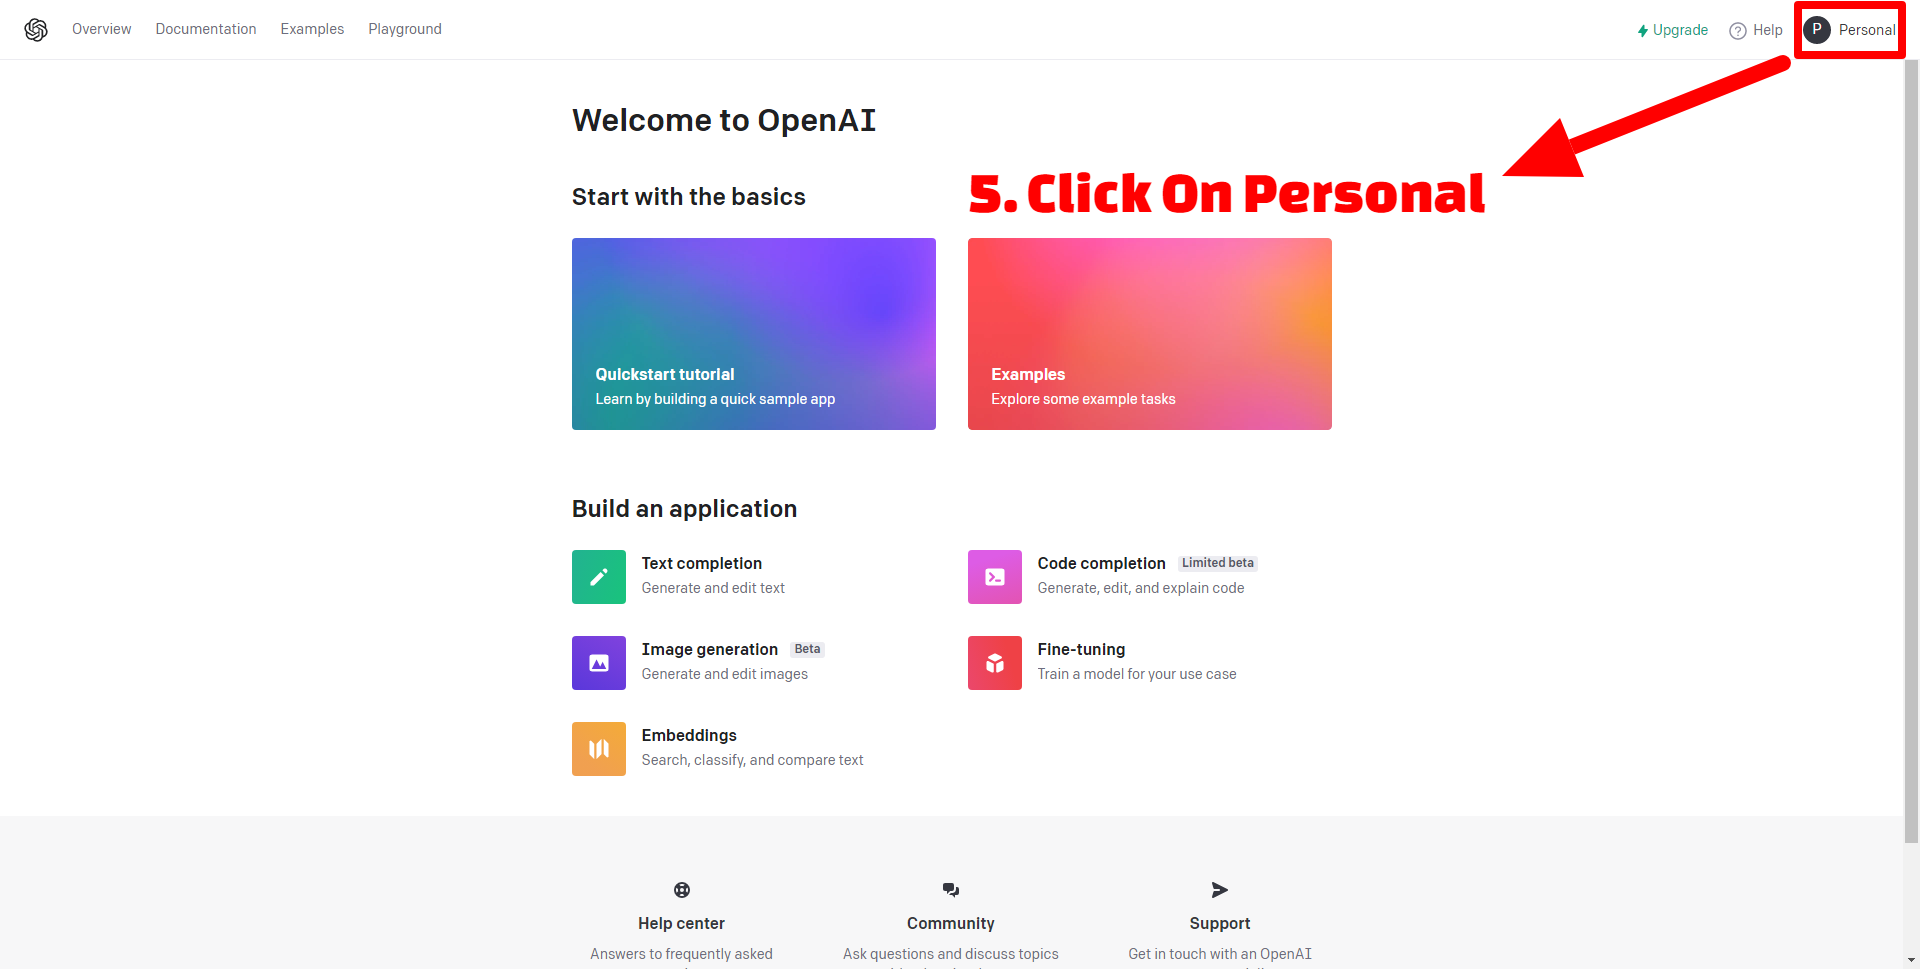
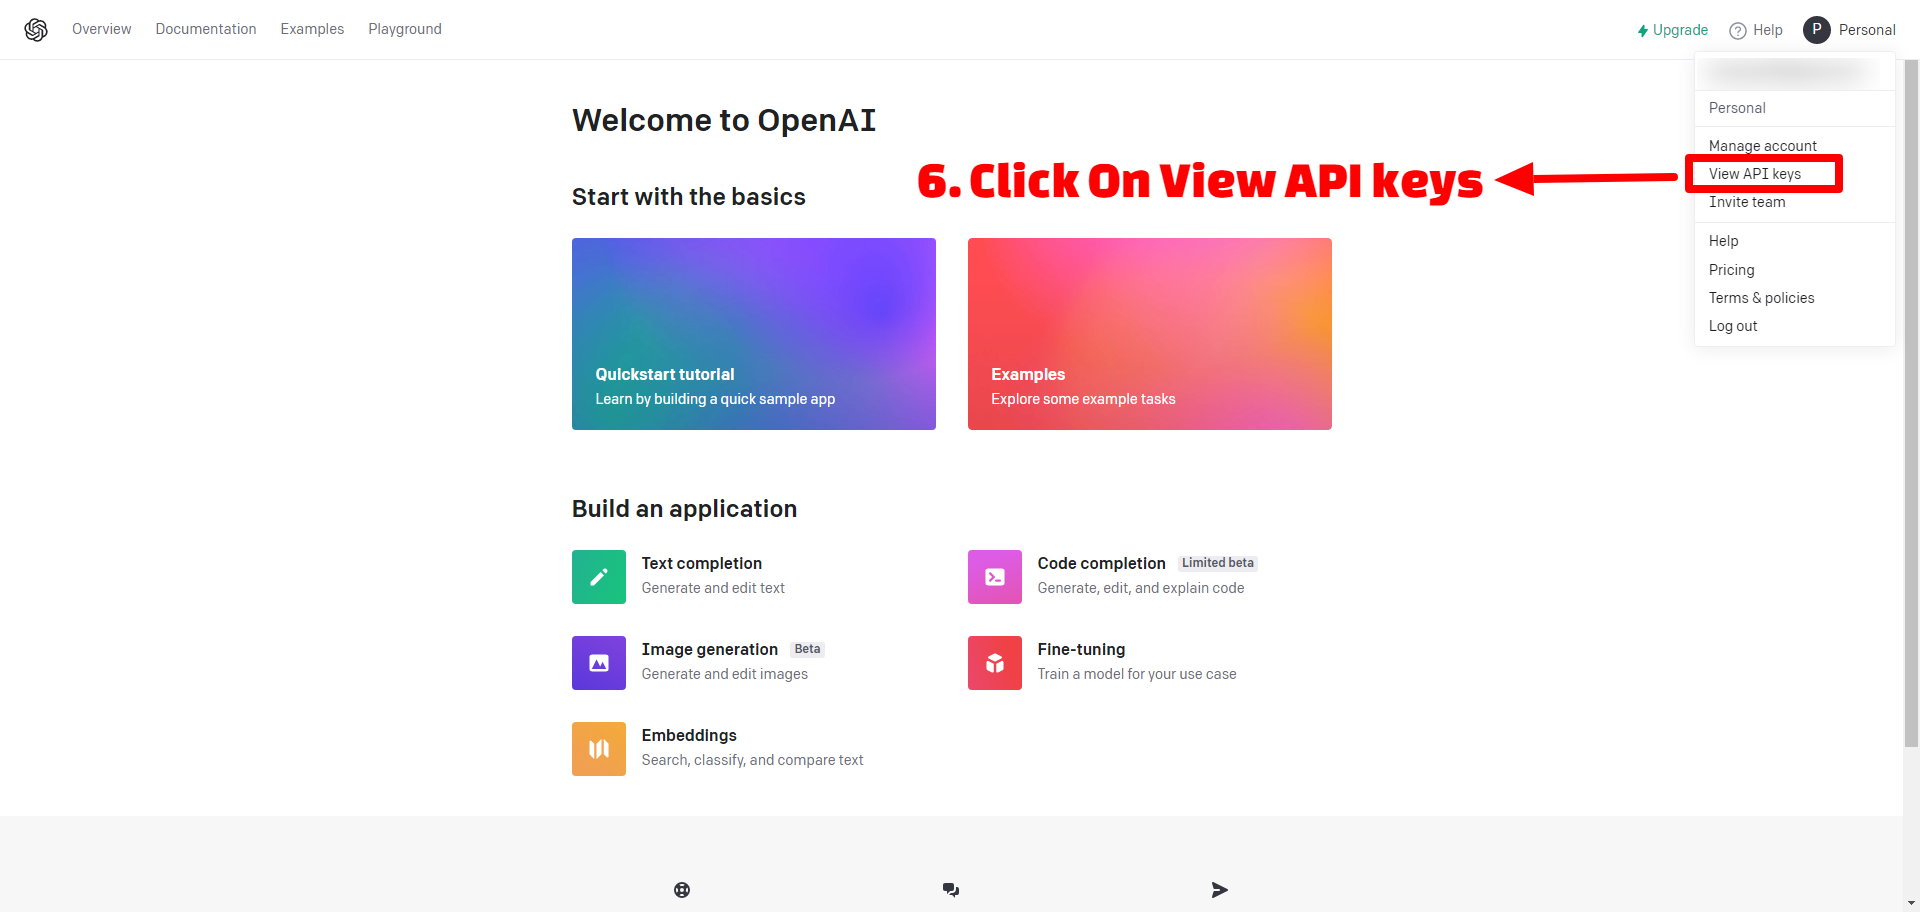
After creating an account in the previous step, navigate to the Personal tab.
After navigating to the Personal tab, click on the View Api Keys button.
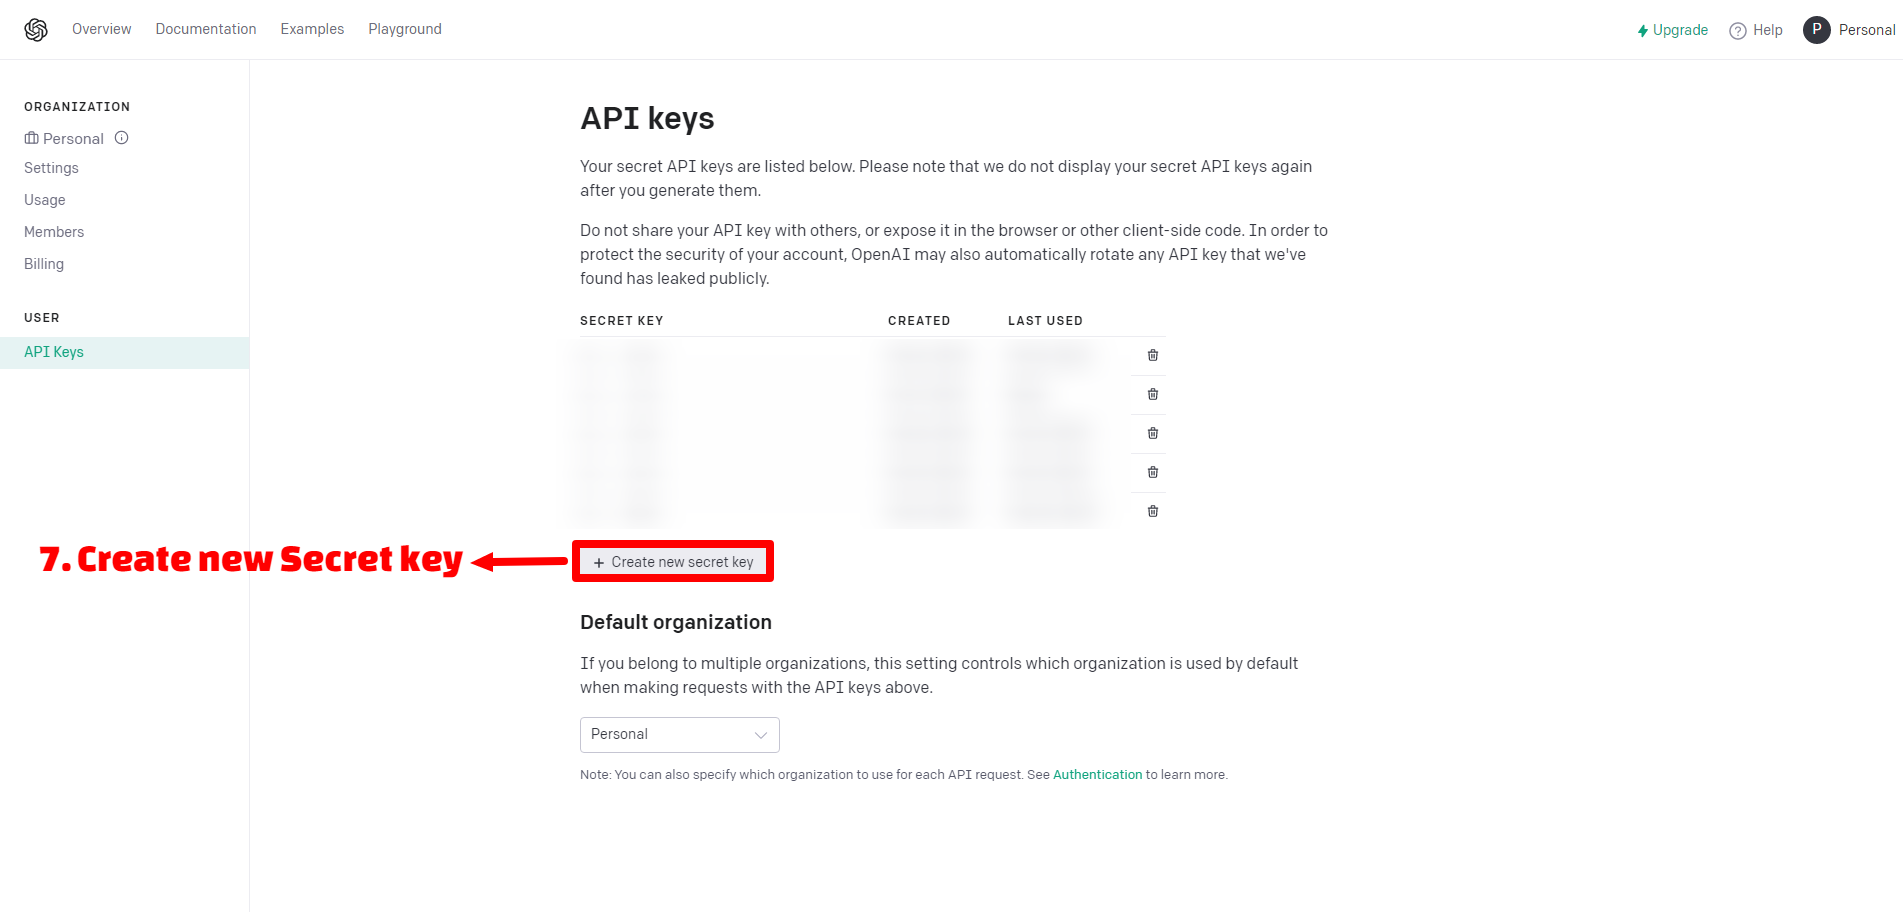
Now you can create a new Secret Key like the below image.
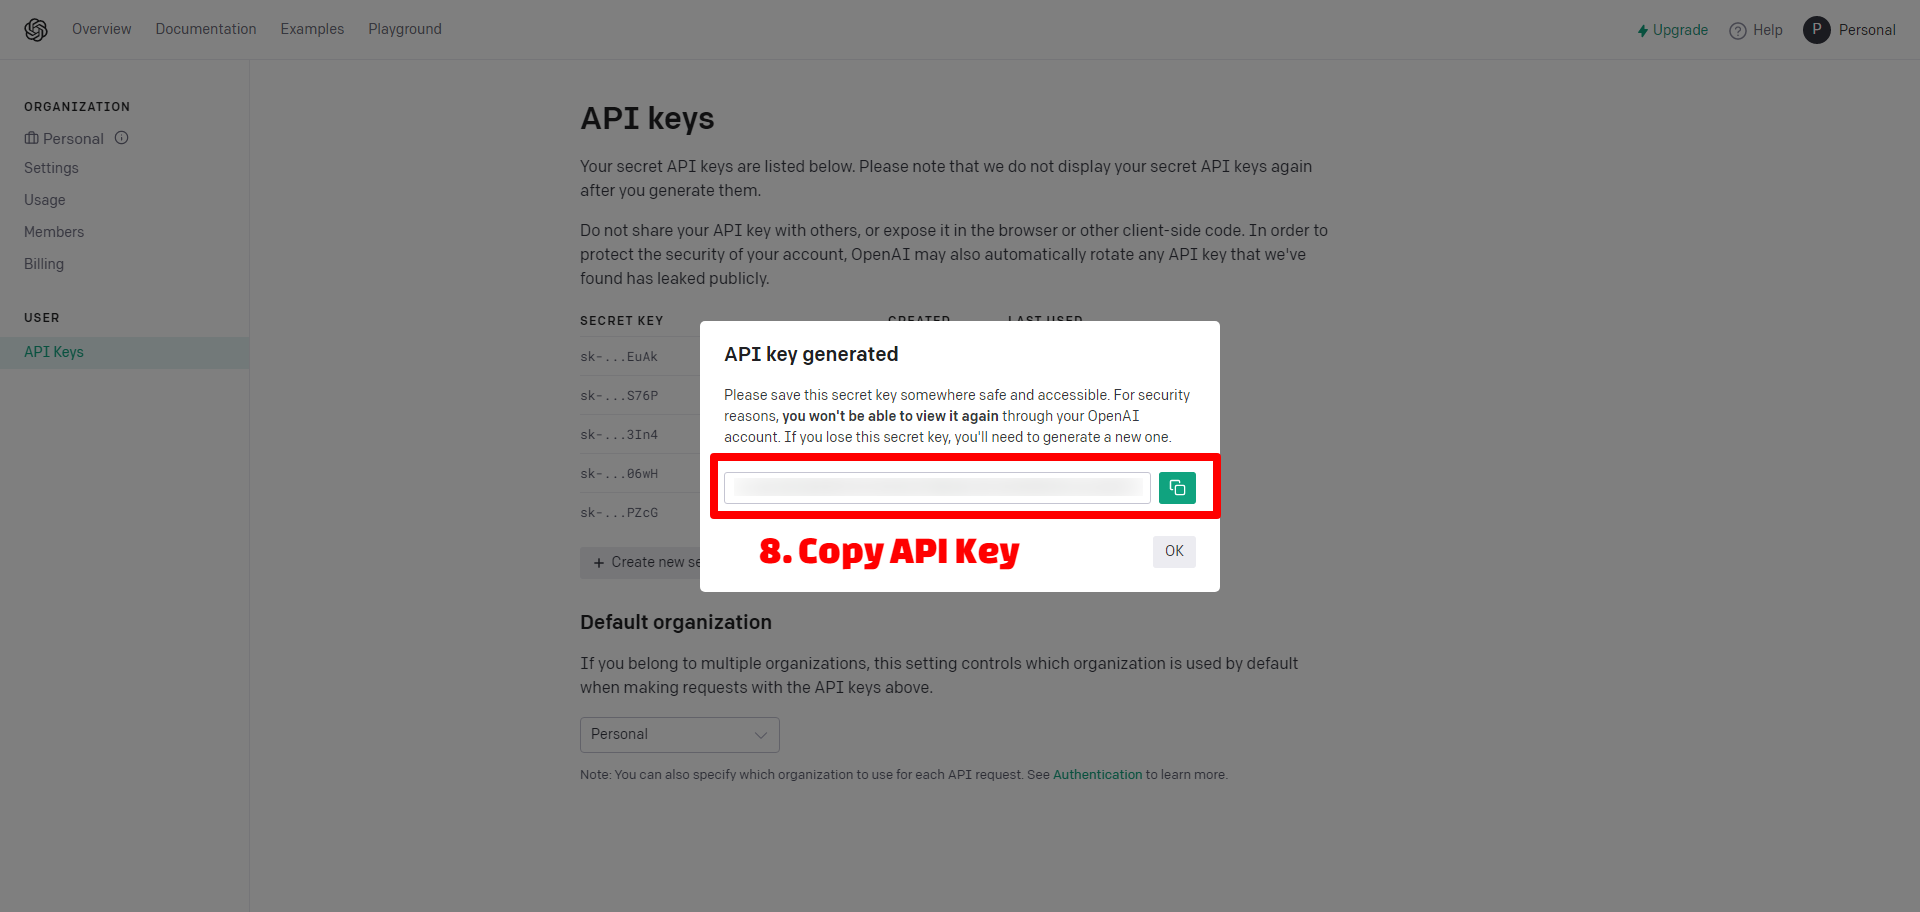
You should copy API Key like the below image.
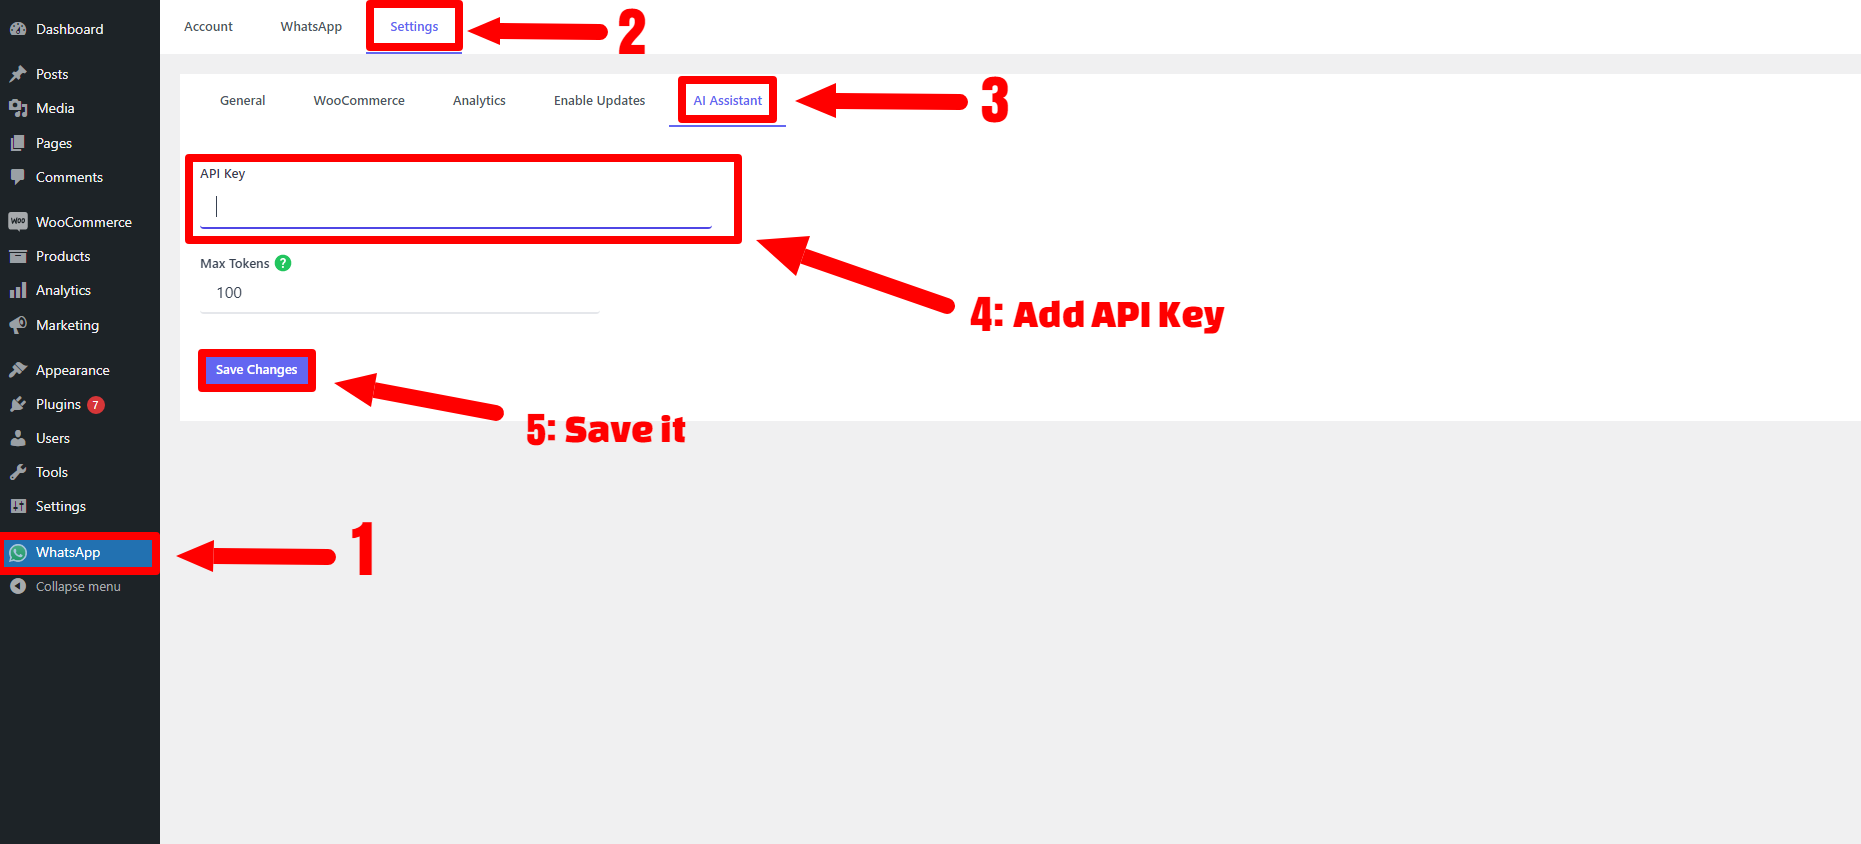
Add API Key in Settings
To Add the API Key, navigate to the WhatsApp >> settings >> AI Assistant tab and Add the API Key you created in the previous step, like the image below.
Create ChatGpt Account
After installing the ChatGpt plugin in WordPress, you must create an account for ChatGpt
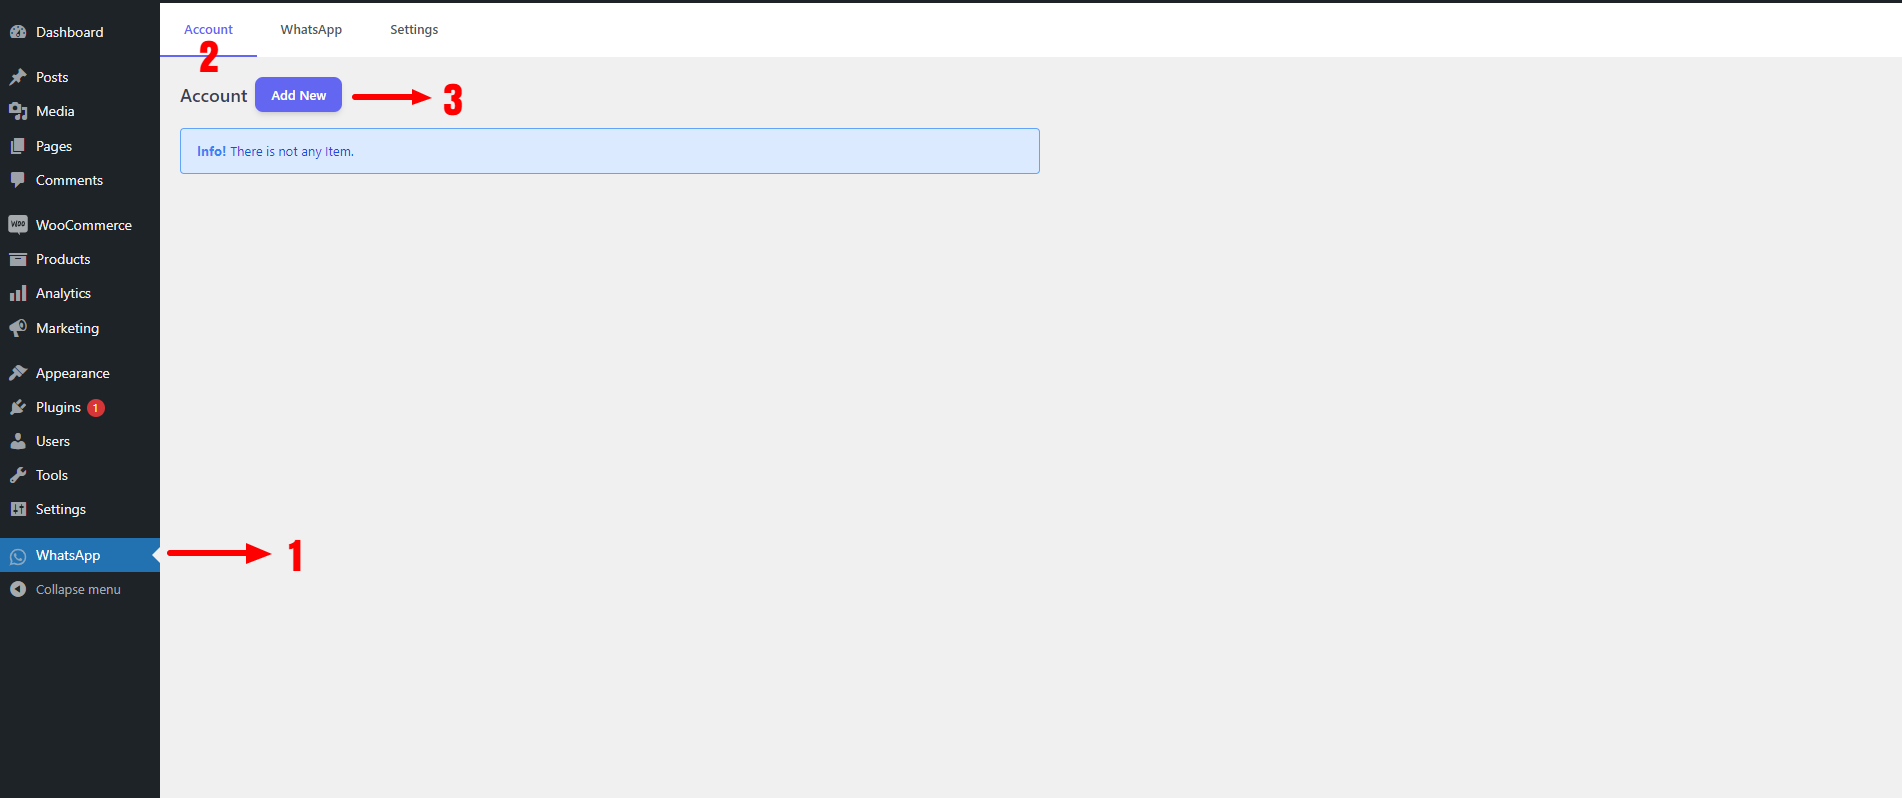
To create an account, navigate to the WhatsApp >> Account tab and create an account like the below image.
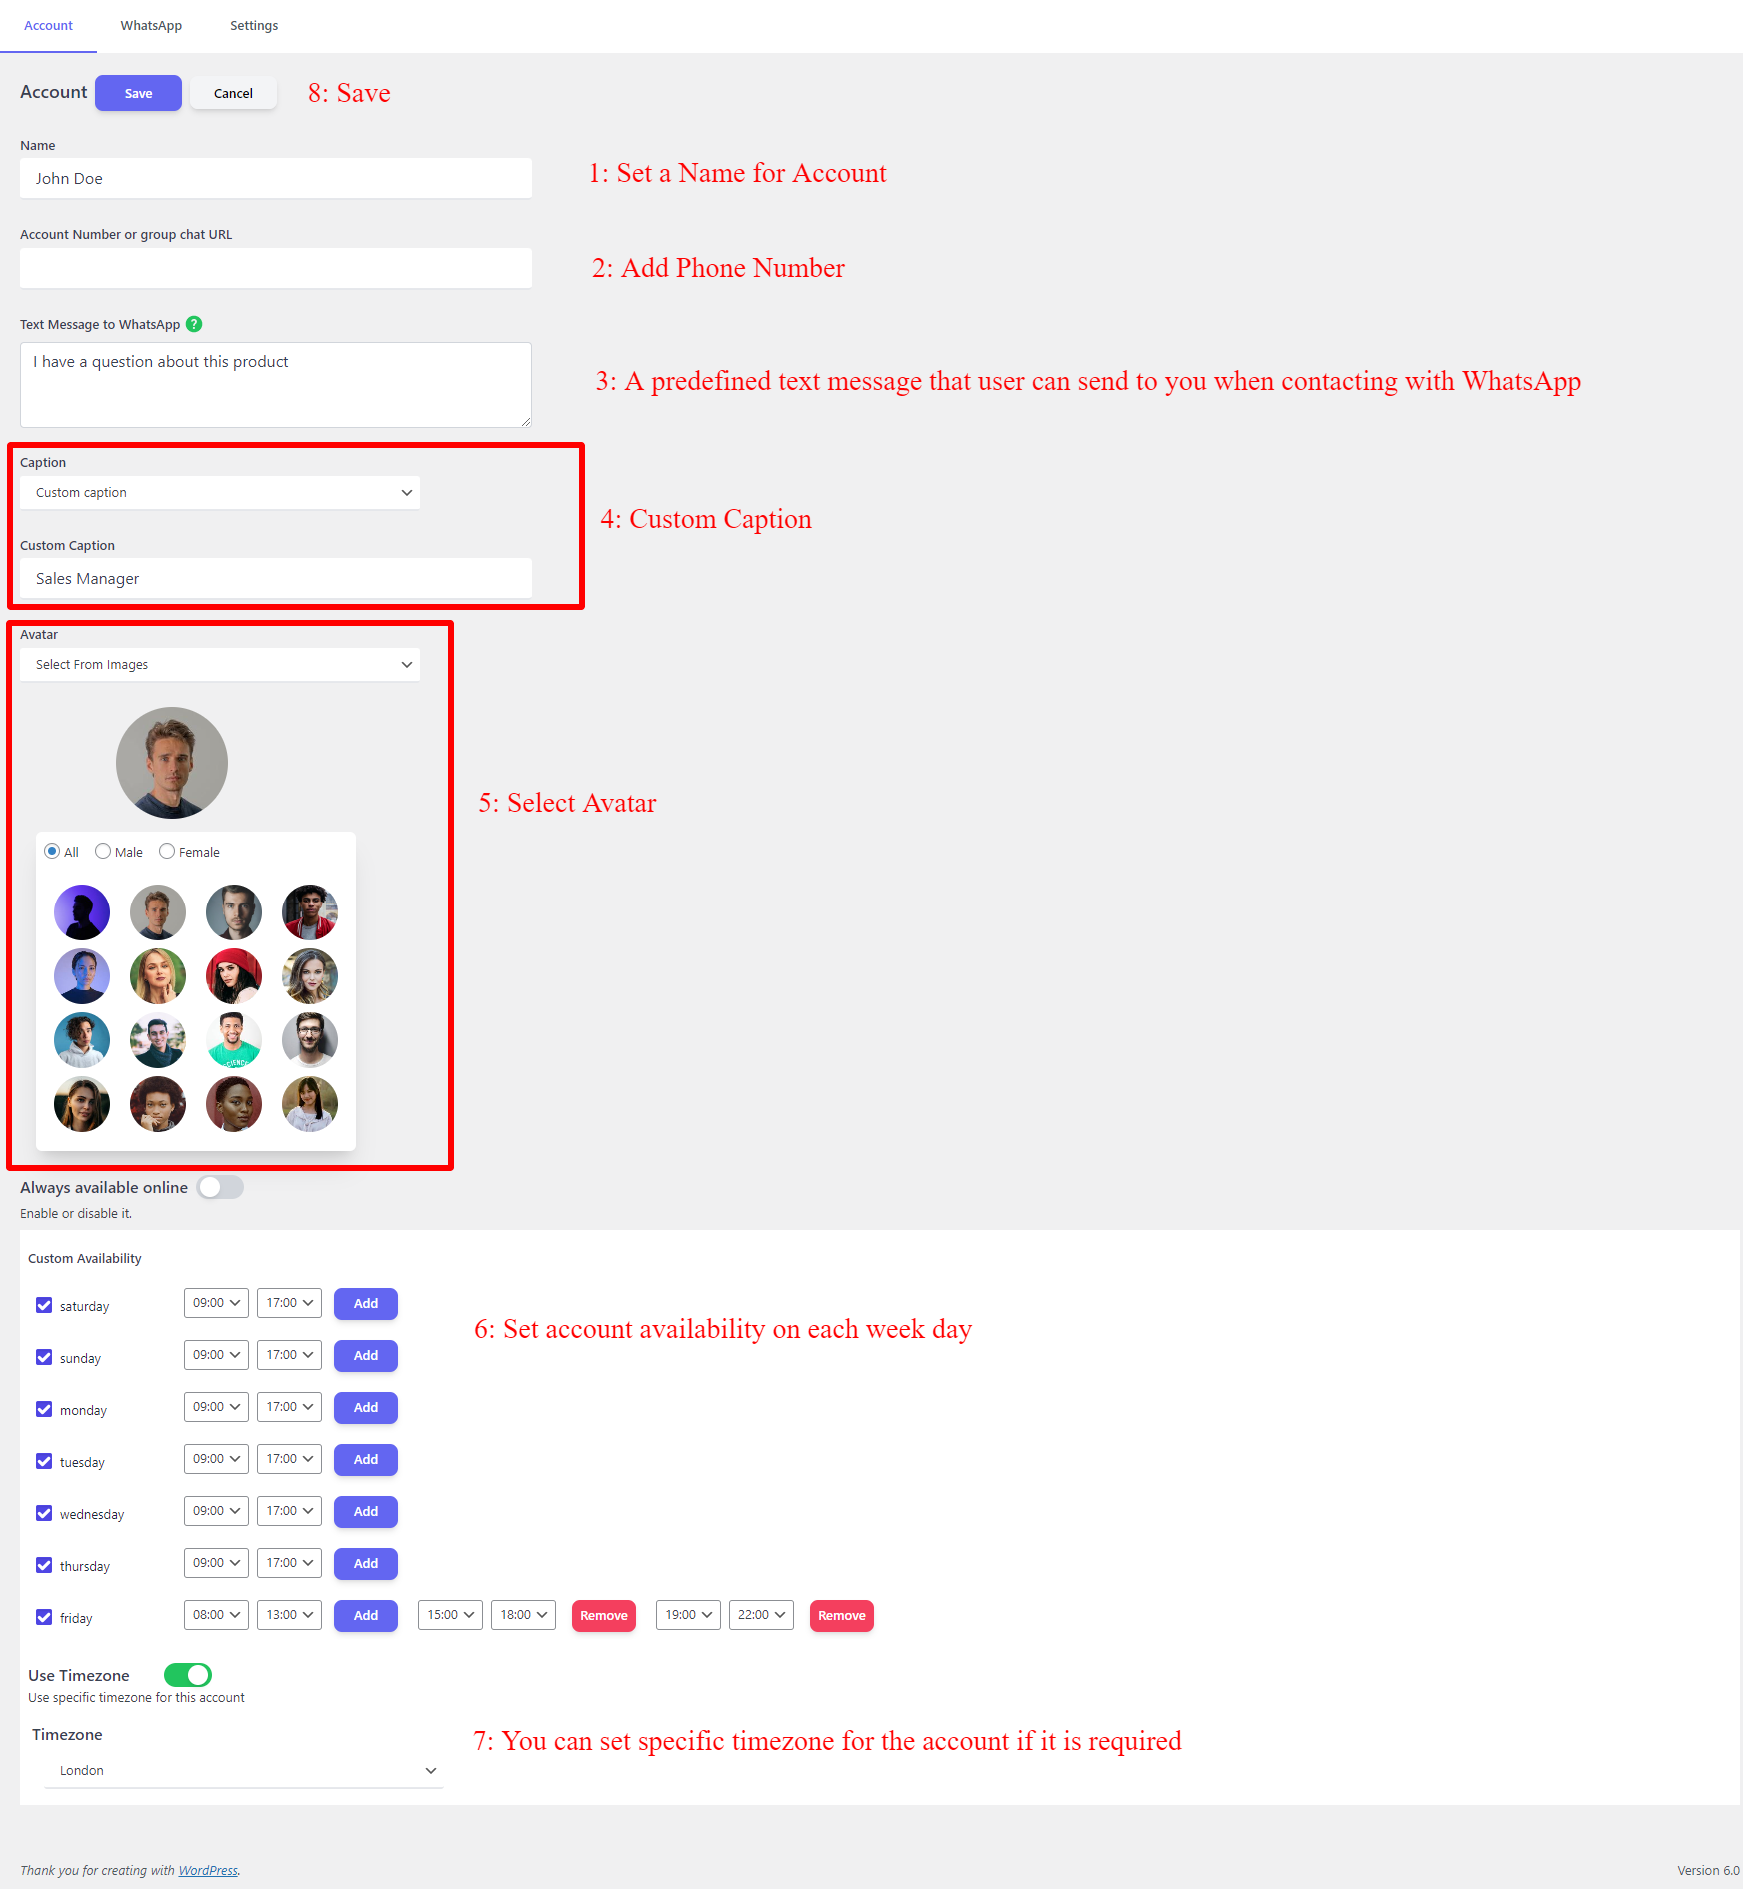
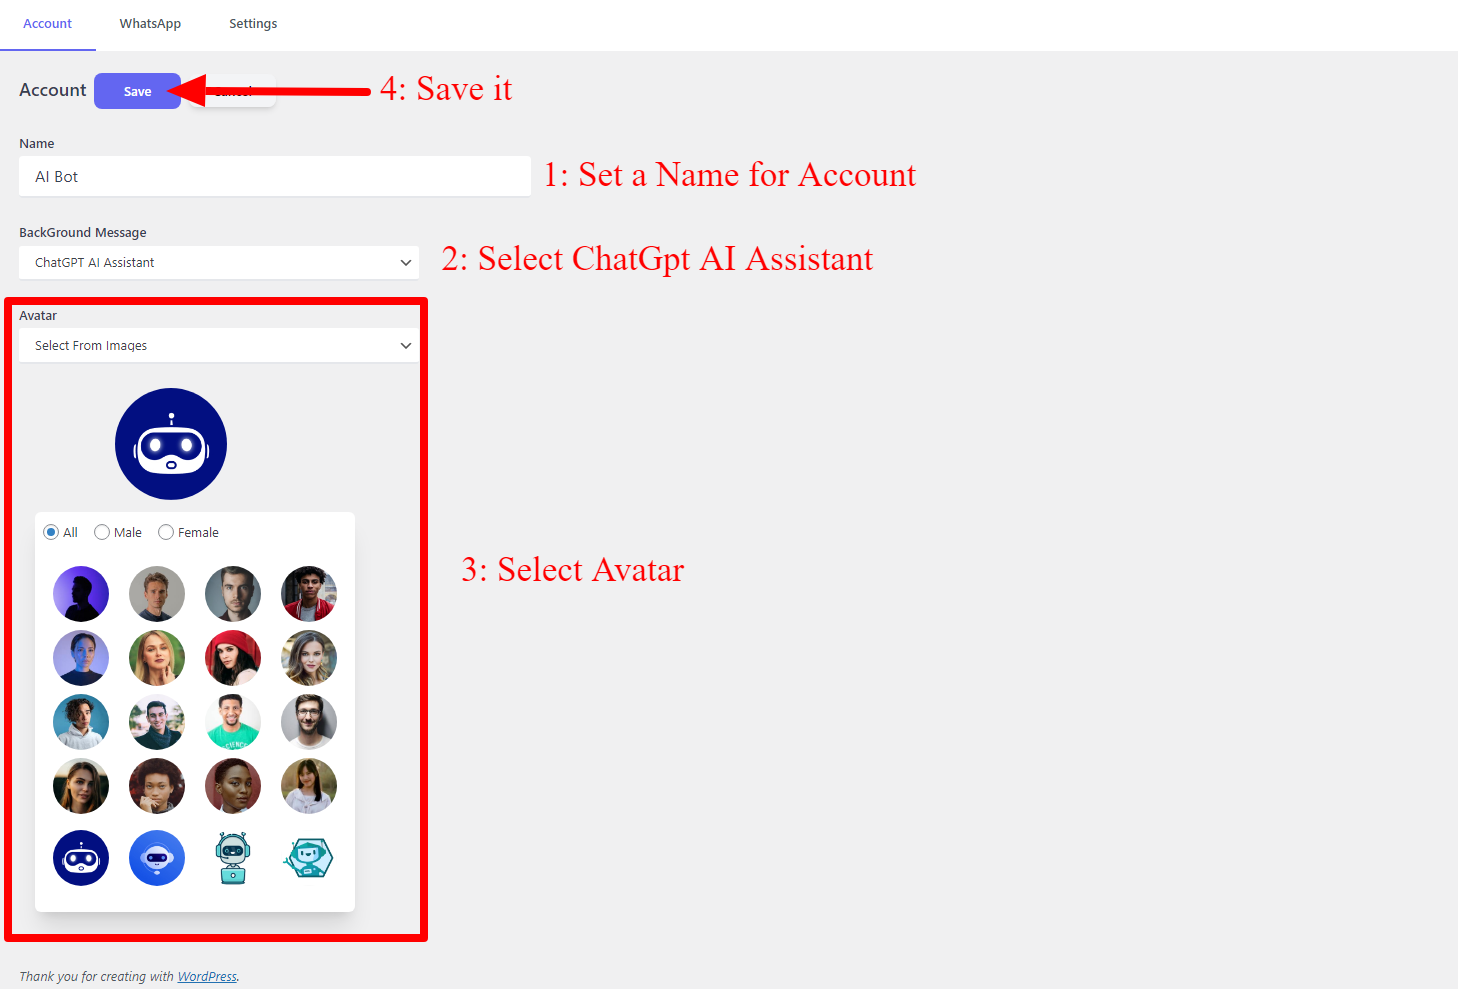
Now fill in the required field of the account like “Name,” Select ‘ChatGpt AI Assistant,” and set an avatar to the account.
Save the account and go to the next step.
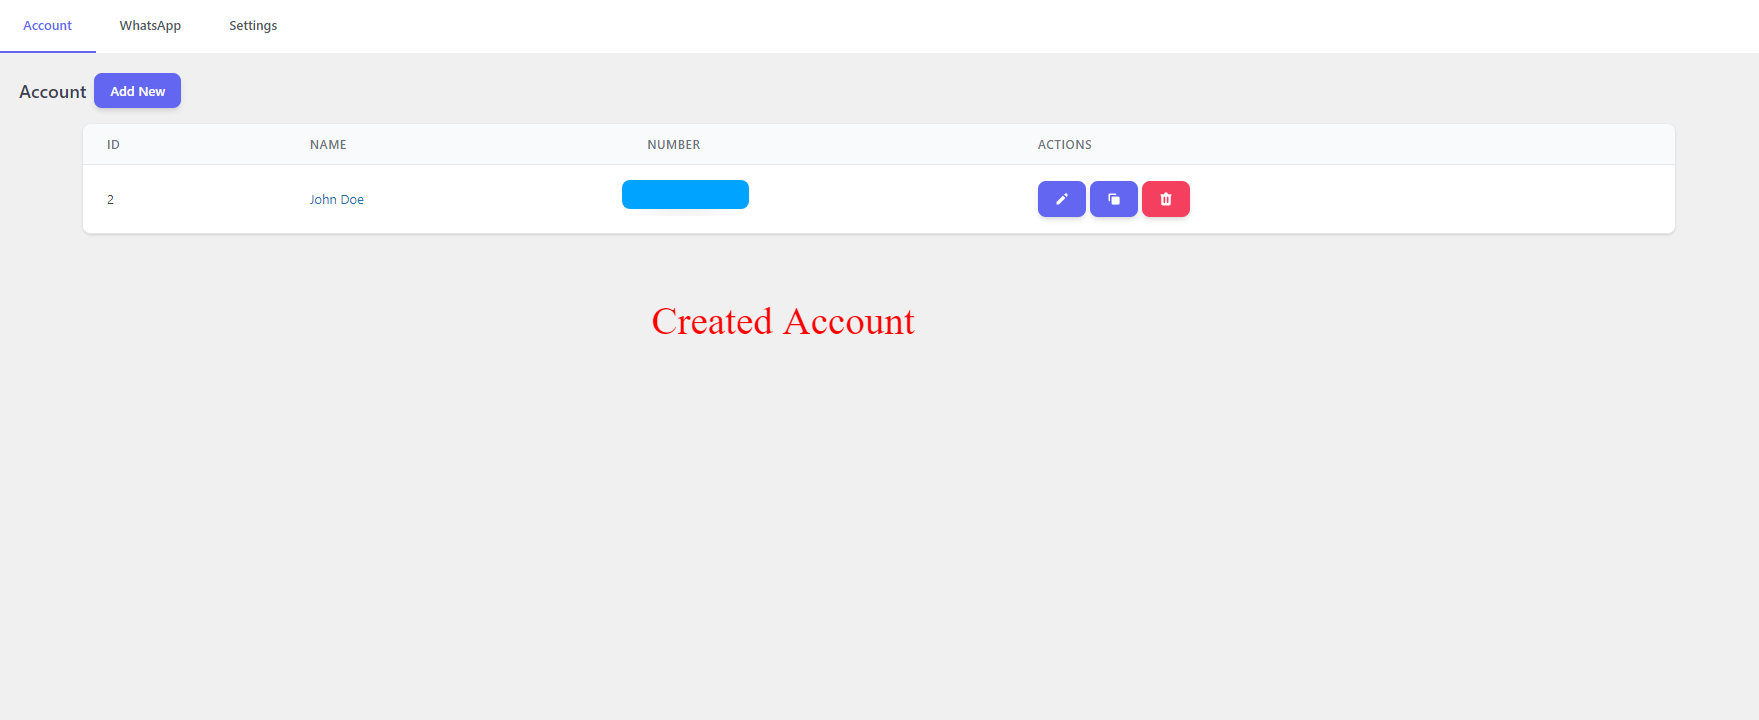
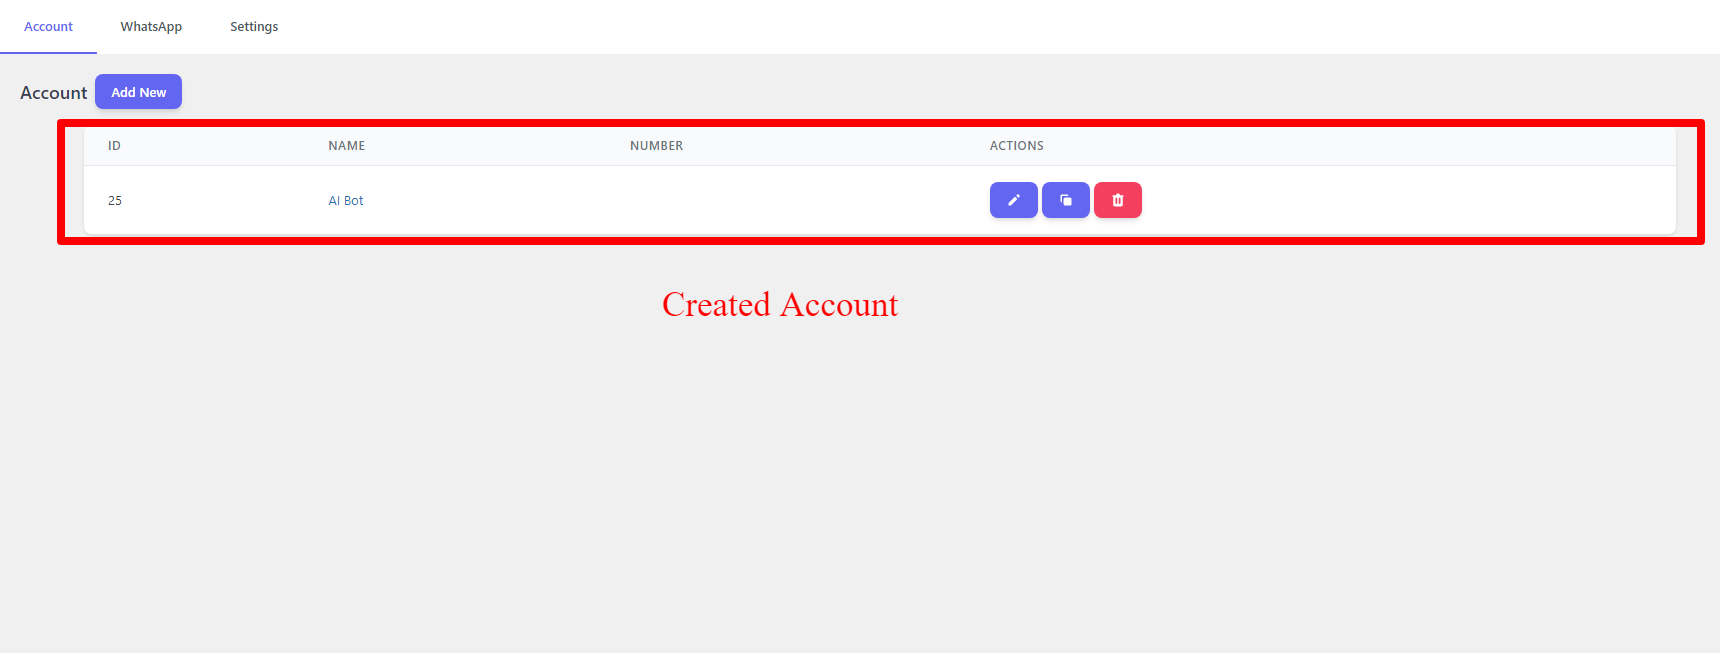
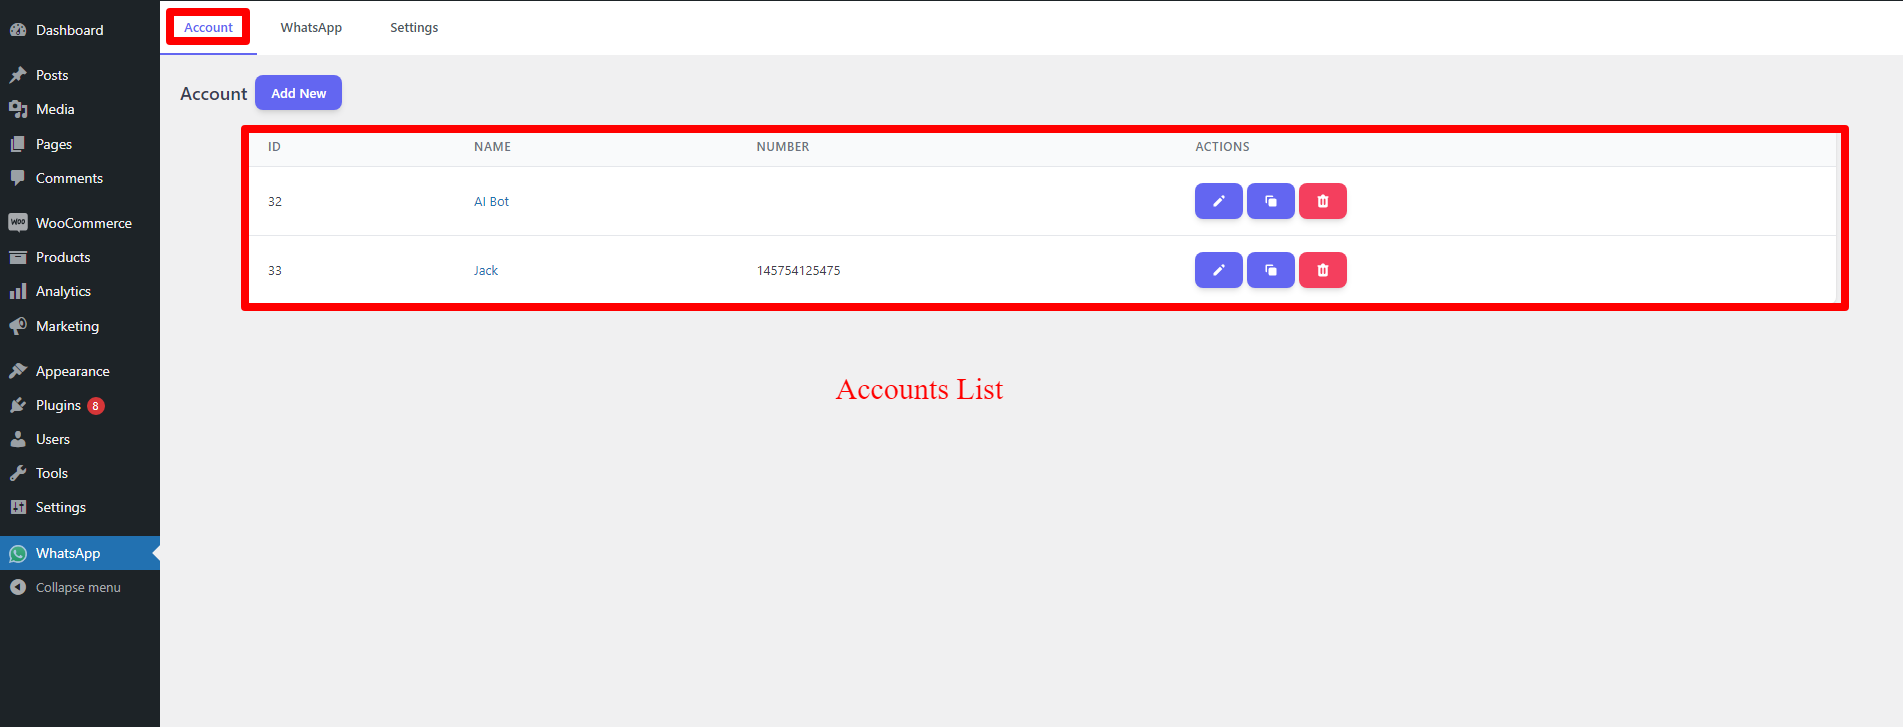
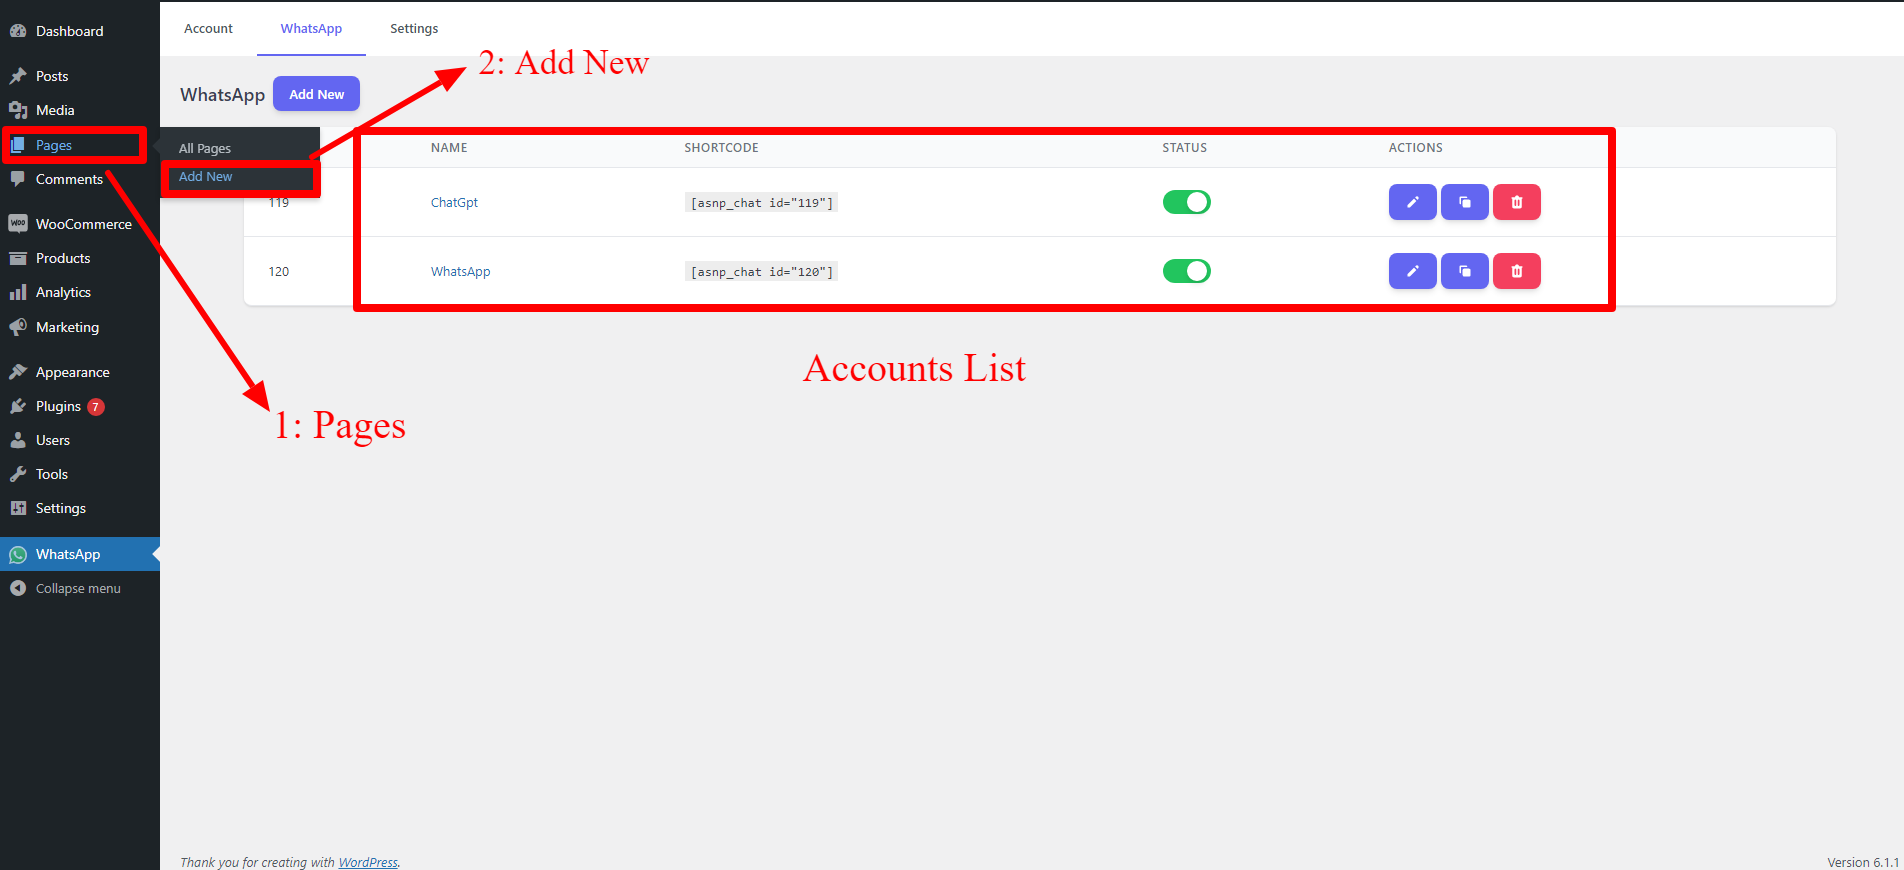
After you create the account, it will be listed in the Accounts list like the below image.
Create Single Account ChatGpt
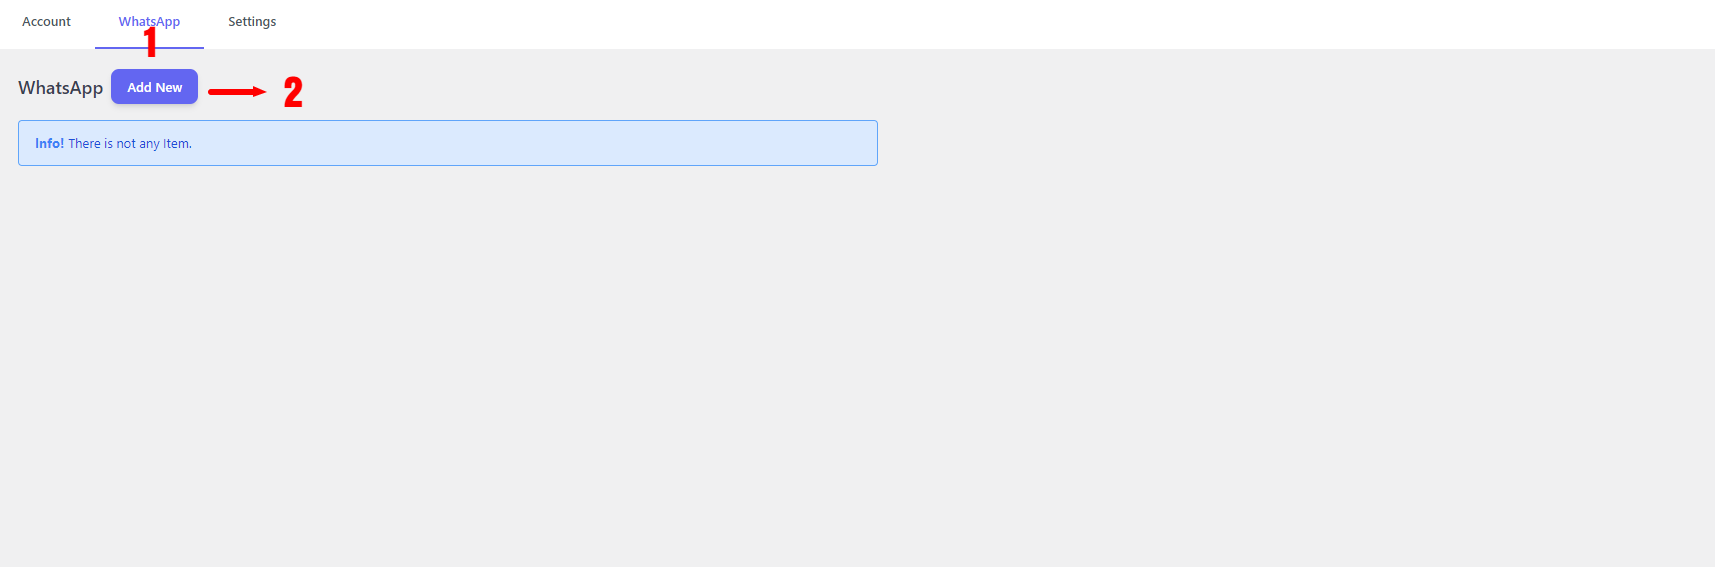
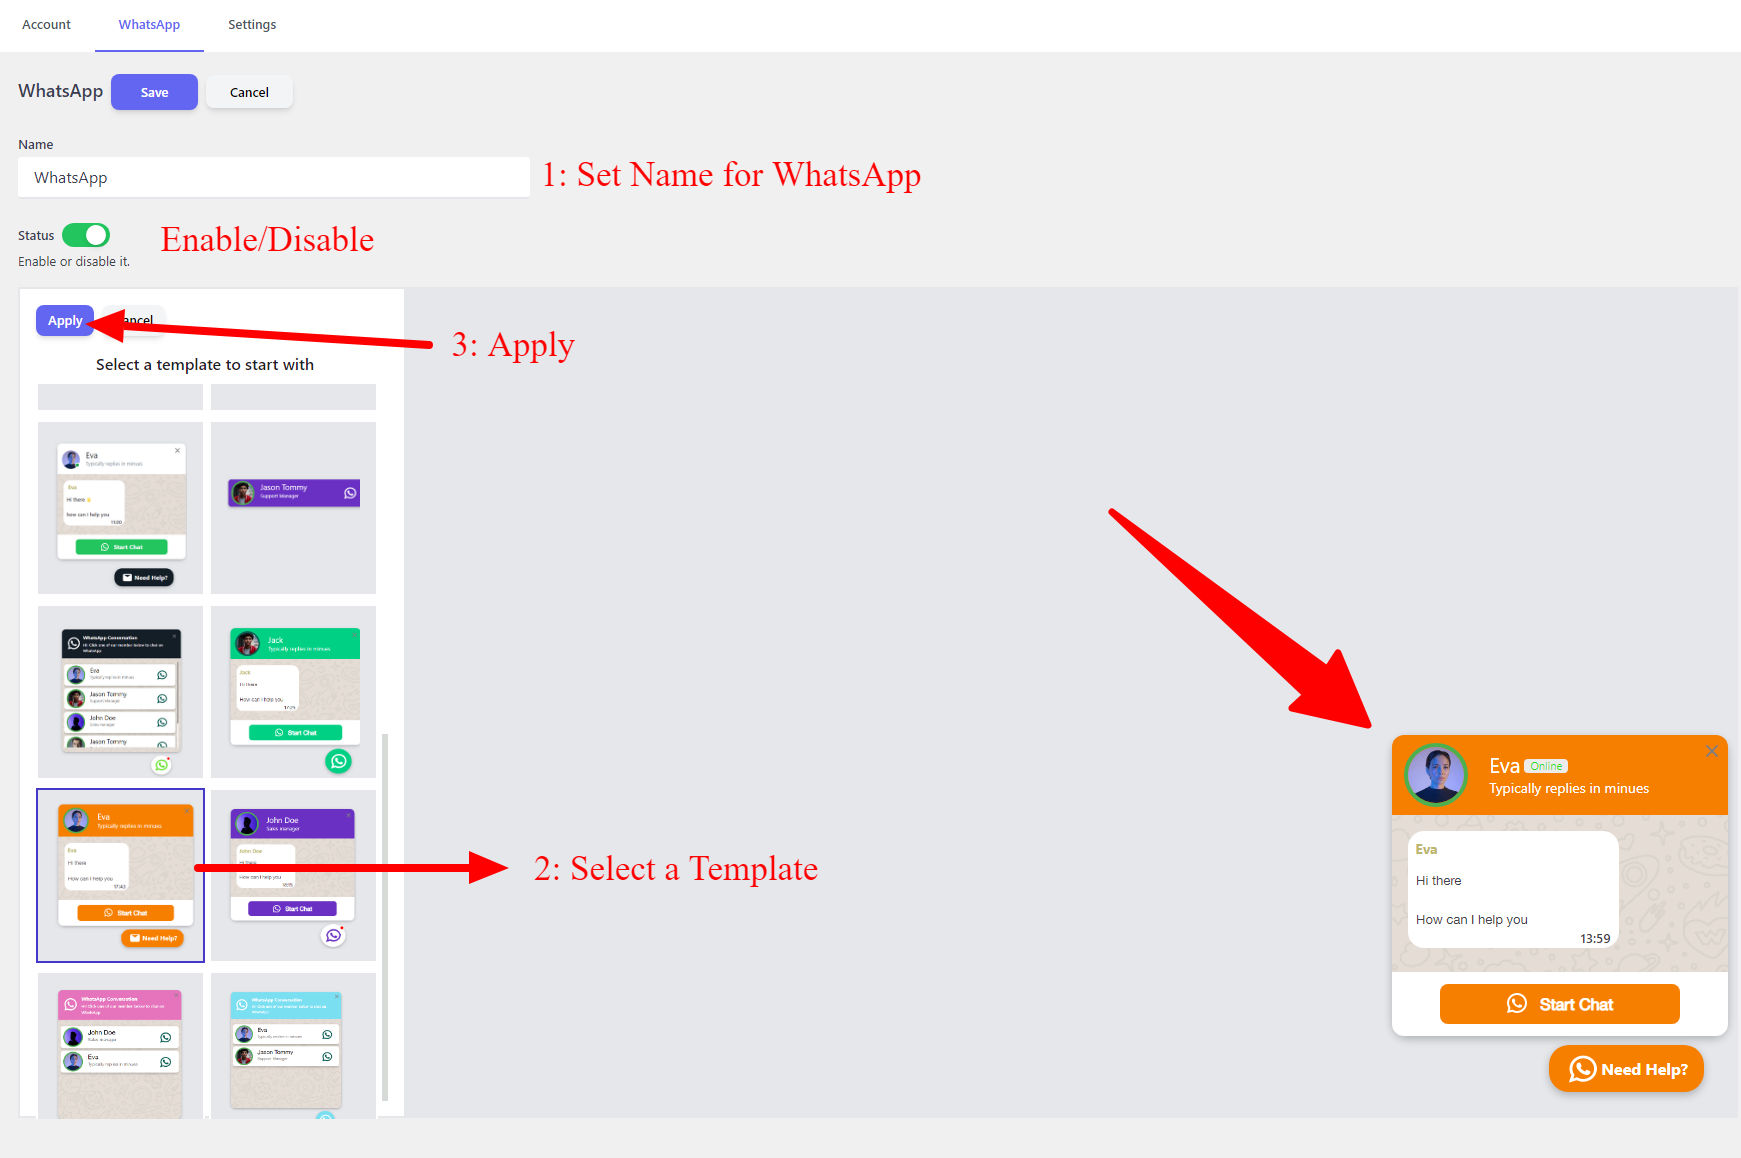
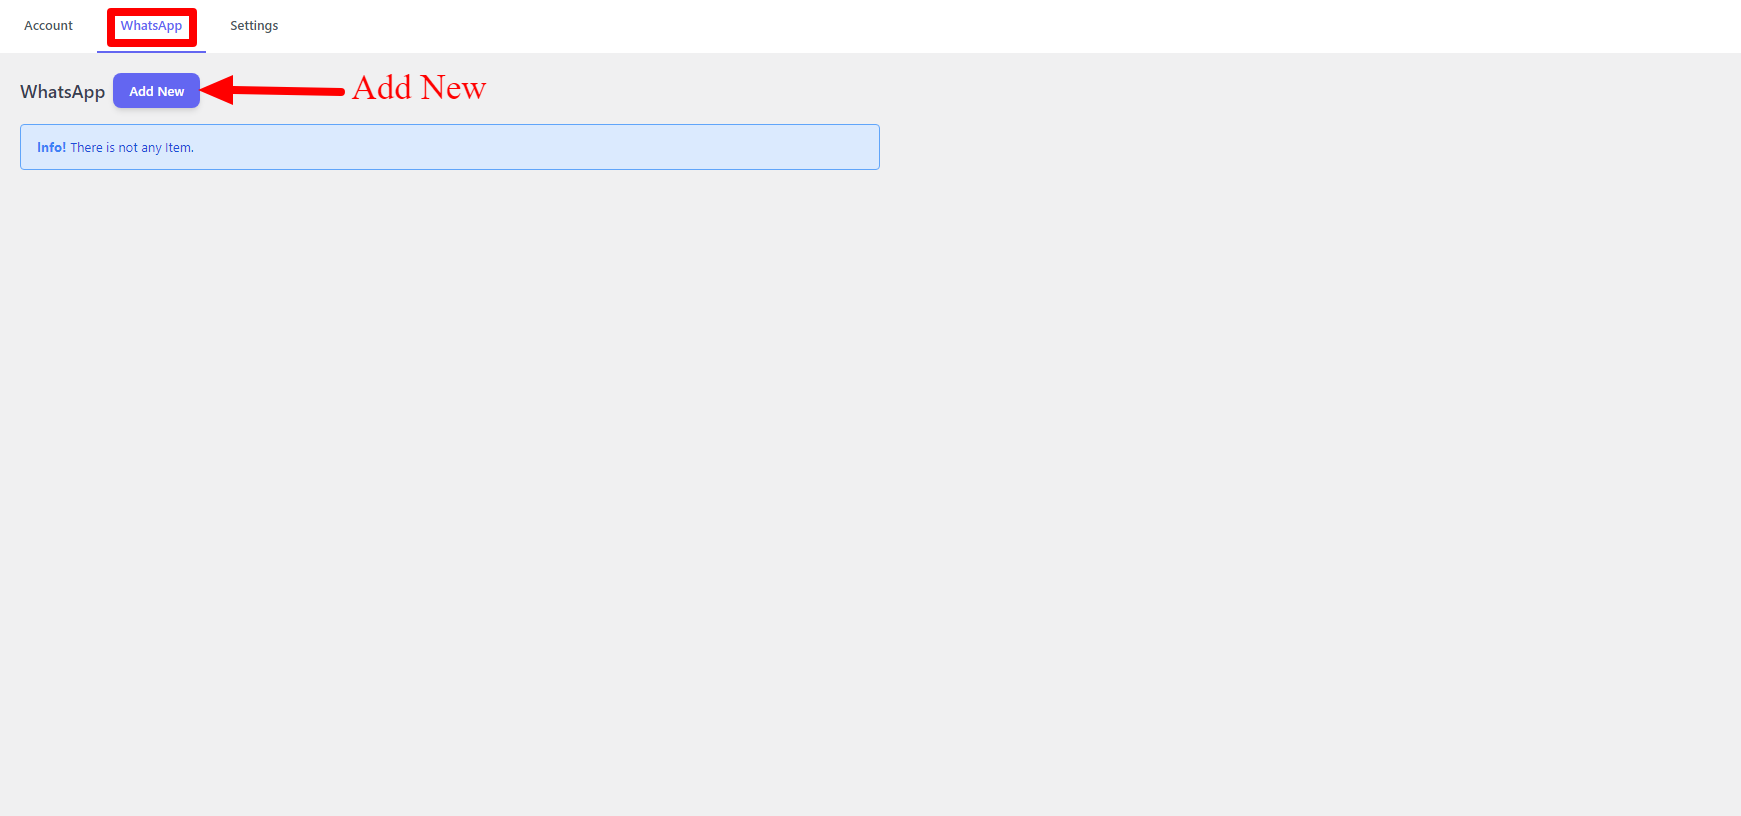
After creating an account in the previous step, navigate to the WhatsApp tab and click on Add New button to create a chatGpt.
- Set a name for ChatGpt.
- Select a template from the predefined templates list.
- A preview of the selected template will be shown on the right side.
- Click on the Apply button to start using the selected template.
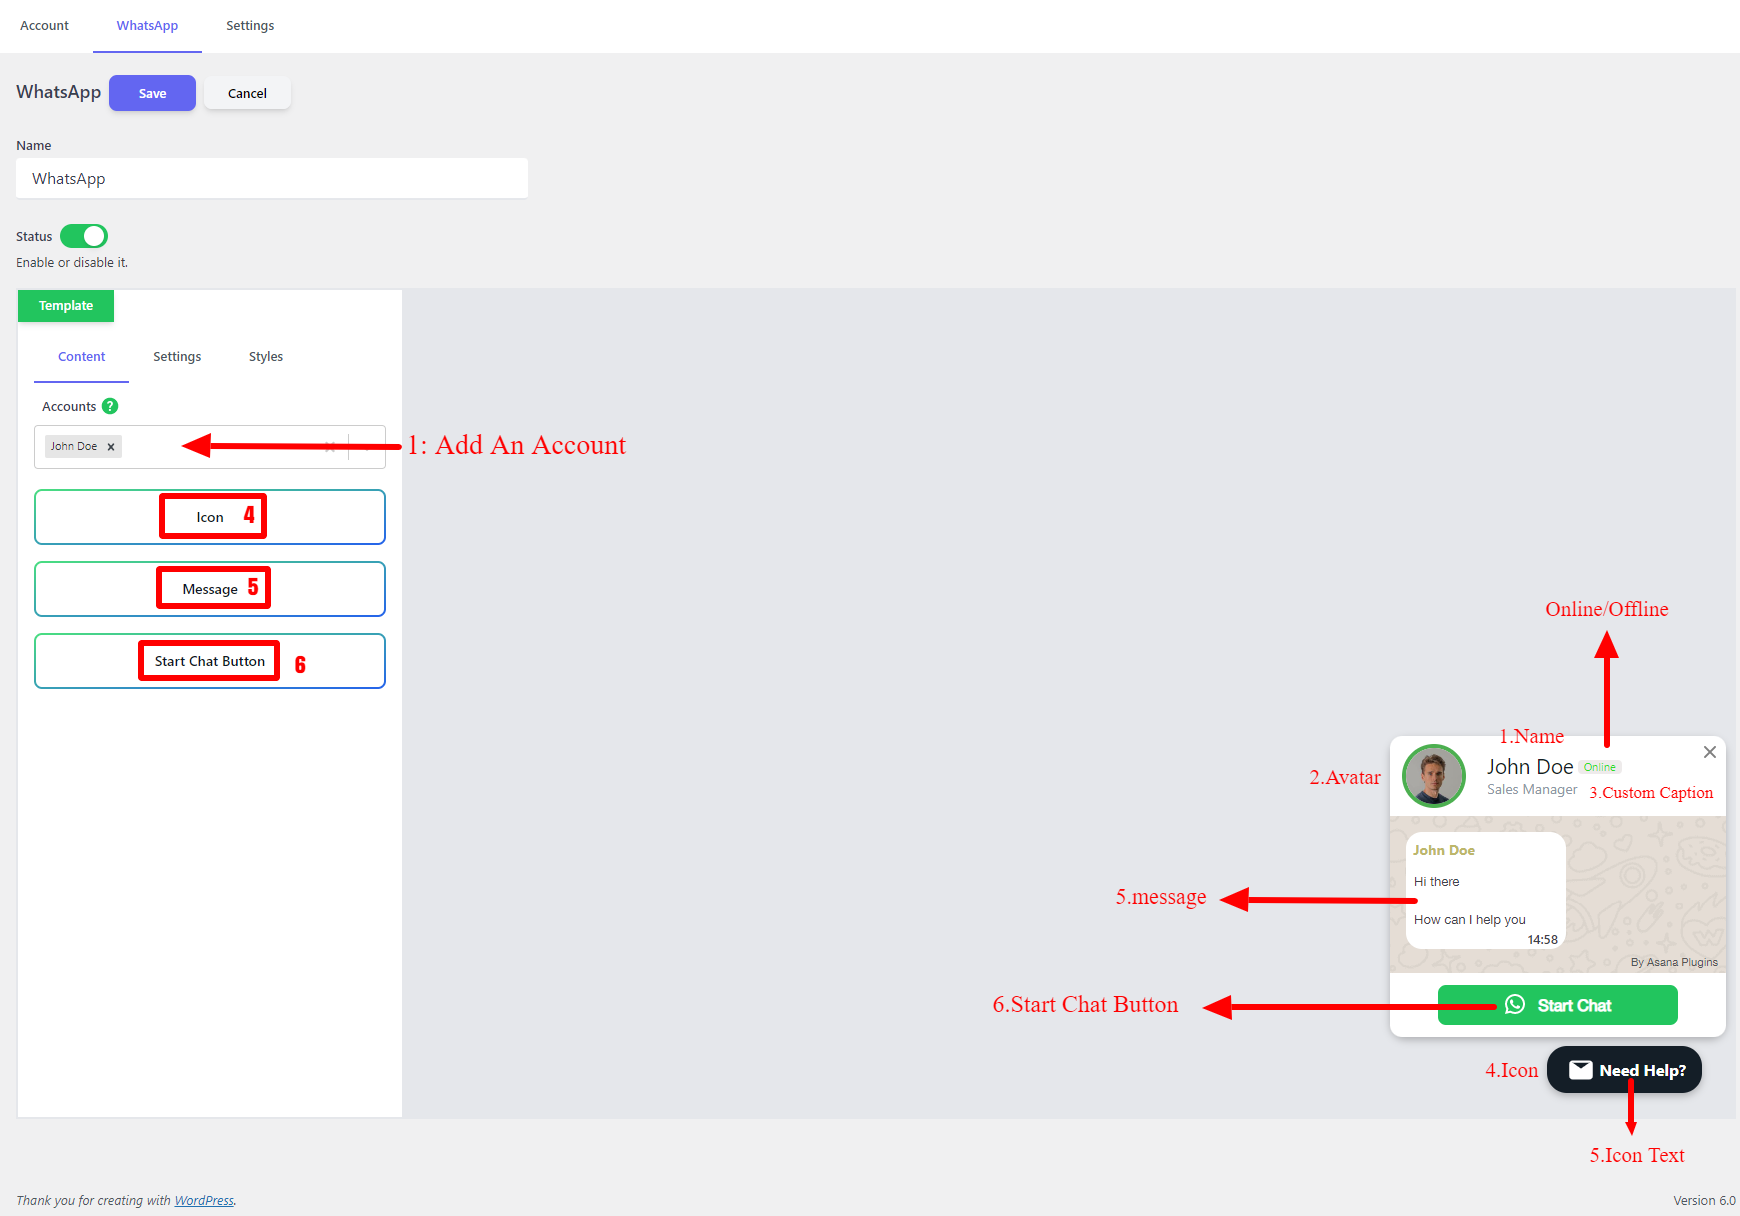
Now in the Accounts field, you should search for the account name you created in the previous step. Please search for the created account and select it to add it to the ChatGpt Button.
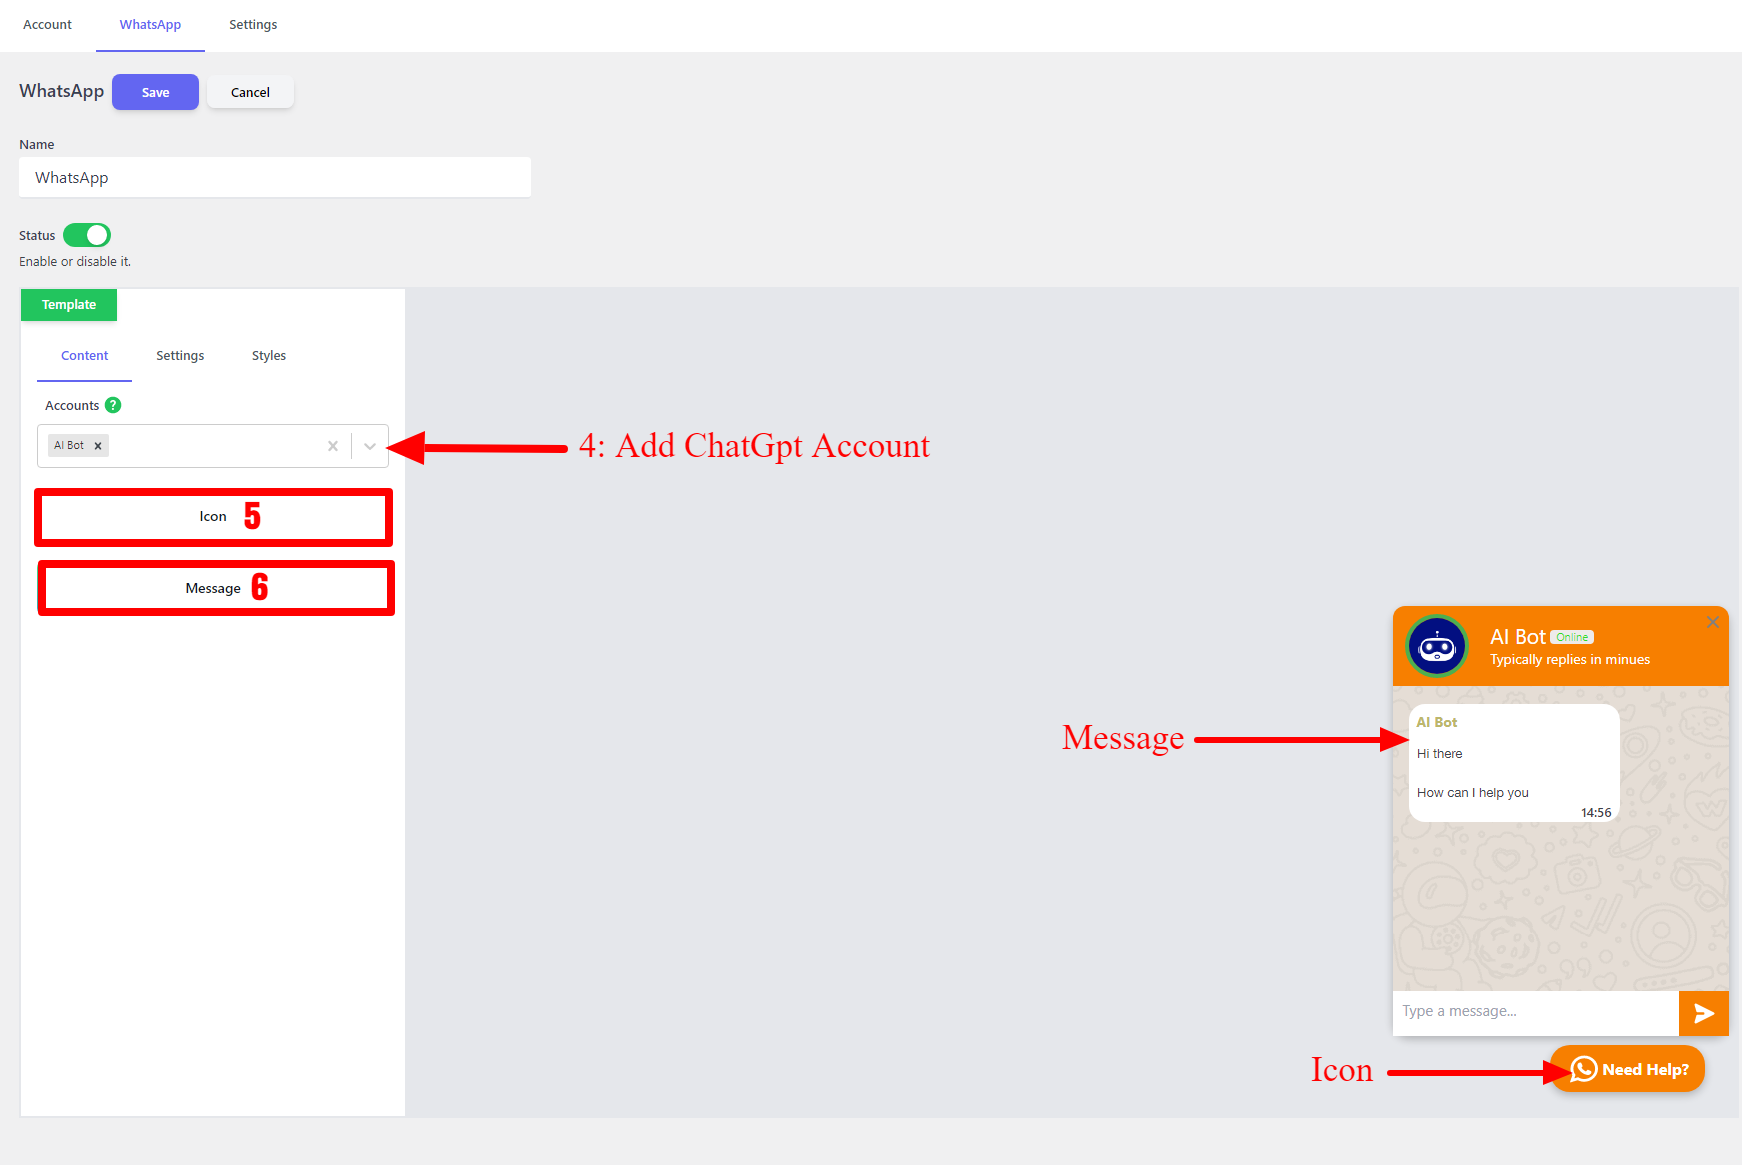
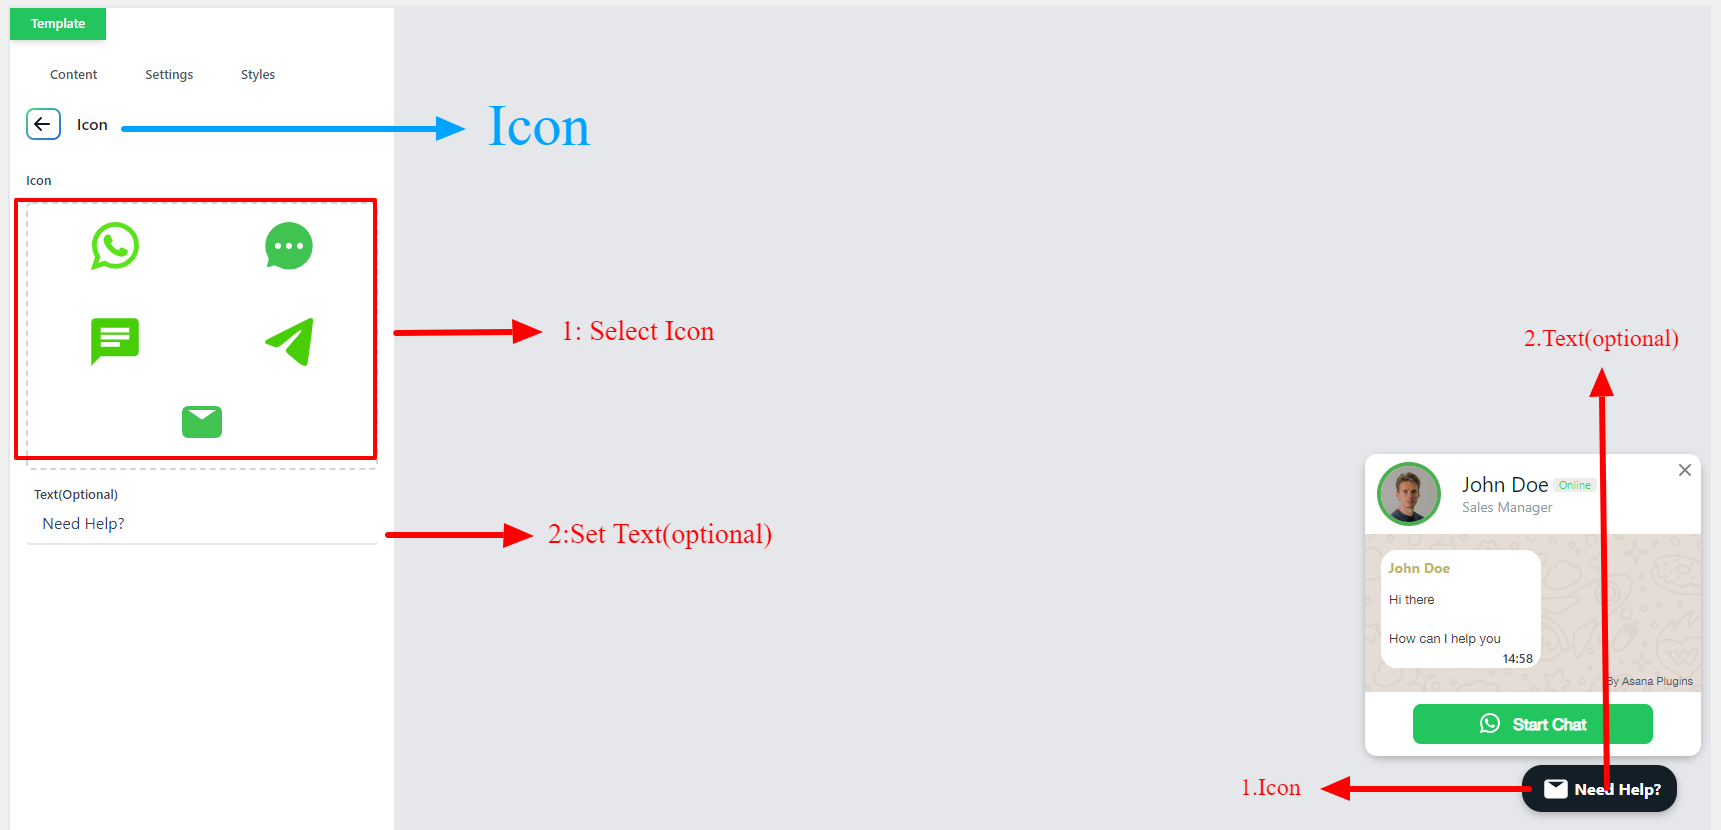
From the Icon section, you can change the button icon and set a text beside the icon.
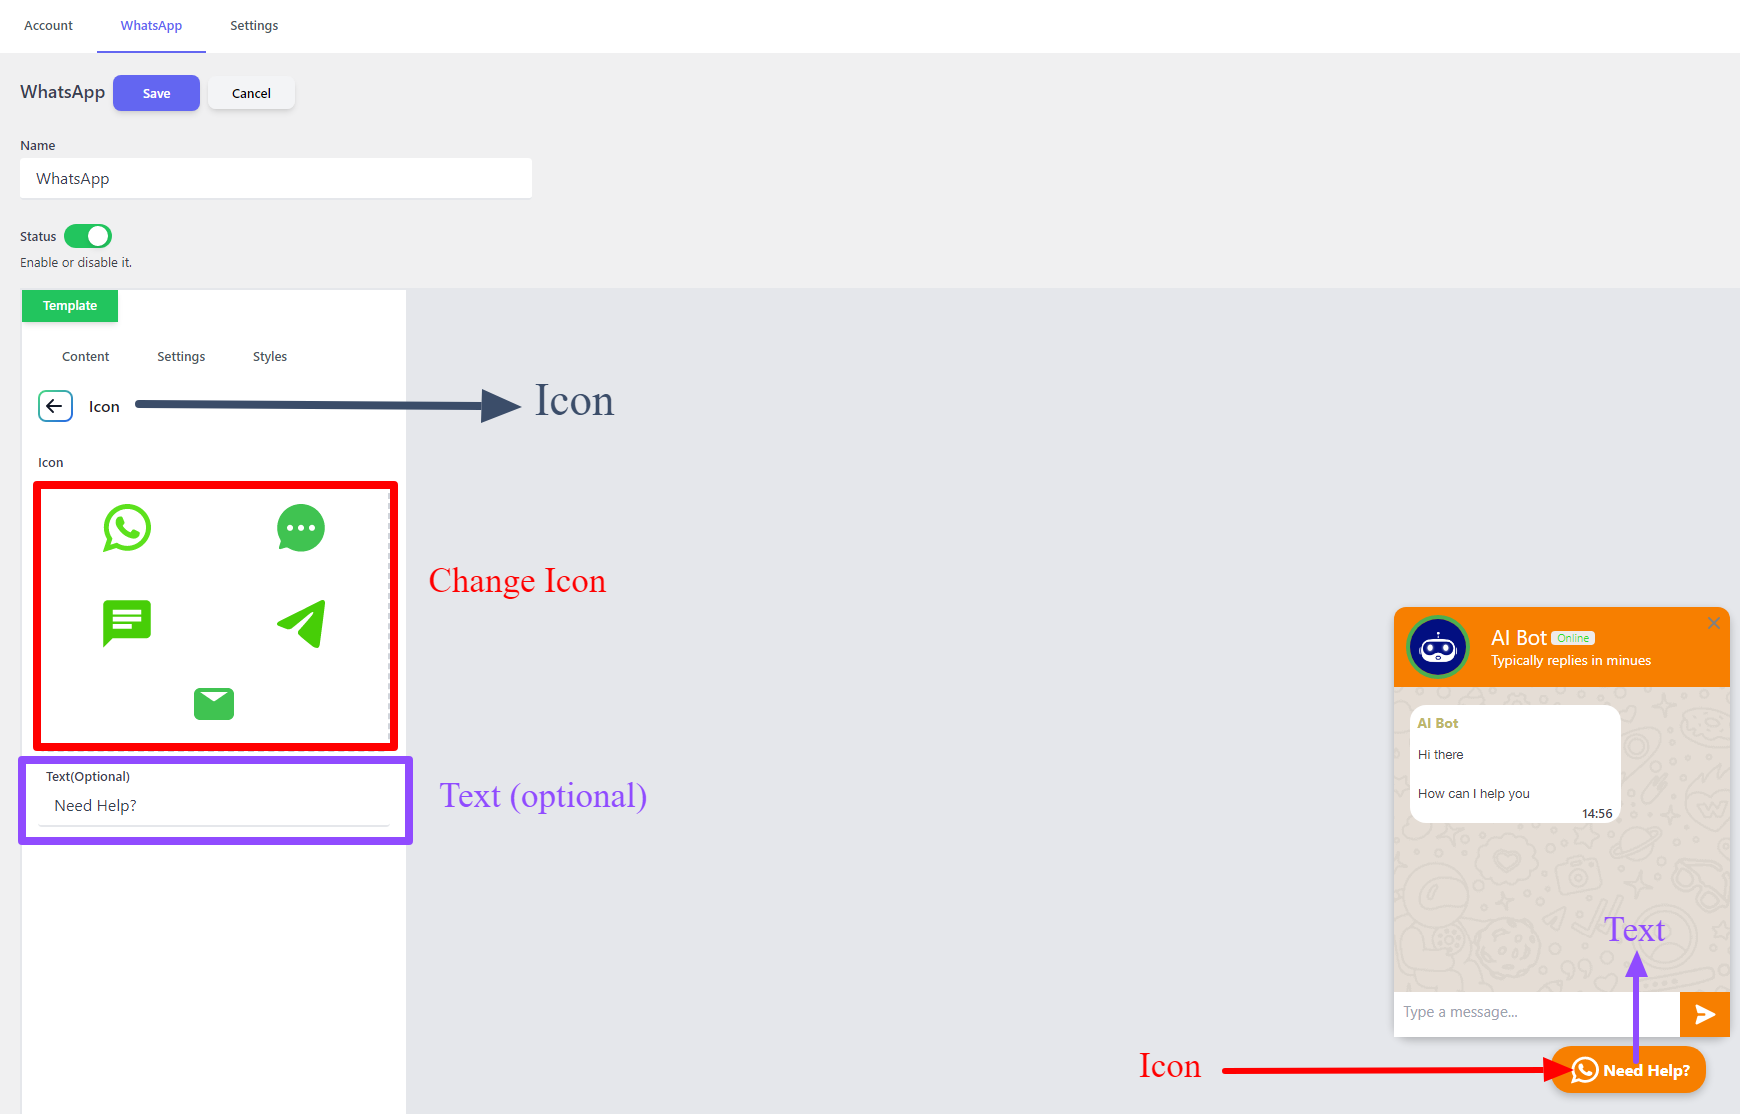
Also, you can change the ChatGpt Button message from the Message section.
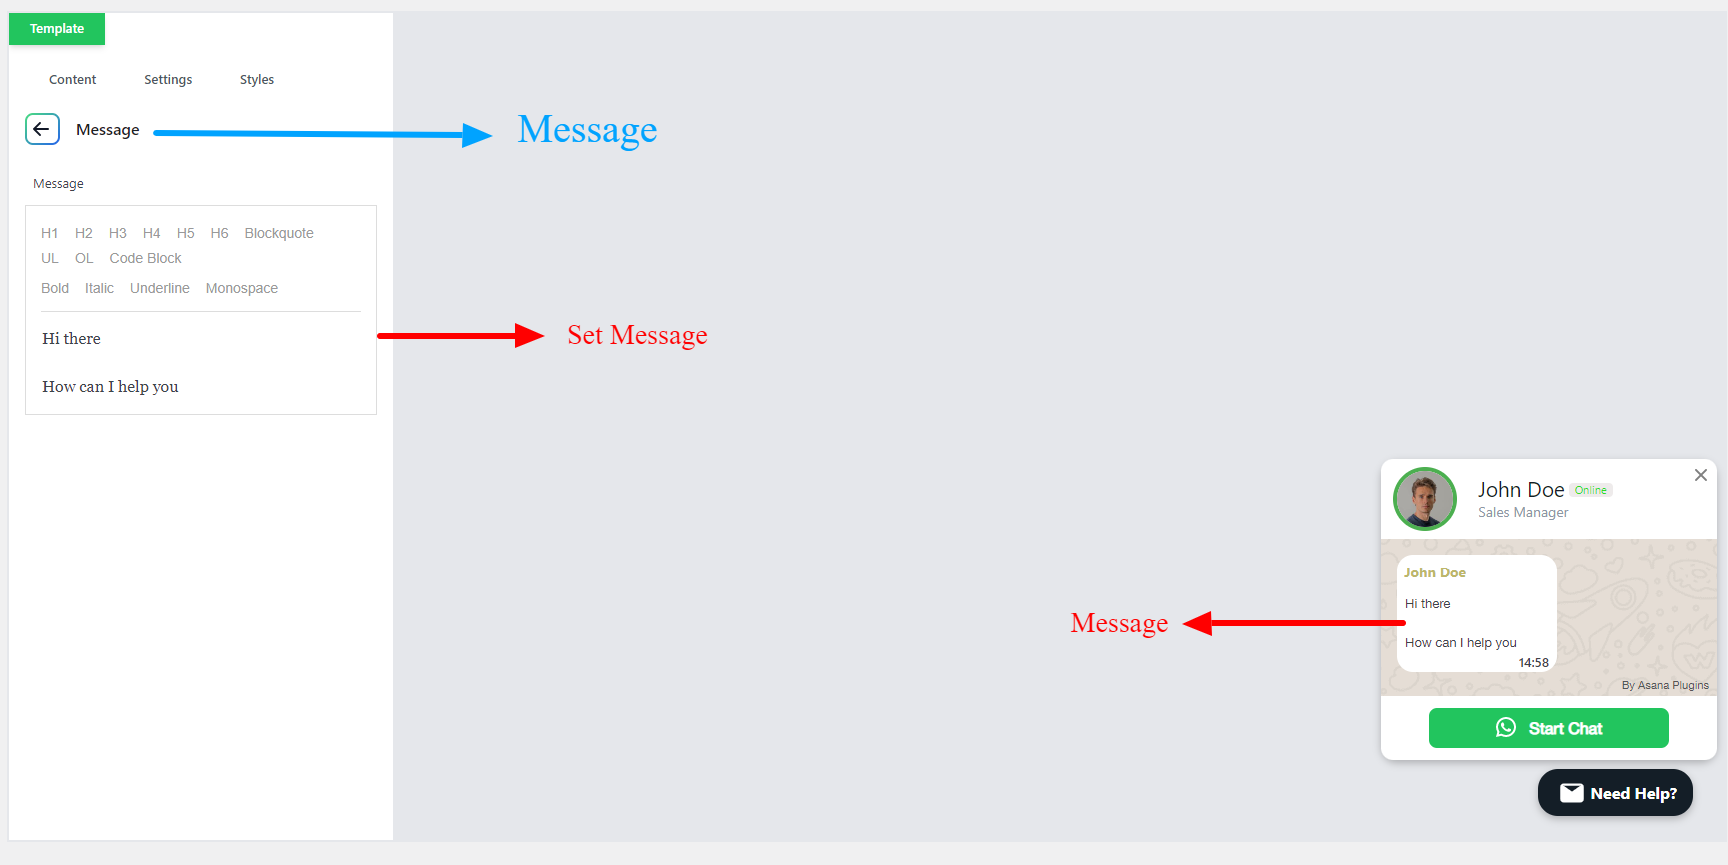
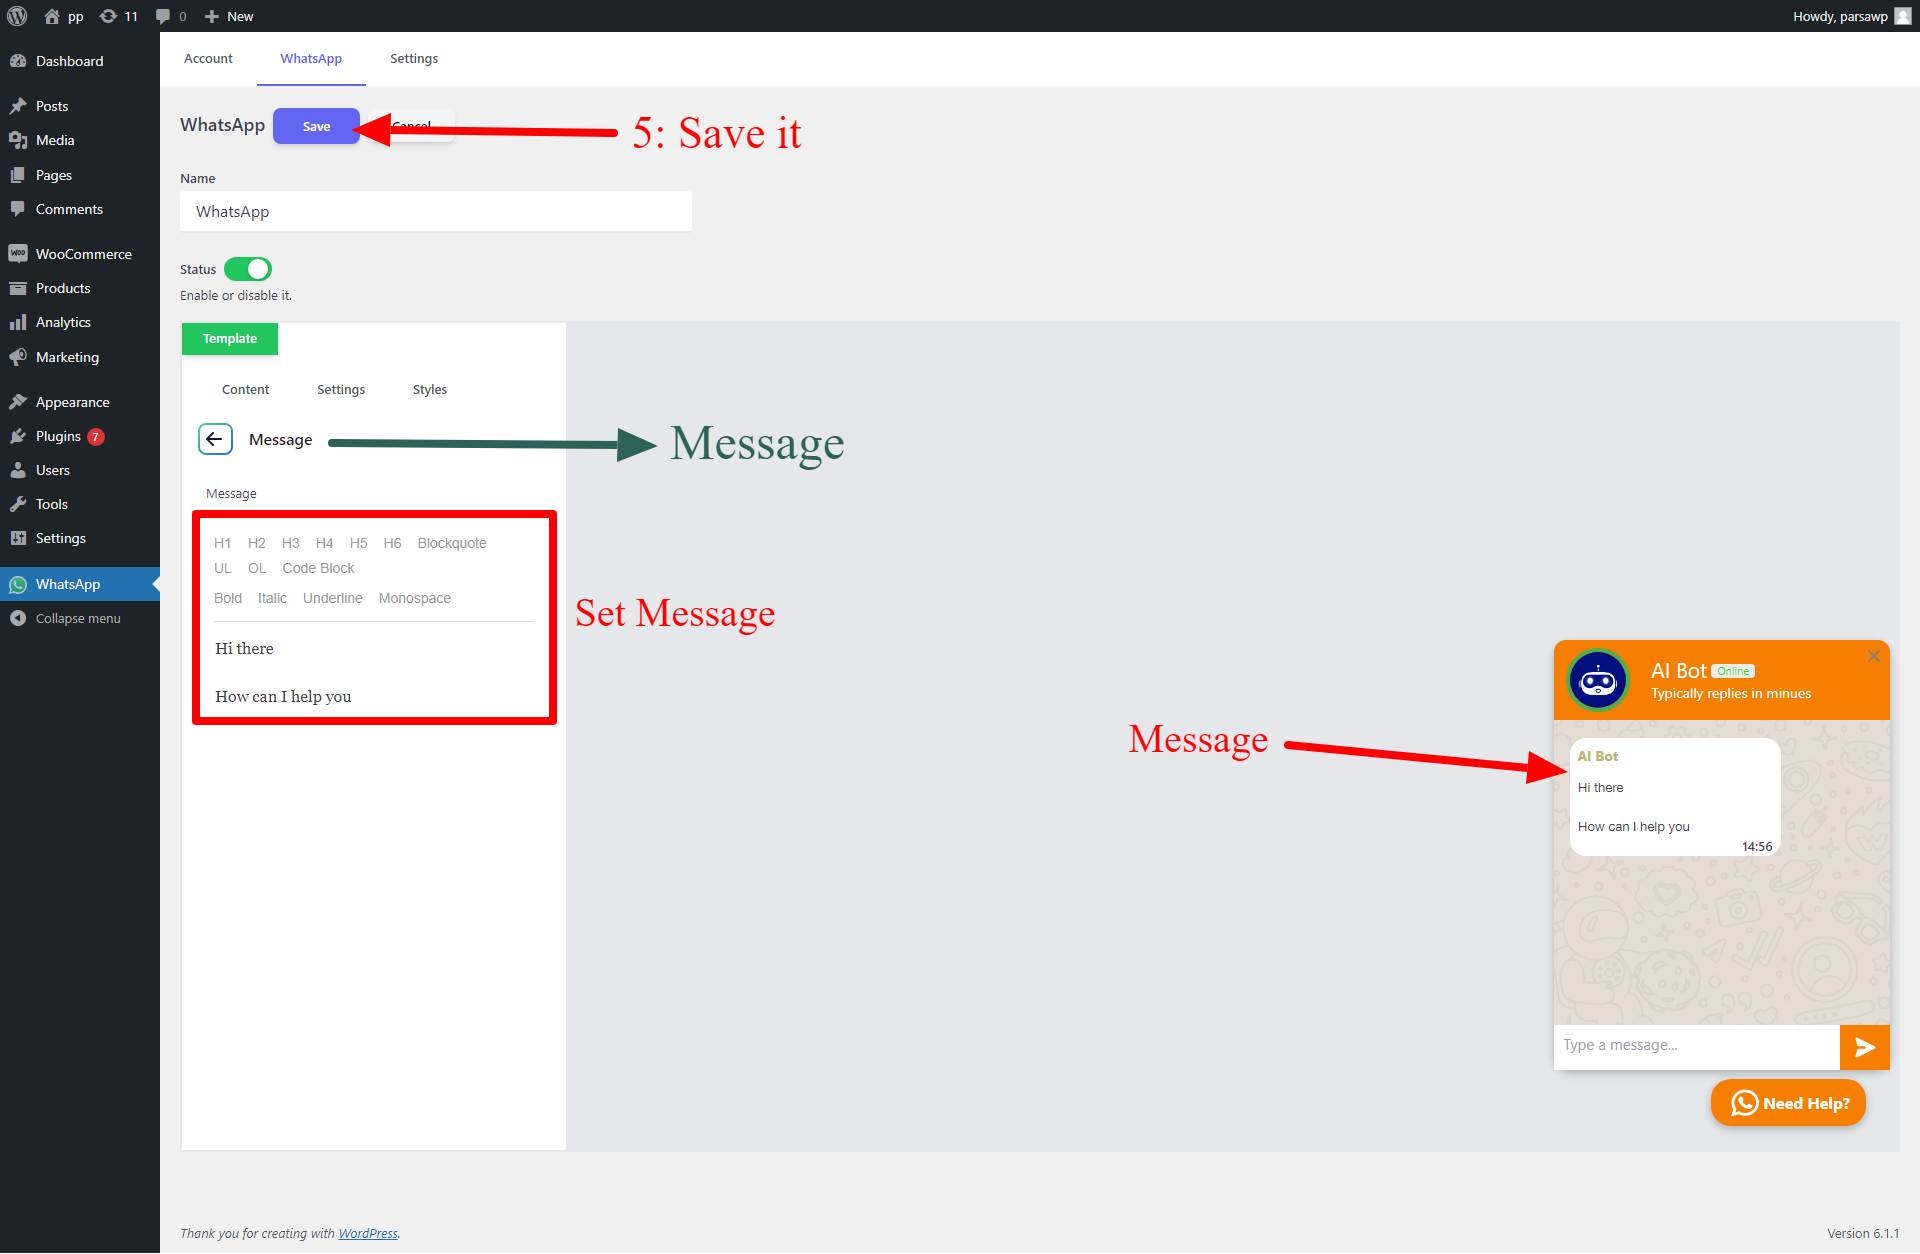
After applying the required changes on the ChatGpt button, click on the Save button to save the changes.
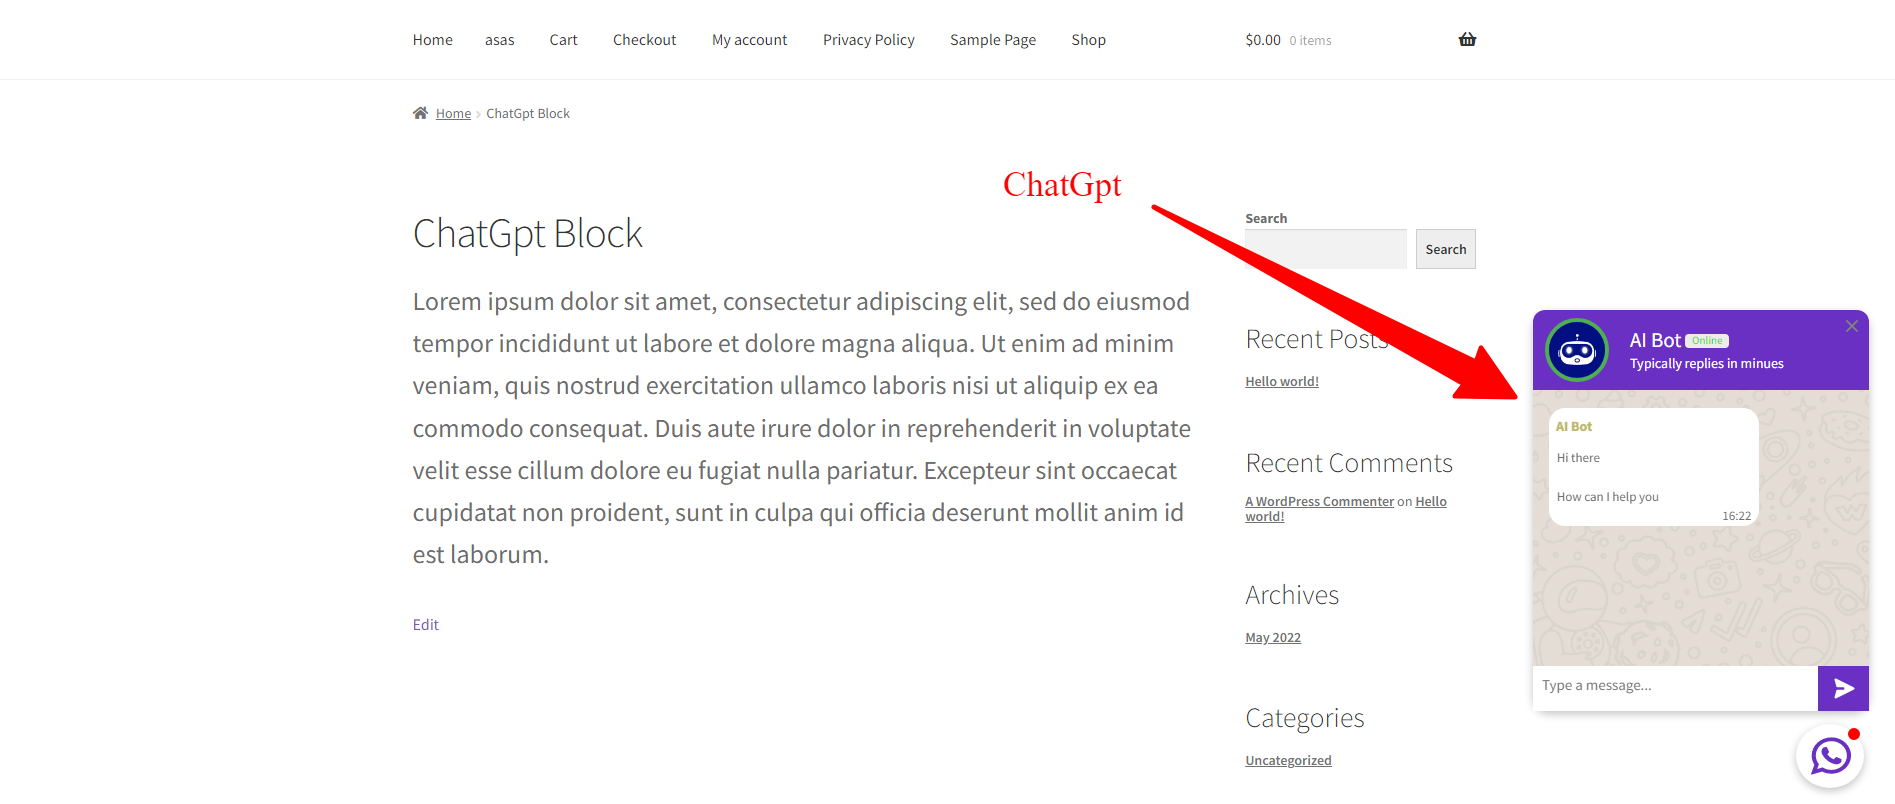
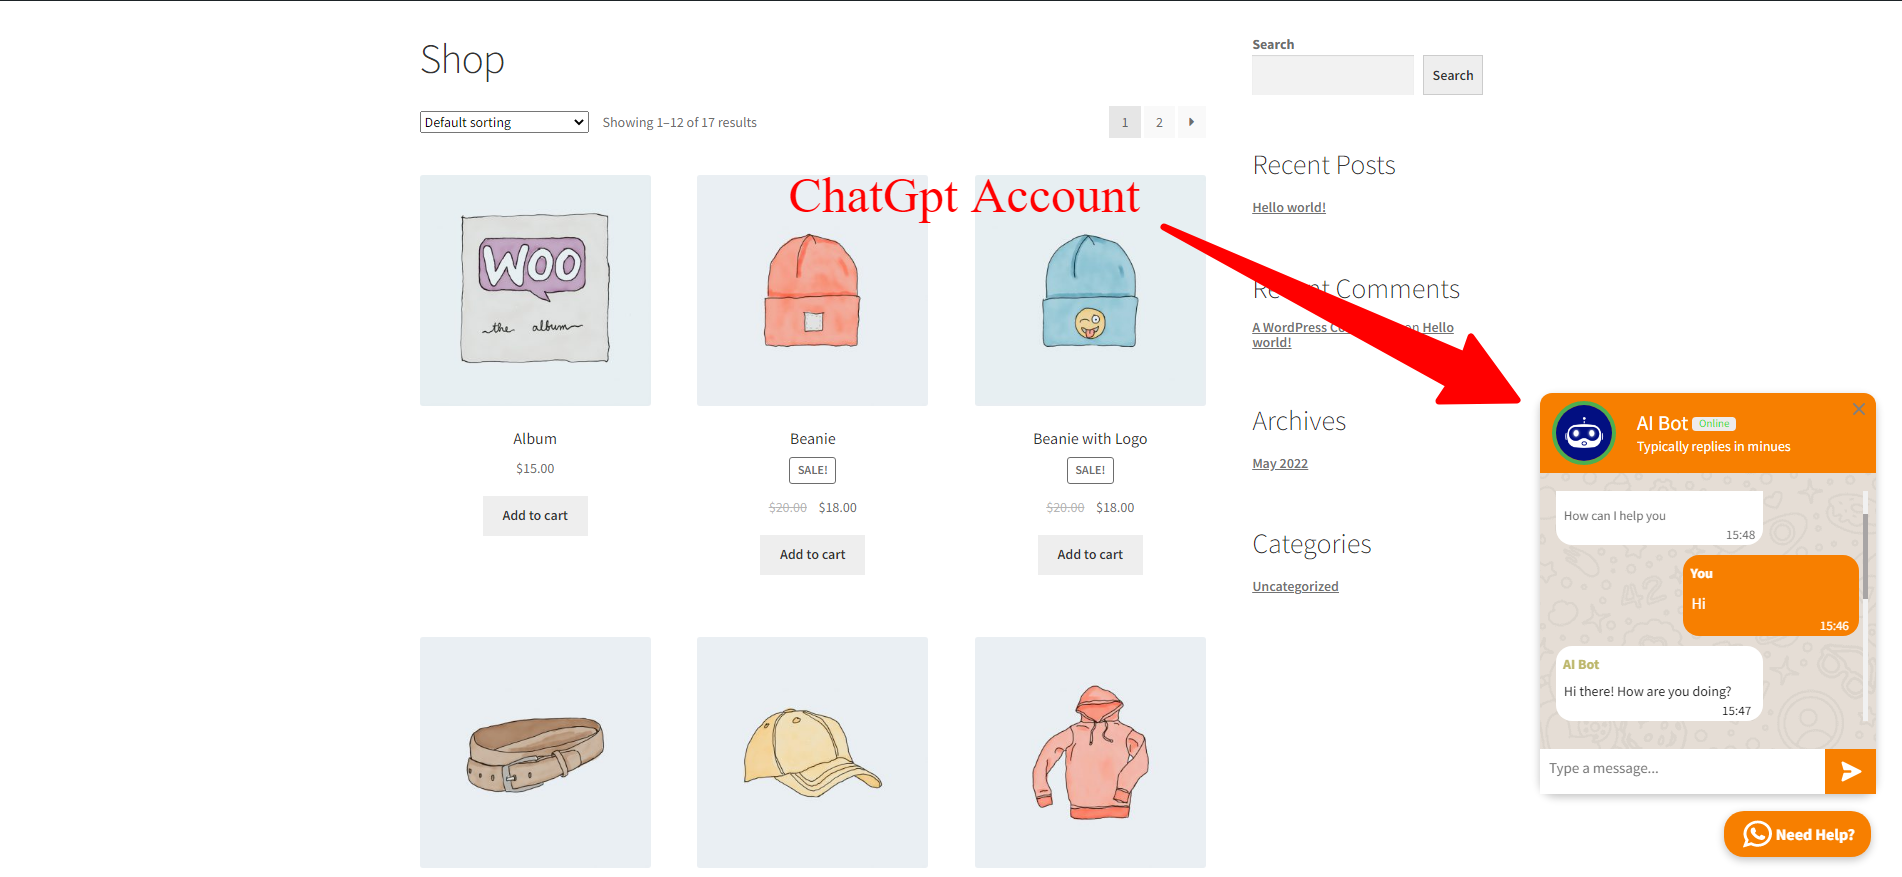
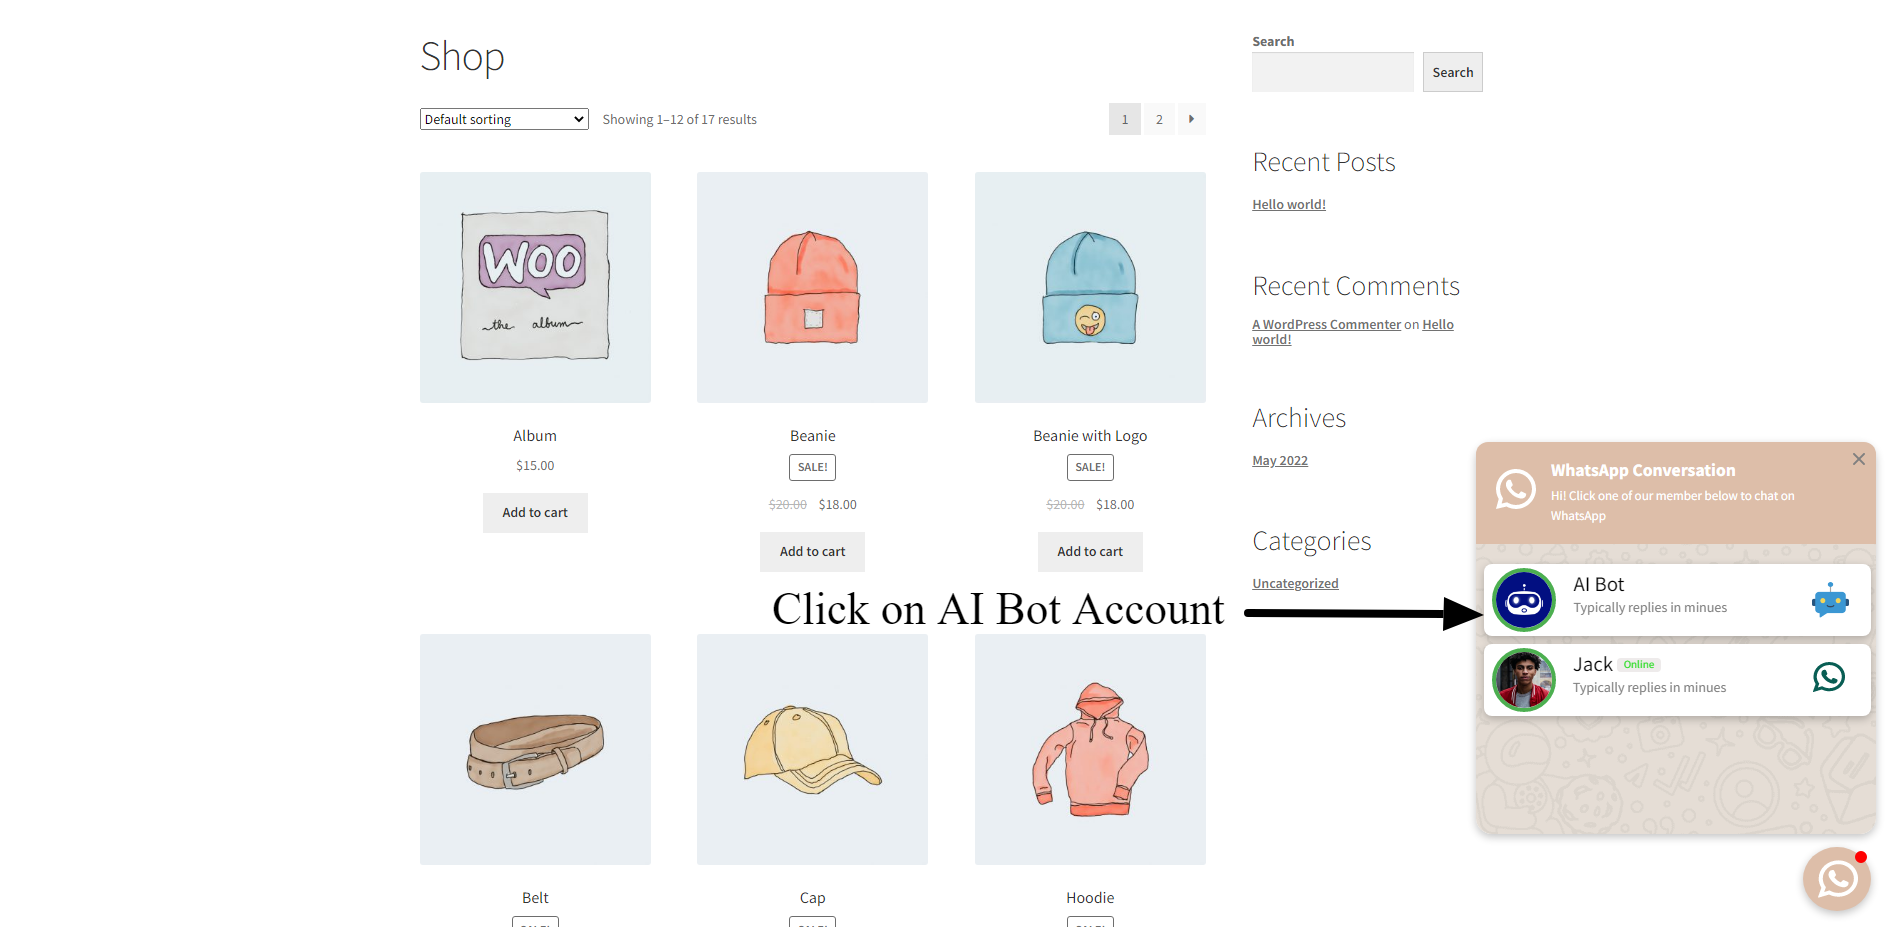
Now you will see the floating ChatGpt Button on your WordPress website as in the below image.
Create Multi Account ChatGpt
To create a multi-account Live Chat Button, you should create at least two accounts, as we explained in the Create Account section
After creating at least two accounts, navigate to the WhatsApp tab and click on the Add New button to create a new multi-account Live Chat with ChatGpt And WhatsApp Chat.
- Set a name for the multi-account.
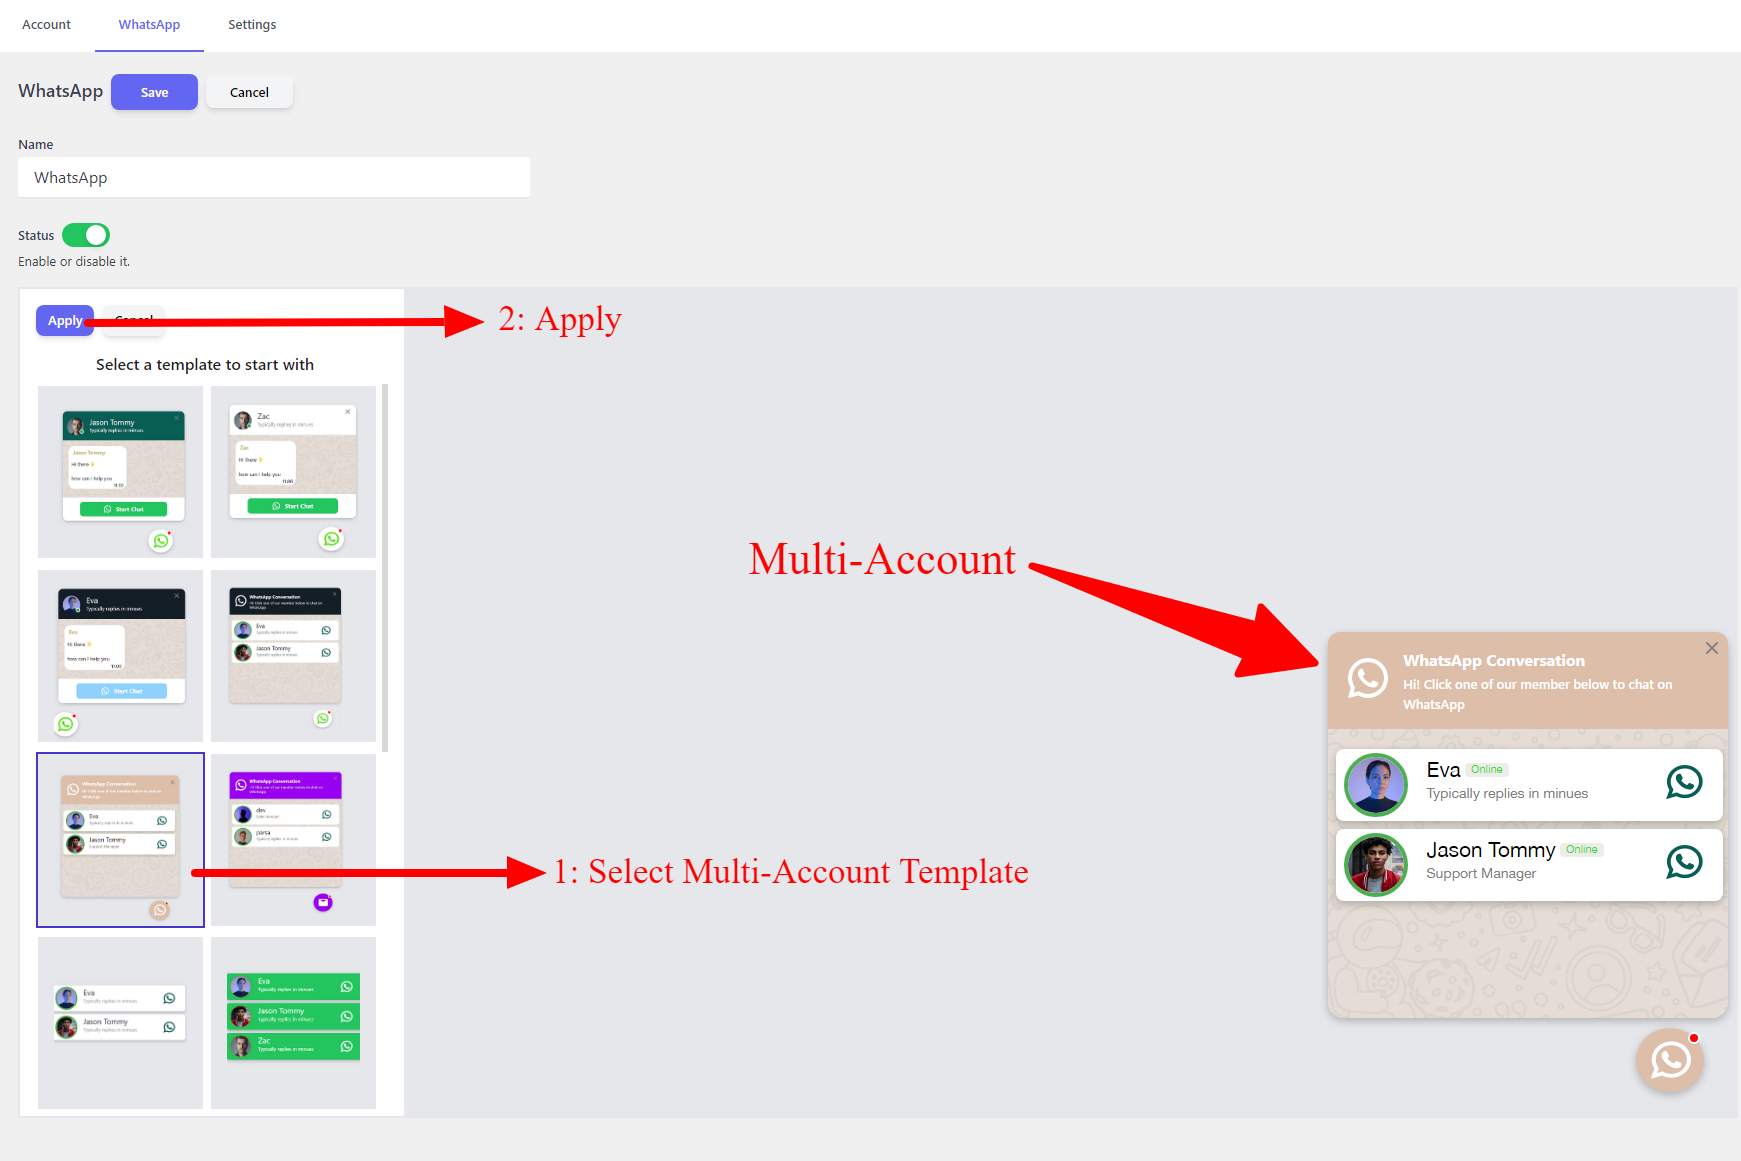
- Select a multi-account template from the predefined templates list.
- A preview of the selected template will be shown on the right side.
- Click on the Apply button to start using the selected template.
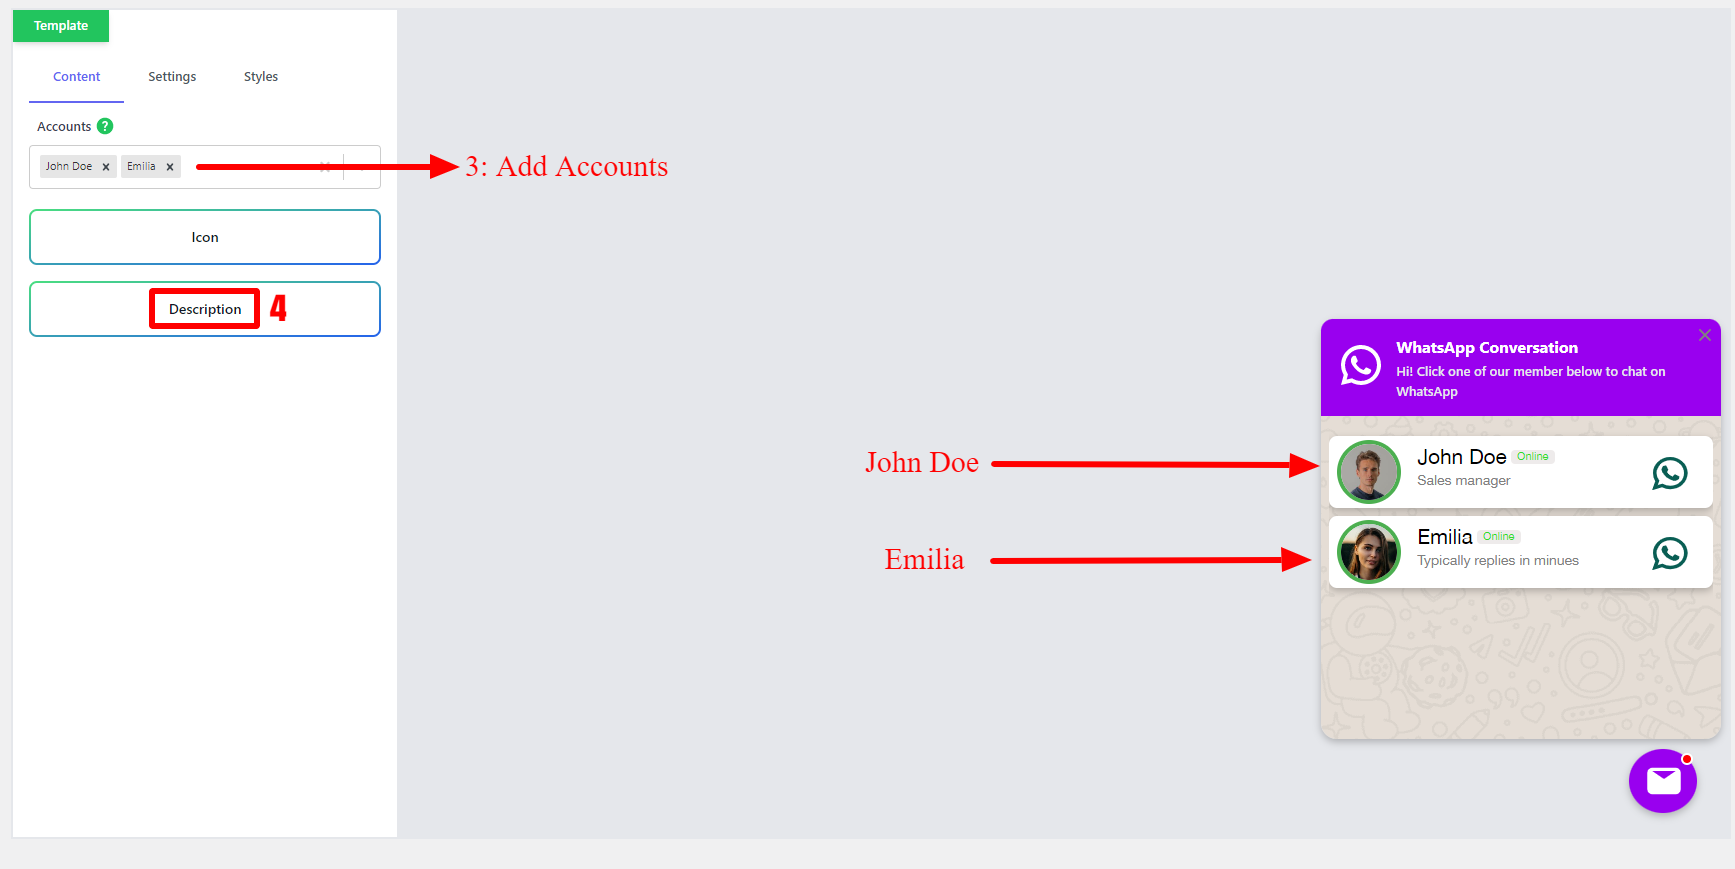
After selecting a template, you need to add at least two accounts to ChatGpt Or WhatsApp. Search for the accounts that you have created and select them in the Accounts field.
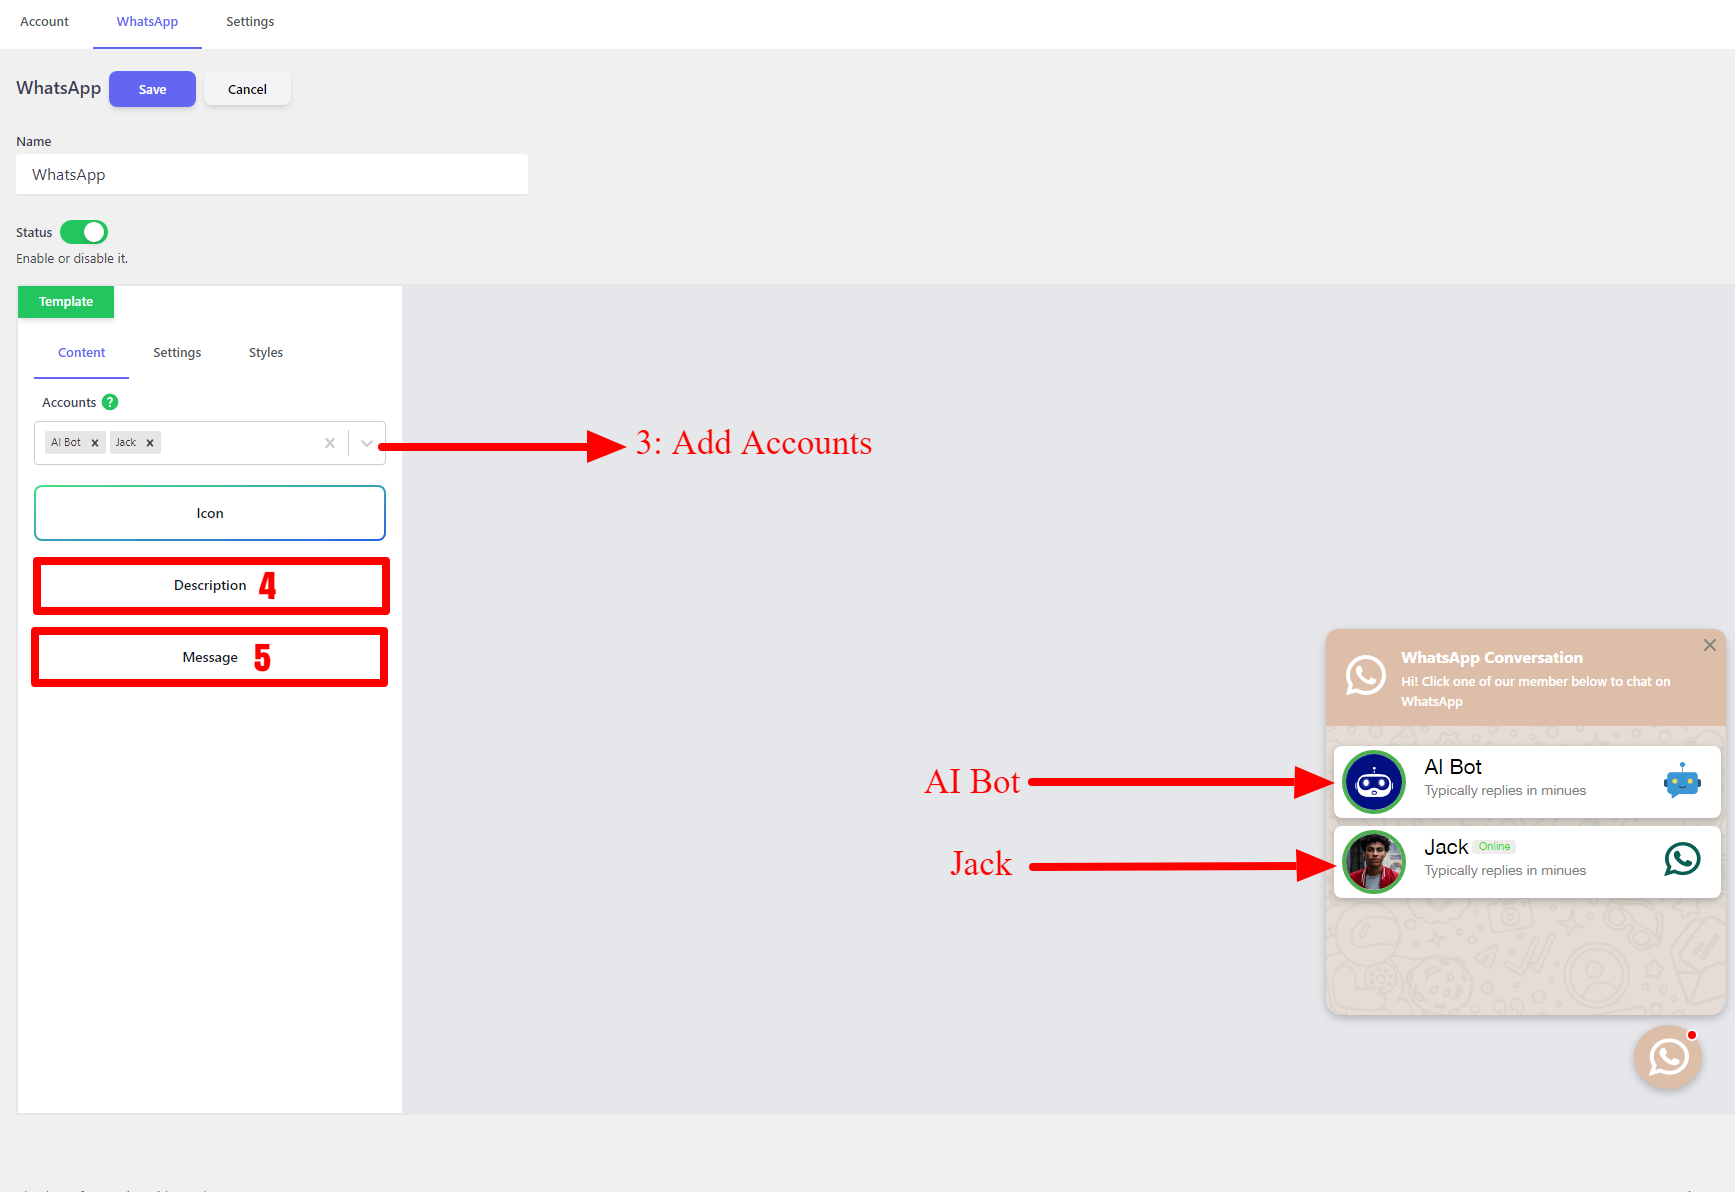
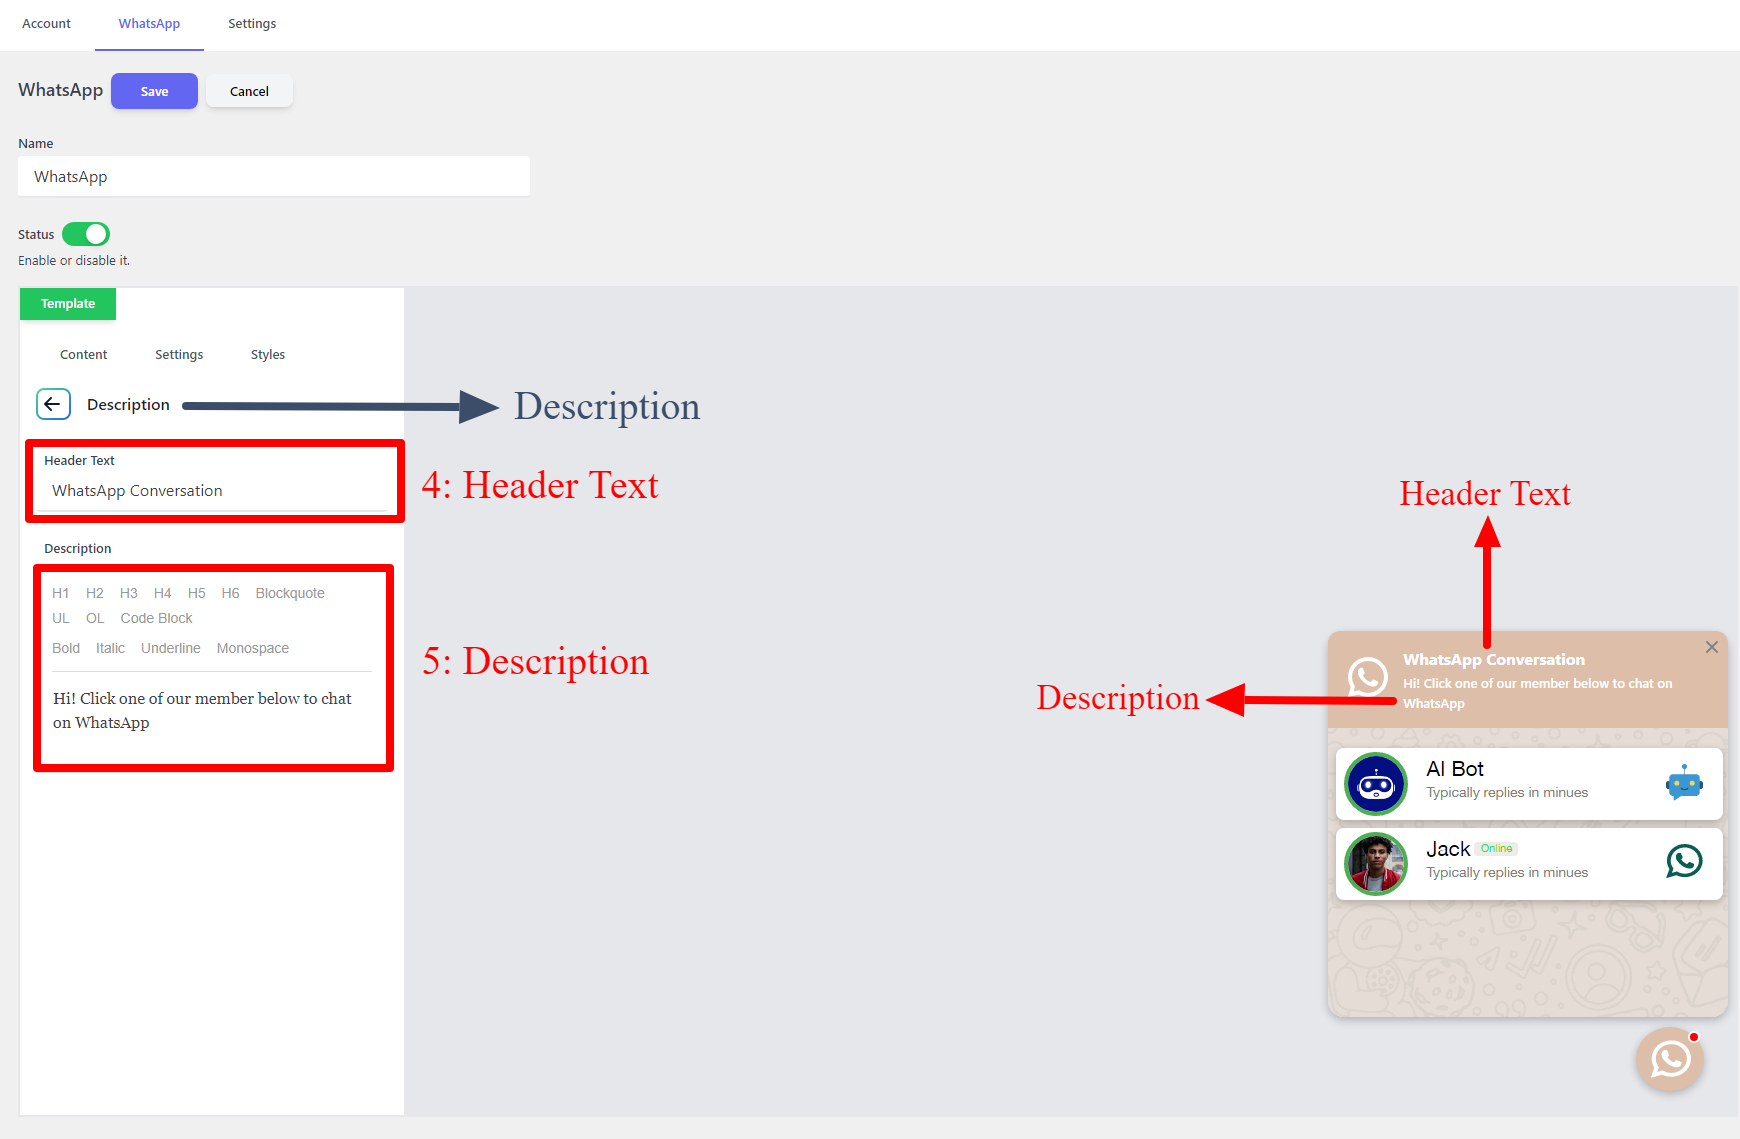
You can change the Header Text and Description from the Description section like the below image.
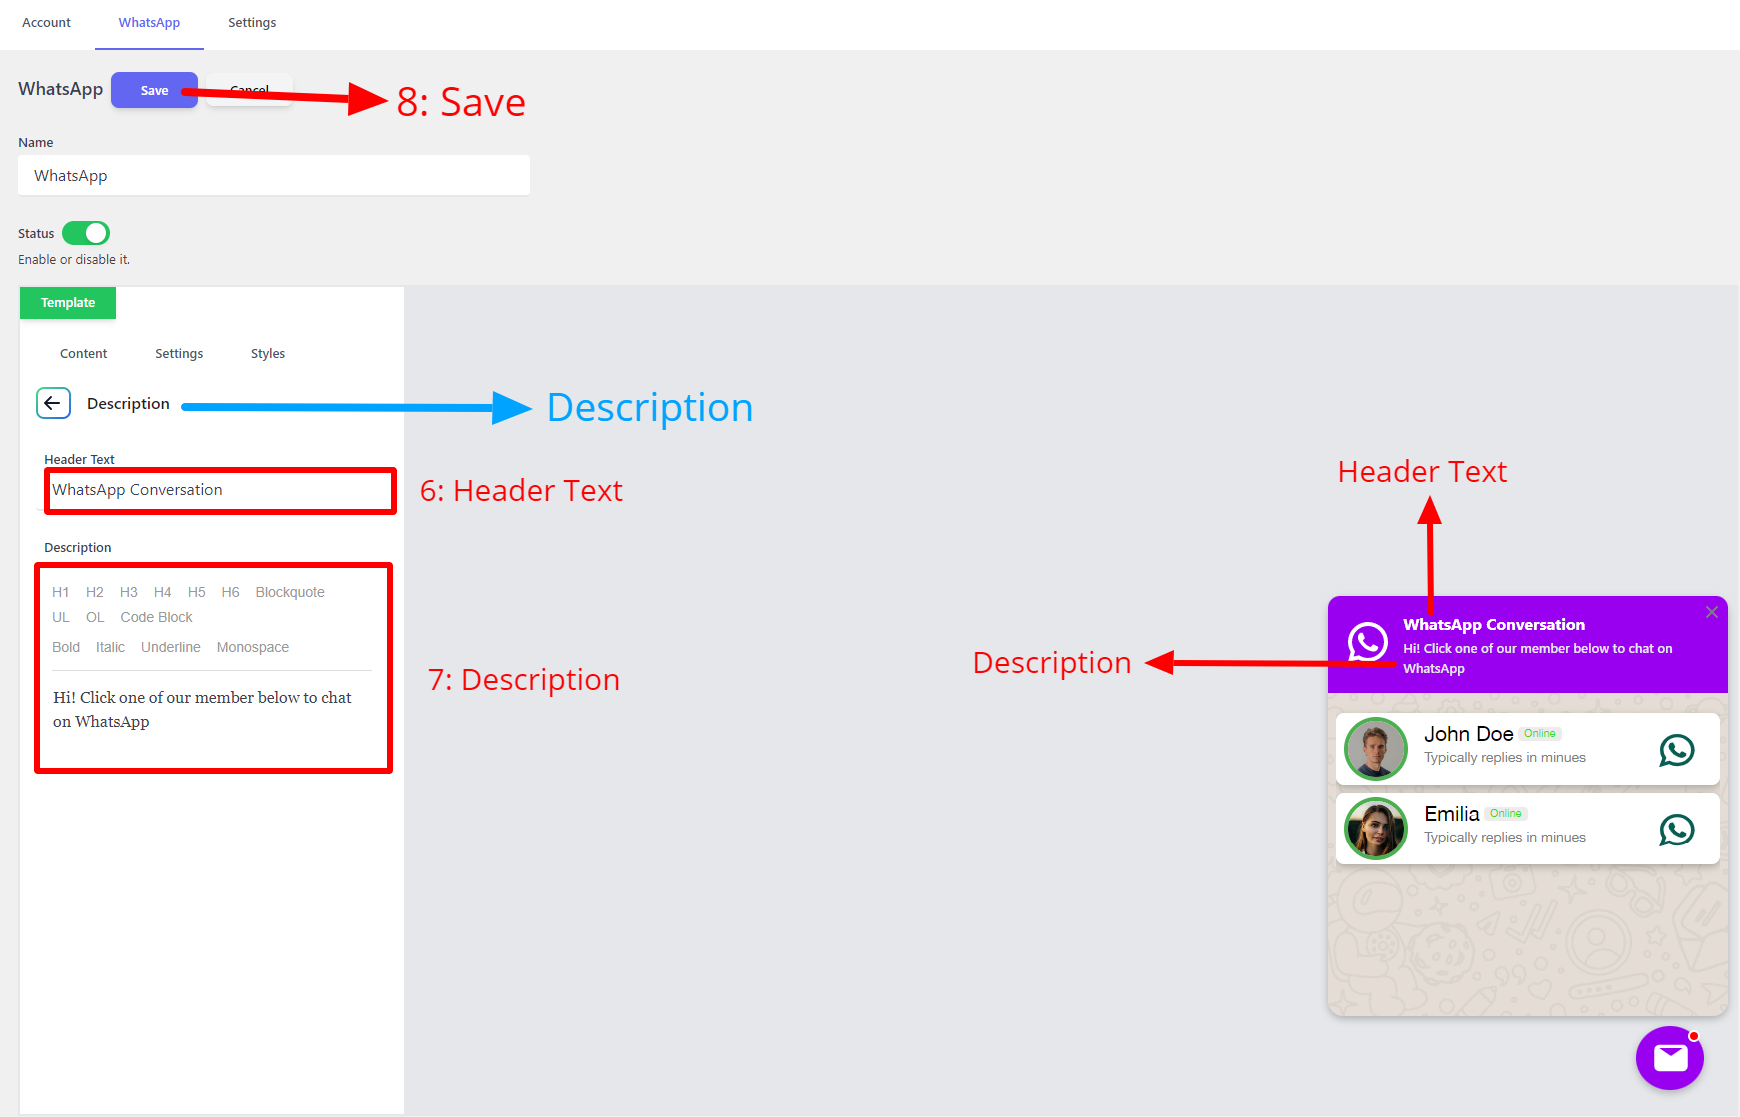
Also, you can change the ChatGpt message from the Message section.
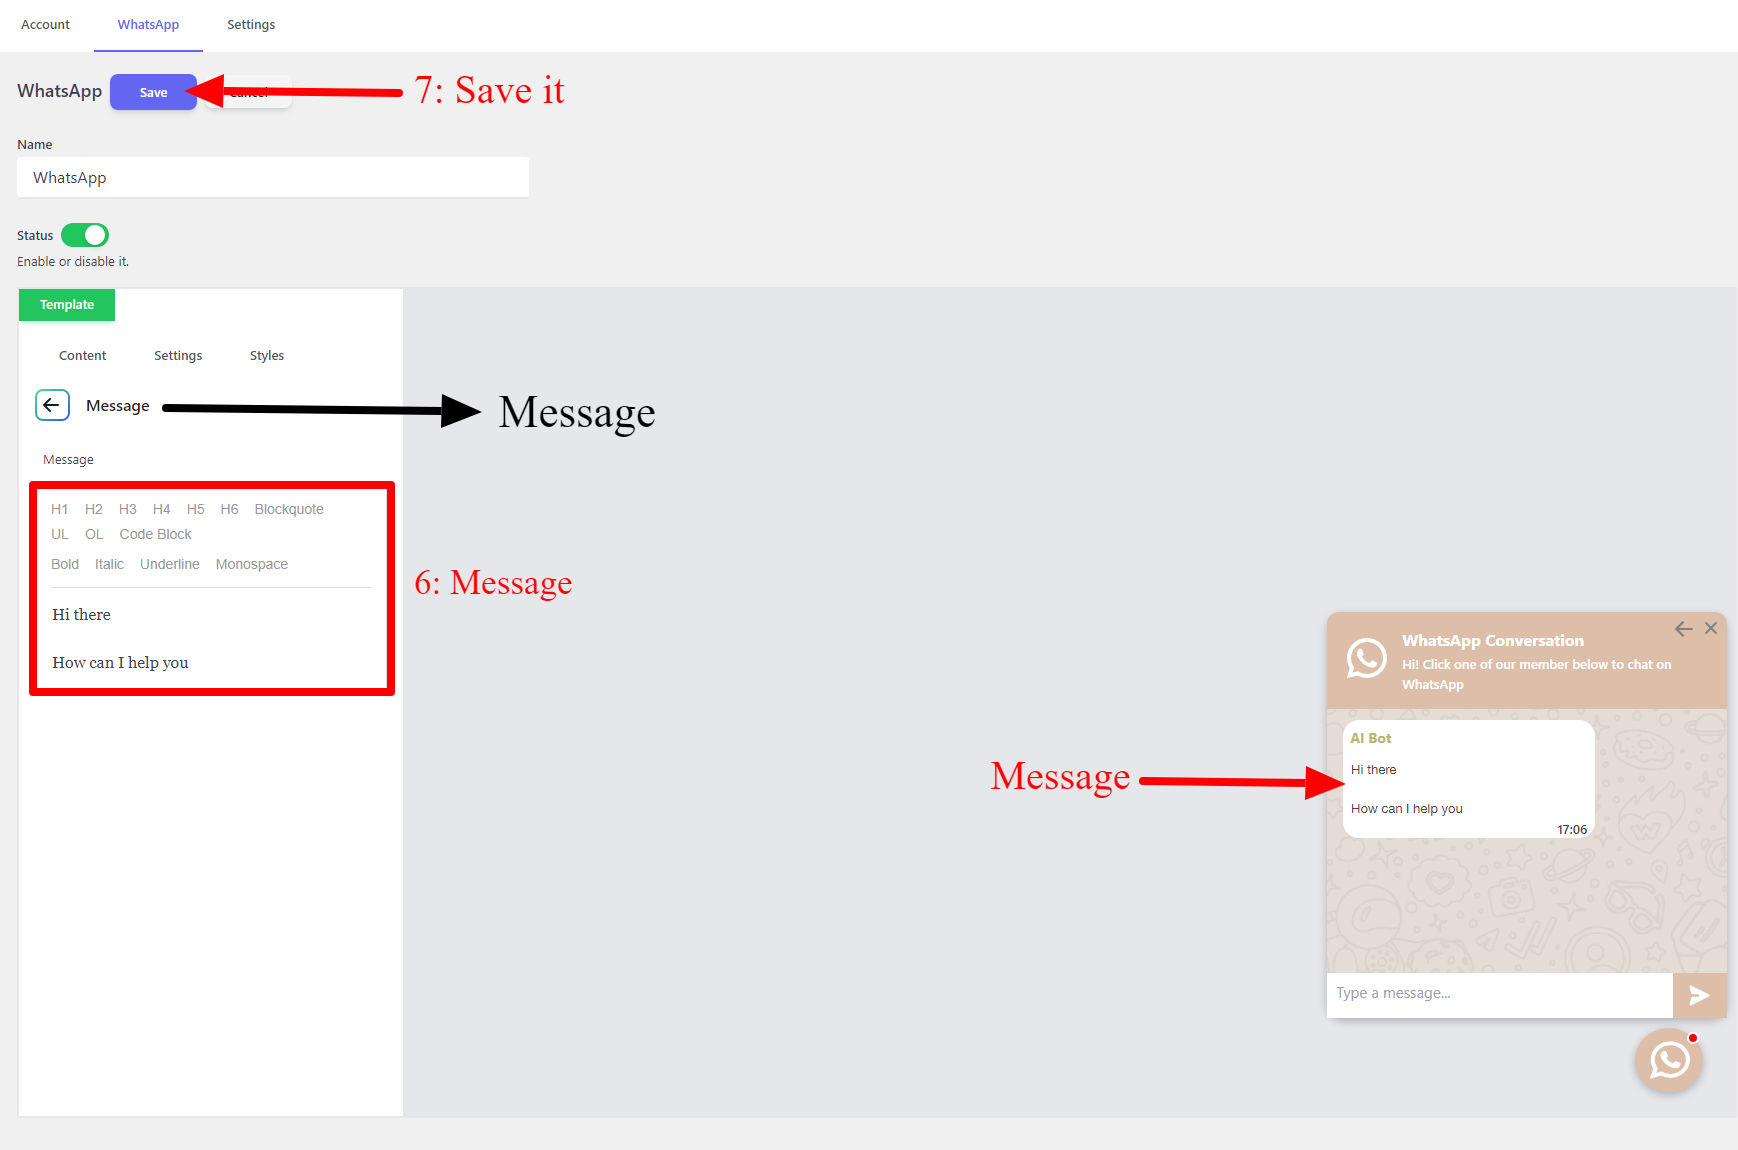
Now, your multi-account Live Chat is ready to use, and you can Save it.
This multi-account WhatsApp Chat Button and ChatGpt Button will appear on all of your WordPress Websites.
Change Accounts Ordering
You can change accounts’ ordering by dragging and dropping them to the right position inside the multi-select field.
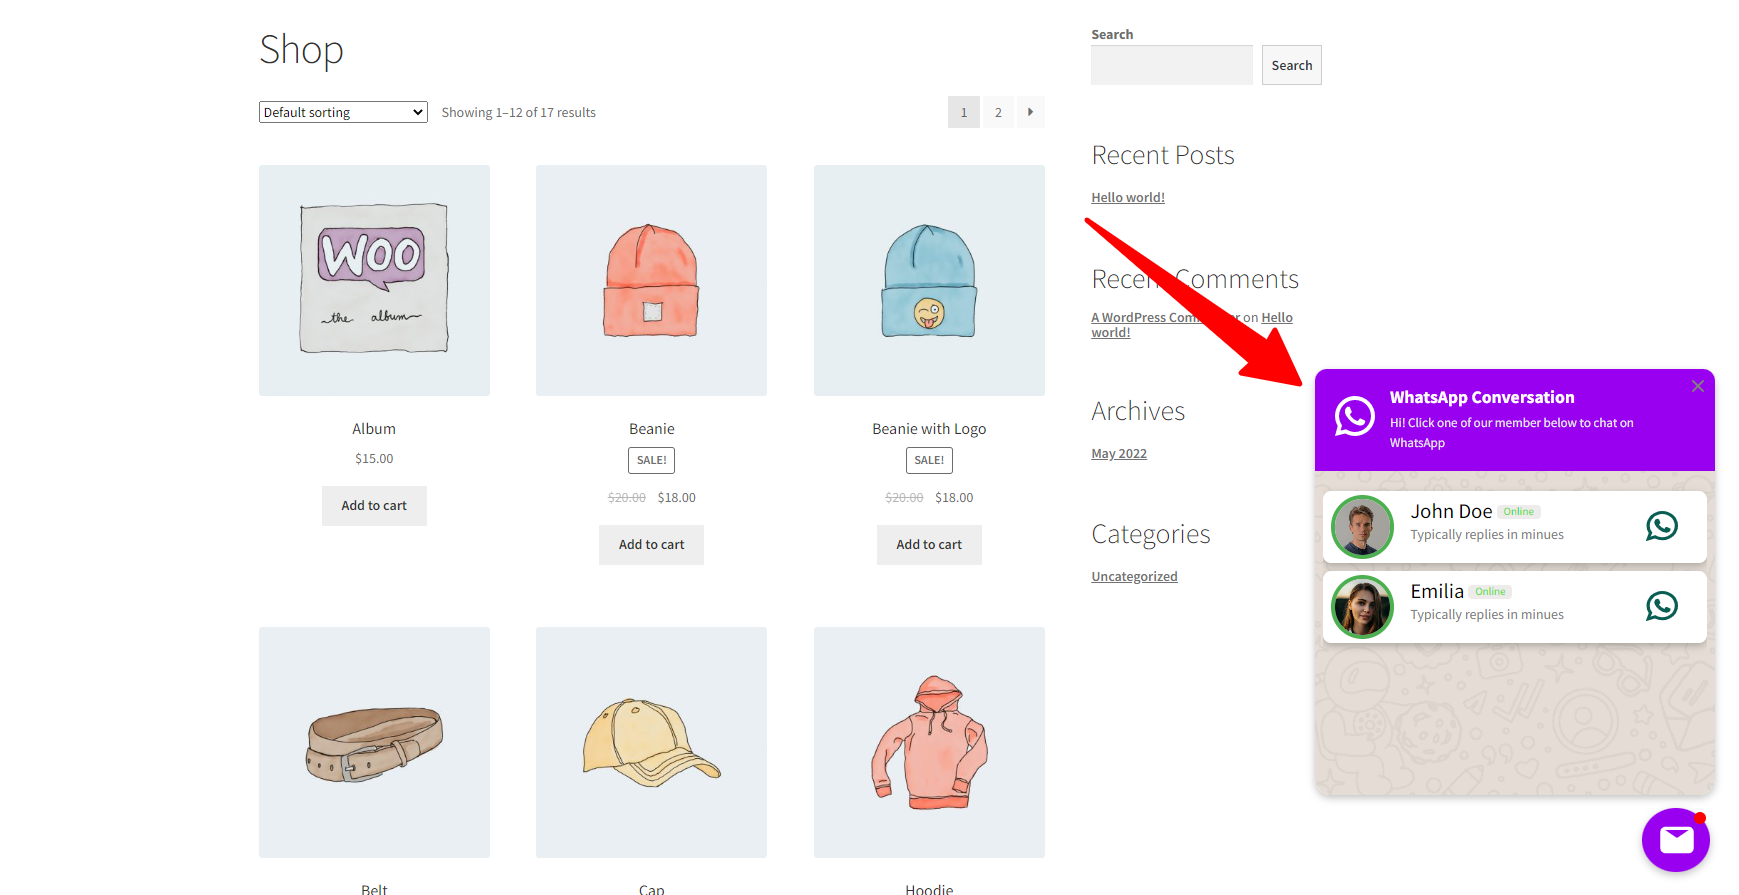
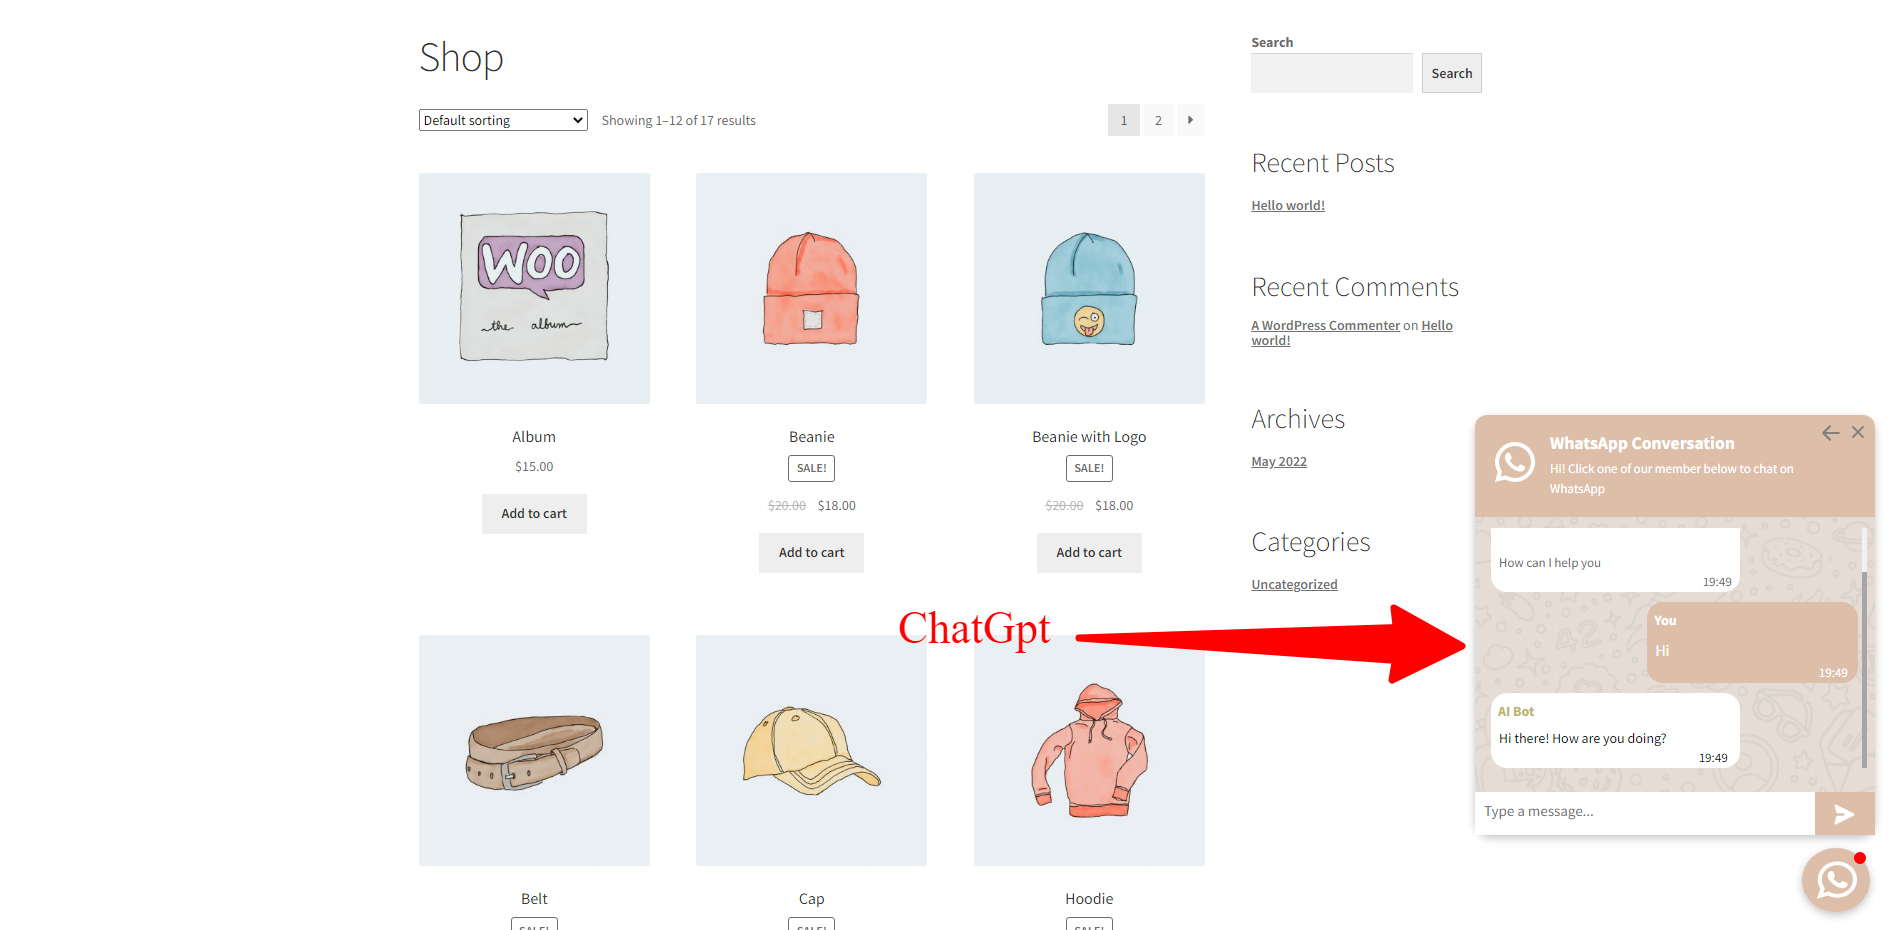
Now you will see the floating WhatsApp Chat button and ChatGpt on your WordPress website as in the below image.
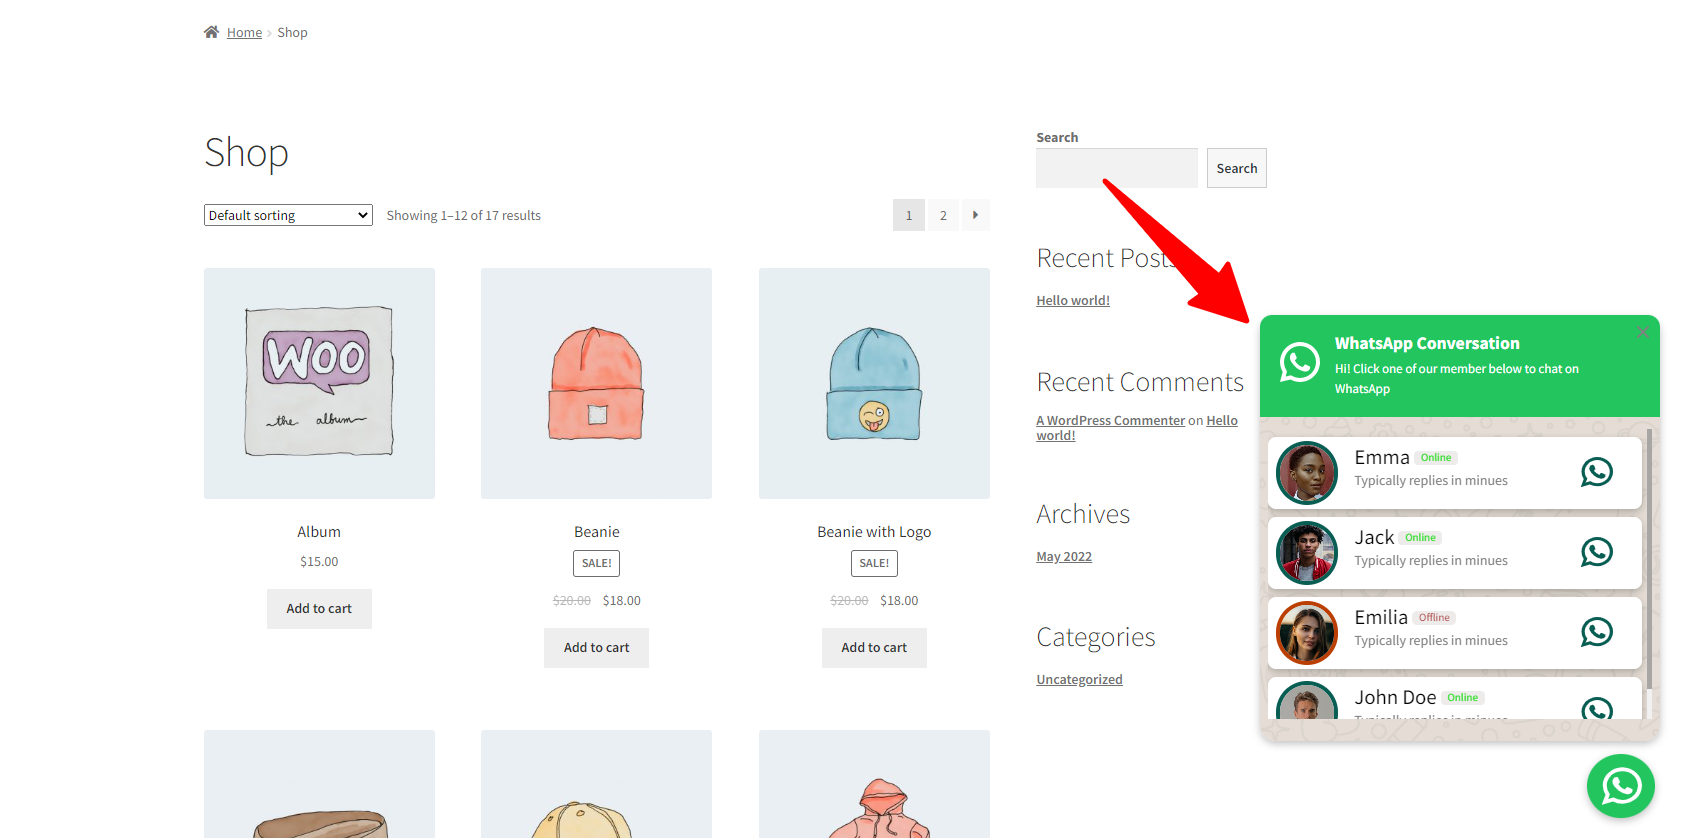
ChatGPT Block for WordPress
To create ChatGPT Block, follow the below instructions.
- Navigate to the Pages tab.
- Click on the Add New button to add a new Page.
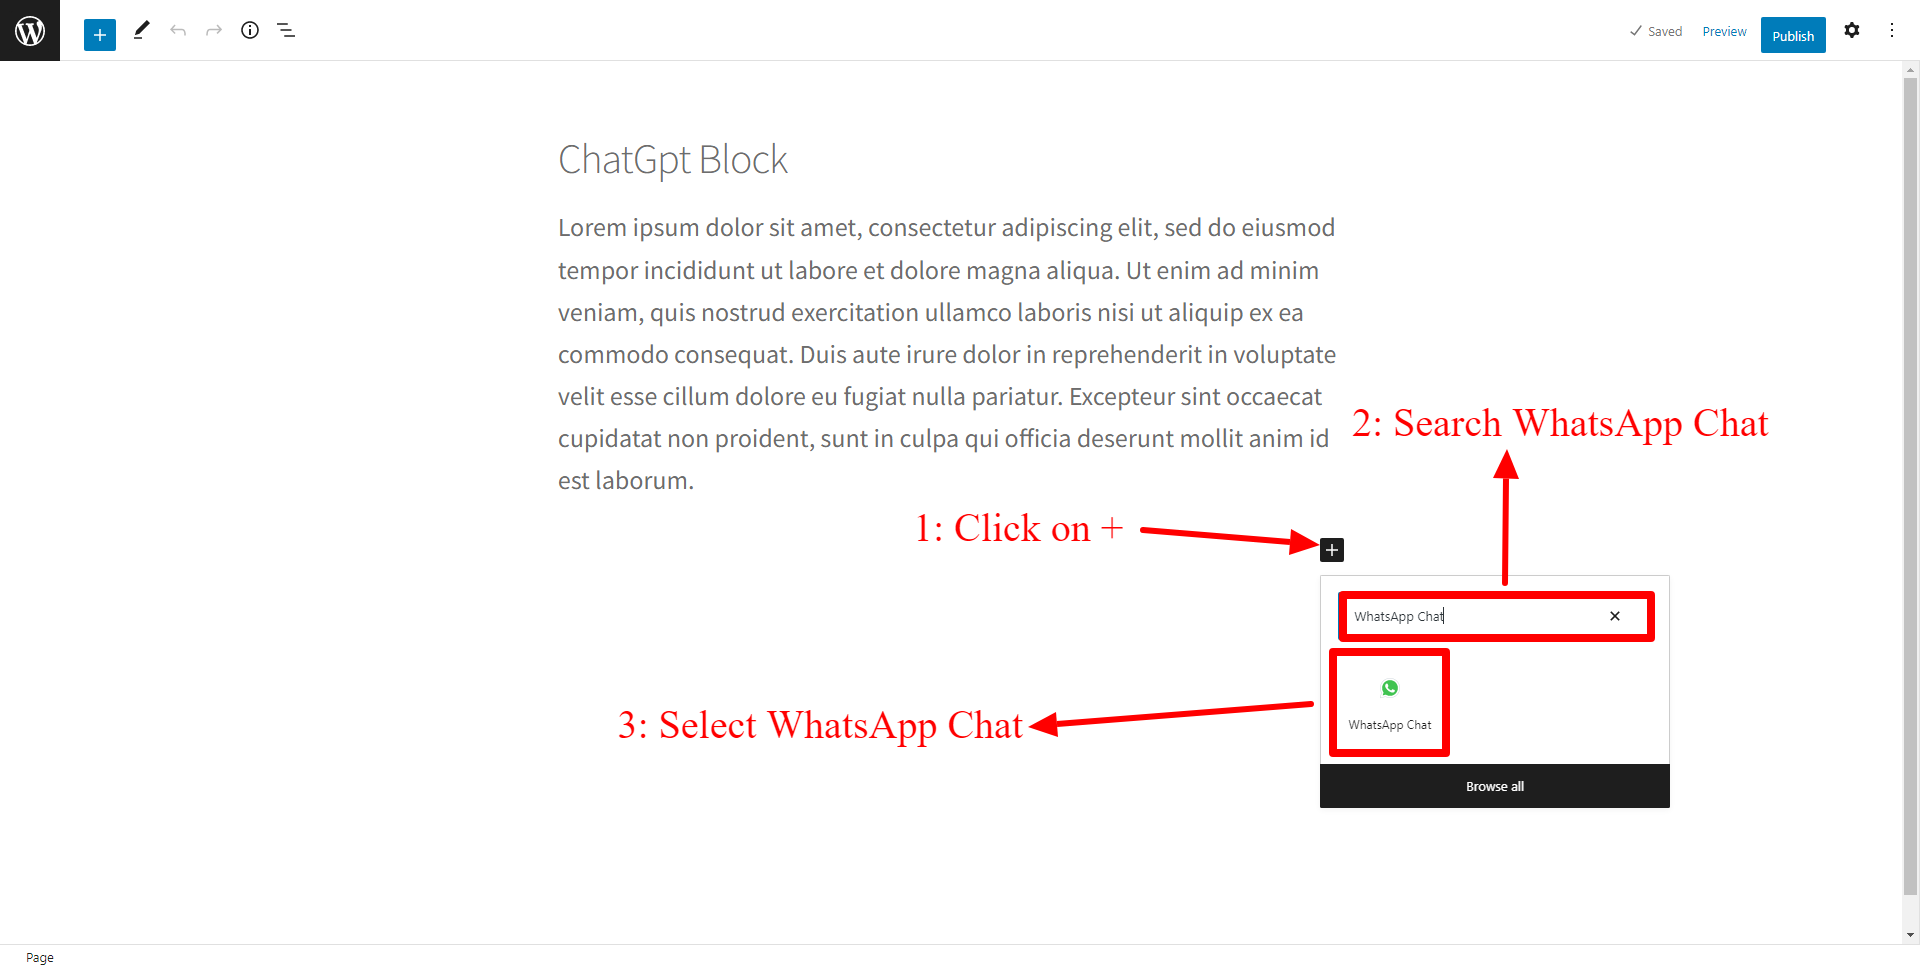
- Click On +.
- Search WhatsApp Chat From Block, and select WhatsApp Chat like the below image.
- Click on the Apply button to start using the selected template.
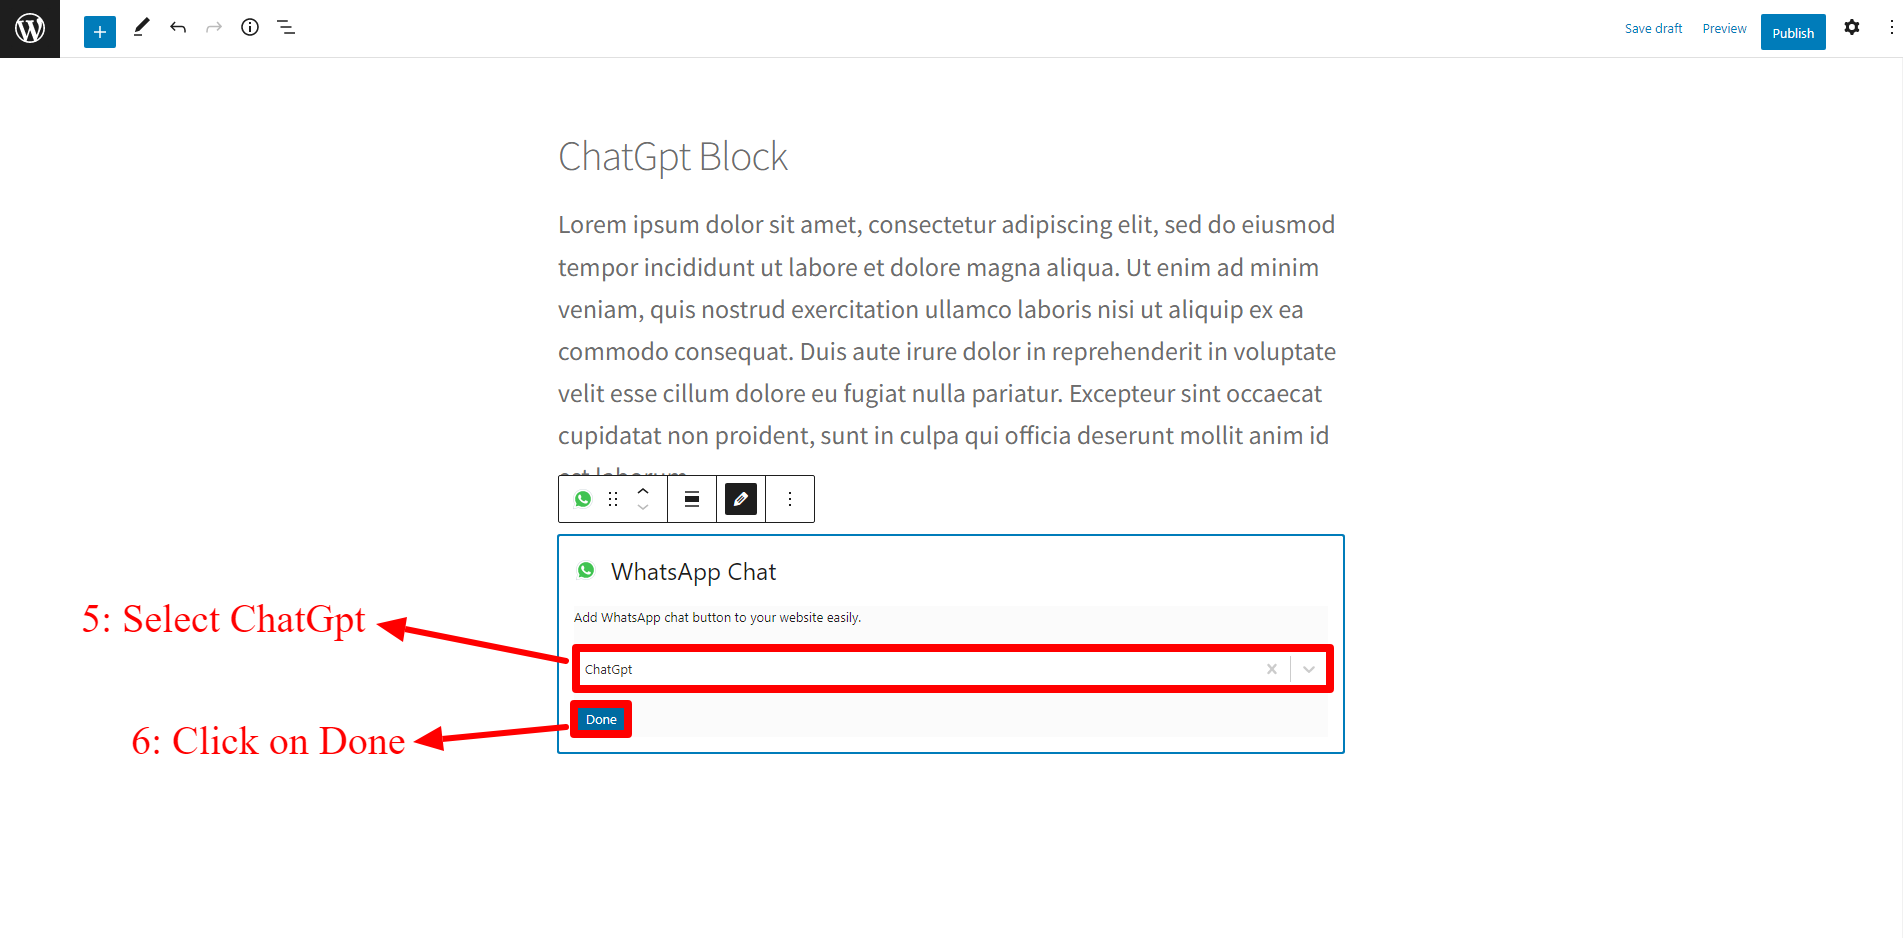
You will see the WhatsApp Chat, Search For Created ChatGPT (ChatGPT in our example)

After Selected ChatGPt, Click On Done
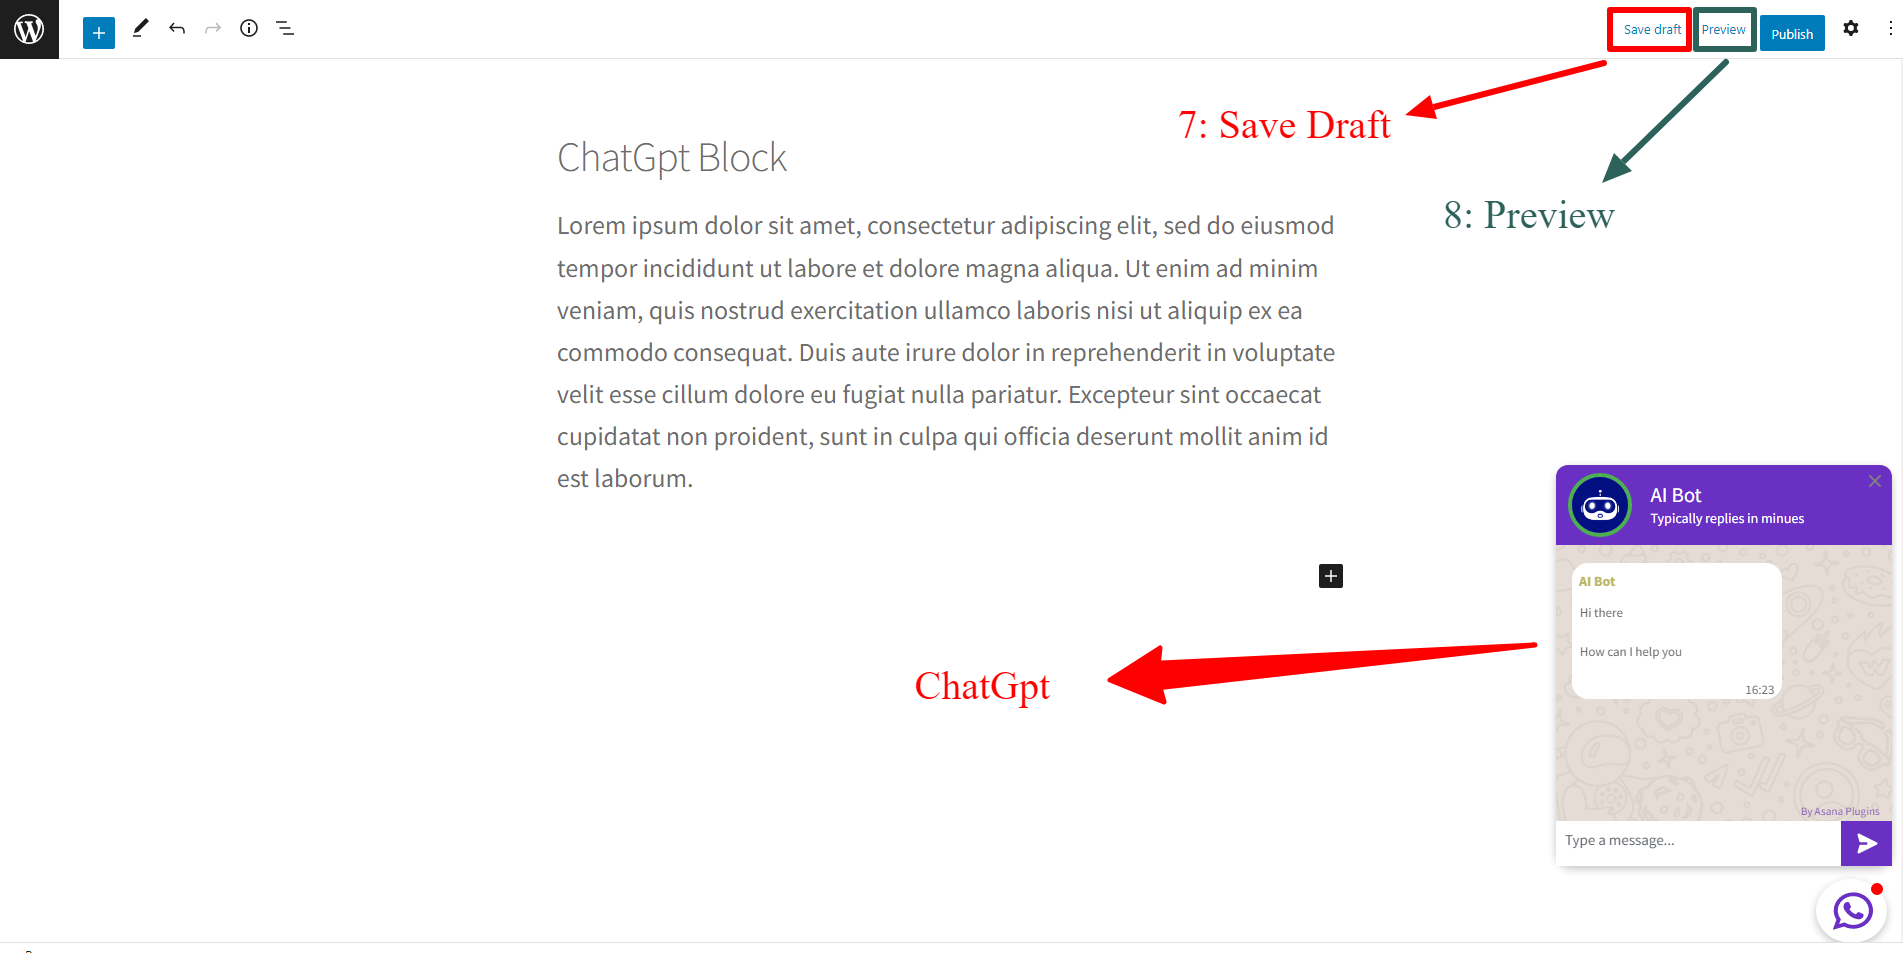
Now you will see the floating ChatGpt button on your website as in the below image.