Creating a Product List
In this topic, we will create a product list and will show them on a site page.
-
Browse to, WordPress admin dashboard.
-
Go to WC Conditions » WC Conditions. After opening WC Conditions page you will see a page like below image.
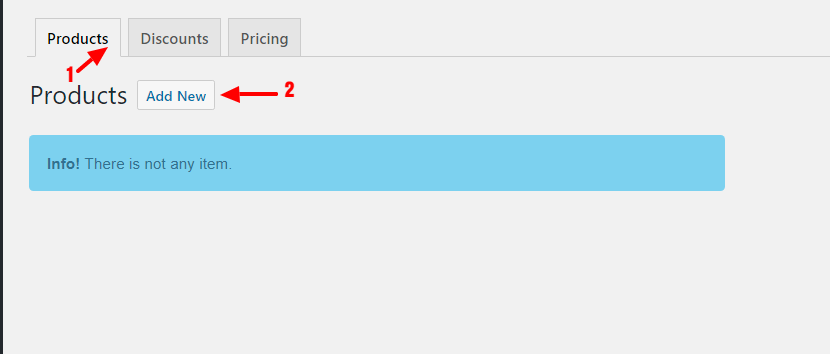
In above image :
- Navigate to Products tab.
- Click on Add New button to add a new Product List.
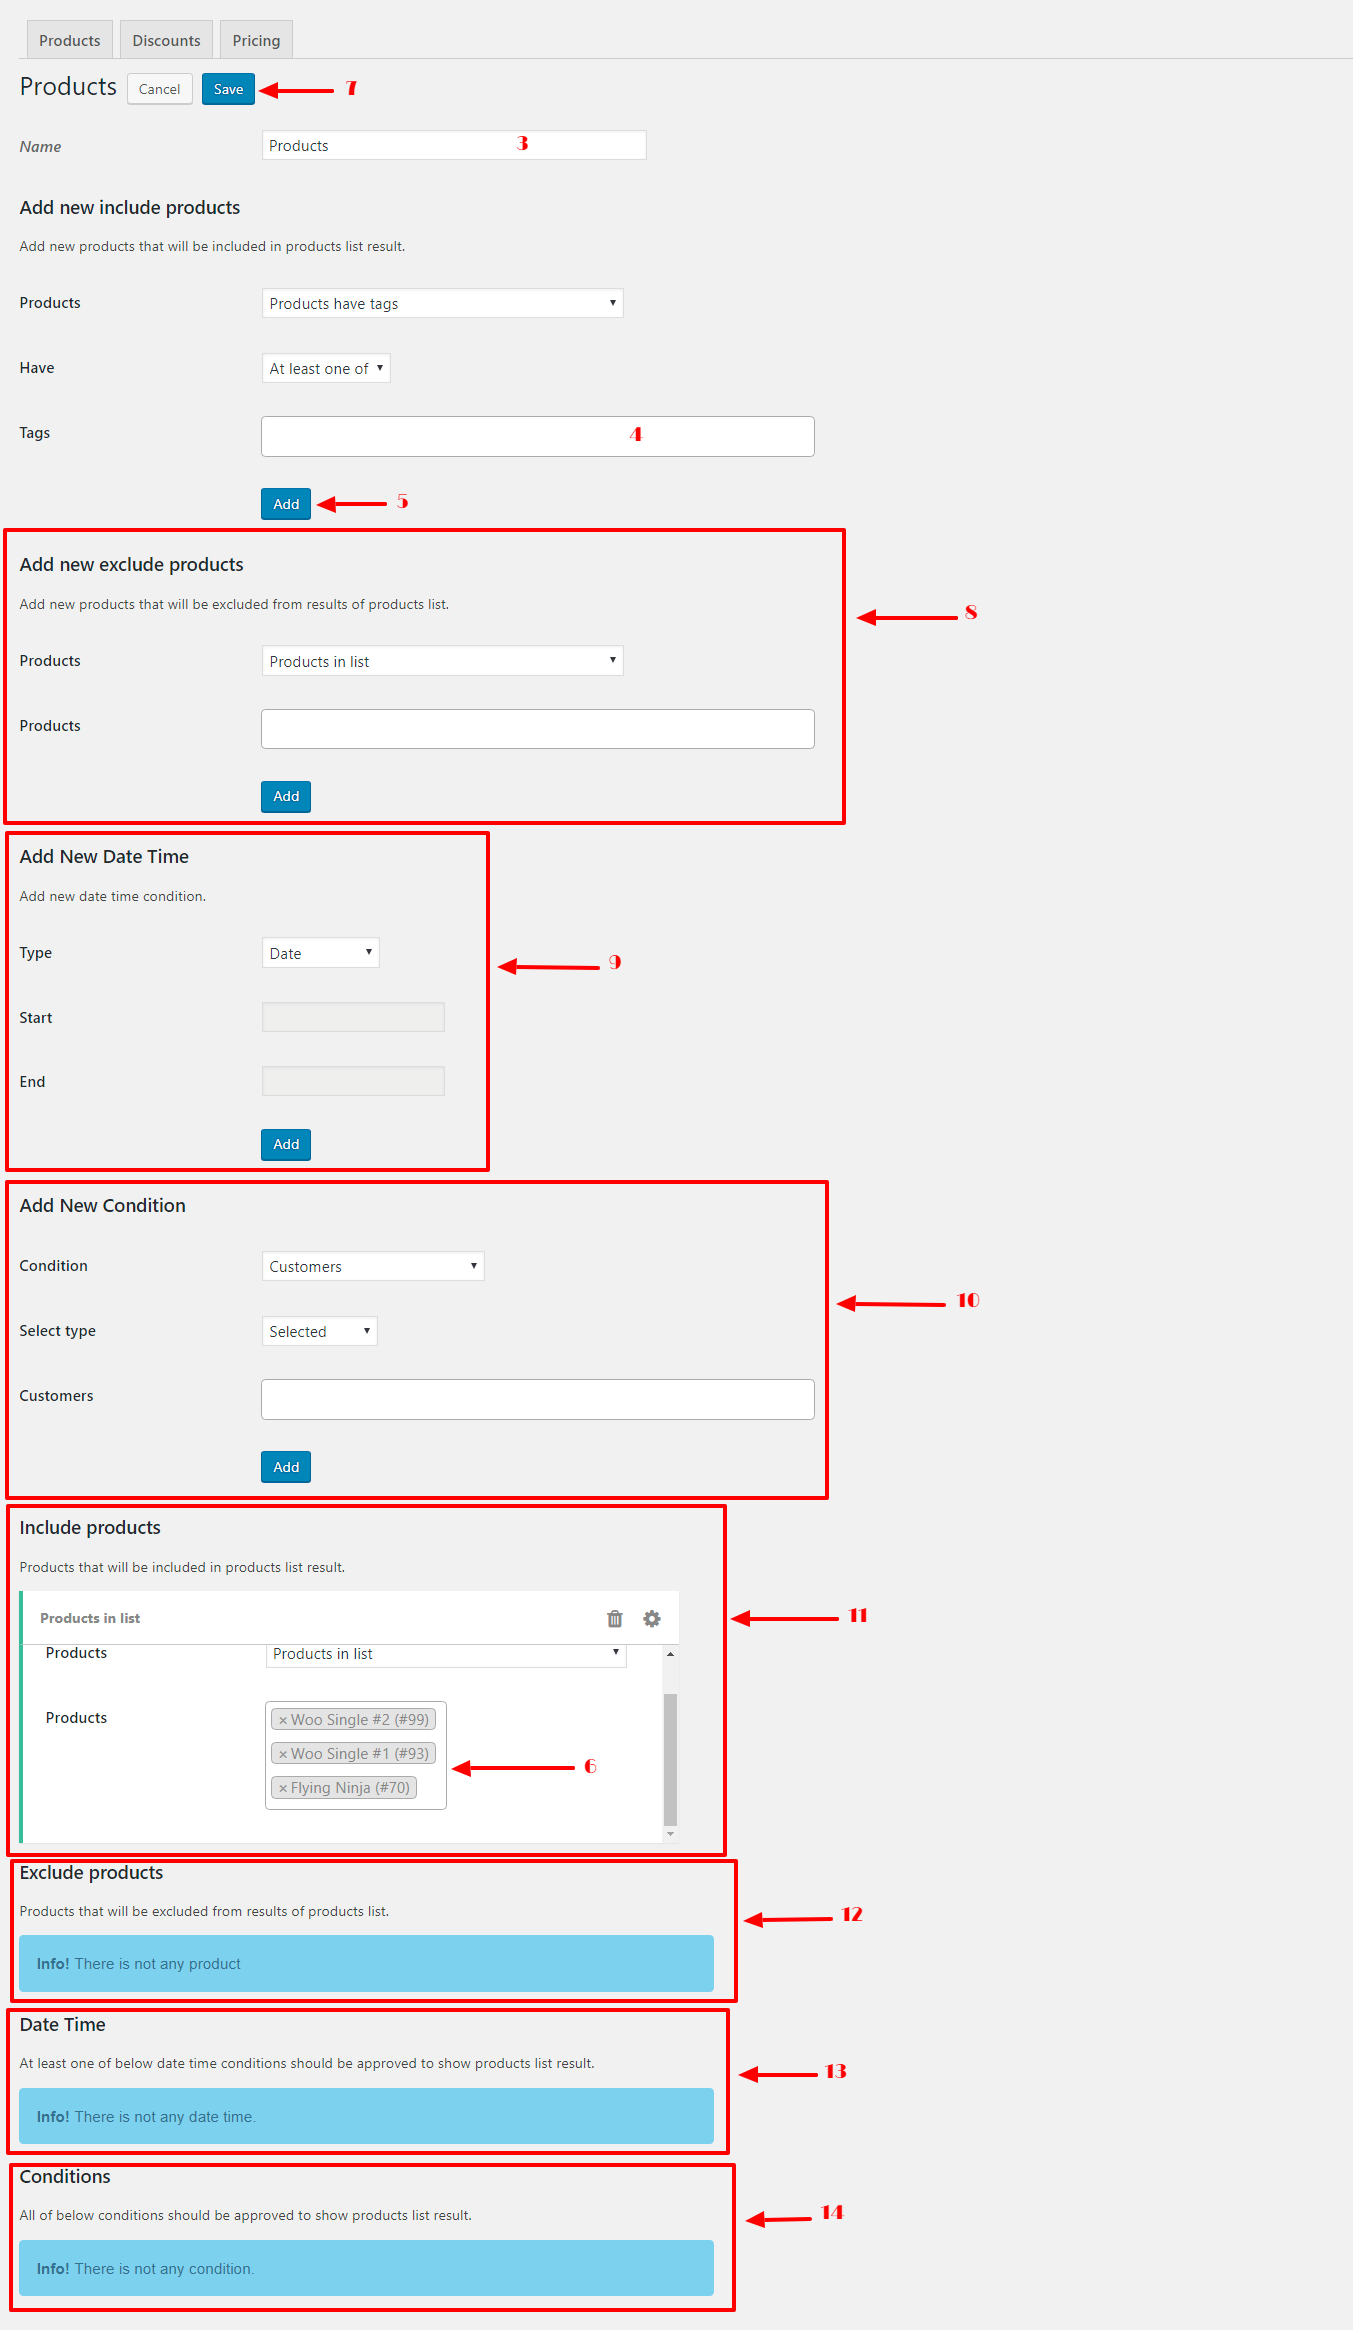
- Set a name for your product list.
- Select products that you want to show in the product list, refer to Adding Products for more information.
- Click on Add button.
- You can see your selected products as like as the image.
- Click on Save button.
- By Add new exclude products you can exclude your selected products from product list end result. Please note that only use this when you want to exclude a product that is in **Include products** list that is number 11 in above image, refer to Adding Products for more information.
- By Add new Date Time you can add Date Time Conditions to your products list. For example, you can set a date period condition to your products list so products list will lists products at the specified period, refer to Adding Date Time Conditions for more information.
- By Add new Condition form you can set conditions for your products list. For example, you can tell products list to lists products to only logged in users, refer to Adding Conditions for more information.
- Include products lists included products by this products list.
- Exclude products lists excluded products from this products list.
- Date Time lists date time conditions that you set for this products list.
- Conditions lists conditions that you set for this products list.
Please note that when one of Date Time Conditions becomes true this product list will displays products in other words it does not checks all of listed Date Time Conditions and when one of these conditions becomes true products will display.
Please note that when all of listed
Conditionsbecomes true this product list will displays products otherwise it will not displays products.
Now, this product list can list your selected products in the front-end by using its shortcode.
Using Product List Shortcode
After creating products list.
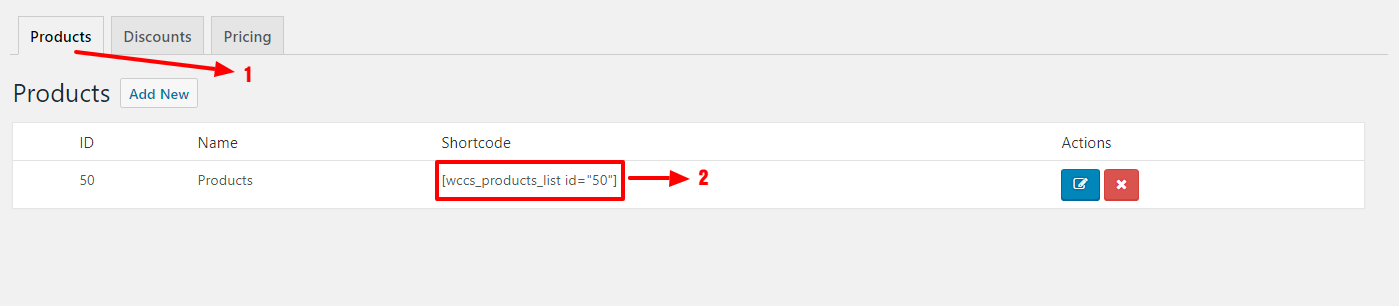
- Go to products tab.
- Copy [wccs_products_list id=”50″] shortcode, please note that maybe your shortcode id is different.

- Navigate to WordPress Pages in Dashboard.
- Click on Add New button to add a new page.
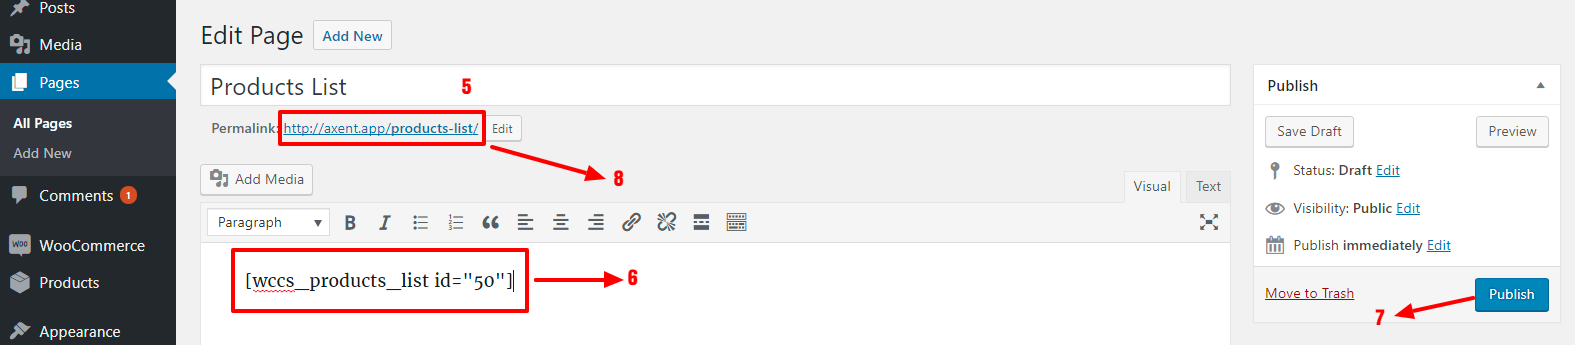
- Set a name for your page.
- Paste your copied shortcode from Step 2 to editor.
- Click on Publish button to publish it.
- Click on your created page Permalink to view the result on the front end.
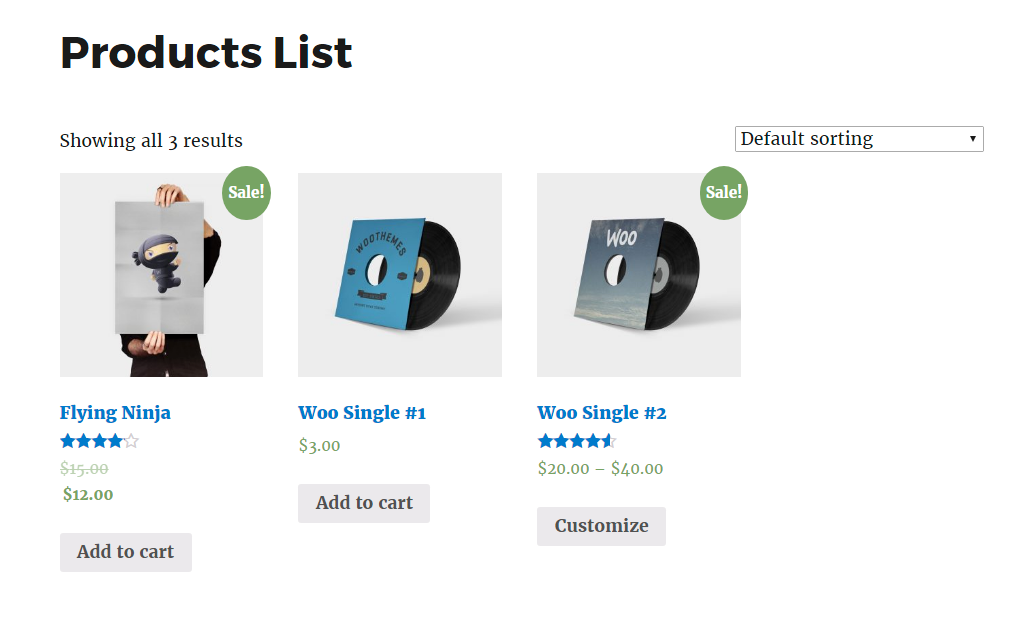
Now you can see your selected products as like as below image on front end page.